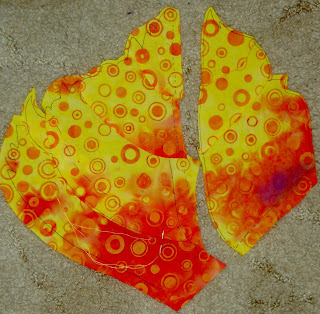
The second day of the Gabrielle Swain class was about the technical steps of putting the blocks together. Swain does all of her applique’ by hand and all of her piecing by machine. She wanted us to follow her through her process, but didn’t care, ultimately, whether we used her process to put the leaves together.
I thought this was an important lesson for me. I often go to class skeptical and with preconceived notions, mostly because I have had teachers who put stupid useless supplies on their list or don’t know how to teach. I am not saying that I am better than them; I am saying that you can’t be a teacher just because you say you are. I have high expectations for teachers. Anyway, when I heard that we were going to do needleturn applique, I groaned inwardly. I was too exhausted to fight and just went with the flow. As the class unfolded, I could see why she makes her quilts the way she does. She has a point and, while I may never make a whole quilt the way she taught us, I am glad I know about it so I have another technique in my arsenal and can choose it among others in the future.
In the first part of the class, GS talked about placing the fabric in such a way take advantage of the shifts in color of the hand dyed fabric. She was basically talking about fussy cutting. You end up with Swiss chees fabric, but she wanted us to understand that by paying attention to the color you could expose light and shadow to make a more interesting quilt. She also wanted us to ensure that we didn’t have big breaks in the colors, that the colors flowed together in a way that looked natural.
Swain also talked about the properties of color. She said:
- Value: light, medium and dark
- Temperature: warm (reds and oranges), cool (blues and greens)
- Intensity: how true or saturated the color is; how much grey is in the mix of the color
- Hue: more color you get in a quilt the less value
I need to do more research on intensity and hue. I have never really taken a serious color class and cannot vouch for what she said about color and hue.
The other color tip GS provided was not to use equal amounts of opposite colors. I think the ratio she mentioned was 60/40, but it could have been 80/20. Another thing for me to look up. You comments on the color theory aspect are most welcome.
Before we started the applique’, I was thinking that hand applique’ would be too much work. I took an Elly Sienkiewicz class a long time ago and really hand a hard time with the needleturn applique’. I made two blocks in the ES class. One was some kind of flower block and the other was a folded snowflake. I did finish them, but decided that my dream of a full, needleturn applique’ BAQ would never happen in my lifetime. Those two blocks will eventually go into my miscellaneous blocks quilt – a quilt I intend to make from trial, test and class blocks… someday. If I find the ES class blocks, I will post them here.
In order to transfer our pattern to the fabric, we had to ink over the lines of the pattern. I used a Sharpie, which worked very well. I taped the pattern to the lightbox and traced over the pattern straight on to the fabric with a Pilot Scuf pen. GS recommended a Pigma Micron pen, but somehow, I didn’t have the right one with me. The Pilot Scuf worked fine, but you have to make sure that the point is not squished otherwise you will get a very thick line. You have to turn the black line under, so you want it to be as fine as possible.
Before you actually start the applique’, you need to decide which way the seam lines will go once you applique’ them. You start with the piece that will be on the very bottom and build on top of the pieces on the bottom. For the applique’, the supplies recommended are:
- Mettler 50w thread
- Thread Heaven thread conditioner (instead of wax)
- #11 sharp needles (I used a between and it worked fine. I bought some sharps later and will try them outthe next time I work on this quilt)
GS cuts her thread at an angle and threads the cut, angled piece through the eye of the needle. I have never understood this tip and am thrilled that I do now.

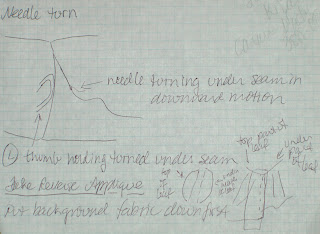
She also showed us a much easier way of doing needleturn applique’. After basting the pieces together with junk thread (who really has junk thread???), you hold the pieces in your left hand and scrape the needle above the raw edge you want to hide, towards the unsewn part of the seam, with your right hand. You hold the piece below where you have already sewn with your left thumb. This allows the appliqued edge to be smoother. It also sends the give towards the unsewn area, which prevents ripples, I think. I found it to be much easier and much faster than the way ES taught. I am not saying that the Queen of Applique’ is wrong. There are many ways of doing things and not every way works for every person. It is important to find the way that works for you and if your results are good, then you should continue to work in the method that suits you.
It was readily apparent how you have much more control when you do this work by hand. However, I can also see how, with care, this work could be done by machine.
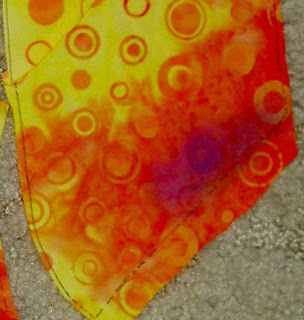
Gabrielle Swain does a lot of colored pencil and ink work on her quilts. She showed us that as well. You can see my colored pencil work in the purple accent above.
Great class. Take her class if you have the opportunity. This post is a good description, but the real thing is well worth the money.

