This is more of a guide than a true tutorial. It is also as much for myself as it is for you.
Supplies
- Fabric (3 different if you want trim, two different if you will not use trim)
- Main body: 3/4-1 yard
- Cuff: 1/3 yard
- Trim (accent fabric): 1/8 yard (will be way too much, but you can find a strip wide enough in your fabric collection, if you don’t want to buy fabric for this part. This is optional. You can make fabulous pillowcases without trim.
- Basic sewing kit
- Rotary cutting kit
- Pins or Wonderclips
- Thread
- Sewing machine
- 1/4″ foot
- Ironing kit
Cut
- Trim: 1.5″x width of fabric (WOF) strip
- Cuff: 12″x WOF strip
- Main body: 27″x WOF
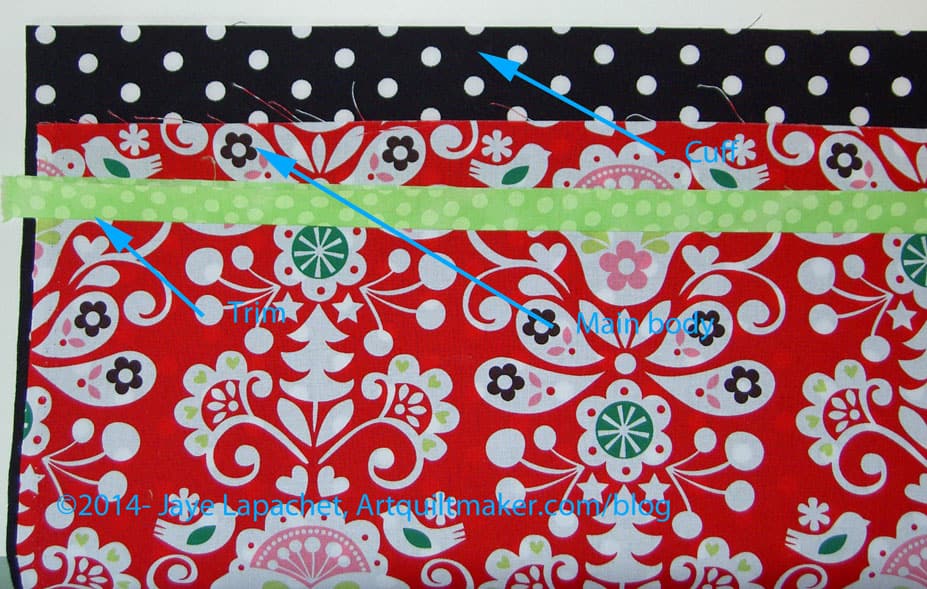
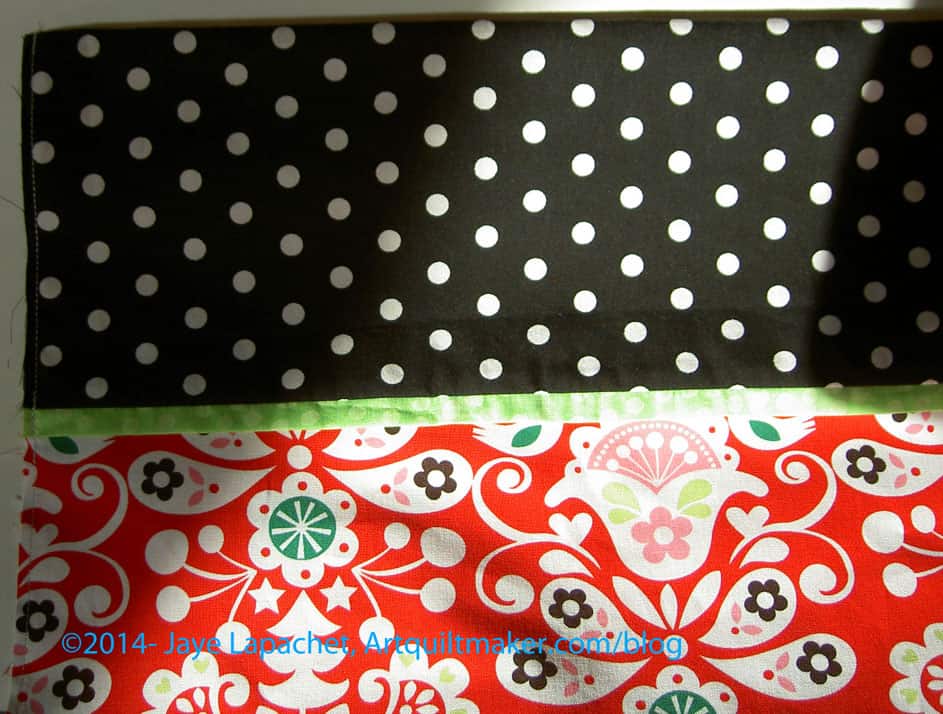
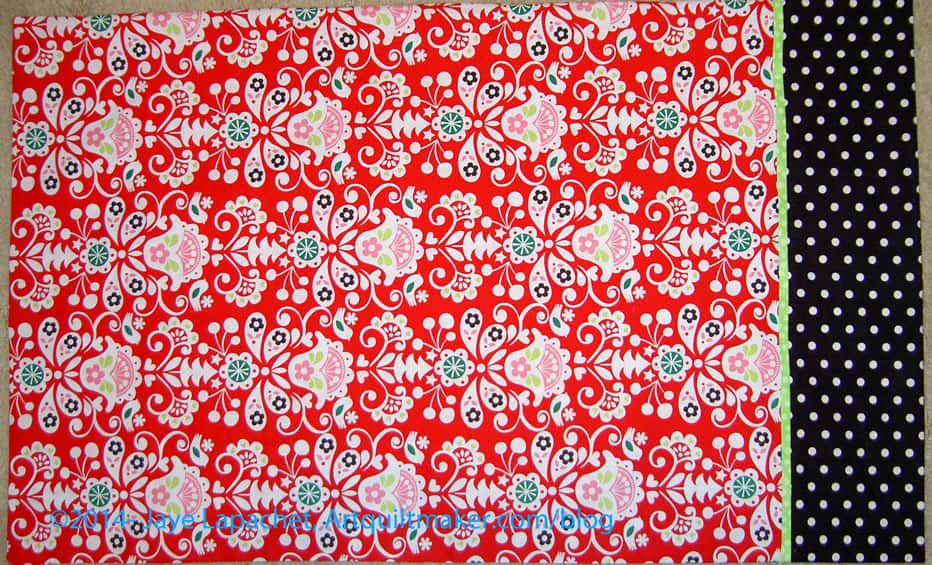
In the example below the following fabrics are used:
- Trim: lime green
- Cuff: black with white dots
- Main body: red with white motifs
Prepare
- Press your trim in half the long way, so you end up with a piece that is 3/4″ wide and WOF long.
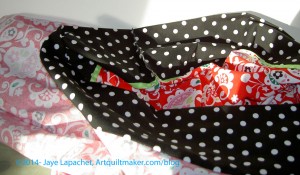
- Lay cuff fabric right side up on your worktable (or ironing board).
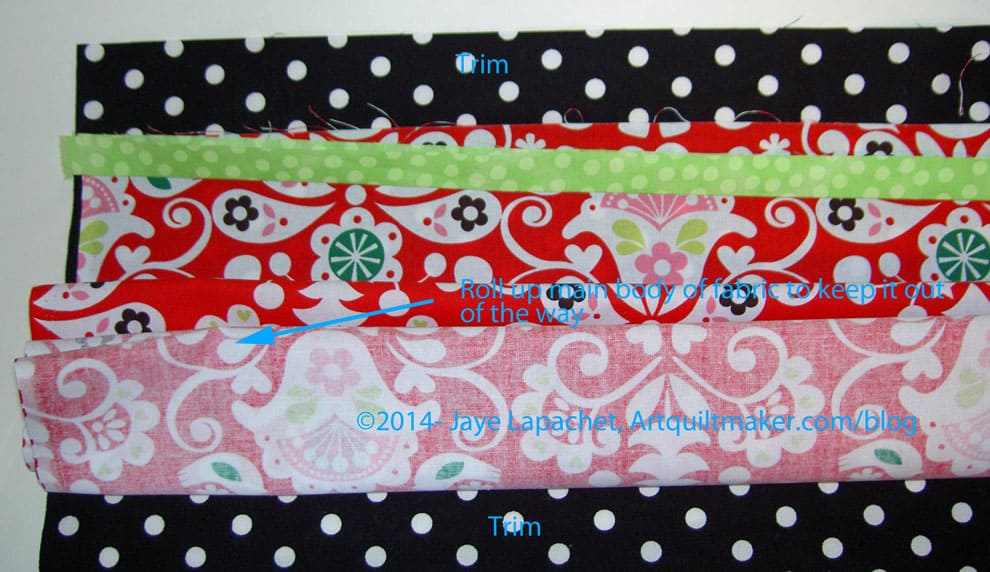
- Lay your main body fabric right side up on top of the cuff fabric. Cut edge is up, selvedges are hanging down.
-

3 Layers Ready to Roll Lay trim fabric on top.
-

Roll up Main Body Fabric Fold main body fabric up towards trim, keeping it well away from where you will be sewing.
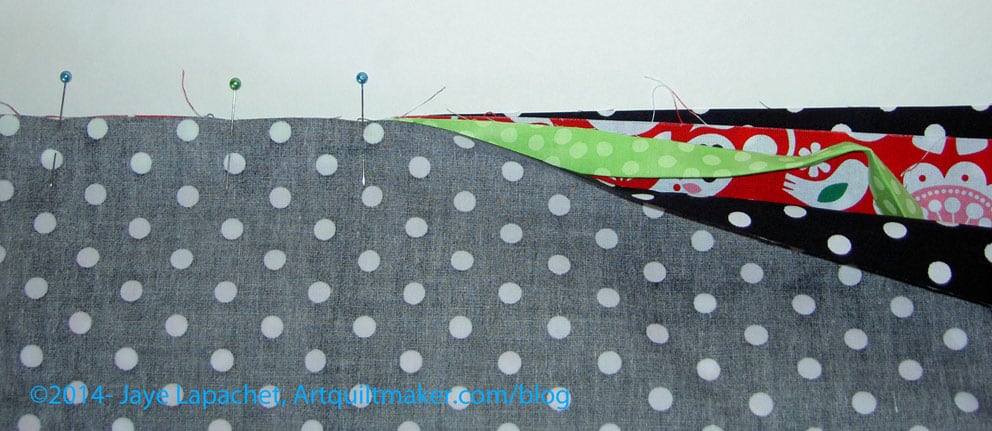
- Bring cuff fabric up and around main body fabric.
-
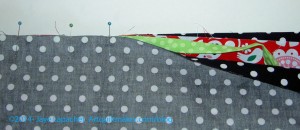
Line up all parts and pin As you lay the cuff fabric on top of the trim, line up the edges of all the pieces you have layered and pin them all together. You will end up with a tube filled with fabric. The tube will look like a burrito with the cuff fabric forming the flour tortilla. All of the other fabric will be wrapped inside it.
-
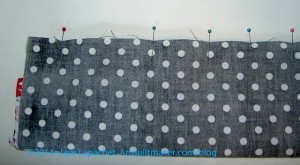
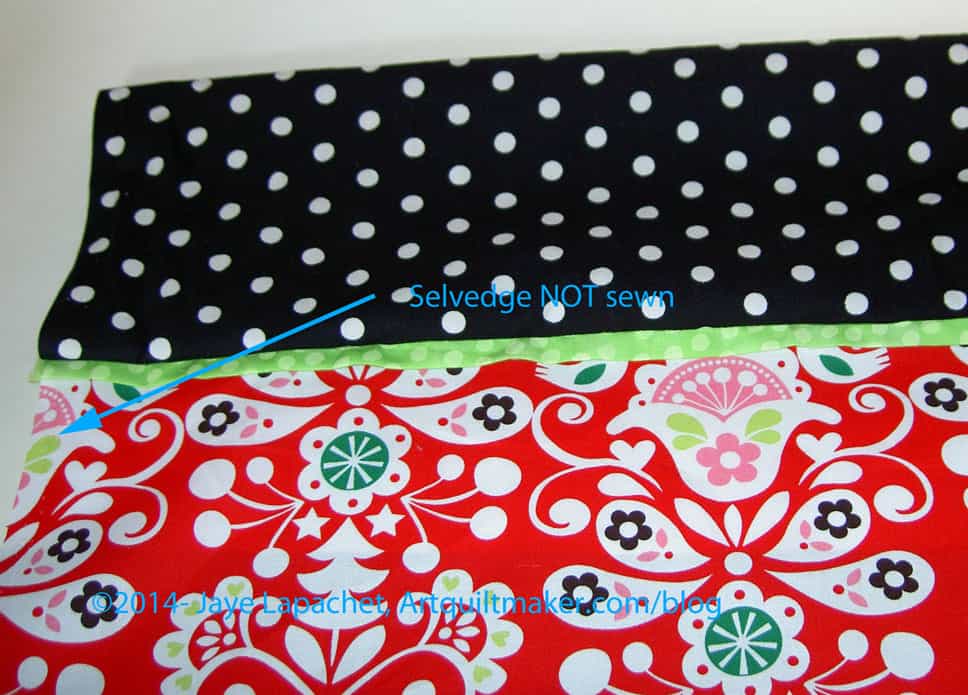
Burrito completely pinned Nota Bene: the selvedges are NOT pinned

Sew
-
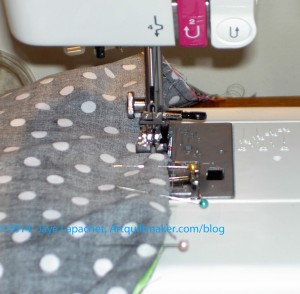
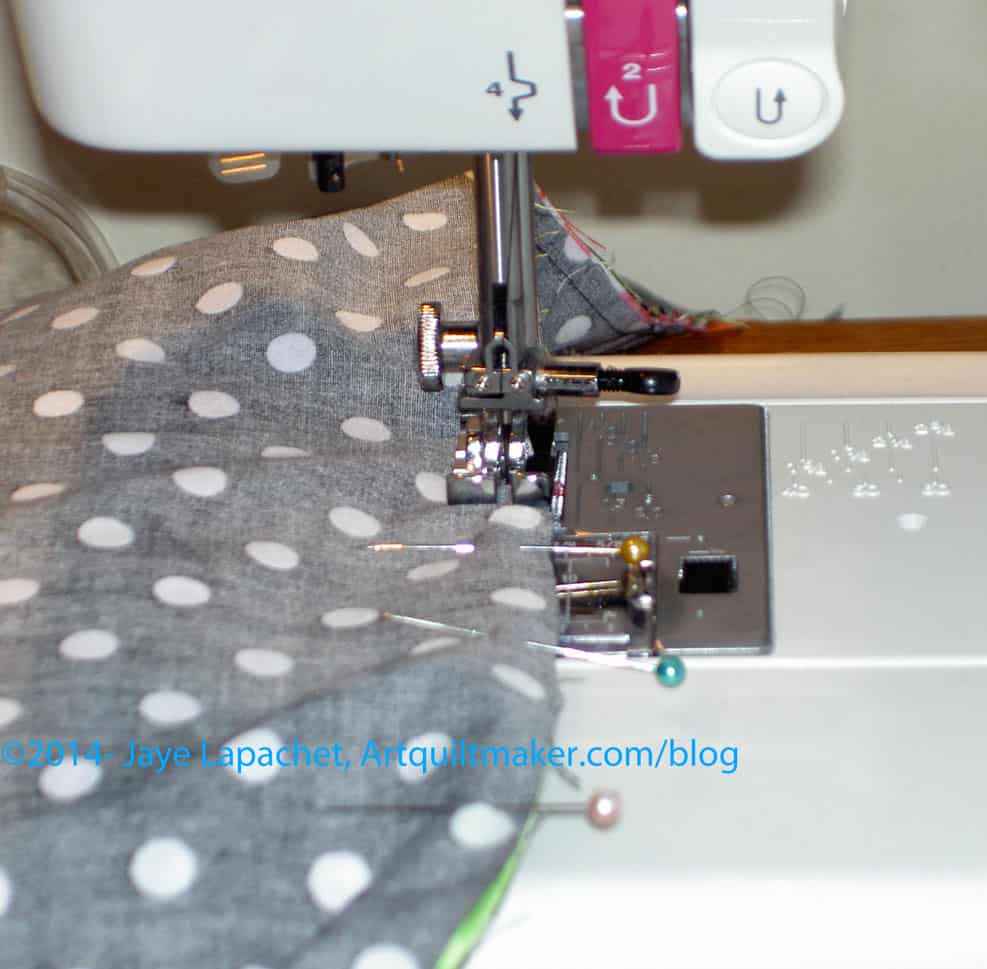
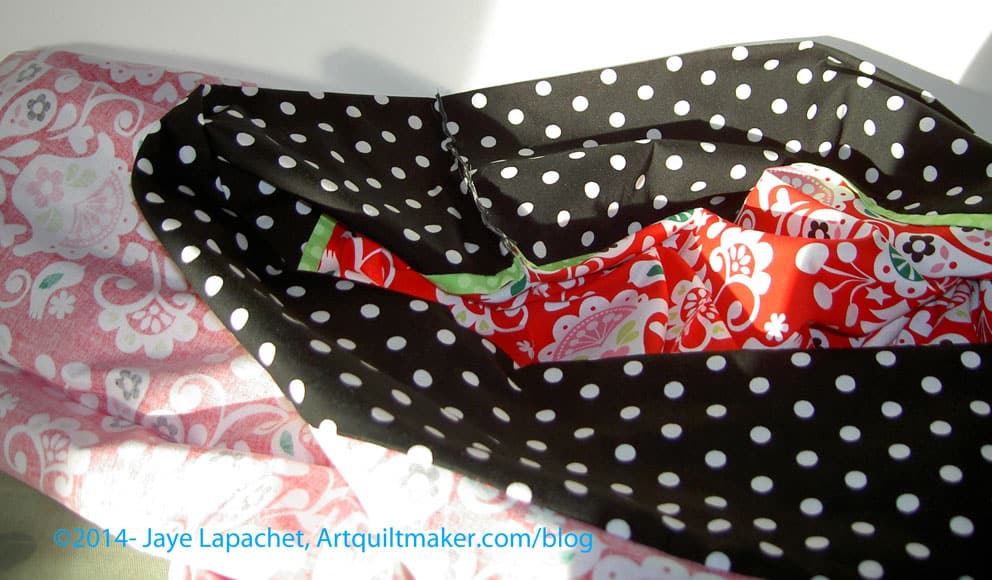
Sew ‘burrito’ Take your burrito to the sewing machine and position it so that the pinned edge is underneath the presser foot.
- Starting sewing, stopping after a few stitches and backstitching, then continuing on until the entire seam is complete.
- Pull out pins as you sew
- Backstitch at the end to secure the seam.

Prepare #2
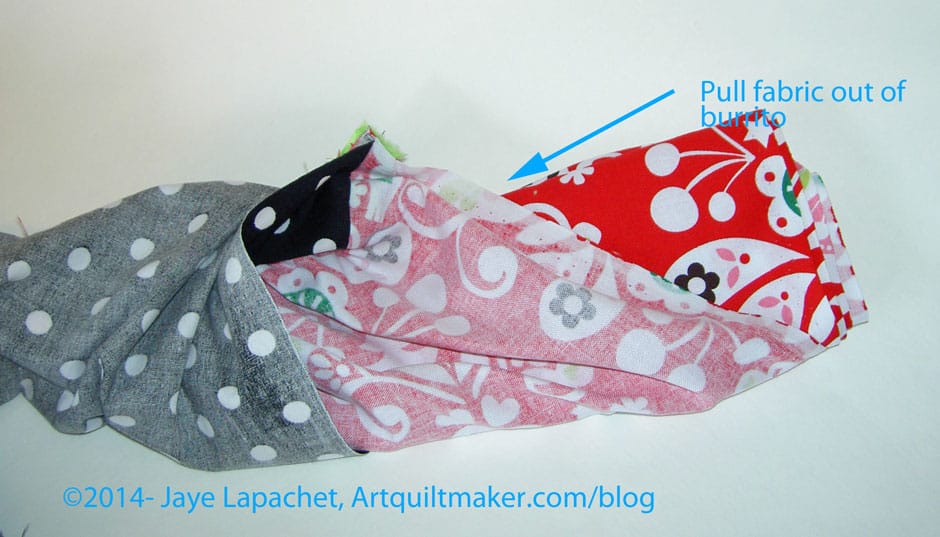
-

Pull Filling Out of Burrito Carefully pull all the ‘filling’ out of the burrito so that you have a piece where the cuff, trim and main body are all sewed together.
-

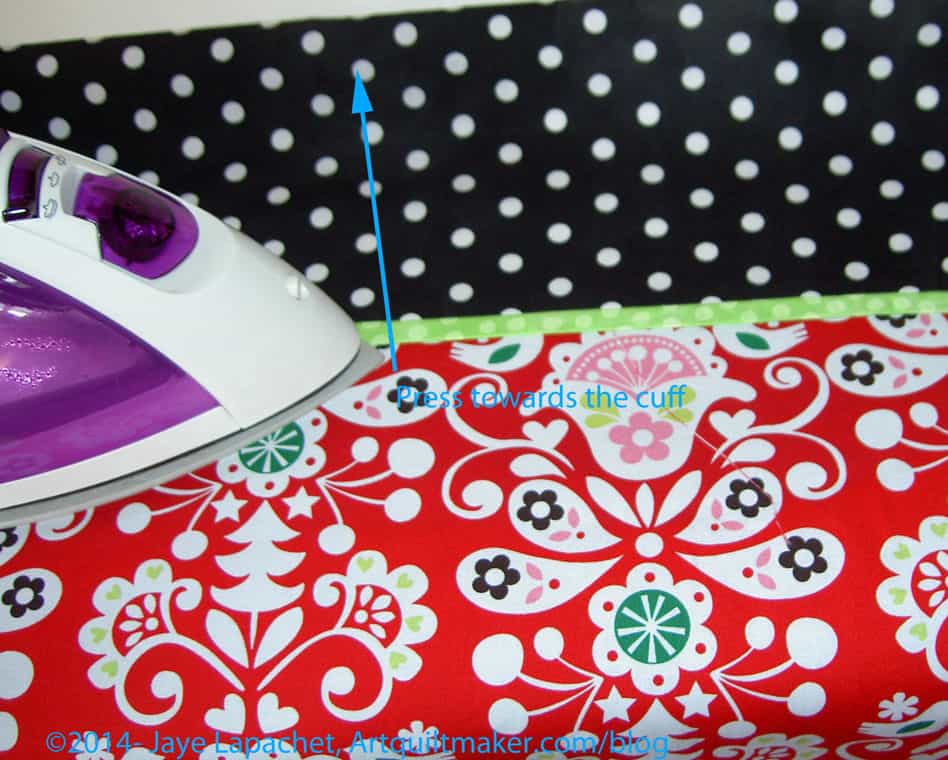
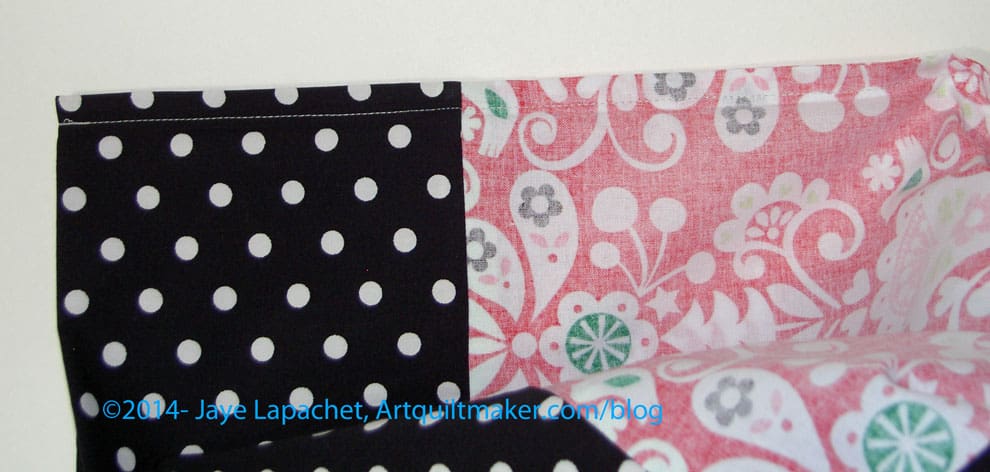
First seam sewn; case on ironing board Lay the piece flat on the ironing board with the cuff fully on the ironing board and the main body hanging down the front.
-
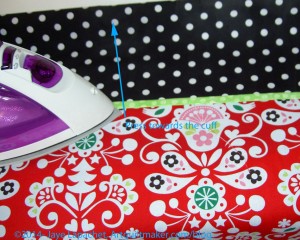
Press Towards the Cuff Press, carefully smoothing the fold of the cuff away from the trim and the main body, so it is neat and tidy.
- Fold the piece in half with WRONG sides together. The RIGHT side will be facing towards you (you will be able to see the right side)
- The selvedges will now be touching each other.
- Trim the main body after measuring 28″. That is the measurement of the main body fabric and does not include the cuff or trim. If you were to open the piece, your main body would be WOF x 28″. You can adjust the 28″ to fit the size of your pillows.
- Pin at strategic points
Sew #2
This step will start the process of making a French seam (completely encloses the seam with no raw edges).
- Using a 1/8″ seam allowance (or smaller), start sewing at the top of the cuff, down the side. I sew it this way to have the best chance at matching up the trim.
- After a few stitches, stop and backstitch the top. This is important because the top seam will get a lot of wear from stuffing the pillow in and out.
- Remove pins as you get close to them.
- Stop at the corner and backstitch, then turn and sew the bottom of the pillowcase closed.
Prepare #3
- Press the seam from the right side.
-
Sew from wrong side Turn the pillowcase inside out so the wrong side of the fabric is showing.
- Place the full bottom of the pillowcase on the ironing board
- Smooth the fullness of the pillowcase towards the seam.
- Press the seam so it is neat and tidy.
- Repeat with the side.
Sew #3
This is the section where you create a French Seam, which means that you will encase the raw edge of the previous seam.
- Starting at the cuff again, sew with a 1/4″ or larger seam along the side. You want to use a seam allowance large enough so that the entire raw edge that you sewed int he previous step is encased.
- After a few stitches, stop and backstitch the top. This will further reinforce the top seam, so it can withstand the wear and tear from stuffing the pillow in and pulling it out.
- Sew down the side neatly as this seam will be seen
- Remove pins as you get close to them.
- Stop at the corner and turn and sew the bottom of the pillowcase closed.
- Backstitch neatly at the edge of the bottom.
Finish
- Press the seam from the wrong side.
- Turn the pillowcase right side out.
- Place the bottom of the pillowcase on the ironing board with the seam away from you
- Smooth the fullness of the pillowcase towards the bottom seam.
- Press the seam so it is neat and tidy. I often press starting on the main body of the pillowcase and moving the iron towards the seam.
- Repeat with the side.
- Shake out your pillowcase and show it off!
Good job!
Notes
- Width of fabric means from selvedge to selvedge. Example: If you cut a strip 1.5″ wide for the trim, there will be a piece of the selvedge on each end of the strip.
- Main body: I straighten a 1 yard piece of fabric and cut it to size AFTER I sew on the trim and the cuff. This leaves me with a strip about 6″ wide, but it keeps me from getting confused about which side is up.
- Main body: the selvedges will be on the sides. Do not sew the trim and cuff to the selvedge.
- Main body: I trim the selvedges from the sides after I sew the cuff and trim on.
- I have used trim sizes from piping to 1″ cut. You can make the trim whatever size gets you the look you want.
Resources
- Twiddletails tutorial – I like the burrito method. Print out these directions and use them as a guide. Most of the way I make my pillowcases are from this tutorial
- Gift Post #2-2013 Pillowcases – see Amy’s comment