We are making the Flower Wreath block. To find out how to make templates, including the ring see Part 1.

Supply List:
- Notebook for notes
- Pen to take notes ????
- Mechanical Pencil
- Fabric (at least 4 different, preferably more greens to create variety in the leaves; scraps work well)
- Fabric Scissors
- Paper scissors
- Fusible web, such as Misty Fuse or Steam-a-Seam 2 or Steam-a-Seam Lite. My favorite is Soft Fuse.
- Applique’ pressing sheet
- Tear away stabilizer (the size of your background)
- Iron
- Ironing surface
- Flower Wreath pattern sheets
Choose your fabrics. You will need fabric for the flowers (1-4 fabrics), leaves (1-20 fabrics) and the wreath (1 fabric). The leaves can be the traditional green or you can use something else. If you use one color, you might want to mix up the prints to increase interest. You can also use different colors. Make the block your own.
I used a variety of turquoises and aquas to keep my color scheme in the aqua/turquoise with red range. I have a few of the leaf fabrics picked out from my scrap basket, but need to find more. It is important, with my limited color scheme, to make sure the viewer can see the individual leaves.
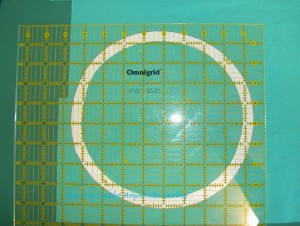
The ring is the biggest pain to deal with so I worked on it first before I even really began thinking much about fabrics for the other parts. I decided to use one of the Pat Bravo Pure Elements solids in the turquoise range, but more on the green side. I haven’t used it in this quilt before, but it will complement the other colors. I picked it to highlight the leaves a little more.
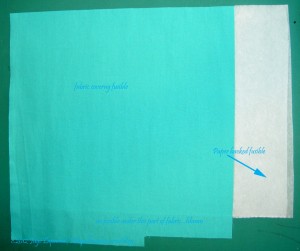
Now you need to make sure that your fusible will cover your fabric.
I used a package of Steam-a-Seam 2 Lite, but there are many fusibles that will work just fine for this project. As I have said before, my new favorite is Soft Fuse. Use a product with which you are familiar or know how to use. Using what you have on hand is also a good idea.
Tear the paper carefully off of one side of the Steam-a-Seam 2 Lite (or follow directions for your fusible) and stick it to the fabric, smoothing it carefully so there are no puckers or bubbles. The fusible is sticky so you can stick to the fabric and re-position it until you are happy before you fuse it to the fabric.
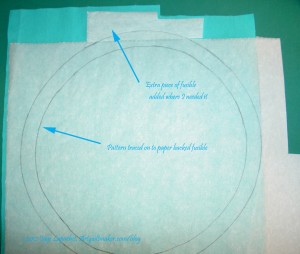
Since the fusible pieces I had were 8.5″x11″, I needed to cover an extra piece (bottom of the photo above) that was wider than the 8.5″ width of the fusible. I cut a piece from the fusible (white part in photo above) and re-positioned it to cover the part of the fabric I need for the size of the template.
Once you are happy, fuse the 2 sided fusible (should have the paper left on one side) to your ring fabric. Follow the directions on the package or website. You may want to cover your ironing board and the piece with an applique’ pressing sheet to keep your iron and ironing surface clean.
Turn your fusible backed fabric so that the paper left on the fabric is face up, as in the photo above. Place your ring template face down on the paper and trace around it with a pencil.
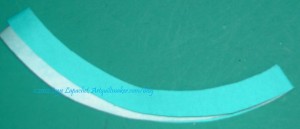
Cut out the ring carefully on the line. I used an X-acto knife to start the center. I did use a pair of fabric scissors, but not my Gingher scissors. It is kind of hard to know what to do, because you are cutting both fabric and paper and you need a nice sharp edge. I use a pair of my mid-range scissors and hoped for the best. They still seem sharp even after this type of cutting.
Fold the ring into quarters and finger press lightly. Again you will be lining up the folds to center the ring.
Retrieve your background. Fold the background into quarters and finger press, so you can see the folds.
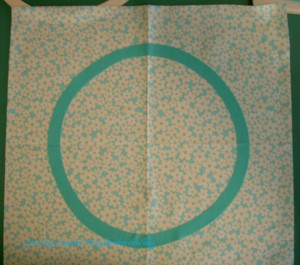
Remove the fusible paper from the ring.
Line up the folds of the ring with the folds of the background. If they are all in alignment, there should be a ring fold snuggled with a background fold evenly. If you want to check, measure from the edge to the ring. You do need an absolutely square block for this to work.
Press the ring with your iron, according to the fusible directions, onto the background so it sticks.
Carefully bring background with the ring stuck to it to the iron. Check to see that your ring is still in place. According to your fusible directions, press the ring into place.
Your ring should now be firmly ironed on to the center of the background.
Leave this piece on the ironing board temporarily.
Retreive the tearaway stabilizer and cut two pieces of tearaway stabilizer a little bit larger than your background fabric. Place your background on top of both pieces of tearaway and pin the background to the tearaway. This will provide stability and prevent the piece from puckering when you zig zag stitch the pieces.
You are now ready to machine applique’ your first part of the block. See part 3 for machine stitching the block.