Skeleton Cuff Pillowcase

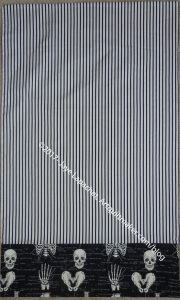
Skeleton Cuff Fabric

While plowing through fabric a week or so ago, I found a leftover piece of skeleton fabric with a note on it that said “pillowcase cuff”. Since I was preparing to send the YM a care package I sewed up a new pillowcase for him. I haven’t been making him one a month like I was last year. If I get inspired, I make one.

I used some stripes as the body since I also found them while I was plowing through that same pile of fabric. I figured I had enough stripes for binding and one more black and white length of yardage wouldn’t be missed.

DH asked me why I was sending the YM a Halloween pillowcase in February. Sigh.

Dream Projects #6

The last time I wrote about all of the new and exciting projects swirling around in my head was in 2015. Time flies when you are having fun.

Art Institute of Chicago Fusible Applique’ Quilt

  • Status: Dream state
  • Pattern: Original
  • Fabric: Turquoise and red, mainly, but other colors for the leaves and flowers, perhaps
  • Steps: need to fuse a bunch of turquoise to some piece of fabric in the ‘ticker tape’ style. I am thinking of making it similar to the Whole Cloth Quilt and using red, again, for the background.

Basketweave Baby

  • Status: Dream state
  • Fabric: Scrappy
  • Pattern: Fons & Porter, series 1000, episode 1005
  • Thoughts: I like the challenge of piecing this quilt and using a lot of partial seams for the piecing

Blue Rectangles Gradation Quilt

  • Status:Hunting and Gathering
  • Fabric: blue 2.5×4.5 rectangles
  • Pattern: similar to FOTY 2008
  • Thoughts: I can’t decide if this is still a dream or if it is already started and I just need to arrange it and start piecing. I have done a lot of cutting, so I think I have started it and it may not be a dream anymore. The original idea stemmed from the FOTY quilts. I just decided to do a monochromatic version – using just blues, in this case. I probably have enough patches now and just need to slot the time to work on it into my schedule.

Blue Lemonade

  • Status: Hunting and Gathering
  • Fabric: blue, purple and green scrappy
  • Pattern: inspiration from TFQ’s Pink Lemonade quilt
  • Thoughts: I probably have enough squares to make this quilt and just need to slot the time into my schedule.

Easy Street

  • Status: have pattern/ dream state
  • Fabric: pinks
  • Pattern: Easy Street by Bonnie Hunter
  • Thoughts: I really liked Daisy‘s version of Easy Street, which she calls Cherry Bomb (she thinks of the best names for her quilts) in terms of color and feel. I don’t want to copy her, but if I do this quilt, I’d like to have the same pinky-red feel to it. One challenge about a mostly monochromatic quilt is getting enough contrast. I look forward to that challenge.

Feathered Star Block

Good Night Irene Quilt

  • Status: dream state
  • Pattern: Good Night Irene from the Missouri Star Quilt Company’s Block magazine, Spring issue v.2, issue 2, pg. 54
  • Fabric: I decided not to use a layer cake and will use the scrap 2.5 inch squares I have been cutting. I love the cheerfulness of Scrapitude Carnivale as I say over and over and am not done with that combination yet.
  • Thoughts: I thought about using dots on a white background, as I did with the Scrapitude Carnivale quilt as the background. It makes the Scrapitude quilt look so cheerful. I probably wouldn’t call it Good Night Irene.

Interlocking Triangles Quilt(s)

  • Status: have a lot of stripes to use; dream state
  • Pattern: This is an idea that I designed myself. I made two quilts and have variations on the pattern to make more.
  • Fabric: I have a few different collections of fabric I want to use. Most are rainbow colored
  • Thoughts: This is a quilt from which I get a lot of bang for my buck. The visual impact is tremendous. The easiest way to do the spiky triangles is with paper piecing. I am not that big of a fan of paper piecing (read my laments about the Spiderweb‘s paper piecing). I made Spiky Stars using templates and that was meditative and won a prize, so it is doable.

Jack’s Chain Quilt

  • Status: dream state
  • Pattern: Jack’s Chain, a continuous pattern
  • Fabric: bright scrappy, consistent centers
  • Thoughts: This is one of the first quilts I saw hanging in a quilt store and thought of making, after I learned to quilt. I have seen a number of variations lately using different hexagons in the center. Making the nine patches would be a good leaders and enders endeavor. As if I don’t have about a zillion leaders and enders opportunities.


Music Quilt

  • Status: dream state, but not very inspired
  • Pattern: Top will have a piece of music the Young Man can actually play. That will probably be applique’ or
  • Fabric/Colors: music prints and tone-on-tones with a little red
  • Thoughts: The Young Man has requested this quilt as his high school graduation quilt. I missed that deadline. I will make it. He has sent me a piece of music, which I printed out. Now I need to make into an applique’

Neutrals and Red/Scarlet Quilt

  • Status: some cutting of black rectangles done.
  • Pattern: Slice a approx. 4 in x 7 in rectangle on the diagonal and insert a red strip, resew and set into columns.
  • Fabric: red, black and whites. I
  • Thoughts: gift. I have black fabrics cut and am just waiting to slot this into my schedule (sounds like the story of my life).

Pineapple (Hunting and Gathering)

  • Status: I have strips cut.
  • Fabric: dots. Have most of the strips cut. Will be much more selective about which strips I use.
  • Pattern: Pineapple log cabin
  • Thoughts: I haven’t given up on a Pineapple quilt despite my frustration with the previous attempt. I bought a different ruler: a Creative Grids Pineapple ruler in hopes that it will work better for me.

Pink Rectangles Gradation Quilt (Hunting and Gathering)

  • Status: same as Blue Rectangles quilt above
  • Fabric: pink 2.5×4.5 rectangles
  • Pattern: similar to FOTY 2008
  • Thoughts: How many gradation exercises does one person need.

Silk Colorblock quilt

  • Fabrics: silk dupioni and cotton in brights (of course)
  • Pattern: Similar to Colorblocks 2
  • Thoughts: I have made a couple of, what I call, Colorblock quilts over the years. One was the Kona Challenge in 2011, another was my 1990 Colorblocks 2 and the first one, Colorblocks, also made in about 1990. I bought the silk fabrics at the Marin Needlearts show about a zillion years ago and they have languished waiting for me to learn to back them so I can use them.

Spin Wheel 

Stepping Stones #3

  • Status: waiting.
  • Fabric: Macaron pre-cuts from Hoffman. It isn’t started, but I have lots of pre-cuts and think they would make a really fun version of this quilt.
  • Pattern: Stepping Stones by the Lintott girls

Windmill  (Hunting and Gathering)

  • Status: half cut; need more greys for the background
  • Fabric: Scrappy. I will use a grey for the background, because if I use more of the cut fabric patches, the pattern will be lost. The pieces are too oddly shaped and I don’t want to lose the pattern in a mass of scraps.
  • Pattern: Come Quilt with Me Rotary templates

Out of the Dream State:  Below is a list of projects that were on this list that I actually did or am working on:

FOTY 2017 Starts

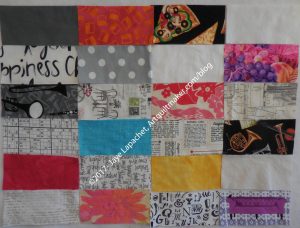
First Batch of FOTY 2017 Rectangles

I know it is confusing to have two of these going at once.

I had to clear off my ironing board in order to put a new cover on it. Mine had a big hole, which wasn’t really bothering me. However, my ironing board is a unique brand and I came across a cover in a store and snapped it up. In order to actually use the new ironing board, I had to move the pressed fabric waiting to be cut. The above picture shows some of it, but also fabric from a recent wash load.

The shape for 2017 is a 3 inch x 6 inch rectangle. I chose that because I want to play with a subway tile look. I think I have decided not to cut smaller pieces for used/in my closet fabric. So far I have only cut new fabrics, so I still have some time to decide. I think I will just make all of the patches the same size. I am also thinking I will stagger the rows like when a bathroom is tiled. This means I need something for the ends. At the moment I am thinking white Ta Dots on Grey. Stay tuned.

New Donation Blocks

Mid-Feb 2017 Donation Blocks

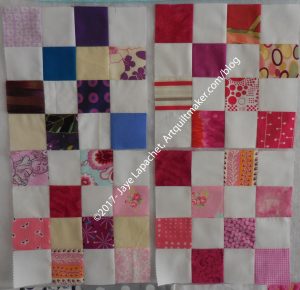
I am doing other things with leaders and enders so my crop of donation blocks and tops has slowed. Not stopped but slowed. Here are new blocks that will be donated at the March BAMQG meeting. I made the first four during the week of 2/5, approximately. I have put a few more together and just finished those last Thursday.

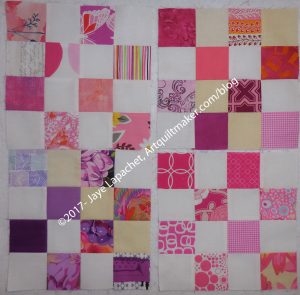
More pink + 1 purple block

I am really channeling my childhood bedroom, which was pink and purple. I paid a lot of attention to the fabrics I chose for the second batch as I wanted to play with color and pattern.

You can see some of my favorite Kaffe Collective fabrics as well as a piece of a couch.

These blocks are definitely girly and I will need to get back to some more boy blocks. I couldn’t resist indulging in a little pink.

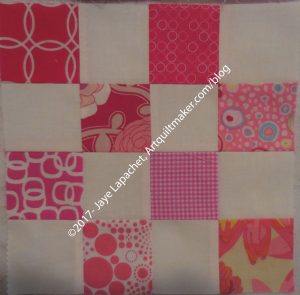
Favorite donation block

This is my favorite block. I love the fabric combination. I have a lot of pink squares so will probably come up with more pink blocks.

ColorPlay: Tulips

ColorPlay: Tulips original

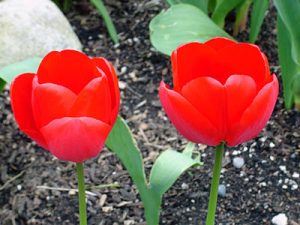
Tulips are, possibly, my favorite flower. I am pretty partial to spring flowers, such as daffodils, hyacinth and narcissus, so it is hard to say. One reason I like them is that florists don’t tend to pair tulips with baby’s breath. I sincerely dislike baby’s breath. I had white tulips for my wedding bouquet and DH often gives me white tulips when he wants to give me flowers. They are also delicate and simple.

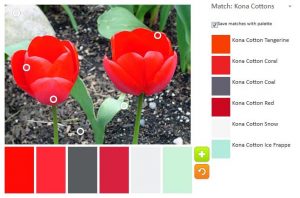
Above is the original image I uploaded to the Playcrafts Palette Builder tool. I can’t remember where I took it.

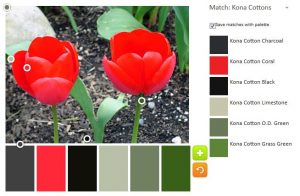
The first palette is appealing. I like the Coral and Black combination with the other neutrals included.

ColorPlay Feb 24 n.3

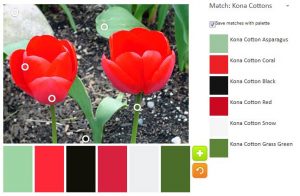
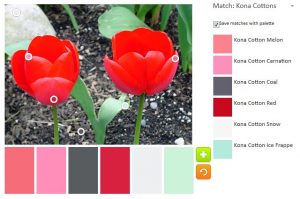
Since I have to mess around with the palettes, I moved the little circles and came up with a slightly brighter palette. I love the addition of Kona Red and the Kona Snow to this option.

ColorPlay Feb 24 n.4

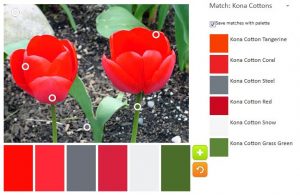
Fiddling further allowed me to add another warm hue, Kona Tangerine to the mix. This grouping is getting quite warm.

ColorPlay Feb 24 n.5

The Kona Snow and the Kona Coal seemed to want to stick to the palette. This palette has no more greens, but includes an icy blue called Frappe.

ColorPlay Feb 24 n.6

This final palette is probably my favorite. I was excited to be able to move the circles in such a way as to add Kona Carnation. I have been using Aurifil 2479, a lovely carnation-like pink for another project, and loving it. It was so nice to see a similar hue show up in this palette.

Let me know if you make anything with these palettes. Thanks to Anne over at Play-crafts for her tool.

Various & Sundry 2017 #3

Techniques

Reminding ourselves periodically of good technique helps keep us on the quilting straight and narrow. I found a cutting tutorial that I thought was interesting. It starts out talking about tools – rotary cutters, mats and rulers. I usually position my ruler so that more of one of the lines is on the fold of the fabric. This tutorial does it differently. My ever burning question was not answered and that is: when lining up the ruler do you put the fabric on the line or next to the line. Anyone know?

Moda put up a blog post on working with coated fabrics. This should help provide an alternative to the problem we discussed in the Hack that Tote post.

Art Gallery Fabrics has a guide to machine stitches.

Color, Patterns and Projects

Love of Patchwork & Quilting have a Selvedge Sewing – DIY Taravel case project on their blog. This could make another useful and interesting addition to my gift list. I haven’t tried this pattern, but based on my experience with the Clippy Pincushion project, it shouldn’t be difficult. Looks like a good way to use up selvedges as well.

Have you seen the Pantone Color of the Year? What do you think?

I found a good laptop sleeve pattern. I want to try it.

Fun and Games

You know those hotel door hangers that keep the cleaning people out until you are out of  bed? Moda has one to keep the family out while you are sewing. There is a little bit of crafting required, but not too much for some much needed peace and quiet.

Some comments on artists as hoarders.

Other Artists

I happened on an old post over at Lily Street Quilts and was amazed at the fabric. Marci has done a bargello type quilt using pebbly fabric and the choice is so effective.

Weeks Ringle has written a post about a traditional Japanese Festival which facilitates giving thanks to our tools and supplies.

My sister sent me a link to an article about Yayoi Kusama, thinking her designs would make great quilt patterns. I think her work looks like Kaffe Fassett fabrics.

Mom made placemats
Mom made placemats

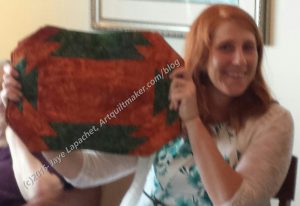
My mom made some placemats for my niece’s wedding shower. They came out really well and are perfect colors for her.

Fabric, Notions, Tools and Machines

I was looking at text themed fabrics and saw that Pink Castle Fabrics also sold sewing machines. I was very pleased to see that they include the price on their site, which I find unusual, but also very pleasing. For kicks, I looked at the Janome Horizon Memory Craft 8900QCP SE machine. The color and the wheel on the front bother me, but the specs tell me that it has everything I want. Since the price was listed, I was pleased that it and the Janome Horizon Memory Craft 12000 were not as expensive as I thought.

History

The New England Regional Quilt Study Group/American Quilt Study Group is having a quilt study day in Rhode Island at Quinn Hall, 55 Lower College Rd, University of Rhode Island, Kingston, RI on April 8, 2017.
Dr. Margaret Ordoñez and Dr. Linda Welters will present our program featuring materials from the Historic Textile and Costume Collection at the University of Rhode Island. This is a rare opportunity, and we will need to limit the group to 48 attendees. To read more about our presenters, here are the links to their pages at URI:

Meet Margaret Ordonez

Meet Linda Welters

Registration
Morning program
Lunch – Bring your own bag lunch. Beverages will be provided.
Afternoon Show and Tell – Bring an antique quilt from your own collection. (Dr. Ordoñez and Dr. Welters have promised to share quilts of their own too!)
Fee: $55.00
To sign up:

Please send your registration and check made out to Marjorie Farquharson:

Marjorie Farquharson
682 Great Plain Ave.
Needham, MA 02492

Name:   _______________________________________
Email:  ________________________________________
Telephone: ____________________________________________

The deadline to register with payment must be received by April 1, 2017.

________________

Additionally, there will be a WQSG meeting on Saturday, March 18th.  We will be starting at 10:00.  Welcome/social time begins at 9:30.  The meeting is being held at the Oshkosh Library, 106 Washington Ave, Oshkosh WI  54901.  It is one block east of Main Street in downtown Oshkosh. There is a large on site parking lot just north of the building.  Our meeting will be in the basement. A donation to the library will be collected as the room will cost us $40.

Bring a sack lunch or there are several fun eating options within a short walk of the library.  Allison is bringing water and she says there are two excellent coffee places within two blocks along with a hot dog joint, a wine bar and cafe, and the best cookies in Oshkosh.  Allison will be talking about quilts associated with the Temperance movement and said she found some really interesting information and photos to share.  Please bring any quilts you may have from that time period to share as well as any new acquisitions you’ve come up with since the last meeting.

Shameless Plug

Verity Creek
Verity Creek

My brother-in-law has published his first book, Verity Creek. It is on Kindle and in paperback. Please try it out.

Gift Pillowcases

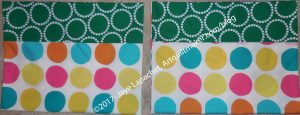
Some time ago (last fall??) Mom and I did a circuit of her local quilt shops. I bought some huge dots with the intention of making pillowcases. Finally, last week, I had got some inspiration.

Erin's Pillowcases
Erin’s Pillowcases

My niece will be getting married in April and her shower was this past weekend. In concert with two of her other aunts, we hosted a shower for our niece. I bought her a gift off her list, but had no suitable gift bags that were large enough in which to wrap it. DH tried out all the non-Christmas gift bags we have and none were large enough. He suggested a pillowcase. What a brilliant man!

Later, while plowing through some fabric, I found the pillowcase fabric I bought with mom. As happens with inspiration, I realized I could use this fabric to make two pillowcases and wrap the gift.

As I have said, the cuff is the pain for me, because I hack into fabrics as soon as they are washed for all the hunting and gathering pieces I need. I found some perfect green for my niece – Lizzy House Pearl Bracelets. It isn’t a perfect match to the green in the dot fabric, but I think it works.

My niece liked them, especially the dots and that makes me happy.

North Coast Inspiration pt.2

Misty scenery
Misty scenery

This post will make a lot more sense if you go and read part 1 first. That post has pretty pictures as well.

Down the street from the Humboldt Parlor Hall is the Clark Historical Museum. It is housed in an old Bank of Eureka/Crocker Bank building, which was purchased by Cecile Clark for her collection of items related to the area. The museum is small, but very well done. They had a special exhibit of 1960s fashion when we visited.

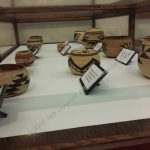
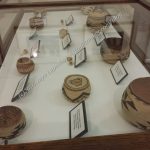
The museum also has one of the largest collections of Native American baskets in the US. I thought the designs on some of the baskets shared similarities with quiltmaking.

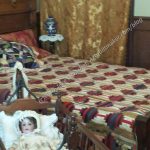
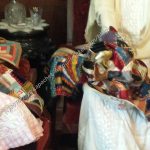
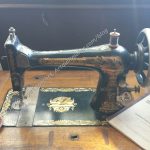
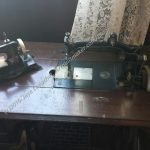
The museum also had a suite of rooms depicting a Victorian parlor and bedroom. Several vintage sewing machines were displayed along with a couple of quilts – two crazy quilts and a beautiful log cabin. I am concerned about the scrunched up display of the crazy quilts and hope they are replicas.

Eureka is a very nice city and there is a lot to do, wonderful restaurants and many historical sites. It is well worth a trip.

Part 1

Bunny Hop Quilt Shop Review

Stitch Quilt Shop Review

Ocean Waves Quilt Shop Review (previous review, not 2017)

Finished: Apron (FINALLY)

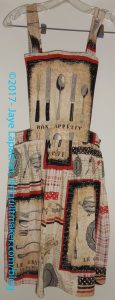
Apron Front
Apron Front

I finished this apron months ago and for some reason could never get myself together to take a photo. I finally gave myself a good talking to and got it done.

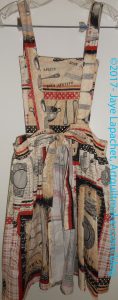
Apron Back
Apron Back

It is still in relatively pristine condition because I haven’t used it. I am saving it to enter in the San Mateo County Fair. SIL and I are trying to enter a number of projects so we can beef up the display area. If you are in the area, please enter something!

After not looking at it for months, I wish the colors had been different. I am not big on that beige or the rust. I really like the motifs and am really happy with the fussy cutting I did.

I had a lot of help with this piece. Kelly helped me cut it out about a thousand years ago and Mom helped me with the gathering, which was just about the last thing I needed to do to finish it.

I decided yesterday that I would give this apron to one of my nieces who needs an apron. I told her she wouldn’t get it until after it is exhibited at the Fair.

Book Review: Hack That Tote

Hack That Tote!: Mix & Match Elements to Create Your Perfect BagHack That Tote!: Mix & Match Elements to Create Your Perfect Bag by Mary Abreu

I received Hack That Tote for Christmas. I can always count on the YM to get me something towards the top of my wishlist. I hack bags, because I actually use the bags that I make. I wanted this book to help me be a better bag hacker. You have seen my attempts at hacking the Petrillo Bag pattern. I am happy with the results, but I thought a little additional understanding of the structure of totes and their patterns would assist me in my efforts.
This book starts with a basic pattern and gives a visual representation of the various hacking options (pg.6-7).

The first chapter is called “Anatomy of a Tote Bag” (pg.8). It only mentions the elements of a bag, but explains them thoroughly. For example, I never knew that “the square notches cut from the bottom corners dictate the shape of the finished project” (pg.8). I probably knew it somewhere deep down, but this book writes it clearly and puts it out there for my brain to chew on.

There is also a discussion of ‘drop,’ how pockets work best and how the “width and length of the bag work with the bottom corner notches in determining the finished bag size” (pg.9). All of the these structural tips in the information sections help with hacking a tote. Understanding the underlying structure of anything helps the maker to disassemble and reassemble their project, including bags.

The images are also helpful. Pages 6 and 9 have images that help understand the underlying structure – or how bags change as they are hacked. This structural information is brief but well written and useful.

The third chapter is called “Overview of Hacking the Pattern” (pg.10). The section starts with changing the size of a bag and gives the formula for scaling up or down. Changing fabric is really an easy ‘hack’. It is actually barely a hack and probably should not have been mentioned in the same context as changing the size of a bag. As a very basic hack, Abreu briefly discusses ways of using fabrics to change the look of one’s project (pg.12-13). This section makes me think of my mosaic pieced journal covers and how making such a large piece of fabric would use up a lot of scraps as well as be interesting if one could deal with all of the seam allowances.

Fabrics are discussed in an entire chapter of their own entitled, shockingly, ‘Fabrics’ (pg.14-). This section is different than the above in that it discusses particular types of fabrics and their qualities in relation to making bags. The chapter includes my favorite fabric tip. “I nearly always select light colored fabrics for bag linings” (pg.14). The author also discussed aligning fabric motifs (pg.14) and different fibers (pg.16-19) extensively. She provides for use of different fabrics and her opinion on their suitability for bags.

“Interfacings and Stabilizers” information is given space as well. The topic is illustrated with a page spread (pg.21). The chapter gives extensive help on why to use stabilizers and the author’s preferences such as “… to interface both the exterior and the lining, which allows the bag to maintain its shape over time” (pg.20).

Again, Ms. Abreu gives an illustration of various interfacing and talks about their uses (pg.22-24). I was pleased to read about buckram, which I have never used (pg.22). I was also pleased to get a short lesson on craft stabilizers, which Abreu describes as “beyond the heartiest of interfacings lies a category of products called craft stabilizers” (pg.24). I have never heard this term so I was pleased that she named some brands with which I was familiar so I could get context. The author also gave useful tips on sewing through them.

One thing I like about this section the “Considerations of Interfacings/Stabilizers” (pg.25). This part gives advice on when to use what type of interfacing. She uses projects in the book as examples. While this could be seen as self-serving, I think it is a great idea because there are a wide variety of projects which provide a variety of examples for almost any available pattern.

Handles can be hacked as well. Ms. Abreu talks about different types of handles (pg.26) with examples (pg.27). Pockets, decorative elements, bottoms, hardware as well as handles are all included in the Elements section (pg.26-35).

After a lot of great information, the patterns start with a basic tote. The patterns each run about 4 pages, depending on the complexity. I have seen some full sized quilt patterns in books on a shorter number of pages. The basic tote is the pattern on which most of the other patterns are based.

I originally saw this book at a store and one reason I put it on my list, besides the basic hacking information, was the Tubular Frame Purse (pg.60-67) pattern. I like the idea that I might be able to carry one bag for work rather than a purse and a tote or briefcase. I like the shape and the fact that it stands up by itself. The pattern calls for foam interfacing such as Soft and Stable.

Like many of the patterns, there is a sidebar called “Inside the Hack” (pg.60), which discusses how to accommodate different sizes of parts. There is a lot of cutting for this pattern and the design uses several different types of interfacing. Though I haven’t made the bag, the steps seem to be well written and clear. This pattern has a bag bottom, so the maker could use press-on vinyl to protect the fabric from wet floors. Keep the negative sides of press-on vinyl in mind when you use consider using it.

This pattern uses a tubular frame. It is definitely on my list to try out. I just have to find some proper fabric, assemble the interfacing and supplies.

The Boat/Pool tote (pg.68-73) would be a great project in which to use a large print fabric for the outside. alternatively, I might use a laminated fabric for the outside, especially if I planned to use the bag around water. This pattern doesn’t have a separate bottom piece so press-on vinyl isn’t an option.

The Laundry Duffle Bag (pg.94-98) could be a great option if you want to include a storage bag for a gift quilt. One option (hack?) given for this project is using French Seams and a heavier fabric. This interests me and I want to think about how to parlay this into use for different patterns.

Hack That Tote doesn’t have an index, but it does have an illustrated Glossary (pg.99-102) and a Resources page. I find the Glossary helpful for techniques with which I am unfamiliar. I would have liked it better if projects that used the listed techniques were include with the entry.

A ton of photos were included, which makes navigating the instructions easier. I recommend this book.

There are a wide variety of patterns in this book of different shapes and sizes, including a messenger bag and a crossbody bag. Some look like patterns I have seen from other designers. There are a limited number of shapes for bags so, perhaps, it can’t be helped.

View all my reviews
North Coast Inspiration

The trip did not rest on my visits to Stitch and Bunny Hop. Eureka and the surrounding is beautiful. I found it to be especially beautiful on this trip because we have had enough rain to make the hills green and everything seem clean and fresh. Aside from the quilt shops, there is a lot of history and they have done a nice job making the downtown appealing, so it is well worth a visit.

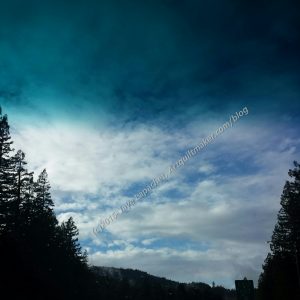
Watercolor Sky
Watercolor Sky

The drive up (about 6 hours) was beautiful after we crossed the Golden Gate Bridge with blue sky and green hills. We were pleased and a bit relieved to see some blue sky after the crazy hard rain we had on Thursday. We stopped in Willits for lunch and then it rained on and off the rest of the way to Fortuna. The rain clouds make for some beautiful sky photos.

I thought the blue of the sky in the first photo (right, above) looked like a particularly good watercolor.

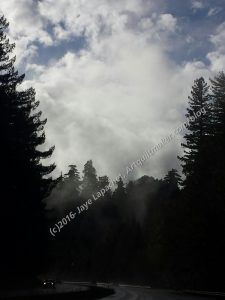
Trees and mist on Hwy 101

The area was known for logging at one time. There are tons of Redwoods that have grown back or been preserved. These trees with their mist also made for some nice views as well. As mentioned, the weather was rainy on Thursday at our house and the highway did not escape the pounding. there were a couple of places where we had to detour off the main highway to get around work being done.

On Saturday, DH dedicated Fire Station #6 on J Street. It is now a fire museum and the Friends are working on restoring the building and preserving fire equipment. It was a very nice ceremony, one of the best I have attended. Humboldt Parlor did a great job organizing the event and even had a TV reporter along side newspaper photographers.

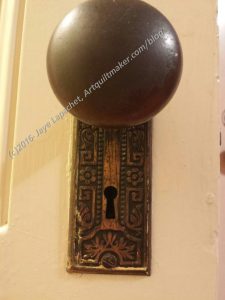
Parlor Hall doorknob

After the dedication we were invited for lunch at the Parlor’s hall, which is in downtown Eureka. I always wish DH’s Parlor had a hall, but there are a lot of issues with owning property, not the least of which is buying it.

One of the things I noticed was the artistry of the doorknob plate. This could be a quilt design with a little reworking.

I love this kind of detail and, though I wouldn’t want this exact doorknob assembly, I do think the plate would be fabulous.

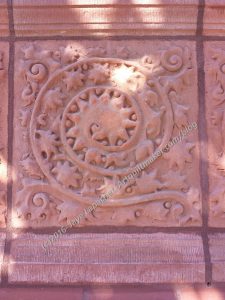
Building decoration, Eureka

We walked around a little bit on Saturday after the dedication and I saw various details that made my brain spin with ideas. The photo left is an interesting version of a spiral. It is one of  many that decorated one part of the building. It made me think of Friend Julie, as she is my spiral girl.

I am not sure what it is made of, but it looks somewhat soft, in terms of stone being soft.

Check back for part 2 in a few days.

ColorPlay Travel

View towards Fortuna

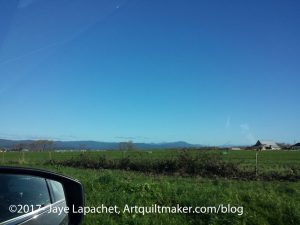
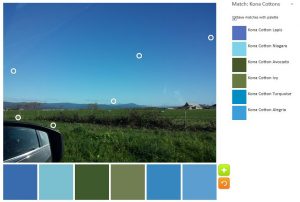
Last weekend we went on another #politicalwifery trip for the Native Sons. We headed up to the North Coast. After, what seemed like, days of pouring rain, Saturday dawned beautifully clear. DH pointed out a gorgeous view so I am using that view, on our way back from Stitch in Ferndale as today’s ColorPlay.

You can see why I picked this. Last time I was trying to get a nice blue palette. Today, I’ll be hard pressed NOT to get a nice blue palette.

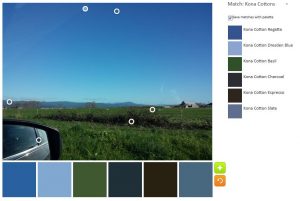
ColorPlay Feb 17 n.1

Today I remembered to save the ‘auto color’ image. The tool seems to cluster the images into the dark. It is interesting. This isn’t the perfect palette, but I do like the Kona Regatta and the Dresden Blue (top two).

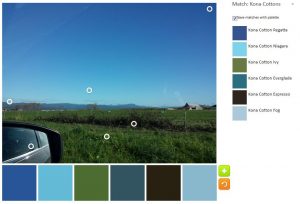
ColorPlay Feb 17 n.2

This might be my favorite. I am not 100% sure, but it has Kona Niagra, which is close to Kona Jamaica, a sure favorite. There are also a sufficient balance between light and dark.

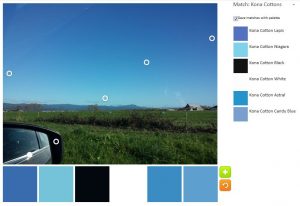
ColorPlay Feb 17 n.3

N.2 was my favorite until I saw n.3. Still no Jamaica, but the Lapis with the Niagra work really well together. The medium blues really make this subtle.

ColorPlay Feb 17 n.4

I added in the greens to see what would happen. they are more mossy than I like, but the balance works. I think n.4 is probably the most successful palette.

Try the Palette Builder out yourself and show me what make.


Shop Review: Bunny Hop – North Coast

Bunny Hop Quilt Shop

It really was a beautiful day on Saturday, but that meant that my poor phone was having trouble taking photos – lots of glare.

Bunny Hop is located in an old Victorian. The inside does not appear to have been modified much, including the kitchen, which looked freshly painted and was decorated with a cherry theme. They made the inside work, which pleased me. I dislike it when historic buildings are chopped up without sensitivity. Eureka, Ferndale and Fortuna have some great Victorians.

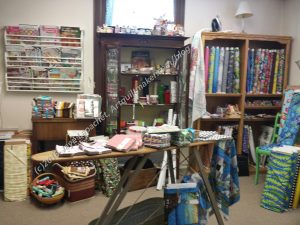
Bunny Hop room 3
Bunny Hop room 3

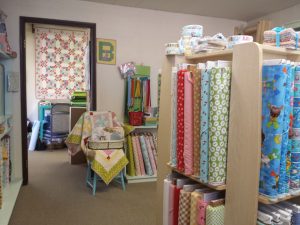
In contrast to Stitch, this shop’s decor was in keeping with the Victorian style of the house. They had a fair amount of 1930s repros but they also had other bright and cheerful fabrics that I wouldn’t categorize as repro, but not Modern either. The fabric they had was similar to Scruffy Quilts (normal??). The decor definitely tended towards repro.

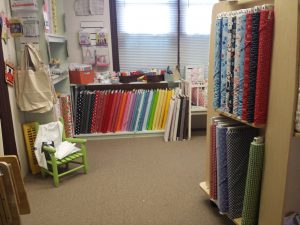
Bunny Hop: Room 2
Bunny Hop: Room 2

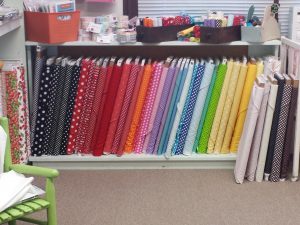
They had some precuts – mostly charm packs and mini-charms. On the ironing board were some Uppercase charm packs, which tempted me. I resisted. They had a great selection of dots and had they placed together. There were patterns and notions and samples everywhere. I realize now that I didn’t really get a good look at some of the notions they had away from the cash register (DH was waiting in the car).

Bunny Hop: Room 2 dots detail

The rooms were on the large side – or well laid out so the place didn’t feel crowded. The shop owner seemed to have a good FQ policy and they were placed near the like fabric on the bolt. I bought a couple of text fabric FQs for the Carpenter’s Wheel and one of the Studio E blue to which I am attracted.

Bunny Hop Main Room
Bunny Hop Main Room

They also had a nice selection of white on whites, which made me think of TFQ. I bought one called gingham for a background. It had a white printed (a la Blueberry Park) grid on it. Not sure what quilt I will use it for, but there is no shortage of options. Bright white is something that I find goes well with the bright colors I use.

The main room was also where they had notions, including a nice selection of scissors, Renaissance Ribbons and their blue fabrics.

Bunny Hop: Room 2 detail 2

The project on the wall of their workroom was appealing. I couldn’t get a closeup view. It was 16 patches set with lozenges so it looked like the 16 patches were Sawtooth Stars.

The photo, left, was taken in the same room as the dots (above). They had some kids prints along with the repros in this room.

Bunny Hop: Room 1
Bunny Hop: Room 1

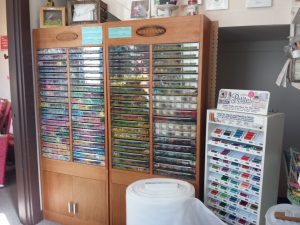
In, probably what used to be, the Service Porch Bunny Hop had their interfacings, fusibles and a lot of Sullivan embroidery floss.  The floss was mostly in hanks rather than spools like the recent Sue Spargo and Aurifil purchases I have made. There were some in balls. I haven’t heard of this company and didn’t buy any. Isn’t that a GREAT cabinet?

Bunny Hop Project Area

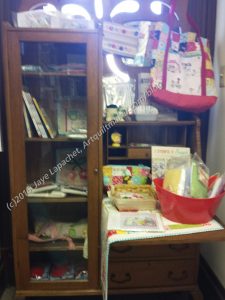
Finally, of course, throughout the shop, they had samples and projects. This area was particularly cheerful. You can see the red, yellow, green and white theme they had going. This was another area with a number of books and patterns, which I did not take the time to explore in depth. 🙁

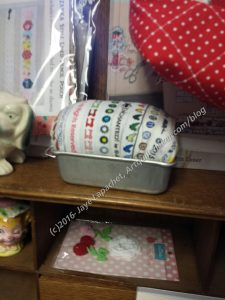
There was a pincushion made from selvedges in a small bread loaf tin (second shelf under the bag and to the left) that was fun. I am not sure how it would be to put pins in, but it would make a cute decoration for someone who enjoys selvedge projects. It is also another way to use up those selvedges.

Bunny Hop selvedge pincushion idea

I enjoyed this shop, not only because it was new, but because of the cheerful quality of the projects and the fabric. I was also pleased when the cashier told me about Stitch. It is well worth a visit, especially if you are in town visiting a number of quilt shops.

Visit Bunny Hop Quilt Shop
Address: 1809 Albee Street, Eureka, CA 95501
Phone: 707-497-6356
Email: info@bunnyhopquiltshop.com
Website: http://www.bunnyhopquiltshop.com/

Book Review : The New Hexagon

The New Hexagon: 52 Blocks to English Paper PieceThe New Hexagon: 52 Blocks to English Paper Piece by Katja Marek

I bought this book because it was a block dictionary and the cover was very appealing. I think I also liked the cover’s color and was in a weak mood. Still, I do love block dictionaries and this is a great one for new a way of looking at hexagon blocks. I have never seen a grouping of hexagon ‘blocks’ before and these are really unique. I am really excited about English Paper Piecing right now and can see myself starting several projects using that technique. I am trying to restrain myself, especially since I plan on making the La Passacaglia quilt.

This book was paired with the Marti Michell Perfect Patchwork Templates set G. I thought they would be great for cutting the fabric. The sizes of the rotary templates don’t match the sizes in the book so that is a problem. However, as creative people I know that most of us can adjust the blocks to the size of the templates since they make cutting fabric much easier.

Predictably, the book starts out with a table of contents. After the table of contents, the author presents us with her view of paper piecing. The method I use (thread basting) is considered “truly laborious” (pg.4), though in fairness to the author, I do buy paper templates rather than cutting them out myself. Marek advocates glue basting fabric to cardboard over thread basting.

The author discusses the advantages of EPP, including its portability. I do agree that English Paper Piecing is portable, as you have seen with my half hexie project.

The Tools and Equipment section (pg.6-7) is compact but information filled. I was thrilled to see that Ms. Marek goes to the level of telling her readers what weight of paper (pg.6) she uses to print her EPP papers. This is very useful information if I decide to print templates rather than buying my papers. In addition to the tools, Marek also describes her “on-the-go box” and what it contains. I am a huge fan of Go Bags as having a bag ready to take on trip means I don’t have to rummage for supplies and possibly forget something. It also means I might actually get something done on a travel weekend where I might otherwise get no time with a needle.

The fabric in this book looks like Kate Spain’s Terrain, another appealing aspect to the color scheme of this book. It is well suited to the examples as there is opportunity for fussy cutting from some of the motifs.

English Paper Piecing Techniques (pg.8-11) follows the chapter on tools. This section has everything you need to know about paper piecing. Keep in mind that this is the author’s method and variations you use are not wrong. While I haven’t tried the glue basting method, the complete directions given do encourage me to give it a try. I normally only wash my quilts as needed so I worry about the lasting effects of the glue on the fabric. She talks about removing the papers but not about reusing them or washing the glue out of the fabric.

There is the ubiquitous section on “Quiltmaking Basics” (pg.12-15), over a page of which is concerned with binding the quilt. There is no talk of quilting the quilt beyond following the manufacturer’s instructions. Of course whole books have been written on the subject so I am not surprised.

One of the most interesting chapters is called “Working with Patterns” (pg. 16-18). One thing this section shows is why the reader should prepare the templates in the way the author recommends. “The following is the so-called ‘fine print’ — the little details that are often glossed over. You may never choose to changed the size of the blocks in this book, and you may never need to calculate the height of a hexagon. But when you become inspired to start designing your own quilts using the blocks I have provided, these little tidbits are here to help you. The size of the blocks in this book is determined by measuring the length of one side (in this case 3 inches) (pg.16). Even I, who glosses over directions with wild abandon and to my shame, can see the wisdom in Marek’s words. This section also gives tips on fussy cutting and provides ideas on layouts. Study these pages carefully and you will benefit greatly. I did and found a variation of Jack’s Chain which has my head spinning with thoughts on that layout.

Over 71 pages 52 hexagon blocks are presented (pg.19-52). The author has named all of them with women’s names. Carol is the most basic divided hexagon, being made up of 6 triangles. Most of the other blocks have smaller hexagons and diamonds, some half hexies (Lorraine is similar to my EPP project), triangles, parallelograms, and kite shapes all rearranged into hexagon shapes in very clever ways.

Finally, the book has a few projects. Because of the nature of EPP, I think this is a book that will inspire quiltmakers to design their own quilts. All of the projects, especially those made in Terrain are very appealing. My favorite might be the Rain Chain Nursery Quilt. It reminds me of the modern donation quilt our color group made a few years ago. There is a lot of background, but the layout is very appealing. Sadly, the Jack’s Chain variation is made from unappealing beiges.

There is also a list of resources and a gallery. This book has a lot of scope for inspiration

View all my reviews
Shop Review: Stitch – North Coast

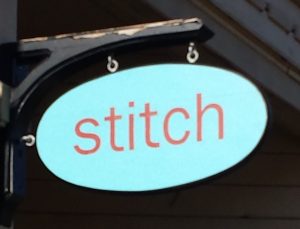
Fun Stitch sign
Fun Stitch sign

This is a fantastic shop. I wanted everything and bought more than I had planned. I am so glad I went and wish this shop was in my neighborhood. I am probably lucky it isn’t.
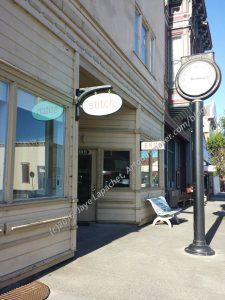
Stitch: view from the street

I was directed to Stitch by the kind lady at Bunny Hop Quilt Shop, another shop I missed last year. Stitch opened in January 2016 and I didn’t visit last year. DH reminded me that we spent the day wandering around Fortuna trying to get a library card. I don’t remember anything about quilt shops last year and I can’t find anything on the blog so perhaps I didn’t visit quilt shops last year? I must not have been feeling well. 😉

Stitch: view from the street

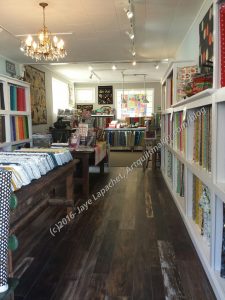
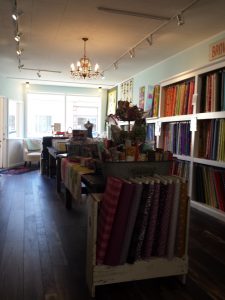
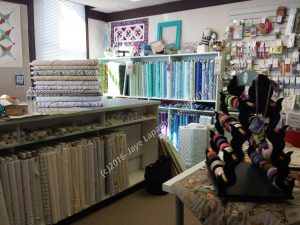
The outside of the building isn’t anything to write home about. It needs a good coat of paint and some glossy white trim. The inside of the quilt shop is a paradise. It is small, but has a great feel, wonderful fabric, lovely displays and a general air of things happening. The fabrics were all modern and current. I never liked light blue, but after seeing it on the walls of this shop, I might change my mind. The shop had the feel I want for my bedroom.

Stitch: View towards the street

While I was there two ladies were in the small classroom making modern Dresden Plate type blocks that made me want to sit down and make one as well. The owner was calling out encouragement to them while she helped me.

The shop is compromised of one large room (photos left and above) along with a small room behind the cutting counter that had a design wall with interesting blocks on it. As mentioned, there was also a small classroom. In the classroom was a wall of sale fabrics.

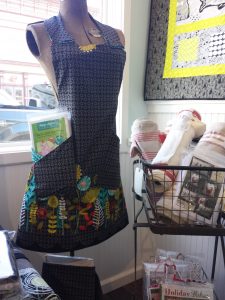
Stitch: Apron idea
Stitch: Apron idea

The displays were also wonderful. Why didn’t I ever think of using a border print for an apron? Genius.

The whole front corner made me think of Friend Julie as it was grey and yellow themed. In addition to the tea toweling, of course. The apron pattern is the Church Ladies apron that I made, but shorter. And better looking. The fabric is great.

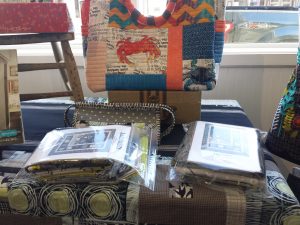
Stitch display detail

Also in that corner was a display that included a tote bag and a Sew Together Bag. The kits are for the quilt on the wall in the photo above.

I saw the crab fabric on the Hawthorne Threads site and almost bought it. I think it is interesting, but, after seeing it, am glad I didn’t.

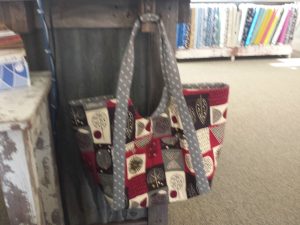
Stitch: Poolside Tote

Finally, they had an example of the Noodlehead Poolside Tote (sorry, slightly blurry). I LOVE the grey dot straps and the bold print. I bought some of that grey and am thinking of making something similar with one of my man Phil’s (Philip Jacobs) flower prints. I think a larger bag might be better, but we will see. I need another tote (and project, for that matter) like I need another hole in my head. Still, the idea of using that grey with a bold print is very appealing. I really, REALLY need some serious sewing time.

The cherry on top of the ice cream sundae was the Sue Spargo AND Auriful embroidery threads. They didn’t have as much Sue Spargo as Thistle Dew, but they had enough to keep me happy.

I really wish this shop well. I also wish it were in San Francisco. It is an incentive for me to go to this Native Sons event again.

Visit Stitch!
385 Main St
Ferndale, CA 95540
(707) 786-5007


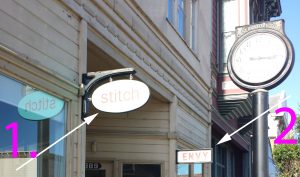
Stitch Envy
Stitch Envy

This is a funny view of the front of the shop.