I didn’t think I would actually start with fabric, but last week was a challenging week and I did! I had about an hour before life started in again, so I stood at my cutting table, cut fabric and glued it to my pattern. Having a limited amount of time was good, because I didn’t get overwhelmed with the thought of starting.
I know she looks like a big helmet haired weirdo, but I promise she will get better. I am putting all the dark pinks on parts of the hair that are supposed to be farther away and lighter fabrics on hair that is supposed to be closer. That is what my research told me to do, so hopefully it will look ok.
I am making the roses (perhaps some other flower, but I think of them as roses) blue and am working with the same principle.
So far all of the fabrics are from my scrap bin.
Two products you MUST try: Karen Kay Buckley Perfect scissors and Sewline Glue Pen. DH bought me the scissors for Christmas. I don’t do much hand work and thought this would be a great project on which to use them. It is! They are a fabulous tool! They are sharp and precise and you absolutely need them. I recently spoke about being interested in the Sewline Glue Pen. I came across one and bought it. Again I thought it would be good for this project and, again, it is perfect. The glue is just sticky enough to keep the pieces down. It is also very smooth, so it doesn’t pull as much as a glue stick. I feel like I got a lot done in a short amount of time and these two tools really helped.
Last weekend was the CQFA meeting. I mentioned this project briefly when I talked about Attack of the Hexies.
Caroline taught a workshop using Susan Carlson’s techniques from her Serendipity Quilts book.
To start we got an email with prep instructions and when I finally got a minute (work really gets in the way of my quiltmaking!) I started getting the materials I would need together. One of the items was Drawing of simple object, ( Think little kid’s coloring book.)
I have one coloring book left from when I was a kid and couldn’t find it. I did find my old stained and leaded glass pattern books. Those drawings are simple enough and I perused them. Two stuck out for me. One was in the book and one was a drawing, probably a tracing of an image from another book, I had done that was stuck in the book. No attribution on the second one, nothing. If you have an Ed Sibbett, Jr book with the image below, please send me the citation. I do want to attribute it properly.
I decided to do them both, one at a time, but both. I have been lamenting, in my head, the fact that I haven’t been doing much art quiltmaking lately, which seems kind of lame, considering the name of this blog. I tell myself that all of my other quilts are ‘color work’, but I might be fooling myself. I do work a lot on color, but….
Stained Glass image
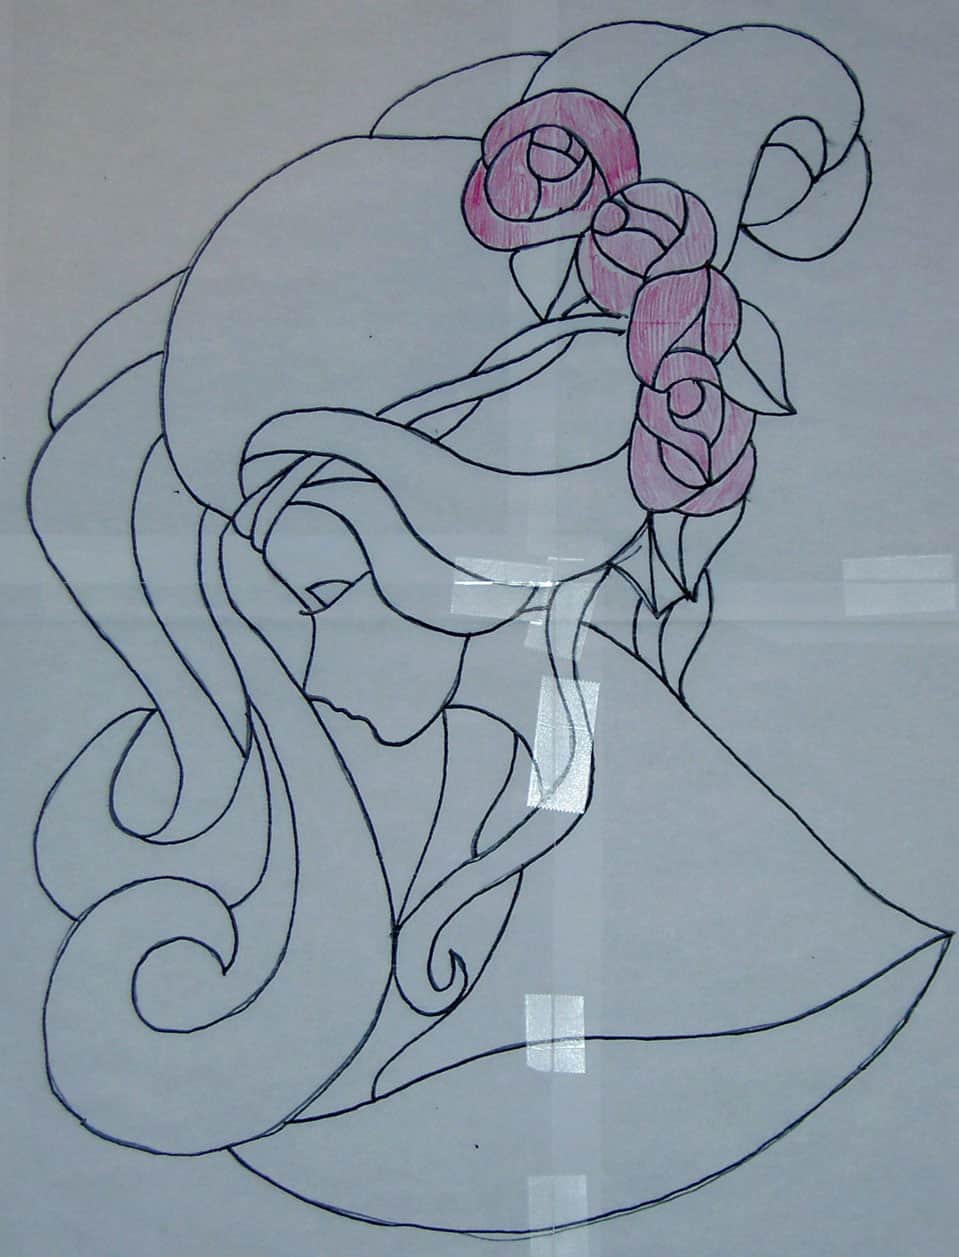
This image shows the first piece I will work on. the idea is to use scraps to make up the image. Everyone was working on it at the meeting and I was ‘in process.’
I will use pink for the hair and blue for the roses. I will probably use one piece of fabric for the face. It will not be green, but other than that I don’t know what color it will be. I might do the eyelash in embroidery.
According to Caroline, our workshop leader, the first step was to transfer the image to fabric. My actual first step was to enlarge the image. The original was smaller than 6×6 and I wanted to do something a bit larger. It is now in the 20×16″ range. It was a painful process, but I finally figured out how to do it and went ahead to the transfer-to-fabric stage.
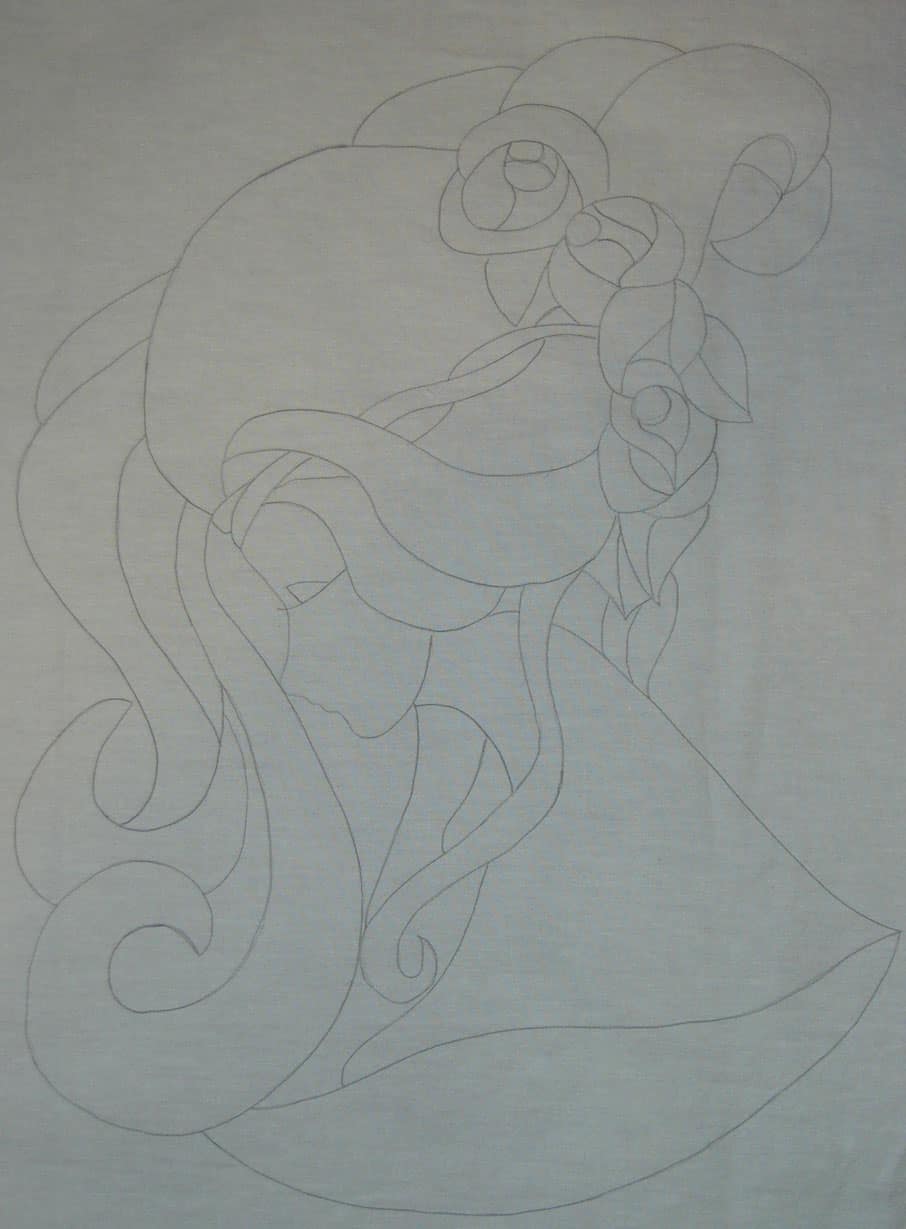
Design on fabric
I used a piece of the linen colorway of an Art Gallery solid. I still had some left even after using bunches on the Flower Sugar Hexagon (Attack of the Hexies) quilt top. I simply traced over the printout with a Sewline pencil. It worked like a charm when I was able to keep the fabric in the right place over the printout.
My next task is to remind myself of the rules of light and dark: “if I put a light in a front piece of hair, will it look closer or farther?” and then I will get to it. I have the scraps already chosen and am eager to get to work.
I suppose I could check more thoroughly to see if I have Susan Carlson’s book, too.
Periodically, I will find something interesting that is old and post it under the Vintage Tuesday tag. In this case, I am showing you an old quilt of mine. It can’t really be called vintage as it is only 24 years old, but you get the idea.
There are a few things that you should immediately see in this piece. They are:
another hexagon quilt – I really have done a few of them
not my colors
gradated to a certain extent – as much as could be with the colors I was using
This isn’t my first quilt, but I believe it was the first quilt I actually finished (the Sampler took me awhile, because of the hand quilting). It was finished in 1990.
I did in response to a challenge posed by one of the members of the quilt group of which I was a member at the time. We were all on board and one of the other members went to pick the fabric. It is all machine pieced-NOT paper pieced- and machine quilted as well.
Do you like that binding? I put the binding on by machine and then sewed all those miters down by hand.
Sarah was kind enough to ask me to participate in this blog hop. Although I did write a bag review for Purse Palooza at the request of Sara over a Sew Sweetness, I feel like this is a different kind of thing. Thus I am sticking to my guns and saying that this is my first blog hop! Please be kind! I am so thrilled to be part of this blog hop. There are so many great artists who did the September round and now another group of fabulous artists doing the November round.
Bonus and Prizes
There will be a giveaway on my blog. I have one DVD to give away thanks to Sarah and Interweave Press. You can win this DVD by leaving a substantive comment (e.g. ‘s,ign me up!’ will not work), such as telling me what you thought of the video if you saw it or a clip, telling me what you thought of the review or something else. Sarah may read the posts and comments as well, so throw the girl a bone. 😉 You must leave the comment on THIS post.
UPDATE: COMMENTS CLOSED. WINNER HAS BEEN CHOSEN
I will pick the winner, contact the lucky winner and then send the contact info to Sarah who will get the DVD to the winner.
Sarah will be having a Grand Finale at the end, sometime in late November or early December (I’ll let you know), which will include additional goodies to win from MistyFuse and Havel’s Scissors!
Background and Purchase Details
I have known Sarah for awhile, mostly through an online group to which we both belong. I have enjoyed watching her career and cheered her on as she has reported her quiltmaking successes. This DVD/online workshop is just the most recent in a long line.
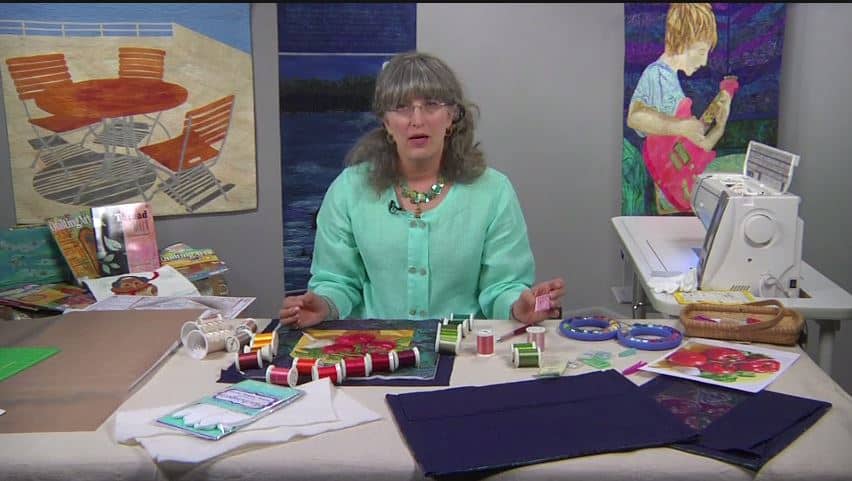
The following is from the Interweave email announcing her video, which I thought was a great description: “According to Sarah Ann Smith, not creating would be like not breathing: not possible! Sarah learned to sew after a neighbor girl made an apron for her doll when she was 6; when she found quilting, she knew she had found her passion: art and sewing. A former US diplomat, she draws on her years living in South America, Africa and North America, as well as her travels to Asia and Europe. She specializes in machine work and coloring with thread. Sarah is the author of ThreadWork Unraveled, lives in Hope, Maine, and has a husband, two sons, four cats, a pug and too many ideas!” Sarah’s website is a gateway to all things Sarah Ann Smith. You can reach her blog, store and a gallery of her quilts as well as tutorials, videos, her free bibliography, class supply lists and much more. Her site is very well done.
The video is a workshop which teaches you her “collage process, from selecting the best photo for your first effort at this technique, to fabric selection, patterning, fused collage, to threadwork at either the top or quilting stage.”
Digital download or DVD
Available from Interweave
Available to international quiltmakers
1 hour 16 minutes in length (first 30 second or so are the FBI warning)
Meat and Potatoes
The first thing I noticed was that the video started in my browser kind of suddenly after I clicked on the link in the email. I don’t watch a lot of videos-I have to actually watch them, which interferes with my sewing productivity, so I prefer audio only so I can sew while I listen-so I don’t know if this is normal. I was able to stop the video with the normal type of computer video controls, so it was no problem. I am thinking that this is a setting on my computer that I would do well to adjust.
I was under the impression that this was a free motion quilting video and was pleasantly surprised to find that it was so much more. Students learn how to:
Select a photo for your composition.
Choose fabrics, prepare them with fusible web, and alter them with textile paint.
Create the working pattern.
Fuse the quilt top.
Use free-motion machine quilting to bring the fused design to life.
Discover Sarah’s strategies for creating an artful machine-stitched fabric collage!
The workshop starts out with an interview with Sarah. One thing that stuck out in my mind, from that interview, is that she says to “learn and be proud of every project you do.” This is absolutely right. You cannot get better without practice. Sometimes the practice means ending up with projects that are not as successful as your next one will be.
The interview sets a tone of encouragement. The tone is positive and upbeat and made me feel like I could do whatever Sarah taught. This tone is continued throughout the video.
The next section discussed materials. After a brief introduction Sarah gets right into the discussion about the supplies, starting with the photo. I liked this part, because she doesn’t just say “take a photo”; she tells us what makes the photo good for her process, the things to look for in a photo and what to avoid. Even in this early stage of the video (2:03), I get the impression that she has thought a lot about the process.
I am skeptical when people describe products which they would like me to use. Do you know how many specialty items I have from classes and projects? I always wonder if I have to have that particular brand or if I can use something I already have on hand. When describing the materials, Sarah tells you why she likes a particular product. She mentioned Saral (remember I told you about that in one of my tutorials?), but also mentioned something similar called Transdoodle (3:58). In the discussion about the two products, she gives the pros and cons. One thing she said about Transdoodle is that it had a heavier chalk layer. That means that I can get more uses out of one sheet. I may have to get some and try it out.
Five minutes in, Sarah is showing the student her method of selecting fabric and giving some hints on painting on fabric. Sarah talks about commercial prints, batiks and hand-dyes. She gives her preferences, but doesn’t disparage the use of any types of fabrics (6:10).
The fabric selection includes modifying fabric using materials such as paints, pencils and judicious cutting to get the right shades and textures. Throughout Sarah tells us why a particular fabric works or doesn’t for the piece.
I also liked it that Sarah gave some practical and useful tips on fusing (9:30): why she uses a certain type of iron, what she uses to clean it in case of a fusing mishap and maintenance of her pressing sheets. The whole time I watched I was thinking of Pam and her Miss Jingle quilt and SherriD with her Unicorn quilt. I am sure they could have used some of the techniques that Sarah shows. I was really impressed with the amount of detail included. It was really useful. It made me think that fusing wasn’t so bad.
Design and composition follow fabric selection (17:55). This is the longest section of the video and really gets into making the bones of the piece. The first part of this section talks about the photo. Sarah gives some examples of variations of the photo she eventually started to use. I was pleased to hear her use terms that we have learned about in the design series.
I was also very interested when Sarah talked about the light in relation to how the light source was positioned and how our eyes perceived the light (20:50). I think that little tips like this, even if I never do her technique, will help me be a better quiltmaker.
Sarah shows two methods of creating shapes (~30:00) for your composition. This is a great addition to the video, because not all of us learn or work in the same way. Having a variety of methods from which to choose makes the video more useful. I also think that there is an appropriate amount of detail. Not too much so as to be boring and not allow for creativity, but enough so that the viewer can make the project while having a bit of leeway to inject what s/he knows about art quiltmaking.
Sarah’s Thread
Remember I said I thought this was a free motion quilting video? Well, Sarah doesn’t disappoint in the free motion quilting department (43:08), though she does not show you in detail how to FMQ. She gives an overview of the important parts in relation to her workshop: needles, thread, FMQ design. Her information will be helpful in conjunction with some of the other FMQ workshops, books and videos out there.
The beginning of this section is really appealing, because of the way she has the thread laid out. During the thread preparation section, she reiterates the issues with the darks and lights that she brought up at the beginning. She also talks about her process, including describing how she works at the machine. For those of not used to working with a lot of thread changes, this conversation is very helpful.
I was pretty impressed with her stitching. She uses a darning type foot (not hopping) and has set the feed dogs to the down position. With these parameters, her stitch quality is excellent. The stitches are small, but not microscopic and relatively even in terms of length. I was also impressed with how a fabric blob suddenly turned into a shadow with nothing more than a little stitching over the top of the fabric. The stitching really smoothed out the lines of the fabric pieces.
The last part of the video is called Gallery and Conclusion (1:10:30) and this is the place where Sarah talks about moving on to your own photo. Using some of her quilts, she explains what she did to make certain quilts work, including where she used precision vs blob fabric pieces. I liked her tip on quilting with light thread in the background to enhance contrast.
Throughout the video, there are hints. Some include such things as protecting your furniture, features of products, details of using particular products and things to watch out for when using her preferred products. Sarah gives examples from particular pieces of her work in relation to the tips. She also gives alternatives, where possible, for tools and supplies that the viewer may not own and may be too expensive or too specialized to purchase. While some of them may seem like pure common sense, the way she interjects them at just the right moment makes the tips and hints even more helpful. They are in context, which helps me remember them when I am actually doing the same action. Something along the lines of muscle memory, I think. This workshop reminds me so much of being in an EBHQ class!
Clearly the techniques take practice if the viewer wants to get as good as Sarah, but she takes the fear out of a lot of the steps with her clear instructions and tips and tricks.
Technical Difficulties
When watching a video, I find that my computers stops and downloads/processes in the middle of the video, which degrades my viewing experience. As a result, I have learned to let the video download and then start watching after most (or a lot) of it has downloaded. I had some trouble with this video. I really think that it had something to do with my computer or the user (me!). This has nothing to do with the production or quality of Interweave/Quilting Arts products. I downloaded the video twice and even after turning off the sleep and hibernate modes on my computer, I wasn’t able to download past about 55 minutes within my browser (Firefox). I was able to fix this by going to my Interweave account, finding the download link and saving the video to my computer. The video took about an hour to download, but then I was able to watch the last 20 minutes.
Wrap Up
I was reluctant about this video in the beginning, but also determined since I committed to helping Sarah with her blog hop. I was pleasantly surprised. This is a great video and I don’t think you would be disappointed. From early on in the video, I felt that not only that could I do Sarah’s collage technique, but that I wanted to do it. Throughout the video, I added some of the supplies she mentions to my Amazon Wishlist and felt excited about using some of the products that had inspired some reluctance in me in the past.
Mean Mom Stuff
The giveaway will be open for 3 days only. It closes officially on Nov.22 at 6pm PDT, so leave a substantive comment NOW. I may not actually get to choose the winner until November 23, but no whining if you can’t leave a comment at 6:01pm.
November 28: Sarah Ann Smith Sarah writes “Yep–it is US Thanksgiving that day…I’ll write mine up in advance! Or maybe I should do mine on Black Friday (the beginning of the holiday shopping season the day after…)” Sarah claims this will be The Grand Finale including goodies from MistyFuse and Havel’s Scissors!
Nota bene: I have included some time codes where appropriate as a kind of citation. I hope this is helpful.
I am not a big fan of representational quilts of people. There is something about the quilting on faces that freaks me out. Also, why make a quilt when I can just take a photograph?* As a result, I often skip past these types of quilts at shows. When Art Quilt Portfolio People Profiles by Martha Sielman showed up, my heart sank even while feeling very glad it was a quilt book and not a jewelry book. 😉
I have to say that I was pleasantly surprised. There is a bit of freaky face quilting in this book, but overall Sielman has done a 100% excellent job choosing the quilts for this book.
As I looked over the table of contents, I found there are a lot of artists in this book with whom I was unfamiliar. I was really only aware of Pam RuBert and may have heard of Jenny Bowker, though I can’t think where. It is nice to be introduced to new quilt artists. As I read through the book, however, I found many artists represented who were not profiled. Susan Shie and my friend, Pamela Allen, both have pieces in this book as well as other quiltmakers whose work I have seen in the past.
The book starts out with a well written, smart introduction discussing faces in our society, pareidolia, the organization of the book and much more. Sielman weaves stories about the artists and their work to whet the appetite for this book. As I re-read the introduction, my fingers itched to move on to the images.
The artists included are international and have different ways of working. Their work has different messages and meanings, which Sielman discusses at the beginning of the book. As I re-read the introduction, my fingers itched to move on to the images. I think this quote describes the artwork in this volume beautifully “…we come in so very many different sizes, colors, and shapes. Our human family is infinitely varied and unendingly interesting, and– as this book demonstrates– it serves as a rich source of inspiration for artists around the world (pg.9).”
The book is organized by artist. I like art quilt books organized this way, because I can see relationships between quilts and the style of the artist. In some of these quilts, I like the colors. In others the imagery, aside from the human form[s], is interesting to me. Also, there is some information about the artist and I can get an idea of what their work is like before I have to go trolling multiple different websites and blogs.
The book is also organized by theme. I am not going to try to explain this. You can buy it (or get it at your local library) and see for yourself. In the first theme, happiness, the reader is introduced to Collette Berends. I can only describe the imagery of her quilts as “nightlife.” I do like the way she has represented the people. They are a bit fuzzy and impressionistic.
Yoshiko Kurihara’s quilts (pg. 66-71) are very angular and the people represented are clearly not meant to convey real people. They have no faces and the angles of their bodies are sharp. In no way are these attributes negative, though, because I was clearly able to tell that the figures in the pieces were people.
Kathy Nida’s (pg.164-169) work stuck with me as well. It is a little bit gross for me, but the quote “…of trying to NOT be pregnant, then trying TO be pregnant, and then NOT again. That little group of organs, the uterus and the ovaries, rules a woman’s life. (pg.164)” really stuck with me as one of life’s truths for women. Much of Ms. Nida’s imagery involves detailed imagery of the inside of the human body: the organs, food and medicines going in, etc. Her work and this imagery, especially in relationship to women fascinates me.
Some of my favorite quilts are:
-Kate at 40 by Kate Themel, pg.55. I like the yellow that she used as well as the blue. Both are on the face, which makes it clear that this is not a representation of how any actual human looks, but an impression or suggestion.
-Motorcyclist Portrait Project: Kari and Jim, 2007 by Cheryl Dineen Ferrin, pg. 61. Mostly I like the lips and the sunglasses on the woman in this piece. The lips are a wonderful shape and I adore the color. There is something about the sunglasses that is very appealing as well.
-Time Traveler, 2011 by Louise Schiele, pg.157. I love the colors in this piece as well as the large clock and the repetition and balance of the figures.
-Pam RuBert’s quilts are punny and fun (pg.170-175). I like it when, though serious about our work, we can also make people laugh. I love her work for the series element of it as well as the laughter.
There is something great in each of these quilts whether it is a color combination or a curved line or some details. Even in quilts where I didn’t like the overall look of the quilt, I saw something that inspired me or gave me an idea.
This book is well worth the cost and I would encourage you to buy a copy for your personal library or donate a copy to your local public library. Enjoy!
Thanks to Lark for the review copy!
GIVEAWAY ALERT!!!! I have two copies of this book to giveaway. I know I announced that I would be doing a giveaway a few weeks ago. There was some family stuff going on and I couldn’t get my act together, but I have now! I have two copies of this book to give away, thanks to Shannon at Lark.
There are special rules for this giveaway:
You have to like my page on Facebook: https://www.facebook.com/artquiltmaker OR
Be an email subscriber to my blog. If you were an email subscriber on 4/8/2013, then you get an additional entry. If you unsubscribe before the drawing, you cannot win. Only current email subscribers win.
No whining.
I will draw a winner around Sunday May 5, so you have a week to subscribe to the email version of the blog and like https://www.facebook.com/artquiltmaker.
Update 5/5/2013: Giveaway closed. Thanks for playing along!
*I really need to understand this, so please tell me what you think. I just don’t get it.
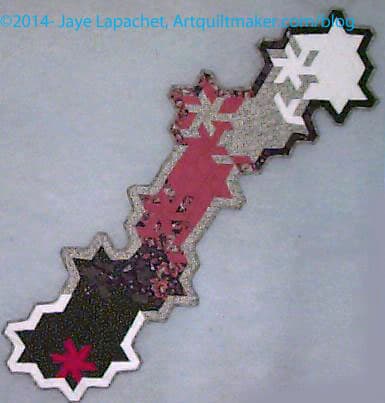
I said previously that I thought this piece was finished. I took it out on Friday in order to decide for sure and decided to put a facing on it and prepare the piece for finishing. The photo, left, shows the front with the facing applied by machine. I am sad that some of the edge detail was lost in the seam allowance. I’ll have to remember to plan better next time.
This piece didn’t need as much beading as the others I have done. I am not sure why. Laziness might be a factor, but the riot of color and fabric definitely draws attention to the elements of this piece. I don’t think it needs much detail to draw the viewer in.
I am a little sad about these small pieces. I really don’t have anywhere to display them, but would really like to have wally large enough to hang all of them.
Garden back
I am particularly fond of the back. I used different colors to quilt and intended to cover up the back with a fake, but it looks so nice that I could barely stand to cover the edges with the facing.
Now I need to stitch down the facing and make the sleeve. I have a lot of cards to write for Christmas, so I don’t know if I will be able to finish this before the end of the year, but that is definitely my goal.
Now I feel like I can work on some of the other smaller pieces on the 26 Projects List. Perhaps I will do a blog post about each one as well?
I had it on my list to deal with the disposition of a couple of projects and the Flower Garden was one of them.
Once I pulled it out of the closet, I was a little sorry to see it go as I do like the stitching and the border, but I still don’t like the flowers, so off it goes to a better life. I am going to use the border idea again, perhaps in piecing, definitely in fusible applique’.
Of course I will do stitching with Perl cotton in other pieces.
A few weeks ago, I spent a whole weekend, essentially, machine quilting the Garden quilt. I spent so long quilting it, because I am somewhat obsessive and like densely quilted quilts. It takes forever, but it looks great.
I thought I would get this piece framed like the Kissy Fish piece. On Kissy Fish, I didn’t pay much attention to the back, so the back looked fairly terrible: knots all over the place, long stitches joining sections, etc.
However, I took at look at that back after I quilted it and thought it looked really interesting. I quilt with different colors so the stitches blend into the fabric on the front. I don’t really care about the thread color on the back, because I didn’t think anyone would ever see it. I am in the habit of using the same thread color as bobbin color, so as a happy accident the colors of the quilting on the back look very cheerful.
Garden Back detail
In looking at the detail, it occurs to me that I now know why people like whole cloth quilts. In a way the back of this piece is like a whole cloth quilt.
BAMQG is having a challenge making a whole cloth quilt and I wasn’t really interested in doing the challenge, but looking at these photos makes me think that I might have an idea for a challenge piece.
Garden Back – Another View
A lot of the quilting I do, when I actually quilt, uses a regular foot rather than a walking foot. I haven’t felt confident in the last few years of my free motion quilting skills, so I have taken to using the regular foot. It works pretty well.
I worked, over the weekend, on the Garden quilt. I am machine quilting it. I hadn’t really planned to work on it since I have a back for the Corner Store to finish, a back to make for the Super Secret Project #2 as well as a binding and some other miscellaneous random finishing tasks to accomplish. I also have some bags and smaller projects I could work on to keep my mind off of things. Still, I sat huddled over my machine and machine quilted for hours.
Yes, I am in avoidance mode over the Corner Store, but at least I am accomplishing something while I am avoiding something else. That can’t be all bad, can it?
Free motion quilting
This is the first time I have done any free motion quilting in a long time. Admittedly, I didn’t do much on this piece, but I did some and I am pretty proud that a) I am still able to free motion quilt and b) my machine could handle it.
I am really pleased with the servicing the store down south did. The machine works like a charm and I have stopped having traitorous thoughts about replacing it.
I didn’t free motion quilt (FMQ, FMQing) this entire piece, but I did some FMQing in some key areas. In the photo of the sun, I did some FMQing in the ball of the sun.
Annotated Garden
I have annotated the last photo so I can try and show you the differences in straight line quilting vs. FMQing. You will have to make the photo larger to see what I have written.
I have been so remiss in reviewing this eye candy book by Lark Crafts! They sent it to me at least a month ago and I waited to have enough to write a review that would do the book justice. HAH! That will never happen, so here I am writing the review, finally. Hopefully, it is a good one.
This is a lush and lavish book. The photos are wonderful and there are plenty of them. The styles of the quilts are all different as well. Anxiety Won, 2006 by Ginny Smith has a folk art feel with the birds and improvisational cutting while I can’t even tell that Martha Cole’s piece, First Turning, 2007, is a quilt because it looks so much like a photograph.
This book is full of texture, paint, quilting, non-quiltmaking fabrics such as taffeta, embroidery, stenciling, which all flows together very well for a united whole. The color is rich and many of the quiltmakers nod at classic techniques and fabrics. There are regular quiltmaking fabrics that you and I probably have in our fabric closets. Piecing and quilting are used frequently by a variety of different artists to convey their message.
I have a love-hate relationship with representational works in the quiltmaking genre. I don’t like the quilts where an image is just printed on a piece of fabric and called a quilt. I believe in piecing and the symbology of some quilt blocks. I want some mystery. If someone wants to take a photo, go take a photo. I know that sounds harsh. Now you know one of my failings. Some of the quilts in this book are like that and I just had to ignore them. In spite of my own fault, there were so many other quilts with excellent designs and amazing imagery.
Unlike the Masters Quilts series, Masters: Art Quilts: Major Works by Leading Artists and book:Masters: Art Quilts Vol. 2: Major Works by Leading Artists, both of which I adored, this book goes into a bit more about the quilt artists, their process and some of the pieces. Judith Trager writes “I had been an avid gardener until about 2004 or 2005, when I discovered that I could no longer do the physical work. So I started making garden quilts” (pg.15). This is one example of a peek into the process. The other artists explain their work in different ways, sometimes talking about inspiration or process or how they got from there to here.
All of the artists’ sections are well illustrated and show a variety of work. I don’t know how any quiltmaker could fail to find something attractive. Cassandra Williams uses pieced diamonds and equilateral triangles as backgrounds in her quilt Dance of the Deep (pg. 81). Elsbeth Nusser-Lampe’s Struggle 2010 has the feel of Marie Webster’s Poppy quilt. The shimmer of some of the background fabrics is one of the elements that the artist uses to bring the feel into 2010. Aside from piecing, I also see the influence of other quilts in some of the pieces.
Threadpainting, which was mentioned in the Texture podcast from last week, and quilting are both very evident in this book. The photos are so good that they made feel I could reach out and many of the quilts. The reader is able to see the amazing quilting in many of the quilts. Vagabond Song by Elaine Quehl is one example.
This is an excellent book. I love the photos, the imagery and the accompanying text. Run, don’t walk to get this book. I am adding it to my collection!
This piece was started in a Pamela Allen class in 2009. I dreamed about it this week which encouraged me to pull it out of the closet (it usually hangs on the wall of my fabric closet, so I see it frequently) and I spent some time working on it over the weekend.
Garden detail
Basically, what I did was start machine quilting the background. I have a very straightforward style for quilting the piece: I start outside of the piece and go straight up and down until I am done with the section, then I move on to the next section.
I have the perfect green Aurifil for the green grass section, so I worked on that and got quite a bit done.
I also decided to use a variegated King Tut thread that I have had for awhile for the orange hand dyed sections around the turquoise flower. Really nice thread! I know I have used it before, because the wrapper was off the spool and I had a partial bobbin. I can’t remember which project, though. It gave me no problems and I really liked the look.
I want the piece to look like it was built in layers. At the moment, I am trying to figure out whether to also closely quilt the foreground (flowers, stems, leaves, etc) or if I will just use the Perl Cotton to quilt it. I have quilted the stems separately and at a slightly different angle to see if it looks different from the background.
Garden detail
Another layer of the piece is the different fabrics I used. Some of them are part of the same area, so I need to try to minimize the impact of the change of fabrics.
I should have quilted the foreground before I added the flowers, but in the course of a workshop, that sensible method just isn’t possible.
Awhile ago, I decided I wanted to make Julie a really special gift for her birthday. I decided on a journal similar to my Red Journal as a gift. The date slid as my November and Decembers were pretty busy and it ended up as a Christmas gift.
She is a purple person, so I decided to make the cover from some of my purple scrap. I had quite a few from the Purple quilt, so it wasn’t difficult. However, I got really busy and distracted right before her birthday, so I didn’t finish it. Then December was really busy and I didn’t finish it in time to give it to her for Christmas. I told her about it and promised her it would be done.
I did work on it over the holidays, but in the course of being distracted, I somehow got off track and started making her a new cover out of the fabric I used for the Stepping Stones quilt.
Huh? I know. Not sure what was happening in my mind, but there you have it.
Purple Journal Signature 1
Finally, I stopped working on the cover and turned my attention to the pages. The point is to make signatures (groups of pages). I was going for 12 pages in 2 signatures, which, when folded in half, would give 48 pages total to write or on which to journal.
I have a small stash of random, scrap paper, which I got out and started sewing together. This process ruins the needle for fabric, so I worked on all the pages I needed. As I worked through this process I decided to make two more journals for other gifts and made the pages for those, too.
Purple Journal Signature 2
Since my needle was ruined for fabric anyway, why not? I’ll talk more about those journals later.
You can use any kind of paper, but you shouldn’t use ALL really thick paper. You need to use different weights otherwise it is too hard to bind at the end.
I sewed the various pieces together to make 8.5″x11″ sheets, which I, then, folded in half. Julie will have to use different pens to write on the different papers as some of the papers are shiny and won’t work with roller ball type pens. It will be interesting to see what she does with it.
Purple Journal Back
I have been struggling with what it means to be an art quiltmaker lately (for awhile, actually) and whether I am or not. I think this project puts me firmly in the camp of art quiltmaker.
I don’t think I have ever posted about the quilts I made around the events of September 11. I try not to think about the whole situation, because it is just depressing and senseless from so many angles. And the senselessness just seems to continue.
I decided to write about them this year, because my work is good and I still think the message I tried to send is good. I keep one of the quilts on my wall and look at the words and try to remember to walk the walk.
After September 11, Karey Bresenhan called for quilts to be made and sent for the Houston Quilt Market and Festival where they would be displayed 2 months later. Many, many quilts were made and displayed, including my quilt, Fireball.
The exhibit was followed up by a book. Fireball was included in the book. Fireball was successful, in a way (displayed at Houston and included in a book), but it wasn’t the quilt I wanted to make for 9/11. It was an immediate, viseral reaction to the horrifying images shown on TV.
What Comes Next
What Comes Next is the quilt I wanted to make. What Comes Next has a message that I wanted everyone to hear and see and heed. I wanted politicians to take up the call and act in a way that would truly show the US as a world leader.
It took me much longer to make What Comes Next than the month or so I had to make Fireball. I worked on the beading in the car heading to L.A. I worked on the rubber stamping at my SIL’s house during craft night. It is one of the quilts I have quilted myself. I worked hard on the quilt to send a message of hope and peace and to encourage people to think about what comes next after September 11. Nobody heard or saw or heeded. It just makes me sad.
Update 9/12/2011: Based on my friend Kathy’s post, I have changed the name of this post to include the year, 2001. I want to move past this date. I want 9/11/2001 to become part of the past, which is not to say that we should forget those affected. From Kathy’s post:
“The Elder said the thing that would keep the tragedy alive was the fact that we keep referring to September 11th in the present tense. Every time we say 911 or September 11 without including the date 2001, it continues to work on our psyche as a current event. He said that unless we can collectively place the event firmly in the past it will continue to haunt our todays and true healing would not be possible.”
I do not want this day to haunt my life forever. I want to remember the people with joy, I want to learn from the mistakes we, collectively have made in the quest for justice, and remember the heroes with awe. I want us all to consider What Comes Next and move forward confidently in a positive direction.
Thanks to everyone who participated in the giveaway of Masters Art Quilts, v.2. We didn’t have many entries, so the odds were very good. Angela O, a friend from BAMQG was the winner! Congrats, Angela!
If you didn’t win, I hope you will go out and buy it. It is loaded with eye candy and worth the money.


