Red Scribbles Finished

Red Scribbles completed

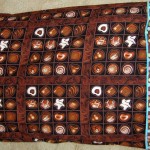
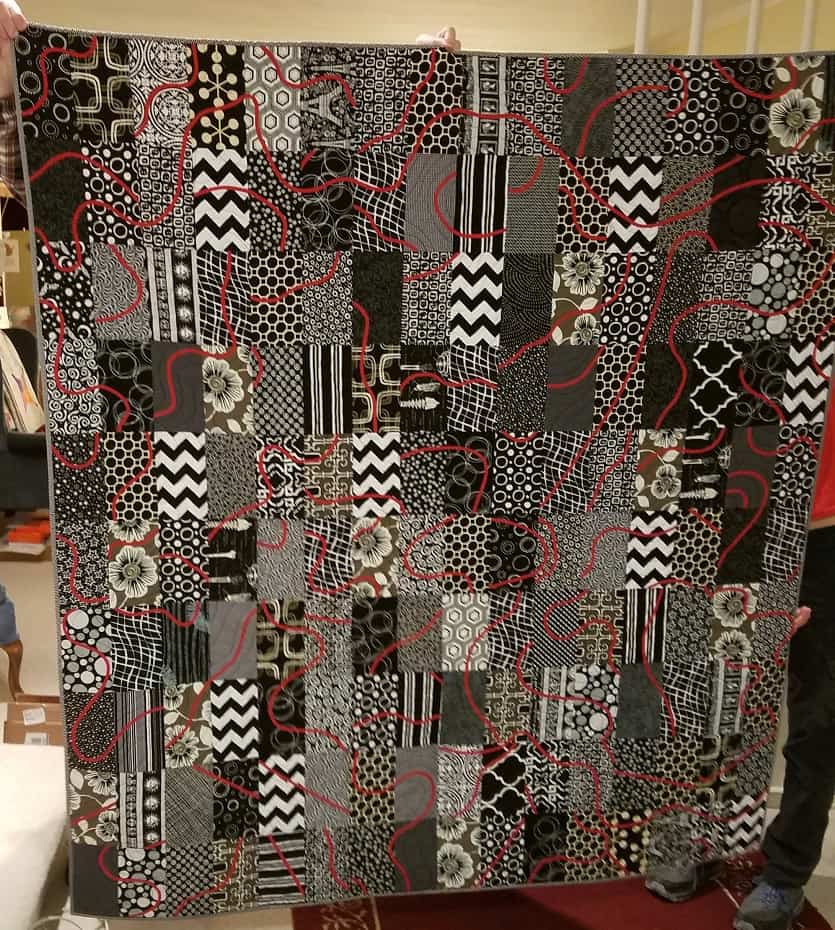
I finally finished Red Scribbles about two weeks ago. It is has been go-go-go here, so I didn’t post until now.

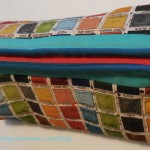
I only had to finish the binding, which shouldn’t have taken very long except that I am not getting a lot of handwork done since we are working on the giant puzzle. I also had some other handwork projects with firm deadlines.

I started this quilt in 2016 after doing the January challenge for the Mighty Lucky Quilting Club.

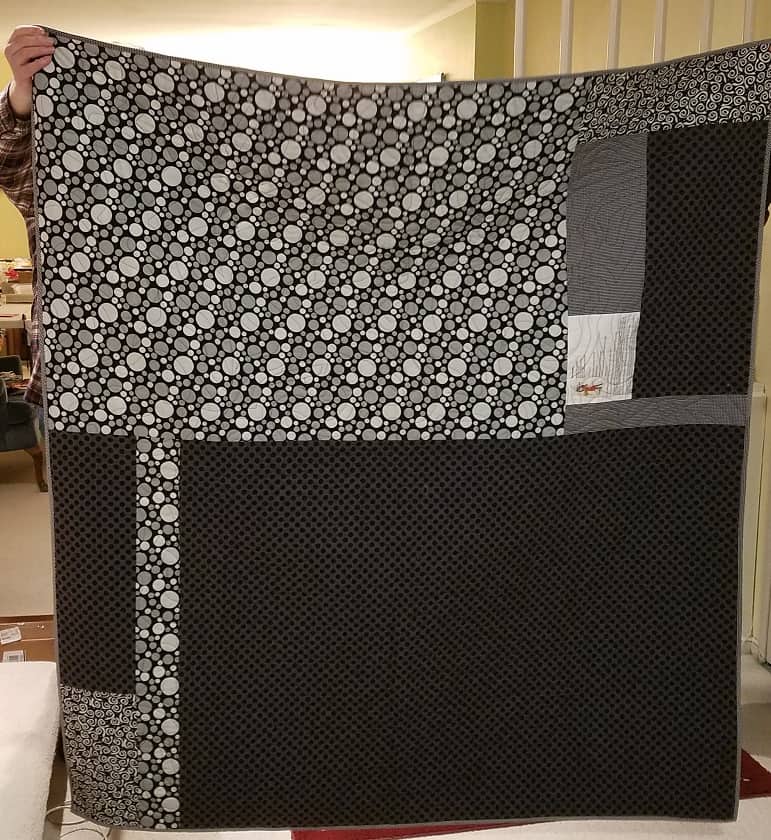
This quilt took a long time to come together, but I am really pleased with how it came out. As a result, I am now teaching the bias tape technique as part of my basic quiltmaking class. I haven’t written up a tutorial, so you’ll just have to pay me to teach you!

Red Scribbles Completed - back
Red Scribbles Completed – back

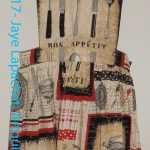
I think this might constitute the start of a series. I gave another quilt to my SIL when DH’s brother died and now I have given this quilt to my husband’s sister and her husband. Of course, my sister has received at least two quilts.

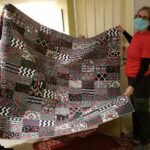
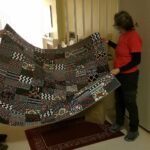
SIL and BIL came over to get it close to their anniversary. Too bad I was teaching when they eventually showed up, because I didn’t get to hear their comments. DH handled everything and got photos as well, so it was fine.

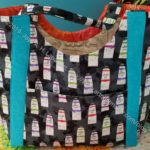
This quilt has encouraged me to get back to Who Am I? Instead of doing a lot of satin stitching for the words, I plan to use bias tape. I have to experiment with widths of bias tape.

For now, I am pleased that I am moving forward.


Birthday Extravaganza

Happy Birthday
Happy Birthday

My birthday was last week and I received A LOT of gifts. It was so nice of everyone to think of me again.

Modern Handmade Purchases - January 2021
Modern Handmade Purchases – January 2021

I also got to go and use a gift card I received in December at Modern Handmade. I haven’t been to a quilt shop in ages and that one is definitely a favorite.

2021 Gifts from Julie

Friend Julie met me there. While we were waiting for the shop to open, Julie gave me a large bag of gifts, which included a Mini Oliso iron and Mini Maker Case!!

She always knows what to get for me. I love the Mini Maker Case, but I am also really excited about the The Elements of Color** book. Johannes Itten is a master of color. I use his color wheel, called the Color Star**, all the time

In the evening, my mom came over and brought a cake (made from the wonderful Alternative Baker** cookbook) along with some of my favorite Jamoca Almond Fudge ice cream. It was great to see her and my stepdad. I don’t get to see them enough with this COVID thing going on. It was great to be able to have a little visit.

UPDATED 2/8/2021:

10" Clammy
10″ Clammy

I got two other gifts after I wrote this post. I want all the gifts to be in one post. I received the 10 inch Clammy**, which means I have a full set. I still have to try them out. After reading the directions, I am pretty excited about trying it. I have long wanted to piece circles into a background. I took a class a long time ago, but I think the Clammy method might be less fiddly. What I also need for my birthday is a quilt patron: someone who will pay me a salary and I can just sew to my heart’s content. A girl can dream, right?

Martelli rotating mat

I have a rotating cutting mat, but I don’t really like it because it is square. I frequently get hit in the stomach by one of the corners. It’s not like I get injured or anything, but it is annoying. This new rotating mat**, from my darling YM, is round. I don’t get hit in the stomach, which I like, and I have been trying it out with some of the shapes I am teaching my students lately.


**I use affiliate links and may be paid for your purchase of an item when you click on an item link in my post. There is no additional cost to you for clicking or purchasing items I recommend. I appreciate your clicks and purchases as it helps support this blog.

BAM Officer Appreciation Gifts

Organizing 2021 Officer Appreciation Gifts

Last Saturday was the first guild meeting of the year. Traditionally, we have given the officers appreciation gifts at this meeting. COVID-19 or no COVID-19, 2021  was no exception.

Maria's Officer Appreciation Bag 2021
Maria’s Officer Appreciation Bag 2021

Mary C was kind enough to be  the drop-off point. Her house is more centrally located in the county than mine and she has a good porch. With county rules on sheltering-in-place and ‘travel’ because of COVID-19, this year was a little harder to organize. People had to mail their gifts, or drop them off, as allowed. Also, I tried to be sensitive about costs and encouraged people to write notes instead of buying a gift. I also offered up notepaper, etc for people who were really struggling.

Last week I went over to Mary C’s house and we assembled the bags, physically distancing and wearing masks. Mary C has a wonderful backyard and I am always happy to spend time there.

Members of the guild came through magnificently! A few members made bags so we could contain the other gifts. I couldn’t believe the effort that people took with the small gifts. If last year was good, this year was better. We got an amazing array of gifts. I don’t know how we will match it next year.

Maria's Officer Appreciation Bag 2021 items-detail 1
Maria’s Officer Appreciation Bag 2021 items-detail 1

Mary C went out at the last moment and got the gift bags (large pink bag in the above photo) so we could ‘wrap’ them. We had to drop the bags off at officer’s houses and we wanted it to be less easy for them to peek before the meeting.

Lots of zipper bags, but also supplies like needles, Iron Off, and Quilt Soap. Embellishments, gift cards and fabric were also in evidence.

I was so pleased and the officers were very happy. It wasn’t as good as doing the whole thing in person. however, it meant we got to spend more time organizing the bags so they looked pretty.

BAM Door Prize Organization

BAM January Door Prize

Yesterday was the first time we gave a door prize in 2021. The bag isn’t as full as some were last year, but we are trying to tone them down a bit.

Tim made the bag. SueG made the zipper pouch. Carrie made the coasters, pattern weights and the thread catcher (not shown). The other items were all donations one way or another. I enjoy the team effort.

Earlier this week, I received a big box of items from Carrie. She made coasters, pattern weights and thread catchers for all of the months of this year. She did the work in record time without any fuss! It was fabulous.

Once I got all of Carrie’s contributions, I decided to organize the offerings. I got everything out of the bag and laid it all out. I put as much as I could into SueG’s zipper pouch. Not everything would fit, so I put each month’s gifts temporarily into a plastic zipper bag until I get more containers for the months.

Door Prize Organization System

Sewing Kit Officer Thank You Gifts

Finished Altoids Sewing Kits

DH, apparently, has an Altoids habit. I had no idea until he came home and started to work remotely. I asked him to save me a couple of tins and suddenly I had 8 to work with. I wanted to make small sewing kits for the guild officers. I looked for tutorials. The one I liked was DIY Felt Magnet. It turned out, however, that I mostly fumbled along on my own during Craft Nights. Check back in a few days for a tutorial of my own.

One key was letting everything dry thoroughly after I glued it.

Finished Sewing Kits - open
Finished Sewing Kits – open

I am pretty pleased with the way the sewing kits came out. I would have done some things differently if I had known, but I didn’t.

I am particularly pleased with the WonderClips** band. I think that is genius. I know I am tooting my own horn and I don’t want you to think I have a big head, but I was trying to think of a solution for storing some WonderClips along the lines of the clippy pocket I made for the UCAB. I wonder if I can sew some bands and add those instead of going through all of the Clippy pocket steps?

Sewing Kits showing Trim

The other thing I realized was that I could use the bias tape makers to make almost perfect trim by cutting fabric on the straight of the grain and applying it like trim. There was no messing around with the iron, trying to get the trim straight. No burned fingers or frustration. Those bias tape makers** are fun to use and I am finding them to be more and more helpful.

I delivered these on Wednesday when Mary and I put the Officer Appreciation gift bags together.


**I use affiliate links and may be paid for your purchase of an item when you click on an item link in my post. There is no additional cost to you for clicking or purchasing items I recommend. I appreciate your clicks and purchases as it helps support this blog.

Finished: Sew Together Bags

I finally finished the Sew Together Bags and they are now in the hands of their new owners.

The outsides used different fabrics and embellishments, as I mentioned, but the insides were similar. I used most of the same fabrics for the insides. While the white insides make tools and supplies easy to find, I think they are a bit boring and might use one or two pieces of colored fabric to break up the white next time (yes, I am sure there will be a next time. 😉  )

As I mentioned in one post, the placement of the hexagon embellishment feature was off. I tried a few different things and considered some others. In the end, I left the original embellishment where it was and added a couple of extra hexagons. I think it looks nice and the original embellishment provides a surprise for the bottom if anyone looks there.

The recipients all claimed to enjoy their new bags. Tim doesn’t do much handwork, so I hope he finds a use for this bag.

Past Gifts for Mom – Revised

Someone commented on the Paint Tube fabric when I was at Sew Day. I sent along the post I wrote about past gifts I have given to my mom. It has been awhile, so I decided to update it. I might do another update after her birthday, but here are the various gifts I have made for her with different artist fabrics I have collected.

I was able to find the Sweet Dreams pillowcase. I forgot I made that for her. I also have a few in the pipeline for Mother’s Day and I am sure I will make more for Christmas.

More Progress on the STBs

Green 2020 STB
Green 2020 STB

I made good progress right before Christmas on these bags. I wanted to finish them, but life got in the way.

I was pleased when I attached the lining to the exterior and saw how the embellishment lined up. YAY! It looks like I knew what I was doing!

Dresden Plate 2020 STB

The Dresden Plate version came out pretty well also. I like how just part of it shows. I am pleased with the colors, though I wonder if I should have backed the Dresden Plate. I think that dark blue of the exterior is showing through some of the lighter blues. Not a huge deal, but something to consider in the future.

Hexie 2020 STB
Hexie 2020 STB

I need to adjust my hexagon version a little. Almost the entire motif is on the bottom of the bag and mostly unseeable. 🙁 I am still considering taking the exterior off the lining, ripping out the hexies and re-appliqueing them to the exterior higher up.  That is a lot of ripping. I think it is more likely that I will make a new hexie motif and add it to the front where it can be seen. If the exterior fabric weren’t a blender, I would be fine with leaving it as is, but it is a little boring compared to the others.

Two out of three isn’t bad!

Gift Post #6: Butterfly Mask

Butterfly Mask
Butterfly Mask

This is the mask I made for my SIL to go with the Butterfly Cotton Candy Pouch. I actually finished it on December 19. As I have said, I have to wait to show off gifts as some of my recipients read this blog.

I was amazed at how easily it went together. I really didn’t have any problems after getting re-oriented back to the pattern. It gave me heart to get back to some of the masks that are languishing half finished on my cutting table.

STB Lining Progress

Hexie Lining - STB 2020
Hexie Lining – STB 2020

I made good progress on the linings before Christmas. I spent one whole Sunday putting the linings together. As I think I have mentioned, I really need more horizontal surfaces to layout my projects.

I am pleased with how it sewed up into a 3D lining in a relatively straightforward manner. I used a denim needle this time and the sewing went a lot better. I don’t want to say it was easy, but I didn’t fight with the layers as much as I did last time.

I think the white looks very clean and fresh.

Green Lining - STB 2020
Green Lining – STB 2020

The green version looks good, too. i used a scrap of a vintage feedsack for the pincushion. I don’t know if the recipient will appreciate that touch, but I like it.

The zippers for the inside are forest green. A little boring, but the recipient likes green so….

I have to say that as much as I complain about the Ultimate Carry All Tote, the way she makes the pockets to minimize the layers would work very well with this bag, too.

I am really not disliking this process as much as I have in the past. It is possible that I should say, I am not struggling as much as I have in the past.

Gift Post #5: Butterfly Pouch

Butterfly Cotton Candy pouch finished

I finished the Butterfly pouch I talked about the other day. It was a relatively quick project and despite some problems I am happy with how it turned out.

I resolved the size issue by cutting off the excess on the side panels. I think this is a little smaller than others I have made, but I still like it. I am particularly happy with the fussy cutting of the main panel.

Butterfly Cotton Candy pouch finished - inside
Butterfly Cotton Candy pouch finished – inside

The inside fabric is a really good choice, if I do say so myself. It is a bright white and reflects the light really well. I think this means that SIL will be able to see her stuff easily.

Gift Post #4: Sheffield Tool Bag

Sheffield Tool Tote - back
Sheffield Tool Tote – back

As I said earlier this month, I finished the Sheffield Tool Bag the week before Christmas.

I am usually pretty pleased with the Sew Sweetness patterns, but I found this one particularly easy to put together. The ease of putting together this bag was in direct contrast to my memory of putting the Quilt Illustrated Tool Tote together.

Sheffield Tool Tote - top
Sheffield Tool Tote – top

I found two tricky parts and the zipper was involved with both. First was the zipper panel and the video remedied my confusion. The second was the other/non-zipper tab end of the zipper and I am not sure how to remedied that beyond using a matching thread to the zipper and hoping for the best. I’d like to put a zipper tab on instead of folding over the ends of the zipper on that one end. I’ll think about that for future versions. I’d like to make another one of these bags.

On the bright side, I feel like I finally got the concept of ‘veering the zipper’. I talked more about this during the making of the Pink & Green Cotton Candy pouch. There is something about the way it was presented in the Sheffield Tool Bag video that fixed the concept in my head. Yay!!

It has a different feel than the Quilt Illustrated Tool Tote, though I believe the supplies were similar. I haven’t checked the Quilt Illustrated pattern recently, however, and I know I quilted the outside of the QI Tool Tote, though that is an option for the Sew Sweetness pattern as well.


Sheffield Tool Tote - inside
Sheffield Tool Tote – inside

I am particularly fond of the inside. Despite being canvas and VERY loosely woven, I love the design motifs of the fabric I used for the lining.

Now that I know where all the pieces are going to be used, I would make different fabric choices for future versions. Still, I believe the white fabric makes the inside light enough to see all of the supplies (and stuff) that would go inside.

Sheffield Tool Tote - front
Sheffield Tool Tote – front

I didn’t have enough fabric for the slip pockets to be the same on both sides of the bag, so I used similar colors, but different fabrics. I think they look ok. The ice cream fabric was used so that it goes with the Classmates tote I made last year.


Gift Post #3: Sidewinder Pouches

Finished: Sidewinder Pouches

I finished the four mediaum Sidewinder pouches earlier this month, but didn’t want to show them until the recipients received them.

I wanted to make them all with stripes, but didn’t have any green stripes (that I could find).

I thought the leftover Philip Jacobs fabric from the back of FOTY 2019 was great fabric and the two young women who like green would like that fabric. They can donate their pouch if they don’t like it.

Finished: Sidewinder Pouches open

The top zipper placket would have looked a little better if I had turned the stripes vertically. I just didn’t think about it. I will know better next time, if I make this pattern again.

Butterfly Cotton Candy Pouch

Butterfly Cotton Candy pouch started

We draw names at Christmas, so we can get a nice gift for one person rather than a bunch of small gifts for everyone. I usually purchase something off of my giftee’s wish list, but occasionally I like to make something as well. This year I got one of my SILs and really wanted to make something.

The Cotton Candy pouch is still a favorite, soI started another one on Friday as an additional gift. I used a similar fabric as I used on an apron I made for her a few years ago. I forgot that I used the blue instead of the purple. Oh well. I hope she likes purple.

Butterfly Cotton Candy pouch side view in process

I am still struggling a bit with this pattern. This time the side panels were MUCH larger than the main panels. I checked the measurements multiple times, but still can’t figure out why the side panels don’t match. And this time they are WAY off. Regardless, I can still make it work.

On to veering the zipper!