Make Lounge Cushion Cover

I was randomly surfing blogs and websites today (studiously avoiding the laundry, the Christmas cards and the Pineapple!) when I came across Make Lounge via Juju Love Polka dots blog. I saw this cushion cover and thought it was very fun. Sadly, Make Lounge is in London and I am not. Still, perhaps I will take out Pamela’s project and be inspired.

Appliqué cushion cover

appliqué cushion cover
  blog it

Halloween Revisited + Some General Notes

I was browsing Deirdre’s Sloppy Studio when I came across the Sassy Art Goddess blog. I think of this as the best pumpkin I saw.

Other notes and tidbits:

Yarnstorm has some new and interesting links to other blogs. Pea Soup is quite good and I love the creativity of the names of people’s blogs. How about Lobster Squad? Kind of makes me wonder if Artquiltmaker is a misleading name since nothing that I am working on currently could remotely be called ‘arty.’ Her drawings remind me of what I would like my visual journal to look like. Oh, yes, visual journal. Got to get back to that….

I was asked when is the best time for me to write my blog and my other writing and I really can’t figure it out….yet. I often write in my journal in the morning and my blog at night – bookending the day with writing. But I also write more blog posts on the weekends and more journal entries during the week. Today I am writing in my blog in the morning and I definitely feel much more energetic about it. Of course, since I am not at home, I don’t have all of my tools, so the posts are more texty that full of pictures,perhaps skewing the impression? Let me know if you see a difference in the posts I write in the morning vs. the ones I write at night. I know you are rolling your eyes at my unreasonable demands, but just let me know if you notice! Otherwise just read on!

Artquiltmaker blog has not shown up in Technorati yet, per my Entering the Internet Age post. I will have to investigate. The blog is showing up on Google results, however, which, I guess, is good. I haven’t seen any additional traffic, but also don’t have a counter. More investigation required, I believe.

Have a great day!

Using Liquid Paper to Satisfy a Child’s Halloween Dreams

How to Make a Halloween Costume

Supplies and Tools

  • Picture of child’s dream costume
  • Felt (of appropriate color(s)
  • Sewing machine
  • Scissors
  • Shoelaces
  • Timtex
  • Liquid Paper (correction fluid)
  • Aleen’s Craft Glue

The Halloween costume, except for some decoration, which are drying, is finished. The Darling Child is happy and I didn’t have to buy anything except 2 yards of black felt. I like using felt for Halloween costumes, because the raw edges don’t ravel. You can also just cut it off, glue things to it and cut strange shapes out of it with no problem. The costumes are a bit fragile and don’t usually last long. You can see the cloak that I made by looking at this picture from Wikipedia.

I didn’t have any white paint, so I used Liquid Paper to create the whorls on the red emblem the Darling Child needed.


I only had enough red to make five of the emblems, so we had to place them carefully for maximum effect.

It is kind of fun to make the Halloween costumes – to make a child’s Halloween dream come true. It is also fun to kind of figure out how to make something work with what you have on hand. I always buy enough felt to get through the main part of the project, but inevitably, I don’t think farther than that. One costume I made needed a fat tail that stood up. I used a paint stirrer to keep it stiff enough. That was before I knew about Timtex.

Hiatus Progress

I decided that this brief interlude while the 9K is in the shop can be considered a Pineapple hiatus. I don’t want to take the blocks off the wall and put them away, because then it will be a year before I get back to it, so having a small break where I can work on different projects will be rejuvenating for my work on the Pineapple.

Although I spent most of the day working yesterday, I did have time to make the baby blankets. I get a yard of flannel and hem the edges. On the 9K, I have a variety of decorative stitches and letters that I can use to make words. Between flannel baby blankets and gift bags I have tried nearly all of the stitches on my machine and found which ones I like for which type of project. Usually on baby blankets, I use the star pattern. I also use the letters to make words which say “For Baby Last Name” and “Made by My Name.”

However, with the 9K at the doctor, all of that is out the window. In using the Jem, I don’t have very many options in the decorative stitch department and I have no options for words. I made due and used the zigzag and whizzed through all 6 blankets. I still need to wrap, get cards and send. I don’t know if I will make bags for them, but we will see. It is a good way to spread the word about gift bags.

Above are the fabrics that I used. The two left hand fabrics will go to the baby due in October (person I want to impress), the two purple fabrics will go to the baby due in December (colleague/fellow librarian/friend), The two right hand fabrics will go to the second baby due in October (colleague/fellow librarian/friend).

So, #1 on the list is complete.

  • 6 baby blankets: two colleagues and one person I want to impress are having babies: 2 each
  • Binding for Sharon’s quilt.
  • Binding for Serendipity Puzzle.
  • Gift bags: I have lots of fabric for bags, and Christmas is coming.
  • Cut out fabric for test blocks. I am going to start looking at new machines soon and I want to have some piecing in my own fabrics, which I can use to test the machines.
  • Wash and press new fabric.
  • Replenish Pineapple strips.

I was also able to work on pressing some fabrics that have already been washed and cuttings strips for the Pineapple, but I am in no way near done with that and I doubt I will even be able to make a dent.

Making Lemonade

When you have lemons, make lemonade.
As you know, the machine is gone and I can’t work on the Pineapples (Well, I suppose I could, but I want to be sure all of the problems are consistent by using the same machine). I have a Janome Jem, which I have only used a handful of times, so I have formulated a list of other things I can work on while giving the Jem a little workout. Here it is:

  • 6 baby blankets: three friends/colleagues are having babies-2 each
  • Binding for Sharon’s quilt.
  • Binding for Serendipity Puzzle.
  • Gift bags: I have lots of fabric for bags, and Christmas is coming.
  • Cut out fabric for test blocks. I am going to start looking at new machines soon and I want to have some piecing in my own fabrics, which I can use to test the machines.
  • Wash and press new fabric.
  • Replenish Pineapple strips.

I also have a lot of hand work, which I can now work on since the thimble came back from vacation:

  • Pamela’s self portrait from June 2006
  • Pamela’s garden from June 2006
  • Pamela’s house and garden from May 2007
  • Kissy Fish

So now I am going to get off my duff (computer) and start some of these projects.

One good thing about the machine being gone is that I could get a good picture of the Pineapple blocks.

Thoughts on Visual Journals

I stared at the screen all day yesterday and was amazed when no new posts materialized.

Today Deirdre got me thinking with her post mentioning a new box of crayons. This dovetailed with me finding two sets of felt tip markers that I have had for years (yes, they still work). No longer my implement of choice, they have been languishing.

I am still thinking about visual journals so Deirdre’s post made me think of the “visual work” I did when I was a kid. Doodleart were black and white posters you bought in a tube and then colored with felt tips. I loved Doodleart posters and am amazed that they are still in business! I see the aquarium and think I did that one way back when.

I was also thinking about coloring books. I used to go to TG&Y on my bike and buy coloring books and paper doll punch out books. I think coloring books may have been the original visual journals for me.

This Disneyland coloring book is copyright 1975 by Walt Disney Productions. It is called a Whitman Book, Western Publishing Company, Inc., Racine, Wisconsin. There is a history of this company online.

I really thought a lot about color when I was coloring. Notice how Minnie’s shoes carefully match her dress?

It should come as no surprise that I was extremely neat in my coloring. I also DID NOT share. I didn’t want anyone messing up my work of art. 😉

Still no movement on actually creating a modern visual journal, but it is still rolling around in my head. I think I need to find a good art store.

What a Messy Day!

After reading Cloth Paper Scissors all week, I got a bug in my ear to paint and layer stuff. It had been germinating for awhile and the CPS just put all the pieces together. I used to make book covers and postcards by cutting out pictures from magazines, gluing them down and covering them with contact paper. I still have at least one bookcover with such a collage. Not as sophisticated a process as the ones CPS describes, but creative nonetheless. I like to make things that are useful, I guess.

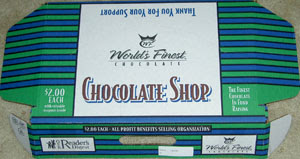
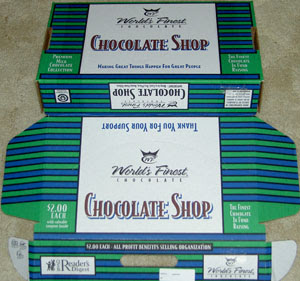
The World’s Finest Chocolate boxes are cool. Darling Boy sells chocolate from them every year and I love the shape. They are like little suitcases and I just couldn’t toss them out. I thought I could decorate them and make something.

First, I went through my supply closet and pulled out all of the possible supplies.

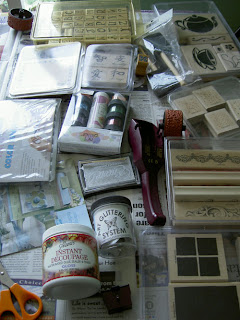
I am embarrassed to say that a number of the items were unopened. Some of the rubber stamps had never been mounted. It took some time to do all that.

Then I carted everything downstairs, covered the table DH had set up for me with newspaper and set out for the craft store. I knew, from reading CPS, that I needed Diamond Gel Medium. I don’t have a good art store nearby and the craft store didn’t have it so I reverted to some dark depths from my painting past and bought Gesso. On a whim, I also bought some Sparkle Glaze and some dotted scrapbook papers as well as a pack of cheap brushes.

Next, I covered the box with Gesso and let it dry.


Drying was a problem. I didn’t factor that into the whole process. Not only did the drying take a long time, but the layers weren’t completely dry even after I waited. I have to admit that I was impatient to engage in the process.
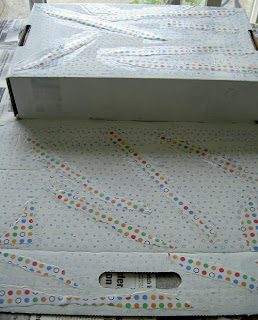
First I used a Stampin’ Up roller wheel and I stamped/rolled dots all over it in purple ink. I didn’t do that well, because I didn’t know how to ink the roller and roll at the same time. I wish I had paid more attention in Karenlee’s classes!

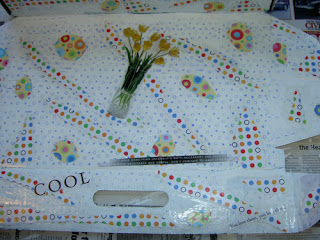
Next I ripped up some of the scrapbook paper and applied it with decoupage medium. I had some around from when I wanted to make a type of prayer box (still have the stuff, except for some of the decoupage medium).

After the first layer, I began to feel some confidence and added some more scrapbook paper (see the yellow ripped into circles?) and began to add other pictures.

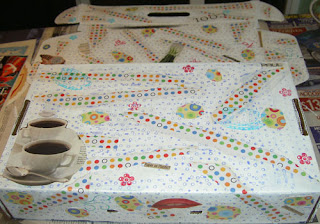
I started to apply some magazine sayings and pictures. The decoupage medium gave the piece a bit of a shine.


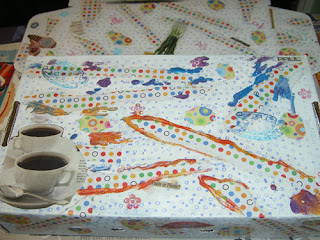
The glitter I added didn’t turn out as nice as I had hope. I know it had to do with my inexperience. I didn’t really know how to apply the glue the right way to make the glitter spread evenly.

I also stamped the large cups and flowers on it. Some of the rubberstamping smeared after I put a layer of Sparkle Glaze on to finish the piece. This is pretty much how the outside of the finished piece looks.

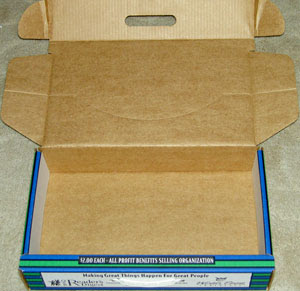
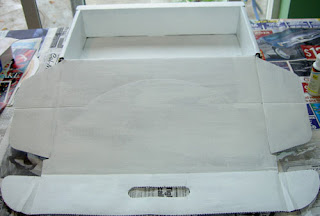
This is the inside of the box. I just painted it with the Gesso just to make it a little nicer looking. My painting skills aren’t great, but maybe I will put some fabric inside or something.

I was really out of my comfort zone doing this project, which I think is good. I thought it was fun. It was good to have enough time, though I know now that I need to leave the piece to dry longer. It didn’t come out as well as I would have liked, but I am not ashamed of it either. I have some more of these boxes and might like to try this project again. It got something out of my system.

San Mateo County Fair 2007

We spent the day at the San Mateo County Fair yesterday. The Fair, in general, seems to get smaller and smaller every year, but they still had a great selection of quilts and other needlearts. I wish more people would take the time to enter one thing.

I attend county fairs for many reasons. I really enjoy it being a coming together of things that people in the county make/participate in. We spent quite a bit of time looking at the bee hive and talking to a beekeeper. The cut flowers and plants were also amazing. My two favorite things are the quilts and frozen bananas. I thought the frozen bananas had gone the way of the dinosaurs after I checked every food vendor and none had them. I finally found them hidden in the ‘international’ area. I never knew milkshakes and frozen bananas were considered foreign food. Oh well, you learn something new every day!


As you may remember, I entered Thoughts on Dots into the fair. It didn’t get a prize, but I was pleased with how it was displayed. I was happy that there were no Sunbonnet Sue stuffed dolls in front of it and it wasn’t folded over anything. You can really see the whole quilt.
I was also REALLY pleased with how flat it hangs (no ripples!) and how well the sleeve looks. No lumps!


While I like, what St. JCN calls, the San Mateo Dotty better, this quilt reminds me of it. I know they are very different, but there is something about it that brought the SMD to mind.

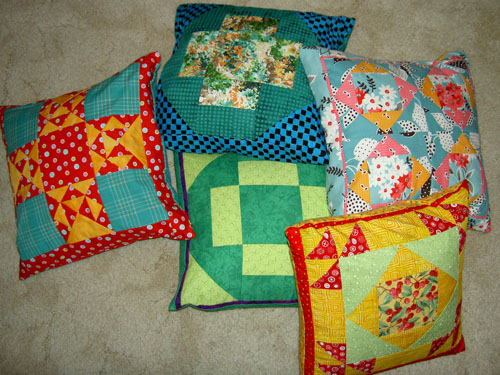
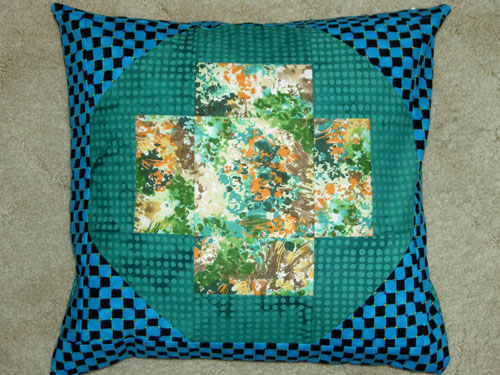
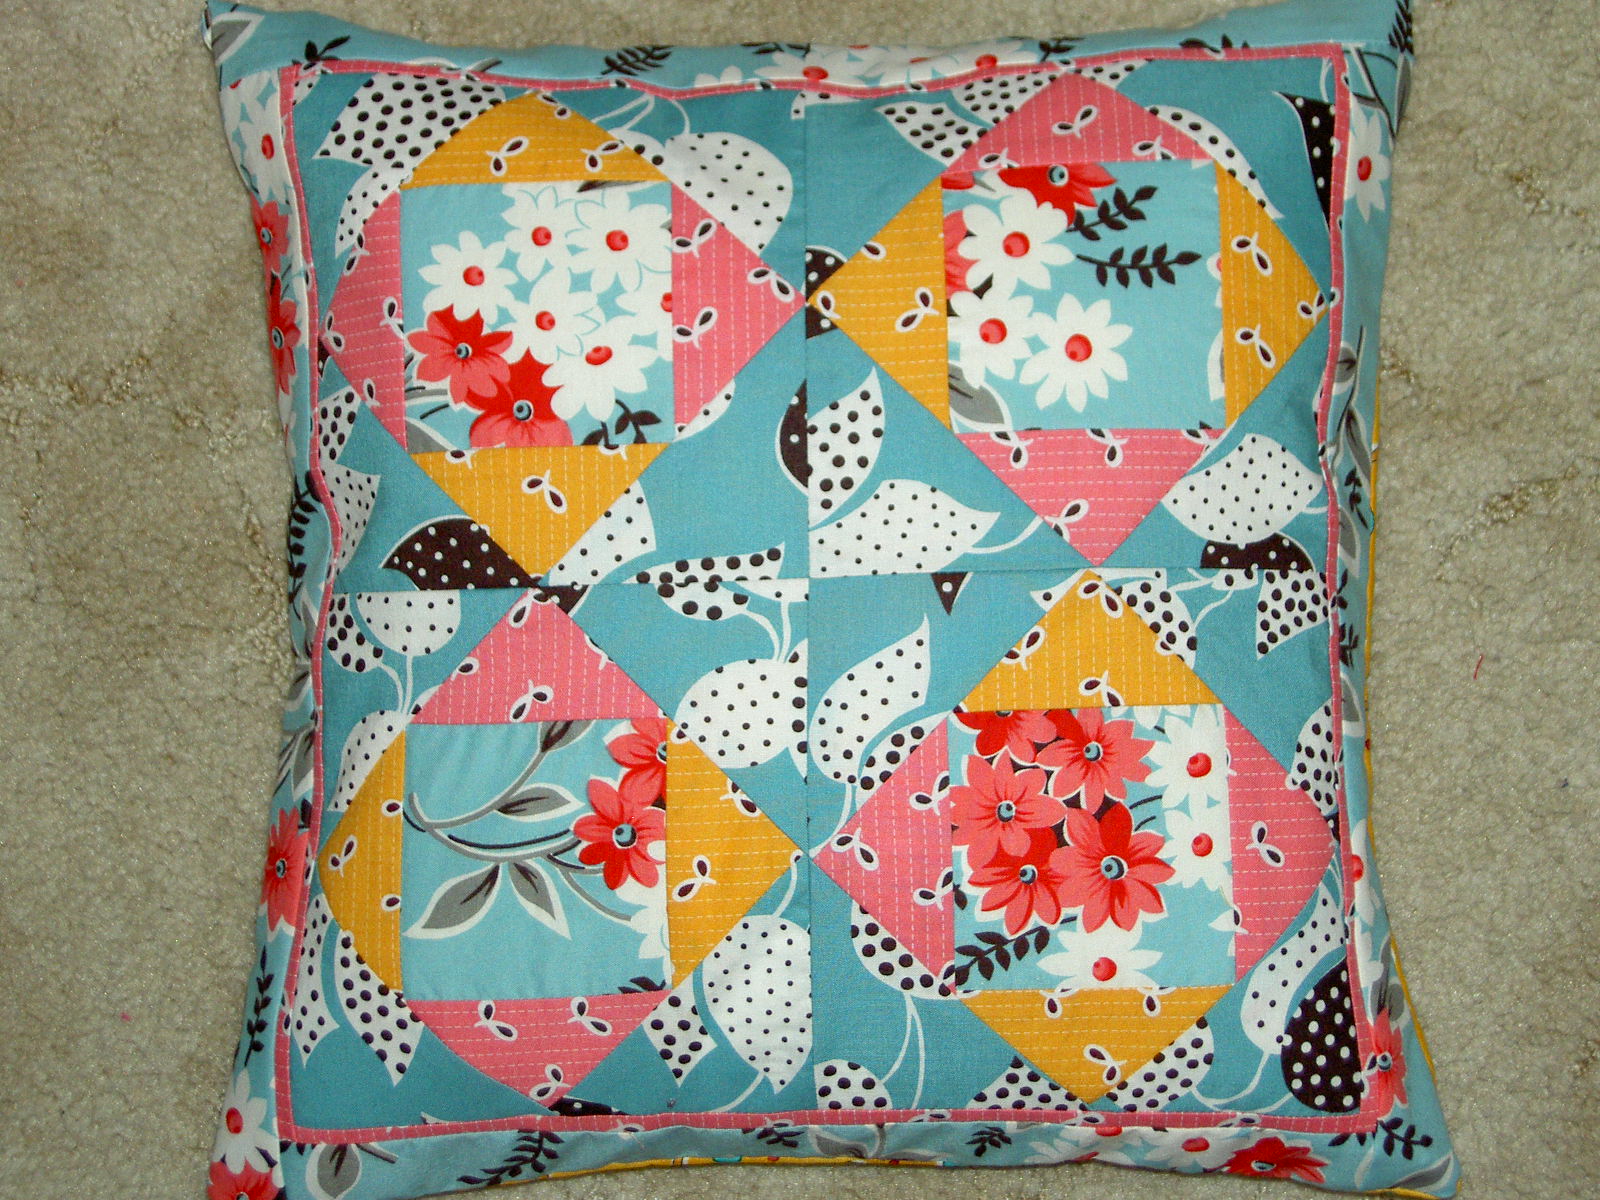
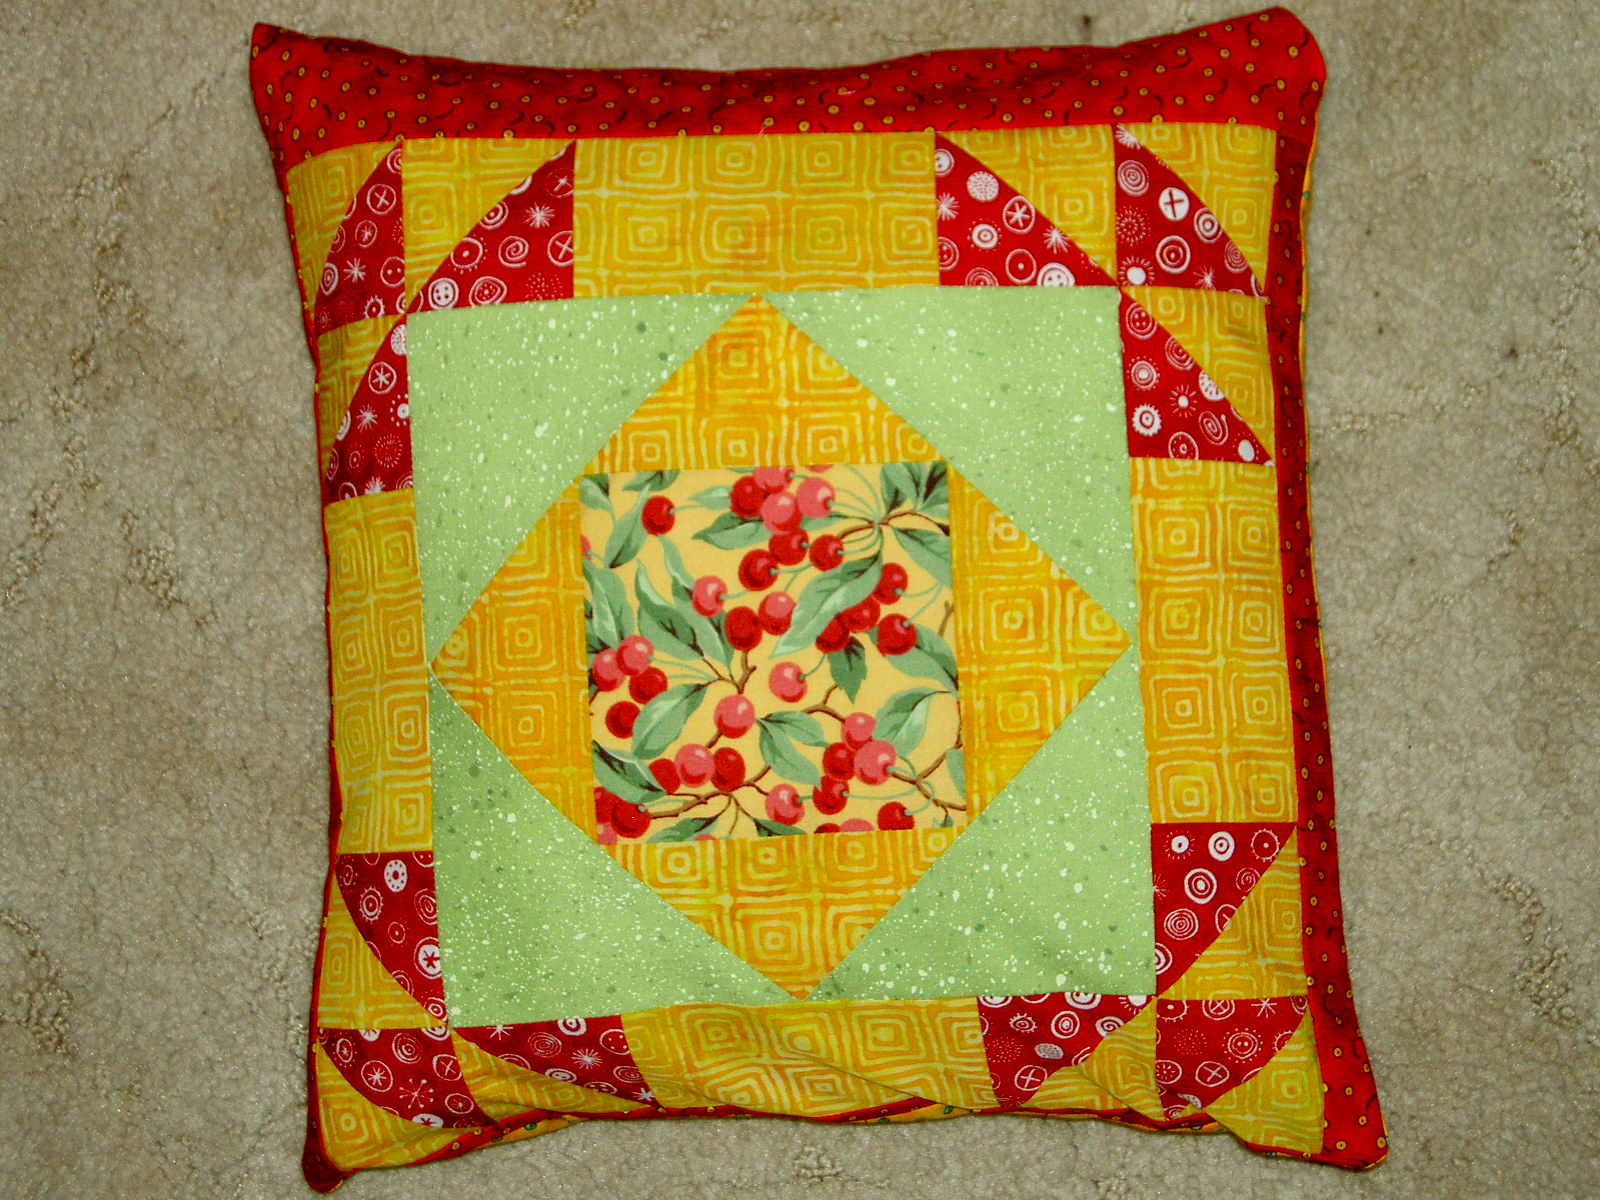
This is a close up and I really like the flower motifs for the quilting.
These were fun! They are crocheted cupcakes.
Detail shots. Do you like the “sprinkles?”
This quilt was tied and didn’t hang very well, but I loved the tree in the middle. That drawing was very well done.

Detail of the tree.

The complete group of photos, unaltered and BIG are here as well as few other needlearts items that struck my fancy.

Hanging on By My Fingernails


As you can see, messy crafting runs in the family. I went to a scrapbook night with my sister Friday night. This is her work area. She does gorgeous pages! I created about 10 pages and they were all very basic. My theory is get those photos on pages and be done. When my photos are all up to date, I will take more time for each page. I am still set on the goal rather than really enjoying the process. I’ll get there yet. Sis takes her time with each page and really makes them wonderfully.

Time has been even shorter lately than before. Yesterday, we had a long car drive, so I brought my hand piecing and was able to finish another Cross Block (Flowering Snowball). I thought I would able to do more, but I have to face reality. It takes me about 1.5 hours to make each block.

I can’t help but lay all of the blocks out each time I make a new block. Then I play around with them for a bit. I move them around so that no colors are too close to each other. I also try to make sure the backgrounds are duplicated too close to each other.

This time, I realized that having more choices for foregrounds and backgrounds makes me make better choices. I have been trying not to duplicate colors or fabrics in one block.

Gift Bags Spreading

Jenny Wren Paperie has launched a line of gift bags/gift wrap using fabric. I like the way mine are built better, but the fabric she uses is lucious. I am also thrilled that people are thinking about buying gift wrap that is reusable.

GIFT WRAP – jenny wren paperie


the jenny wren paperie have just launched a brand new collection of gift wrap. designed by jennifer playford and called furochic they are an eco-friendly alternative to disposable paper gift wrap and based on traditional Japanese furoshiki cloth. and because they are made of cloth it means they are reusable! . the furochic range was shortlisted as a finalist in the national stationery show best new product awards last month in new york.

  blog it

Teacher Pillows Finished!

The Teacher Pillows are done and wrapped. HOORAY!


I found the cute bags at Walgreen’s, of all places. They are so adorable (thank heaven for no boy teachers this year!) that I didn’t feel bad about not making gift bags for them. I delivered the Principal and Assistant Principal pillows before I left. P will deliver the rest next week in stages.

Now I have to think about next year. St. JCN said that he fact that the project went well towards the end made no difference to her torture threat. She suggested a different project, so I will have to think on that. Suggestions, always welcome, of course!

Teacher Pillow Success

First, some inspiration. I was inspired by Yarnstorm’s photos, so I took my camera with me yesterday and snapped a pic of these roses in my neighbor’s yard.

Now on to the Teacher Pillows.

They are done except for the hand stitching. I am thrilled that I survived. It is always touch and go at the beginning!


Above is the principal’s pillow. St.JCN said the violet was inspired. I thought so and am glad someone agreed. I saw the quilt that inspired the violet yesterday as it scrolled across the screen in my screensaver. I will post it here, if I find it again.


Above is the Assistant Principal’s pillow. I actually think this one came out the best of them all. I think having enough fabric to use on the back is key. I will try to remember that for next year.


Pineapple blocks 11 & 12 are also done. They don’t fit on the design wall properly with all the others so #12 is hanging off. I think they look nice and cheerful. Not so dark as 9 & 10.


And now for a tip. I used the Jacquard fabric (see example in circle above) that you can run through your printer for quilt labels and for the drawings for the back of the pillows. It works because there is paper stuck to the back of the fabric that helps get it through the printer. You have to peel off the paper before you sew. (I suppose you could leave it on, but I don’t) This product works pretty well, except that if you try to sew through it when the wrong side is facing up, it gums up the needle and the stitches get really small. Normally I try to sew with it on the bottom. Today, I wasn’t able to sew with the printer fabric on the bottom for some reason that I don’t remember now. I sewed through it and immediately got stopped. I had a brainwave when I saw a pile of tissue paper. The arrow in the picture is pointing to the tissue paper I put over the Jacquard fabric just along the seam allowance. It worked like a charm. No sticking needle resulting in ugly stitches. I always press this printer fabric with a piece of clean, white printer/copier paper under the sticky part. I don’t let the sticky part touch the iron or my ironing board cover.

This Week’s Progress

If you don’t have time to read much today, here’s the short version: not much.

If you do have time to read the entire post today, the long version follows. 😉

Not sure why, but this week seems to have been especially busy. I think I may have accomplished a lot in the realm of quiltmaking and it just may not feel like a lot. Somehow not working on my own project and working on gifts doesn’t feel much like I am making progress. Perhaps, it is just that I am not making progress on my color studies or on my UFO list?


I wanted to put a small border on the above pillow for the Principal, but I was kind of stymied for what color. I originally thought of a strip of white piping, but decided I didn’t want to deal with making one. St. JCN, in all her wisdom, suggested a white strip, but, somehow, that didn’t seem right. As I was drifting off to sleep one night, the little voice in my head whispered: Violet. GREAT! I tried it (see above) and thought it looked good.


The reason I wanted a small border was so that the green border would not “bleed” into the green block. The violet seems to clearly define the block. I am pleased with how it worked out.


I also put a few more rows on to Pineapple blocks 11 & 12. They are getting there. 3 more colored rounds to go. I have the background strips cut for the next round, but haven’t sewed them yet.

Special Whine Redux
Earlier this week, as you probably noticed, I was feeling a bit sorry for myself and the state of my pictures. I went back and looked at Yarnstorm‘s post called Square Dance and the photos she included. I realized that while her photos are totally fabulous, one thing about how she structured this post is that she put up her inspiration and then showed the quilt that came out of it. I really liked that. As a brief aside, I like the quilt-to-be she shows, because it is simple, but not boring. She is working with color in a way that I have been trying to do lately (see Thoughts on Dots and some of the other square pieces I was working on last year). She has done a fabulous job with blues, something that I greatly admire.

The other thing about Yarnstorm’s pictures is she has a great eye and she crops very well.

So, I will stop whining, crop my pictures and keep working!

Teacher Pillows – No Torment

Despite the fact that I still can’t measure, 3 of the Teacher Pillows are close to completion. The machine stitching is complete and I only have some final hand stitching to do on them and, voila, fini!

I thought to myself this morning that I should be able to finish three. I am not sure I really wanted to buckle down and do that many, but it got stuck in my head and here I am.

I don’t normally sew during the week, but I did some stitching on Friday afternoon. I was very slow and deliberate and not out to accomplish a lot. I just wanted to make some progress, no matter how little. I think that short session got me to the point where I could put three pillow covers together today.


Teacher Pillow – Front: I am really pleased with the way this front came out. I was not that thrilled with the Economy Patch that the child chose, but piecing more of the design in a smaller format really made it look good. I also LOVE LOVE LOVE the Flea Market Fancy fabric out of which I made this front.


Teacher Pillow – Back: I am not so enamoured of the back. I ran out of the flower fabric I used for the front and grabbed these fabrics. I didn’t just grab the blue randomly, but I am not sure why I chose it. My SIL came over and suggested yellow or pink (well, DUH! Why didn’t I think of that?), so I added the yellow to the outside. The back isn’t great, but done is better than perfect and, hopefully, she won’t look too much at the back.

The variety of colors, however, illustrate the way I made the back. I made two squares and then added a bit of extra fabric to the top of the front, hemmed it and folded it over. I will hand stitch down the folded over part.


Aide Pillow – Front: I sewed this one last (for the day) and it came out the best. It is small enough so the pillow form fills the entire cover.


Aide Pillow – Back


Resource Teacher Pillow – Front: the red, yellow and green color scheme has always been very appealing to me. I am pleased with the way this one came out although the pillow form doesn’t fill up the cover. C’est la vie.


Resource Teacher Pillow – Back: I had extra space on the drawing, so I added a photo. All the drawings and labels were scanned and printed on an inkjet printer.


The above photos show the different borders I tried for t he Aide pillow. It kind of gives you an idea of my process.

Not trying to make the envelope style pillow cover has been a big help. I have to say that I am still not sure what the right way to make pillows are and, as a result, I am wasting a lot of fabric. Part of hte issue is piecing the back using the drawings. For some reason that step adds enough of a wrinkle to make the project complicated. What I really need is a book like Around the Block that says how to make a pillow cover if you have a certain sized pillow form. Perhaps C&T will add such a book to their “Fast, Fun & Easy” series? That is one “Fast, Fun & Easy” tha I would buy.

Still, it makes me feel good to spread some quiltmaking and sewing out into the world.