BAMQG IRR Progress

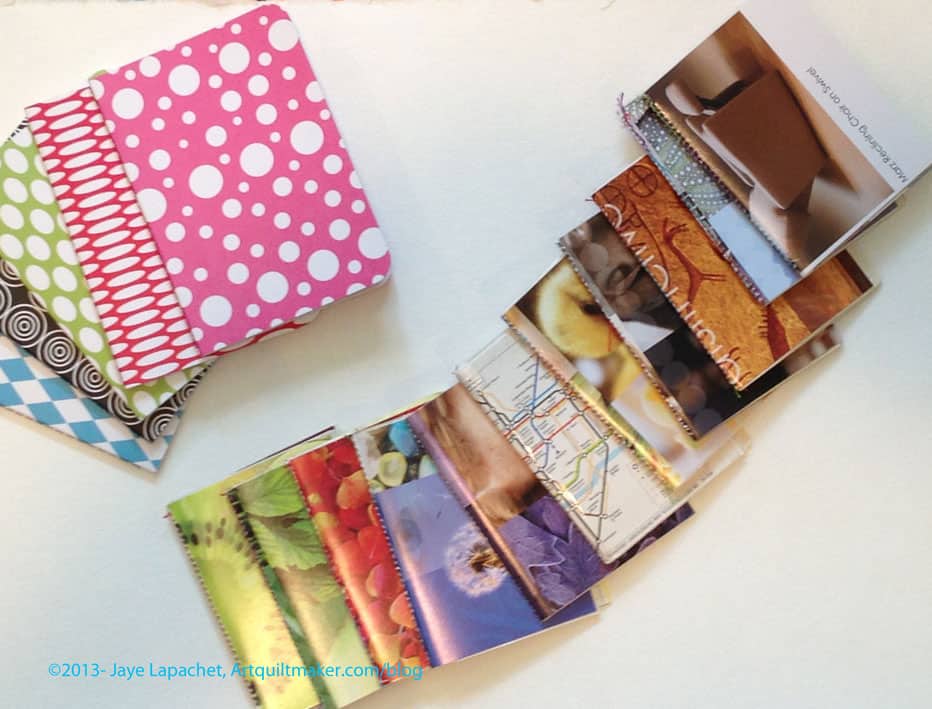
More progress has happened on the BAMQG Improv Round Robin. I worked on Cindy’s and then handed it off to Michelle. Jen posted in the guild forum that she worked on mine.

Cindy's IRR Before
Cindy’s IRR Before

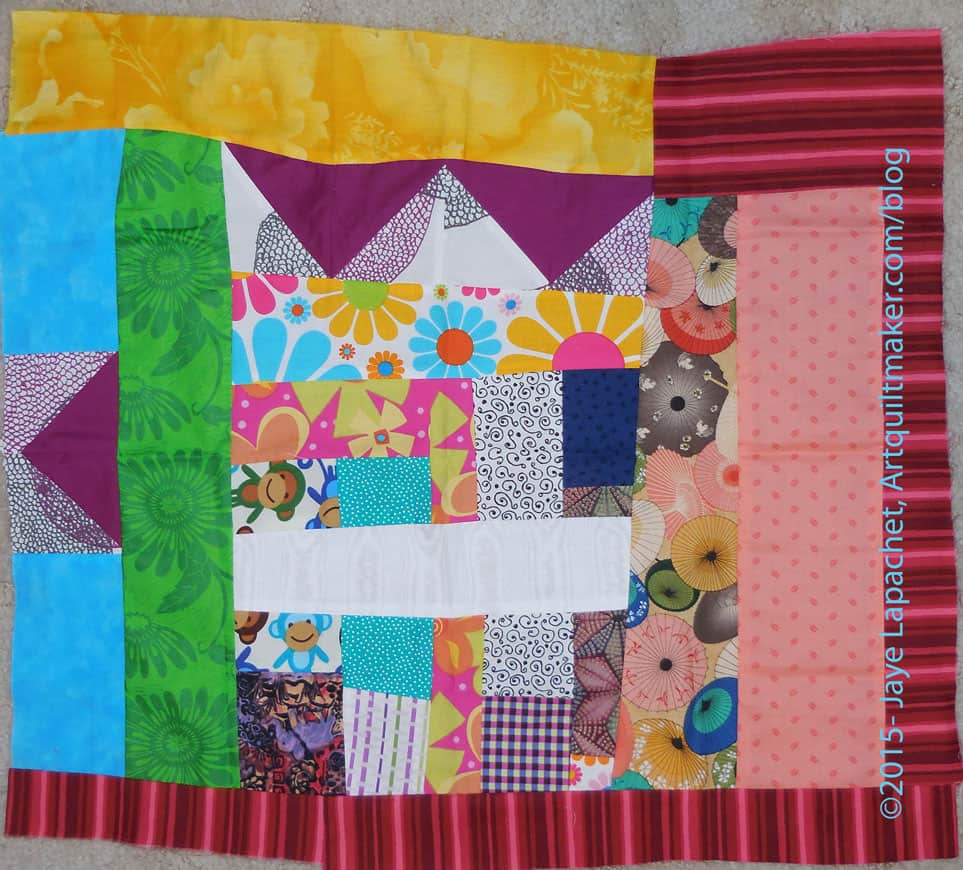
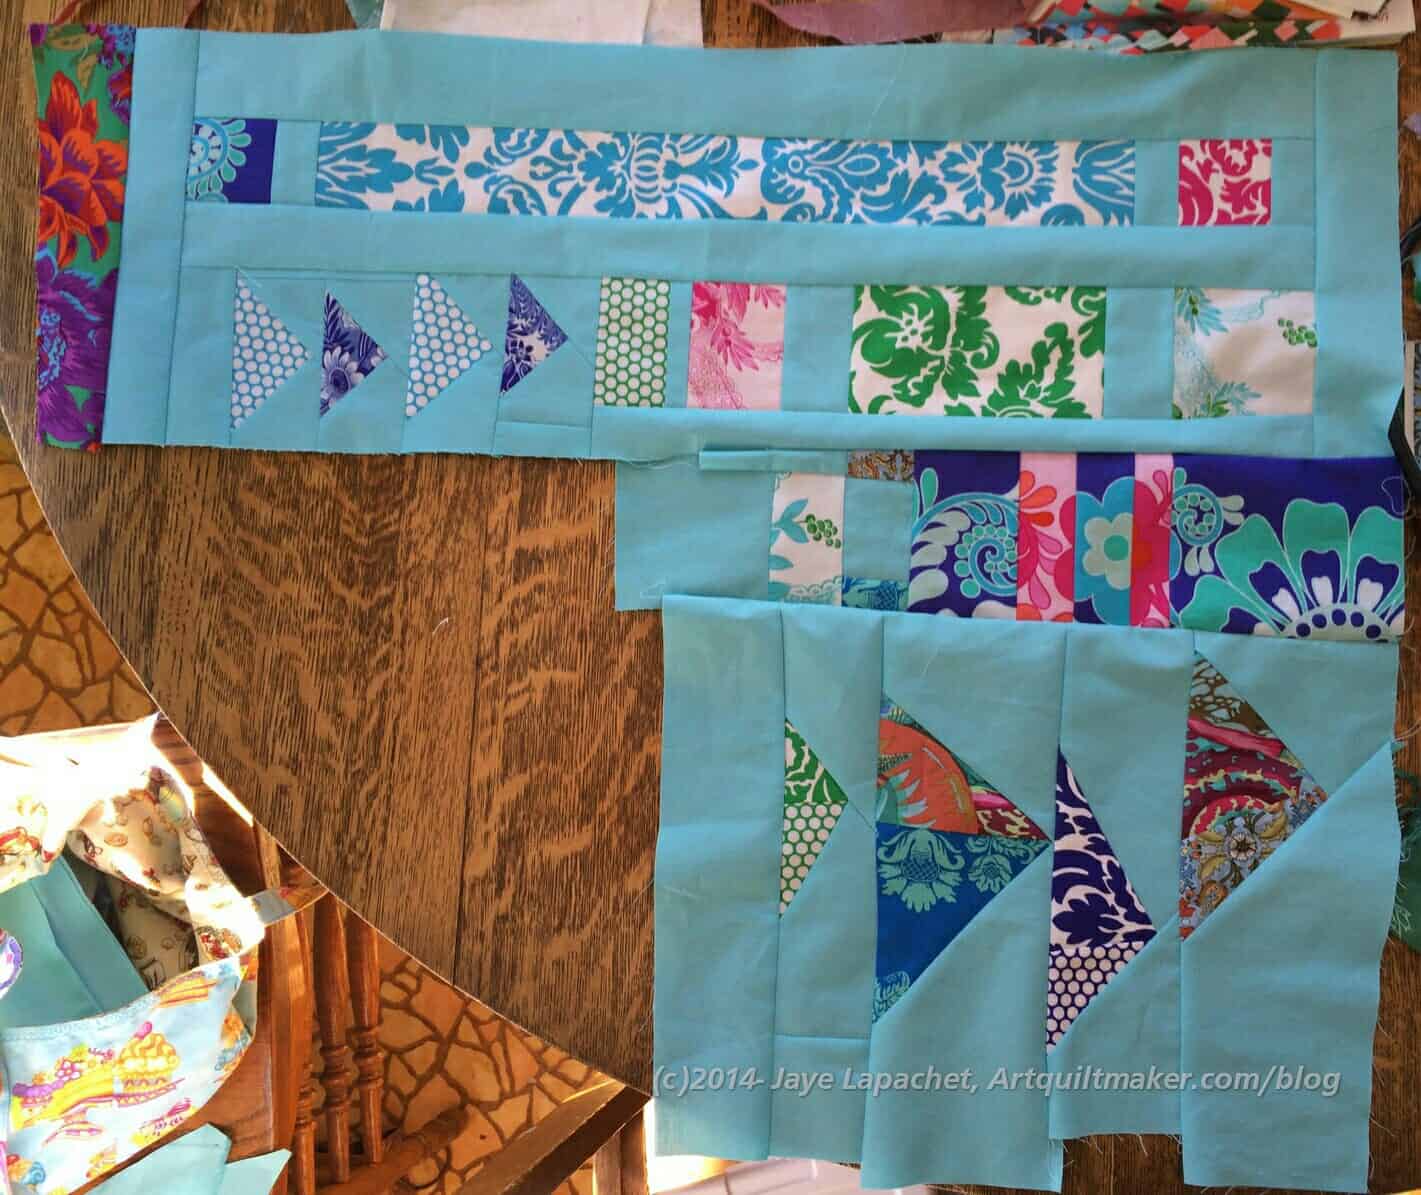
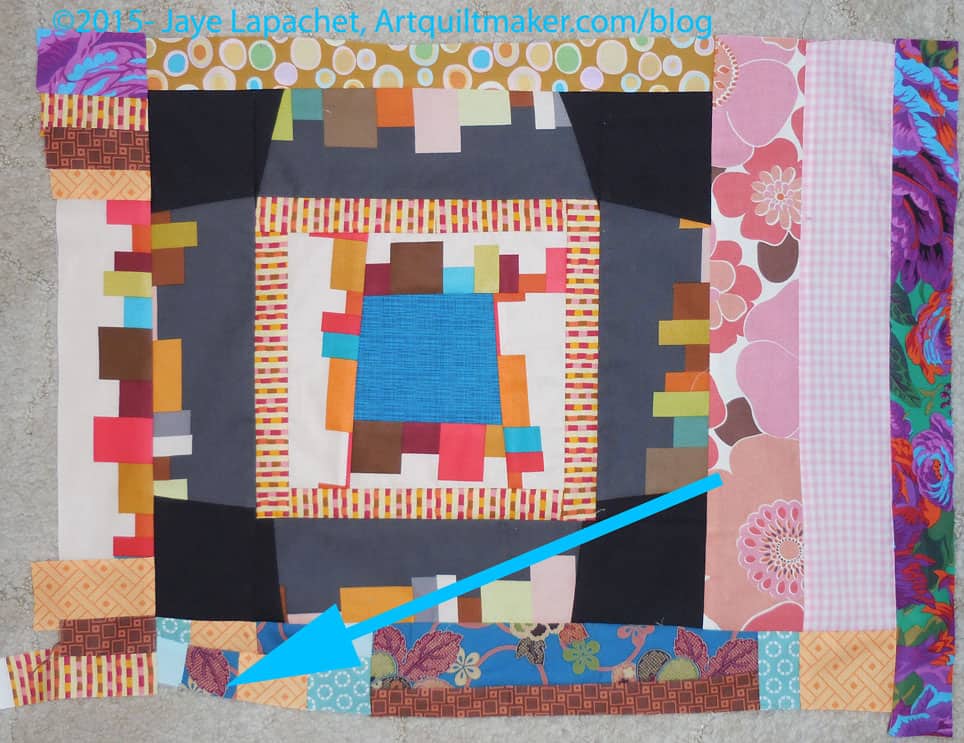
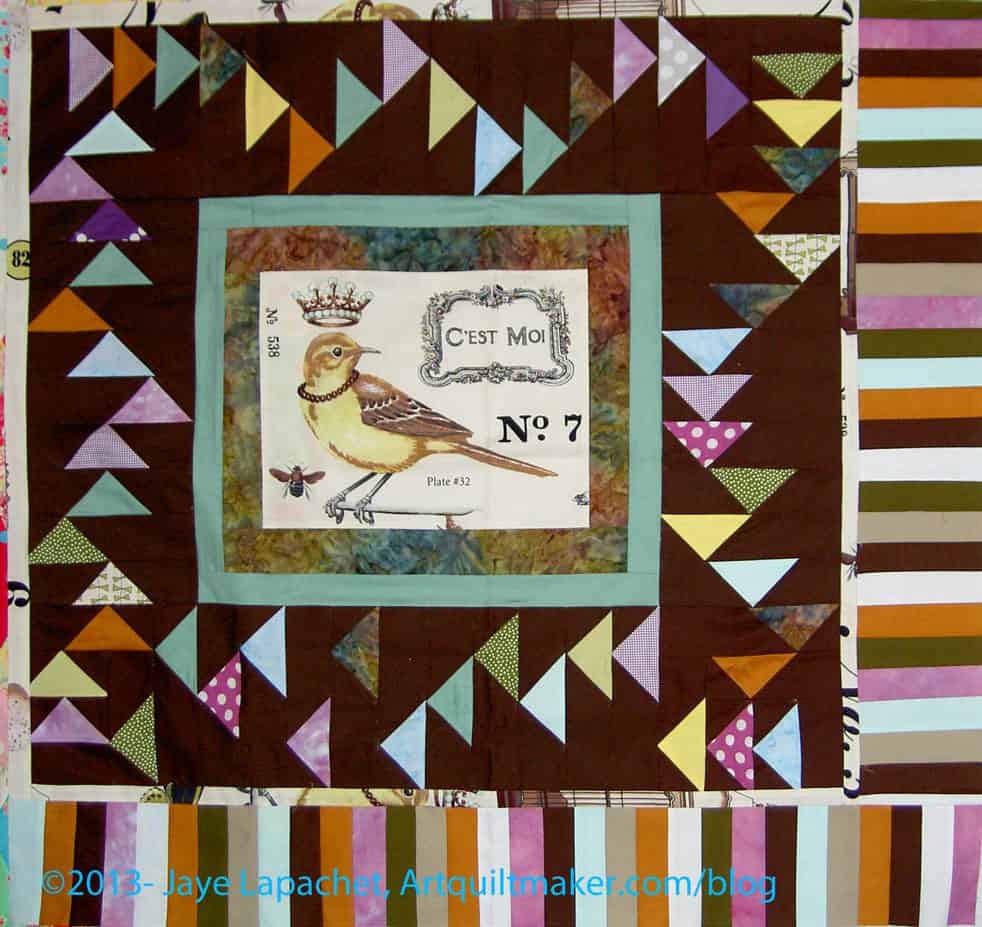
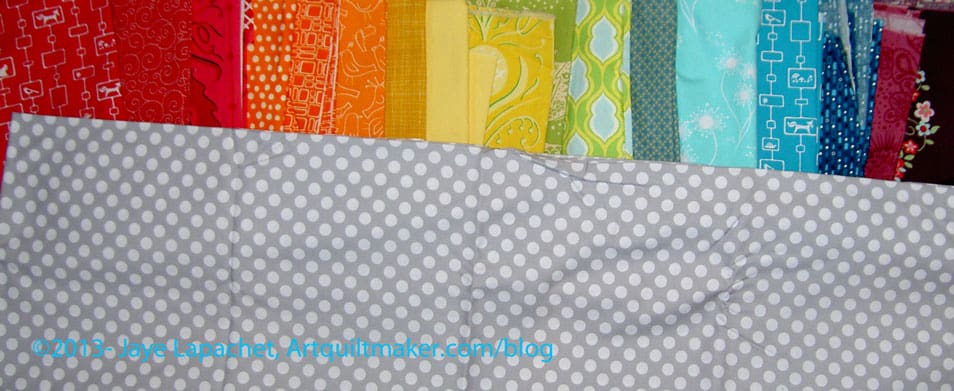
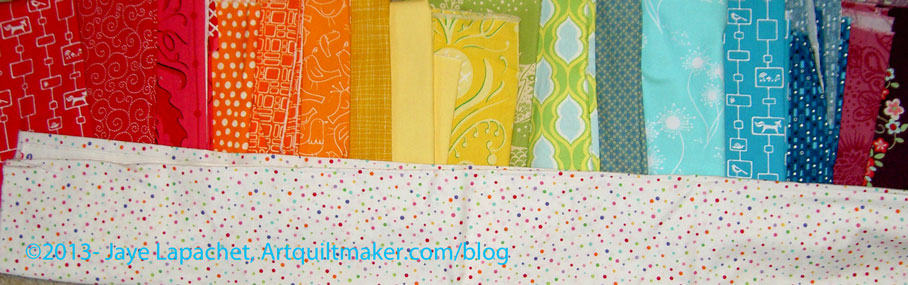
The first thing I did with Cindy’s was look through all of the fabric she provided with the piece sitting next to me.

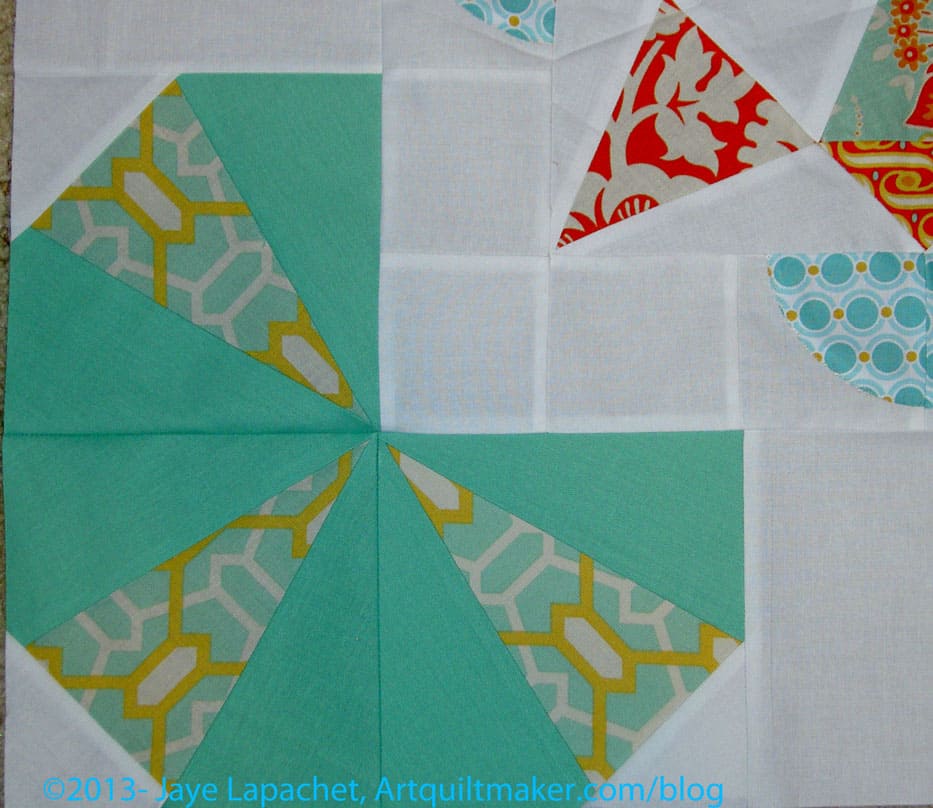
I thought it had a lot going on. I decided to use the turquoise solid (shown at left) as the background with my signature fabric to continue the Flying Geese motif already used a couple of times by other contributors. With a vague plan in place, I got busy cutting and piecing.

The piece I made was a little too short so I added a pink square. There was a  pink solid in the group of fabrics, so I used that.

Cindy's IRR After
Cindy’s IRR After

I really did, mostly, cut without a ruler, but my piece looks very precise compared to the rest of the sections. I know that my arm injury is affecting my cutting. Mostly I have to rotary cut much slower and, apparently that equals more precision.

I like my part. It balances the turquoise on the left side and the Flying Geese do bring repetition and continuity to the piece.

This is also a good exercise in what I can do in 20 minutes. I am not counting cutting, because of the injury, but sewing and designing. I think looking at the fabrics first was a good thing to do. I think it helped jumpstart my process.

My IRR after Jen's work
My IRR after Jen’s work

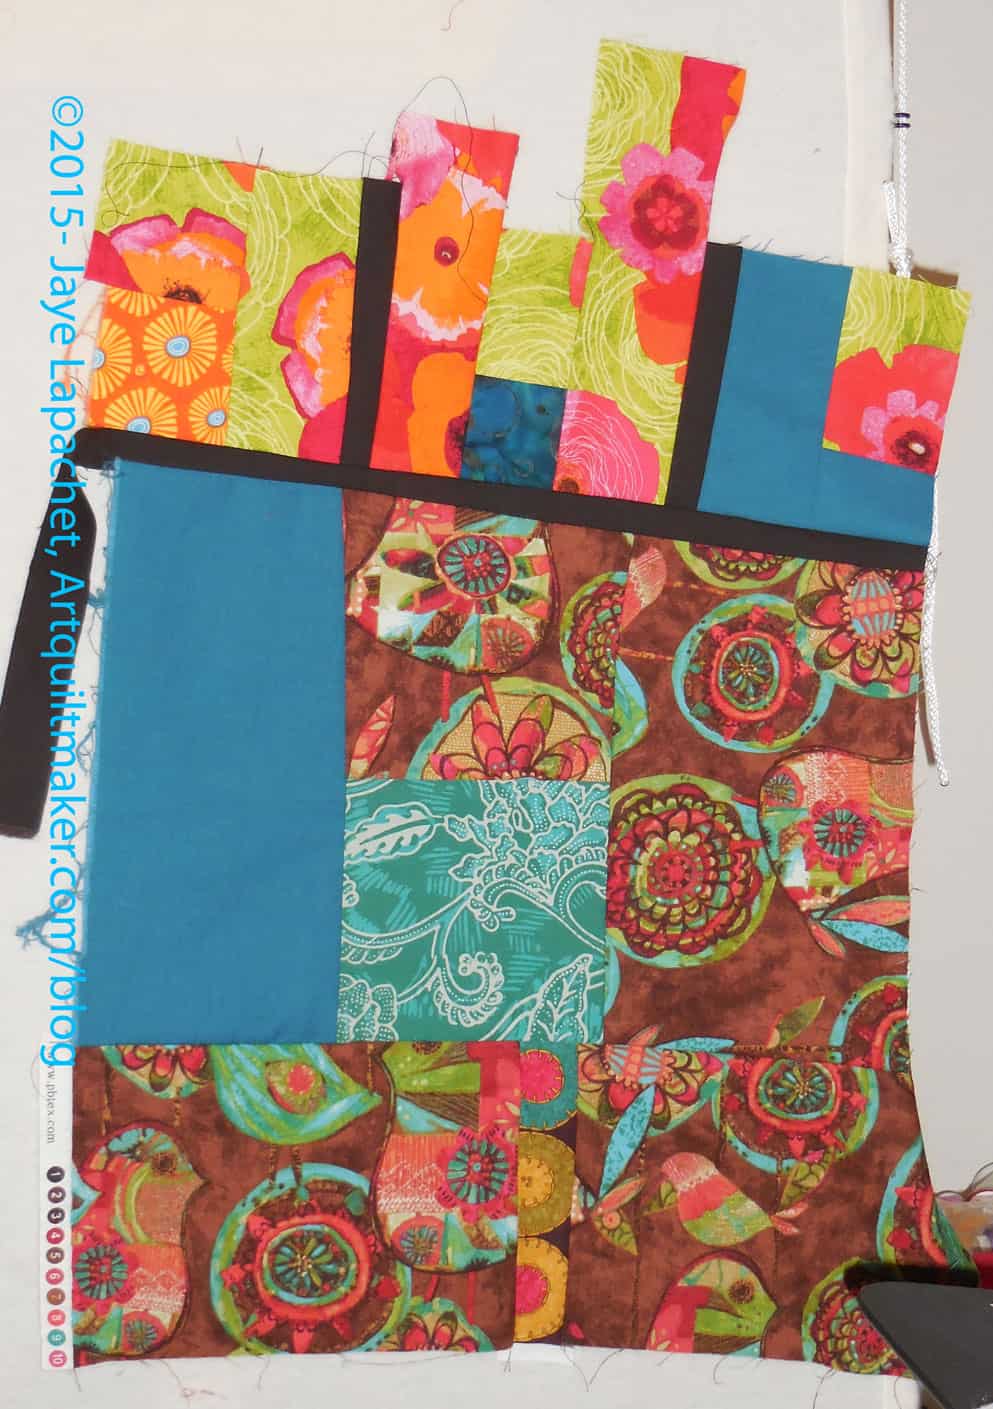
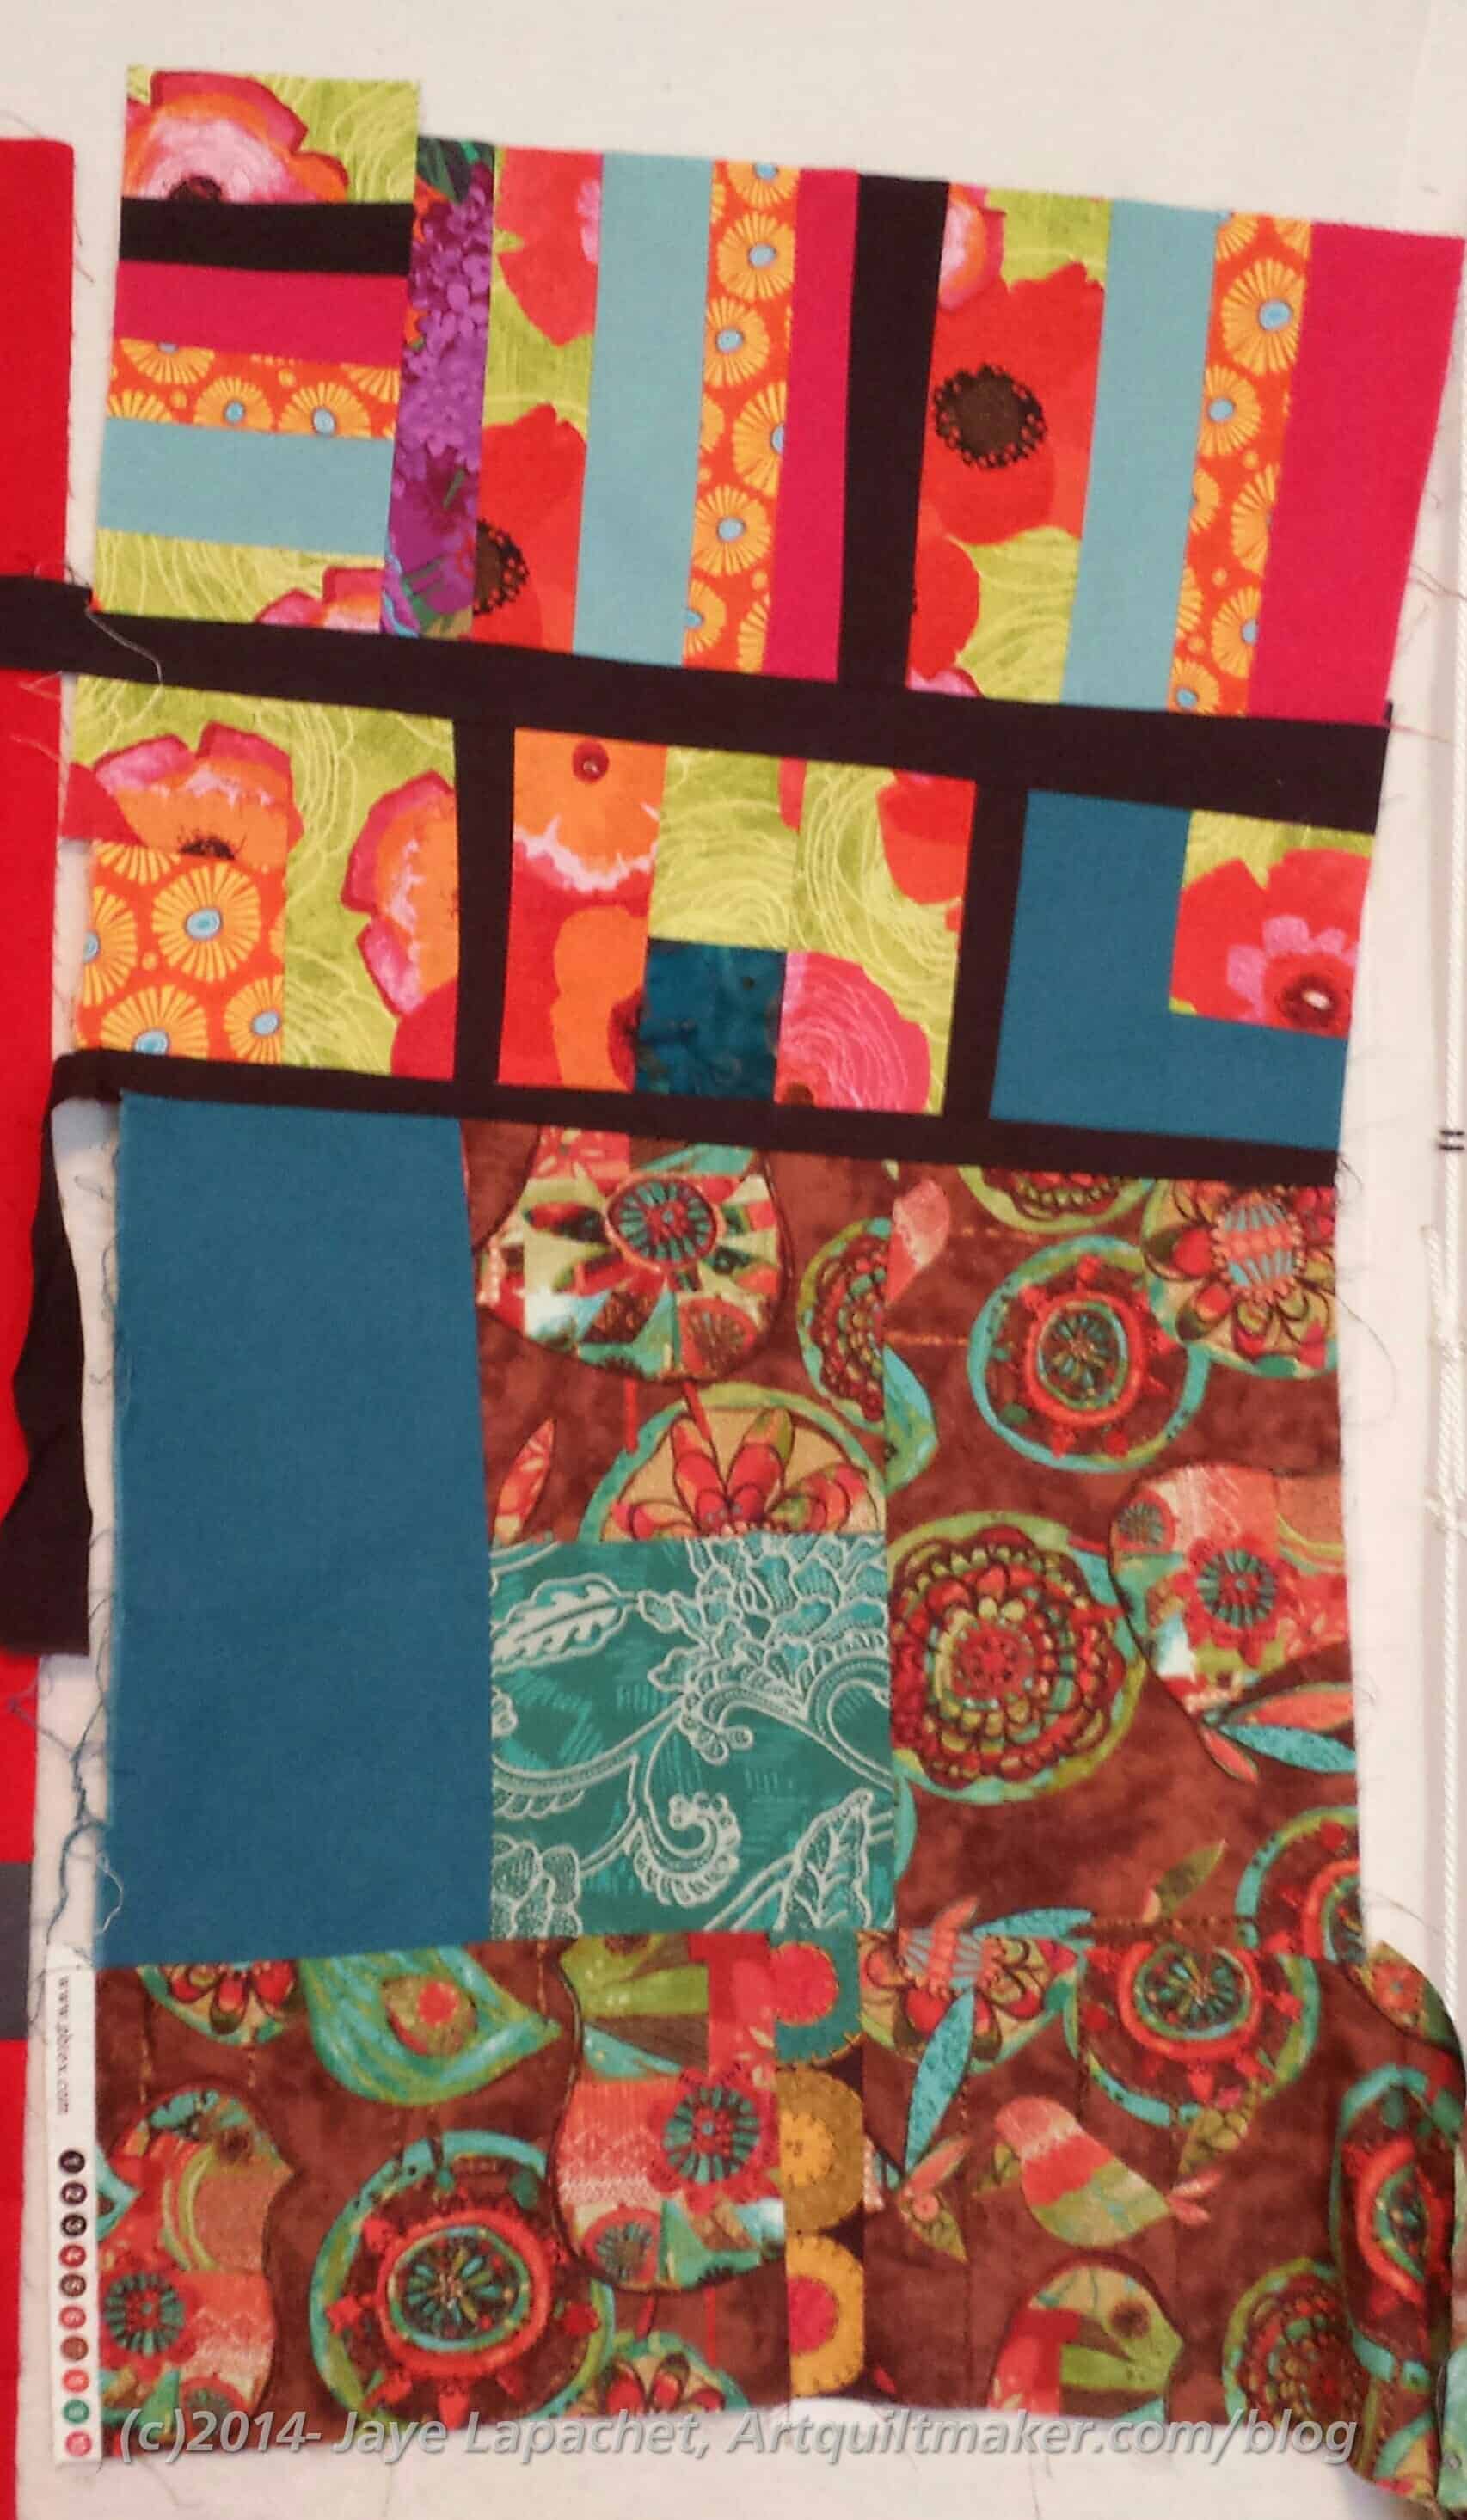
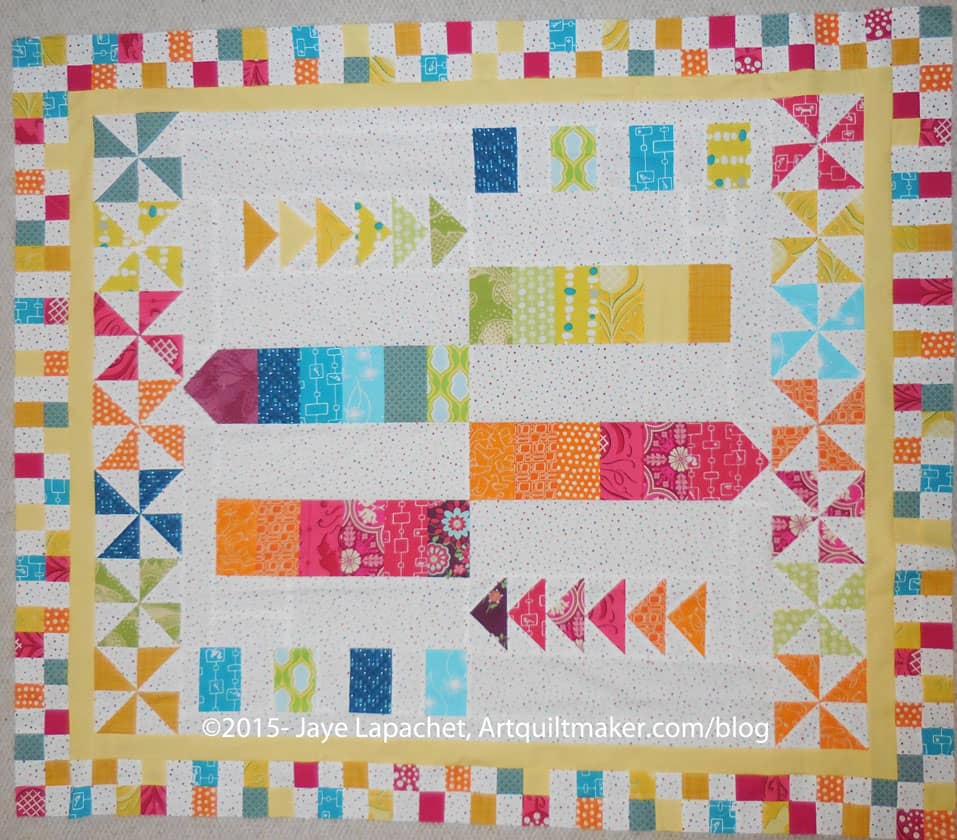
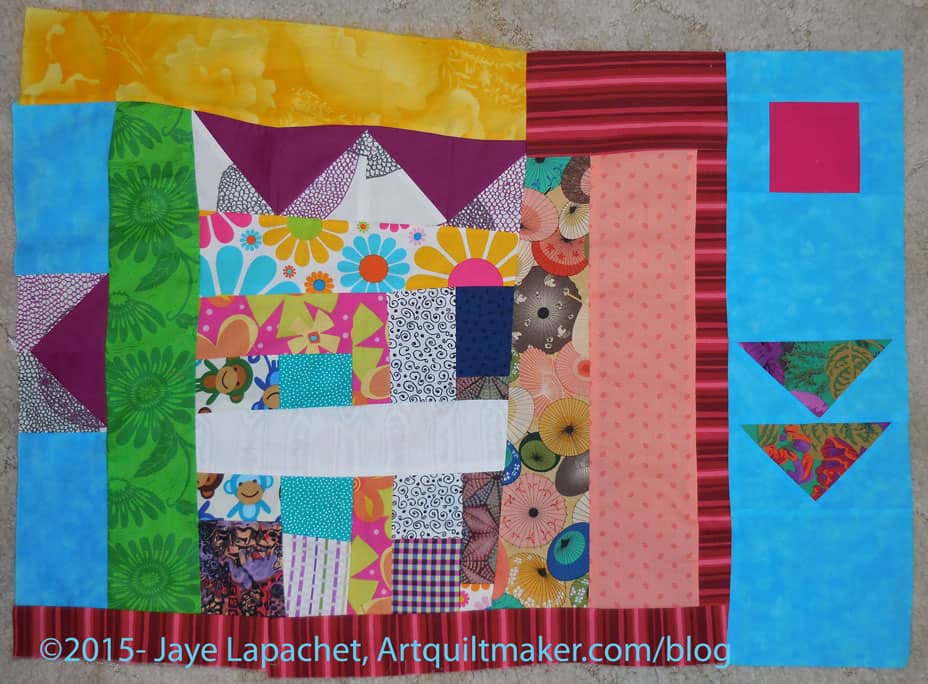
Jen posted about my piece. Michelle had worked on it and made it into a L. I was a little concerned about that, but only a little. I knew my Club Doodle (the name of our group) pals would come through for me. Jen did with flying colors.

It is still keeping that turquoise background feel, which I am happy about. There are more Flying Geese, which I am also happy about.

I am also glad that the Queen Street fabric is finally getting its day in court.

In terms of administration, I have worked on Jen’s, Michelle’s, and now Cindy’s. I feel like I have worked on more of them, but, perhaps, that is because I also worked on mine. I need to work on Claire’s, Diana’s and Rhonda’s.

More IRR

As mentioned the other day, the IRR is going well. I worked on Michelle’s piece on Saturday. It is, as also mentioned, a 20 minute exercise, so I worked on it early and got it finished.

Michelle's IRR Start
Michelle’s IRR Start

I started with Michelle’s piece, by putting it on the wall and looking at it for a few days. That tactic would have worked better if I had taken a look at the fabrics she included. 😉

I decided, however, that I was going to work on it on Saturday and get it out of my hair.

I did loosen up a bit on Michelle’s. Even I can admit that mine was a bit more uptight than improv. I guess that is part of the process.

Once again, I have a shortage of design wall space. I really think I need a whole room with movable design walls all over it. OR I need to clear my mind of the jumble of projects in it. My mind is an insane mess right now.

Michelle's IRR with my contribution
Michelle’s IRR with my contribution

I should have balanced the piece out by putting my contribution on the bottom, but I wanted to continue those dark solid lines. I really do like the strips of bright. the top of the piece is very happy.

It is headed off to Jen next.

IRR Start etc

The other day I wrote about the Improv Round Robin, starting from the middle rather than the beginning.

The details of this round robin can be found in a blog post on the BAMQG site and in the book by Sherri Lynn Wood called the Improv Handbook for Modern Quilters.

IRR Start
IRR Start

The basic idea is that you spend 20 minutes on each round, including the start. I had to pick out fabrics and a signature fabric. I used Queen Street by Jennifer Paganelli and my signature fabric is a Philip Jacobs. You can see my signature fabric on the bottom of my starting piece.

The signature fabric is a fabric that we add to each piece we work on to know that we worked on it. I just had to use a Philip Jacobs as it is uniquely distinct to me. Many of the other modern quiltmakers don’t use Philip Jacobs fabrics that I have seen.

Wanting to try for a piece that was not square, I made my piece long and thin. Cutting is difficult for me at the moment, so I gave myself a bit more time on that piece, but then sewed like a demon so as not to break too much of the rules.

I kept looking at the Flying Geese TFQ and I have been exchanging. I decided to incorporate some of them into this piece, but the rest are just squares and rectangles. The solid is supposed to be the background.

IRR Start with Michelle's work
IRR Start with Michelle’s work

Michelle was kind enough to send me a photo of my start since I, apparently, forgot to take a photo of it.  She also sent a photo of what she added to the piece, so I can see how it is progressing.

I like that more of the Flying Geese have been incorporated.


IRR

I joined the Improv Round Robin at the last BAMQG meeting. I was really busy last week and didn’t get my stuff together until the morning of the meeting. I forgot the crucial thing: my starter piece. DUH! Fortunately everyone is really nice and I wasn’t the only one. I took Jen’s piece to work on and Michelle and I met near my house and we exchanged starters.

Jen's IRR Piece
Jen’s IRR Piece

After the meeting last Saturday, I came home and worked on Jen’s piece.

I thought there was no possible way she could have made her piece in 20 minutes (more on that later) until I saw that some of her piece looks like piecing, but is really part of the fabric. So that was her trick. 😉

I added the bottom, which I curved on one end to give someone else the opportunity to do some curved piecing. They may just cut it off or do an angle, which is OK, too.

One of the things about this project is that we each have to have a signature fabric that we add to all of the pieces. I had to use a Philip Jacobs print! It is the green and purple fabric on the right hand side. We are assured that everything will go together just fine.

Jen's IRR piece before trimming
Jen’s IRR piece before trimming

I added some more piecing at the curve, but cut it off. You can see what I did in the bottom photos.

You can see the kind of wonky piecing, which is what inspired me to cut off the end. I added the left side as well.

While I was trying to decide what to do, I pieced some strips of Jen’s fabric together. I ended up just putting them in the bin without using them. I kind of like the thought of adding something that someone can springboard off of.

Round Robin Returns

BAMQG Round Robin
BAMQG Round Robin
BAMQG Round Robin detail

Remember when we started the round robin project?

My round robin came back after a long vacation! It went through two moves of my various round robin-mates. Kathleen was able to work on it during the past few weeks and I just got it back yesterday!

It is so bright and cheerful! It is also completely unexpected. I guess the point of a round robin is to work with other people and see how they would work on your project.

I was expecting the rows I created to be continued out into the border, but instead Kathleen added these very cheerful pinwheels and the checkerboard border.

When I saw the pictures of the piece I thought it was very small, but the piece turns out to be quite large – well on its way to being a twin or larger quilt.

I think it needs more and Kelly has agreed to work on it. I think I have to look at the design thus far some more. I also need to see what else the design needs in case it comes back to me and I want to make it bigger. I think I would like others to work on it, in addition to Kelly, though, if I have the opportunity. We’ll see who I can round up.

BAMQG Round Robin detail

My Round Robin

Round Robin after 1st Round

I was able to see my round robin start on Saturday at the BAMQG meeting. It was fun to see it, though not much has been done.

Poor Kelly moved after we started the project. My RR got stuck in a box by accident when she had some problems with the move. My piece has only had one person work on it. While it is cheerful and the work done so far looks really good, when compared to the fabulous work another group did on their projects, my piece looked kind of sad.

HOWEVER!

The other group has done 6 rounds and mine has only gone through one round so the potential is definitely there. Also, we only have 4 people in our group. Looking at the piece in photos really makes me realize how bright and cheerful it is.

Round Robin potential for Round 2

Kathleen is next on the list to work on my piece.  She and I pulled out my piece and talked about what to do on it. At the moment the piece is very vertical. We were thinking that it needed some more horizontal, so we explored some ways of making it more horizontal. One thought was to make the edge a little smaller. In the photo you can see that we folded the edges under so that we could see how the piece would look with squares of color on the edges instead of rectangles.

We also talked about connecting the liked colored edge squares (or rectangles) with lines of the same colors, possibly weaving more than one under the other. You can see that some of the various colors on the bottom right are also on the top left. I am a fan of that idea, but I am not working on it, so who knows.

Kathleen said she might draw something to try and work out a design. I was wondering if I could use EQ7 to import the picture and then draw around it to show what I meant. I don’t know if it will work, but can try it and see.

The other thing I was wondering was if I should see if there are other people who want to work on it – perhaps non BAMQG people? We’ll see what fabulosity Kelly and Kathleen conjure up. 😉

Related Round Robin Posts

Round Robin Round Four Complete

Kelly's Round Robin
Kelly’s Round Robin

I spent some time with Kelly’s Round Robin over the past week. I finished my portion on January 1 and was pleased to be able to move on to the Attack of the Hexies.

I saw Camille Roskelley’s Round and Round quilt and liked the basic block so much that I wanted to make it. The version from Around the Blocks blog really inspired me. I love the way the triangles seem to flutter or twirl on the background. The basic component is a Friendship Star, a block that I always thought had potential, but never quite liked. Now I know that making it smaller and combining it with others like it was the ticket. Camille Roskelley is a genius.

I didn’t think the block was the right size for the piece, but I decided the piece could use something bold. I resized the block and worked on the whole piece in EQ7. I could only get an idea of the outcome. The piece has special fabric and I didn’t feel like scanning and uploading it. From what I could see, I thought it would work.

Round and Round - one block
Round and Round – one block

The block has 85 pieces. I reworked the piecing as well as resizing it, because some of the pieces didn’t need to be small squares. Also, I didn’t want, for example, to piece 4 squares together to make a larger square.

Chunking Round & Round

This made the final piecing of the block a little different than just piecing the block together in rows. I was able to chunk it. Once I was able to see how to chunk the piece, the piecing was no problem. I used the Triangle Technique to make all of the triangle squares (half square triangles).

Fussy cutting in Round & Round

SIL suggested that I fussy cut the special fabric and use that for the center rectangle in order to echo the original focal point of the piece. I thought that was a good idea and fussy cut different portions of the special fabric for the centers.

Kelly's Round Robin
Kelly’s Round Robin

I think it came out well and I hope that Kelly is happy with my work. I was really pleased with the block. I can’t make it to the meeting in January, so I sent it off to Kelly.

Related Round Robin Posts

Round Robin Round Three

Kelly's Round Robin
Kelly’s Round Robin

I also have Kelly’s piece and it is time for me to work on it. As soon as I tidied Kathleen’s piece out of the way. I need to keep  Kathleen’s piece for a little while as Kelly is still working on setting up her studio.

I put her piece up on the wall so it has a chance to speak to me. Nothing yet. I thought Chris’ piece needed space. I wanted to retain the freshness of Kathleen’s piece and Kelly’s piece…..

I don’t know. There is definitely personality. There is definitely movement. Kathleen’s Flying Geese really add a lot to this piece. This is a rich piece as in it has a rich look. The idea of a Persian rug comes to mind, though it doesn’t look like a Persian rug, and that isn’t quite right, but I think the closest I can describe is that it just has the feel of a Persian rug.

There is also an element of a royal banner. i can see this piece on a long pole being carried in front of a large group of men on horseback wearing the royal colors.

I don’t think it needs space. I think the richness needs to be continued, and perhaps some more points. I am just not sure how. I’ll keep looking at it and see what I think about.

What do you see?

More Round Robin Progress

Kathleen's Round Robin Piece
Kathleen’s Round Robin Piece

After recent events keeping me away from my machine and last weekend’s fiasco of sewing and ripping, I decided that I would make progress this past weekend. I decided I would sew and make progress.

I did make progress. Small progress, but we have to rejoice in the small successes, right? I finished my part of Kathleen’s Round Robin piece. I am really pleased with how it looks. For one, I am pleased I was actually able to do something. Two, I think I did a good job echoing the shapes from the center.

I hung the piece I got from Chris up on my design wall so I could look at it. It spent a few weeks up there and as I was looking at it, the Kaleidoscope shape in the center stood out, especially those long thin triangles. Also, the fabric with that jade green in the Kaleidoscope in the very middle caught my attention. From those two thoughts, I worked on my design and fabric choices.

Kathleen's Round Robin in Progress
Kathleen’s Round Robin in Progress

I used foundation piecing for the blocks for the corners in my round. I designed the corner blocks using EQ7 and then printed the foundations out. The Carol Doak paper I got some time ago is great. I printed right on to it and it worked like a charm. I was able to rip out paper with a minimum of torn stitches. It might not be the most cost effective (I don’t know) but for the limited foundation piecing I do, it worked great.

You can see from the ‘in progress’ photo that I used three blocks to make up the corners and then filled the middles of each side in with white. I had a hard time figuring out the measurements. They weren’t standard so the center white piece is different than the blocks. Not everything lines up nicely either, but I think that can be the nature of round robins. I think it will look fine once finished and quilted. I don’t think Kathleen will mind. At least I hope she won’t

Kathleen's Round Robin detail
Kathleen’s Round Robin detail

The detail shows the fussy cutting of the green, gold and white fabric very well. After I finished, I thought that replacing the green (closest to the white) with white might have kept it fresher, but I think it would have had the problems I mentioned above.

After doing all the piecing, I decided I like the way, viewed from some angles, the center piece looks like it is on top of the part that I added. I also think the corners look a bit like stylized flowers.

I think that the next person will need to get back to the orange – well, I should say that if I were doing the next round, I would use some more orange. I can’t tell you how tempted I am to add some orange.

It didn’t turn out exactly as I imagined and I am thinking that that green makes it look a lot more 1930’s than anticipated. I also think that more white might have been better, but I paid special attention to fussy cutting the alternate fabric in my corners and I wanted it to show. If I had added some white to the corners, that gold, green & white fabric would not have stood out as much as it does. I am pleased with the way it came out.

Now on to the brown one.

Round Robin Progress

The Round Robin isn’t going exactly as planned and I have two at my house while Chris has none. I am not sure what Kathleen has. Fortunately, we are flexible and working through it.

Kathleen's Round Robin
Kathleen’s Round Robin

This is a pretty and fresh piece. That white is very stark and helps the other piecing float. As I stared at the piece, I knew I wanted to maintain that bright freshness.

Finally, I came up with an idea. I plan to add some Kaleidoscope-esque bits to the corners.

That was rolling around in my mind from the beginning, but I couldn’t figure out exactly how I wanted to do it. I was finally struck with a technical plan over the weekend and began the process of foundation piecing.

As I mentioned on Twitter, I sewed the same seam 3 times and ripped it out 3 times, then quit. I think I was trying to use a piece of fabric that was too small and my stubbornness (work, dammit!) got in the way. That one foundation is shredded, so, hopefully, I have learned my lesson.


Stay tuned for more details.

Round Robin

I didn’t know what category to put this post in, so I hope it works for those of you who are category-crazed.

The last time I really thought about this piece was back in June and I really wasn’t thinking about this particular piece, but the Round Robin in general and my piece specifically.

Where did you say July went?

I haven’t been to a BAM meeting in forever, sadly, but Kelly has been a great sherpa for me. Yesterday, I sent off my round robin work along with some cat beds and she will, once again, kindly, sherpa them to the meeting this Saturday.  Someday I will see the BAMQGers again.

I wasn’t able to finish the orange and grey donation quilt yet. I didn’t really work on it last weekend. I’ll get back to that as soon as I pick out a blue for the sashing. Apparently, that is the hold up in my brain.

Round Robin
Round Robin

I did make some time last weekend, in the midst of the quantity to do some quality.

This is Chris’ piece and when I first saw it, my impression was that it needed some space. I used the white to give it some space, but didn’t want to just put white strips on, thus the corners.

I also varied the width of strips a little bit so it would have a bit of movement, or viewer’s eyes would move around.

Now that I look at it, it kind of looks like a tulip.

I tried to make the white the same white as in the flowery black/white/yellow print so neither would look dirty. The black on white I added is pretty bright. I think it works. I hope it works, at least. Chris makes art quilts, so she can paint over the white, if she doesn’t like it.

This project definitely involves muscles that are atrophied in me. I am committed to working through all of the pieces, but I am not sure about the project. I am anxious about doing a good. My technique will be good. I hope the design will be, too. I am not sure if my design work fits the piece. It certainly isn’t terrible.

Round Robin Start

Round Robin Start
Round Robin Start

I wasn’t able to attend the meeting last weekend, but got my start to Kelly and she shepherded it to the meeting and to the person who will work on it.

She has given my piece as well to the person who will work on it. I put it in a bag I made a few years ago as I thought it would be nicer than a plastic bag or a cardboard box.

I included one of the small books Maureen made for me for thanks last year so that people could write their thoughts somewhere organized.

As I thought, I used a group of fabric I bought at Birch Fabrics a few years ago. They are definitely older fabrics, but favorites of the modern set as well. I hope I haven’t embarrassed myself by the fabrics I chose. I added a few others to add interest. On the off chance someone bought the same group and made a quilt from it, I wanted mine to be a little different.

I can’t wait to see the piece that I get to work on.

Round Robin Fabrics

I decided to use the Rainbow grouping I bought at Birch a few years ago. There are some nice modern prints that the BAMQG color group will appreciate and I will finally get to use this group.

TFQ is in town for a visit. She came over on Sunday to hang out and we looked through the fabrics I wanted to consider for the Round Robin project I discussed last week. I am always pleased to have a second set of eyes help clear the fabric fog, but I especially appreciate TFQ’s opinion, because she has a good sense of design. We were particularly focused on the background. We started with the Kona color card and were looking at a Kona Honey Dew. I wasn’t in the mood to buy fabric and she won’t be home until later this week to send me any, so I put the color card away.

Grey Border
Grey Border

We went through a lot of fabrics and finally came up with three finalists: all dots, two grey and one white with rainbow. The first option is a small grey dot, which worked well with the group of fabric I chose. I believe the dot is from a Camille Roskelly line, but am not 100% sure.

Ta Dot in Stone
Ta Dot in Stone

Ta Dot in Stone is always a good option as well. I thought, and TFQ concurred that the dots were too big and would overwhelm the other fabrics. I do like that Ta Dot Stone as a background, though.

Rainbow Dot
Rainbow Dot

The best option, though is this Rainbow dot. I have wanted to use more dots in my work this year. The white background perks up the other fabrics. None of the other fabrics will bleed into the background and blur the shape of any of the piecing.

Now I have to make a center.

Round Robin Ready?

Fabric choices for a round robin quilt.

Color Group
Color Group

As I mentioned in my last BAMQG post, my Color Group decided to throw our colors out the window and do a round robin. I am going to participate, but part of me is on the fence. My last experience with group projects left me with blocks filled with inept sewing, poor cutting, ugly fabrics and a bad taste in my mouth.

I brought this point up a bit tentatively at the group and, not wanting to insinuate anything.  Kelly and Kathleen suggested that it would be different because we know each other. They may be right as the round robin I did, back in the Dark Ages (1999), with my quilt group worked out really well. The piece I got back, Carousel, is really nice. I decided to do it, if for no other reason than to get to know my group better and, perhaps, create a small group that can meet for a long time into the future.

First things first. Fabric.

I have several groups of fabric put aside for a future project. I dug the most attractive and appealing out.

Option 1: Dots. Dots. Dots.

Dots Option
Dots Option

I love these fabrics. As you might remember, they were in my birthday box from TFQ. They have been sitting on my cutting table waiting for inspiration to strike while I plow through Sawtooth Stars. The lightning has not yet struck.

If I use these, I will need a background fabric. I think it would either have to be the Michael Miller TaDot in Stone to be in keeping with the all of those dots or a smaller dot. A stripe might work as well. These are strong fabrics and the background will have to be a real background.

Option 2: Pretty in Pink

Pretty in Pink Option

I am not over the pink thing yet, despite Sparkle Pink. I also like the idea of calling a quilt ‘Pretty in Pink’. The group on the right is a group of fabrics I bought at FabricWorm/Birch, probably on my first trip to Birch. The Victorian style large print on the left is recent and I added it in to give some interesting design options to those working in the group. Besides who doesn’t need a little turquoise and a few birds in a quilt?

Option 3: Rainbow Modern

Rainbow Modern Option

These have been languishing since my first trip to Birch. I have been waiting, again, for inspiration to strike. The fabrics are all probably old news and nobody likes them anymore, but I still like the group of them. This is my favorite group, actually, although some of the colors are a bit greyed. I think I would need a larger piece for background and would have to try out different fabrics to see what would work best. I would love to include one of the many dots I have, but I wouldn’t want to overshadow the other great fabrics.

Option 4: Pop Parade by Metro for P&B

P&B Pop Parade
P&B Pop Parade

I bought these fabrics via mail from Quilting Adventures after having great fun using the previous P&B line for Serendipity Puzzle. That was 2.5 years ago. This group was actually the first group of fabrics that came to mind. There are dots. There area lot of interesting design elements in the fabrics. I would need a background and I am not sure what that would be.

Of the 4 options, which is your favorite? I won’t promise to use your favorite, but I am interested in your opinions.

Next up: instructions, guidelines and suggestions.

Journals
Journals

We also need to include an instruction sheet or list of dos and don’ts. There is some information on the Indianapolis Modern Quilt Guild site about round robins, which is helpful. I think I will use one of the journals Maureen gave me for this project. I could also use one of the journals I bought as party favors for my birthday. I don’t want to just include a piece of paper. It would be nice to have a little keepsake. Emphasis on ‘little’, as it has to go in the project folder. Also, I don’t think people will write a lot.

Decisions. Decisions.