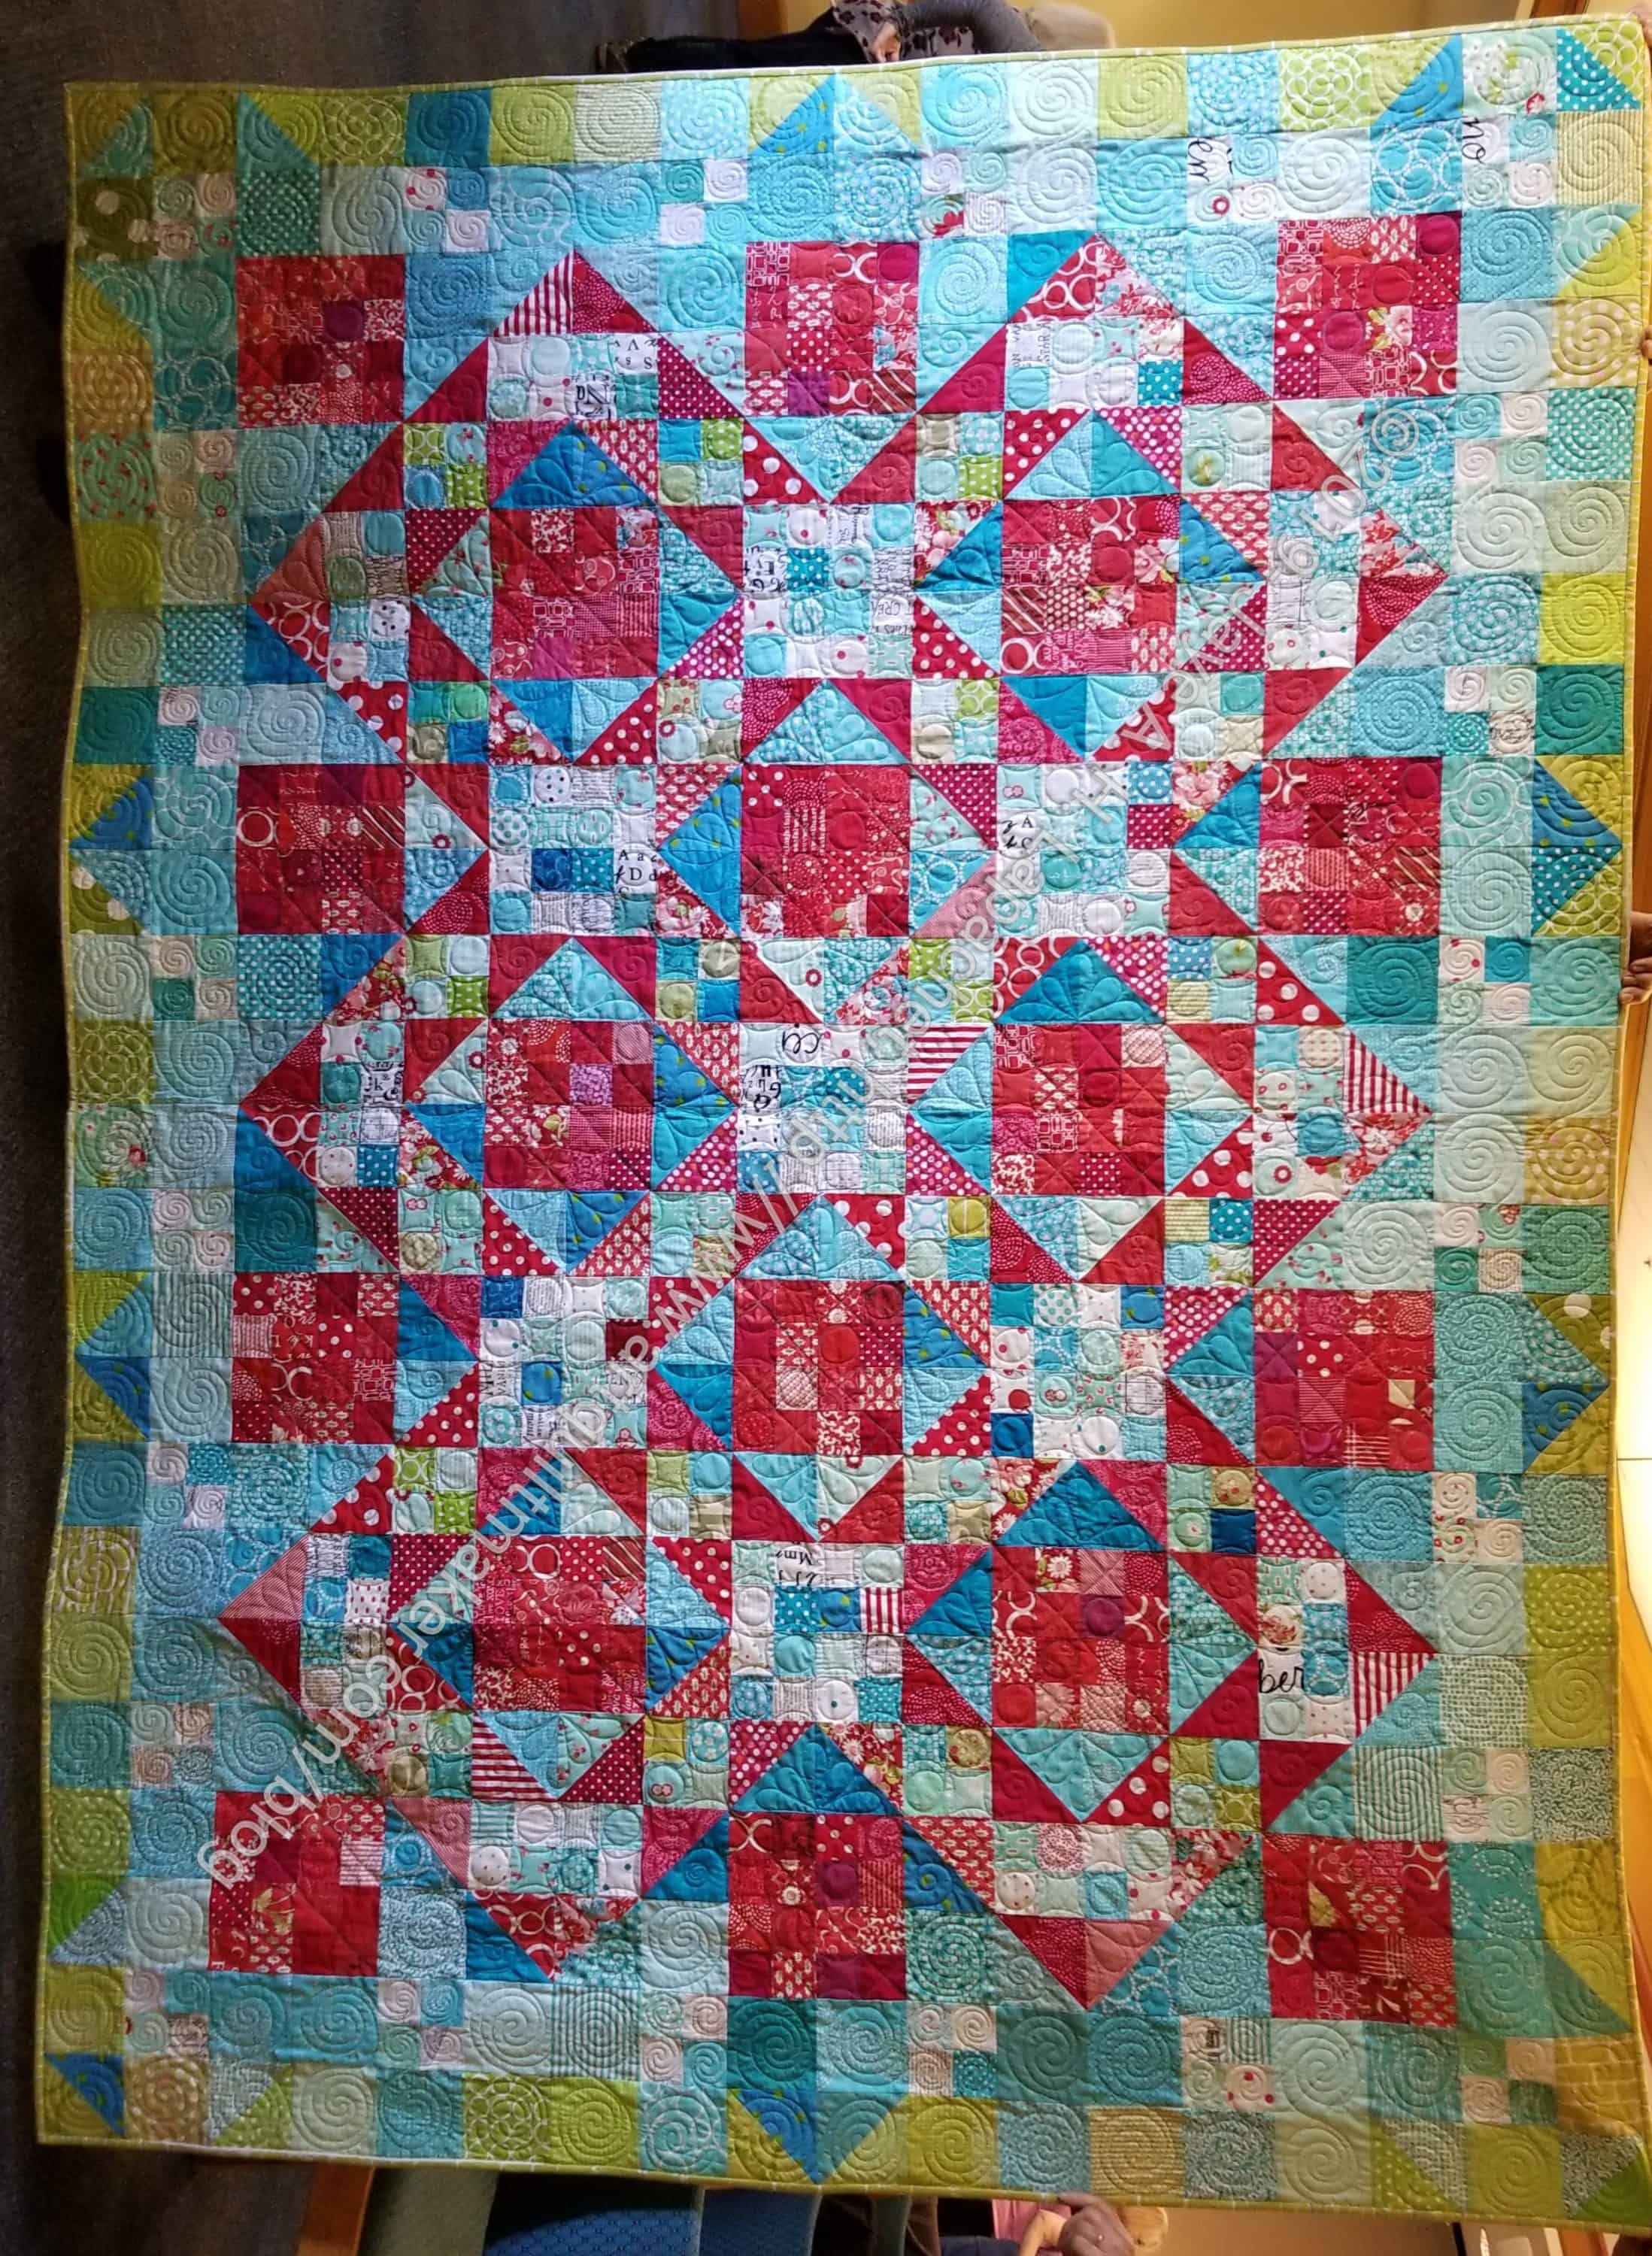
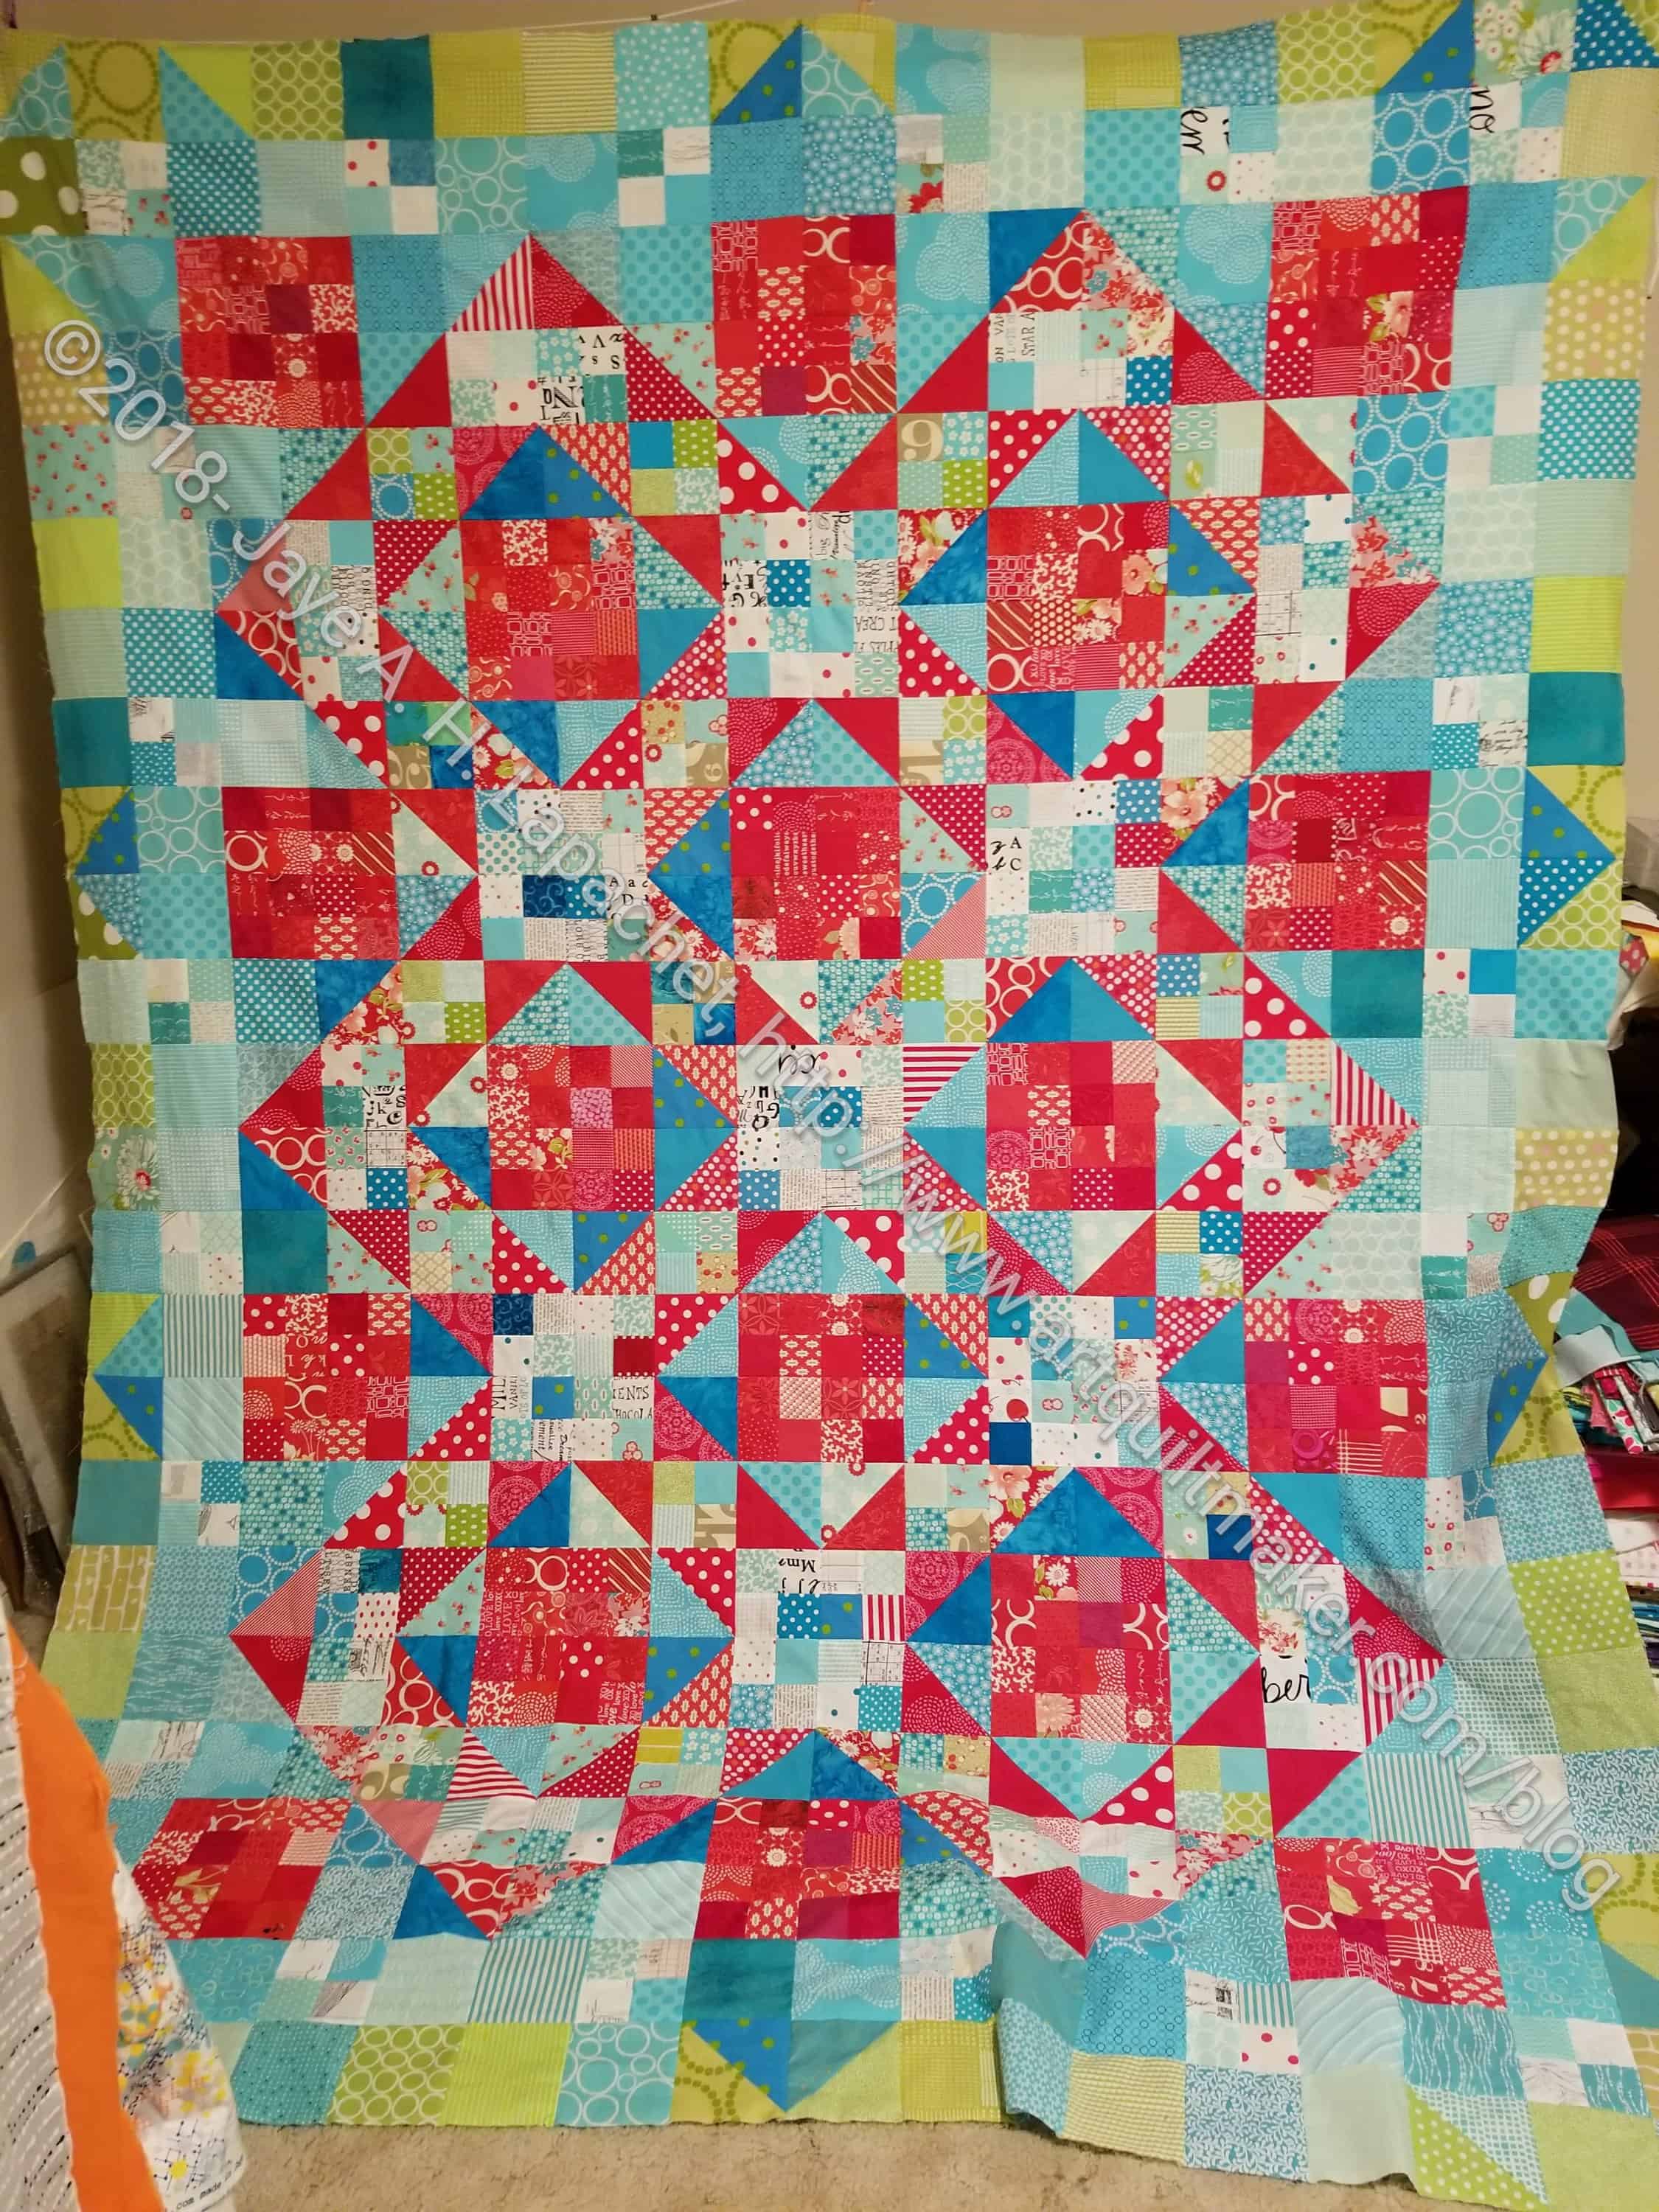
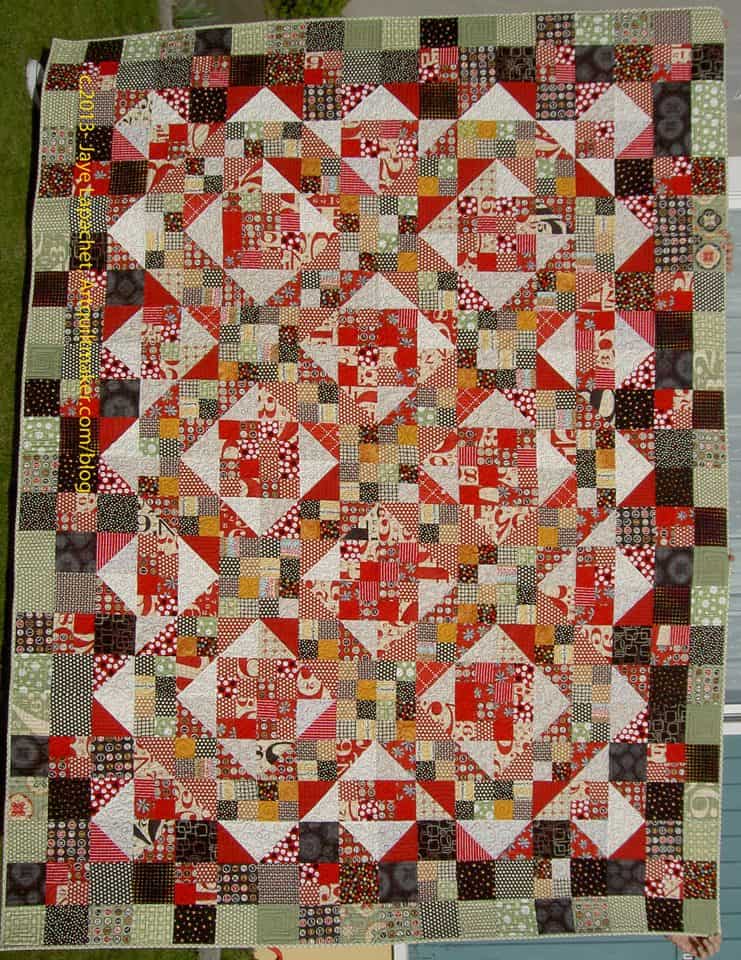
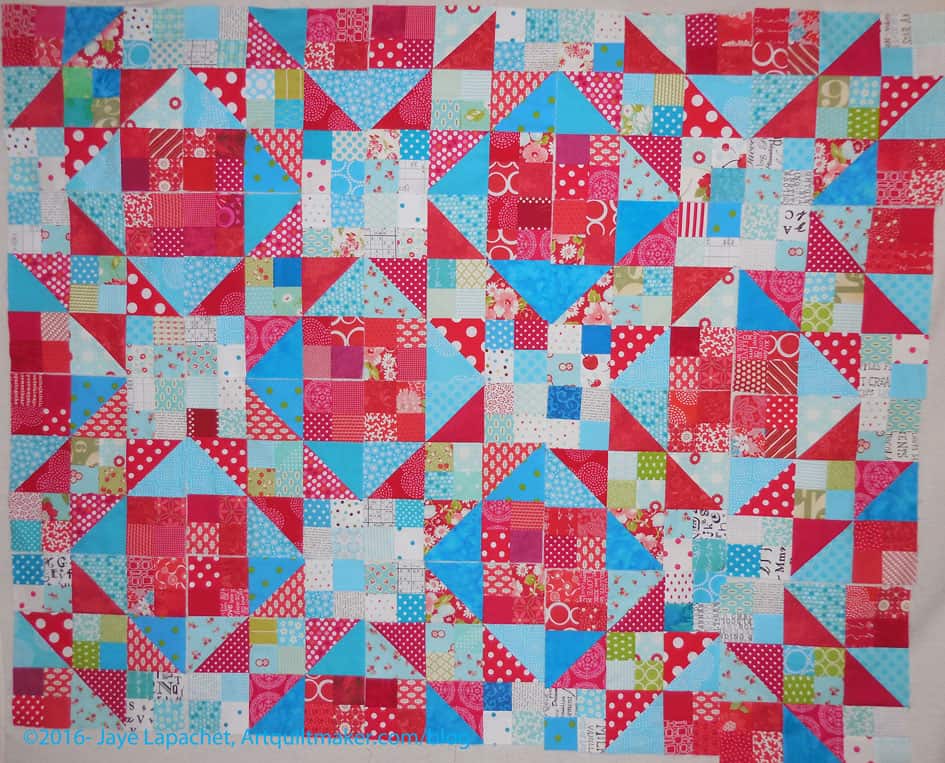
I meant to drum both of my quilt hangers into service for this huge monster, but, sadly, the YM left to go back to school before I could do it. Regardless, the Stepping Stones n.2 is finished.
Some guild pals helped me take the photos by holding it for me.
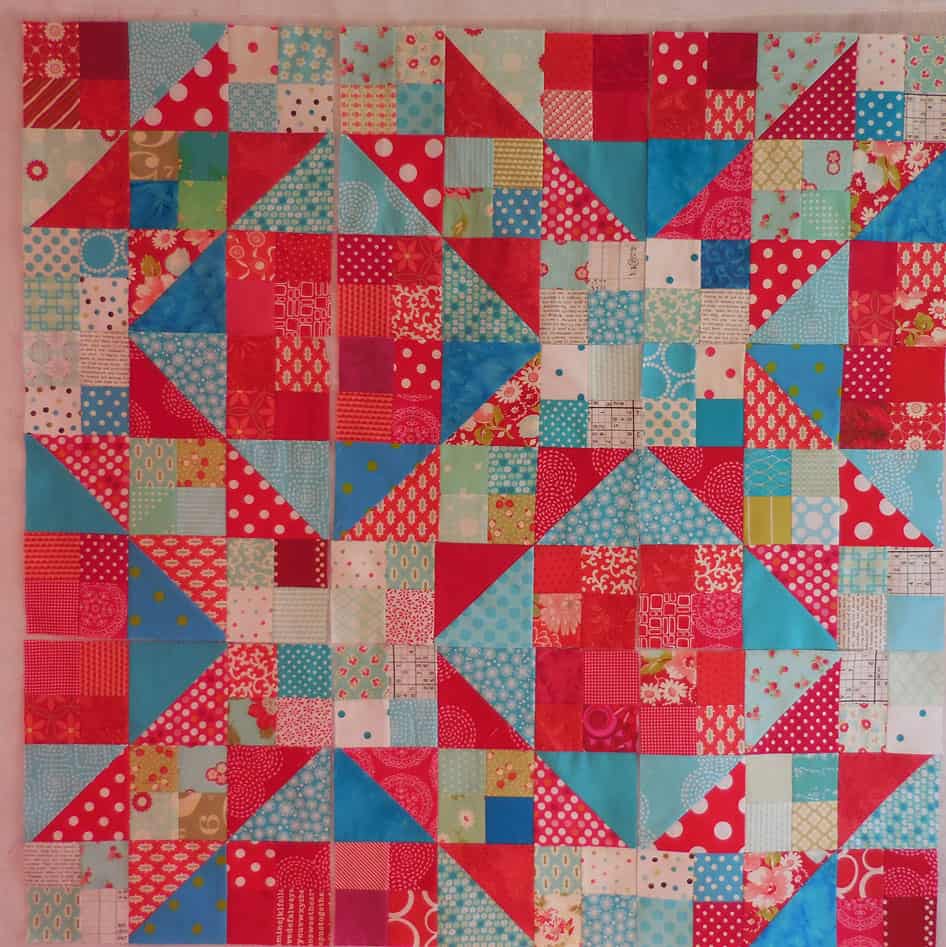
There are things I don’t like about it, mostly concerning value (or maybe contrast– I haven’t delved into the differences yet), but the overall look is good. I may not be done with this design yet, but we will see. I am not sure what I would do differently aside from changing placement of some of the fabrics or create a different border.
Yes, I worked really hard over the weekend and finished the top!
I also finished the back and binding, so the piece is ready to go to Colleen. Yay!
I started playing around with colors in 2012, so this quilt has been hanging around for longer than I thought. Those first tests were a lot different than what this quilt turned out to be. I am pretty pleased with the colors, though the darker turquoises do stand out. At least they are evenly spaced.
I have another group of fabrics destined for this pattern. Regardless of whether I actually use those fabrics for n.3 remains to be seen, but I don’t think I am quite done with this pattern yet. I’ll need a different border. This one is fine, but not for a second quilt.
I realized that I don’t talk much about ripping out stitching. I do it all the time and this week was no exception.
Stepping Stones n.2 – 1 seam left
I have been eager to finish the Stepping Stones n.2 top as it has been on my design wall for too long. In my rush, I put a block together wrong and then put it in the quilt. With one seam to go to finish the top, I had to rip out a bunch of seams. Yes, I had to. I looked at the quilt for a long time time, trying to decide if I could live with the mistake. I didn’t want to rip when I was so close to finishing, but I just couldn’t live with the problem.
Stepping Stones n.2 – 1 seam left + error
The look is almost right, but if the viewer looks hard, there is a disruption in the pattern. Also, all of a sudden two like fabrics were placed together, which I really worked hard to avoid all through the piecing process.
I am sure you can’t avoid the big circle, but refer back to the photo above to see the problem. Look down and to the left one row to the see the duplicate fabrics (not circled.
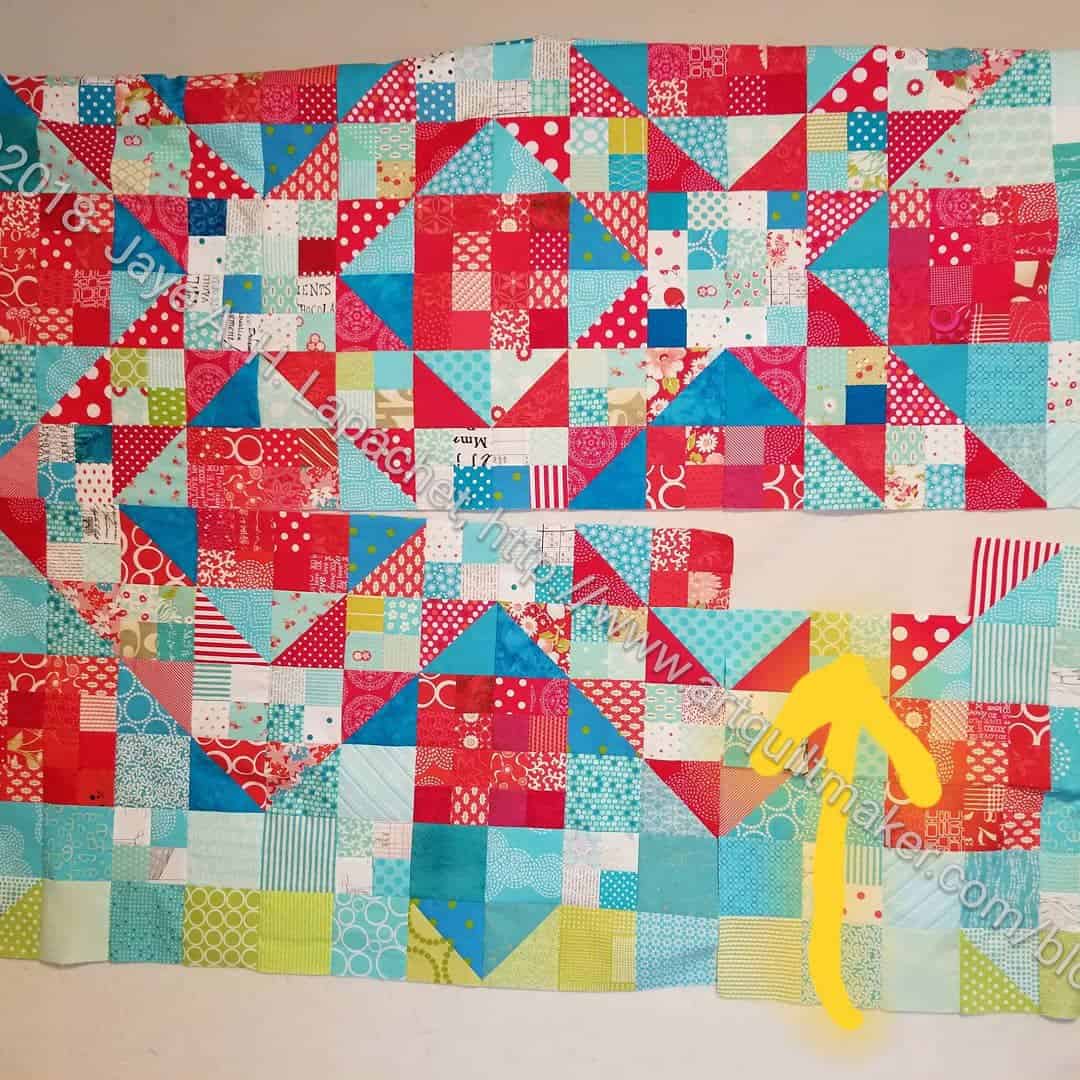
Stepping Stones n.2 – lower right hand corner – ripped
Yep. I ripped. I thought I would just take out one row from one block and sew it back in. I ended up taking part a good portion of the lower right hand corner. The photo with the arrow is before I ripped out some other pieces.
I am in the process of sewing the bottom back together and finishing the top.
Christa Watson has a new pattern out called Stepping Stones. It looks like a reimagined Rail Fence to me, but who am I to say? I had to stop contemplating the names of blocks, however and get back to sewing.
Stepping Stones Border Block – Left Side
I try to make a CrockPot meal for Mondays so that we can come home, eat and I can go to Craft Night in a timely manner. Craft Night was at my house on Monday and the meal was over and done before I even needed to prepare the tea and all. I had about half an hour of time, so I raced up to my workroom and sewed! I didn’t have a lot of time over the weekend to sew, so this was a good way to scratch that itch for sewing.
Stepping Stones Border Block- Right Side
I wasn’t able to finish a lot, but every little bit helps. I had cut some fabric, so I could work on a couple of border blocks, which I did. These blocks will allow me to put together another row of the top.
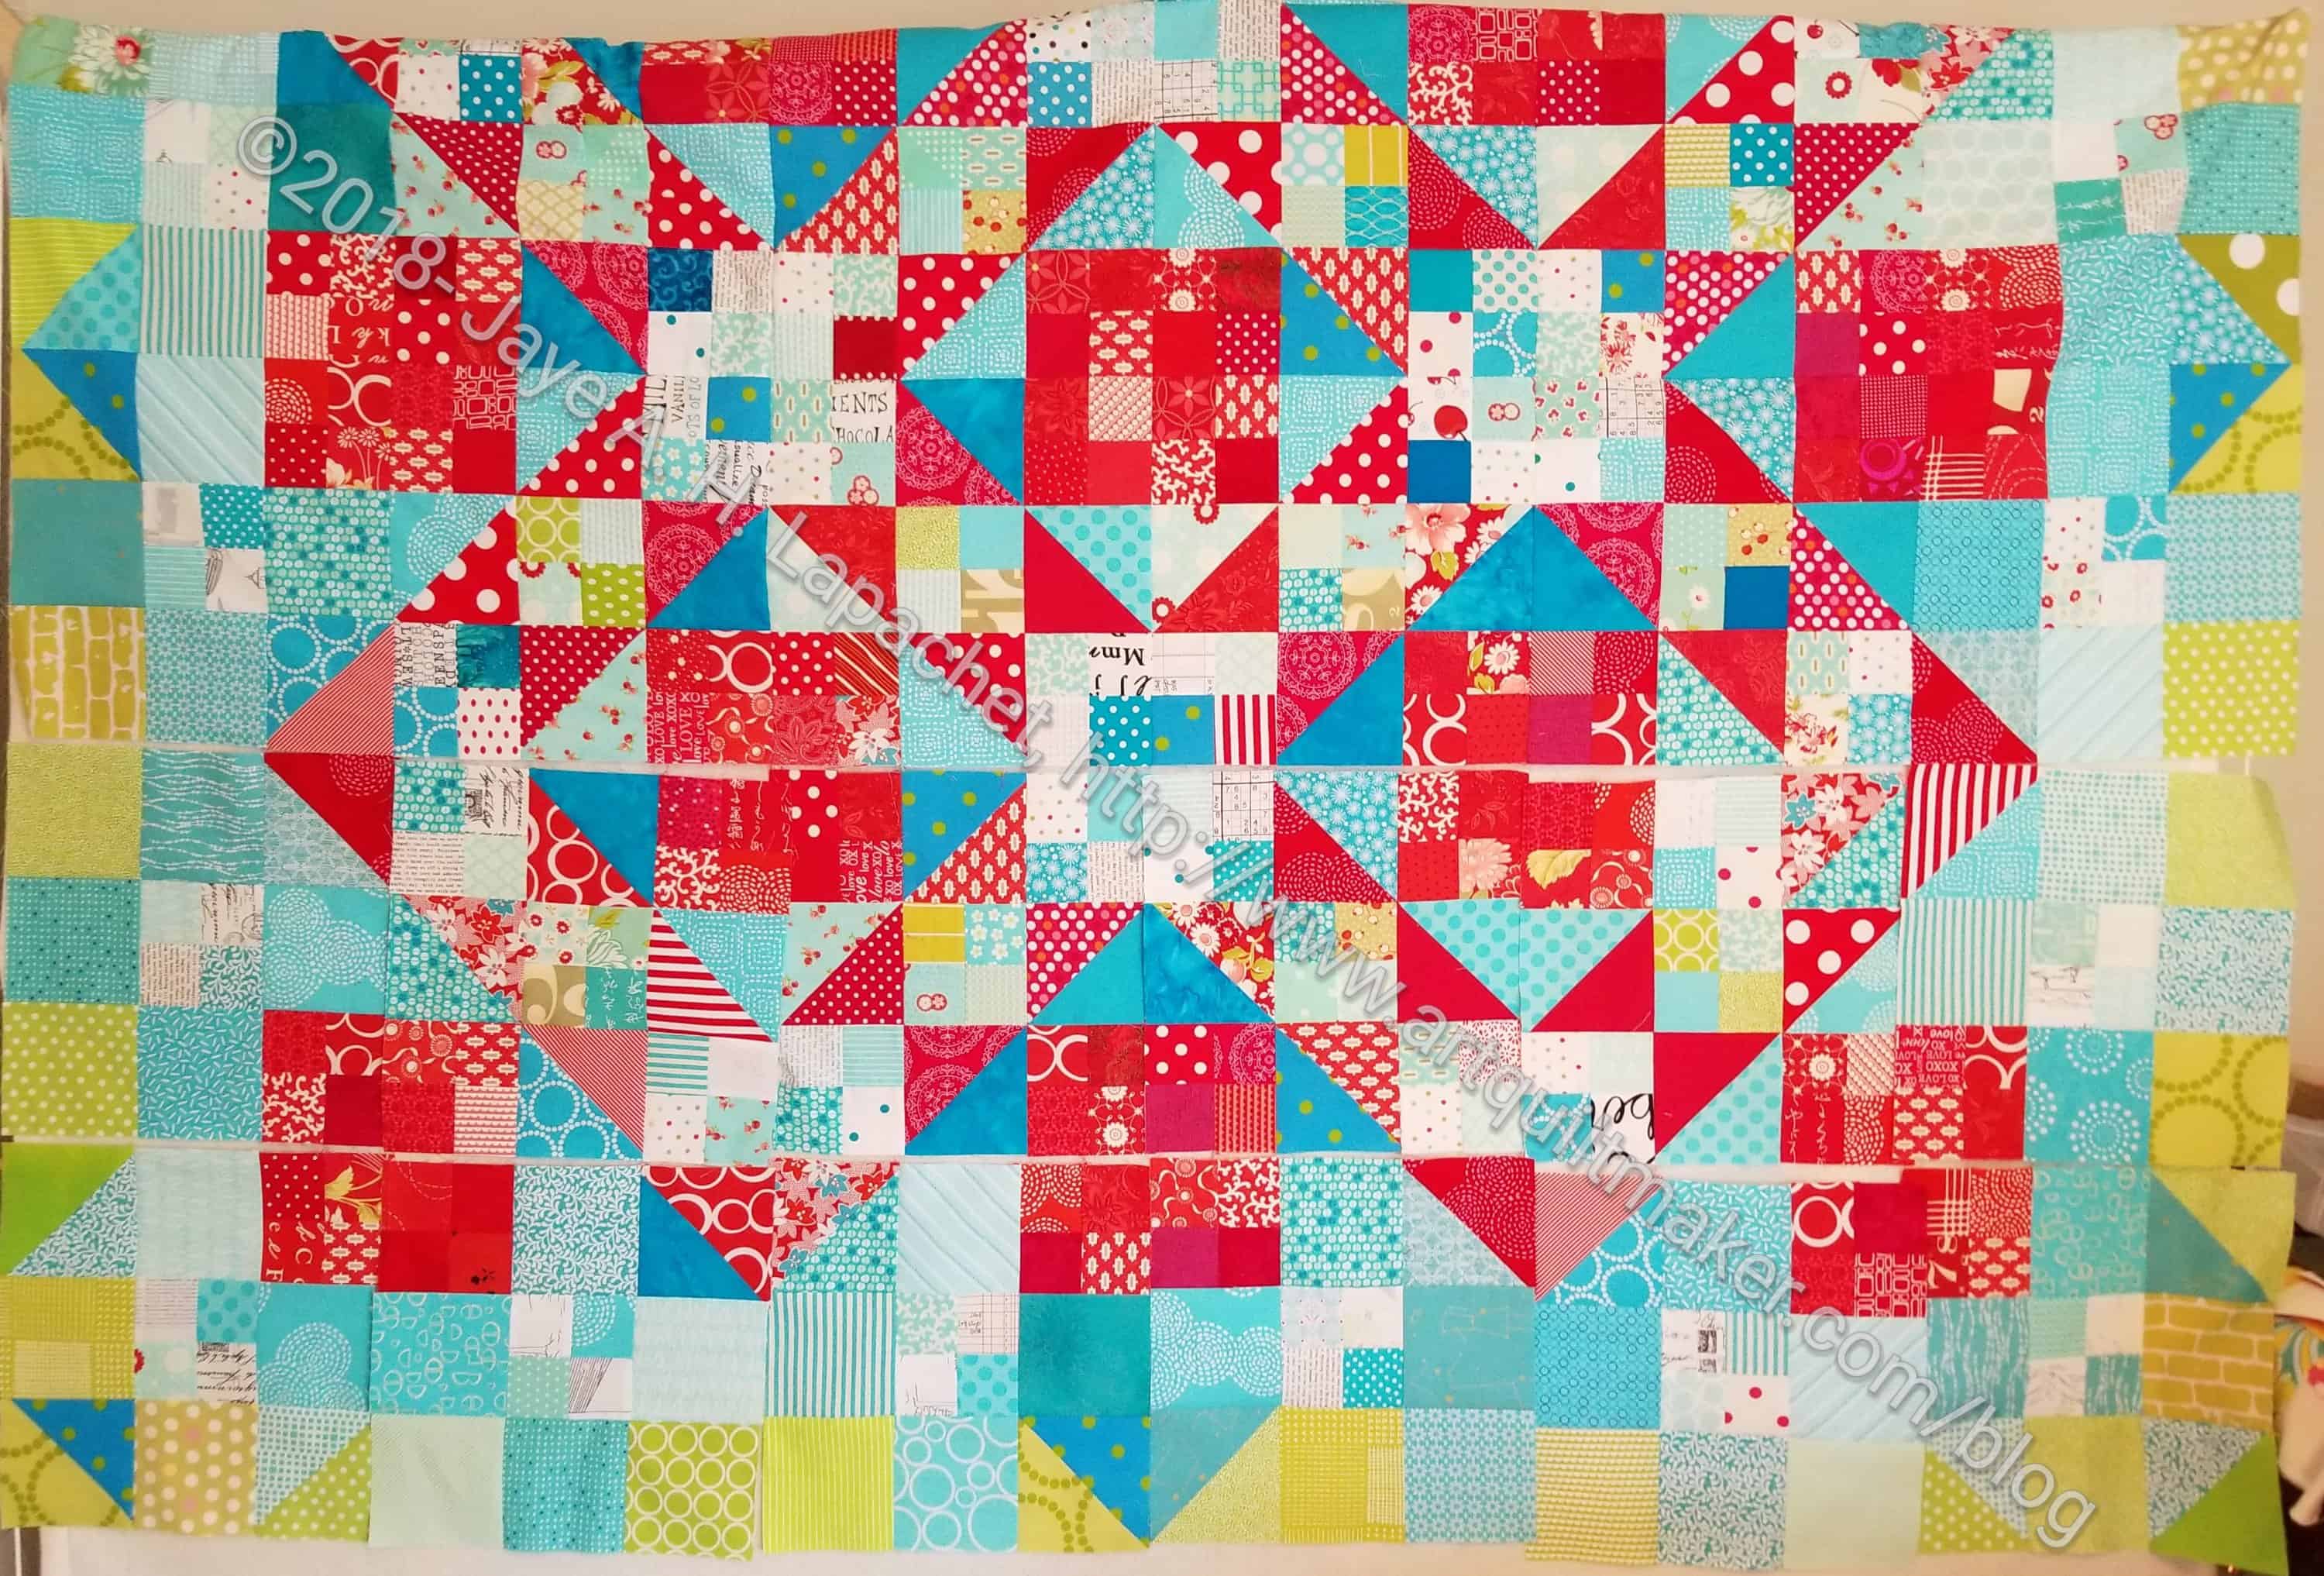
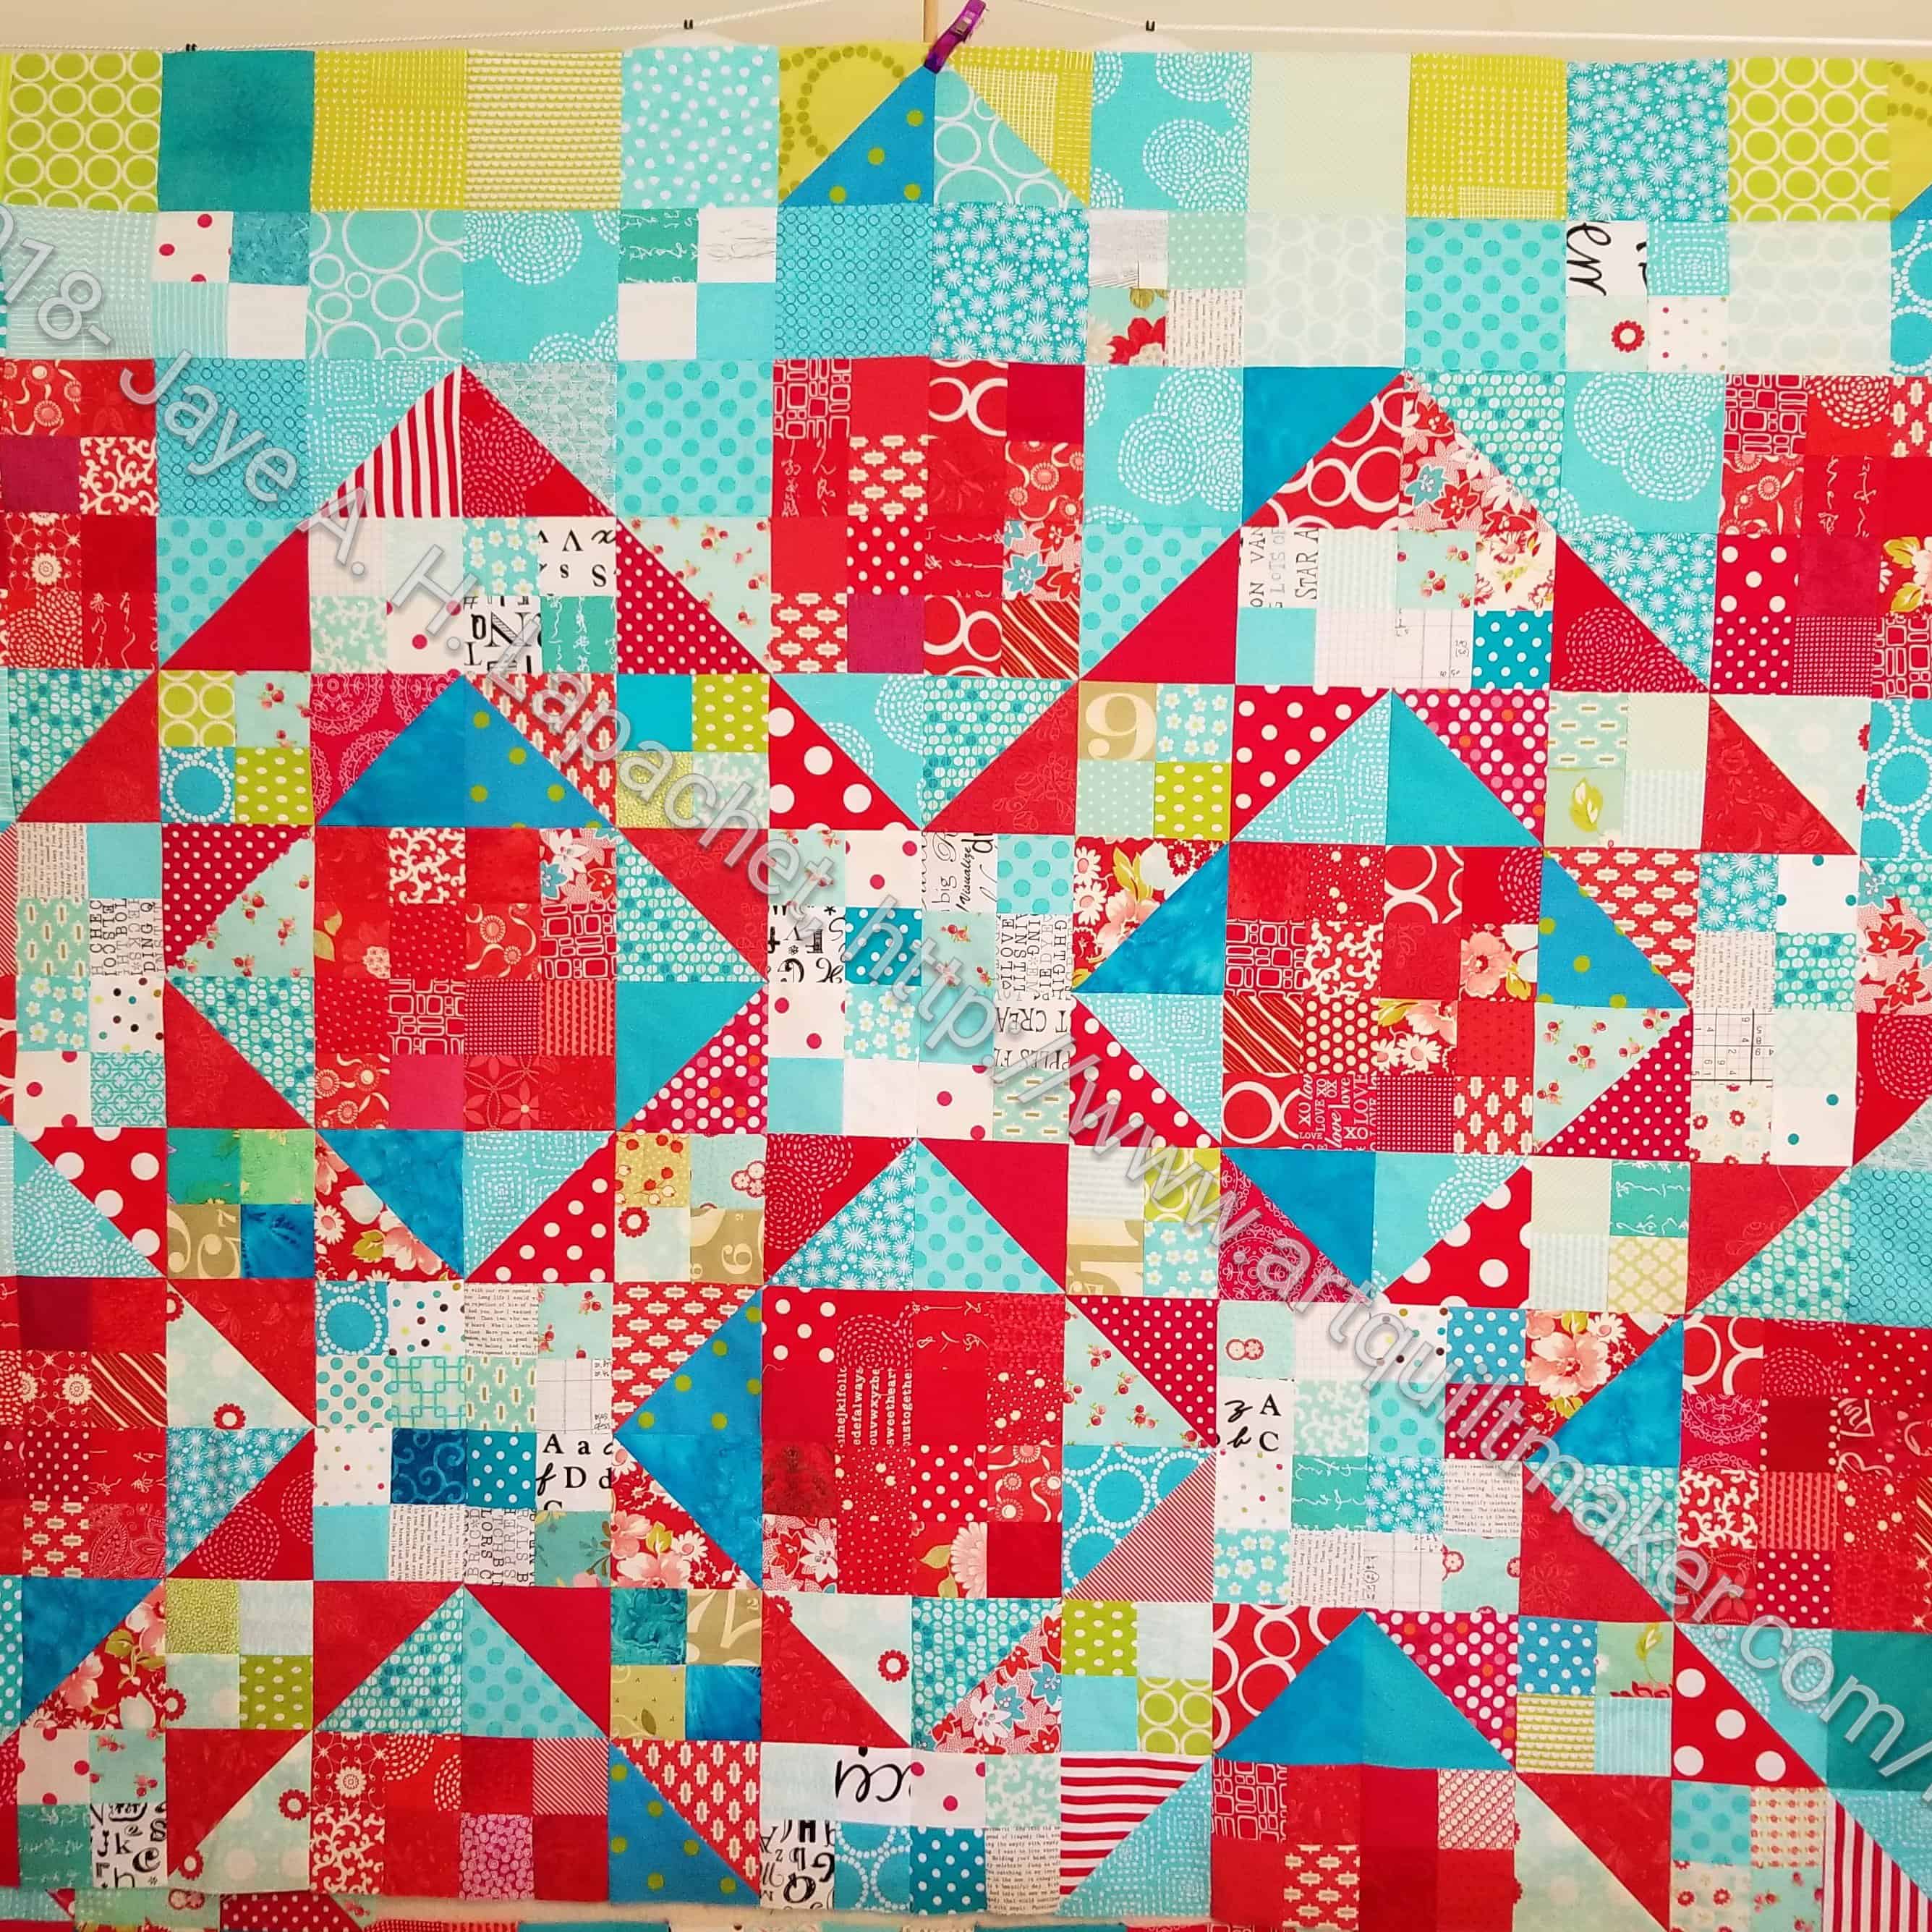
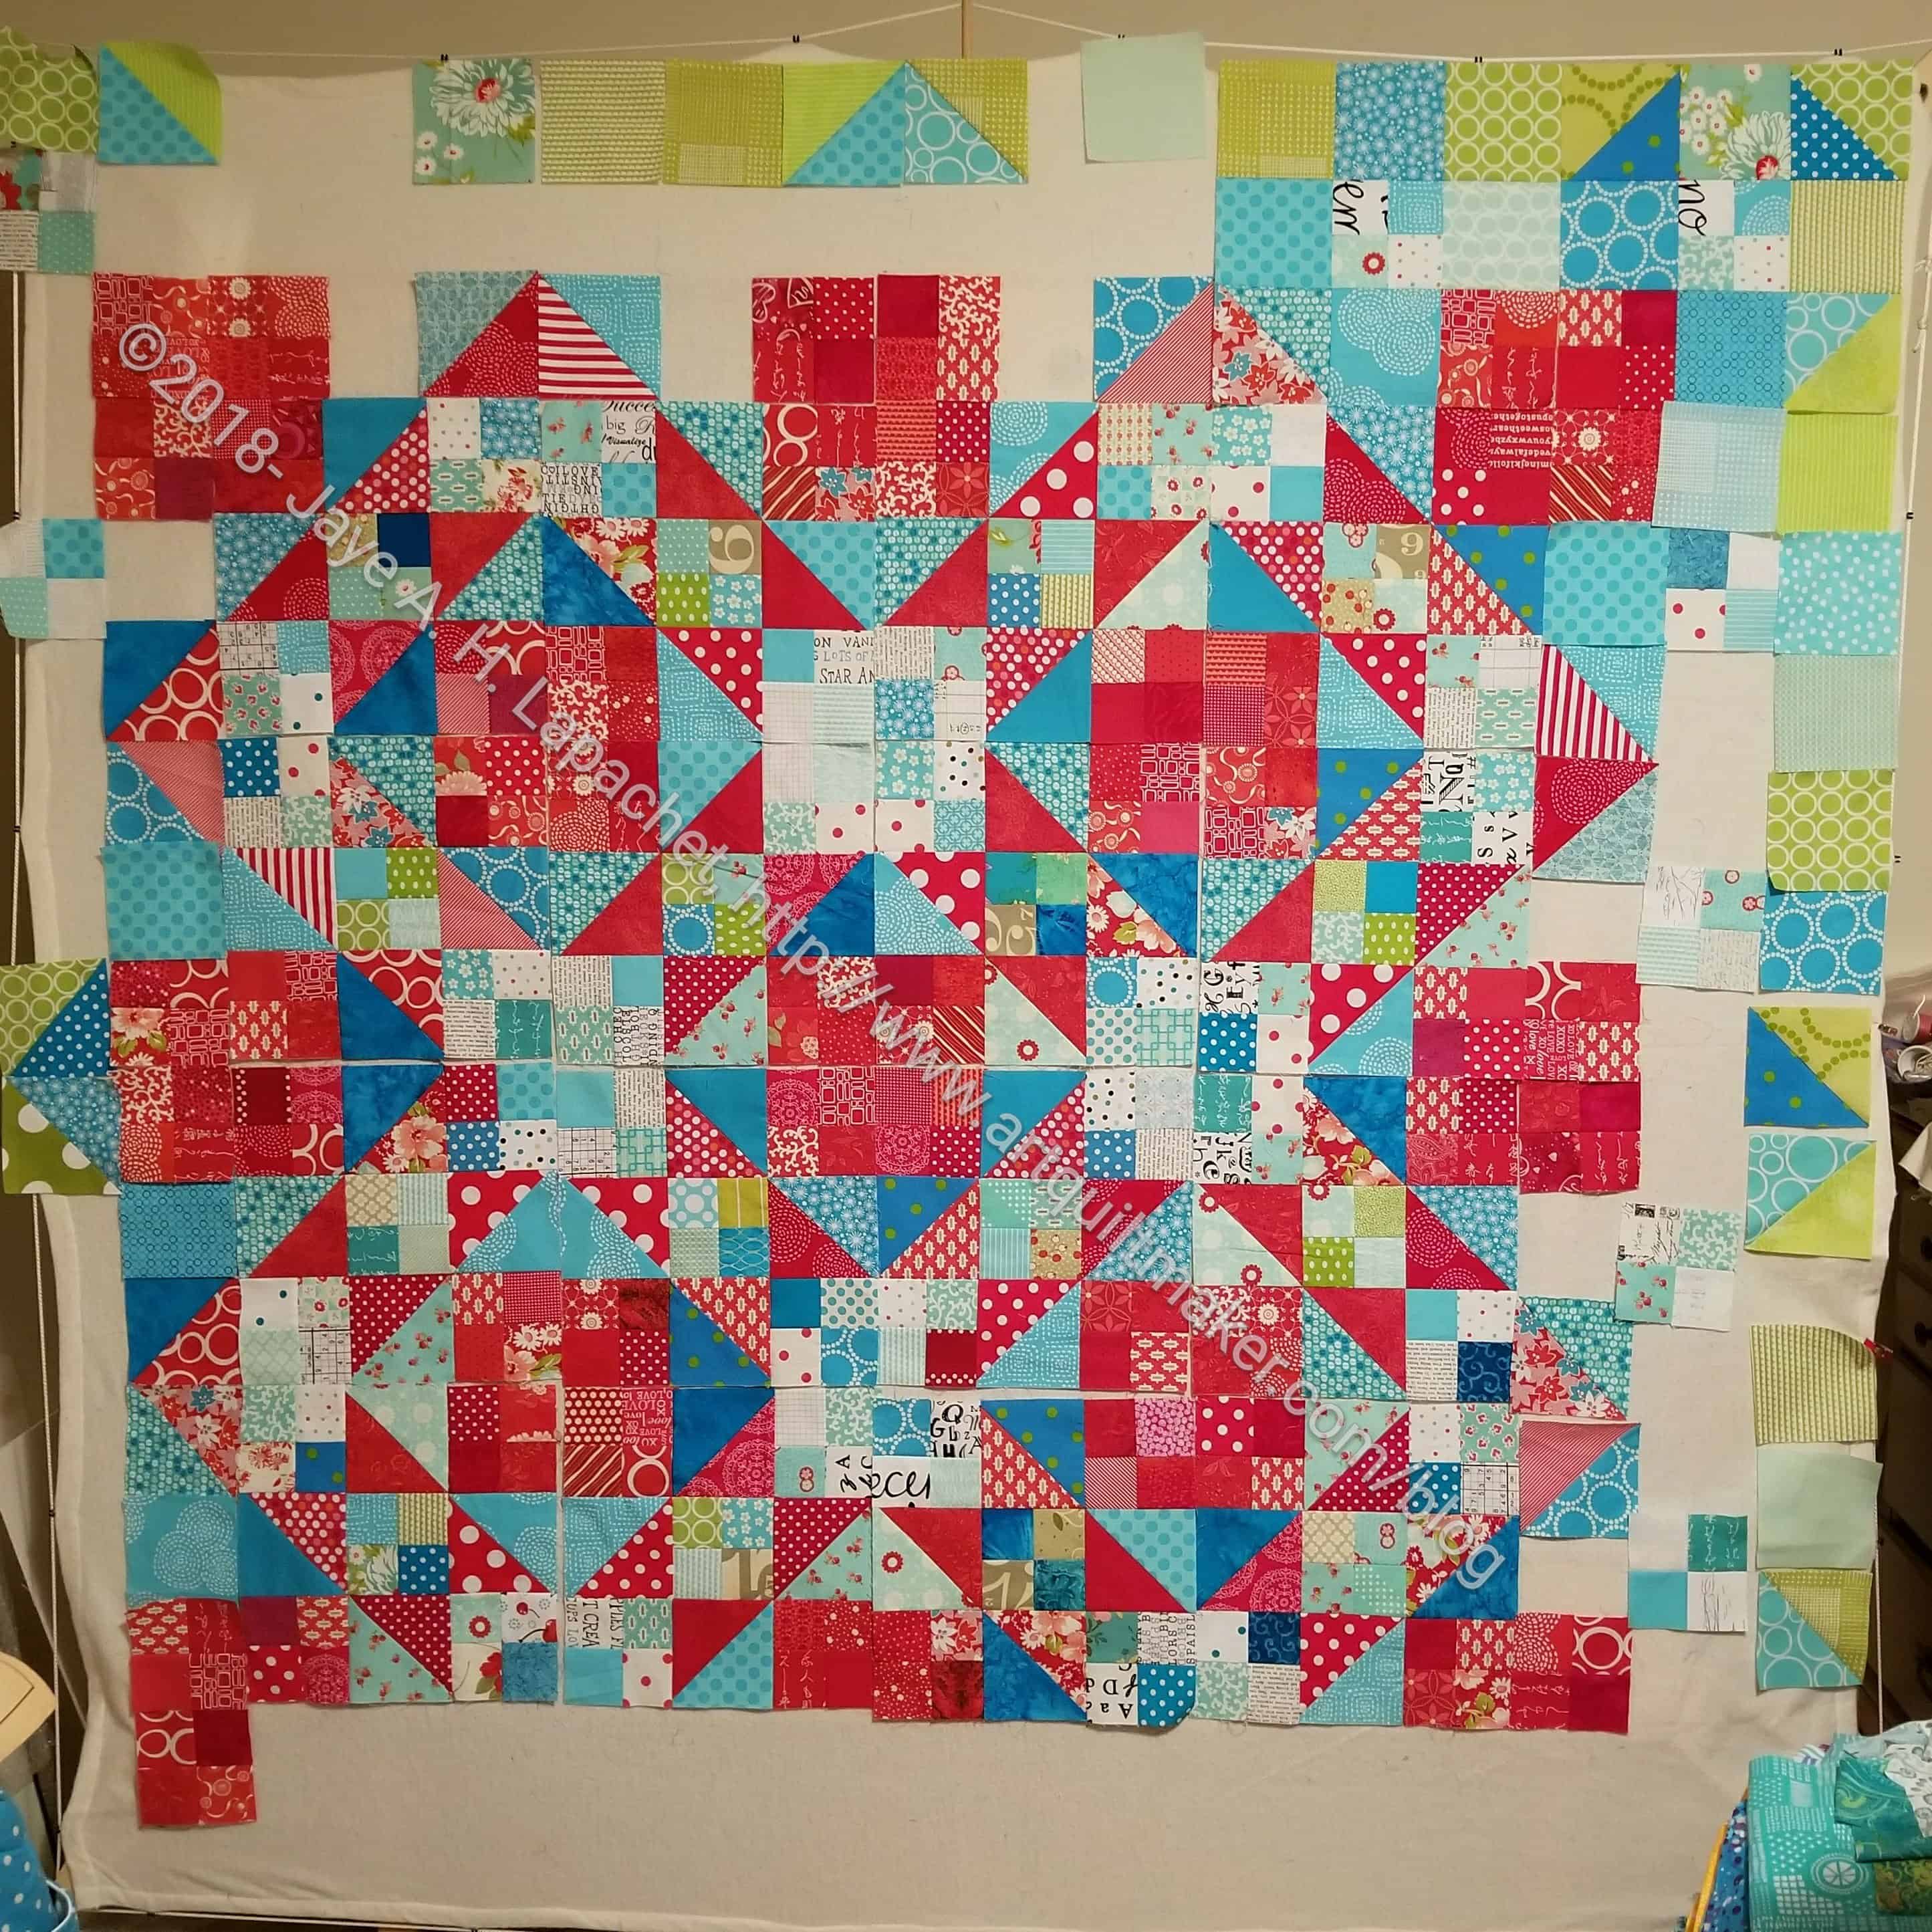
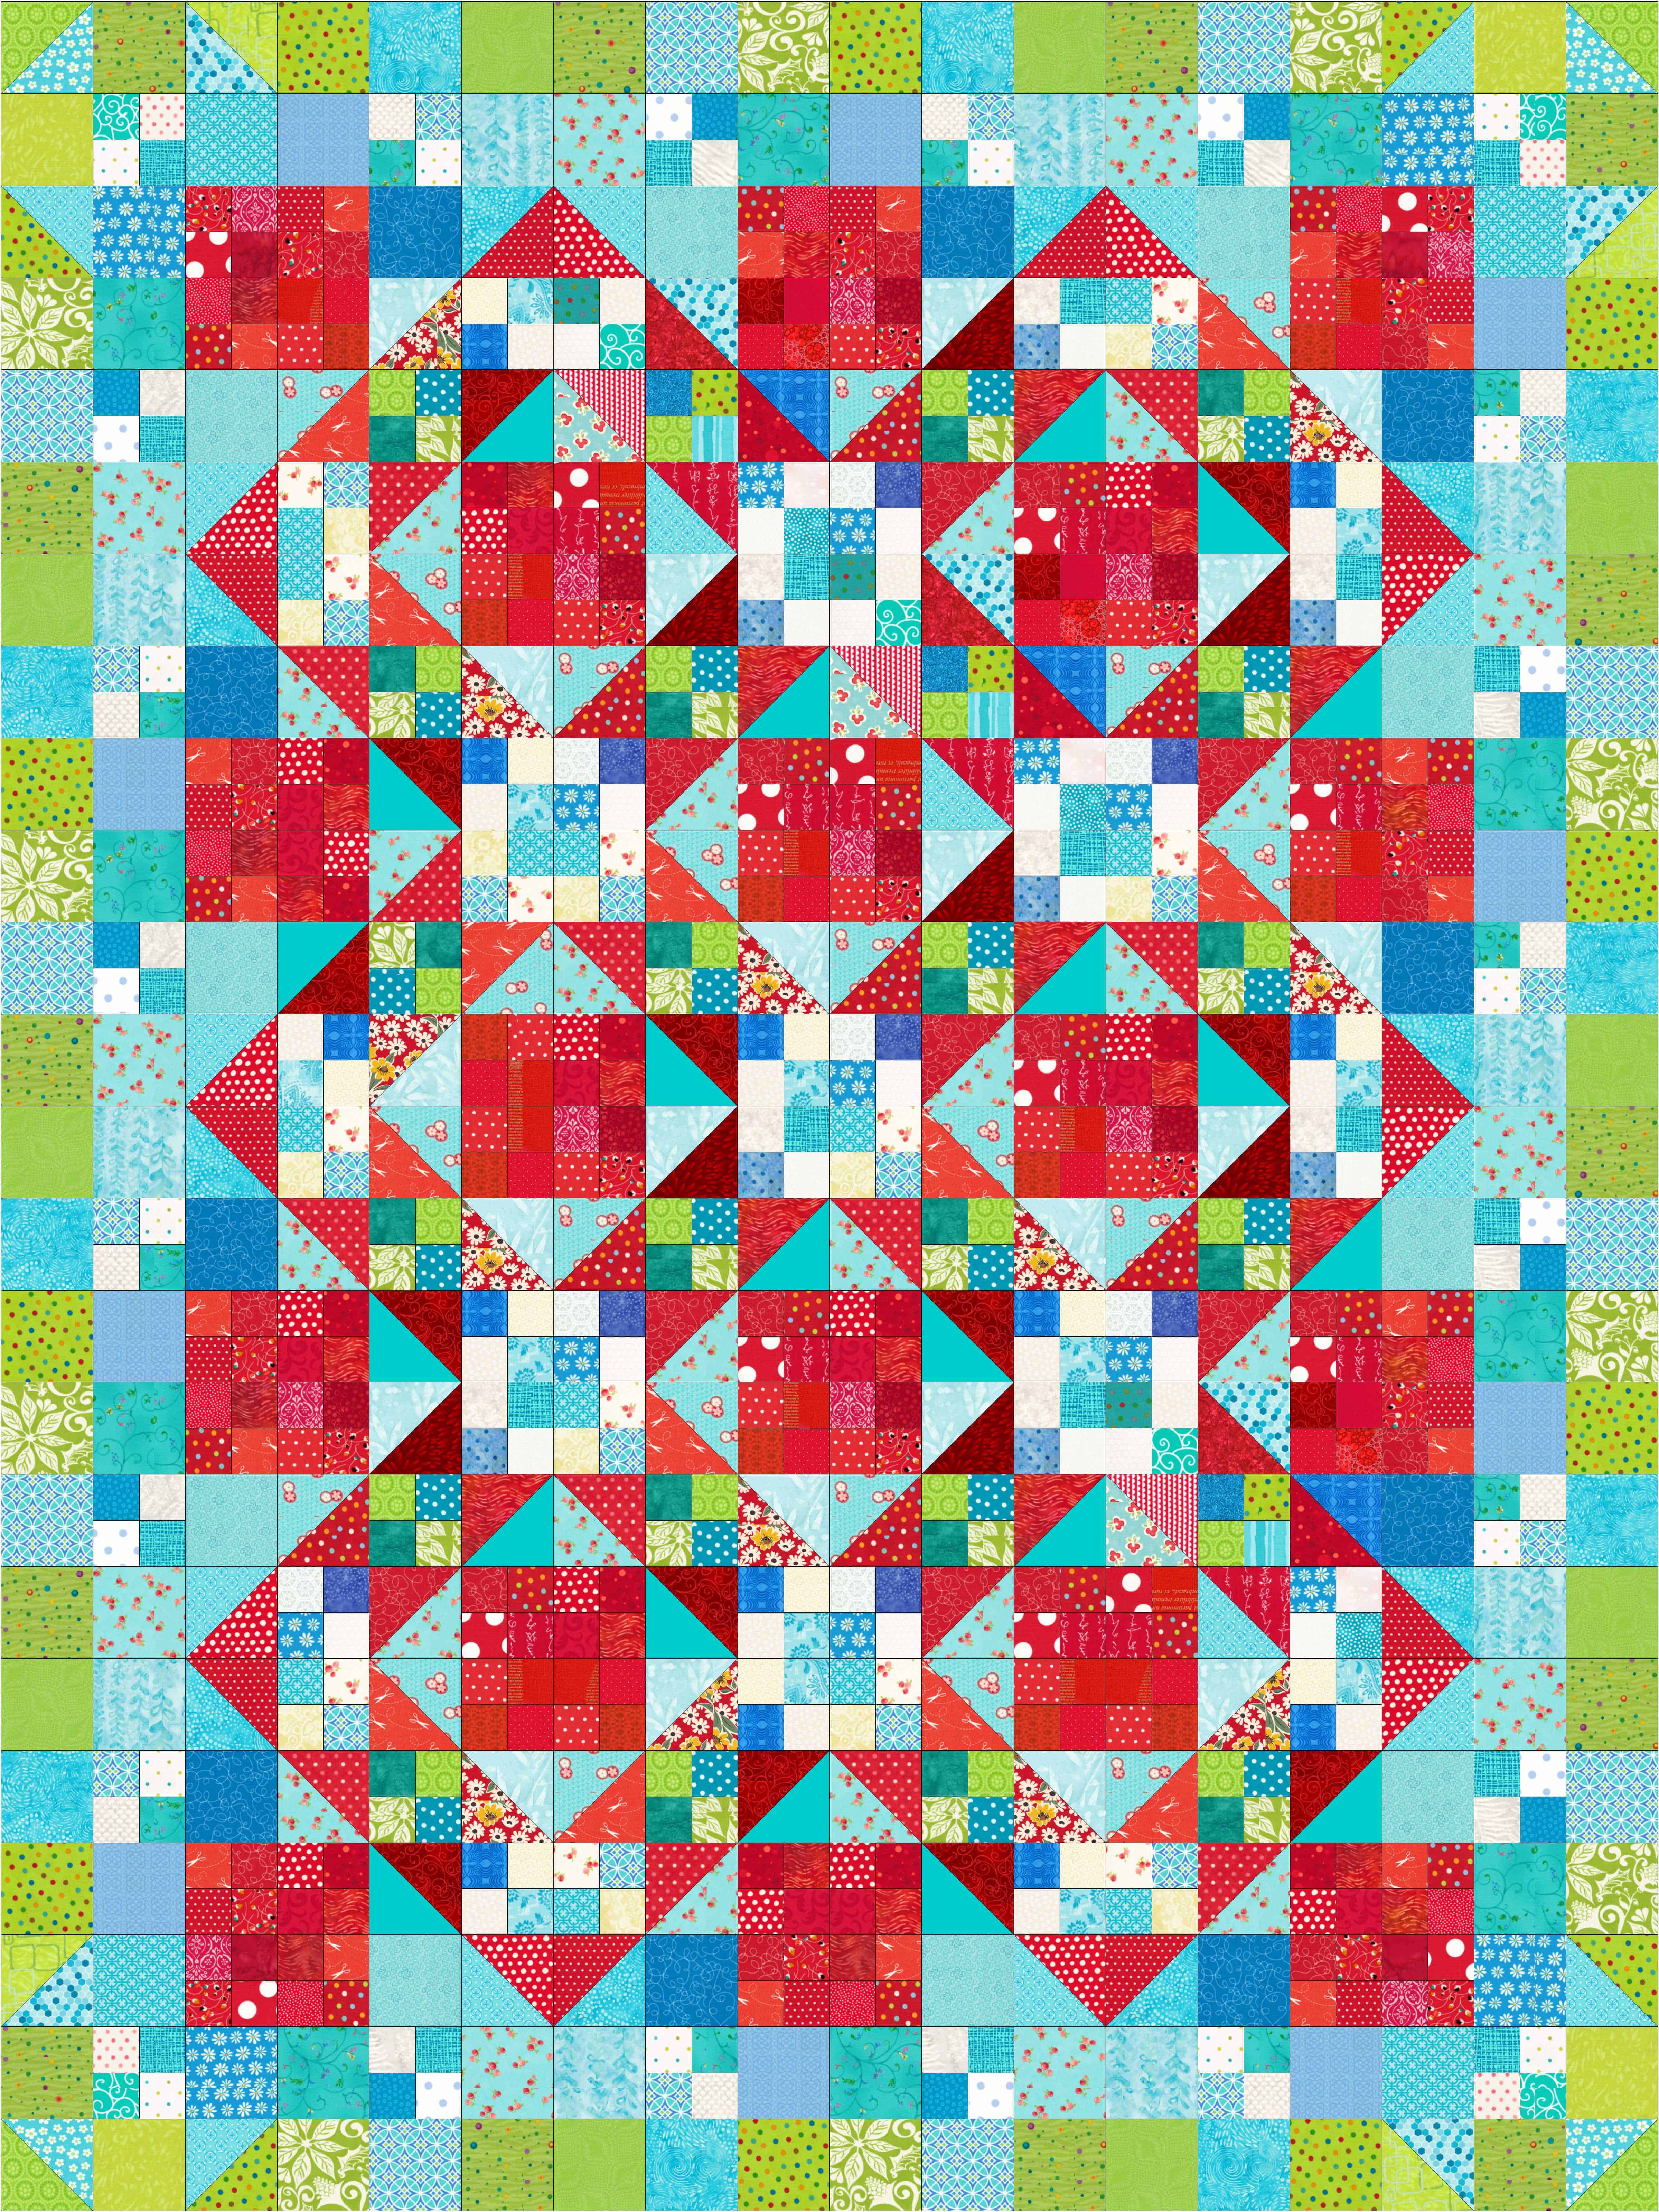
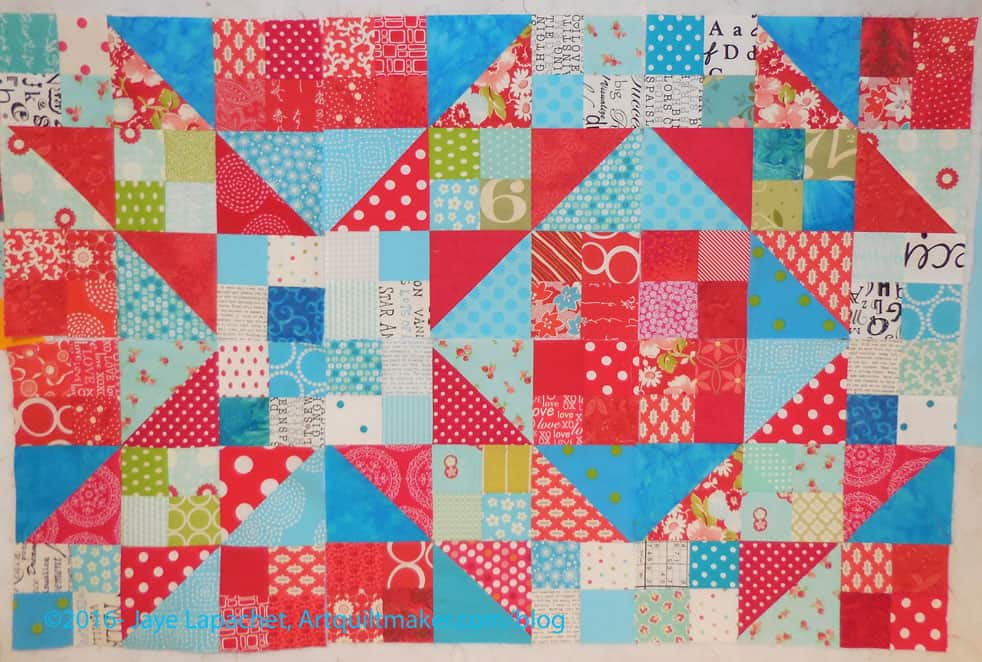
The green and blue HSTs indicate the middle of the quilt and prove I am halfway finished with the top. I know you believe me, but sometimes I need to prove to myself I am making progress as slow as that progress might be.
Aside from cutting more pieces, which I have mentioned, I have to make a few more HSTs. I can’t actually see one corner of the quilt, because there is some stuff piled in front of it ( 🙁 , I know). Once I sew the latest row to the top, I’ll be able to pull the quilt up and really work on the bottom.
Progress might be painfully slow, but I am making progress. It would be really great to finish this top before July 7, but we will see.
I made really good progress over the weekend. I had only a few seams to sew in order to finish half of the quilt. The quilt is starting to look like something!
I have had to cut a lot of blues and greens for the border, so that is taking time, but at least I can do a few at a time in between everything else.
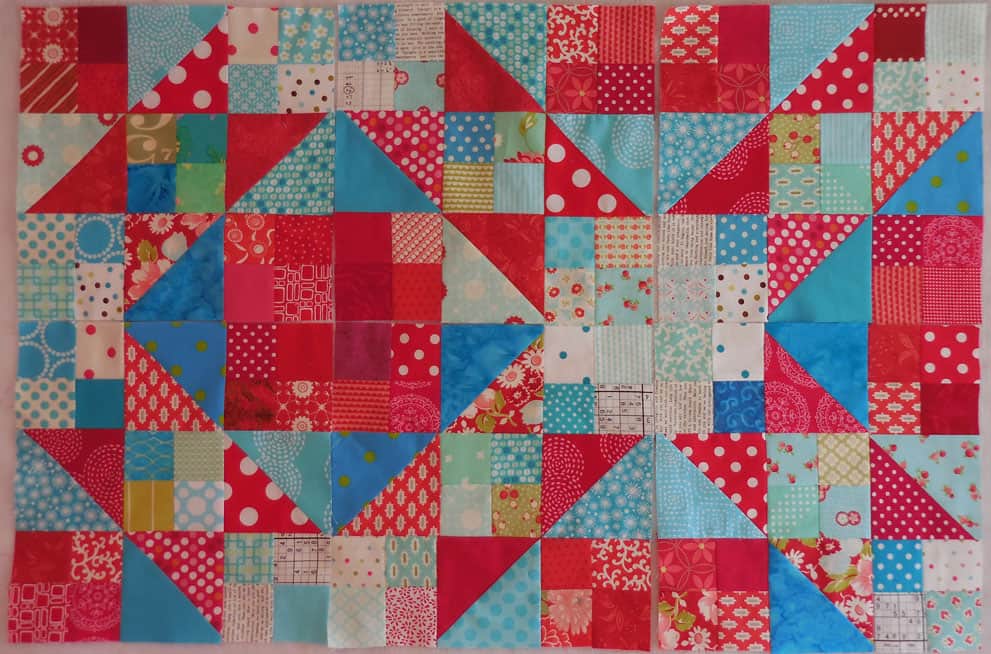
Looking at this half makes me think that I might have to work on another one of these. I would like to see the framework of the red diamonds more filled in. On the other hand, if I used more red, would the Sawtooth Stars (check the middle, right under the red square) show up? Perhaps fabric with less contrast? Red and pink or orange and yellow? I’ll have to play around.
I also need to work on the border of a new version. This border is ok, but not great. Not sure why, but it isn’t doing much for me.
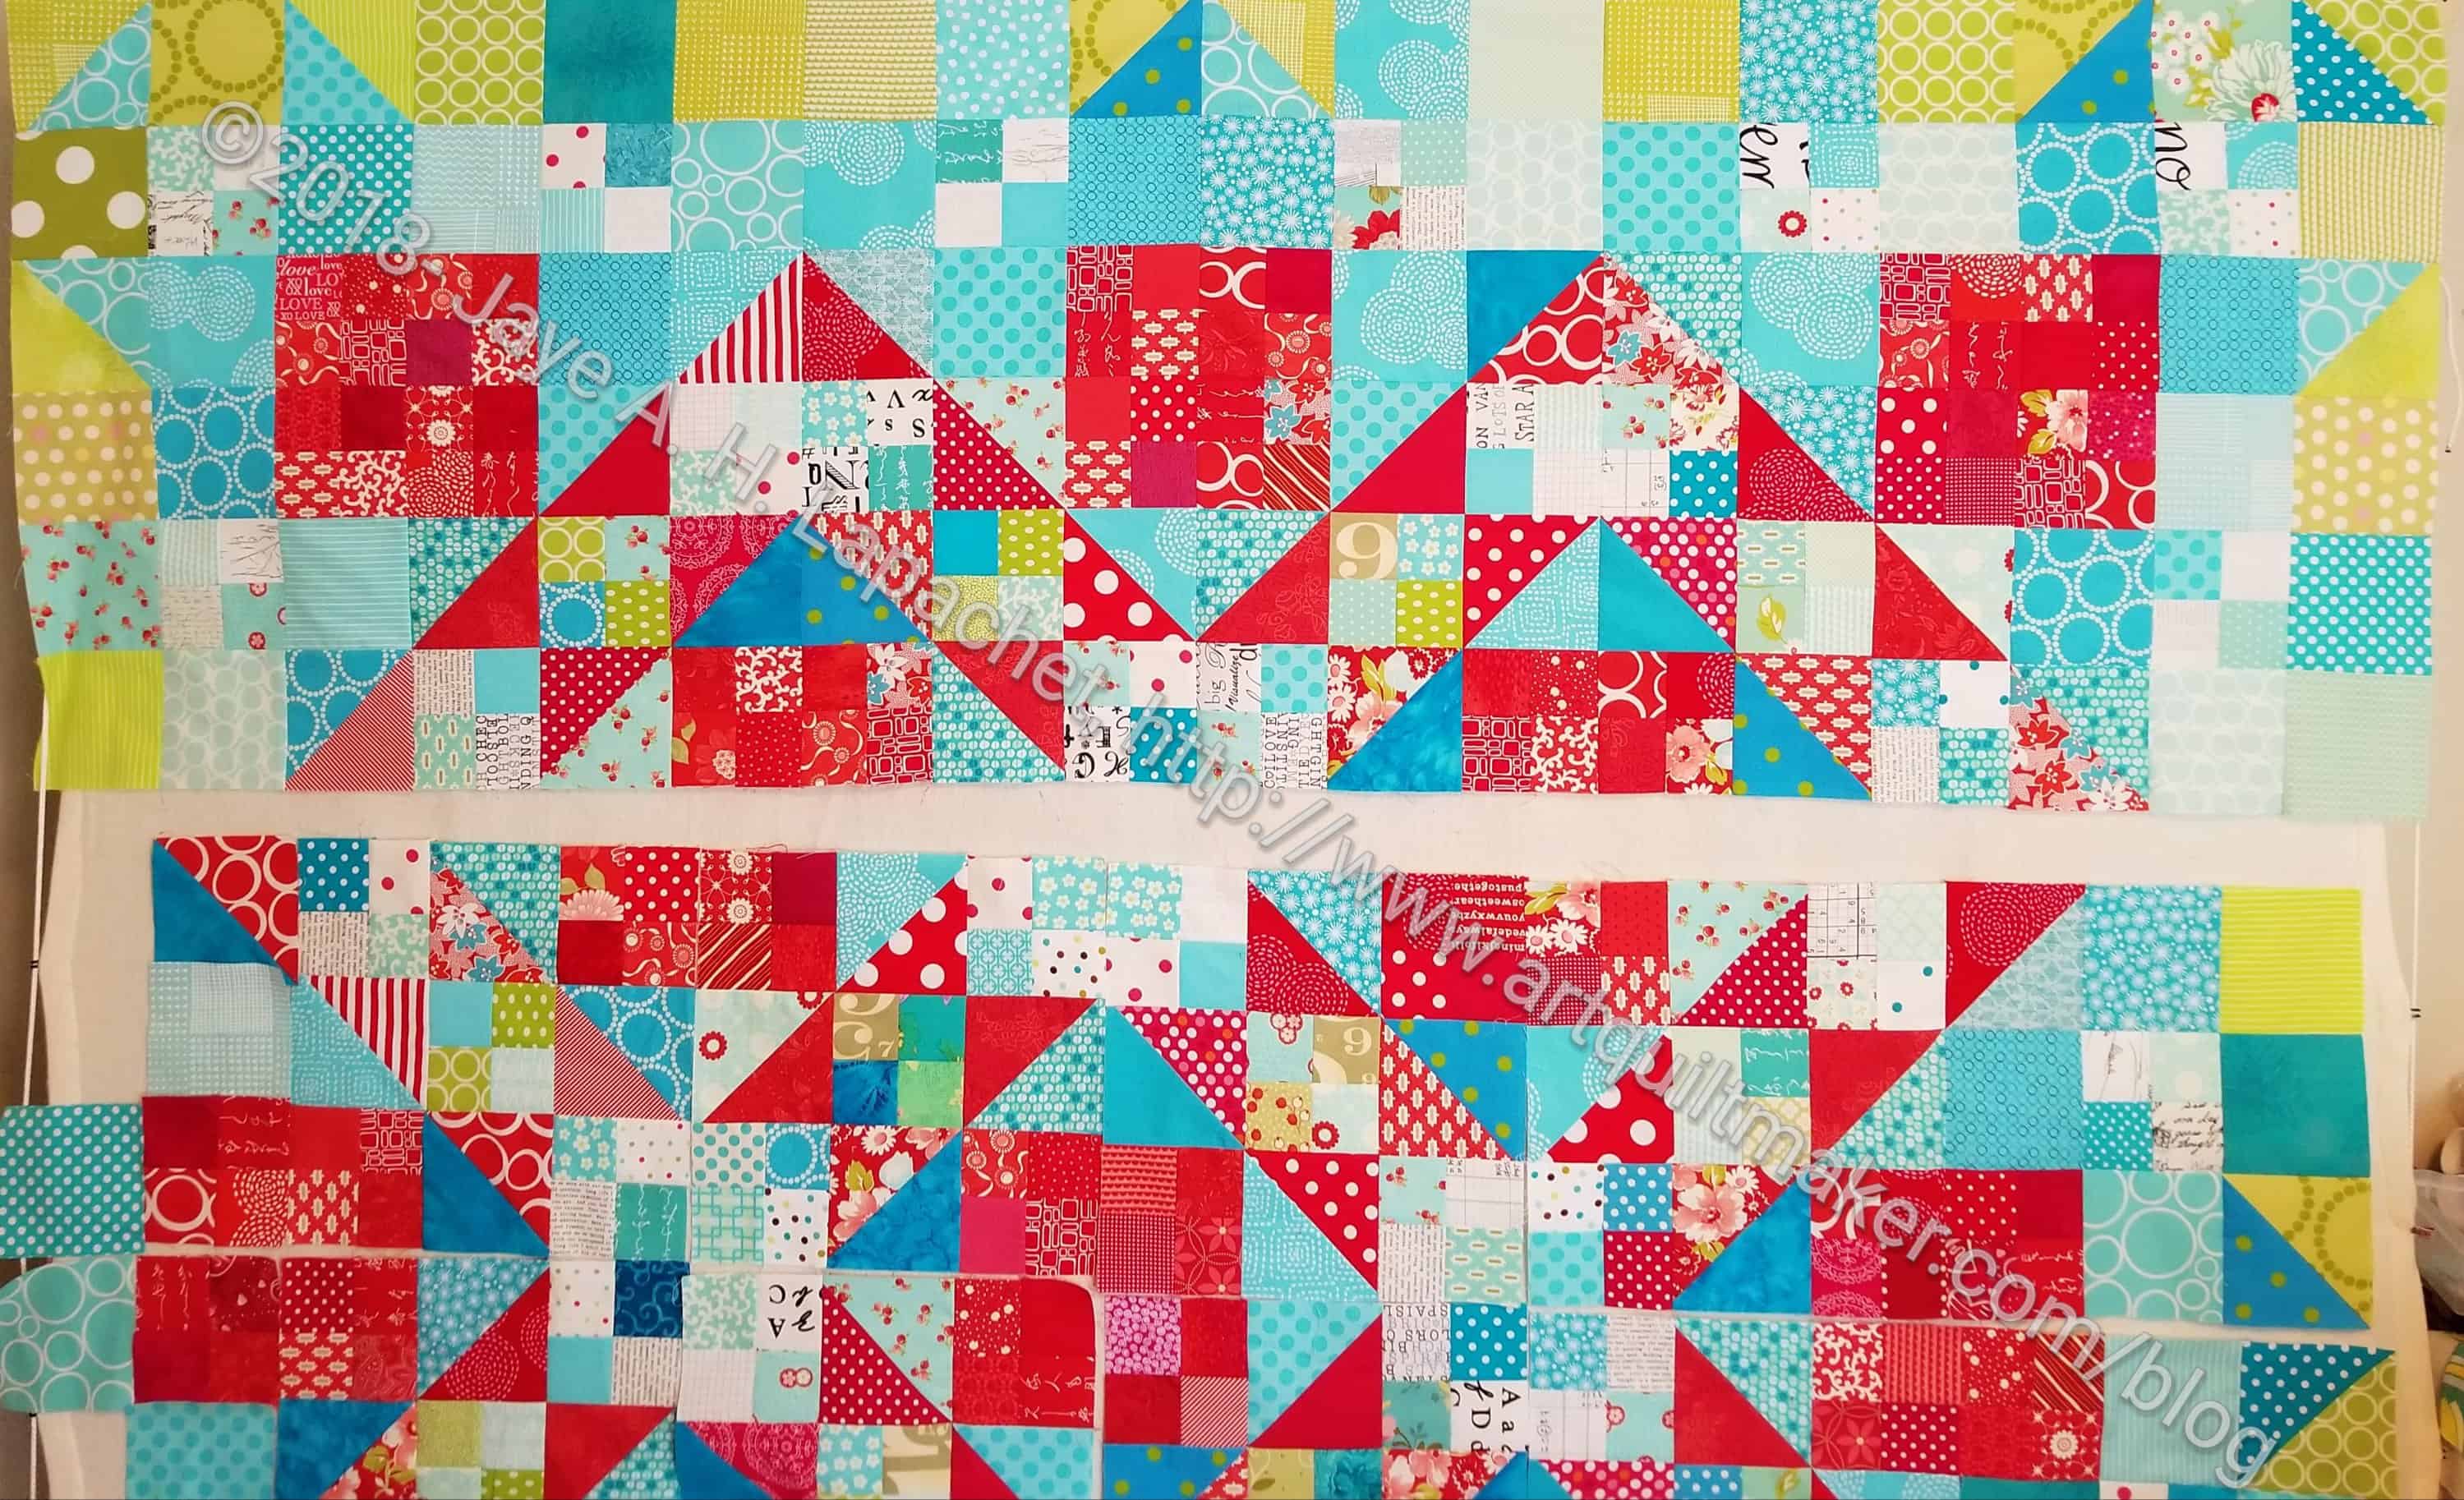
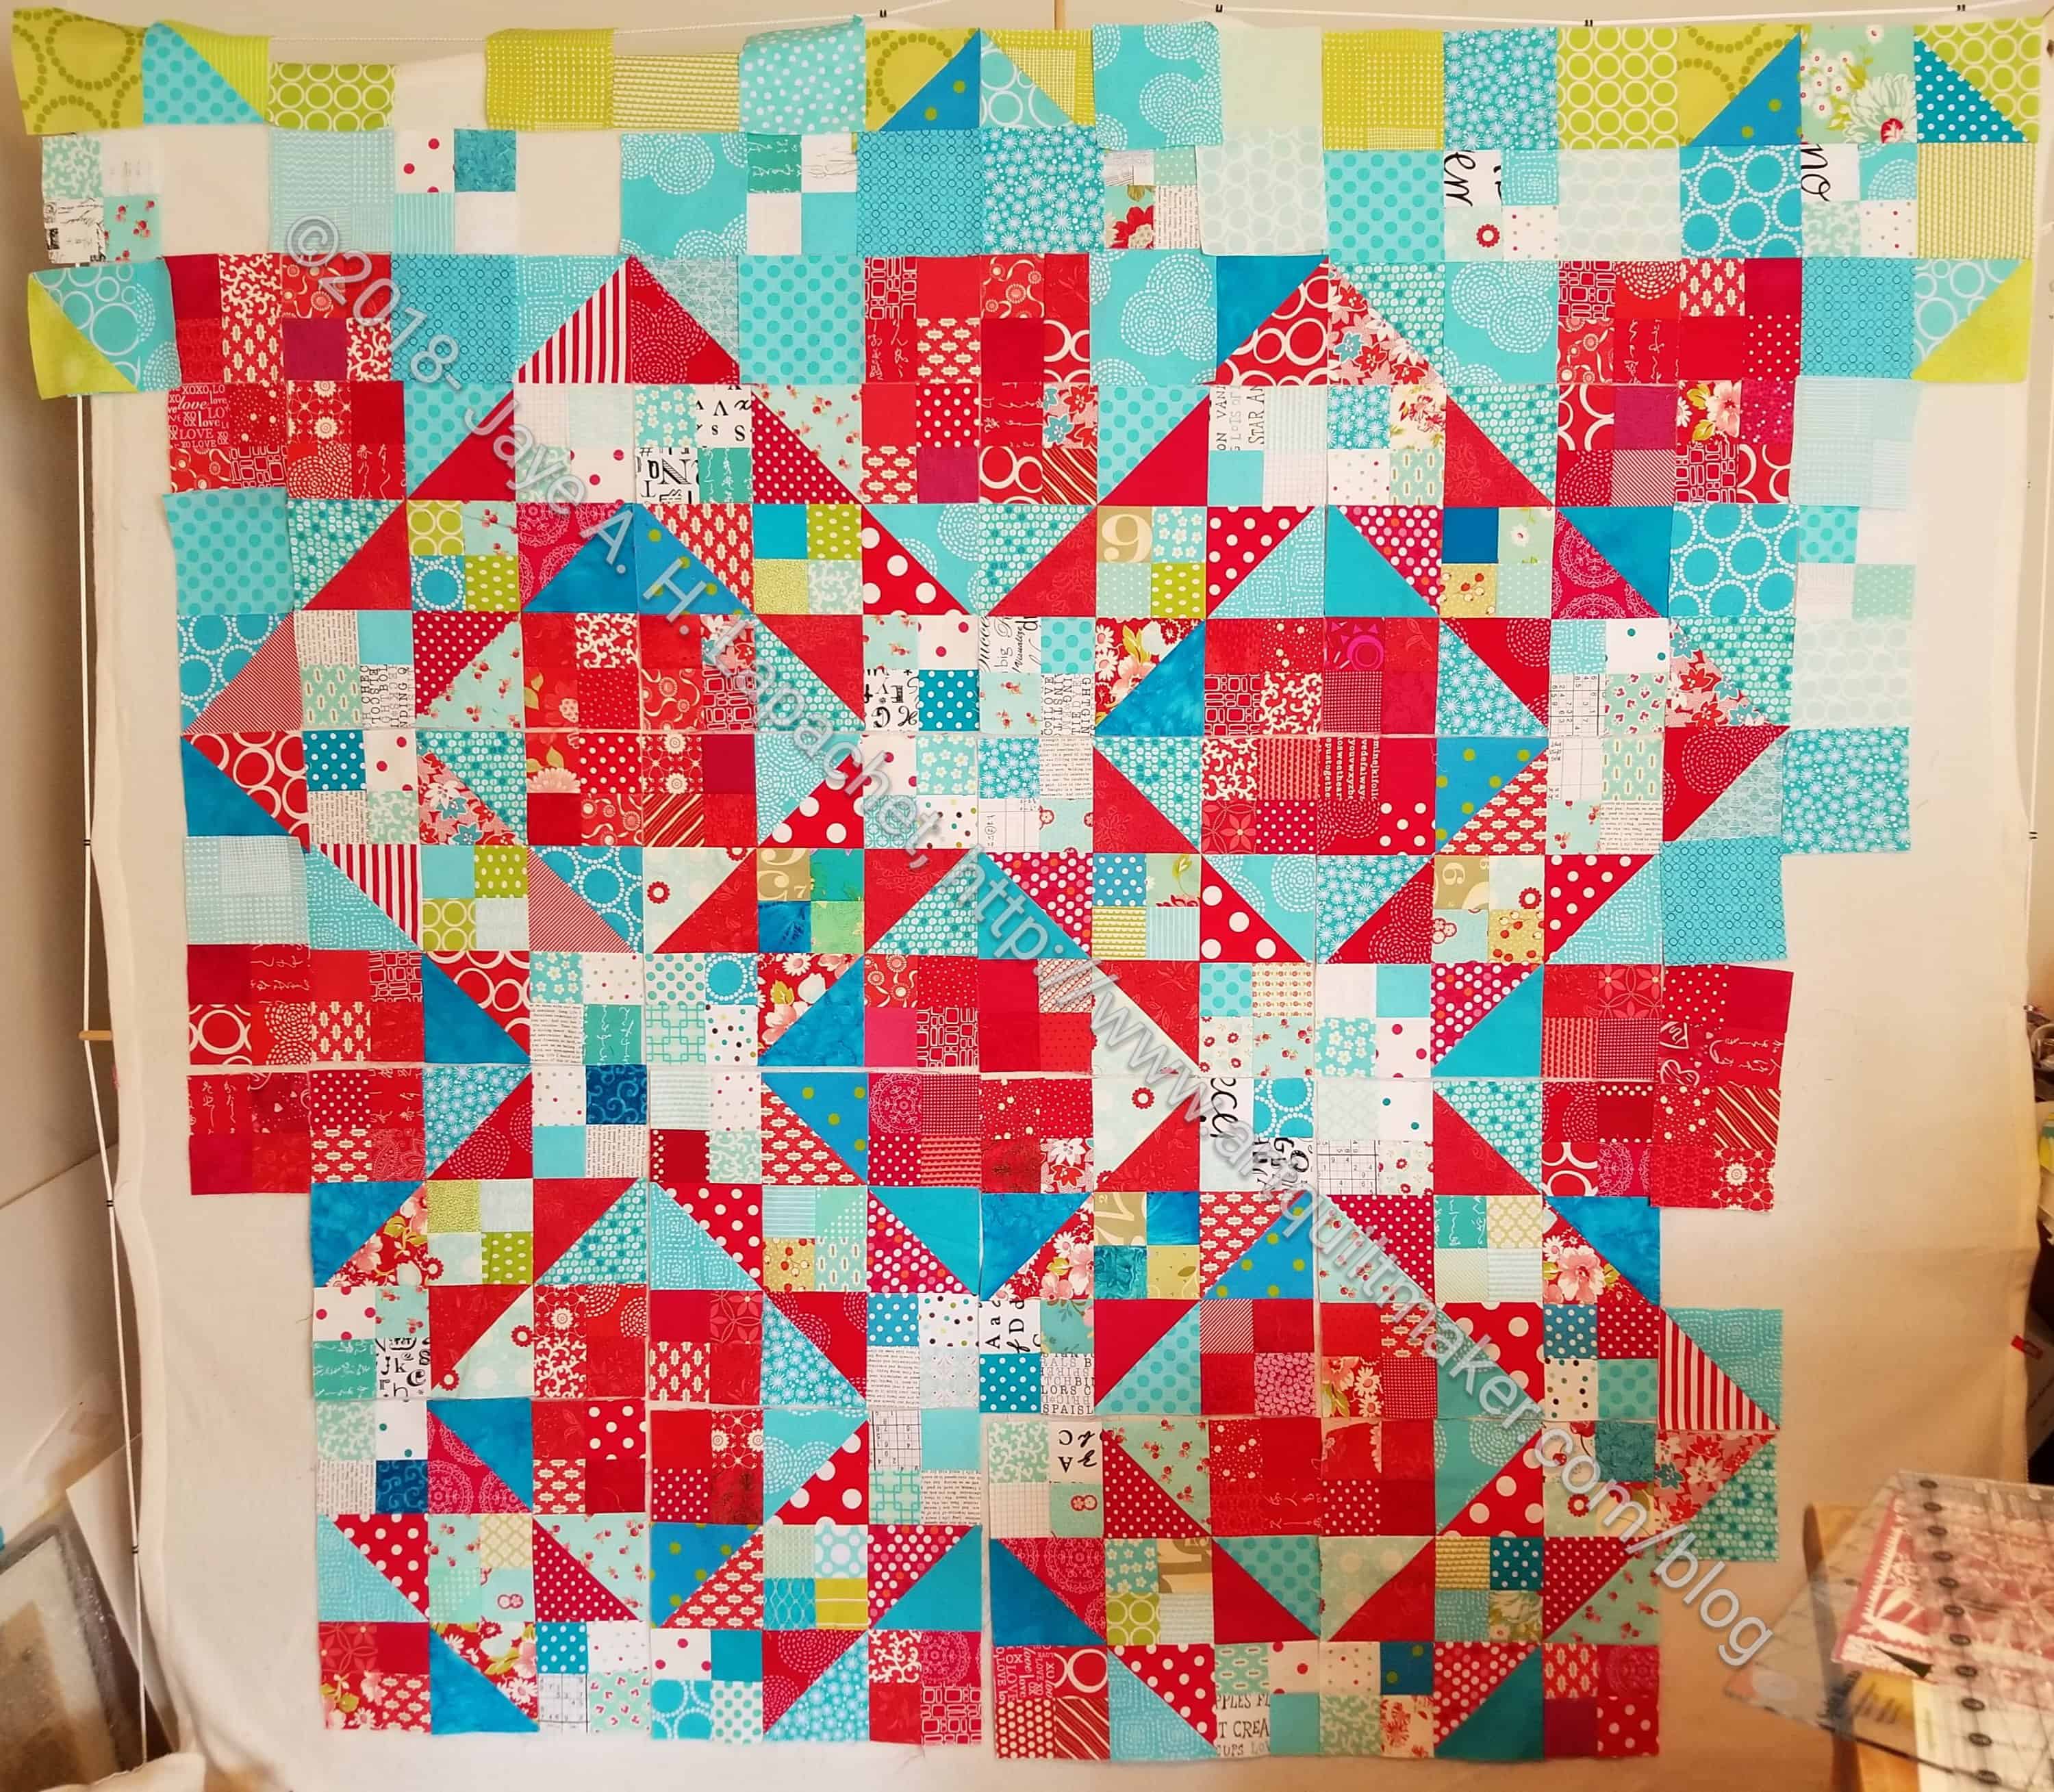
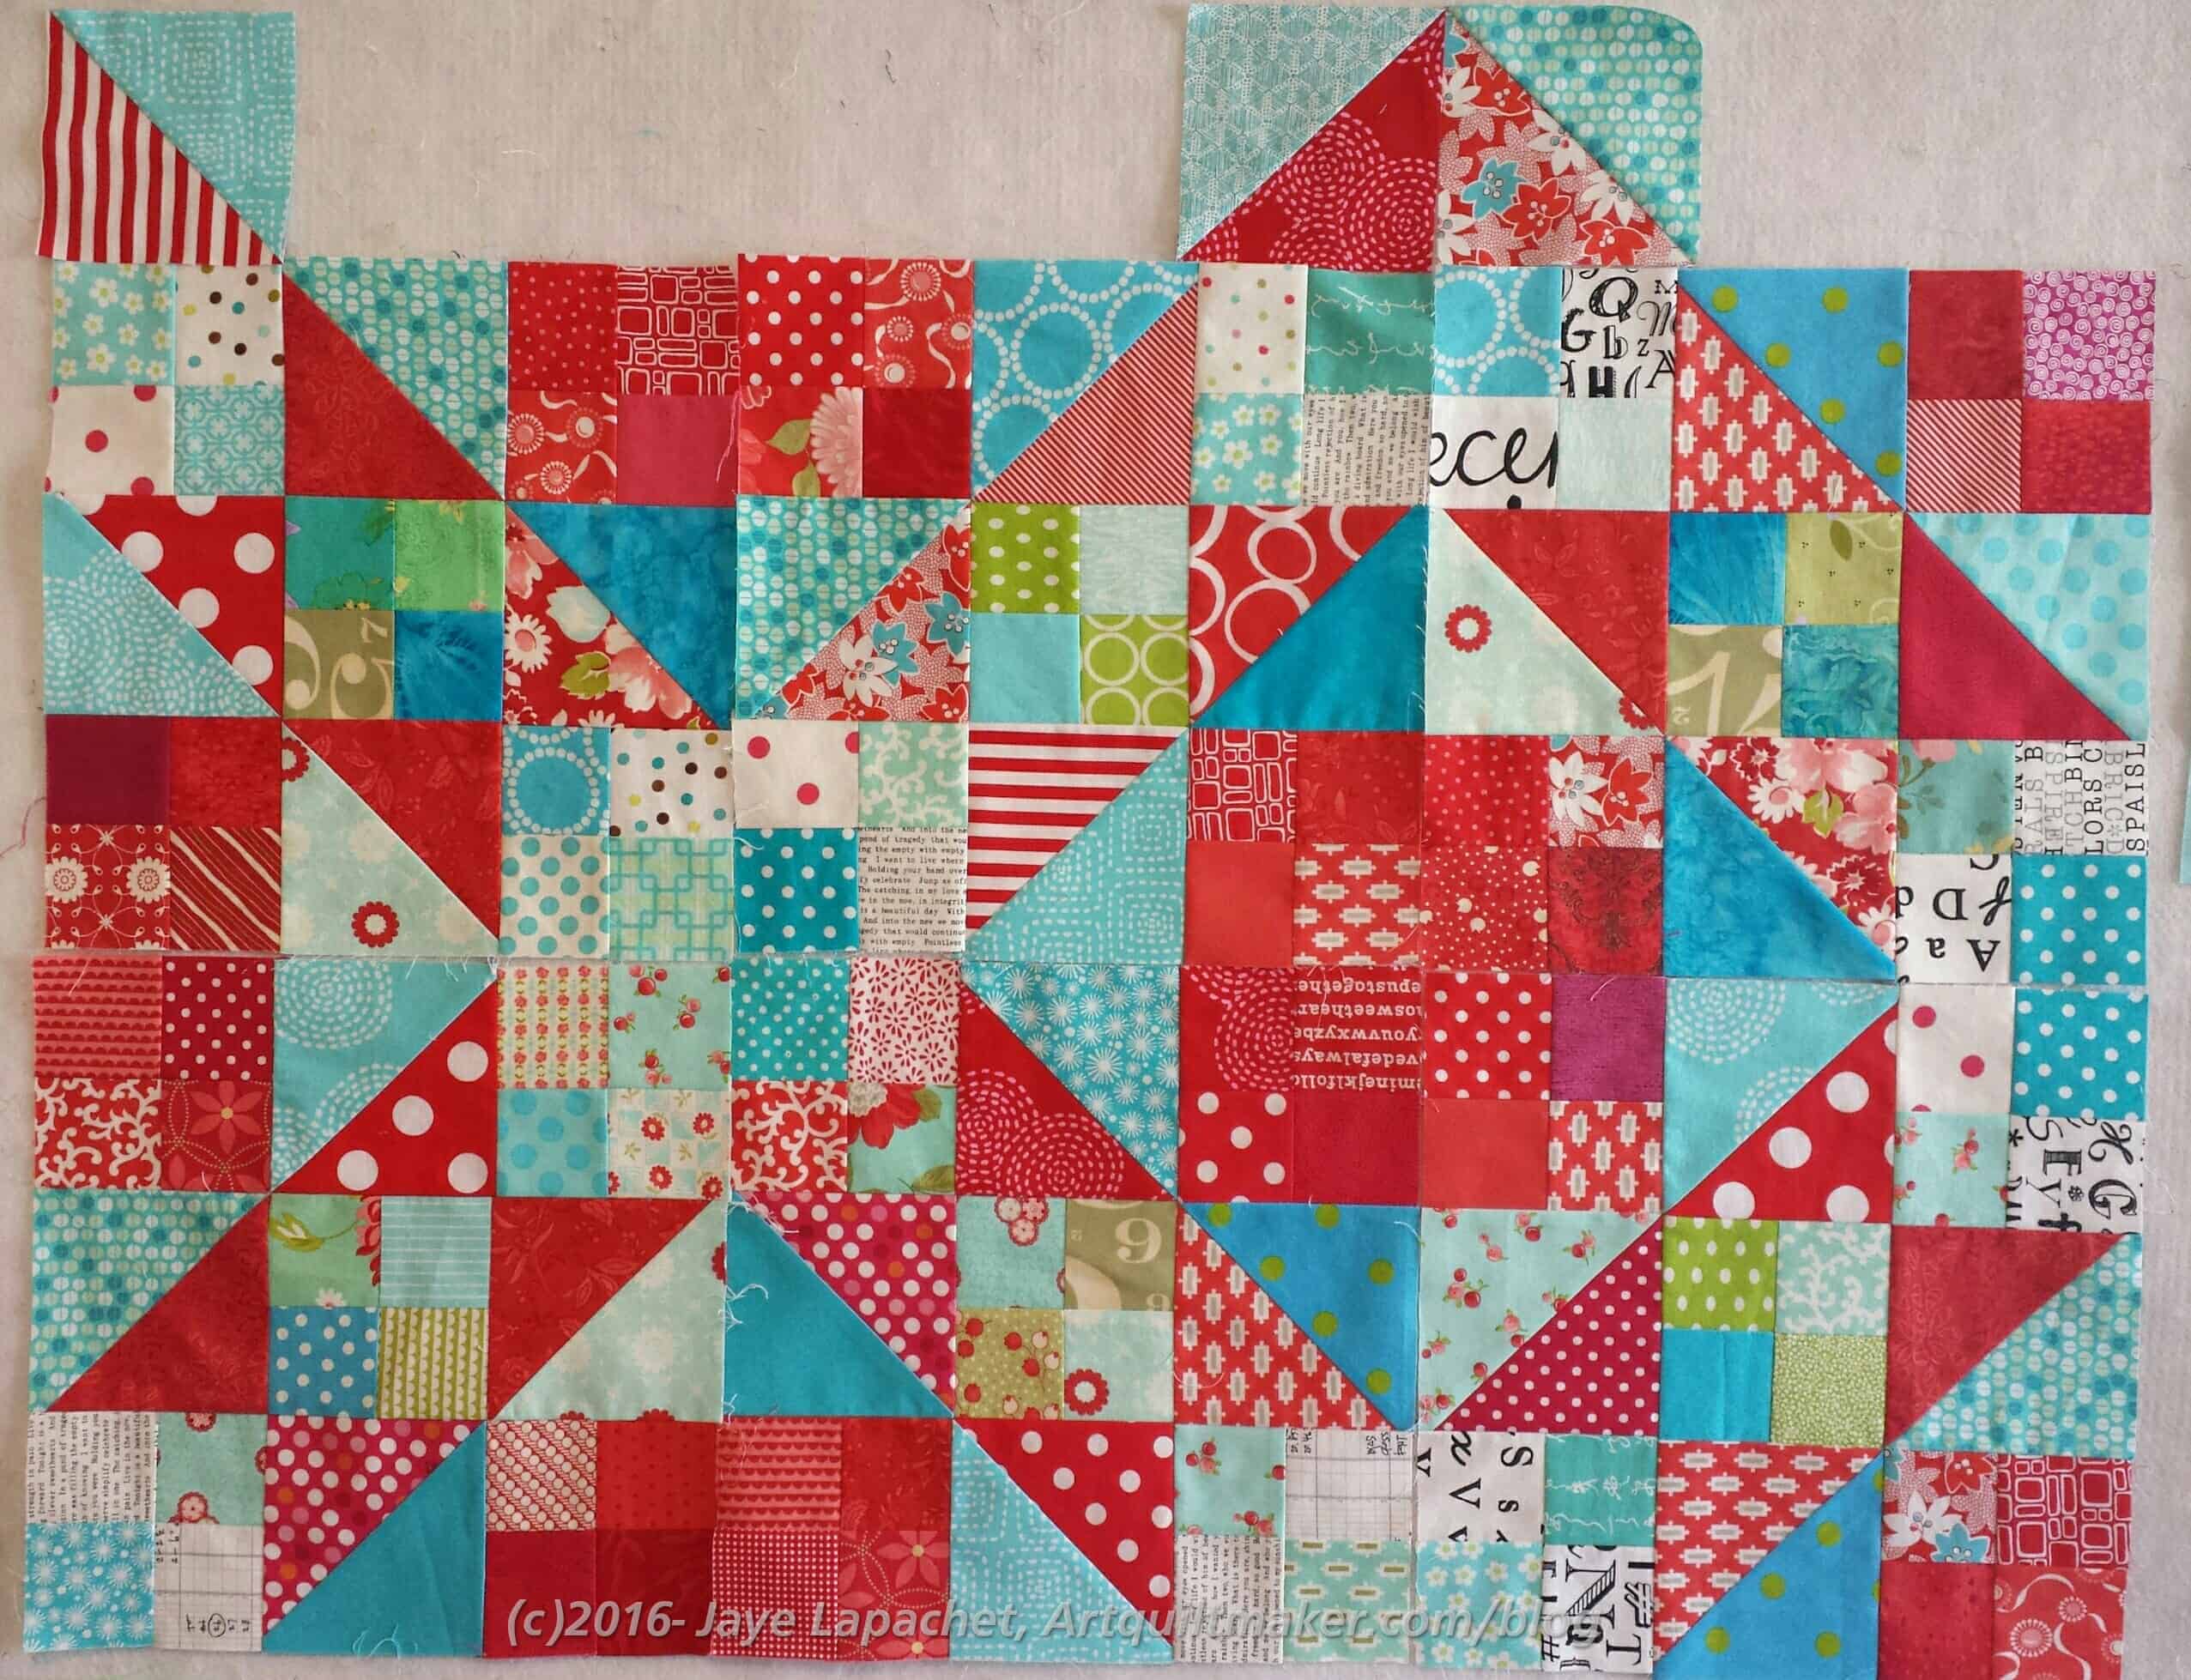
I wouldn’t normally put a quilt together like this (you know I like chunking!), but it is too long to fit completely on my large design wall. I put the top quarter (ish??) together and and then flung it over the top so only the bottom couple of rows are showing. That allowed me to move everything up and work more on the middle. I hope also, to work on the bottom, but I will probably have to move it up again.
I am always amazed at how good quilt tops look sewing together. I really like the top part of this quilt and it took me so long to get to this point. Yes, I have a lot more cutting and a lot more sewing, but I am thrilled, finally, to be making some progress!
I have been in a sewing drought for the past few weeks. Not because I didn’t want to see but because I had no time.
Stepping Stones n.2 Border Block- side
On Saturday, in the late afternoon, I got back down to business. I came back from being out most of the day and started sewing on the Stepping Stones n.2 blocks.
I still haven’t cut all the pieces I need to finish the border blocks. I have been cutting and sewing alternately which allowed me to sew 2 blocks together before dinner and that small amount of progress really made me feel great
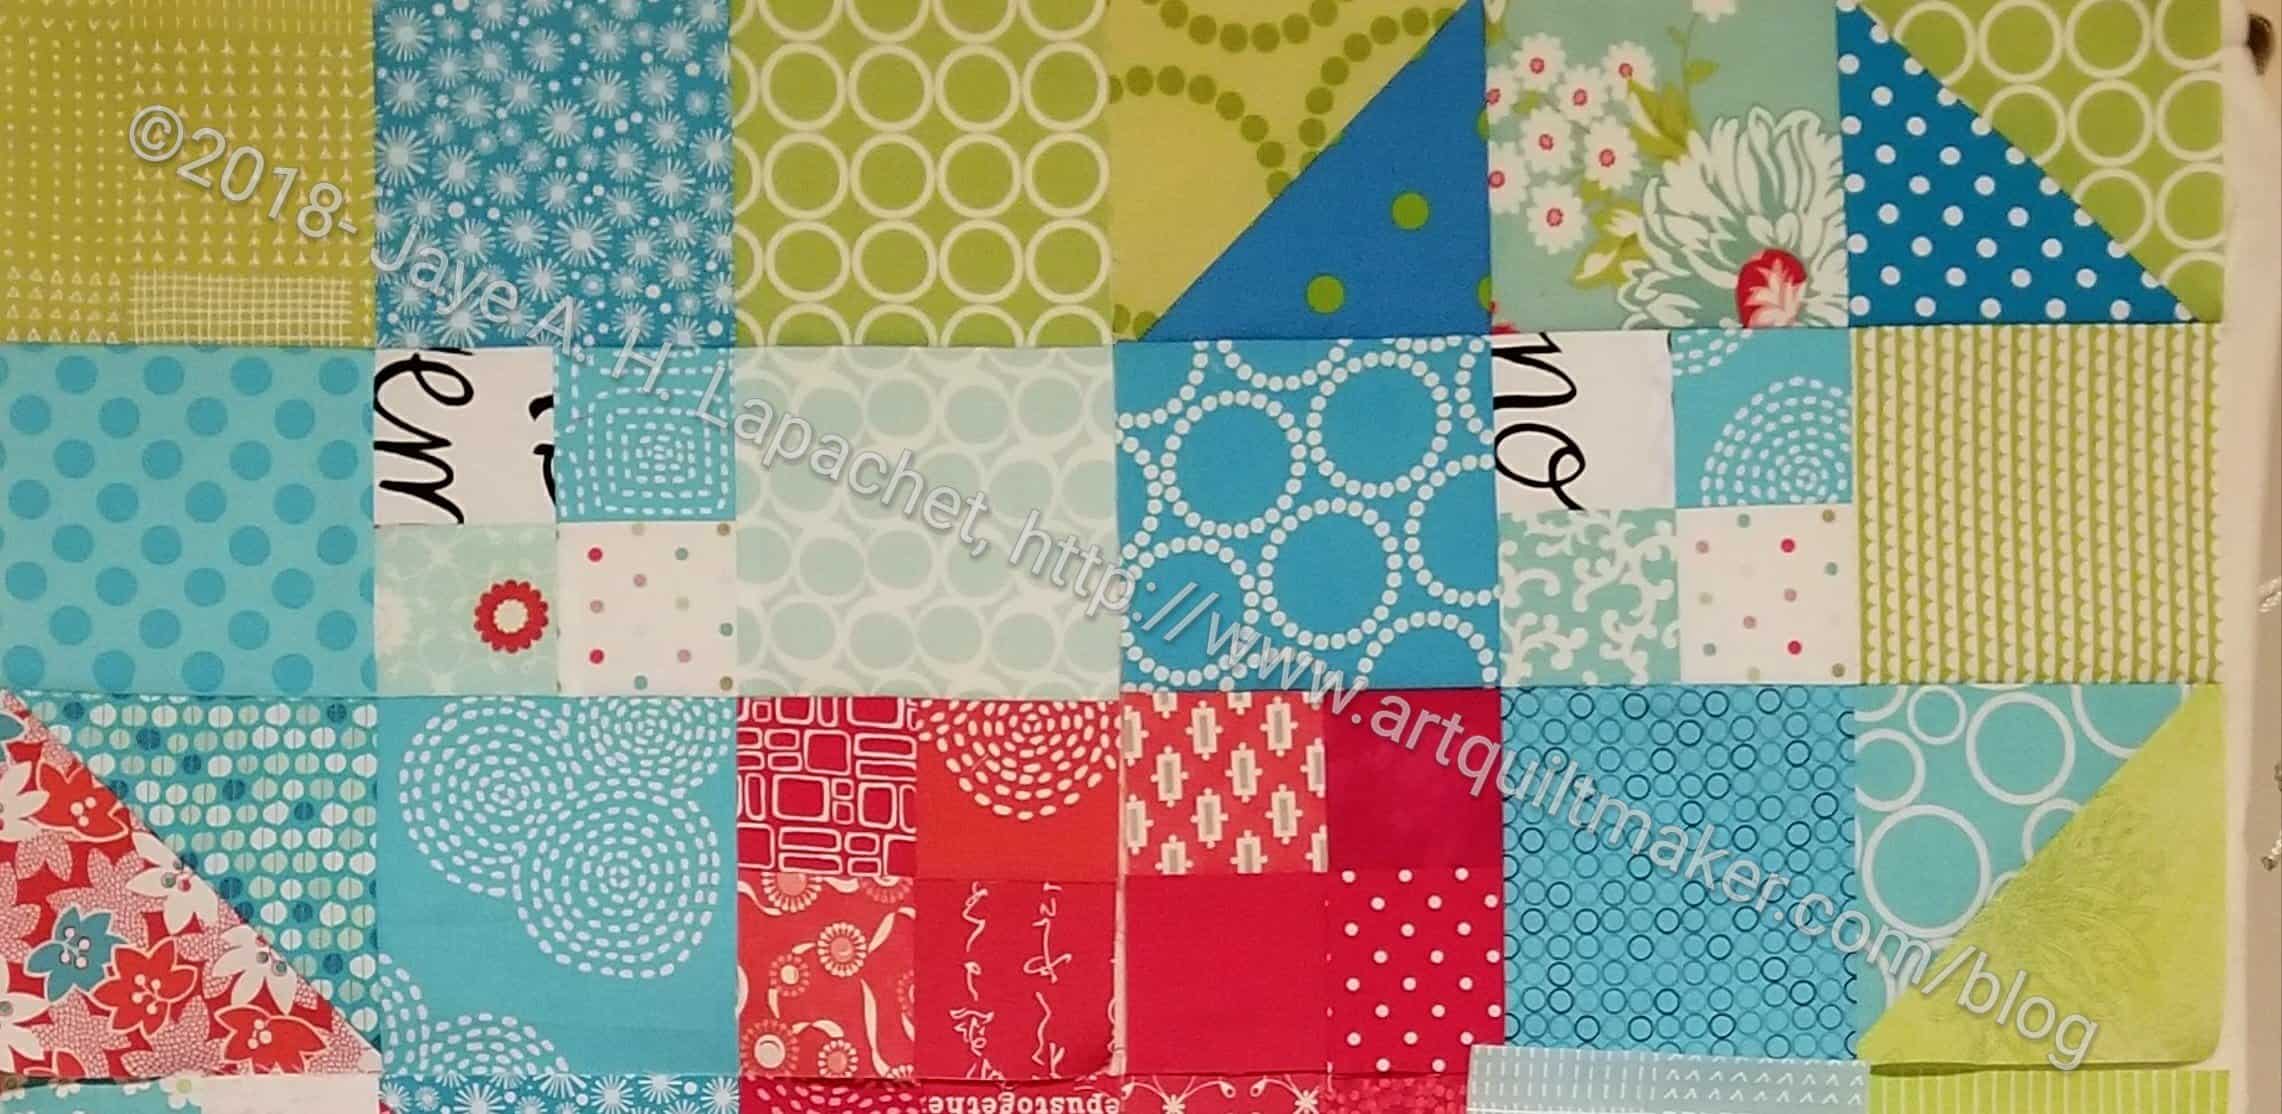
The Octagon Nine Patch is ready to go to Colleen and I put the Stepping Stones blocks back on the design wall. The last time I talked about this was only in March, so not an eternity ago. There is a lot of work to do on this piece: more cutting for the border. I am tempted to sew the upper patches into blocks and then sew the upper blocks together. I can’t really fit the whole piece on my design wall and that seems like a good solution. I am afraid I will end up with some blocks with all the same fabrics next to each other, however. I know it will look a lot better sewn together. It looks a lot more defined in the photo than it does in person.
I can’t decide if I am determined to get this done this time or not. I started this in about December of 2014, so it has been hanging around awhile. I should get it pieced and off to the quilter. I am not quite feeling the love. What a shame.
I have been cutting a lot of fabrics for this quilt. As a result, I was reminded of why I like Hunting and Gathering. I have not hunted or gathered fabrics for this project, so I have to cut fabric in order to finish. If I had done some Hunting and Gathering, I would have all of the cutting completed and be on to piecing. I don’t really like cutting a lot all at once. For a scrappy quilt, there is a lot of cutting.
Stepping Stones n.2- end of Feb 2018
Fortunately, I just got to it, listened to a book and cut away. Since the beast is so big, i can only really work on two sides at a time. In the photo, right, I am working on the top and the right hand side. While only working on two sides, I am still cutting for the left and bottom. Compared to the photo I showed you last week, you can see that this piece is progressing well. You can also see the design coming together.
I finally cut enough fabric so that I could put a couple of blocks together. I just had to do it. I felt like I was making no progress, even though I could see that I was cutting. So, I made the blocks. What a relief. Now I feel like I am making progress. It is just tedious to keep cutting, cutting, cutting all the time.
Stepping Stones: right hand top corner
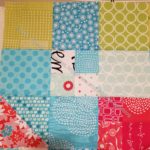
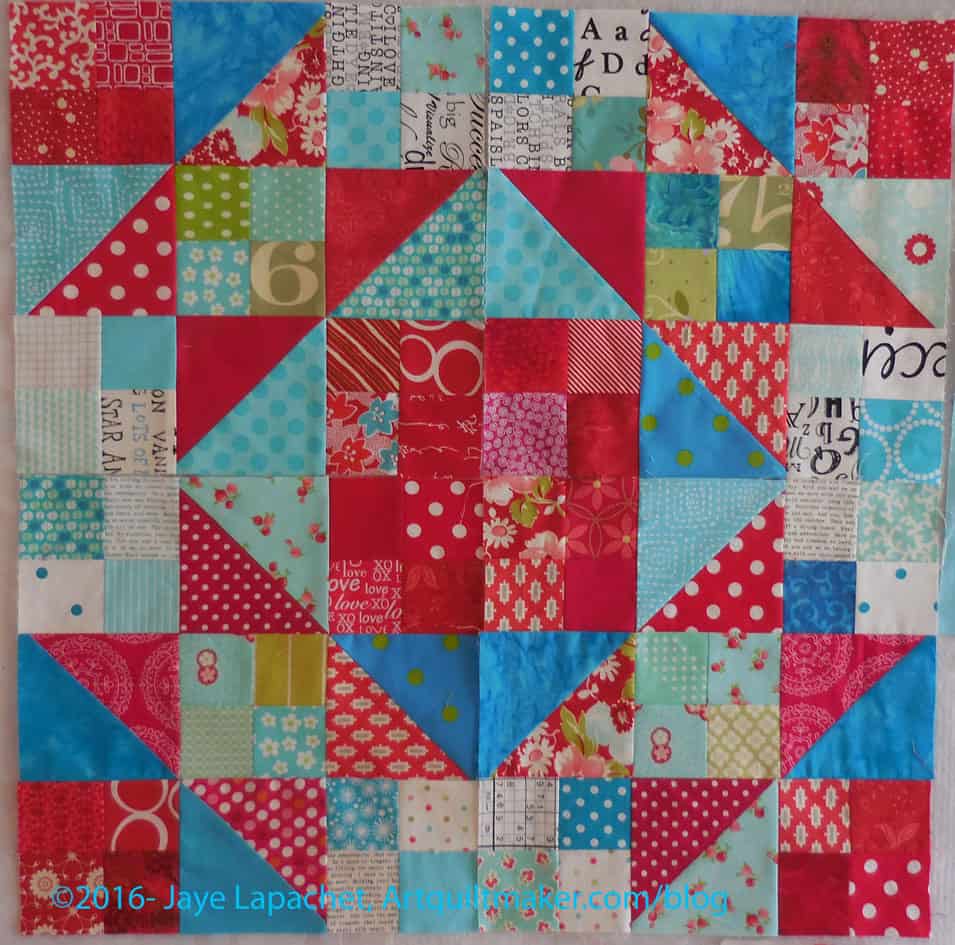
The block with the green and blue HSTs is one of the corner blocks. With the red 4 patch, you can see how the border integrates into the quilt design as a whole.
Stepping Stones: inner border block
Stepping Stones: corner border block
As mentioned I was able to piece two blocks. You can see the red four patches and the rest of the blocks in more detail above. While there are some duplicates, most of the border blocks are made especially for one location in the quilt. I designed the border this way, so the center motif would be finished and not cut off along the edges.
After FOTY 2016, I put the Stepping Stones n.2 on the wall. I thought of doing the Blue Gradation quilt, but I needed something relatively easy.
HA! I chose wrong. This quilt isn’t difficult and all the center blocks are finished. I need to make all the border blocks and in the design of the border, I am using the self bordering technique. This means that the border is made from blocks that, when viewed together, form a border.
I had completely designed the border, which was good and just needed to make it. I found that I had no green patches, no blue 4.5″ patches and no HSTs. Basically I had to made the whole border from scratch – cutting everything, making the blocks and finally sewing.
No problem, right?
Well, it was a little bit of a problem, because the quilt is too big for my design wall. Sigh. I have to make part of the quilt and then move the quilt over and make the rest. It is a strategy, but not an ideal strategy.
I have about two complete border blocks done, mostly because I needed to see some progress. The style of the quilt requires a lot of different fabrics, so a lot of cutting.
I spent some time over the weekend working on the Stepping Stones. I am ready to just piece without thinking. It never seems to work out, though. I always have to do some deciding or planning or math.
This past weekend required all three. As you might remember from my last update, I had some HSTs to make and was putting it off. I finally made them when I needed some easy piecing. I made a bunch so I would have some choice when I made a few more blocks to complete the top. After I made the HSTs and completed the leftover partial block, the question of the border came to mind.
Stepping Stones Revised
I sat down to look at the EQ plan I had and found that I hadn’t completed it. I wasn’t 100% happy with the border I designed for the original Stepping Stones quilt. It is in no way terrible, but I wanted to finish off the groups of squares (red 4 patches set in groups of four, above).
Stepping Stones, EQ version
I played around with EQ and came up with a new design. I am not sure it is the final for a couple of reasons:
I don’t know that the groups of red 4 patches in the corners add anything
I am not sure about the blue/green HSTs in the very corner. They add a little something, like breaking up a series of squares, but they don’t have any reference anywhere else in the quilt.
Stepping Stones #2 Border Trial
I am absolutely sure that I am happy with the red points that go into the border to finish off the scrappy lines of red that are made of HSTs throughout the quilt.
I want to get the border settled so I can start putting the whole top together via chunking. For chunking, I need to start in one of the corners.
Even though I am planning to work on the Peacock, I am still going to show you the projects I revisted and tell you my thoughts about them.
The Stepping Stones was the first project to go up once the Food Quilt #3 was off the design wall. My other design wall where the blocks have been staring at me for weeks is just not big enough to get a good view of all of the blocks. I really thought I would work on this project next, but the Peacock called to me when I put it up.
This project needs more blocks. I think adding five more blocks along the bottom will be enough. It is a good leaders and enders project, so I will sew the new blocks while I work on the Peacock. After that, the center will be large enough. I want to finish off the secondary designs, which means adding a similar border to the one I designed for my previous Stepping Stones quilt.
As I have said many times, the photos in the book aren’t that good, so it is hard to figure out what part of the design should be emphasized. The edging blocks on the previous Stepping Stones were all different from the center blocks.
In my first version, the “ladders” are much more prominent. In the blue/aqua version, the stars seem to stand out. My colors on this version are a lot more distinctive. My first version was less murky than the book, but more so than this blue/aqua combination.
Here is a comparison of the two quilts/tops:
Stepping Stones: Finished
Stepping Stones: July 2016
Looking at the two of them side by side makes me think that I may have already done enough to the sides and can start on the border blocks for the two sides and the top.
As I said the other day in the latest donation blocks post, laying out FOTY 2015 doesn’t make for a lot of tangible production. While I enjoyed making the donation blocks, I did need a little variety and the Stepping Stones parts were handy.
Four Stepping Stones blocks – April 2016
I enjoy these blocks and seeing the way they will be laid out makes me very happy. Turning each on a little bit makes a huge difference.
Even though I may need the squares for the layout of the Carpenter’s Wheel blocks, I have used some of the low volume prints for the white space in these blocks. I have plenty of fabric for the [mythical] Carpenter’s Wheel layout and can always cut more.
6 Stepping Stones blocks – April 2016
Making a few blocks always leads to making more and the six shown give an idea of what the quilt will look like and makes me want to make more.
Based on the layout I devised for my nephew’s Stepping Stones quilt, it looks like I will only need two more blocks and then border blocks for the width. I thought I measured 8 blocks across my bed, which doesn’t account for border blocks. I want to make the border blocks to finish the design. There are two blocks around the whole edge of the previous SS quilt and I could eliminate those if I thought the width was too big. Measuring next, I think.
I am really pleased with how the blocks look. Now to get FOTY 2015 off the wall so I can layout all the blocks I have and see what I am facing. After months of feeling meh about quiltmaking, I am finally excited about several projects! Yay!
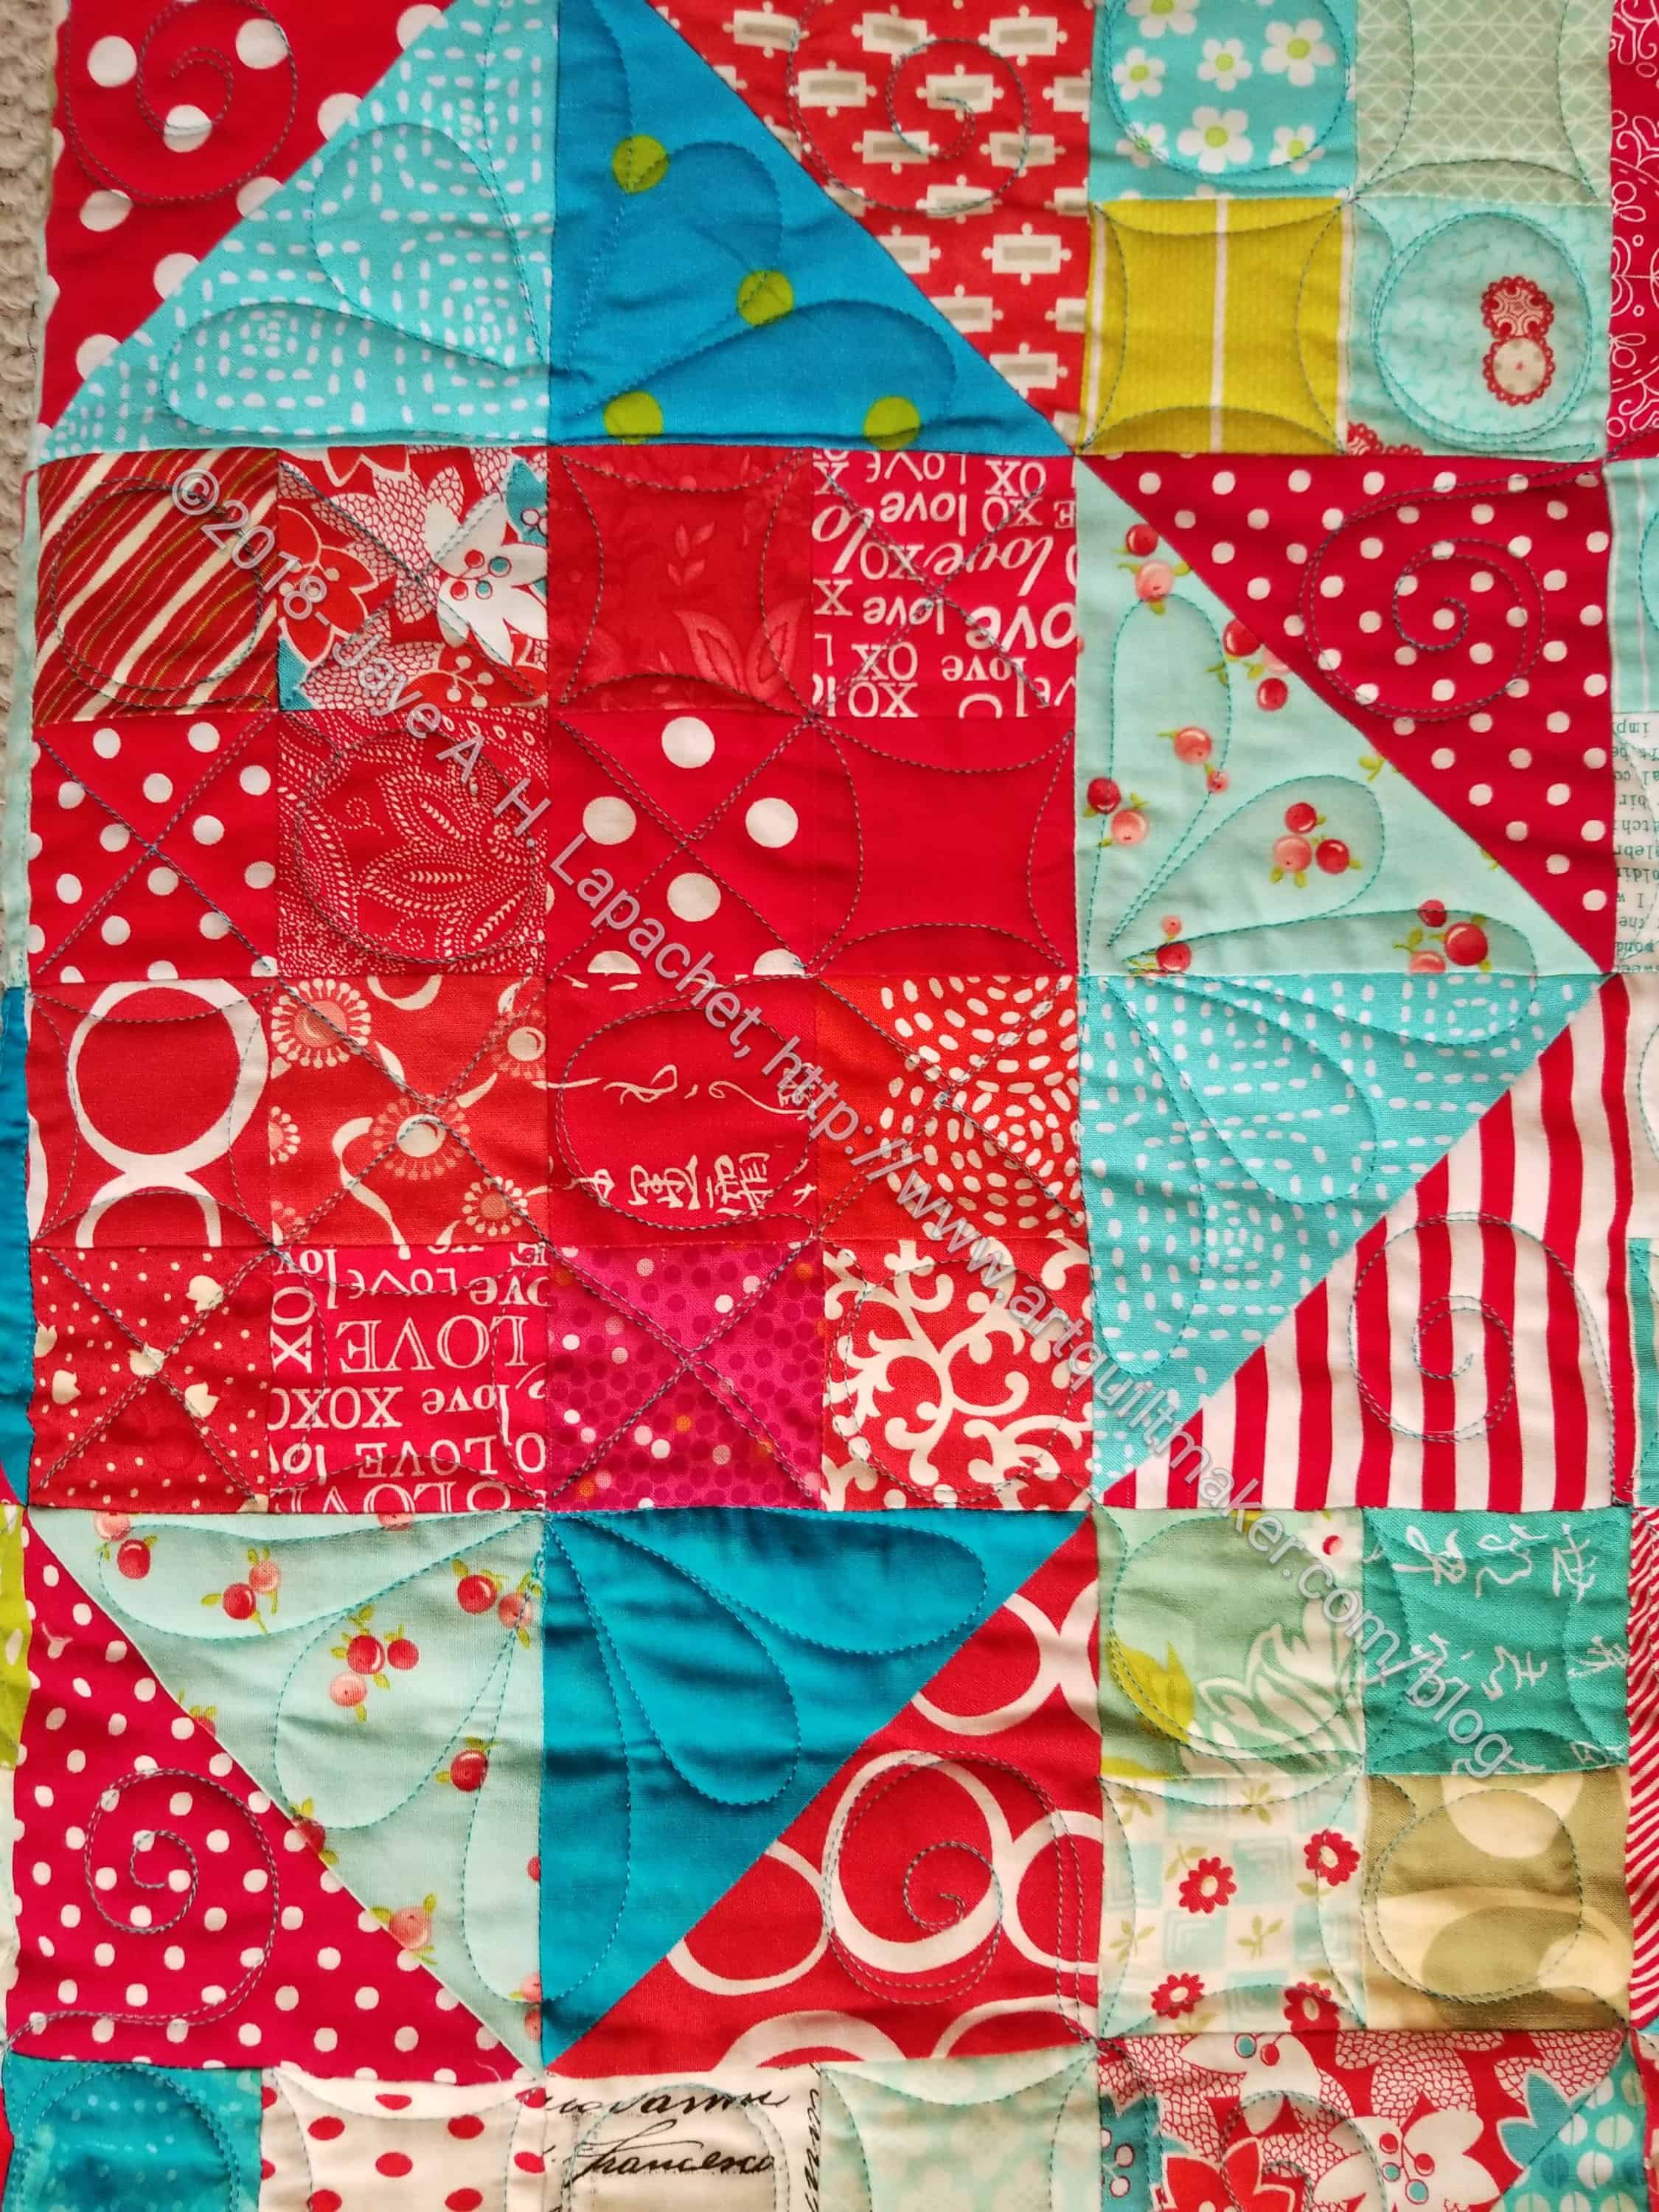
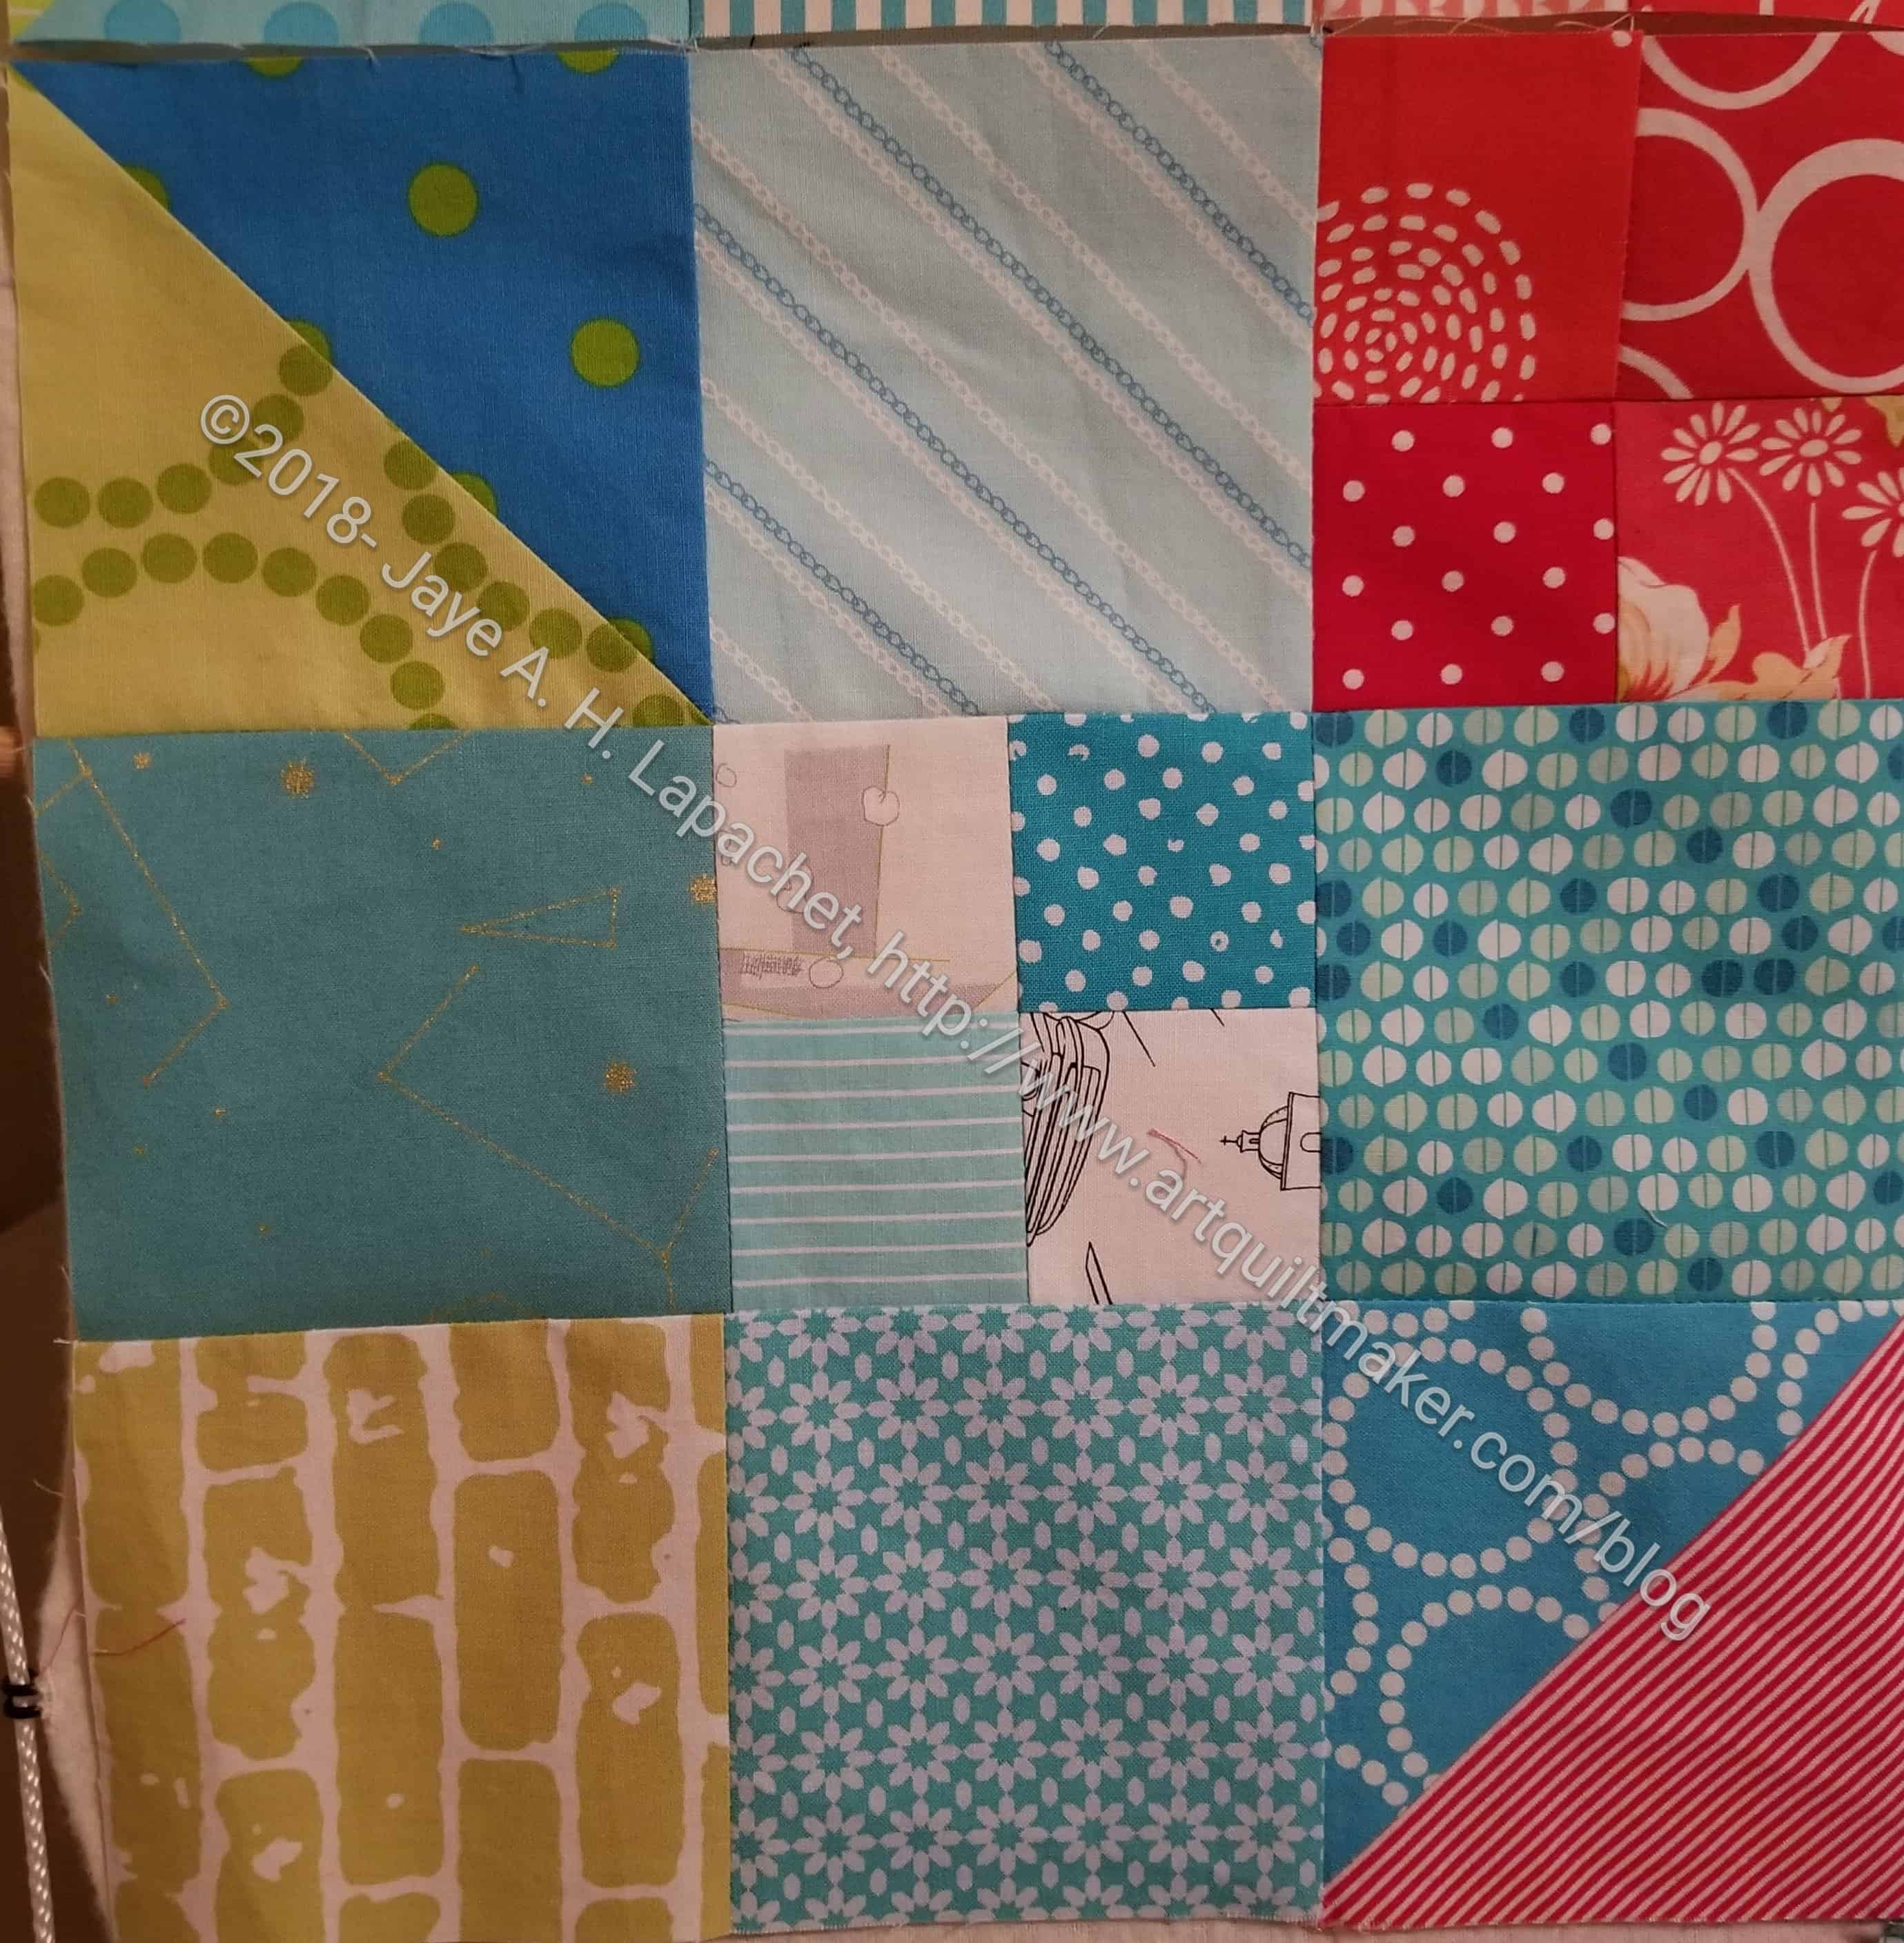
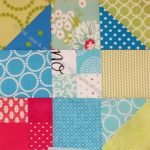
Using leaders and enders I made a few more Stepping Stones blocks. They are looking really awesome, I think. I love the way the red and blue really create distinct secondary designs. This was a little hard to see in my previous quilt. From far away the previous quilt looks great, but close up you can’t see the pattern as well as you can in this turquoise and red version.
Stepping Stones – starting to look like something
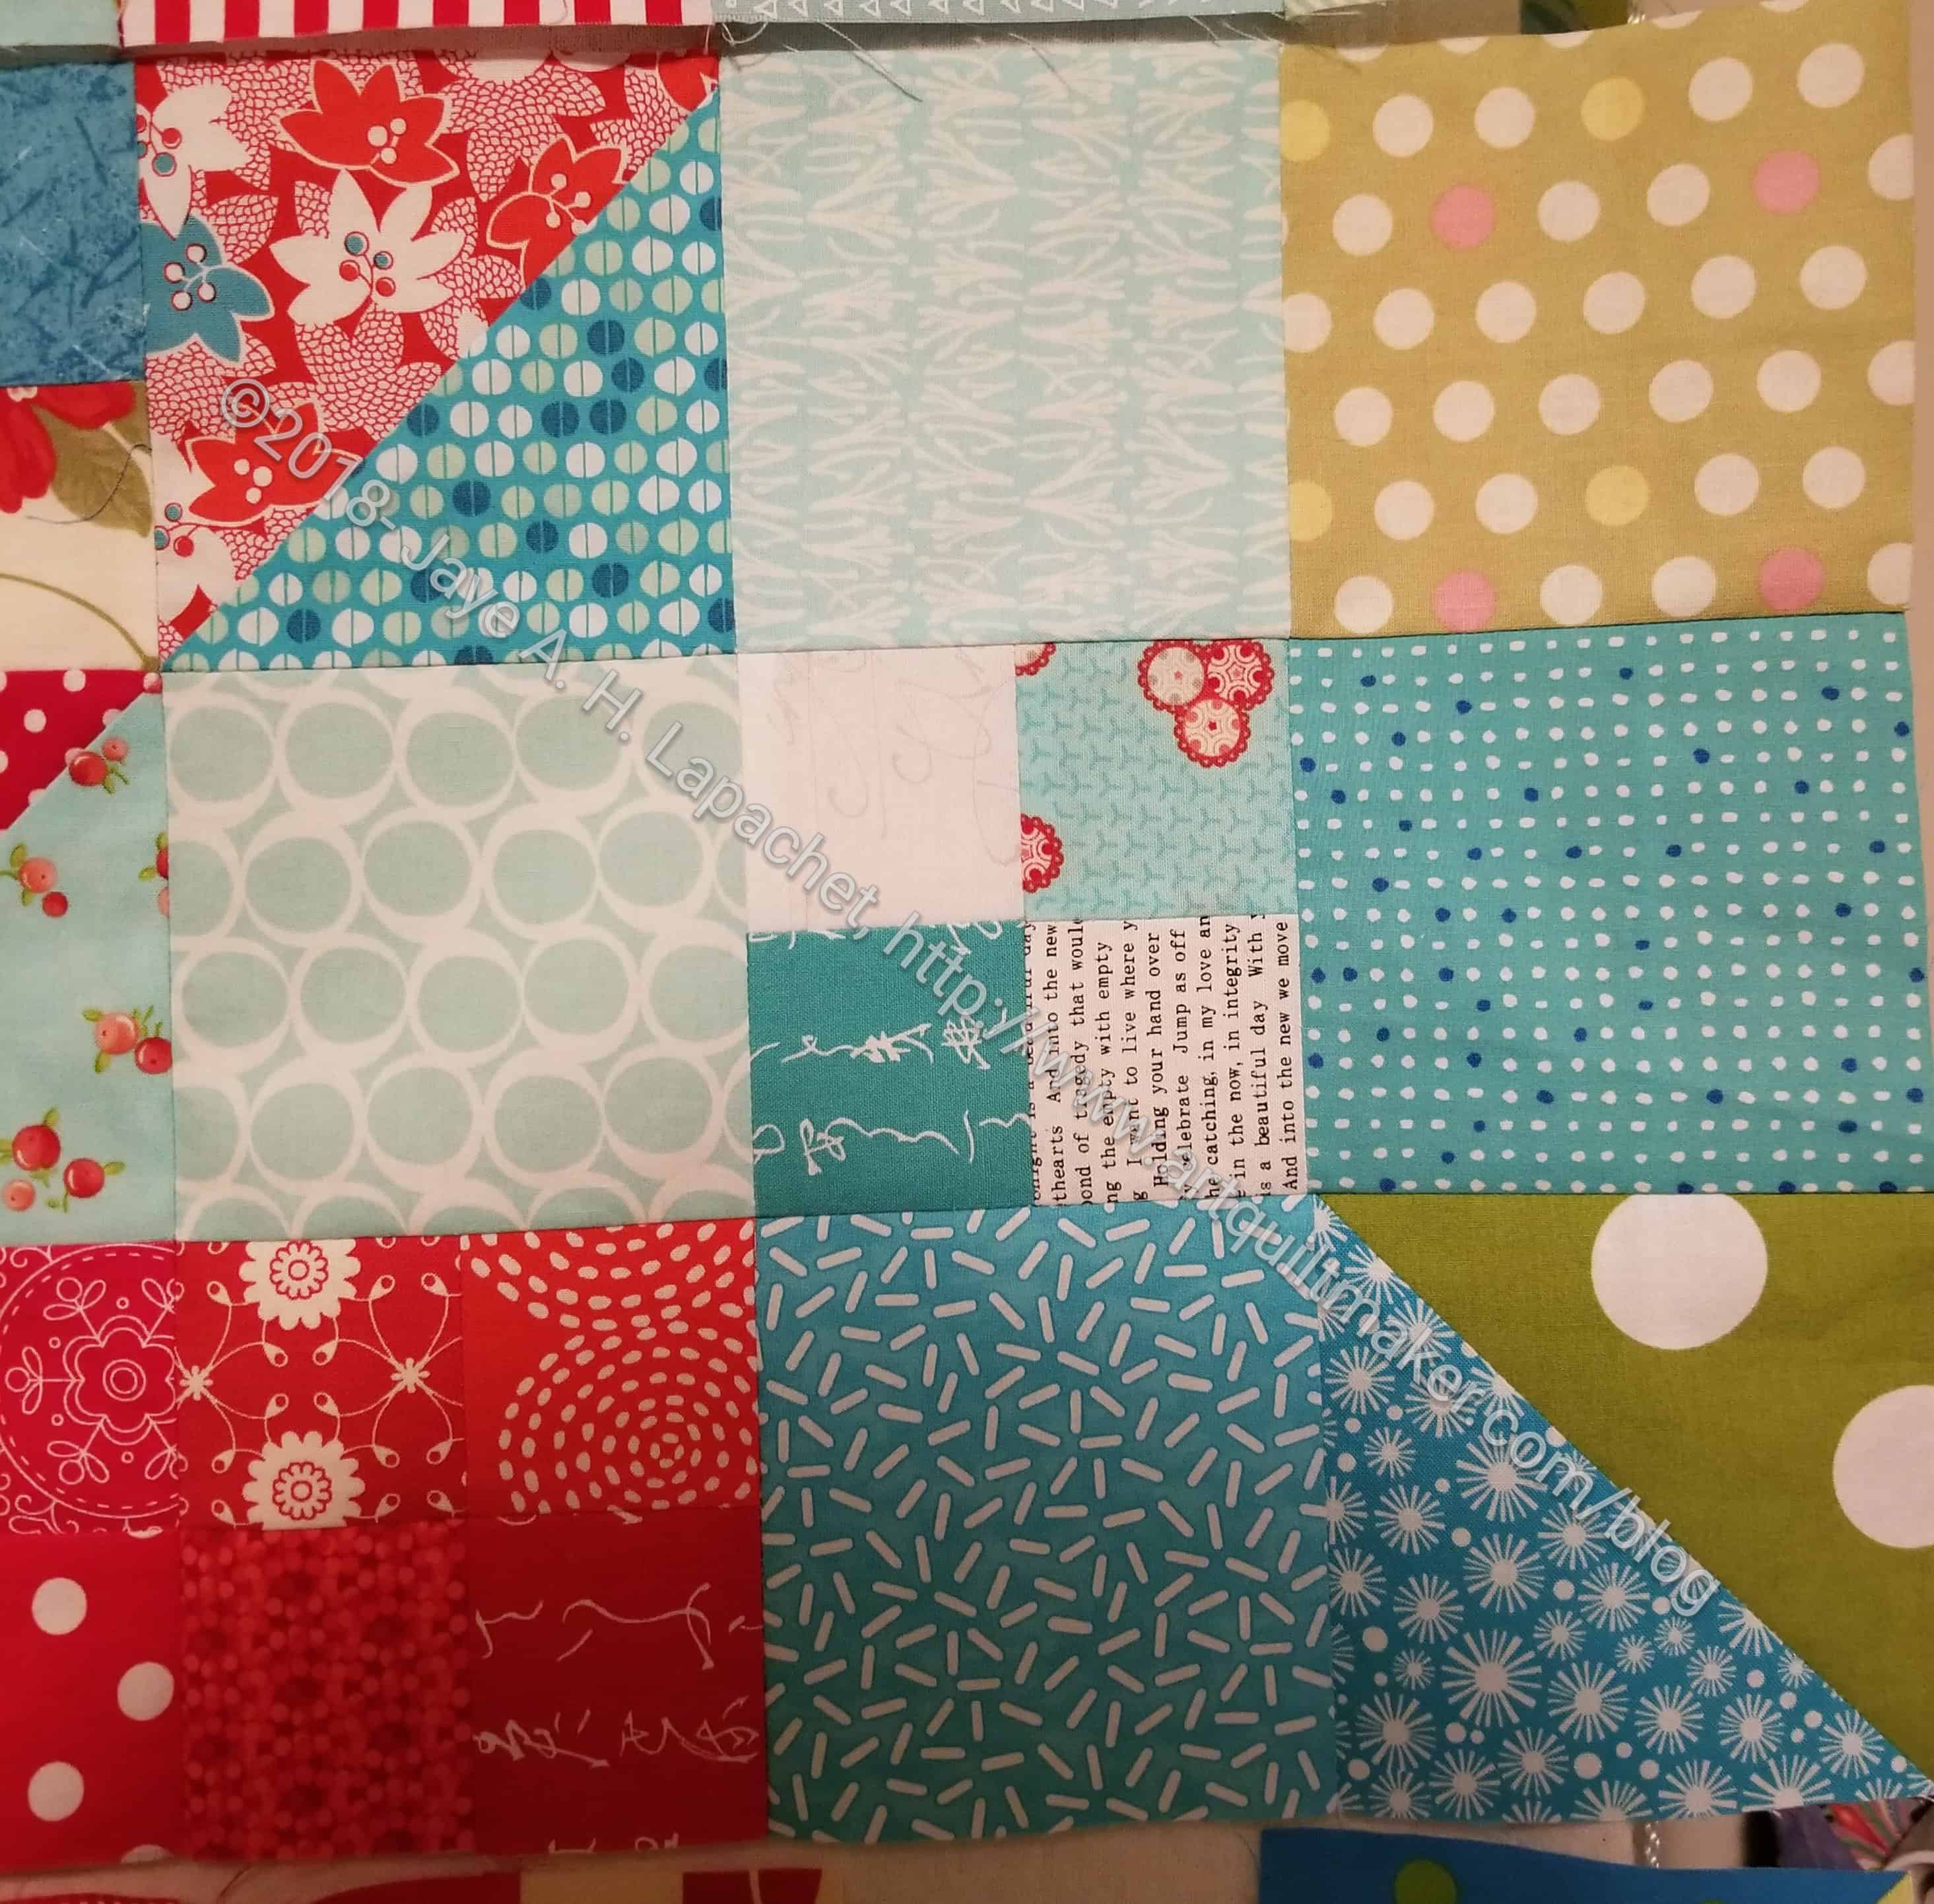
I have added a few new fabrics to the mix for this quilt. My original idea of using all Bonnie and Camille fabrics is pretty much out the window. They were a good starting place, but much too limiting. With all the fabrics I have added, I still don’t think there are enough. I get annoyed when I see two fabrics together. I am starting to see the appeal of charm quilts.
The picture to the right is the new blocks with a few of the old ones to show you the effect of the whole design.