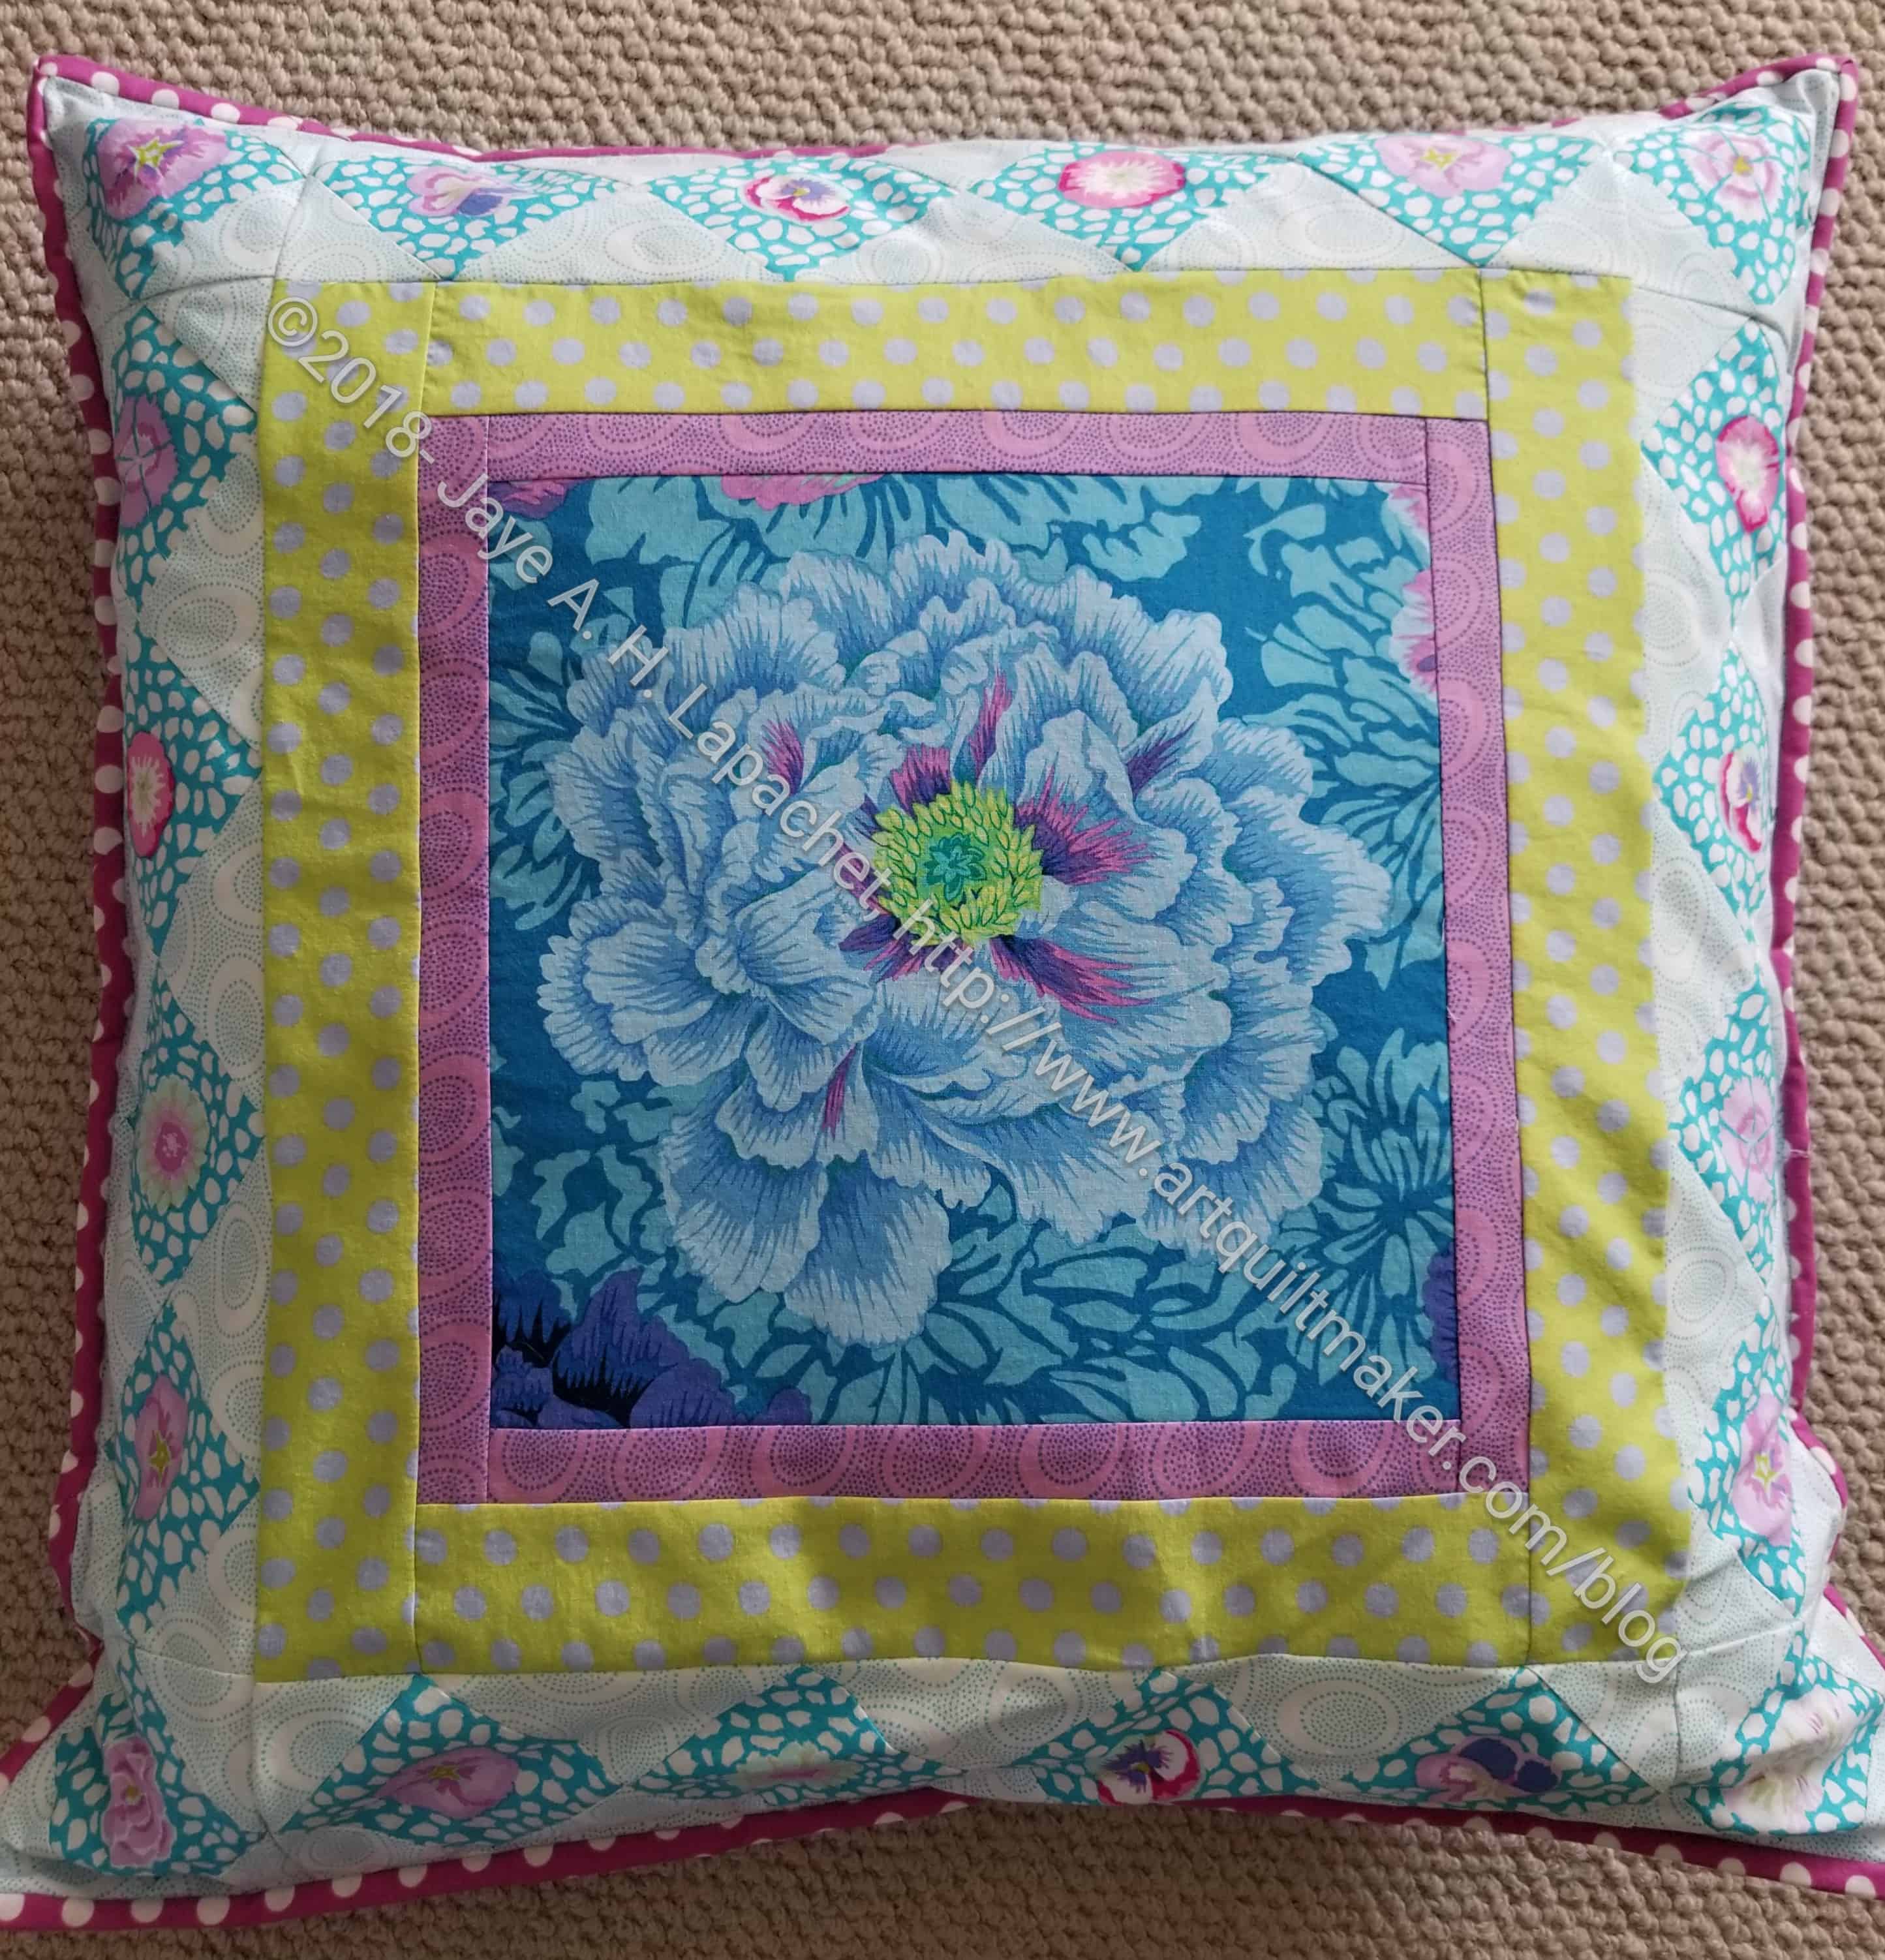
I can’t believe I forgot to show you the pillow I received in the BAM Pillow Swap.
Rhonda made this pillow for me and I know she chose the fabric be cause I adore Philip Jacobs prints.
Thanks, Rhonda!
Commentary about works in progress, design & creativity
I can’t believe I forgot to show you the pillow I received in the BAM Pillow Swap.
Rhonda made this pillow for me and I know she chose the fabric be cause I adore Philip Jacobs prints.
Thanks, Rhonda!
I talked about the pillow that I made last month, but I forgot to post about the pillow I received.
Rhonda made me this pillow sewn from Philip Jacobs fabric. It is really great and I love it.

I needed to rest at the beginning of March, but knew I had a pillow swap to finish by the April meeting. My recipient’s color preferences were listed as:
I wanted to be sure my design was modern, fit the desires of the recipient and wasn’t too difficult to piece. I immediately thought of the Alison Glass fabrics I used for the Triple Star. Except for the white, I thought those fabrics would fit well with the desired color scheme.
I had a pillow I thought was made by my pal Amanda stuck in my mind. I asked her about it and she suggested Pinterest. I immediately found the design for which I was looking – the X Plus O block. Once I had the name, I found a lot of examples and spent a happy hour laying on the couch and looking at them.I also found an example that I thought would be good inspiration.
Before I could really sew again, I worked on the design using EQ8. I was able to play with the size and get the elements right.

After I could sew again, I went back to working on my Sew Together Bag project. In the middle of that project, I needed a break, but didn’t want to reset my machine for piecing. I knew that if I did, I would have three more UFOs and another year would pass before I could give the gifts. Cutting was a good idea, so I cut out all of the pieces.
One of the helpful parts of EQ8 is the ability to print out rotary cutting directions. I found a bug in the process of doing this, which I reported to the Electric Quilt Company. It turned out not to be a bug; they don’t consider a lozenge shape to rotary cuttable. I was able to figure out the size to cut a square as I plan to use the flippy corners method or the Simple Folded Corners Ruler.
I also used the Spoonflower zipper installation instructions. I acually watched the video and found it to be really helpful. I am pleased with how my pillow’s zipper closure came out, though I had to redo it a couple of times. I think the problem was the zipper foot I used. I used the flat snap on zipper foot. I didn’t feel like I could get as close to the zipper as I like. As a result I didn’t catch the seam allowance, which makes a closed up area around the zipper. I should have used the tall, skinny foot. I am used to it. I didn’t use it because I was sick of installing feet and resetting settings on my machine. I paid the price.
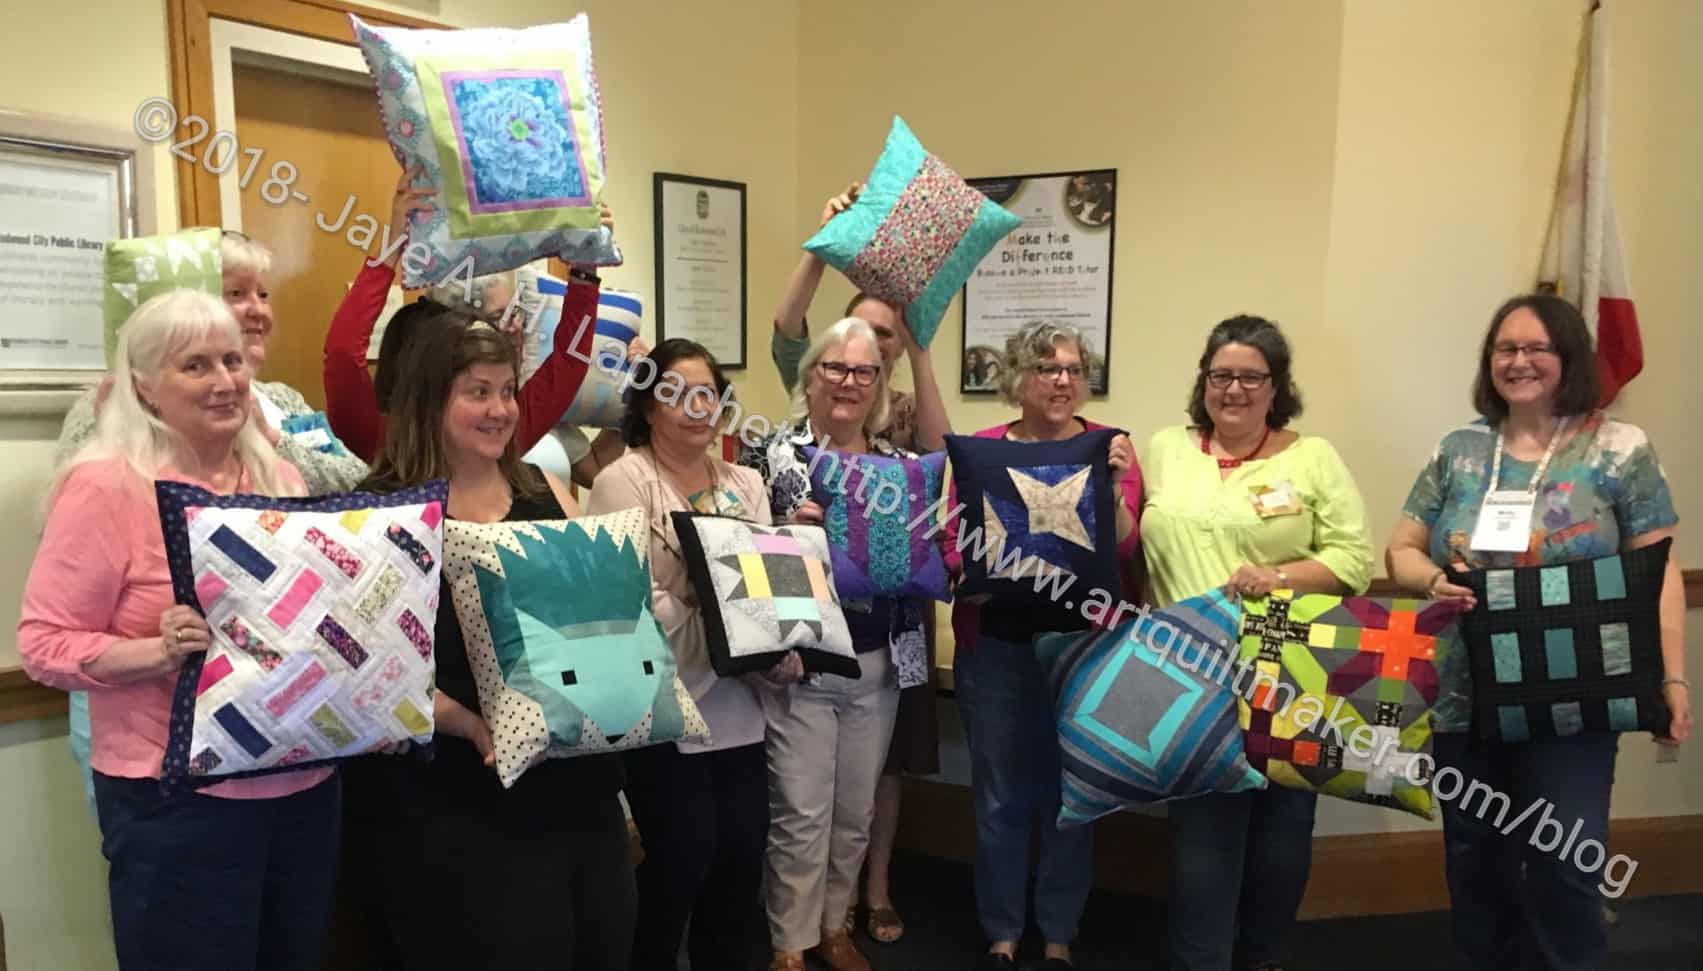
We exchanged yesterday and everyone did a wonderful job. I am behind Christina, but you can see my pillow over my head.
The CQFA meeting was Saturday and it was a really good one.
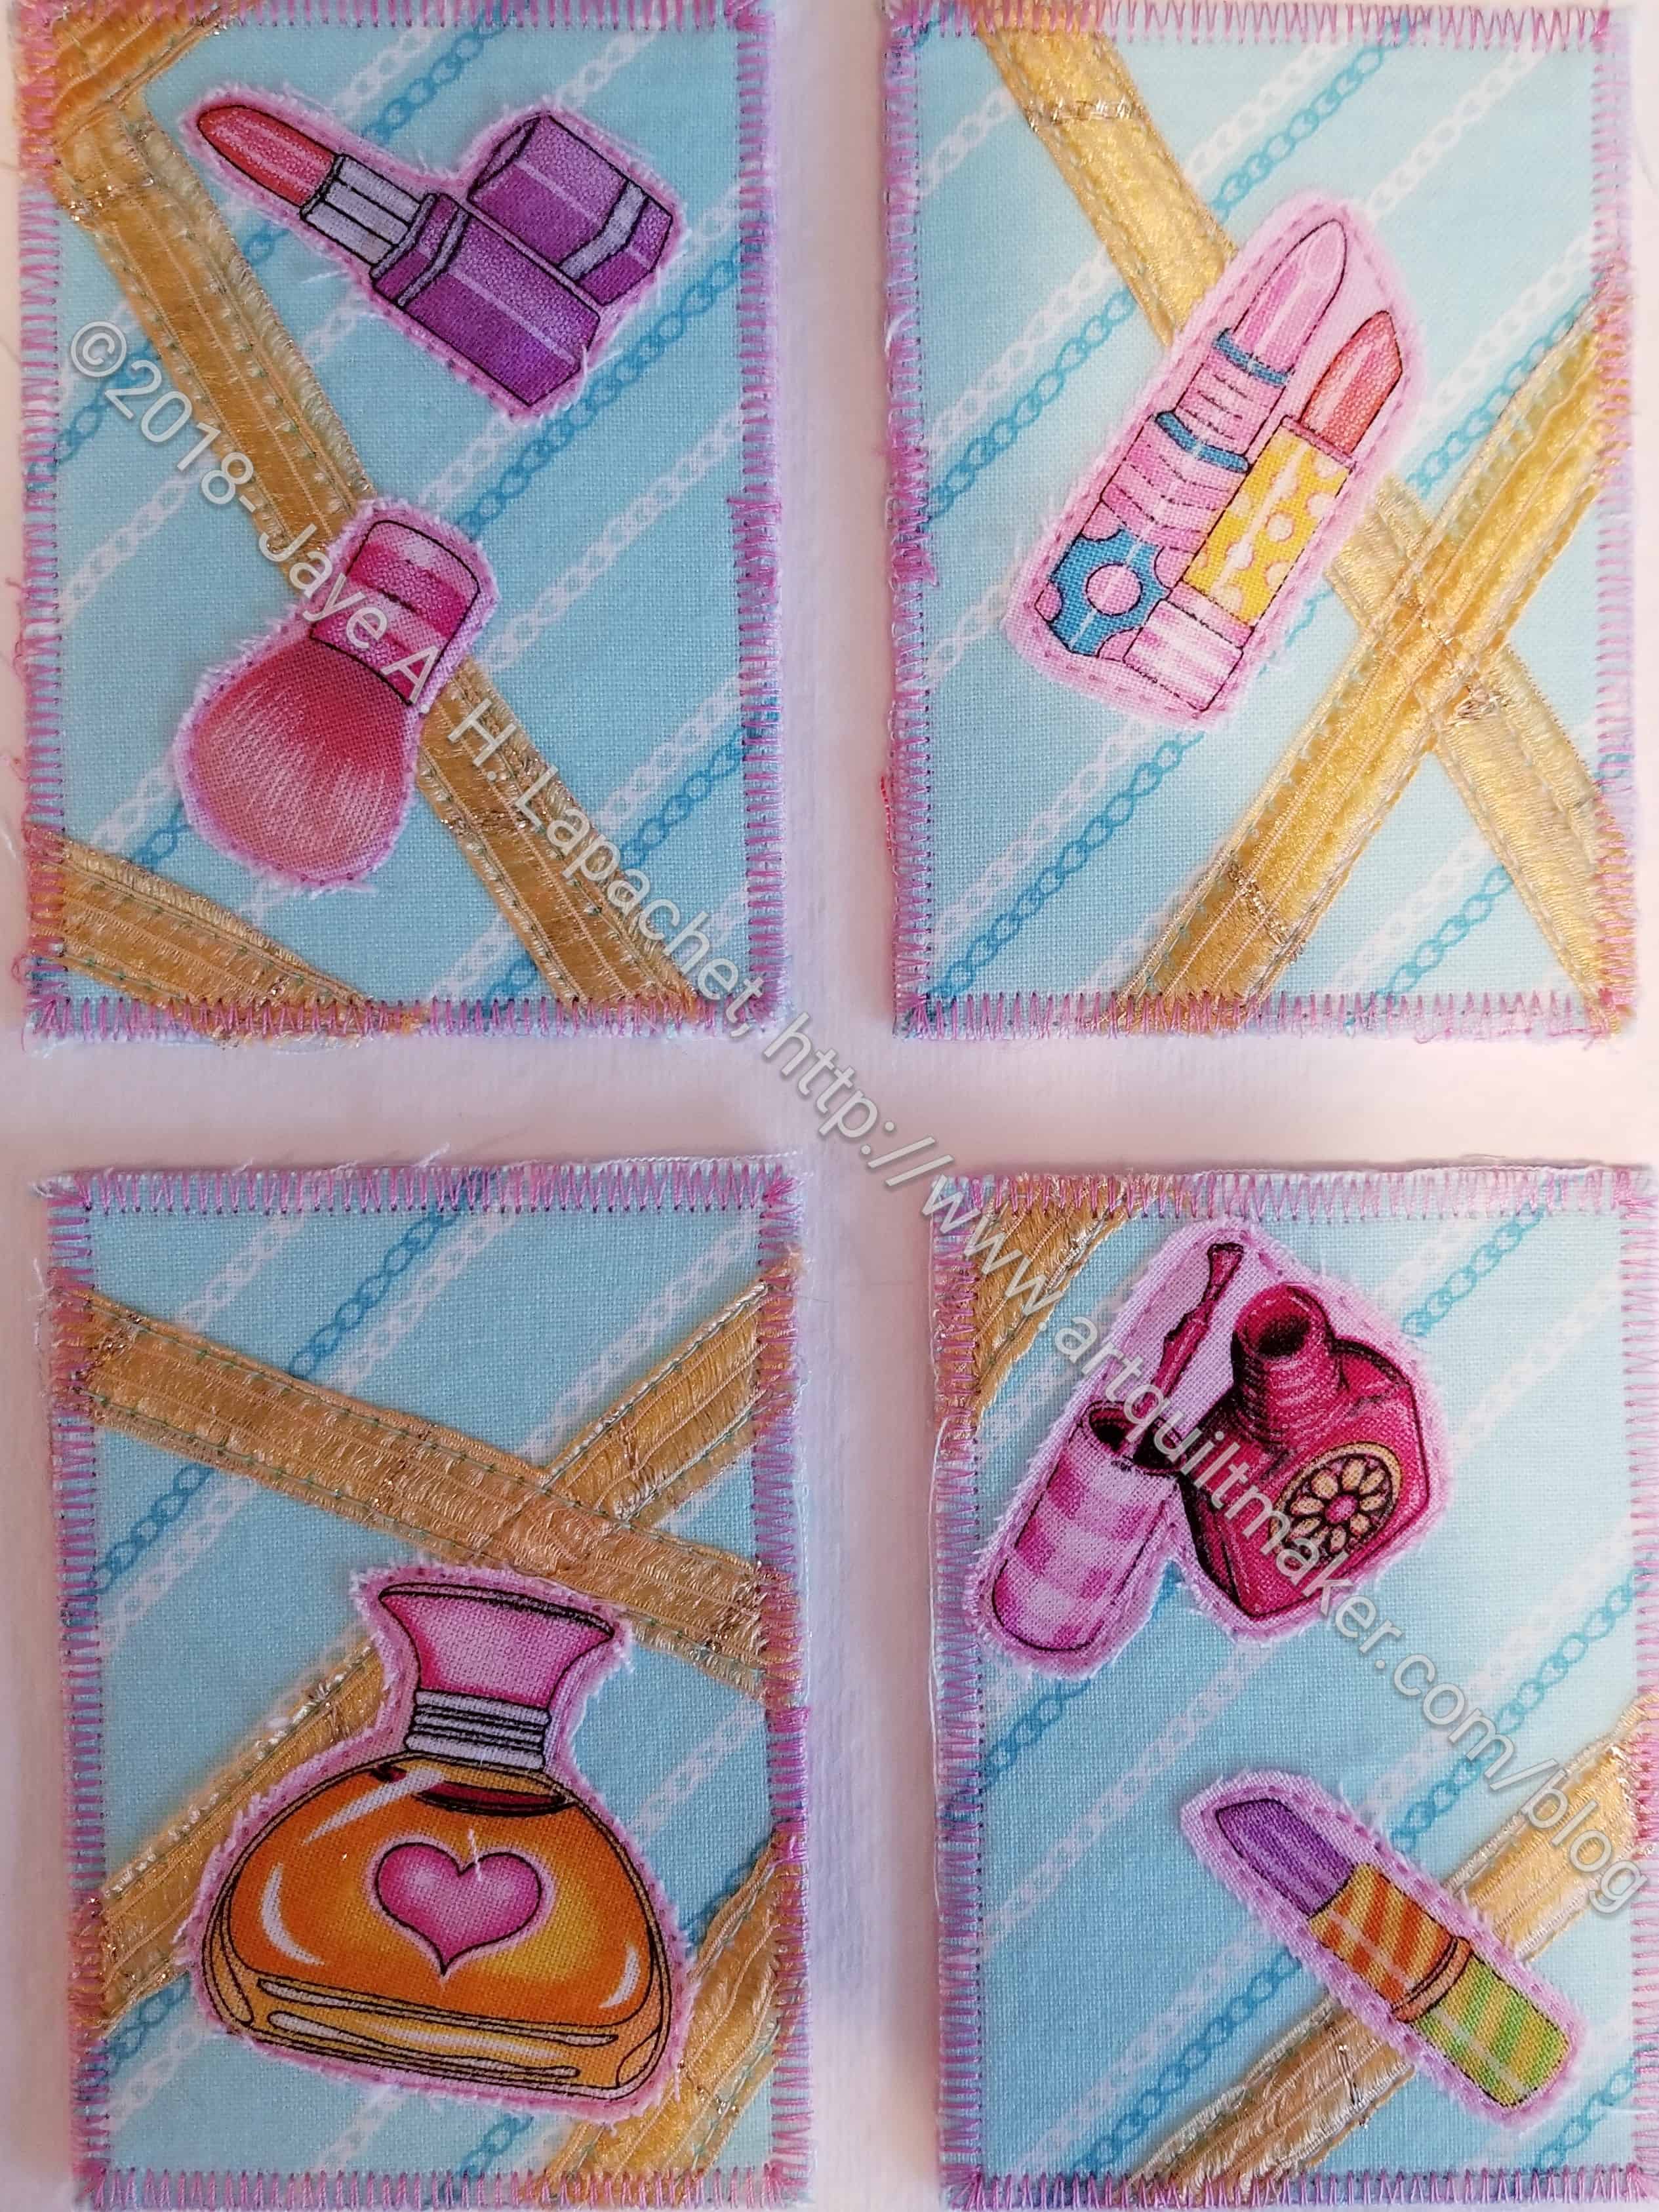
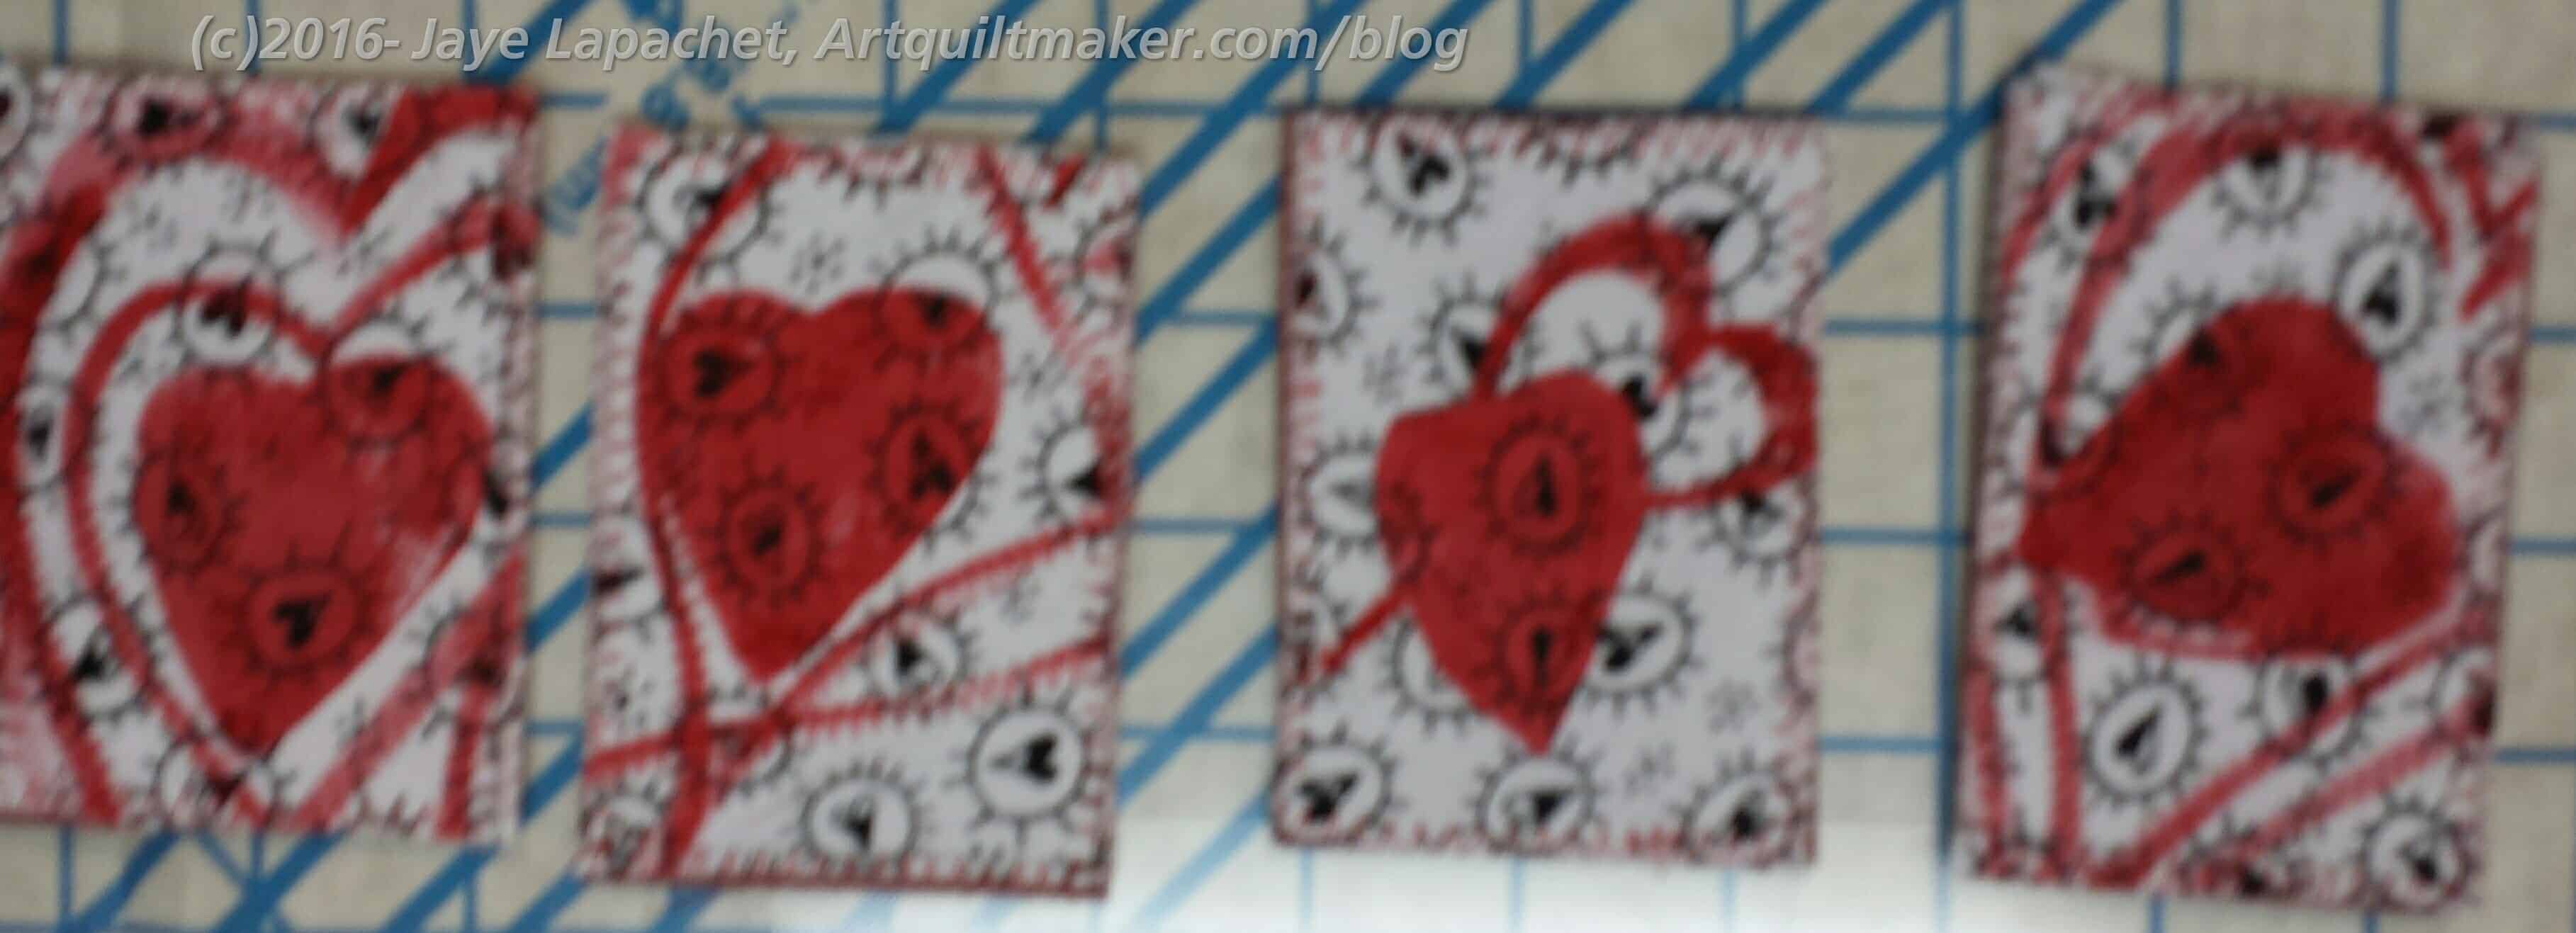
We swapped ATCs, as usual. I wasn’t inspired and really waited until the last minute -Friday morning – to make mine. I used what scraps were on my cutting table despite my lack of enthusiasm about the project.
I focused on making the cards as technically perfect as possible. I think I achieved that goal.
I must work on the next batch sooner, so I am not working under the wire next time.

The Winter Extravaganza Palooza swap was yesterday at the BAM meeting. Being the blog editor, I had compiled a giant list of tutorials and patterns a few months ago for inspiration. It is an impressive list, so take a look. 😉
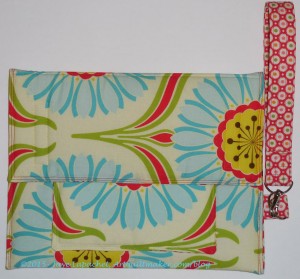
My swap partner wanted a bag, so I pulled out one of the bag patterns I have had sitting around and tried it out. I know I could have used one of the tutorials I just crowed about, but I didn’t. I wanted to plow through some of the bag patterns I have purchased and this was the perfect opportunity.
I wasn’t hopeful that this bag would be successful (unlike me, I know!), so I was pleasantly surprised to find that this bag came out pretty well. The flap is a great opportunity to do some machine embroidery or applique’ or other type of embellishment. I chose some interesting, if black, modern fabrics for the outside, so it wouldn’t show the dirt.
The pattern is Flip Flap bag from Totes by Sandy. The pattern is not 100% clearly written, though the interpretation could have been my problem. I had some trouble with some of the steps, but it all came out in the end. I would have made the lining section much smaller. I did make it a little smaller, knowing from past experience that it didn’t need to be the same size as the outside. I didn’t make it small enough and the inside sags a little. 🙁 I don’t know what the normal reduction is for linings – half inch? a whole inch? I could experiment, but probably won’t.
I made the inside light so my partner could see her stuff.
I am thinking about making this again, as I think it is a good size. I wonder about adding more pockets. The handbag I use now has a section at the front for cards, lipstick, etc and I wonder if that could be incorporated into this design. Perhaps not with the asymmetrical flap.
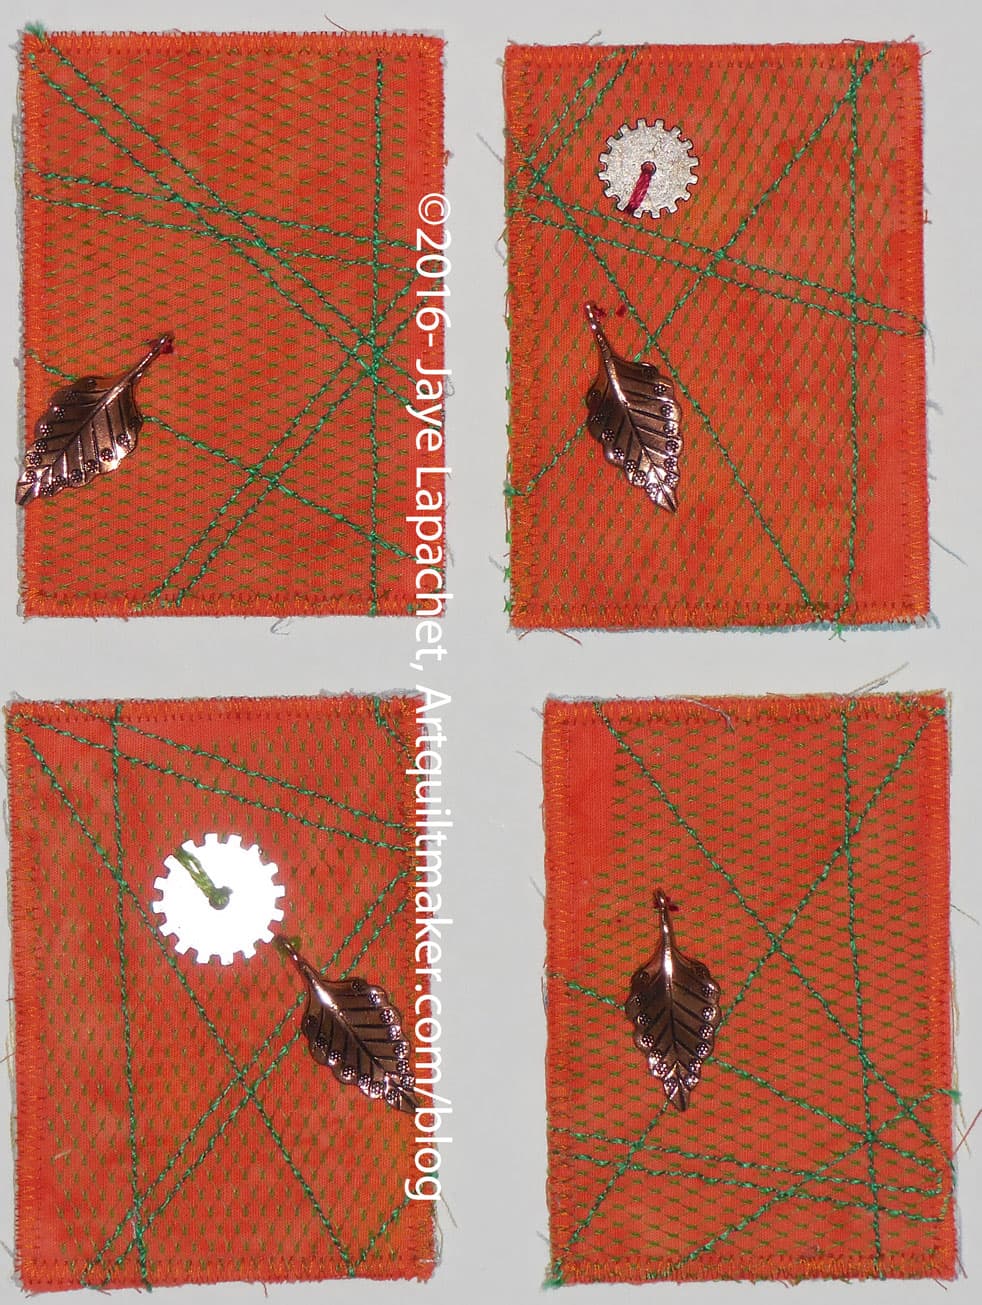
I finally made some ATCs! After missing several meetings, then not having time to make any before the October meeting I feel like I have reached the summit of a high mountain. Additionally, I used the charms that have been sitting on my cutting table (or falling off repeatedly) for months!
I wanted a fall theme to go with the leaves and it is still Fall, though it feels like winter some days.
Today is the CQFA meeting, so we will see how they are received.
We had the CQFA meeting on Saturday. Of course there was an ATC swap. Not participated in the swap this time, but I received two lovely cards and got to keep one of my own.
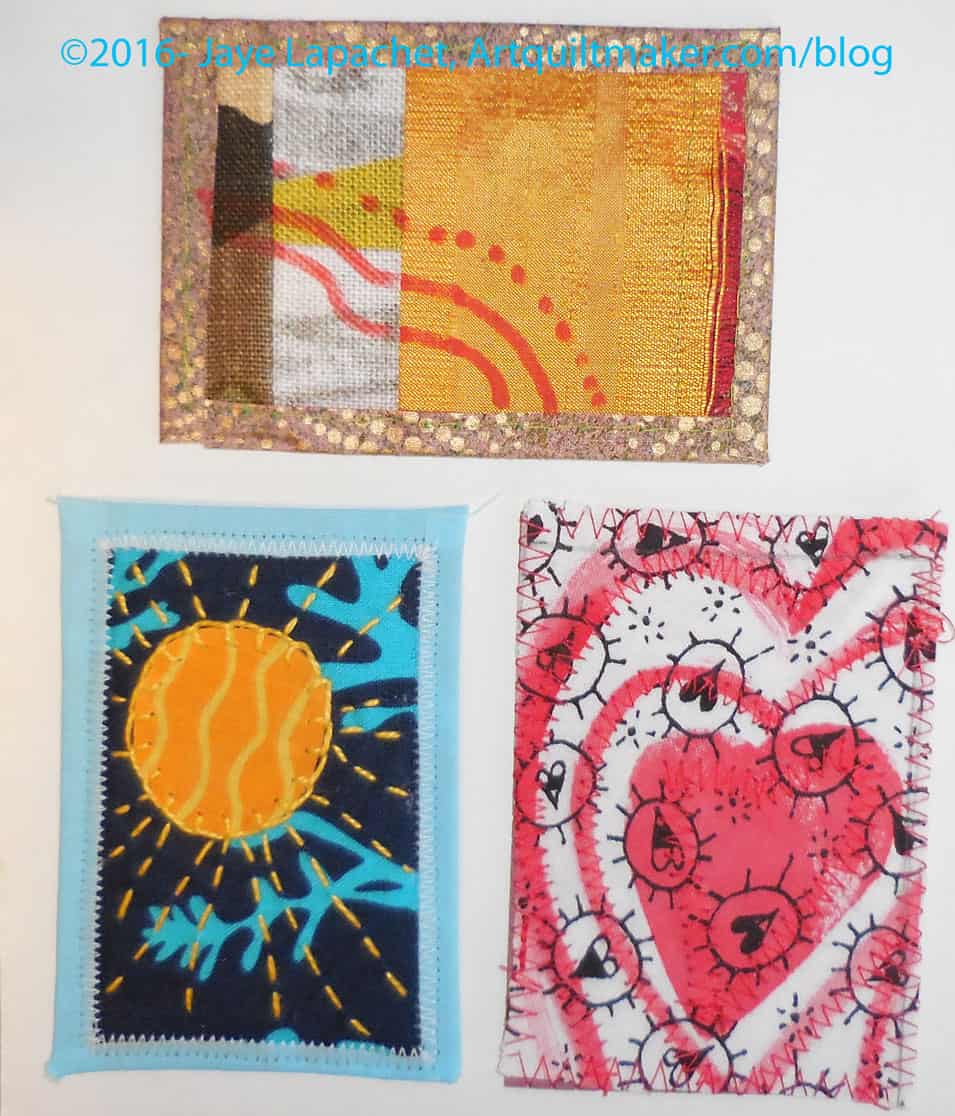
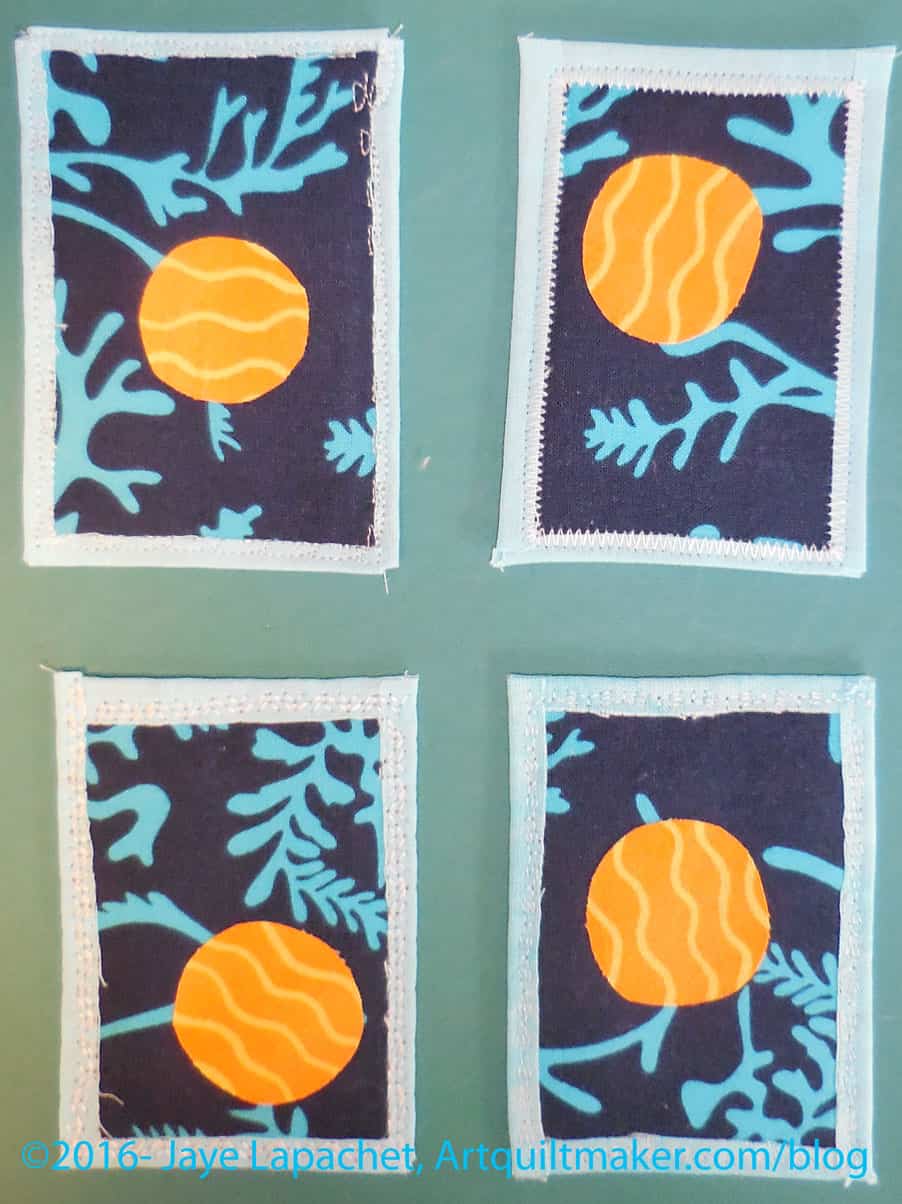
As usual I intended to make them well in advance. Friday morning (day before the meeting!!) became unusually busy and I still hadn’t made any. Eventually I tore myself away from all the other things demanding my attention. I went for a walk determined to decide on a design. As I walked it occurred to me that I wanted to do something very simple and I came up with a design comprising an orange circle on a blue background. I was imagining the colors I used in the Wonky 9 Patch quilt. That particular blue and orange glow when put together.
I also remembered Ms. Lottie’s directions for finishing the edges and decided I would try the technique. I would have done a better job if I had actually read the directions again, but I did what I thought I remembered the directions saying. I had some trouble with the corners. They don’t look very tidy and I realized why after I read the directions when I finished. Such a great plan (<–irony). I’ll give it another try next time.
I like to put stiffener in my ATCs so they are more like cards. This meant that the fusible on the inside of the backing was adhering to loose Pellon interfacing. It didn’t secure the three layers together at all. I liked the technique and the little frame it makes. I’ll just have to make the technique my own for next time.Reading the directions might help. 😉
By the time I arrived home I had an idea. It didn’t quite work out the way I imagined, but turned out satisfactorily. I didn’t have the exact colors I saw in my minds eye, but I did have colors that worked well together.
When I put the initial pieces together, they looked unfinished. I always like to do handwork and haven’t had many bindings to hand sew recently, so I sat on Friday night and stitched some Perl cotton on to these ATC pieces to add interest and finish them. I seem to often do embroidery or beading on these pieces. I wonder if it is a signature?
Bron and Virginia also participated. We each got one of our own and gave Rhonda the extras to bring to Angela.
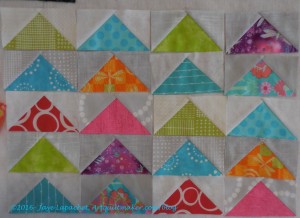
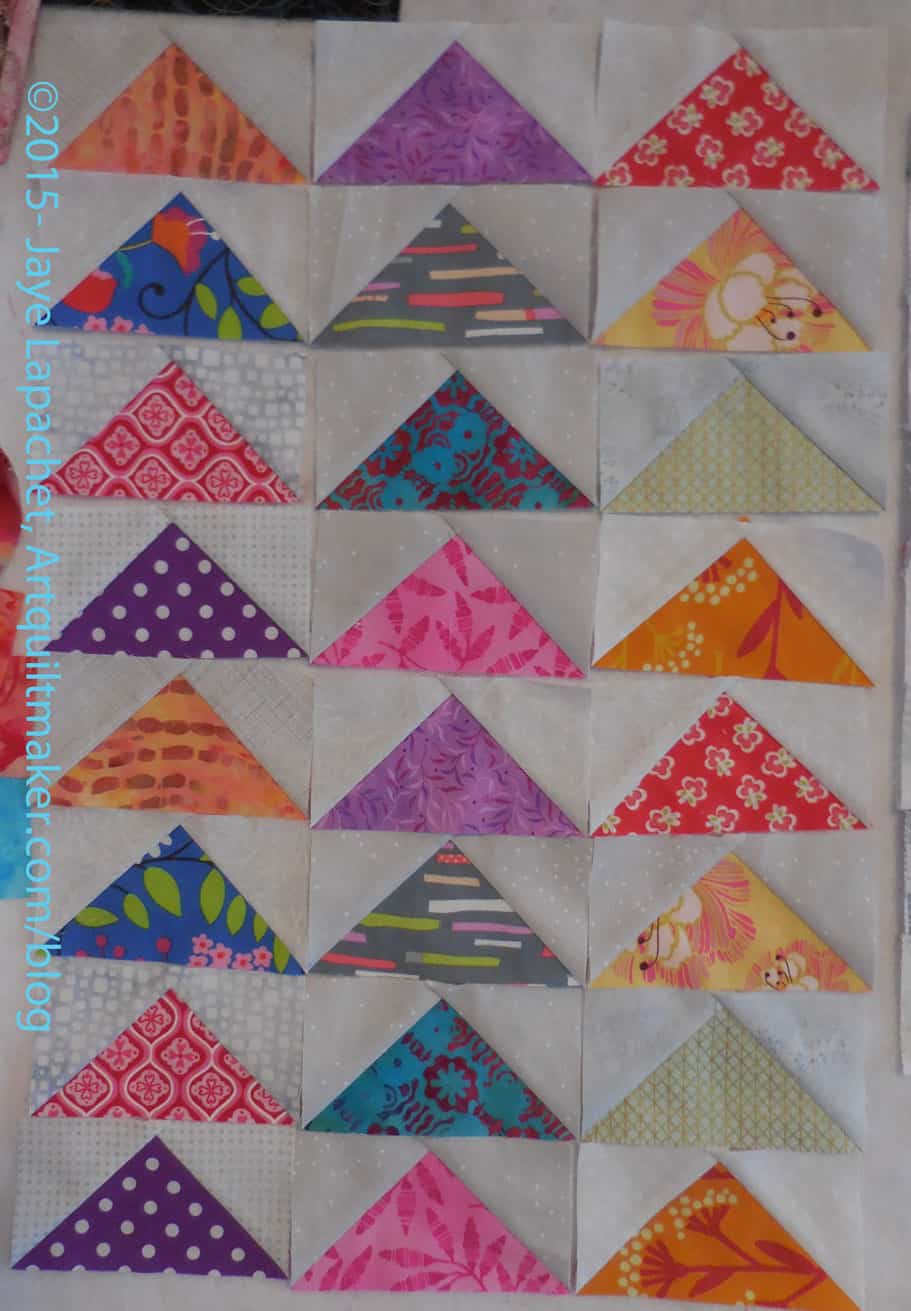
I am more excited about Flying Geese now that I may have a plan. Shown are the latest group.
Lots of green this time and not all mine!
I have been making and receiving Flying Geese all along. I finally decided to do an update as the group was getting kind of large and was taking up space on my design wall. Also, the last update I did was on November 14 and that seems like a long time ago.
If I did the math correctly (50 weeks x 4 geese each week), I have at least 200 right now. It doesn’t seem like enough, though. I think I must have more. I am kind of amazed at how easy it is to make these blocks and to have them add up in number. I really want to sew up all the patches I have cut. I am trying to restrain myself.
Some of these TFQ won’t recognize, because I haven’t send them off yet. They were part of the Wacky Weekend Work I did. Flying Geese make good leaders and enders.
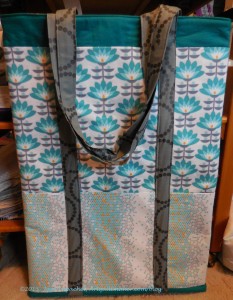
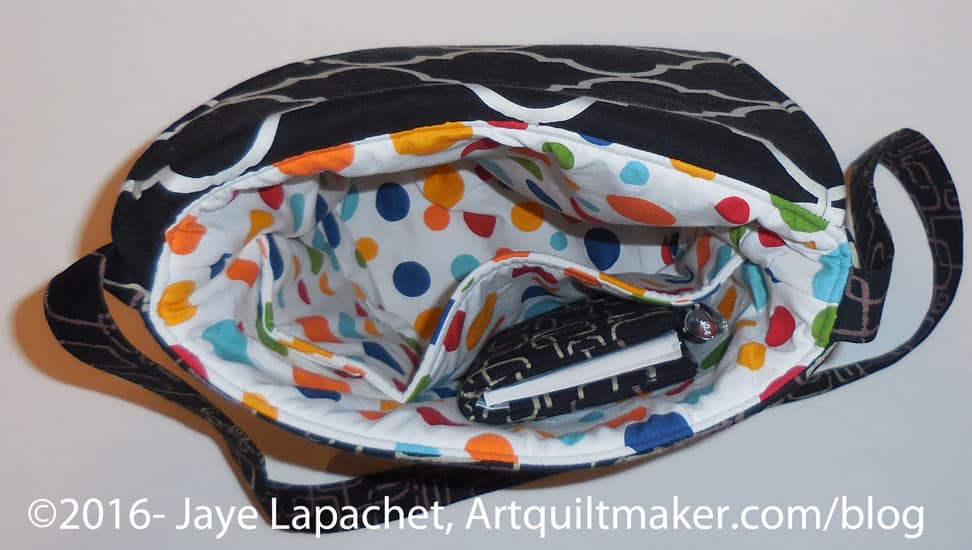
There are a couple of reasons why this is the best bag ever.
First, I needed a bag which I could use to transport my June Tailor board. If it wasn’t written on my to do list, it was on my mental to do list. Since I took the Dale Fleming class and needed to buy the June Tailor board for it, I have wanted a bag that could accommodate that board. I just never could get to making one.
Next, I didn’t have to make it. This was my BAMQG swap gift. I couldn’t believe someone would make me such a large and wonderful gift. I really was shocked. Amanda made this bag in colors that I really like. The pocket on the outside will accommodate my Omnigrid 24″ ruler. The outside side pockets will accommodate other rulers and supplies as well.
Third, she also added useful pockets on the inside for 6″ and 4″ rulers. Amanda included a cutting mat and the small square rulers. Not only is this gift really useful, but Amanda was really generous in the additional bits she included.
Finally, I get to cross something off my to do list. Whether it was on the list or not.

BAMQG had a gift exchange yesterday for the Winter Extravaganza meeting. I made a tablet cover for Cindy C.

I started it a few months ago, right after the announcement and my giftee assignment.
I found many tablet covers, but finally decided I liked the look of the Sew Mama Sew pattern by Jen Carlton Bailly. In the end I got a tablet cover with which I am pleased and it only took me a day, but, in the end, I didn’t like this pattern.
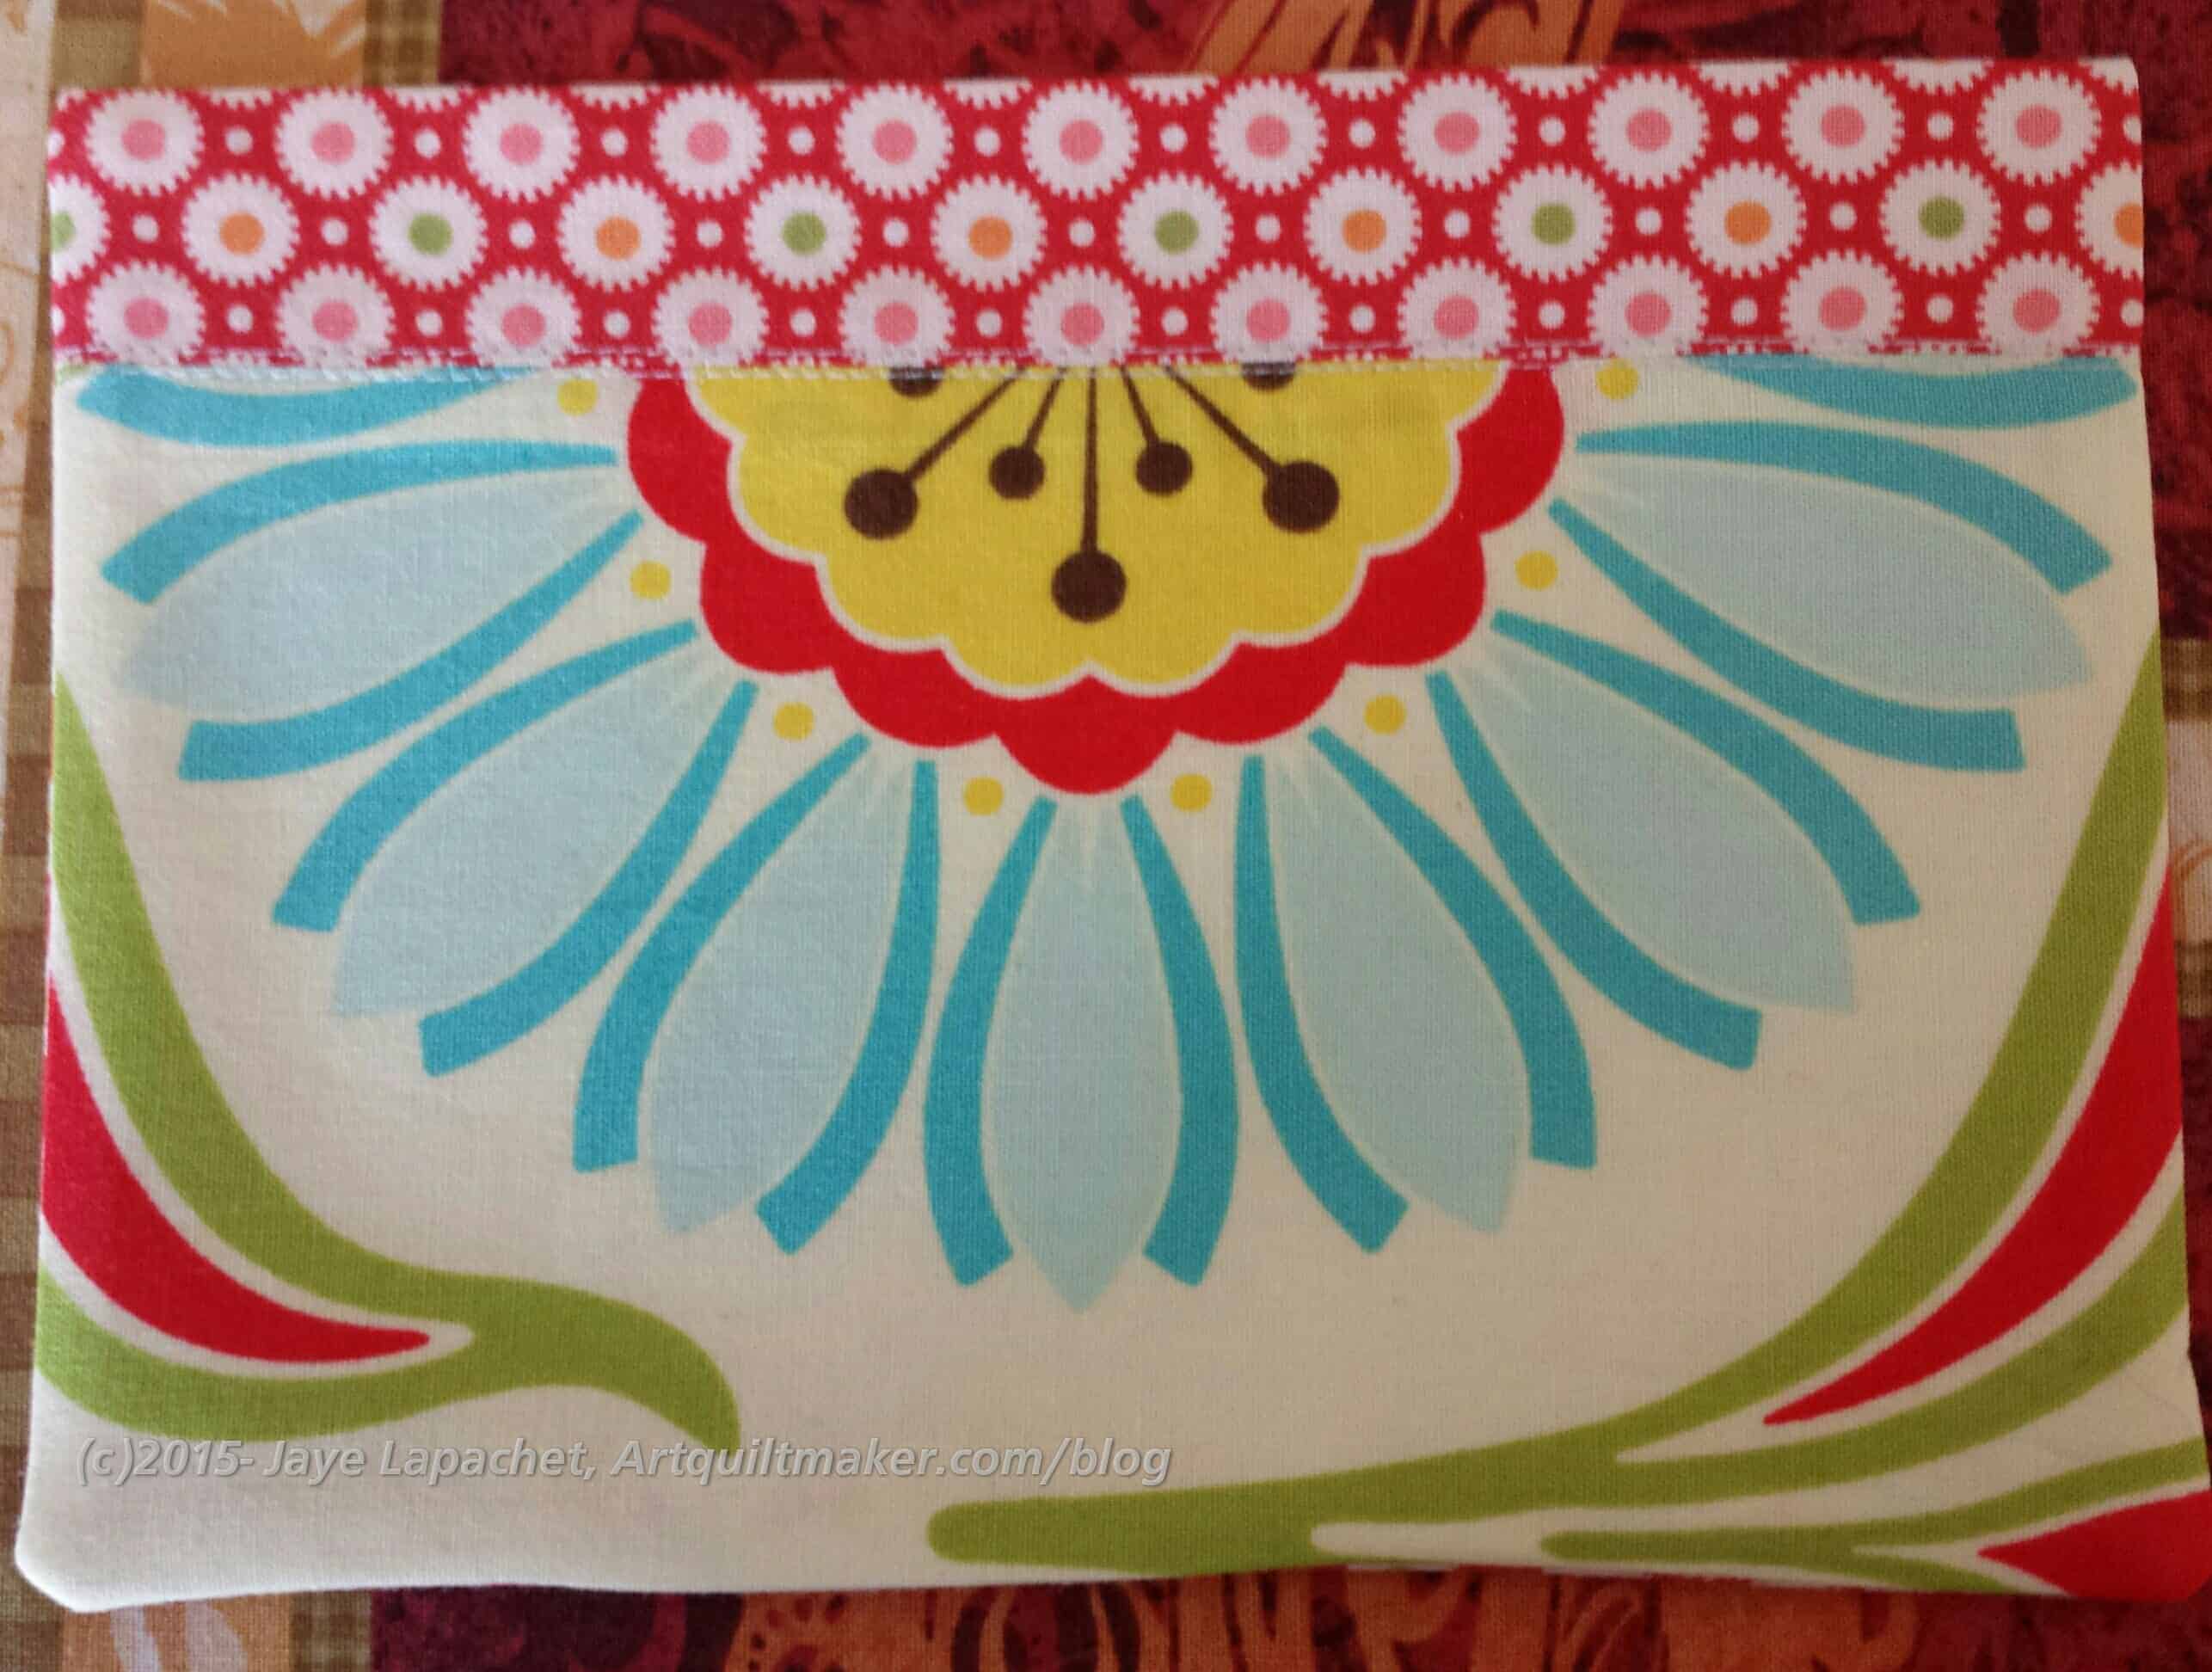
The tablet cover I needed to make was intended for a modern guild’s swap. I have a lot of the Heather Bailey Pop something fabric – Sugar Pop? Pop Rocks? I don’t remember the name of it. It is modern and so I used it with a Bonnie and Camille Bliss print on the inside.
I searched for a tablet cover pattern, cut the pieces and then let them sit for nearly a month. Bad idea, because I had a hard time finding the pattern on my computer. It was there; I just didn’t remember where I filed it. I also forgot where I was in the making process. Sigh. Not an auspicious start.
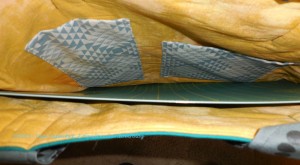
I started out making the pocket as the directions said. I was quite proud of my pocket. The corners are a little wonky, but I was proud of the way I lined up the fabric.
This pattern ended up being somewhat problematic and the problems started when I went to sew the pocket to the cover. The directions weren’t specific on where to sew the pocket and from the pictures, it looked like it was sewn to the inside. I sewed it on and went on with making the rest of the cover.
I used Soft & Stable instead of the recommended interfacing, because it is nice and cushy. I wanted the cover to keep the tablet from getting scratched and the Soft & Stable provides a good cushion. It is not fusible so I sewed the pieces into the seam allowances to keep them in place.
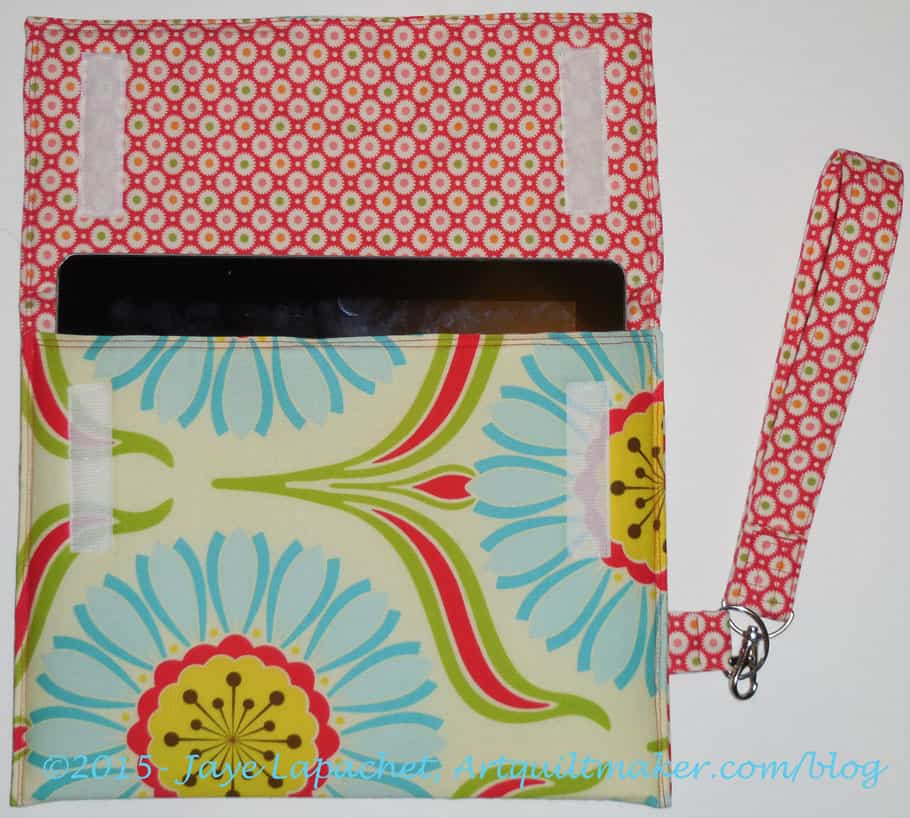
Once you get the hang of bagmaking, most bags (and this is essentially a bag) are very similar. I sewed along at a good clip. I slowed down towards the end, because of the strap for the wristlet. I had to translate the webbing directions to using interfacing and fabric directions. I think my wristlet looks ok.
The velcro was also a challenge and I would have put it on before I sewed the lining and the exterior together if I had known how it would fall in the steps. I’d like my velcro to be hidden, which means sew to the lining and the Soft & Stable NOT to the outside. That type of construction is not much more complicated, however you do have to think ahead.
Yes, I read the directions, but without fabric in my hands, it might has well have been gibberish. I’ll do it a different way if I make another one.
As I mentioned above, I sewed the pocket to the inside of the cover. There was no mention of sewing the tablet cover together. Even reading over the steps above and below, I could find no spot that said to sew the cover together so it looked like an envelope, so I did my best when I got to that spot.there were three sections, so it wasn’t difficult and I used monofilament so the stitching wouldn’t show up.
As it turns out, the pocket ended up on the inside. With the opening down.
Since the opening was down so I couldn’t even claim it is a hidden pocket. I am not a good pattern reader, so I went back to be sure and step two does not mention what fabric (outside or lining) I should sew the pocket to. Different fabrics are shown in different pictures. I know it is hard to write tutorials and thankless, as well, but this was not a complete pattern. I am not sure it was tested.
I looked at it and thought about it overnight. I decided to take the whole piece apart and resew it so the pocket would be useful. Unsewing monofilament is no picnic, but I am much happier with how my version of this pattern turned out.
The pocket is nice looking IMO, but it covers the matching of the fabric on the actual cover that worked at. Oh well.
The meeting on Saturday was long and fabulous. I can’t write one post on all that happened. It is too much to include.
We had a short business meeting, then everyone put their challenge and workshop pieces up and we all walked around and looked at them.
While this was happening, some of us exchanged ATCs. Virginia, Angela, Nancy and I were the only ones who made ATCs. This was a GREAT batch, though, and I love the ones I received, including one of my own.
I almost never get one of my own, mostly because I don’t make an extra to keep. My own fault, but it is nice to get one once in a while.
I spent part of the day, and most of the evening, Friday making my ATCs. The big piece of ATC backing that I made at the beginning of the year to help make the ATC process progress more quickly has disappeared (sigh), so I had to start at the beginning. Part of this process was clearing off my cutting/worktable. I had things in progress there, which took up space, so I cleared them off, made the backs of the ATCs and then started in on the fronts.
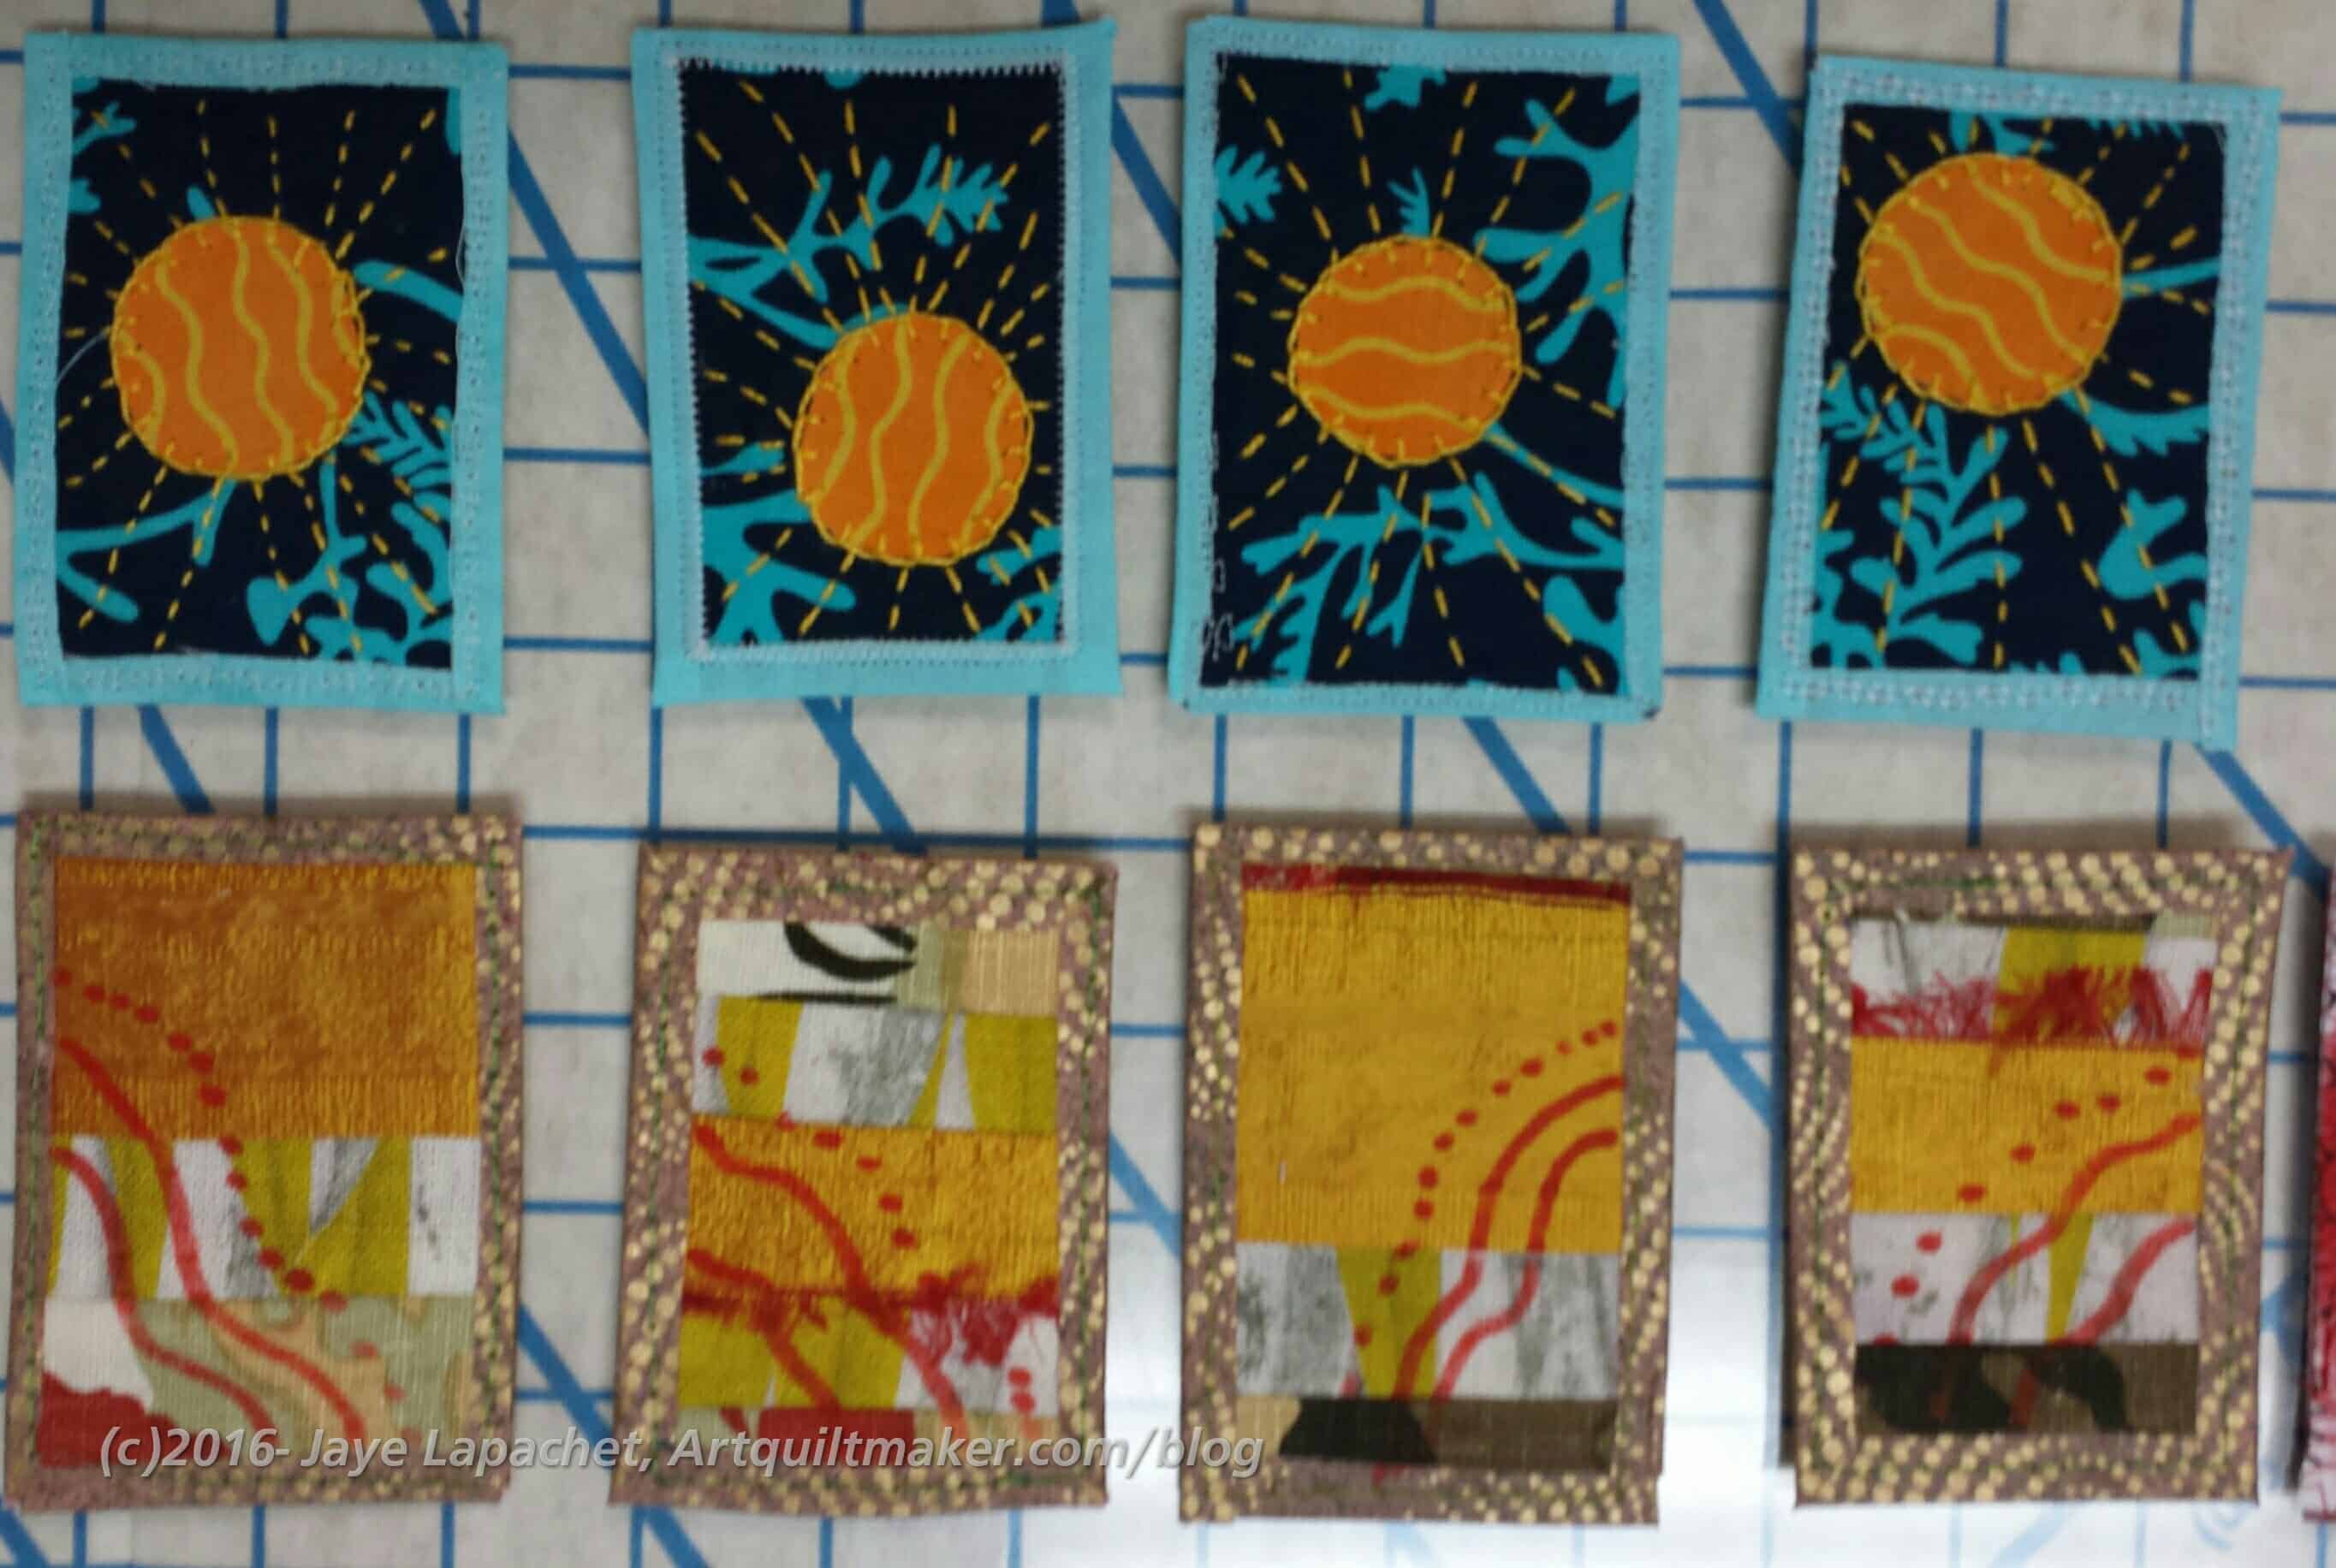
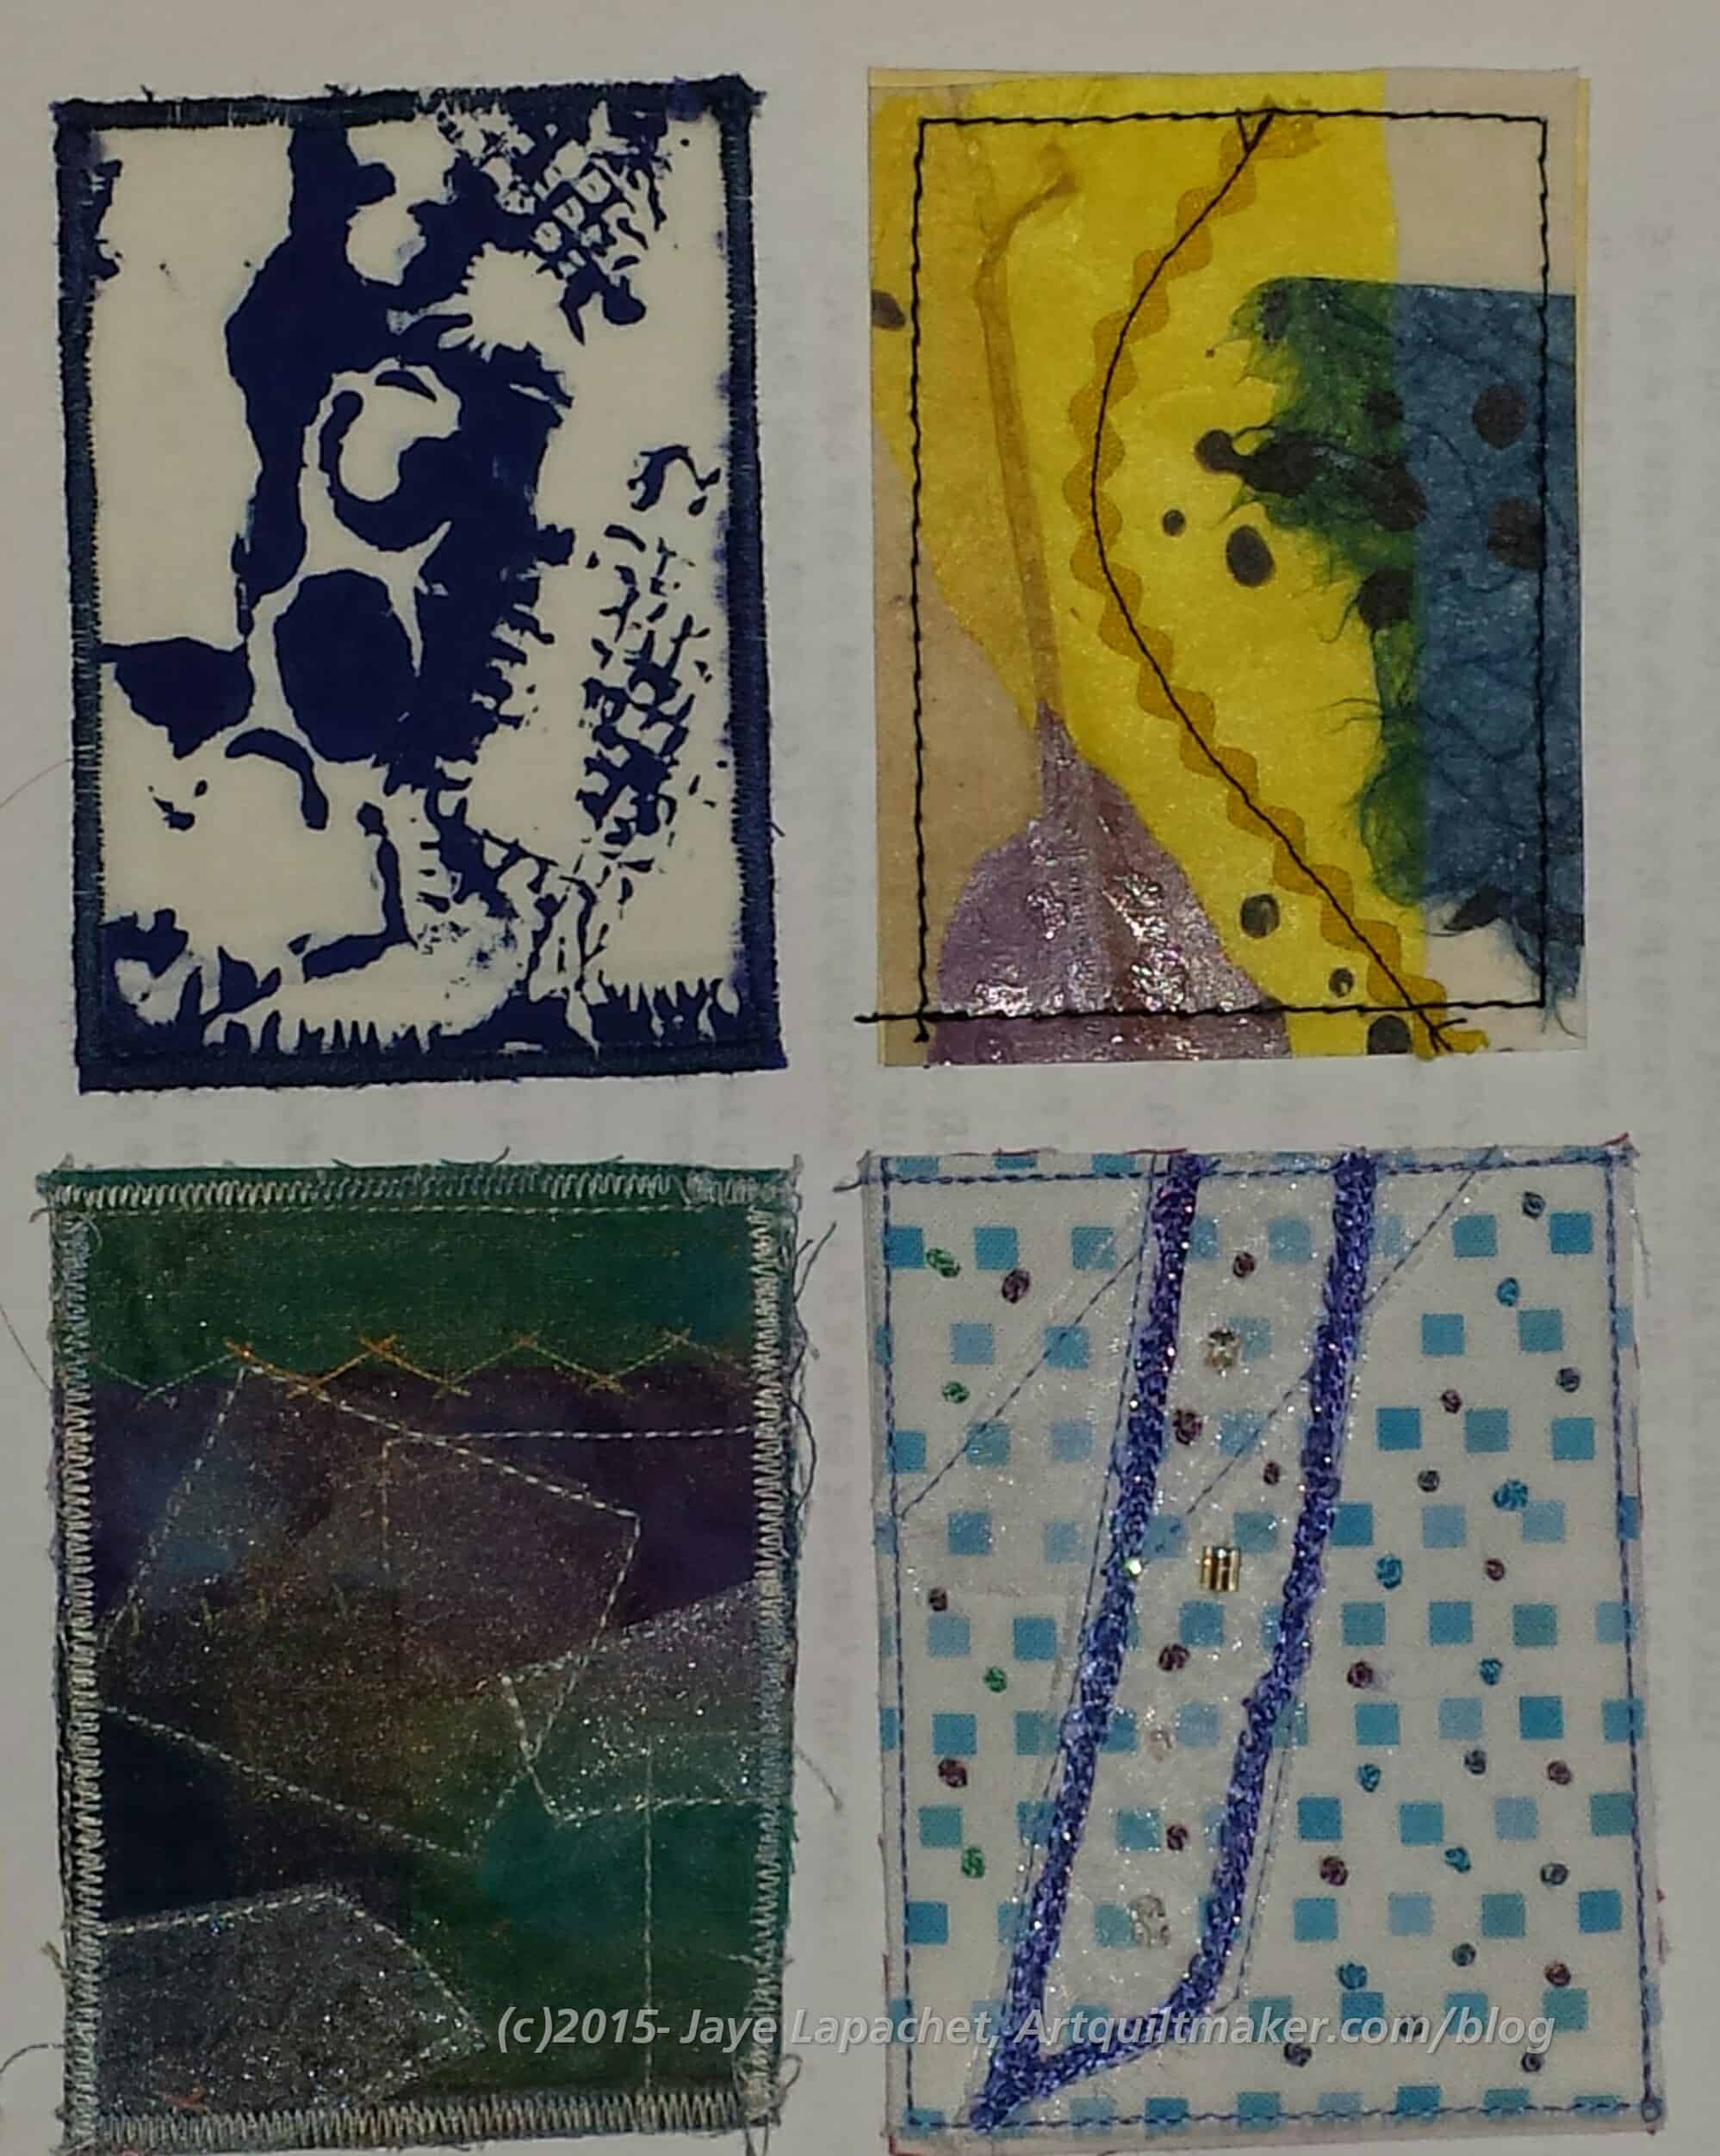
I used scraps, mostly. I also decided to try using some of the sheer ribbon I save from gifts for gift bags as a starting point. I enjoyed using it as it gave the piece a bit of a sparkle, but I think I should have used a darker fabric if I wanted the ribbon to show up more.
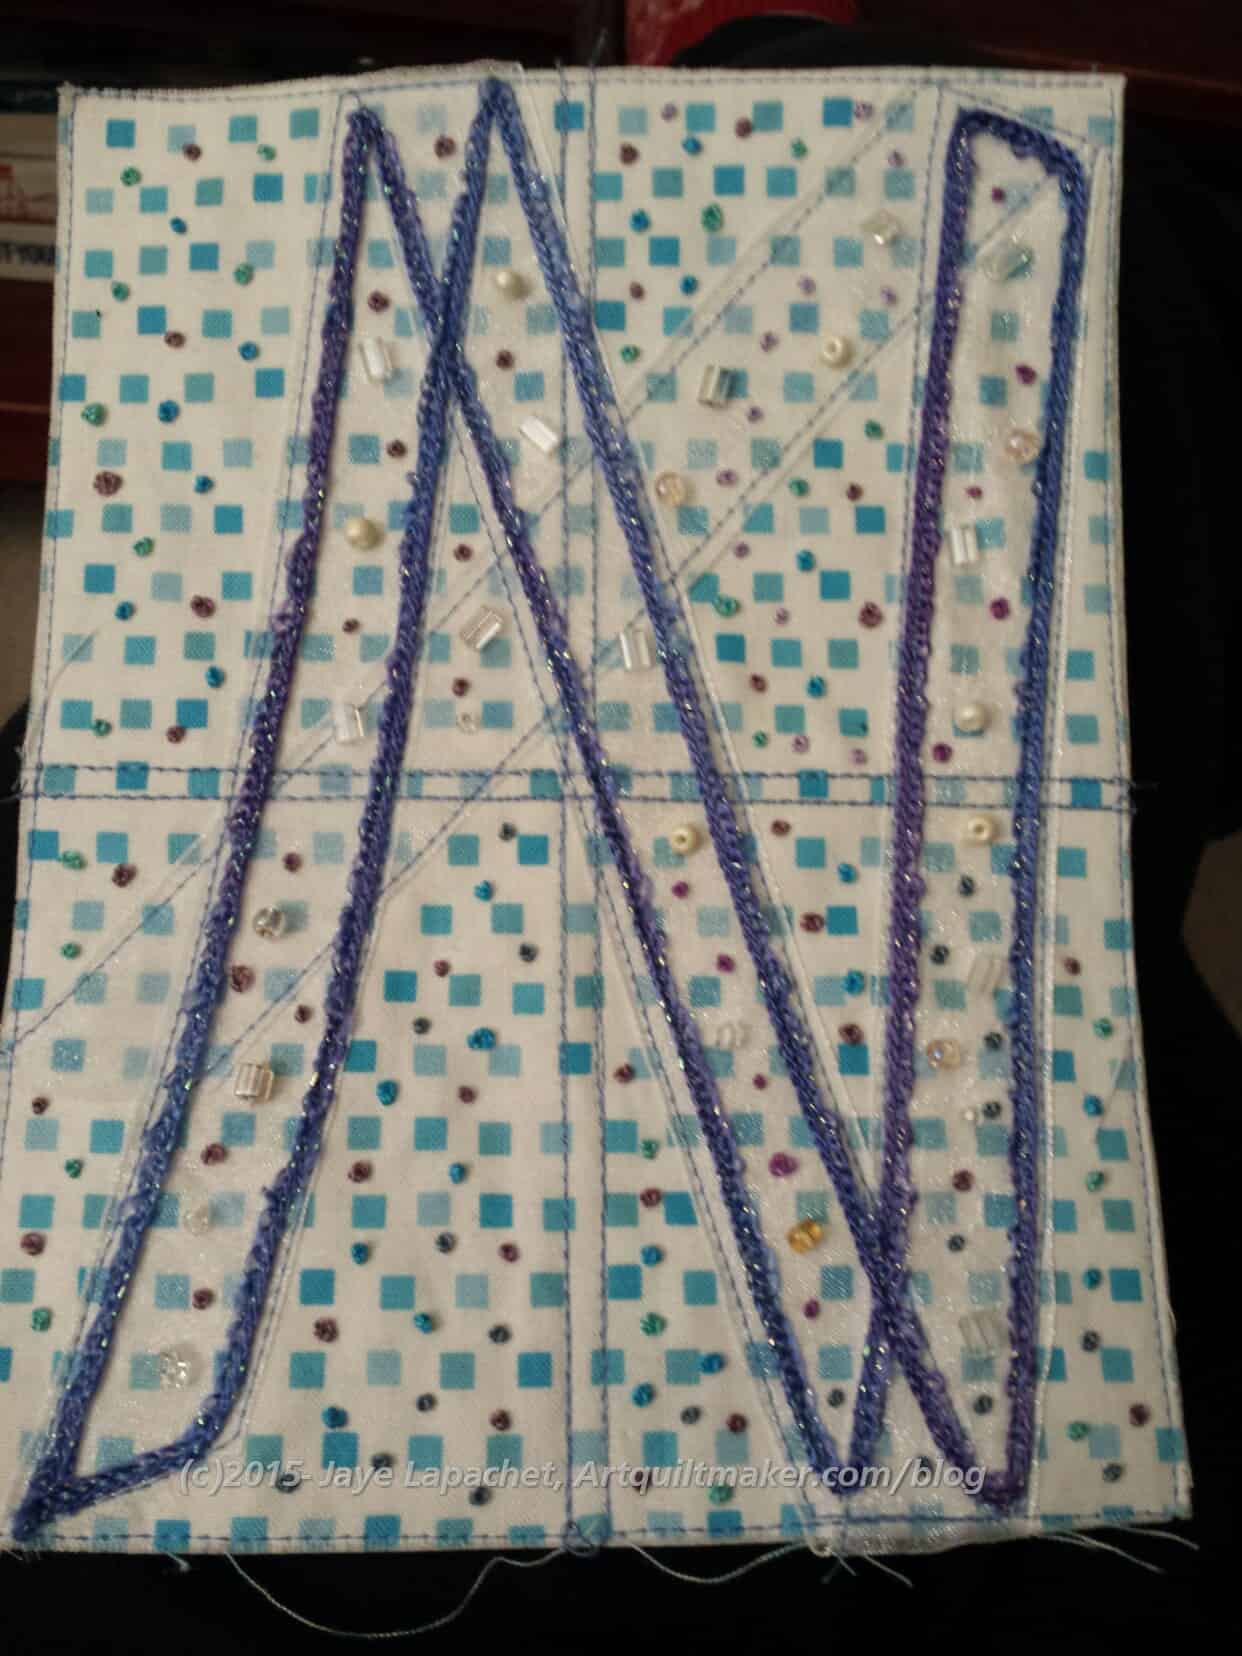
I usually make the 4 ATCs as one big piece and then cut them up. It makes for less fiddliness. This time I was smart and left a little bit between each ATC so I had room to cut them apart. You can see the stitching lines around each 2.5″x3.5″ rectangle. This rectangle is my canvas and helps me remember that whatever is between those two lines will not be seen.
That blue thread is very thin and almost looks like a length of single crochets. I carefully placed it next to the stitching where I stitched down the ribbon and sewed it on with a straight stitch. I bought it and a few other colors on a card that had 5 different types of embellishing thread in about 2-3 yard lengths. I use them periodically for ATCs.
In the evening, I added french knots using several blues, greens and purples from the Anna Maria Horner set of Perl Cotton I bought some time ago. I also put beads on each card, using a Bead Soup selection. I love doing the handwork, especially as it gives me something to do when I watch TV that makes me feel like I am making progress. The handwork was a little hard on my hand. I need to think about that next time.

Angela told me that she took a class from Valerie Goodwin and used the techniques of blending and adding sheers for her ATCs. The sheers are a similarity between Angela’s and my ATCs.

Virginia’s ATCs felt like they were painted on paper, though mine has part of a leaf under, what looks like, a piece of decoupaged tissue paper. There is some stitching as well. Virginia is immensely talented and I am continually in awe of what she makes.
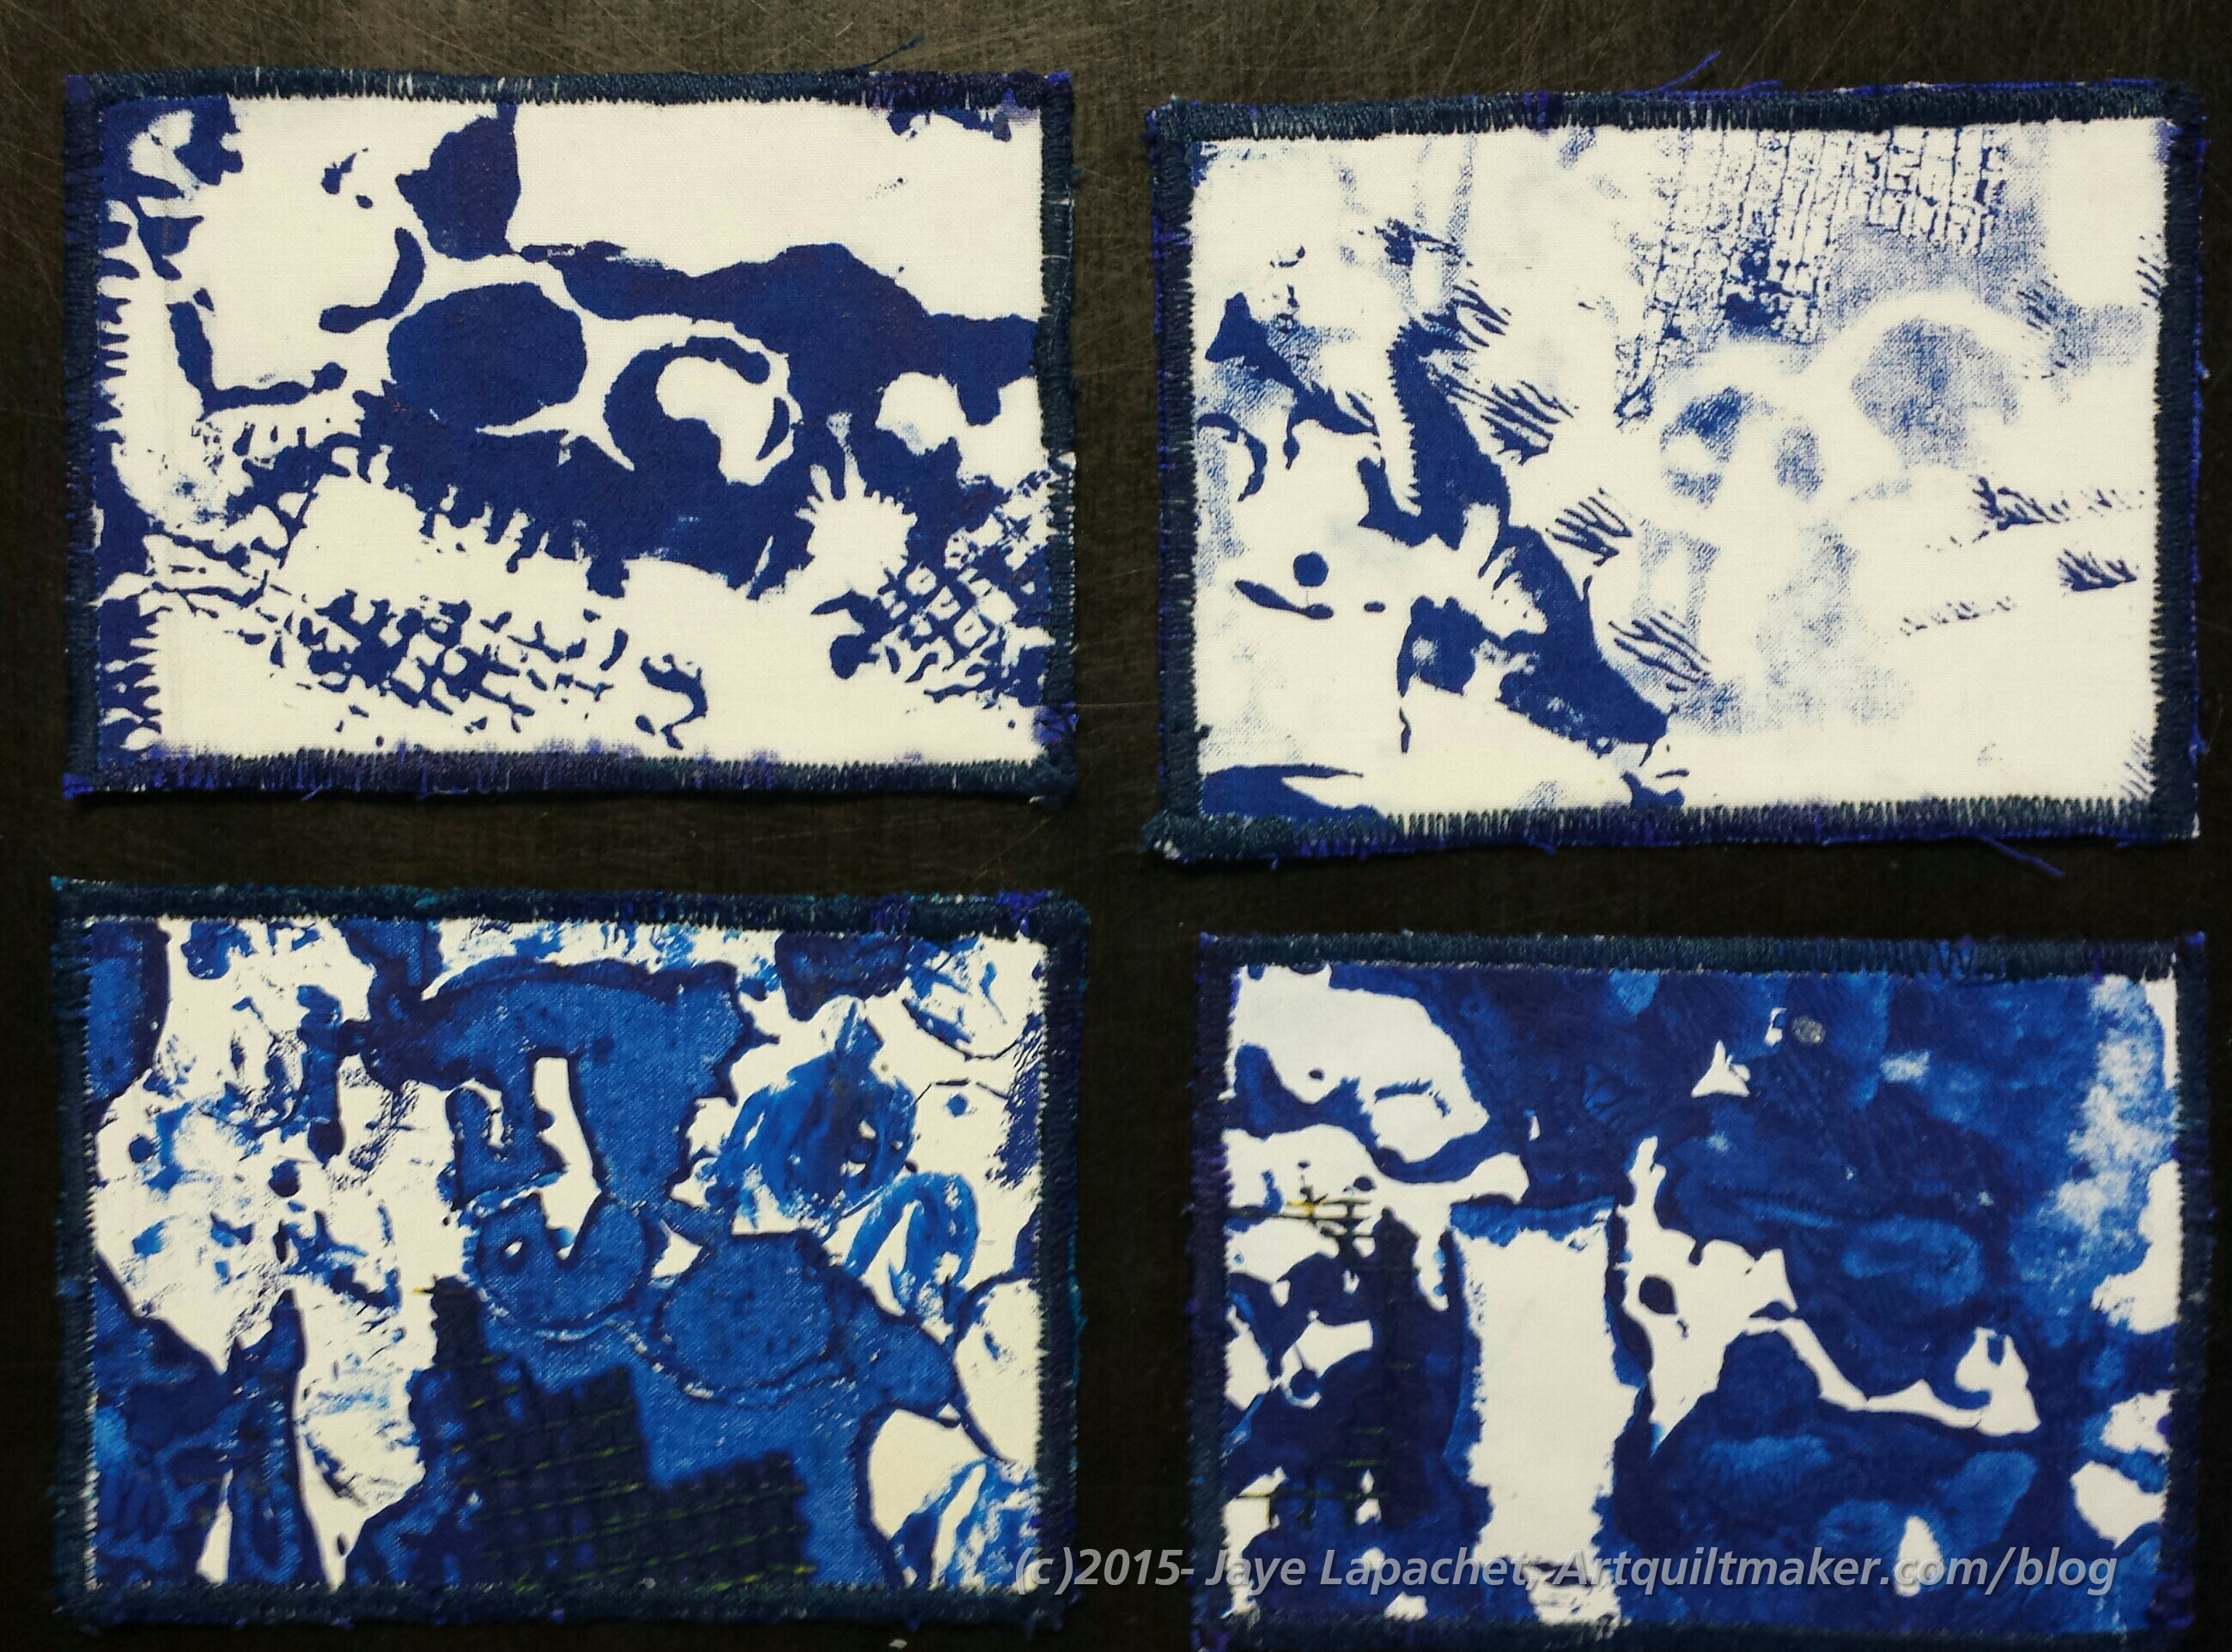
Nancy used a printing press at work for a project and was inspired to come home and do some printing with glass sheets. I really like her designs and kind of wish she would upload them to Spoonflower and make the designs available as fabric.
One of the things I like about ATC swaps is the opportunity to play a little bit. Of course, I could do that all the time, but I don’t. This is a deadline I can use to make a little piece of art.
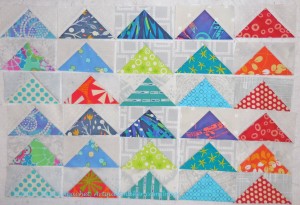
I have another batch of Flying Geese blocks to show. In light of my post on inspiration for this project, I also spent some time on Pinterest looking at Flying Geese quilts. I finally feel ready to start thinking about a layout. I am not sure I want to sew a quilt, but looking at designs is finally fun.
This group of blocks looks much more Autumn-ish than previous groups.
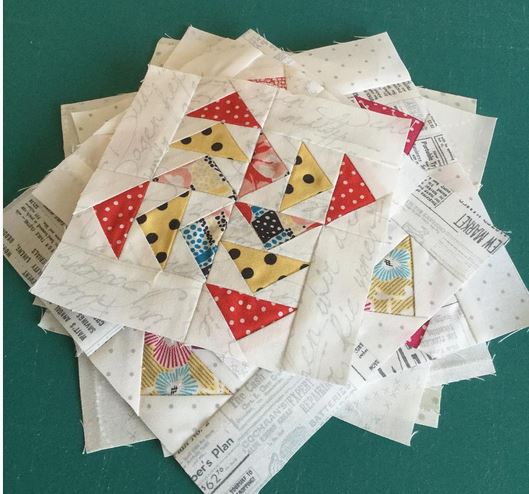
TFQ recently sent me a link to block that I really like made from Flying Geese. It was on the Moda Instagram feed and I can’t tell if it is a historic block or if the maker added another FG to a Dutchman’s Puzzle block.
We have been doing the Flying Geese Exchange, which I highly recommend, BTW, and I have started to look around for interesting design in which to use the Flying Geese. I have begun to start thinking about something interesting to do with the blocks. TFQ is clearly on the same page.
The blocks above are from the Moda Instagram feed. I have always liked the Dutchman’s Puzzle block and actually made one for my first Sampler quilt. This block puts a little twist on the idea, but it might be just enough to keep me interested.
Mary Fons posted a link to a block she made, which I originally thought would be great for our Flying Geese. After looking at it again, I don’t think it will work. I still like it, but there is an extra color that exaggerates the motion in the block. Our Flying Geese do not have that extra color. Of course, we could still put the block together, but we would miss out on the motion.
Love of Patchwork and Quilting had a block made from Flying Geese (Issue 24, Darling Dorothy) that is mildly appealing. I don’t think it will work for me for a whole quilt.
So you can see where my head is with these Flying Geese. Any ideas? Any interesting ideas?
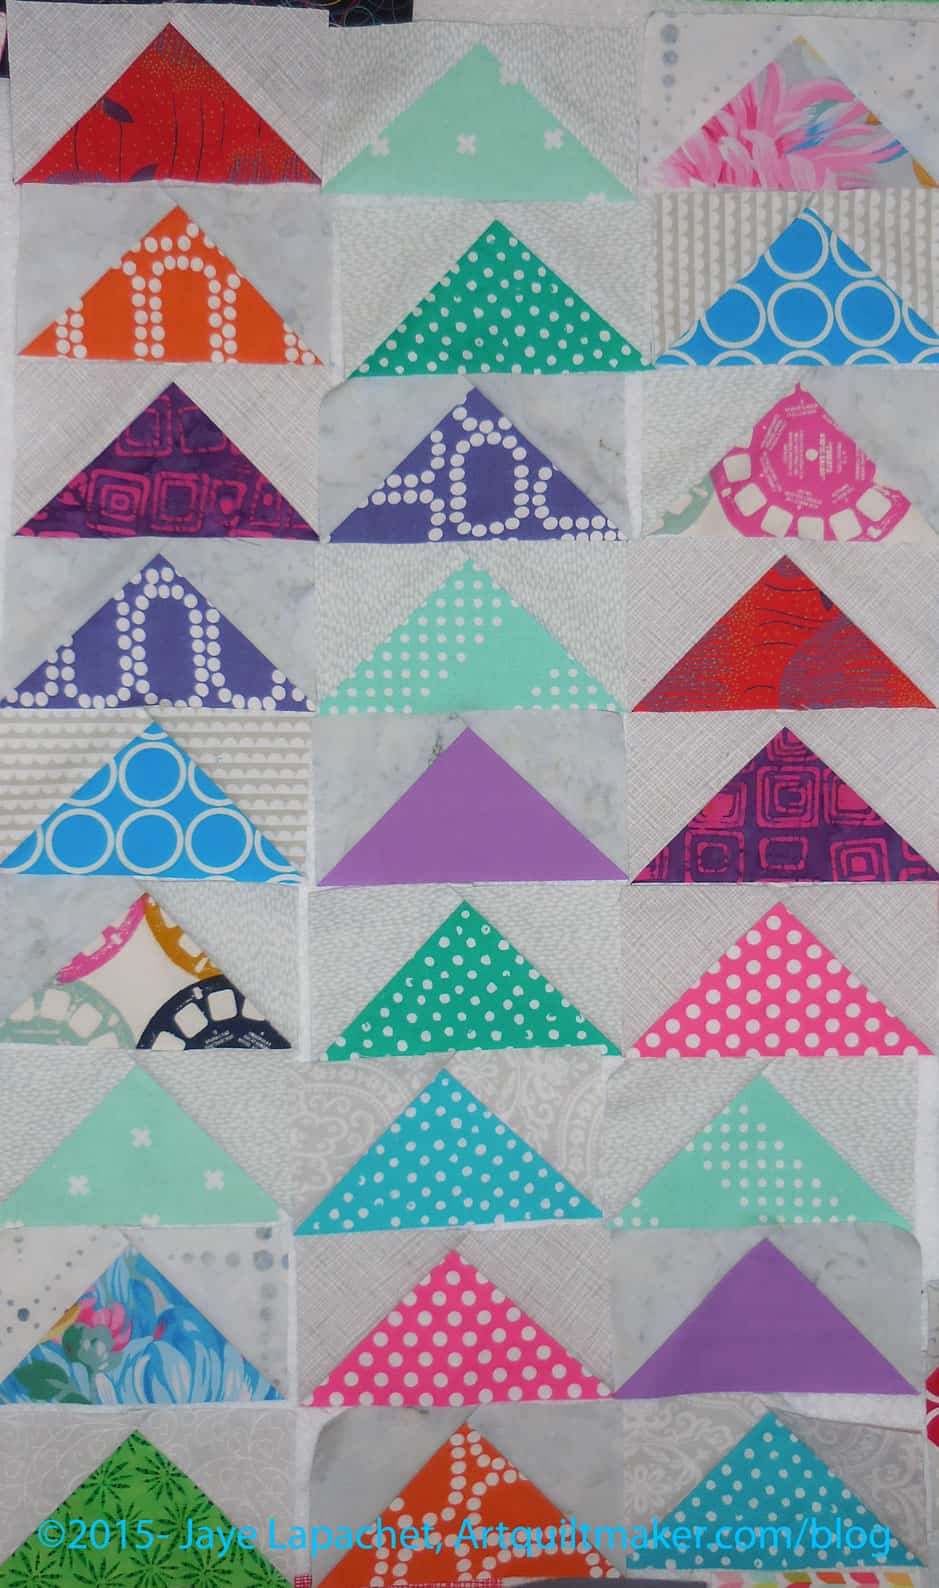
TFQ and I are still working on the Flying Geese exchange. We will through the end of the year, at least. I think for both of us this swap is keeping our heads in or keeping us on track.
It is nice to have something to do every week.
The FGs shown in this post are a combination of my contributions and TFQs. I think they go really well together. This group is very bright and cheerful.
I am not sure what I want to do with them. I have been looking at different layouts for all of these FGs and haven’t found one that I like yet. It is early yet.