Twirling Triangles Test

I think this might be alliteration week. First, Food Fabric FQs and now Twirling Triangles Test.

I got the Pyramid Ruler from Fons & Porter and decided, once I started sort scraps for various scrap projects, that it was time to use it.

Last weekend, one of the tasks I did was try making the Twirling Triangles patches. First I cut a strip from Kona Snow that was 4″ wide. The strips had been sitting around for a little while.

Sewing Scraps to Strips

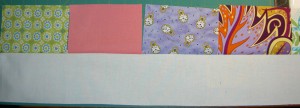
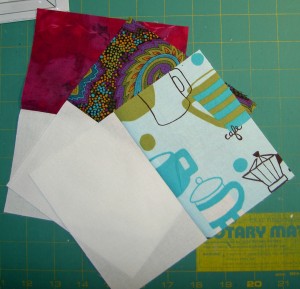
Then, I went through my scrap basket and cut pieces that were 4″x5.5″ and carefully sewed the squared scraps to the strip. Frankly, 4″x5.5″ isn’t exactly a scrap and that became apparent as soon as I started trying to cut pieces. I don’t have a lot of scraps that size. Why would I?

Pieced Strips Ready to Trim

Once I had sewn patches to the strip, I only had to cut the Kona Snow strips to make the strips sets above. The size of the commercial printed fabric patch meant that I didn’t really have to measure. I just used the printed fabric as a guide.

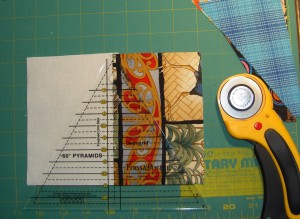
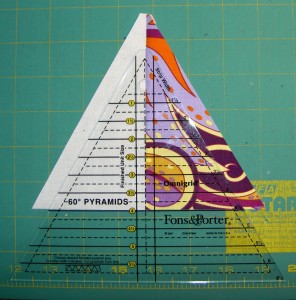
Trimming using Pyramid Ruler

The Fons & Porter Pyramid Ruler is very easy to use and that trimmed corner on the top is awesome!

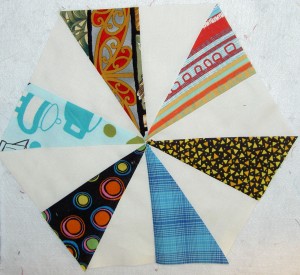
Test Pieces Arranged

Here are the test pieces laid out. This ‘block’ is about the size of a dinner plate!

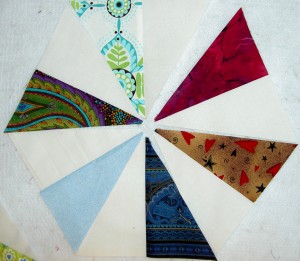
Test Pieces Arranged #2

I think the patches are too big, because they make blocks that will be enormous. I think I will cut them down.

Cutting Down the Wedges

I think I have pretty much decided to cut these wedges down to the size shown above. I believe the strips will have to be cut 4.5″ wide and the scraps will be cut 4″x4.5″ wide. I think it will be easier to use scraps with these sizes as well. I haven’t actually done any cutting, but will do it soon. There is always more fabric, right?

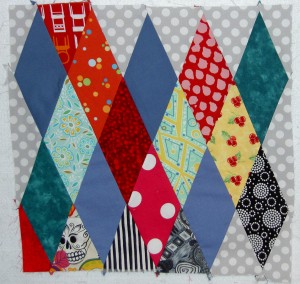
Diamond Test

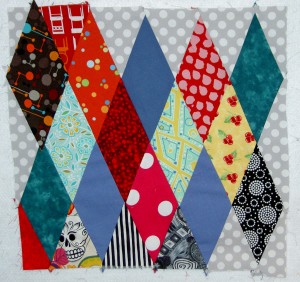
Finished Diamond Test Piece

I spent some time yesterday working on the test piece. I wanted to get into the groove of sewing diamonds again. The Eye Spy feels like a long time ago. Now I think I have a better idea of the sewing, though matching the points and sides of the diamonds proved challenging. I found a book that had some tips and will take a look at that before I start the piecing.

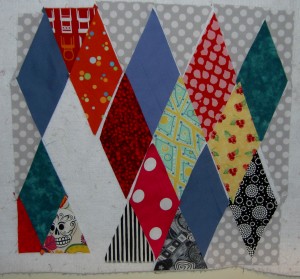
Diamond Test Piece in Process

The left hand corner section of the above photo is pieced. You can see the piece getting smaller as I piece it. There are two diamonds in the machine, which is why there is a big white space in the photo.

Aside from matching the points, I also had some trouble with the border diamonds and corners. As a result, I think I will start in the center and piece outwards. I’d like to piece the diamonds in chunks and it might work better to start piecing them in groups of four. I’ll try it and see.

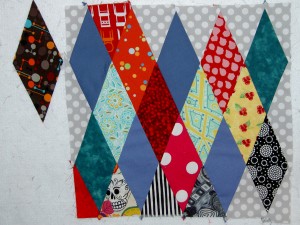
Finished Test Piece with Comparison Diamond

I didn’t measure the finished diamonds, but you can see the significant change in size. It will be interesting to see the big piece develop.

Finished Test Piece with Comparison Diamond Overlay

To give you another view, I have overlaid the patch/unfinished diamond on top of the finished piece so you can see the difference.

Frosted Stars Test

Frosted Stars Test
Frosted Stars Test

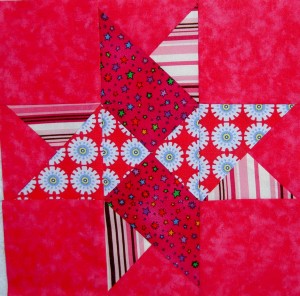
Since I am thinking about going out and actually buying special fabric for a project, I thought it might be a good idea to test the pattern to see if I liked it. Since I finished the top and back of the Blue Janus quilt this morning, I thought it was something that I could manage.

I dug out the directions and went to work. I can’t say I was enamored with the directions from the Moda Bakeshop. It really too me a long time to make one block and I had to follow the directions step by step, because there weren’t cutting directions for one whole block at the beginning of the section where the star starts.

I redrew the block in EQ7 just to see what it would take to make some straightforward cutting directions. I can see why Charlie Scott used some fancy triangle tricks. I created rotary cutting directions in 12″ and 9″ (both finished) sizes. These blocks use quarter square triangles and the triangles need to be cut weird sizes, which I know nobody likes. Still, my directions are a lot more straightforward than those on the Moda Bakeshop page. You can cut the quarter square triangles slightly larger and then cut them down to the normal size. I hope you will be able to click on the numbers above and download the rotary cutting directions.

I am going to make another one using my directions and let you know what happens. I am not knocking Charlie Scott. I love the free patterns out there and have a really difficult time following them. I will probably put some borders on the one above and send it to Anna Maria Horner for the Rainbow project.

Jelly Roll Thoughts

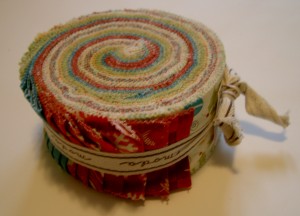
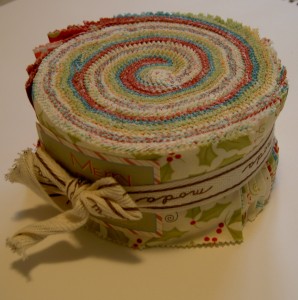
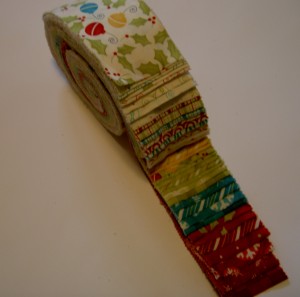
Merry & Bright Jelly Roll

I needed a fast project, some quilt sorbet for when the Sorbet quilt wasn’t working.

I have had a Sandy Gervais Merry and Bright Jelly Roll for a long time. This past weekend, I decided it was time to take the fabric strips and make the It’s a Wrap quilt. I had some other things to do, but I spent a lot of time just sewing and learning.

It was a somewhat strange experience. First, someone said they couldn’t believe I was using a Jelly Roll. I was hesitant to tell them about the pattern. I did tell her for shock value and I thought she would keel over. Sometimes, I think, by limiting choices, a quiltmaker can focus on other elements of the process. That is what I was doing, even though I didn’t start out with that intent.

Merry & Bright Jelly Roll

One thing I learned is that there is value in trying things out: different fiber content, different construction techniques, different tools, etc. Having a pattern and the fabric choices taken care of gave me fewer decisions and I could focus on learning the pros and cons of the Jelly Roll.

There is no doubt in my mind that the Moda Bakeshop offerings are a brilliant marketing scheme. My biggest confusion with the one Jelly Roll I had was that many of the pieces were cut off grain. Nadine Ruggles mentioned this in one of her blog posts, but I got to experience it first hand. This means that my strips weren’t straight, but bowed – tending towards Cs and Ls rather than Is. This phenomenon was frustrating, but I also learned a lot about strip cutting and grain. I know that I need to line up the selvedges and trim the sides to make a straight cut. Seeing the bow in the the Jelly Roll strips made me understand (in an embedded in my mind sort of way) what cutting off grain does to strips.

I don’t have a Jelly Roll book, but I would like to know if they address that problem in the directions of the various projects. Nothing was said on my pattern.

Unrolled Jelly Roll
Unrolled Jelly Roll

The things I liked about the Jelly Roll:

  • I got a little taste of a number of different fabrics. I could do this by cutting a strip off of fabrics that I buy (on grain, of course)  and saving them for a future project.
  • I like working with full lines of fabric just to see how the designers patterns work together. A whole line of fabric is like a complete painting to me. I get a lot of joy out of working with a designer’s creation.
  • The strips were already cut, so I could take my small cutting mat down to the coffee table and cut and watch TV. If I cut a bunch of strips on ‘spec, I could do this as well.
  • I didn’t have to decide how many yards of each to buy.
  • I had a limited palette to work with.
  • I like the fabric and a Jelly Roll was just enough to satisfy me, especially since the only reason I buy Christmas fabrics is to make gift bags.

I saw this quilt on a blog called Sister’s Choice Quilts. She also used the Merry and Bright fabric line. I have always loved the Chinese Coins pattern and the combination of Chinese coins and 4patches make this a winner. I love seeing the same fabrics in different patterns and similar patterns in different fabrics. That concept is one of the things I really like about quiltmaking.

Done with Blue


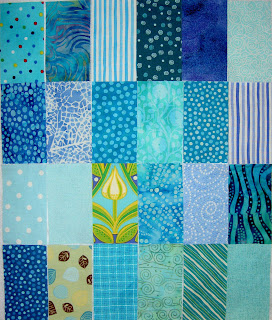
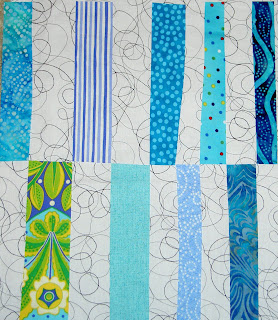
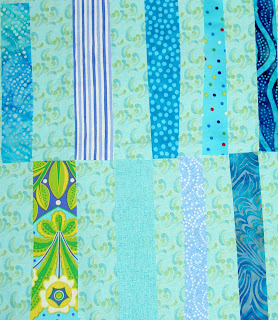
These are the fabrics that I started with. As I was cutting the FOTY pieces, They fell together and, as I said, I wanted to do something calm and quick-ish with them. I still like the fabrics together.

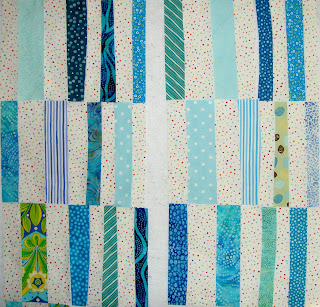
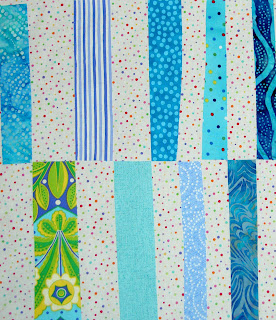
Here are all the pieces cut out and ready to sew. The contrast between the two photos (first photo above and the photo directly above) is striking. The photo of the cut pieces does not convey the look I was seeking at all. I think the dots was the right background choice from among the three I pulled, but I think the background strips should have been thinner.

Above is one pieced block.

Above are 6 completed blocks. I decided that these blocks are the sum of the Hop Skip and Jump blocks I will make. I am not getting the look that I want with this pattern. The blocks are pretty small and I would have to make at least 24 more to get a lap quilt. This is more of utilitarian quilt pattern and I am not interested in making it as a wall hanging. I enjoyed the sewing, but when it was time to cut more pieces I couldn’t face the work and decided to cut my losses. Perhaps I will make someone some small placemats since I didn’t sew the blocks together.

Tomorrow I am making a tote bag!

Hop, Skip & Jump by Denyse Schmidt Project

I decided to work on the Hop Skip and Jump pattern by Denyse Schmidt (Denyse Schmidt Quilts book) as my next project right now. I rarely sew from patterns, but this one seemed like a good one to use with the blues that I had weeded out from my new fabrics. I had thought of modifying the pattern so that there were no curved pieces, but I didn’t. I am not afraid of curved piecing (note Flowering Snowballs/Cross Blocks), but each of the 16 pieces required for each block must be cut out separately. It is an arduous task, but I am into it now and will just continue on.

One problem I already had was with the copy place. The pattern directs the maker to enlarge the pattern by 400%. I have terrible problems with office equipment, copiers in particular, so I went to an office shop and they offered to do it for me. The girl couldn’t get the entire pattern on an 11″x17″ sheet of paper. She asked me at one point if it would be a problem to have the top of the pieces cut off. Finally, I told her she could reduce the size slightly and that seemed to work. It doesn’t bother me to have slightly smaller blocks. I can make a few more with no problem.

For once I have cut all the blue pieces for 6 blocks before I have sewed any of them together. I haven’t decided on the background yet, so I haven’t cut background pieces. I thought I had just bought a white on white that I would use, but I can’t find it so either it was my imagination, it is hiding from me or it isn’t washed yet.

This is my favorite. The background is a very cheerful dot print where the dots are irregular and a variety of different colors. I am all about cheerful, you know. 😉

The above is my second favorite. I don’t have enough of this particular black on white print, so I would have to use a variety of different black on white prints with the same weight/ratio of black to white. I wouldn’t want it to be too overly black.

I really wanted a very calm looking quilt, thus all the blues. This background is one of the P&B New Basics from 2000. I recently bought a yard of it and have at least a fat quarter somewhere else. The problem is that it is very close to some of the value of the other fabrics so the pieces blend together. I think they blend together a little too much.

There are a couple of factors for the background: one is that it has to have the look that I want. Another is that I have to have enough of the chosen fabric to use as a background. The bottom line is that I want this to be a quick quilt. I don’t want to spend weeks on picking the background. I also, however, don’t want to hate it when I am halfway through the sewing. I am happy to hear what you think.

Series of Bags

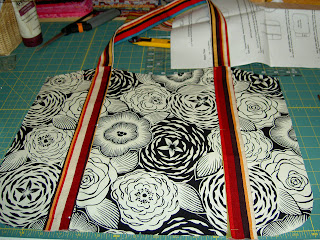
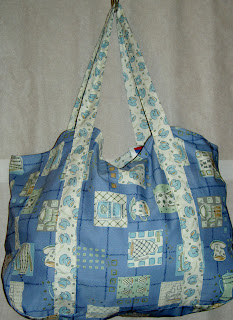
TFQ and I went to Quiltworks Northwest in Bellevue on Friday. At the shop, TFQ saw this bag made up and bought the pattern. The pattern is called Eco Market Tote and is from Favorite Things. I don’t normally buy or even think about non-quilt things, so I didn’t pay much attention. I was interested, but not from the making point of view. I am not sure what lit the spark, but after we visited the Quilting Loft and saw the Alexander Henry Home Dec fabrics, I knew I wanted to make one. TFQ suggested that we make them and it was a great idea. I would have never finished mine if TFQ and I had made the first ones together/at the same time. While we were working with our own fabrics, we puzzled out the directions together. We, unfortunately, got the first printing of the pattern and there are a few mistakes, which have, since, been corrected (TFQ contacted the company). We also made some adjustments, like making the handles wider than the pattern calls for.

The fabulous thing that I found is that this is a great opportunity to work in series. No, it is not a quilt, but it is a great canvas for showcasing fabric combinations. There is also a lot of room for creativity – different types of pockets, different fabric combinations, different fabric ratios and even embellishment. I know that TFQ has picked out fabrics for two more and I would like to make more as well. I have several large conversational fabrics in the quilt backs stack that would really be great as bags. I also have some great French fabrics that a friend brought me from France that would make excellent totes.

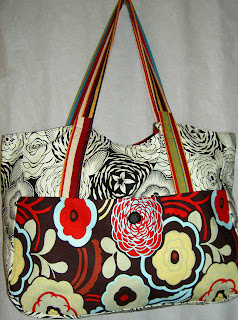
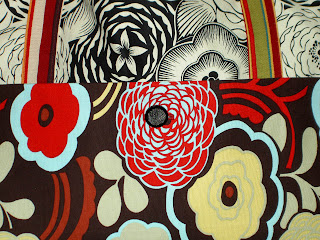
This is my bag. As mentioned, the fabrics are from the Alexander Henry Home Collection. They feel like canvas, but may be a kind of cotton duck. I am actually kind of stunned that I picked them out as the accent fabric has a lot of brown and all of the fabrics are very 1960s looking.
This was a great project to branch out in the fabric department and try something new. I wouldn’t buy these for a quilt, but for this bag, they are great!

Back of the bag in construction phase.Front of bag with pocket pinned on. The back and front are the same until you put the pocket on. The above picture is how that back looks and the picture below, as you can see from the picture of the finished product, is how the front looks.

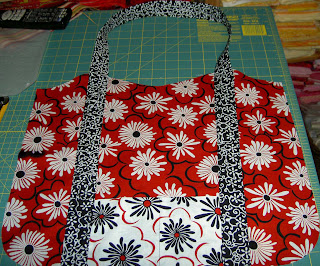
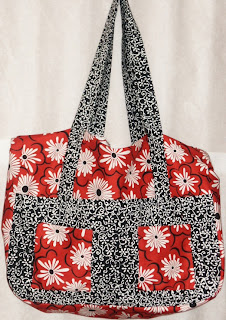
This is the third bag. TFQ made it today.

She added two more pockets on this side to break up all the black. The new pockets do a good job of bringing the red fabric back into the limelight.


The lovely piece below has the distinction of being the first bag we completed. It is TFQ’s bag, but I think it was a real collaborative effort – at least int he brain power department. This was also the bag we learned on. The fabrics are fabulous and it turned out really well.
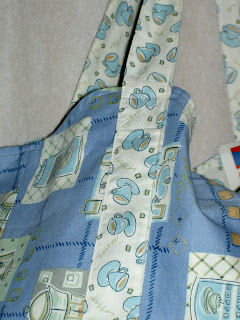
Detail of the the reinforcing X stitching to keep the handle secure.

What a Messy Day!

After reading Cloth Paper Scissors all week, I got a bug in my ear to paint and layer stuff. It had been germinating for awhile and the CPS just put all the pieces together. I used to make book covers and postcards by cutting out pictures from magazines, gluing them down and covering them with contact paper. I still have at least one bookcover with such a collage. Not as sophisticated a process as the ones CPS describes, but creative nonetheless. I like to make things that are useful, I guess.

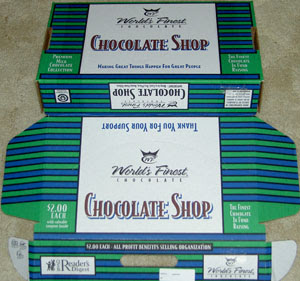
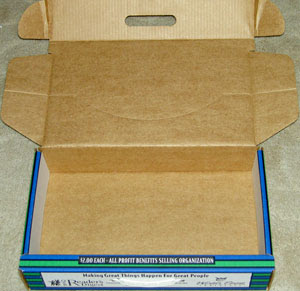
The World’s Finest Chocolate boxes are cool. Darling Boy sells chocolate from them every year and I love the shape. They are like little suitcases and I just couldn’t toss them out. I thought I could decorate them and make something.
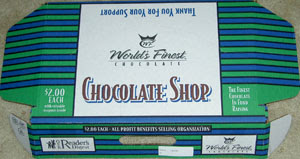
First, I went through my supply closet and pulled out all of the possible supplies.
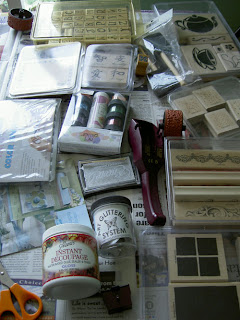
I am embarrassed to say that a number of the items were unopened. Some of the rubber stamps had never been mounted. It took some time to do all that.

Then I carted everything downstairs, covered the table DH had set up for me with newspaper and set out for the craft store. I knew, from reading CPS, that I needed Diamond Gel Medium. I don’t have a good art store nearby and the craft store didn’t have it so I reverted to some dark depths from my painting past and bought Gesso. On a whim, I also bought some Sparkle Glaze and some dotted scrapbook papers as well as a pack of cheap brushes.

Next, I covered the box with Gesso and let it dry.


Drying was a problem. I didn’t factor that into the whole process. Not only did the drying take a long time, but the layers weren’t completely dry even after I waited. I have to admit that I was impatient to engage in the process.
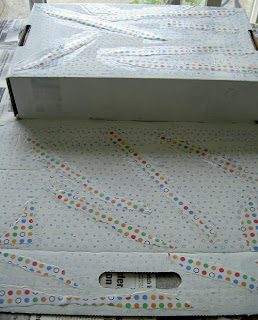
First I used a Stampin’ Up roller wheel and I stamped/rolled dots all over it in purple ink. I didn’t do that well, because I didn’t know how to ink the roller and roll at the same time. I wish I had paid more attention in Karenlee’s classes!

Next I ripped up some of the scrapbook paper and applied it with decoupage medium. I had some around from when I wanted to make a type of prayer box (still have the stuff, except for some of the decoupage medium).

After the first layer, I began to feel some confidence and added some more scrapbook paper (see the yellow ripped into circles?) and began to add other pictures.
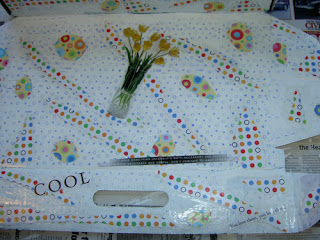
I started to apply some magazine sayings and pictures. The decoupage medium gave the piece a bit of a shine.
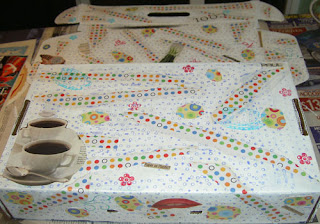

The glitter I added didn’t turn out as nice as I had hope. I know it had to do with my inexperience. I didn’t really know how to apply the glue the right way to make the glitter spread evenly.

I also stamped the large cups and flowers on it. Some of the rubberstamping smeared after I put a layer of Sparkle Glaze on to finish the piece. This is pretty much how the outside of the finished piece looks.
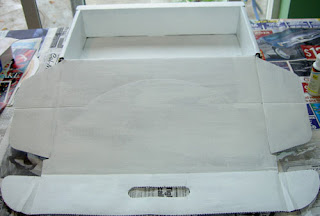
This is the inside of the box. I just painted it with the Gesso just to make it a little nicer looking. My painting skills aren’t great, but maybe I will put some fabric inside or something.

I was really out of my comfort zone doing this project, which I think is good. I thought it was fun. It was good to have enough time, though I know now that I need to leave the piece to dry longer. It didn’t come out as well as I would have liked, but I am not ashamed of it either. I have some more of these boxes and might like to try this project again. It got something out of my system.
Everything Old is New Again

Some time ago, I saw an episode of Simply Quilts on Mosaic Quilting. The artist was a southern woman named Shannon Williams and her idea was really interesting. The blurb for the episode is:

“What can you do with all your scrap pieces of fabrics? Mosaic quilt designer Shannon Williams joins host Alex Anderson in studio to give us the answer. She uses scrap pieces to demonstrate a mosaic quilt project called Blooming Sunflower. Alex reads a letter from viewer Kelly Biddle about her mom, Peggy Biddle, and the 50th anniversary quilt she created for her parents. Then, Alex talks to Peggy on the phone in studio about her work. QLT-705”

At the time (2003), after a class with Gwen Marston, I was working on Women’s Work and had a lot of red scraps around, so I started working on a piece using Ms. Williams’ technique.

It is not a project in and of itself. The idea is that it is ongoing and someday will provide enough new fabric so I can cut other shapes out of it. So far, this is what I have:


The long piece is the one I started with and the shape, after awhile, became quite unwieldy, e.g. not square or rectangular and quite useless. I was unwilling to slap some big strips on to make it a more normal shape, because I wanted it to retain that mosaic quality, so I started the second piece (shorter one) in order to sew it to the first piece and make more normal shape. I have considered hacking off a part and sewing it back on to another side/part of the original, but haven’t gotten there yet.

I haven’t worked on it for a long time as the piece has been covered by strips that I still feel compelled to collect for the Spiderweb. I saw the mosaic pieces peeking out from under said strips the other day and was reminded that I have some reds I could add to make the piece larger. Since I haven’t done any sewing this week, I thought it would be something to share with you all.


This is actually the first photo that I took today, but I thought it didn’t show enough of the detail nor did it show the entire piece. Perhaps I should ditch it, but I do like the way you can see how the two pieces will look together. You can also get an idea of how I simplified the piecing for the second piece.


And here is a detail shot that shows the intricate piecing. At the beginning of this piece, I would fit any size scrap in, which made the piece beautifully complex, but also a nightmare of piecing. I need to add some of the intricate piecing to the second piece, but I haven’t gotten there yet.

The other thing about this technique and my particular piece, is color. Since I had the red and use a lot of red, generally, I thought I would make a red piece, because I was sure to use the ‘new fabric’ later. However, there are often other colors in fabric. You can see the white and some blue flowers and the brown in the coffee cup scrap. I think the other colors add interest, but I know that my eyes gravitate to the white. I don’t have a panacea for this, but it is something that I am playing with.

Another Little Exercise in Color/Pattern Arrangement

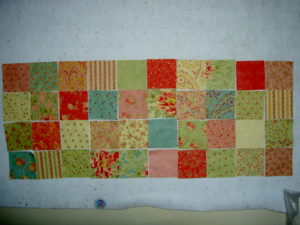
I got these squares from Hancock’s of Paducah. They are the fabrics which comprise Moda’s Poetry Collection by April Cornell. Again, I liked the fabrics, but they are the kind of fabrics that might just sit in my palette if I bought any yardage. Thus, the squares provided a good solution for me to work with the fabrics on a limited basis.

I have been having fun rearranging them. There is a wide variety, but the patterns on the fabric are the same. There are just different colorways. As a result it has been challenging. I don’t want all the same colors together, nor do I want all the same patterns next to each other. I would like the various patterns and colors spaced evenly and pleasingly over the piece. If I am not there yet, I am close.

Another challenge is that there are a couple of prints that stand out if they are near each other, like the dots (of which I did buy yardage). These patterns demand to be far from each other. If not, they scream “what moron put us so close together?” and they produce a lot of grumbling. There are also motifs which are different, but very similar in scale. This means that, from far away, I am looking at two fabrics in four colorways that look the same. I don’t think I can avoid having some of them together and my only option is to make sure that the colorways next to each other provide as much contrast as possible within the limits of the fabric group.

One reason, I like doing this sort of work is that it is easy. I don’t have to cut or press until I sew. I can arrange and rearrange forever with very little physical energy, yet there are some rules. Granted they are self-imposed, but all puzzles have rules. Also, it seems like it is good for my brain. I feel as though my brain is working when I am rearranging.

Once this one is sewed together, I will have three squares pieces. I haven’t the foggiest of what I will do with them. I still think table runners are in my future, but we will see. If nothing else, they will be good machine quilting practice.

BTW, Pamelala has a blog. It doesn’t look like she updates it very often, but the art she has up there is great! Her assemblage art is fantastic. She isn’t doing it anymore, so grab a piece while you can, especially since she is becoming famous for her quilts now.

Fabric Painting

After the CQFA Steering Committee meeting at KAM’s house, we did fabric painting. KAM organized the whole thing and it was a nice ending to the meeting.

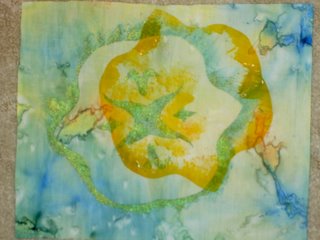
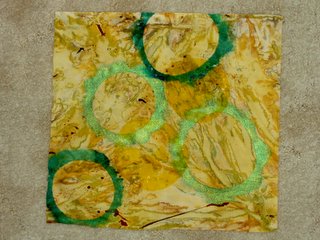
This is my first attempt:
After my first attempt, we watched a five (or so) minute segment of Simply Quilts. It was good to watch after, because I wasn’t too influenced by the demonstrator.

Here is the piece that I finished after we watched the segment.

One thing I got out of the segment is that simple shapes seem to be better, so I worked on this one:

My final piece is the best one IMO.

It was GREAT not to have to do any organization for the project but to just start painting on fabric. KAM was so generous with her paint, fabric, etc. It was wonderful. As you may know, I am not a big fan of messy work. I did enjoy doing this project as I could just play and not worry about making a masterpiece.

I plan to try the presentor’s idea of doing some curved strip piecing through the middle of my piece. I don’t want to make these the center of a piece. I just don’t think they could stand up to the scrutiny.

DCM and I discussed not having enough time to just play and wreck fabric pieces. We are both having a hard time getting over the feeling that each piece we make must be perfect.

A topic for another day….

Kansas City Star Blocks

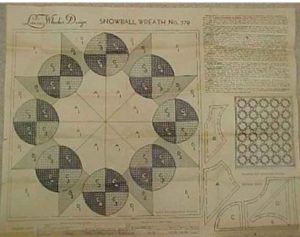
Several years ago I bought a book from the Central Oklahoma Quilters Guild. It is volume three of a multi-volume set of Kansas City Star blocks. I looked through it recently and was reminded that the blocks make me drool with possibilities. Of course, the blocks would have to be redrafted for piecing. I have to say that the women who made some of the blocks when the blocks were first published were no sewing wimps. Many of the blocks have inset seams, irregular shapes, very thin triangles, etc. In that vein, I began thinking about the newspaper clipping of a Laura Wheeler block (newspaper clipping) and tried to remake it.

Snowball Wreath Pattern

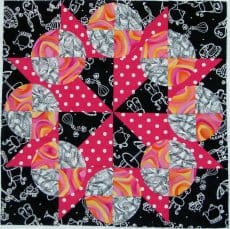
I didn’t use the templates given in the newspaper clipping, because I only had a picture of the newspaper clipping and not the original clipping. Also, the shapes of the pieces were crazy – at least for my level of skill in piecing! I am pleased with the way my block came out, even though I used different techniques (piecing combined with applique’ than the original block.

Snowball Wreath by Jaye

I would like to try again different ways, using different fabrics. I don’t think I got the spacing quite right. There is something not quite right about the newspaper clipping when compared with the actual fabric sample I made. I don’t think it is an easy task to look at a picture of a newspaper clipping and then create it in fabric, but it was a puzzle that I couldn’t put away.

I feel the same way about some of the Kansas City Star blocks. It would be a great project to try and remake them all. What a lot of blocks that would be. Some of them would be fine, but some would be quite challenging.