Thinking About 2024 Sewing

I have been thinking a lot about what I want to sew this year. Yes, I need to continue the 26 Projects project, but it is less important now that I have completed so much and many fewer UFOs. I have been going back and forth between a lot of different ideas. I am not sure if I have settled on one yet.

One idea is to continue as I did last year. You can see what I made by reading the Year in Review post. I made a lot of gifts, made a few donation tops, made a few quilts. While the gifts gave me some direction, I felt like, overall, I was a little directionless.

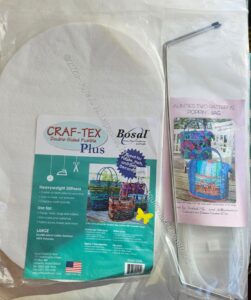
Poppins Bag Supplies

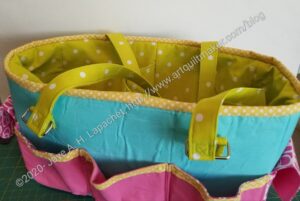
I have some goals, but I never attach a date to my goals. I don’t want to add to the guilt I already feel at not getting enough done. One goal is to replace the Ultimate Carry All Bag. It had a good run and has some good qualities, but it is not the ideal bag for going to Sew Day or on Retreat.

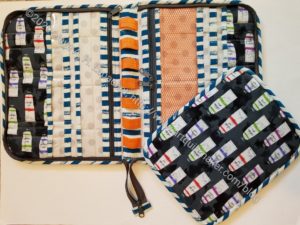
I am still looking for the perfect bag pattern. The other day, I was reminded of the Poppins Bag. I bought the pattern and the frames in 2019 at PIQF, though I have more of a description of the bag from 2018 (when I didn’t buy it-LOL!).  I haven’t made it yet, though I did look at it last year and felt a bit daunted, but, perhaps, with the start of the year I might be more up for the challenge. It might be a good replacement for the UCAB. It is, however, a daunting pattern.

One is idea is just to think about what I feel like doing and sewing in that way. Part of that idea is not to make any gifts, or many fewer. I don’t know if that will work as I have a couple of ideas I want to try. I think that idea is to put less stress on myself in terms of deadlines.

As usual, I want to use up as much fabric as possible. I didn’t make my 100 yard (net) goal last year. Not going to Portland with its tempting quilt shops in January will help with that goal. It does mean a lot of sewing, though.

I guess we’ll all just have to see how it goes.

Contemplation of Zippers

I have been thinking about zipper installation since my sewing date with Cyndi. There, I installed two zippers.

Enigma #3 inner zipper pocket top

The first one was the small pocket zipper, which went into place with no problem. That small pocket is a great opportunity to use some smaller zippers.

The second was the zipper for the overall bag, which didn’t go together at all well. This was completely my fault, because I was being lazy. I didn’t install the zipper foot and, thus, the edge of the regular foot interfered with the smooth installation of the zipper.

Installed zipper looks beautiful

I suffered for my laziness and hope to have learned my lesson. I unstitched the whole zipper, installed the zipper foot and re-sewed the zipper. There were no wobbles using the zipper foot. My only complaint was that I found the end of the thread to be a pain because there is no foot  under which to anchor it. I hope I will now have the habit of installing the zipper foot in the future. 

Trim away foam in zipper opening

On another bag, I installed an internal zipper pocket. I have always found that pressing the area around the zipper opening into shape before installing the zipper to be less than satisfactory. In this latest pattern, the designer suggested trimming away the foam to make the preparation for topstitching easier. I did that and did find it a bit easier. I could have probably trimmed more, but was trying to be careful since I have never done that before. If you haven’t ever made an inside zipper pocket, take a look at this tutorial. Also, Sara from Sew Sweetness* has a video for using her acrylic template. I have one of those templates and use it every time I make one of these pockets.


*no affiliation; just a happy customer

Thinking about Zippers

As mentioned, I am making another Kit Supply Tote. For some reason, I am thinking a lot about this bag. Sometimes, making the pattern a second time gives me new insights.

Over the weekend, I worked on the zippers in addition to the pockets.

The bag requires one separating zipper. I am getting more experience with them after the UCAB and my own Kit Supply Tote.

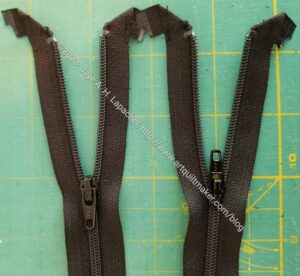
Zipper tape at 90 degrees

Some designers have makers fold back the zipper tape at a 90 degree angle. I have always found this problematic. Over the weekend, looking at the pattern, I realized that I didn’t have to totally secure the piece so it would never come out. I only had to secure it enough to keep it in place until I sewed the zipper in. I sewed a few stitches just where the open edge of the 90 degree folded piece. I had no problems with the zipper tape sticking under the presser foot and developing a thread blob.  

What a revelation!

Now, I just need to install them into the bag.

Thinking about Pockets

I am working on another Kit Supply Tote. As an aside, having a model to look at as I make the pattern again makes the second one much easier.

In this case, I worked on the pockets on Saturday night. I modified the pockets in the pattern, because I thought I could add more pockets. I prepared the modified pockets some time ago, but just started to sew them over the weekend.

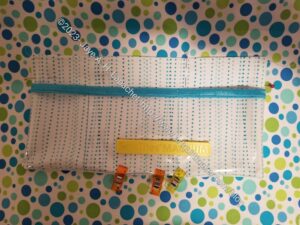
Kit Supply Tote pocket modification

My pockets have the pockets from the pattern on the bottom (white fabric with blue lines of dots) and another vinyl pocket (top of vinyl has blue double fold elastic) layered on top. I thought this was a great idea until I started to sew it. I had to fold the vinyl under to make a seam, which makes the whole piece really thick. It worked, but it wasn’t ideal. I had to rip out one section at the bottom, because I didn’t quite catch the vinyl. After that I was very careful about catching the vinyl.

I could always add an internal zipper pocket, but I think these slip pockets are more useful. I think this idea has potential; I just have to work on it a little more.

N. B. In the photo, I am using Sew Tites**, pins** and WonderClips** to hold the pocket in place. The pins cannot be used on vinyl. I know I have mentioned this before, but it is always useful to hear it again. Vinyl doesn’t self heal, so WonderClips and Sew Tites are a must when you work with vinyl. That Sew Tite Magnum** was great! I use the pins linked above because they work better for me with bags. The super thin pins that some quiltmakers love bend when used with the layers required for bagmaking.


**N. B. : Obviously, you should shop at local quilt shops and small businesses. However, if you are too busy or can’t find what you need there, I use Amazon affiliate links and may be paid for your purchase of an item when you click on an item’s link in my post. There is no additional cost to you for clicking or purchasing items I recommend. I appreciate your clicks and purchases as it helps support this blog.

Quilt Travel Bag/ Go Bag

Cyndi and I talked about the Ultimate Carryall Bag and travel bags in general at Sew Day. It made me start thinking about whether the Ultimate Carryall Bag was the best bag for the job.

UCAB: front, open
UCAB: front, open

I have been using my UCAB as a go bag / travel tool bag since I finished it. it is working ok, but I don’t love it. I forgot to put SF101 on the large pockets so they are particularly saggy. This is not a design problem; it is a construction problem. Ideally, I should make another one for myself, but the directions are so terrible that, even with my notes, I don’t have it in me to sew another one.

It is also kind of bulgy at the front when the whole thing is zipped. That could be because I overfill it.

My discussion with Cyndi got me thinking about the ideal travel tool bag.

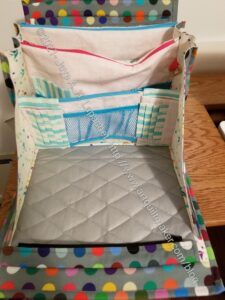
Sheffield Tool Tote - front
Sheffield Tool Tote – front

I plan to make a Sheffield tote for myself. In fact, at Sew Day, I had some fabric out that I want to use, so I took the opportunity to cut those pieces as a start.

I haven’t decided if I will put the very outside pockets on it. I can see where they would be useful, but I can also see how items would fall out. If I do not include them, the Sheffield will look very similar to the Quilts Illustrated Tool Tote pattern I made in 2018. You can see a comparison of the two bags in a post I wrote in 2021. One thing I thought is that I could make the sides of Sheffield taller. I think I need to make a few more before I try that.

Arty Running with Scissors Tote-inside

Another idea is to use the Kit Supply Tote and a Running with Scissors folio together. I have the Kit Supply Tote and could make a Running with Scissors folio for tools and it might fit inside the Kit Supply Tote.

I would have to carefully measure all of my tools so I could make the openings the right size and all of my tools would fit. I would somehow need to incorporate the Take a Stand Bag into this mythical system. As mentioned on the ByAnnie website, the Running with Scissors folio can be draped over the Take a Stand bag so you can see all of your tools. Also, I have the fabric quilted to the foam already ready to go. It makes good sense to make another Running with Scissors and try it out.

Oslo Craft Bag Swap Gift

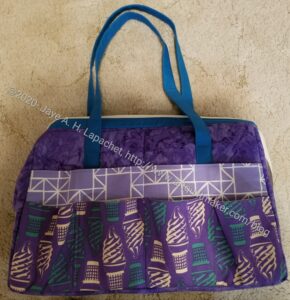
The Oslo Tote is a possibility as well. I am pleased with the way it came out, mostly, but it doesn’t have a top closure. I think it is also a little small for what I need and want.

I could redesign the inside of the Cavalcade Bag and make sure I can fit my Tupperware tool box inside it.

Both from the Crafty Gemini Organizer Club, I also have the Ultimate Project Bag and the Retreat in a Bag. I don’t think these are exactly the tool and supply totes I am seeking. I plan to make them soon, but am not sure how to incorporate them into my travel needs.

The All Rolled Up Tote could also be a good tool tote. I also like the fabric I used. I wouldn’t be able to put a pad of paper or large-ish rulers in there, but it would hold all the scissors, etc that I need.

I have also seen the Sew Awesome Travel Companion Tote. This bag has potential. I might have a similar bag pattern already, but the roominess of this bag means I could store other bags and my Tupperware tool box inside it.

There is also the Crafter’s Carry All Bag. It has similar attributes to the Sew Awesome Travel Companion Tote, but also has negative reviews. Reviewers say it is short on diagrams.

What I really can’t understand is why there is so little competition to the Ultimate Carry All Bag? None of the bag designers, besides Quiltessa Natalie has designed something like this.

Contemplating Finishing

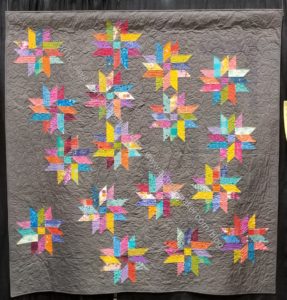
Triple Star: PIQF display location

I was updating some of the Gallery pages over the weekend and noticing that I finish about 5 quilts (including table runners) per year. Of course, there are years where I finish more. 2018 was a good year. I finished 9 quilts, including the Triple Star, which I really like. It lives with the YM now. 2014 was another good year. I finished 10 quilts, some of them quite large. In 2013, I finished 10 projects. The YM was older, so I had more free time. One of them was the Petrillo bag, which was probably one of my first bags. Mostly, I don’t include donation tops in my final finished quilt totals, but in 2012 I did. I included six donation tops I had made in the total of 18 projects (including 2 books) I finished.

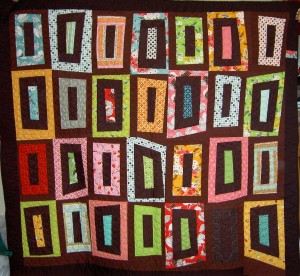
Chocolate Box Finished

It’s also fun to look at that quilts and remember what was going on. There is a chocolate brown quilt in the 2010 list that I really like even though I don’t like brown. I remember working on it on a retreat in Half Moon Bay.

My quiltmaking has changed a lot over the years. I enjoy looking at my quilts and remembering why I made them, the fabric and where I was. Of course, most of them were mostly made at home.

Between 2005-2009, I only finished 10 quilts. I know I was busy with the YM and work, etc, but that still seems like very few. Perhaps those were the years where I was starting a lot of projects.

Despite have a tiny baby and toddler, I finished 20 quilts and projects, many of them small, during 1996-1999. I was kind of amazed at the number. That seems like a lot for those three years.

So, maybe I don’t finish 5 quilts per year, perhaps it is random.

Thinking about Circles

As I have mentioned, I am teaching a quilt sampler class based on my series of tutorials. The class teaches much more than the tutorials offer, including dissecting blocks and quilts so students can think about construction and try things without having to buy a pattern every time* they want to play a little bit.

One of my students is looking at tile and other non-fabric designs and thinking about them in terms of making the design into a quilt. I am thrilled.

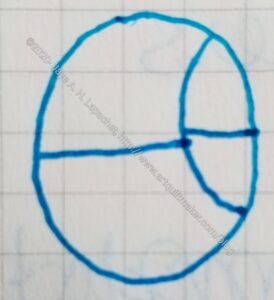
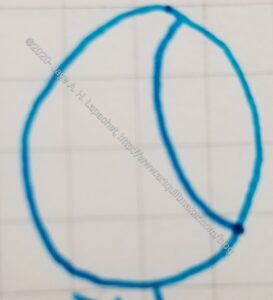
Divided Circle Design

She sent me a design this week that she has been thinking about. I didn’t get all the straight lines lined up, but you get the idea. I thought of the Sew Kind of Wonderful QCR ruler** and how the designers of those patterns have you make units with straight lines and then cut them up.

I thought about that for awhile and think that it would be a good way to construct the block overall. However, I had to figure out how how to get the Orange Peel joined into the circle.

Since I got the Clammies for my birthday from Gerre and my SIL, I decided I would try them out. I played around for awhile cutting circles and trying to figure out how the Clammy** worked. I was moderately successful once I figured out the seam allowances. I look forward to watching her videos and getting more expert instruction on using the Clammy. I wasn’t able to watch the videos while I was playing, because I was at Craft Night.

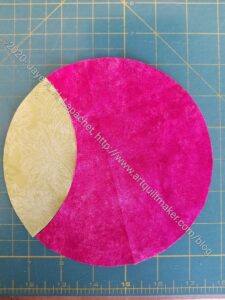
Completing Circle with Orange Peel

I decided that I would worry about dividing the circle later and would start with a circle and an orange peel. I figured I can always break up the shapes later.

I kind of like the possibilities for this shape. It could be a ‘phases of the moon’ type quilt design.

After some fabric wasting, I found that I was ready to cut out some circles and orange peel. I had high hopes that I would be successful.

Fabric Completing Circle with Orange Peel

WRONG! I got the basics, but don’t have enough seam allowance for the orange peel to fit exactly and complete the circle.

Hhhmm. I decide that my next step would be to cut the orange peel with the larger Clammy and see if that works. I suspect Latifah did not anticipate this design and one Clammy cannot be used to cut these pieces. I am keeping an open mind.

Stay tuned.


*N.B. I am not trying to put independent pattern designers out of business. I am not advocating copying the designs of others in order to avoid paying them. I often buy patterns since it is easier than redrawing complex designs myself. I find, however, like with Ring Toss that I didn’t need the pattern once I had the templates. Also, I just wanted to try it and was glad I hadn’t spent more money since I didn’t end up doing anything with the design. Knowing how to deconstruct a block or a quilt improves creativity in quiltmaking.


**I use affiliate links and may be paid for your purchase of an item when you click on an item link in my post. There is no additional cost to you for clicking or purchasing items I recommend. I appreciate your clicks and purchases as it helps support this blog.

Wabi Sabi

I am going through my bookshelves as I prepare to remove everything from my workroom and paint. That project is a story for another day, but the bottom-line is that I cannot stand the life sucking beige anymore and it has to go. In order for it to go, I have move all of my stuff — all of THE stuff out of my workroom.

When I come across certain things, like magazines, I look through them to try and see if I want to devote part of my new, fresh space to them. I am pretty good about marking pages when i initially read a magazine. This makes looking through the issues much easier, though i do tend to want to see what else is in the content. I did mark up a 2014 issue of Fresh Quilts**. I don’t know if this magazine is still published. This particular issue has an interesting essay on wabi sabi by Riane Menardi. Not so interesting that it is going to live in my new workroom, the essay is making me think.

The definition of wabi sabi in the article “an old Japanese philosophy that asks us to find beauty in the imperfect. It us that in life, nothing is perfect, permanent, or complete. Wabi sabi asks us to embrace all the natural states of being – the cycle of creation, growth, and decline, and everything in between.”

I also checked Wikipedia (yes, I looked at the references and this article was well documented) and the definition there is “wabi-sabi (??) is a world view centered on the acceptance of transience and imperfection.[2] The aesthetic is sometimes described as one of appreciating beauty that is “imperfect, impermanent, and incomplete” in nature.[3] It is a concept derived from the Buddhist teaching of the three marks of existence (???, sanb?in), specifically impermanence (??, muj?), suffering (?, ku) and emptiness or absence of self-nature (?, k?). Characteristics of wabi-sabi aesthetics and principles include asymmetry, roughness, simplicity, economy, austerity, modesty, intimacy, and the appreciation of both natural objects and the forces of nature.”

Slight difference, I think, but I can see the relationships.

From a here and now in the world perspective, I know that nothing is permanent. I am sitting at home for the 5 millionth day in a row unable to see my friends or my family. From a quilt perspective, I think things are less clear.

I went shopping inside a quilt store the other day – for the first time in over a year. There they had some fabrics I thought I would never be able to get again. While this was surely an anomaly, it was a welcome anomaly. In my mind this means that while nothing is permanent, sometimes the train of impermanence hurtling toward you is delayed. In quiltmaking, we can get fabrics with the same colors, so the idea in a quilt design can be continued even if the fabric is different.

I worry about the ‘nothing is perfect’ aspect of wabi sabi with regards to quiltmaking. Nothing is perfect, but I strive for excellent workmanship and technique. I want as few mistakes as possible in my quilts. When I do make a mistake, I contemplate it for a bit and decide if I can live with it. If so, I move on. If not, I rip it out and do it over. What worries me is people putting in an obvious mistake in a quilt because ‘nothing is perfect’ or ‘only God is perfect.’ This was a real phenomenon in quiltmaking in the 1990s and kind of outraged me. In my mind, there is no way I can make an absolutely perfect quilt – one with no mistakes. I don’t need to put in a mistake since there will always be mistakes no matter how careful I am. There will always be more than one mistake in every quilt I make whether the viewer can see it or not. Why would you intentionally put a mistake in your quilt?

The author says to embrace mistakes and make them part of the design. I often do this, especially if I run out of fabric. I pick another fabric with a similar color and move forward. The bonus of this technique is that I have  developed a style where I use many, many fabrics rather than just one, especially where fabrics of the same color can make the area of a quilt more interesting. If a mistake will ruin my overall design idea, then I don’t go in a different direction. I fix it. In my work, I need to complete the idea in my head or it won’t leave me alone. I suppose it depends on the idea. If I am just playing, then unexpected directions can be a useful tool. Often, though, I have a design in mind that I want to explore and those feelings can be compulsive.

Ms. Menardi also talks about destruction. She says to ‘destroy something’ or ’embrace destruction.’ I was in an improv exchange once where one member sliced and diced everyone’s piece to shreds  and then sewed them back together. The results were awful. Mine escaped this fate somehow. I think she came up with the idea after she worked on my piece. I was glad, because the resulting compositions of the other pieces were destroyed. Not in a good way either. Every choice in my work needs to have a reason and needs to make it a better piece. Even with my Color Improv donation quilts, I make choices in where I place the fabrics. I might be using looser rules than when I make other quilts, but I still make choices that better the overall design. I don’t believe in destruction for destruction’s sake.

The final suggestion was ‘love (and use) your quilts.’ This is important to me. With very few exceptions, I don’t give people quilts for them to end up in a  cupboard ‘for good.’ I want baby quilts to be dragged around and used to death. I want my nieces and nephews to wrap up in their quilts for comfort until the binding frays and worn areas appear. The bottom-line? There is always more fabric.

I do embrace the beauty of handmade items and recognize that those items have mistakes. The mistakes are not important; the beauty of the visual design and the love that went into the hours of sewing is what is important to me.


**I use affiliate links and may be paid for your purchase of an item when you click on an item link in my post. There is no additional cost to you for clicking or purchasing items I recommend. I appreciate your clicks and purchases as it helps support this blog.
How Long It Takes to Make a Quilt

I recently received a gift subscription to QuiltFolk. My first issue was issue 16 and the theme was family.

One of the essays was called The Time it Takes by Ora Clay and a couple of the things the author said stuck out to me. First, s/he said “As a quiltmaker myself, I am often asked how long it takes to make a quilt. I answer, ‘It depends on how you count’ “.

This is so true! Ora is a wise woman.

Do you count carefully all the number of hours you sit at the sewing machine or stand at the design wall and ironing board? That is definitely one way to count.

Next, she said ” I’ve made many quilts of my own, but I still don’t know how to count the time it takes to make one. I like what the writer John McPhee said about writing: ‘It takes how long it takes.’ I don’t have to plant the cotton for my quilts, but should I include the time I spend researching, designing, and planning before I take a stitch?”

The above is the crux of the matter. As I move about the world doing chores, I think about things including my quilt designs and my quilts in progress. I don’t even know how long I spend thinking about what I am going to make next or how I am going to finish a WIP. Sometimes it feels like an idea or a solution to a problem appears in my head while I am doing something else. I am sure there are hours where the problem is percolating in my subconscious. How do I count those hours?

 What about the years I have spent honing my skills? If I didn’t know how to piece very well, then the basic construction process would take much longer. So, do I tack on years to each quilt?

I don’t think this hours problem is unique to quiltmaking. I think woodworkers and card makers and auto restorers have the same question.

It depends.

Thinking about Blocks

I love blocks. I have always loved quilt blocks. I love how they can be broken down into component parts and combined with different blocks built of the same component parts to form a whole new look. I love they way they can be combined. I love how you can make the same block from different fabrics and have a completely different look. It seems, though, blocks are not popular now, being deemed old fashioned by the Modern Quilt Guild.

I am in a closed Facebook Group that is talking, in a sort of roundabout way, about blocks. The overall theme is the 1930s, so naturally the block patterns in newspapers came up. I have been interested in block designs since I started quiltmaking. One of the first books I bought was The Quilter’s Album of Blocks and Borders, the precursor to the more complete Quilter’s Album of Patchwork Patterns. Both are written/compiled by Jinny Beyer.

I don’t know the history of blocks, in general, though I have read enough about them. The most famous publisher, probably,  was the Kansas City Star, because they published quilt patterns in their newspaper. The patterns were syndicated across the country. Quilter By Design says that these patterns were published from 1928-1961, first weekly then monthly. I have not checked the veracity of these date. I am fortunate enough to have set of the newspaper clippings reproduced and spiralbound. In this set is a wealth of inspiration. There are amazing blocks and quilts that spurred on the quilt imagination of a generation of quiltmakers.

I have heard that many of the blocks were not designed by quiltmakers, but by journalists and were never made. The Snowball Wreath is one of those blocks and Barbara Brackman does a great job describing it and showing photos on her blog. Apparently few of this particular block pattern were made into quilts. I salute those ladies! I did a search and saw some that had been made recently. I did a project a few years ago to try and make a block. I made it a little differently than the pattern implies, but didn’t want to make myself crazy.

The oldest block design Jinny Beyer found in her research was from the January 1835 issue of Godey’s Lady’s Book, a hexagon design. Ladies Art Company published quilt and other needlework designs starting in 1889. Beyer reminds us that many block designs in a publication such as Ladies Art Company were republished later by other companies.

One thing modern quilters have done is revived old blocks using new methods. Paper piecing is a great way to get good results without too many tears. Rotary cutting templates make the cutting of strange shapes easy. Jen Kingwell revived the Circle Within a Circle (Ladies Art Company, 1897. It was also published as Bird’s Eye View by Clara Stone in Practical Needlework, 1906**) block, calling it Steampunk. You can see a version of the current incarnation on the Diary of a Quilter page. My only objection to this revival is the lack of citing sources. I can’t complain much since Clara Stone didn’t cite her Ladies Art Company source.

I would love to make at least one of the all the Kansas City Star blocks. I would also like to make one of all the blocks in Jinny Beyer’s Quilter’s Album of Patchwork Patterns. I don’t think I have enough time left in my life. I also am refusing to let myself think of that as a real, possible project. Perhaps a project for me and 100 of my friends?

One of the things I have is knowledge about blocks. I was taught to make quilts using blocks and in the teaching I learned about grids. Now, for the most part, I can break a quilt down into pieces and have a good idea of how to make the quilt. Sometimes having a pattern is easier, but not having to spend $12 on a pattern I will make once is something to think about. Of course, I support the designers when I think I will make a quilt. Remember Metroscape?

Anyway, I love blocks. What about you?


** This information came from The Quilter’s Album of Patchwork Patterns by Jinny Beyer, ©2009

Net Neutrality Day of Action

Net Neutrality means that everyone receives the same treatment. My content is delivered just as fast as a movie from Comcast. Unless I am doing something illegal, no ISP can slow down what I serve up as content to you. Content providers cannot pay an ISP to provide their content faster than mine.

I am a content provider. While I may not provide content that everyone likes, I am able to provide content.

45’s appointee “Ajit Pai has proposed a reversal of these regulations, which he’s said unfairly burden the ISPs and are archaic for relying on utility-style regulation.”

Allowing ISPs to slow down content will affect public libraries, companies whose product interferes with a product owned by the ISP, schools and more.

Send a comment to the FCC and to your Congress person telling them to protect Net Neutrality. Do it now.

You can find more information on these sites:

This is not a left or right political issue. This is about innovation and fairness. It was a hard won battle to get Net Neutrality. Let’s keep this as a right.

Following up on Ugly Fabrics Post

I was so pleased to get so many comments on my Ugly Fabric post! I really enjoy comments, so keep them coming. 😉

The comments you added were full of great ideas. There was also a string of comments on FB when someone posted a link to this post on a secret quiltmaking group in which I participate.

Jackie said “I’m using my “ugly” (no longer my style) fabrics for testing pattern ideas and donation quilts. I know someone will love them.” I thought this was a great idea, if you can do it. I can’t always work with fabrics I don’t like which is one reason the nieces and nephews don’t get a choice in which quilt design they get for their quilt. I do ask them their favorite color, but they don’t get to choose the shade. If they say something like dusty rose or forest green, they are usually out of luck. I haven’t had a quilt returned, so I guess it is ok.

Nonnie commented “I have a ton of fabrics that may or may not be ugly but definitely fall into the WHAT WAS I THINKING category. I have been dividing my stash into two sections. …. LOVE THE FABRIC, use for family quilts and WHAT WAS I THINKING, use in experiments and donation quilts. I often trial a block or technique in a quilt I later donate to various charities or organizations. I work hard to make them beautiful and desirable but I am happy to know … I WILL NEVER HAVE TO LOOK AT THEM AGAIN. ” (Nonnie likes her capitals 😉   ). I guess a ‘what was I thinking category’ could be added to my list of fabric categories as well. I do pick up fabrics from the depths of my fabric closet and really wonder what I was thinking when I bought it. Often these are fabrics with some kind of strange dot or bold pattern choice. I have taken to pinning a note on new fabrics when I have an idea for them. I have so many ideas flitting through my mind that they don’t stick unless I make a note somewhere.

The other thing I noted was that was that fabrics that look great in a shop don’t always look great in my house. I have figured out that this is for a lot of reasons:

  • I like colors that I never use
  • The other fabrics in the line don’t always come home with me.
  • The light in the shop made the colors look different than they do in my workroom
  • etc.

I have really begun to look at fabrics I am considering buying in order to think about how I would use them. I have thought about this with regard to Tula Pink fabrics.

TFQ asked “Now the question is, are you going to get rid of those napkins so you don’t have to risk having an ugly fabric reaction every time you see them?” This is a good question that cycles through my head as I unearth fabric. I have been picking out pieces and giving them to BAM when I don’t think I will use them anymore. The Charity girls cut the fabrics up into 2.5″ squares and my uglies, which may not be someone else’s uglies, get lost in the 16 patch blocks.

Napkins are another story. Despite the poor fabric choice, the napkins are actually really nice. They are thick and do a good job cleaning faces while hiding stains. My SIL volunteered to take them off my hands as the dusty pink goes with her Desert Rose china. We’ll see.

Peg commented “Why should spend my money or my time on something I do not like. But, we may not agree on “ugly.” ” Peg is a new quiltmaker, though an expert knitter so knows her way around textiles. She reiterated what I thought, which is don’t listen to those who say to add some ugly fabric to make your pretties stand out. My Scrapitude Carnivale quilt is all pretties and that is a gorgeous quilt, if I do say so myself.

Of course, we cannot agree on ugly. I like pink, but not dusty pink. I like bright clear colors which may come from living in an environment that has bright, bright sunlight alternated with grey foggy days. Both of these weather phenomenon require colors that can stand up to those kinds of light. I find that bright, clear colors do that. I would be interested to hear what colors you find you use a lot and why you think that is.

Ugly Fabrics

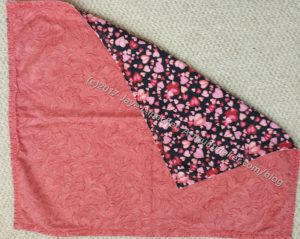
Women's Work Valentine's Day Napkin
Women’s Work Valentine’s Day Napkin

After putting the used napkins from last week in the wash I pulled out new ones. I had rearranged the napkin drawer in order to circulate in some that hadn’t been used in awhile. One was folded back to front and I immediately had an ugly fabric reaction. It really isn’t hideous fabric, but not my colors. The print is interesting. It is a classic design. I don’t think this particular shade of pink has really ever been my color, but I bought it at some point in the past so I must have liked it or had a use for it.

This napkin brought out a whole slew of ugly fabric feelings and thoughts. I was especially reminded of things I had heard I must do.

-Buy a little ugly fabric.

-Put a piece of ugly fabric in your quilts so your nice fabrics will look better.

-Sew ugly fabrics as backs.

You know how well musts work with most people.

I went through about 5 seconds of buying ugly fabric. Then I decided that, for me, that is a seriously dumb idea. I am not spending my hard earned money on ugly fabric when there is so much great fabric out there. I don’t have enough money to buy the fabric I love (bolts of Philip Jacobs prints, please). I also don’t want to devote precious space to ugly fabrics.

The other thing is that ‘ugly’ is relative. My ugly fabric might be your favorite color. I am not here to tell you what you should or shouldn’t like. Ugly for me will be different than your ugly. Buy your favorites.

Also, what I think is ugly today might not have been ugly to me 10 years ago. Tastes evolve. Also, as a new quiltmaker, you might be trying out different styles to find what suits you. You might also mix what you like. I don’t buy many repro prints, even the cheerful 1930s prints. They just aren’t for me. However, there is a blue in the Civil War arena that I love and periodically I will buy an FQ of one print. I am careful, though to make sure it is more blue than beige.

I worked on a quilt called Thoughts on Dots when I was having a big, fat creative block. This quilt was so painful to make, because I was forcing myself to sew. I was forcing myself to work through the creative block.I had a small child who was going through some stuff. DH was going through some stuff. It was a tough time. I moved around 6.5″ squares for weeks. I finished the quilt top and decided to use some ugly fabric for the back. To be thrifty, I decided to use fabric I wasn’t going to use for a front. The ‘ugly’ fabric isn’t hideously ugly, though it is beige. I interspersed the beige with leftover squares, so the back isn’t completely beige and hideous.

We act like we will never see the back so backs can be a dumping ground for ugly fabrics. Thoughts on Dots is on our bed, so I do see the back pretty often and I sincerely dislike it every time I see it. This is why I have used small pieces of beige for donation blocks. I don’t want beige in my fabric closet. This quilt is nearly the sole reason I use a lot of Philip Jacobs prints for my backs. I have decided I want to enjoy backs as much as my fronts. It doesn’t mean that I buy special fabric for the backs. It means I use fabrics I like from my fabric closet. Those Philip Jacobs prints are so well displayed on a back that I can’t possibly NOT use them now.

I also should have realized that being thrifty didn’t mean I had to use that beige fabric. It isn’t as though there has been a shortage of fabric at my house in a while.

My final thought is that everyone should just use the good stuff immediately. Don’t buy it and save it for some other day. That day is today and you will love whatever you make even more if you can see your new favorite fabric immediately.

Following up on Grace

The other day I wrote about grace. The part that has been on my mind, some from Carrie Bloomston’s book, The Little Spark, “I am still trying to get a firm image of grace in my mind. Bloomston provides several metaphors which inch me closer. “Grace is the hinge between effort and effortless. There is a moment in our creative flow in which we are utterly absorbed, content, focused, and present with the moment and everything in it” (pg.42). This is the place I strive for. I do think, however, that we can get snatches of it within each project when the stars align, but that actions we take outside of each project, though including each project help make those moments more and more frequent. For example, how we tidy up, where we find that one scrap we need, etc.”

The main part that has been on my mind is the last couple of sentences – how we prepare for grace. For me, organization is key. I don’t feel that my workroom is optimally organized, but I always work on it. I was on the phone with a friend yesterday and filed random papers and sorted scraps while we spoke. These types of things make way for the creativity. If I don’t have to worry about where something is hiding or where I put that certain piece of fabric, I have more space for creativity and, perhaps, grace.

Part of that is space. I need more space, but have a lot and am concerned that if I get more I will just fill it up. Thus, I am clearing out fabrics I won’t use and trying to keep projects from stacking up. This isn’t always easy as I have to balance having enough to work with having too much spilling over into my workspace.

I’d like to have an organizer come in and make a plan for more shelving and cupboards and a better organization system in the Fabric closet. That expense will have to wait until the YM is finished with college or I win the lottery.

I don’t let this discourage me. You can see the work that I do by reading the blog. Culling fabric also helps even if it is a little at a time. One yard gone is one yard less taking up space. I appreciate the incremental progress. This is my process. This works for me. It might not work for you. Don’t wear my coat. It probably won’t fit.

The Morass

Lately I have been feeling like I am in a quiltmaking morass. I tell myself that at least I am working and making some progress. The problem is that the progress is slow and doesn’t feel real. Morass is a word with a real negative connotation. I couldn’t think of a more positive word. I don’t feel negative, just a bit…..morassy. Finally, I had to sit down and face reality.

As you know,  I make regular lists of my projects to try and keep the UFO list low. I have gotten pretty good at finishing things I start. After reading Friend Julie’s post about balance, I think the problem is that I am working on too much at once. As a result, I can only make incremental progress on any one project. This is the down side of leaders and enders.

Leaders and enders is not bad. It is a fantastic technique and I get so much done when I use the leaders and enders method. Remember Fresh Fruit? I just reached the point where I expected too much out of it.

Right now I am working on the Peacock, Yellow Donation quilt #2, the En Provence Mystery quilt primarily. Primarily is the key word. I also started making some gift bags. I needed a finish, plain and simple.

The problem is that all of these projects are a different stages. Some need cutting, some need color choices. Others, especially The Peacock, need lots of thinking. The Yellow Donation Quilt #2 is the easiest to deal with. It is true leaders and enders. I can just stick the pieces under my needle without much drama. The thing about leaders and enders is that it works best for me if I have one thinking project and one mindless project. Three projects is too much.

I started working on En Provence, because I really wanted to try and work along as the clues were released. It didn’t work, but it was on my mind and I was trying. Now that the reveal has happened, I still like the design and since I started, I am loathe not to work on it. It might be easier if I paused working on this until I was done with the Peacock and then got back to it. I have blocks of time that are good for cutting, though, and En Provence needs the type of cutting I can do with these blocks of time.

The Peacock is actually coming along well. I have struggled along and am finally turning a corner. More on that soon.

Still, the projects feel like they are going slowly. I feel like I am slogging through ankle deep mud, but without the dirt and negativity. I blame the Peacock. I don’t know if it is just a difficult project. Or if I have lost interest and, thus, motivation or if the problem is something entirely different. I think I will be glad when it is done.

I did make some progress over the weekend and I feel like I am getting through the morass.