Design Overview

Recently, Sandy, of Quilting for the Rest of Us, and I recorded a podcast where we started to talk about design. Several months ago, she asked me if I would considering talking with her and her listeners about design. I was reluctant. I am not an expert, but Sandy is pretty good at convincing people to do stuff and I am good at research. It has taken me some time to find the time, coalesce my thoughts and to start to do the research.

The first podcast we recorded was an overview of design. We discussed the principles and elements of design. We talked about what the principles and elements are in design and some examples of how to use them. We tried to talk about why a classic quiltmaker who uses patterns and books should care about design. I’d like to know if you have examples of how you have used design.

Some of my thoughts…

Knowing about design principles and elements helps refine your innate skill. Everyone has innate design skills.

Concept: I use patterns why do I need to know about design?

  • Color is an element of design. To make beautiful quilts, you need to know about color. If you buy a kit, there may be one color you do not like and by knowing about design, you will be able to replace it successfully.
  • Balance is a principle of design. If your eye sees an element of the quilt as being unbalanced, then knowing about design will help you adjust it.

Concept: I am not an art quiltmaker, why do I need to know about design principles and elements?

  • “Some designs lack that indefinable life – or spark – that lifts them out of the mundane, the predictable, the commonplace …. learning about design elements and principles helps you train your vision and refine your subconscious decision making.” (Fearless Design for Every Quilter by Lorraine Torrence, pg.57)
  • Negative space in fabric: “When choosing prints for a patchwork, think about how they’ll look when cut up. Does that small print have so much negative (empty) space that the actual print part won’t show up on half of the pieces? Is that large print so big that the pieces cut from it will look like they’re from entirely different pieces of fabric? (Elizabeth Hartman, The Practical Guide to Patchwork, pg.24).
  • Borders: does slapping on 4 lengths of fabric work with the design you have chosen or would a bit of piecing enhance your excellent quilt top?
  • Books: when looking at books and evaluating whether you want to spend money on it, you can evaluate the various elements and principles of  design included in the patterns of the book.

Many quiltmakers, though not formally trained in art (e.g. an MFA in fine art) have intuitive art sensibilities. (Fearless Design for Every Quilter by Lorraine Torrence, pg.5)

I have been thinking about design for awhile. I never took a dedicated design class in school and have never found one that fit into my schedule since. Also, I am too lazy to leave my house again once I get home. If I did sign up I would go, so the laziness is really me thinking that I would be lazy and not go to class even before I sign up. Sigh!

I have pages and pages of notes I have taken on design elements and principles as I have tried to make the design elements and principles part of my working toolbox.

Design is a way of organizing a piece of visual work. According to the Quilter’s Book of Design, 2d by Ann Johnston, “Design is a  problem-solving activity within all the arts, placing or creating subject matter so it is of visual significance and interesting to the artist.” (pg.xi). I like this definition, because it is understandable and doable. It also isn’t scary for people who have no MFA. When I think about solving a problem with my quilt, I relax about design and try to review the skills in my design toolbox. Remember, though, that “we all have personal experiences, subjective leanings, and differences in personality that make us prefer one thing to another…” (Fearless Design for Every Quilter by Lorraine Torrence, pg.57)

Good design requires practice and is the “result of of a successful combination of design elements … and principles…”(Fearless Design for Every Quilter by Lorraine Torrence, pg.6)

Elements of Design
The elements form the ‘vocabulary‘ of the design (Wikipedia, design elements and principles).

The Elements of Design are the language of the visual arts (http://www.wiu.edu/art/courses/design/elements.htm).

The elements are components or parts which can be isolated and defined in any visual design or work of art. They are the structure of the work, and can carry a wide variety of messages (http://char.txa.cornell.edu/language/element/element.htm).

  • Line
  • Shape
  • Value
  • Color
  • Movement
  • Size
  • Pattern

Principles of Design
The principles constitute the broader structural aspects of the design’s composition (Wikipedia, design elements and principles).

Principles (http://www.wiu.edu/art/courses/design/principles.htm).

The Principles are concepts used to organize or arrange the structural elements of design. Again, the way in which these principles are applied affects the expressive content, or the message of the work (http://char.txa.cornell.edu/language/principl/principl.htm).

  • Unity
  • Harmony
  • Contrast
  • Rhythm
  • Repetition
  • Gradation
  • Balance
  • Dominance

The principles of design, according to my research, are usually taught first. I think they are also a little harder to explain to an audio audience, so I told Sandy we should start with the elements. After getting into it a bit, I am thinking that we might bounce around. Hope you tune in to find out!
Creative Prompt #122: Dress

A garment

special occasion dresses

formal dress

dress a salad

wedding dress

get dressed

dress your hair

put on a dress

wear a dress

dress-up box

dress code

dress uniform

dress rehersal

Dress quote: Enjoy life. This is not a dress rehearsal and another quote “Sometimes I wish I could go back to the days when I was six and my biggest problem was what kind of dress to put on Barbie or whether or not I had enough Legos to build a fort”

cocktail dress

Post the direct URL (link) where your drawing, doodle, artwork is posted (e.g. your blog, Flickr) in the comments area of this post. I would really like to keep all the artwork together and provide a way for others to see your work and/or your blog, and how your work relates to the other responses.

The Creative Prompt Project, also, has a Flickr group, which you can join to post your responses. Are you already a member? I created that spot so those of you without blogs and websites would have a place to post your responses. Please join and look at all of the great artwork that people have posted.

apply dressings

party dress

Definitions: [verb] a : to make or set straight b : to arrange (as troops) in a straight line and at proper intervals ; 2: to prepare for use or service; specifically : to prepare for cooking or for the table <dress a salad>; 3: to add decorative details or accessories to : embellish ; 4 a : to put clothes on <dress a child> b : to provide with clothing <feed and dress a growing family>; 5 archaic : dress down ; 6 a : to apply dressings or medicaments to <dress a wound> b (1) : to arrange (as the hair) by combing, brushing, or curling (2) : to groom and curry (an animal) c : to kill and prepare for market or for consumption —often used with out d : cultivate, tend; especially : to apply manure or fertilizer to <dress a field> e : to put through a finishing process; especially : to trim and smooth the surface of (as lumber or stone); [intransitive verb] 1a : to put on clothing b : to put on or wear formal, elaborate, or fancy clothes <dress for dinner>; 2 of a food animal : to weigh after being dressed —often used with out; 3: to align oneself with the next soldier in a line to make the line straight ; — dress ship : to ornament a ship for a celebration by hoisting national ensigns at the mastheads and running a line of signal flags and pennants from bow to stern

Definitions [noun]: 1: apparel, clothing; 2: an outer garment (as for a woman or girl) usually consisting of a one-piece bodice and skirt; 3: covering, adornment, or appearance appropriate or peculiar to a particular time; 4: a particular form of presentation : guise

Definition [adjective]: 1: suitable for a formal occasion <dress clothes> <dress shoes>; 2: requiring or permitting formal dress <a dress affair>; 3: relating to or used for a dress <dress material>

prom dress

bridesmaid dress

gown

dress-up dolls

dress meat


Various & Sundry 2011 #17

I was so thrilled at the response I received to my last Various & Sundry post that I am excited to start this one. I really appreciate the comments you leave and I do read all of them. One person didn’t agree with me on some points and I appreciated hearing her viewpoints, especially since she disagreed nicely and didn’t imply that I am an idiot! 😉

Projects

Attack of the Hexies

Attack of the Hexies is still going strong, though I think people are silently sewing them together. Sew Excited posted some tips on her blog that I thought were useful, especially for people who don’t sew in blobs, but like to sew in rows.

Pam over at Hip to be a Square podcast also posted about working on her hexagons. I thought about working on my hexagon piece over the weekend, but was derailed by the Food Quilt. She said she will win the race. I didn’t know there was a race, but I am already ahead.

Tools
Janome came out with a new machine over the weekend, The Horizon Memory Craft 12000. I would love to get one of those in the mail, kind of like the review books I sometimes receive, so that I could review it. I don’t think the machine actually hit the stores until October 1 and I didn’t pay attention to the launch party on Saturday, so I don’t know all the features and details. It looks like a hybrid between the Memory Craft 11K and the Horizon. I always thought I would buy another Janome for a lot of reasons, but after my recent servicing drama, I am not so sure. I have to be fair, though. I don’t know how much of the issues were the age of the machine vs. technician error. Buying a new machine isn’t in my future for at least the next 8 years, so the point is moot. It will be interesting to see what machines are available in the next 8-9 years!

Adrianne, over at Little Bluebell has posted a great post on color palette tools. While some of the tools are quite sophisticated and require special software, most are readily available to you on the web. Check out her post and expand your color horizons!

Media
Jennifer Ackerman-Haywood, Craftsanity interview maven gets interviewed n Petit Purls blog. Check out the post. I love the weaving loom photo. The paper envelope/book project Jennifer has on the CraftSanity site has, as Anne Shirley would say, lots of scope for imagination.

As if SeamedUp, Creating the Hive (slightly different) and My Sewing Circle weren’t enough, now we have Tomspoolery! They have a pink and green brand and launched in beta on 9/6. I read over the welcome message, which I thought was well done. How is this crazy competition going to shake out?

Other Artists
Camille Roskelley is part of the Moda County Fair blog hop. Her post was on 9/9. Her family has the most gorgeous skin! I love the colors of her blog. If she posted 5 times a day, I wouldn’t get tired of looking at the polka dot chair and the aqua she uses. Anyway, the post shows all the blocks she has made for the Farmer’s Wife Quilt-a-Long and I love them. I want them. I don’t want to make them, but I want hers! I know I went back and forth about making them. Blocks are always tempting for me, but I just can’t devote the time right now.

Book Review: Gentle Art of Quiltmaking

The Gentle Art of Quiltmaking: 15 Projects Inspired by Everyday BeautyThe Gentle Art of Quiltmaking: 15 Projects Inspired by Everyday Beauty by Jane Brocket

My normal practice for writing reviews is to read the whole book and review the whole book. Occasionally, I’ll glance through a book and write a short review based on my impressions. That was my intent with The Gentle Art of Quiltmaking.

My first impression was that it was a project book and I could churn out the review quickly. The book stayed in my bag and I slogged through the beginning, which covers fabric quantities, cutting fabric and calculating binding. I found the book hard to read and understand. I wasn’t getting the point and I couldn’t figure out the problem. The books is a nice hardcover, with gorgeous photos and pleasant font. The tone is pleasant to read.

One day I found myself with an hour or more to sit and nothing else to claim my attention. Having time, being able to slow down allowed me ‘get’ this book. I was able to fall into the mindset of the author and start to enjoy her writing. I was able to spend a couple additional hours focused on the text of the book. After finishing, I went back and read the beginning, which I found to be much more enjoyable. I realized, in going back, that Brocket says, at the very beginning of the introduction “This is a book about quilt inspiration.” And it is. I missed that crucial line.

This book is a project book, but if you buy this book because of fascinating projects, you will be disappointed. Buy the book for the inspiration and not the projects. Buy the book for the color stories. The subtitle is a complete misnomer and should have been something like “how to write color stories in fabric.” If you buy this book because of color stories, you will adore it.

Color stories seem to be coming into fashion as a way of narrowing a color palette for a quilt. Bill Kerr and Weeks Ringle talk about the “Big Idea” in their books. Michael Miller, a fabric manufacturer, is posting color stories on their blog.

The color stories are the best part of this book and what drew me in. Brocket does a great job of giving us insight into the inner workings of a creative person’s mind. The color stories also don’t shortchange the design process. They are an integral part of the design process. Brocket’s quilts have a story to tell, or a Big Idea to convey, like Bill Kerr and Weeks Ringle discuss in Quilts Made Modern. Jane Brocket‘s writing about the creative process demonstrates to the reader the work that goes into designing a quilt.

The stories start on page 31 with Beach Hut. Each quilt pattern is introduced by a few pages describing the thought that started it all, how the design fits into her idea, her story and how she selected the fabrics. In this section Brocket talks about books or other materials that entered into the design equation.

Fabric selection is also, clearly, a major factor in Brocket’s quilts. In some cases, she found a fabric and built a story and a quilt around it. In other instances, like with Beach Hut, Lisbon Tile and Summer Day, she has made a second quilt in order to expand the story or make the fabric work for her idea.

The fabrics are also not shortchanged. The author and publisher acknowledge the intelligence of the readers by saying exactly (from the selvedge) what fabrics were used. They also give ideas of what other fabrics could be used and acknowledge that fabrics go out of print fast. I saw this information also included in Pam Lintott‘s book,Layer Cake Jelly Roll Charm Quilts.

In quiltmaking, design, and especially color, are very important. In fact, design and color can be the raison d’être of the quilt, yet both design and color are often given short shrift in project books. Books and articles delve deeply into the how, but talk very little about the WHY of the quilt. Why that fabric? Why that fabric combination? Why the juxtaposition of the simplicity and complexity between fabric choices and piecing? This aspect is underrepresented in most current quilt books. As a result, it seems to be something that quiltmakers are not comfortable discussing or attempting.

Jane Brocket covers the WHY very well. She delves into the WHY in minute detail. She covers the creative process very well enabling the reader to understand that there isa process (not magic. Hopefully, the information described will give people permission to explore their own creative process.

A note about the styling: I was not enamored with the styling of the quilt photos. Most of the quilts are photographed in locations that appear to be beyond Shabby Chic and well into ramshackle and derelict. In the picture of the Beach Quilt, Candy version, the viewer sees more of the wall than the quilt. The book designer did include a quilt gallery with 4 photos to a page (this book is on the larger side) so the reader can see the quilts laid out flat without the creativity of the stylist.

View all my reviews

Block-a-Long #21: Off Center 4 Patch

Off Center 4 Patch #21

I love the 4 patch block. Mostly I like the simplicity, but I also like how it can be used as a building block for other blocks and projects.

You can use two fabrics, placing them on the diagonal from each other or you can use 4 fabrics for a more scrappy look.

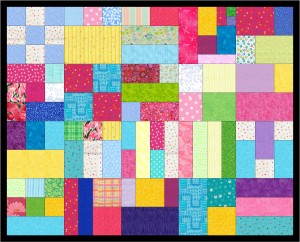
This is block number 20 (I put up the 9 patch twice and haven’t replaced it yet), so I have made a quilt from all the blocks in the project to show you.

The quilt is made from all 20 blocks and you can see how complex it looks, even though each block is pretty easy to piece.

20 Block Quilt
20 Block Quilt

I probably wouldn’t put a black border on the quilt again, but it does contain the variety.

If you have made blocks or a quilt, post a link in the comments section of the relevant block or on the AQ Block-a=Long Flickr group.

Quilts for Sept.11 (2001)

Fireball, 2001
Fireball, 2001

I don’t think I have ever posted about the quilts I made around the events of September 11. I try not to think about the whole situation, because it is just depressing and senseless from so many angles. And the senselessness just seems to continue.

I decided to write about them this year, because my work is good and I still think the message I tried to send is good. I keep one of the quilts on my wall and look at the words and try to remember to walk the walk.

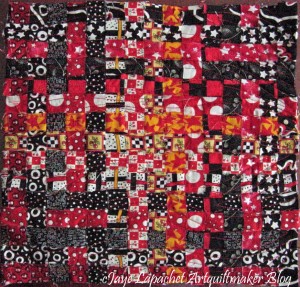
After September 11, Karey Bresenhan called for quilts to be made and sent for the Houston Quilt Market and Festival where they would be displayed 2 months later. Many, many quilts were made and displayed, including my quilt, Fireball.

The exhibit was followed up by a book. Fireball was included in the book. Fireball was successful, in a way (displayed at Houston and included in a book), but it wasn’t the quilt I wanted to make for 9/11. It was an immediate, viseral reaction to the horrifying images shown on TV.

What Comes Next
What Comes Next

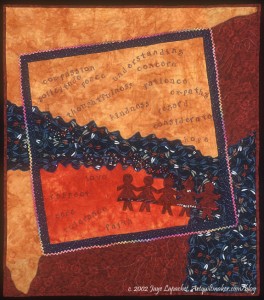
What Comes Next is the quilt I wanted to make. What Comes Next has a message that I wanted everyone to hear and see and heed. I wanted politicians to take up the call and act in a way that would truly show the US as a world leader.

It took me much longer to make What Comes Next than the month or so I had to make Fireball. I worked on the beading in the car heading to L.A. I worked on the rubber stamping at my SIL’s house during craft night. It is one of the quilts I have quilted myself. I worked hard on the quilt to send a message of hope and peace and to encourage people to think about what comes next after September 11. Nobody heard or saw or heeded. It just makes me sad.


Update 9/12/2011: Based on my friend Kathy’s post, I have changed the name of this post to include the year, 2001. I want to move past this date. I want 9/11/2001 to become part of the past, which is not to say that we should forget those affected. From Kathy’s post:

“The Elder said the thing that would keep the tragedy alive was the fact that we keep referring to September 11th in the present tense. Every time we say 911 or September 11 without including the date 2001, it continues to work on our psyche as a current event. He said that unless we can collectively place the event firmly in the past it will continue to haunt our todays and true healing would not be possible.”

I do not want this day to haunt my life forever. I want to remember the people with joy, I want to learn from the mistakes we, collectively have made in the quest for justice, and remember the heroes with awe. I want us all to consider What Comes Next and move forward confidently in a positive direction.

Finished: Sewing Machine Cozy

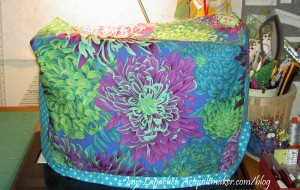
Front View
Front View

I have been thinking (and, perhaps, also talking about) making a cover for my sewing machine for a long time. Last Friday was the day! I took one extra day off work and made the long weekend really long. I got a ton done and was able to rest a bit. I didn’t feel so exhausted when I went back to work.

I buy some large pieces of fabric if I think I will make a bag from the fabric. I don’t like piecing together bits and pieces to make a bag. The Philip Jacobs Japanese Chrysanthemum print I used was one such piece. I was going to make a bag, but I really like it and thought I wouldn’t mind looking at it all the time as a sewing machine cover.

I used a pattern from Strawberry Patches. I had a hard time understanding the pattern, so I also printed the post where she talked about making the cozy and showed pictures. The pattern is fine; my brain just didn’t understand how to make the thing without pictures. I do appreciate people posting tutorials like this, which is part of the reason I post tutorials, too. Have you see the AQ Tutorials? Someday I’ll optimize them for printing.

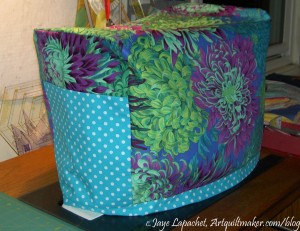
Side View
Side View

The pattern provides measurements for some Bernina machines, but also tells the maker how to measure your own machine, which is what I did. The one thing I should have done is compared the measurements for the lining and the outside. The author suggests that you do those measurements separately, but I think they need to be similar in size. Mine were similar, but not exactly the same and I found the outside was larger once I was ready to sew the lining to the outside. I put some tucks in it, which I wouldn’t do for a gift, but I consider it a lesson for the future.

I am not sure why the author had pockets on the pattern, but I put them in. The Michael Miller turquoise dot makes me happy. Now I can keep the dust off my machine.

Creative Prompt #121: Aquarium

Post the direct URL (link) where your drawing, doodle, artwork is posted (e.g. your blog, Flickr) in the comments area of this post. I would really like to keep all the artwork together and provide a way for others to see your work and/or your blog, and how your work relates to the other responses.

The Creative Prompt Project, also, has a Flickr group, which you can join to post your responses. Are you already a member? I created that spot so those of you without blogs and websites would have a place to post your responses. Please join and look at all of the great artwork that people have posted.

My mind is on fish and the sea today. A friend was in Kauai and all I could think about was sand between my toes and laying on a lounge chair listening to the waves. A Creative prompt on the them is the closest I’ll get in the foreseeable future.

Definition: 1 : a container (as a glass tank) or an artificial pond in which living aquatic animals or plants are kept; 2: an establishment where aquatic organisms are kept and exhibited; e.g. not their natural environment

Seattle Aquarium

Georgia Aquarium

California Academy of Sciences

New York Aquarium

National Aquarium

Aquarium of the Pacific

Monterey Bay Aquarium

salt water aquarium

aquarium supplies

aquarium plants

fish tank

screen saver

Images of aquaria

filter

pump

Two More JMTs

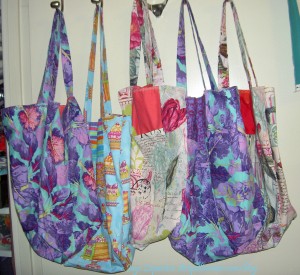
August 1 marks the beginning of the long slow slide to Christmas for me. I know you are running away and screaming ACK! when you hear that (except for those of you who don’t celebrate and are just sitting back and laughing right now), but it is true. I am working away on gifts for Christmas after learning that it is much better to get them done early rather than staying up until the crack of dawn on the 23rd. I am not as organized as Quiltin’ Jenny, but I am getting better!

I finished two more of the Jane Market Totes over the long weekend. I made some progress while my main machine was in the shop since it doesn’t matter much about consistent seam allowances (between machines) on these bags.

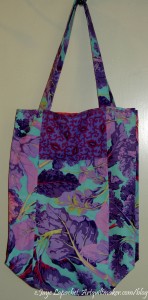
JMT #6
JMT #6
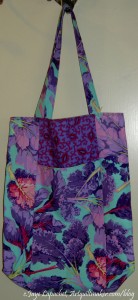
JMT #7
JMT #7

I know they look the same. I used all the same fabrics for the outsides, but they really are two different bags. I have 4 more to make. I inadvertently counted Grama’s Birthday gift as one of the Christmas gifts. Oops!

I also remembered to box the corners on these, which I am really happy about. Not sure why I had the mental block on that, but, perhaps it is over?

BAMQG September Meeting

I like having the meetings at the beginning of the month. It always feels like the month starts out on a positive note when I go to the Bay Area Modern Meetings. I stopped in at Starbuck’s to get a drink before going to a meeting and met a college friend. We only see each other on FB, so it was fun to have a minute to catch up. Both of our sons have started high school so we were comparing notes. I enjoyed the interlude, but the BAMQG meeting had started by the time I got there.

Adrianne Quilt for Japan

Show and Tell is my favorite part. I love seeing what other people are doing. I love the variety of levels of work and the variety of fabrics. Most of the work is very bright and cheerful, which is great.

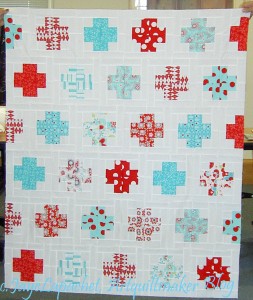
Adrianne has been working on this quilt for awhile and is done with the top. It is gorgeous! I really like the way it came out. I have those fabrics and was having some buyers remorse, but this gives me some ideas. I love the way the dots turned out. There is a lot of movement in the various blocks.

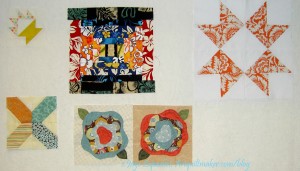
We also displayed blocks from the A-B-C Challenge and various other works. There were a lot of new people at the meeting, so there was a wide variety of blocks to show — not just the challenge blocks.

BAMQG Blocks
BAMQG Blocks

As you know, my block is the Cake Stand block. Angela is also working on the A-B-C Challenge and she did a Courthouse Step block (middle top). Adrianne is working on a different project and she did a Ribbon Star (might also be called Odd Fellow’s Cross, Jinny Beyer, The Quilter’s Album of Patchwork Patterns, pg.64 #4). A new member (or, perhaps, visitor did the X block and the raw edge applique French Roses).

Joy-Lily work
Joy-Lily work

Joy-Lily has a lot of irons in the fire. She is now teaching at a new place on Bayshore called the Sewing and Quilting Collaborative. Apparently, they have longarms they will let people use and the owner buys up stock from quilt stores going out of business and has the stock for discount prices in one part of the place.

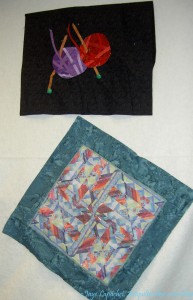
Joy-Lily’s blocks are really interesting. The top one, as you can see, is knitting needles and yarn. The yarn looked like it was made from bias tubes. I didn’t get to look at it closely, but the fabric had a slight shimmery look to it. The bottom block/mini quilt was made from fabric printed on fabric sheets, cut up and then sewed together again.

A number of members who usually participate in the block challenge were absent (long weekend and all) so they weren’t as many this time as last. I was helping Adrianne with notetaking, so I didn’t have to hold the quilts, but I also didn’t get photos of any.

Intrepid Thread Fabrics

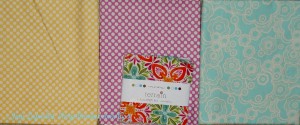
Julie brought my order of a couple of dots, some aqua and the Terrain charm squares. I really like the Terrain. Something about it is very appealing. The colors together aren’t as bright as I normally like, but they aren’t really muted either except for a bit of the green, I think. This pack makes me think of Chinese Coins. I may cut the charms in half and make a Chinese Coins quilt. I need to look through some ideas for quilts using charms. Again, I ask you how many Chubby Charmers does a girl need? 😉

Christmas Bags
Christmas Bags
Christmas Bags #2
Christmas Bags #2

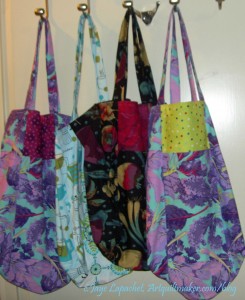
I had no quilts to show this time, so I showed the bags I have been working on. They are all bags for Christmas, except one. Nobody thought I was a lunatic for making the same bag over and over. I passed them all around and was pleased that people commented on the decorative stitches I used around the top of the bag. One of the new women asked about the pattern. It felt good to have people ask for my advice.

I was also thrilled to find out that Angela is saving selvedges for a selvedge quilt. YAY! I have that bag of selvedges I have been saving for something. I am really pleased I can give them to her.

During sewing time, I cut out two more bags – the outside pieces only and cut apart some more t-shirts for The Young Man’s t-shirt quilt. That chore is done except for one sweatshirt and I am not sure how I am going to work that.

Sketching #106

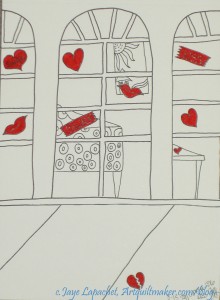
CPP Response #106: Kiss

I had been wanting to do this response for awhile and just never seemed to get to it. The other day, while waiting for the Young Man to finish an appointment, I decided just to do it. I didn’t have all of my previous response sketchbooks to which to refer, so the interior might look different.

Check out the original prompt.

Book Review: The Practical Guide to Patchwork

The Practical Guide to Patchwork: New Basics for the Modern QuiltmakerThe Practical Guide to Patchwork: New Basics for the Modern Quiltmaker by Elizabeth Hartman

I am still looking for a comprehensive, basic guide to quiltmaking; a book to which I could refer when I had a question. I am beginning to think that such a book does not exist and may not be possible to create. Granted, I haven’t read every single book purporting to be a “comprehensive guide.” Why do I care? Aside from wanting that all-knowing guide, I want my students to have a resource to which they can refer when they get stuck. The resource should be comprehensive, basic, detailed and POSITIVE. Skills are important, but the quilt police are not. I want to get people to their sewing machine to experience the joys of quiltmaking.

The Practical Guide to Patchwork: New Basics for the Modern Quiltmaker by Elizabeth Hartman, of Oh! Fransson fame, is another entry into my unofficial contest on ‘ultimate guides.’ This is a beautiful book. It is a nice size, the paper feels good, colors are cheerful, the photos are wonderful and the fabrics are appealing. I also like the way she arranged the projects: “Projects to get you started,” Projects for the a Confident Beginner,” and “Intermediate-Level Projects.” No advanced projects, but perhaps that is coming.

Hartman talks about supplies in a good amount of detail. Her advice, which I agree with, is to “…buy the best-quality materials you can afford.” I keep my supplies for a long time, so it makes no sense for me to buy poor quality. I have the first ruler I ever bought and still use it. She talks about using different types of fabrics, such as linen and mentions madras plaids, vintage bed linens and shirting cottons. I think this approach is encouraging, because she is giving permission to use what people have on hand to those who need it. Also, quiltmakers were told for a long time that sheets were too tightly woven to use successfully. This ‘rule’ isn’t even mentioned. She warns that different fabrics may take some extra work, but I like the tone of trying things out with which pervades the book. I used a Japanese fabric that was thicker and more loosely woven than quilting cotton and lived to tell the tale, so Hartman’s advice is sound. She has good example photos of fabrics she is discussing.

The author includes organizing tips as well as quiltmaking basics (pg.17). Often, the value of organizing your projects is overlooked. Hartman uses organizer cards and labels. Organizing can often be a critical piece of the quiltmaking process and I don’t remember another book that talks about it. I didn’t quite understand her process, but think it is similar to my Post-it note method.

She has an interesting way of hanging small quilts. Ms. Hartman shows a quilt with corner triangles as a hanging method rather than a sleeve. She says that this method works for smaller pieces (pg.19). She also talks about piecing the back, which is something I also don’t remember seeing in many other books.

The author includes some information on color. In it, she reviews a variety of color wheel concepts. There are a couple of paragraphs on each concept, such as the definition of a monochromatic color scheme. This section is like candy, because it is so well illustrated. The fabrics and colors she selected to illustrate her concepts are fantastic! Another addition is a short discussion of negative space, e.g. background. Again, I don’t remember other books even mentioning negative space. I could look at these pages for a long time.

I thought it was interesting that her idea of dots is completely at odds with Harriet Hargrave in the book Quilter’s Academy Vol. 1–Freshman Year: A SkillBuilding Course in Quiltmaking where she said “Dots can add interest, but as with calicoes, too many can become very busy and detract from the design of the quilt. The fewer fabrics your quilt design has, the more important it becomes to limit the use of this type of print. (pg.69)” Elizabeth Hartman says “…but don’t discount the importance of basics, such as dots, stripes, smaller floras, and other small- and medium scale prints. (pg.24)” This might be the ‘modern quilter’ flash in the pan talking, but I think the dichotomy illustrates how individual fabric selection is to each quiltmaker and the importance of finding your style.

Speaking of fabric, Ms. Hartman uses such appealing fabrics throughout the book, even for the most mundane of tasks, such as how to rotary cut (not mundane, I know, for those who are learning to rotary cut!), that I want to run upstairs and pull out some fabric and practice rotary cutting.

This book has a little of everything to get someone started. A new quiltmaker could really get started using this book, with only a little bit of additional help from Quilty. She talks about quilting the quilt sandwich and points out that it is better to avoid stitching in the ditch, because it looks bad if you miss it. This is so true!

The basics section covers 44 pages of a 127 page book, then she gets on to the projects. Right before the project section starts, Elizabeth Hartman writes one of the most important elements in the whole book, which is “…and get you thinking about how to make your quilting projects more uniquely you. (pg.44)”

Most of the projects cover 4-6 pages of instructions. The projects are not difficult for an experienced quiltmaker, but they are also not boring and show good use of a variety of fabrics. Ms. Hartman shows the back as well as alternate color ideas in fabric, not computer generated, for each project. She also does not rehash concepts she has already written about, but refers readers back to previous pages for the information. The projects section also has tips, tricks and new concepts. In The Small Plates pattern, pg.56-61, she describes fussy cutting. In Batch of Brownies, pg.62-69, she talks about the idea of resting places for the eye, which can be used in other projects as well.

Hartman doesn’t always explain her fabric choices. While you might have gotten too much of that in Jane Brocket‘s The Gentle Art of Quiltmaking, I find it useful to understand why an author selected certain fabrics and what they were trying to convey. It helps me learn and improve my own choices.

At the end, Elizabeth Hartman has a page of resources, but the book contains no index. I think it would benefit from an index as a tool for those who wanted to refer to certain sections.

View all my reviews

Block-a-Long #20: Fat Short Columns

Fat Short Columns #20

Attractive name, eh? I couldn’t think of anything better. If I do, I might change the name.

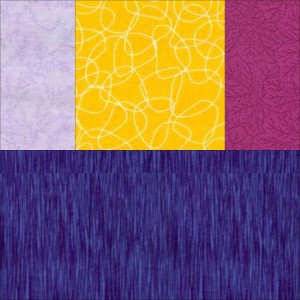
This block is another easy one and very suitable for 4 fabrics.

Directions for Fat Short Columns #20.

You might think that the blocks are too simple, but when they are all put together in one quilt without sashing, they will make a very interesting quilt.

If you make this block, please put a link to it in the comments. If you do not have a blog or website, you can post it to the AQ Block-a-Long Flickr Group.

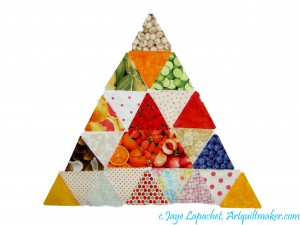
FOTY Triangles Beg. September 2011

Early Sept. FOTY Triangles

Despite my misgivings, I am plowing ahead with my plan to cut triangles until such time as I have a new plan.

Mom and Lil  Sissy were over when I took this picture. Lil Sissy almost had a heart attack when I started to take the pieces off the wall. She didn’t realize that it was part of the process!

The process for making the FOTY quilts really lasts all year long. I don’t get to the sewing until the following year, usually, but I cut and arrange all year long. My process for working on the FOTY quilts is:

  • Buy fabric
  • Wash fabric
  • Press fabric
  • Cut pieces, including triangles from fabric
  • Put triangles on the wall
  • Photograph triangles
  • Remove triangles
  • Repeat.


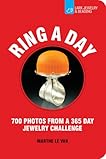
Book Review: Ring a Day

Ring a Day: 700 Photos from a 365 Day Jewelry ChallengeRing a Day: 700 Photos from a 365 Day Jewelry Challenge by Marthe Le Van

This is a book by Marthe Le Van that I received for free to review from Lark Crafts. The first paragraph sums this book up very well. Le Van writes “When I hard that a group of jewelers was creating one new ring per day for an entire calendar year, three thoughts immediately came to mind — This is brilliant! This is completely mad! Where do I sign up?”

Some of the most creative works come out of projects that are brilliant or mad and the Internet helps by making such projects global. The project ended up with 1600 images of rings and the book contains 700 of them.

The book is small in format, easy to carry around; a nice workbook type size. The photos are on the small side, but not tiny. The book is arranged like a daily calendar and some of the rings fit in with the day. For example, for New Year’s Day (January 1) there is a ring made from a champagne cork. I like the fact that there is just enough text in this book. There are not long essays on jewelry making, but salient quotes from the artists. I think these quotes can be used by quiltmakers to gain inspiration. A simple quote that struck home was from Victoria Lynn Takahashi who said “Sometimes a girl just has to play. (pg.15)”

I noticed that entries recounted family projects where people had gathered, someone suggested they all make rings and the entire family sat around making them (pg.69).

I think the great part of this book is the message of inspiration: you can make a work every day; you can make a work from things on hand, you don’t need to shop; making a lot of small work enhances your chances for creating a masterwork; practice makes perfect.

I love this quote from Shannon Conrad ‘The hardest part of making a ring a day was just that — you have to make a ring EVERY day. There was no break. It was relentless. (pg.11)”

Even if you are not a jewelry maker, take a look at this book. Take a look at the shapes and materials and be inspired by them.

Thanks to Leah Eagel from Sterling Publishing for sending me this book

View all my reviews