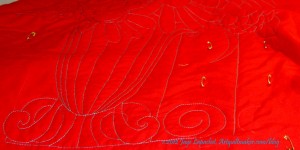
Finished: Whole Cloth Quilt!

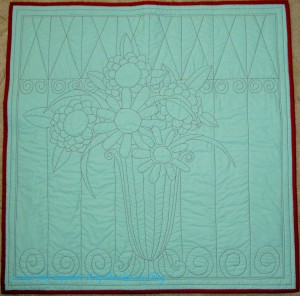
Whole Cloth Quilt: front

No other name really occurred to me as I was working on this quilt. It is kind of sad, because most of my other quilts have much better names. Still, it is better than “The No Name Quilt” and it is descriptive.

I finished the binding in time to show the quilt at BAMQG. I was excited to see the other pieces in the challenge. I wasn’t the only one who used a colored background, but mine was the only red and aqua quilt. It received a good response.

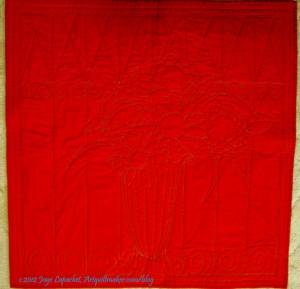
I will put a sleeve on this quilt, but I want to have the back photographed before I do that, thus it is not in the back photo I am showing today and I don’t know when/if I will show a picture of the sleeve.

Whole Cloth Quilt: back

I have to say that the binding went on to this quilt really fast.

Did I tell you? I’d like to use this design again for another rendition of this quilt. I wouldn’t do it as a whole cloth quilt again, but perhaps fusible applique’.

Corner Store Again

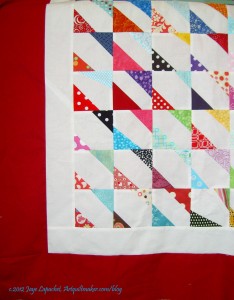
Corner Store with Red Border

As you might remember there were good comments on the next to the last post I wrote about the border of this quilt. Rhonda was right, not that I doubted her, of course. This quilt looks a lot better with a red border on it.

I did a trial run of the border in another post and, then, sewed it on last weekend. Do you ever have times in your quilt work where you have a lot of little things to do – make a binding, sew on a border, fix a hole, print foundation templates – that all seem to stack up before you can move on with projects? I had a weekend like that last weekend. I never feel like I get a lot done when I have those lists of things to do, but the weeks that follow are full of amazing productivity.

I really am so much happier with this quilt now that it has a red border. One thing I completely forgot about was the binding. I had made a white binding, which was no longer appropriate for this quilt, so I also made a red binding for the quilt.

As I have mentioned, I may quilt this myself. My quilter has so many of my quilts and they are languishing a bit. My machine is so much easier to use and no longer frustrating since it was serviced and I have a spool of thread that would work. I think I could quilt this quilt – simply and get it out of the house.

Quilting a quilt does take up space on my machine and does hamper my piecing productivity. I guess I have to become OK with the entire quiltmaking process. I have been avoiding quilting for the last couple of years. Perhaps it is time to get back in the saddle.


Creative Prompt #177: Roll

Shake, rattle & roll

crusty roll

Roll on You Bears!

Definition: verb (used without object) 1. to move along a surface by revolving or turning over and over, as a ball or a wheel. 2. to move or be moved on wheels, as a vehicle or its occupants. 3. to flow or advance in a stream or with an undulating motion, as water, waves, or smoke. 4. to extend in undulations, as land. 5. to elapse, pass, or move, as time (often followed by on, away,  or by ).

Rolling Stone (magazine)

rollcall

Rock ‘n Roll

roll the dice

The Rock and Roll Hall of Fame

Congressional Roll Call votes

Let’s Roll!

Cinnamon roll

Easter Egg Roll

Tootsie Roll (candy)

take roll

drum roll

Rolls Royce

Rolling Stones

Make your response simple. It doesn’t need to be a masterpiece. Take 5 minutes. Just respond and create a creative habit.

Please post the direct URL (link) where your drawing, doodle, artwork is posted (e.g. your blog, Flickr) in the comments area of this post. I would really like to keep all the artwork together and provide a way for others to see your work and/or your blog, and how your work relates to the other responses.

The Creative Prompt Project has a Flickr group, which you can join to post your responses. Are you already a member? I created that spot so those of you without blogs or websites would have a place to post your responses. Please join and look at all of the great artwork that people have posted.

Book Review: PUSH Jewelry

PUSH Jewelry: 30 Artists Explore the Boundaries of JewelryPUSH Jewelry: 30 Artists Explore the Boundaries of Jewelry by Marthe Le Van

This is a new book I got from Lark Crafts to review Tuesday and I have to say that I love this series. The last one I reviewed was PUSH Stitchery. I like the size, shape and feel of the books. I also like the edgy nature of the pieces they include. I probably wouldn’t make any of these pieces (not that there are patterns, because there aren’t), but I can definitely get inspired from looking at them. They are really different from things that I normally look at and looking at new stuff always fires my brain.

I have to admit that the linear part of my brain was in charge when I started looking at this book. I thought that many of the pieces were quite ridiculous, but then I started look at them in terms of creativity, shape, form and some of the other design elements and principles we have been exploring in the Design Series. I kicked the linear part of my brain to the curb and started thinking about them in terms of originality and WOW factor.

The books in the PUSH series highlight several artists and give a few pages to each artist, so the reader can see more than one work by each contributor. This part of the series includes 30 artists. Each section includes a picture of the artist and a selection of their work as well as an artist statement in Q&A format.

This book has really interesting forms. Many of the pieces are quite sculptural.

Some of the pieces I really like:

  • Li-Chu Wu, of the UK, has a piece that looks like a sea urchin.
  • Allyson Bone, of the US, shows some necklaces that look like cat eye glasses or masks.
  • Joe Wood’s pieces, also of the US, are quite sculptural and would be appropriate 50 times larger and installed at the SFMOMA.
  • Dr. Tina De Ruysser, UK, has some very interesting folded paper necklaces.
  • Mirjam Hiller, Germany. She has feathery, layered pieces. Some of my recent CPP responses have had feathers and I see myself gravitating to those shapes and layers.

These pieces really push all sorts of the boundaries and even the display photographs are provocative. Many of the pieces are large. There are a number of the pieces that do not fit my definition of delicate or pretty. The artists use interesting and unusual materials as well: acrylic, dollars and Euros, fur, rubber, and porcelain, to name a few. The processes used to create the works are equally as interesting: folding stainless steel, adding powder coats, a process like origami, if it isn’t origami along with normal jewelry techniques such as stone setting and metalsmithing.

I think that you would get a lot of inspiration from this book and wouldn’t be sorry if you took a look.

Arthur Hash curated the book.

View all my reviews
Windmill Project

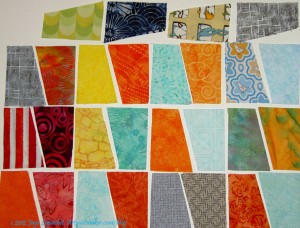
Windmill Patches from Julie

Julie posted about her Windmills/our joint Windmill project and it occurred to me that I hadn’t post anything about this potential quilt.

I am still very much in the Hunting and Gathering stage at this point and I don’t know how large it will be, what the background color will be or anything about it yet. It is not yet up on my radar, which it why it never occurred to me to post about it.

Julie and I went to lunch last week and she gave a bunch of windmills she had cut for me. The photo shows some of them. Lots of lovely and luscious batiks!

We are cutting windmills for each other and we are using a Come Quilt With Me rotary cutting template/ruler. It is a piece of Lucite thick enough to use with a rotary cutter. It was very slick, so I put True Grips on the bottom to keep it still while I cut. True Grips are expensive, so I use the background as well as the dots. I think they work better than the sheet of plastic that can be adhered to rulers.  True Grips are easier to put on as well.

I cut Windmills whenever I am cutting into a new piece of fabric or pull out a piece of fabric from the fabric closet, so there is quite a variety. Lots of dots, pinks and turquoises. 😉

For the moment, I am just going to continue cutting. I have other projects on my plate that are higher up on the list.

Whole Cloth

Whole Cloth with Flowers

I have to say that I find it very frustrating not to be able to show every little detail of the progress of this piece. I couldn’t stand it any longer and wanted to give you a little peek.

I worked on it on and off all weekend last week. I also put in a few hours during the week, especially on Tuesday, when I was off, and in the evenings last week as well. Yes, I was on a mission to finish this piece by the deadline.

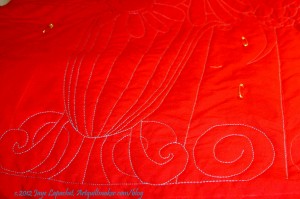
Whole Cloth - Mostly Vase
Whole Cloth – Mostly Vase

That was my plan again this past weekend since it is due next Saturday. When I started stitching on Saturday, I had all of the spirals done,  and had, mostly, straight stitching to finish.

There is a lot of starting and stopping and thread sinking required, but I am enjoying this project for some reason.

I was able to finish the top on Saturday after working on it all day. I spent Sunday trimming it, making the binding, machine stitching the binding. After I folded the laundry, I started to hand stitch the binding down. I was pleased that it going very quickly. In an hour or two, I had more than half of the binding stitched. I was too tired to work on it last night, but, perhaps, tomorrow.

I have a slim hope of making the sleeve this week as well. We will see. I can’t forget to prepare the Renewed Jelly Roll Race for the show. It is due on Friday.

Design Series: Space

This post is a companion to Sandy’s Quilting…for the Rest of Us podcast episode. Listen via iTunes or Podbean. The last design series episode was on Form.

Space is a principle of design

Space is related to form, and, thus, to shape.

Design on the field
Design on the field

Source: google.com via Jaye on Pinterest


Definitions:

Notes:

  • In two dimensional art forms, such as quilts, an illusion of space is created using different techniques such as size, overlapping, vertical location, aerial perspective, linear perspective, one-point perspective, two-point perspective, multipoint perspective, etc. (Pentak & Lauer, pg.171)
  • “…the space around the object can distract, focus, or alter our impression. A cluttered background tends to diminish the importance of the object, while a plain background draws attention to it.” (Art Design & Visual Thinking http://char.txa.cornell.edu/language/element/form/form.htm)
  • “Two-dimensional design is concerned with the flat space” on which the design takes place “and the illusion of three-dimensional space. The major methods of controlling the illusion of space are:”
Overlap objects in front of one another
Shading modeling with light and dark
Linear perspective the relationship between apparent size and space
Atmospheric perspective how the atmosphere affects the appearance of objects in space

(Design Notes: http://daphne.palomar.edu/design/space.html)

    • “Each composition is filled with positive and negative space. Design elements usually occupy positive space and are surrounded by negative space. The amount of negative space within a design field can greatly impact a composition.” (A Fiber Artist’s Guide to Color and Design, pg.130)
White Space (https://tomrobb.files.wordpress.com/2011/04/whitespace.png)

Source: google.com via Jaye on Pinterest


  • With three dimensional art, such as a sculpture, one can see how the object occupies space by walking around it, looking from above, below or from the side. Three dimensional objects have height, width and depth. With two dimensional art [like a quilt], the arrangement of objects on the design field can be crowded with lots of objects or nearly empty with very few objects. These design elements have height and width, but no depth. (A Fiber Artist’s Guide to Color and Design, pg.130)
  • “Forms and shapes can be thought of as positive or negative. In a two dimensional composition, the objects constitute the positive forms, while the background is the negative space. For beginning art and design students, effective use of negative space is often an especially important concept to be mastered. [An] exercise in cut paper require[s students] to work with the same composition in black on white and white on black simultaneously. This makes it difficult to ignore the background and treat it as merely empty space. The effective placement of objects in relation to the surrounding negative space is essential for success in composition.
  • Some artists play with the reversal of positive and negative space to create complex illusions. The prints of M. C. Escher … often feature interlocking images that play with our perception of what is foreground and what is background. Other artists take these illusions of positive and negative images to even greater lengths, hiding images within images. Perception of form and shape are conditioned by our ingrained “instinct” to impute meaning and order to visual data. When we look at an image and initially form an impression, there is a tendency to latch on to that conclusion about its meaning, and then ignore other possible solutions. This may make it hard to see the other images. Training the eye to keep on looking beyond first impressions is a crucial step in developing true visual literacy.”(Art Design & Visual Thinking http://char.txa.cornell.edu/language/element/form/form.htm)

Other:

“PICTURE PLANE
Two-dimensional design takes place on a surface called the picture plane. The picture planes” you use your quilt. We have also been calling this the design field”For a painter it is the canvas, for a muralist the wall.The significance of the picture plane becomes apparent when you think of the image on picture plane as being like what you would see if you were looking through a window. A flat image, like one of your figure/ground projects, appears to be pasted to the window (picture plane) with no space extending beyond it. A photograph or any image that shows the illusion of space appears to extend beyond the picture plane. In rare instances it is possible to make the image project in front of the picture plane.”

(Design Notes: http://daphne.palomar.edu/design/space.html)

Resources:

A Fiber Artist’s Guide to Color and Design by Heather Thomas

Art Design & Visual Thinking http://char.txa.cornell.edu/language/element/form/form.htm

Design Notes: http://daphne.palomar.edu/design/space.html

Design Basics, 5th, c.1999, David A. Lauer, Stephen Pentak