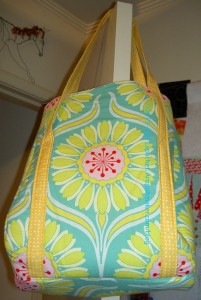
This week we are working on the sewing. Before we can get to sewing the bag together, there is still some prep to do. Please note that this is not a tutorial on how to make this bag. I am just recording my experience and noting things I had trouble with. If you want to make the bag (and I think you should), buy the pattern and read the opening post. Keep in mind that I don’t learn well by reading directions, so I have more trouble than most when reading patterns. My trouble is no reflection on Sara’s pattern directions.
Prep
I was so relieved to finish the cutting. What a lot of work that was! Anyway, I was so relieved that I got right down to the business of putting the bag together. Since adding the magnetic snaps is one of the first steps, I immediately realized that that I had bought the wrong ones. I didn’t buy the sew-in snaps. I bought the ones with the arms you have to bend. This is absolutely NOT Sara’s fault. Yes, I did read the instructions for purchasing supplies, but I didn’t know there was such a thing as sew-in magnetic snaps and simply didn’t see those two words on supply list. UGH! A delay!
I ordered them immediately from Tantalizing Stitches’ Etsy Shop, which is the vendor Sara recommneds. I received the sew-in snaps in about 2 days. I put them in relatively quickly using a small zigzag. The sew-in snap was covered with a clear plastic square and I had to sew over the plastic, which was odd. My machine did it, but I had to yank on the piece a bit to get it started since I was sewing the plastic covered snap to the Soft & Stable (=very thick!). I went around twice just to make sure it would stay in place. The hard part was keeping the snap straight. It didn’t end up completely straight, but since the important part is the circle, I figured it didn’t matter as long as it was in the middle. These are sewed to the Soft and Stable so there is no distortion of the fabric.
I know I could have used the magnetic snaps that you bend, which I think Pam did, but I did like the sew in snaps: no cutting of the fabric.
A lot of the prep was preparing to sew the whole bag together and some of the prep involved some top stitching and sewing parts together.
Straps
I was pleased to see the way Sara creates the straps. None of that turning tiny strips inside out nonsense. She creates them using the folding method that I like. Hooray!
Sewing

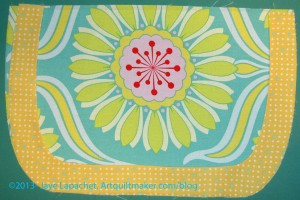
I decided not to do the gathered flap after having some trouble with the gathers. I can’t remember whether I have done gathers before. This was not unexpected as I was a little unsure of the gathers from the beginning. They do add some interest to the bag, but I kept wondering if they would catch on something as I navigate my way through the public transportation systems I frequent. Sara suggested just cutting out a flat piece of fabric using the Flap pattern piece, which is what I did. I also liked that I was able to highlight one of the motifs of the fabric
I was a little confused by the directions in Step #14, covering the flap, but I decided Sara meant topstitching and went with that. I was able to apply the accent with no problems, though, as usual, turning under a small seam allowance, like you would do for applique’ was a pain. I think you could do a regular quilt binding around this piece, if you didn’t mind a little bit of dimension.
 Tutinella suggests topstitching the bottom, which I thought was a great idea.
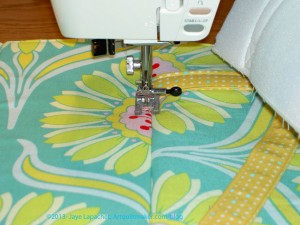
I used my clear applique’ foot and just measured using the inside of the right hand side of the foot, which gives me a line of stitching about 1/8″ away from the bottom of the bag.
One thing about all the prep is that you don’t have to stop to do prep. Once the prep is done, the bag starts to go together very quickly.

I was really surprised at how well the Soft & Stable acted with my machine. I thought I would have to fight with the machine, because of the layers (fabric + Soft & Stable, occasionally 4 additional layers with the straps).
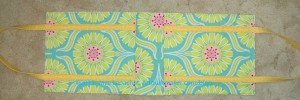
The first round of stitching was really satisfying because of the quick way the bag started to look like something. Yes, the above photo shows it being flat, but it still starts to look like a bag.

The directions say to draw a line 4 3/4″ from the top of the front of the bag. The purpose is to show you where to stop sewing the straps. You need to stop sewing, because the flap flap slides underneath the straps to keep it closed.
I missed that part of the directions and sewed the straps to the bag all the way around. when I realized what I had done, I knew I had to rip. Bleah. It is very hard to rip through all of those layers. I also had made the little squares with Xes through them at the top of the bag which made the ripping even more arduous.
I did it, though, and after an hour and a half I had the bag back to where I should have been.
Other relevant posts:
- Sew Sweetness site – Petrillo Bag Pattern
- Sew Sweetness Flickr Group – post photos of your bag here! We have not created an additional Flickr Group
- Various & Sundry #3
- March 18 post
- Pam’s episode 121 where she talks about the Petrillo bag
- AQ Petrillo Bag Along Week 1 post
- AQ Petrillo Bag Along Week 2 post