Purse Palooza Bag Review

Sara of Sew Sweetness kindly asked me to participate in her Purse Palooza, as I have mentioned. Today is my day. Find my review on the Sew Sweetness blog TODAY! Go leave a comment so Sara knows how popular I am. 😉
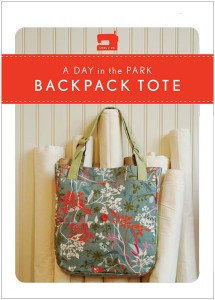
A Day in the Park Backpack

I decided to, finally, make and review A Day in the Park Backpack Tote by Liesl Gibson. It is a few years old and I was relieved to see the pattern is still available at the Oliver+S website. I was pretty excited when I bought the pattern and I didn’t want you to get excited and then not be able to buy it. Also, it is about time I made it.

One of the reasons I bought the pattern in the first place is that I liked the verticality of this bag. Vertical bags are good for commuting as they don’t hit people when you walk up the stairs from the train. The size ended up being good-not so large that I would hurt my shoulder, but a nice size for commuting with a snack, a book, and a few odds and ends. Lunch wouldn’t fit unless it was bills in your wallet. 😉

First off, the look of this pattern reminded me of the Vogue and McCall’s patterns we buy to make clothes. I am not surprised as Liesl Gibson designs children’s clothes. I don’t think she has created many bags or small accessories.

The pattern is in a paper envelope with newsprint instructions. The pattern pieces are printed on tissue-type paper. I am always a little scared of the tissue paper patterns as I am afraid they will rip and be useless. I find it interesting how pattern expectations (plastic envelope with folded 8.5″ sheets inside) have changed since I bought this pattern.

Sara suggested a couple of ideas to get the review started. I don’t have any problem finding things to say, but I thought these were good ideas, so I will include them. Sara asked:

  1. What fabric/supplies were needed to make the bag?
  2. What did you think of the illustrations and instructions?
  3. Did you make any modifications to the pattern?
  4. What Difficulty Level did you think this pattern was at?

Fabric and Supplies

There is a complete fabric and supply list that includes 11 items. You will use all of them if you make the bag as directed. I didn’t find this to be a bag you can decide to make at 11pm on Saturday night and finish to take to brunch with friends on Sunday morning. There are some specialty hardware items that I don’t keep around. I made a special trip to Britex to purchase most of them and Britex is not open at 11pm on Saturday night. 😉 I am sure they are also available online.

I found it difficult to find the O rings required for the pattern. I ended up buying two key rings that were on sale at Joann just in case. After visiting 3 stores and multiple online sites, I ended up using them. They were a little small so make sure you buy O rings on the large end of the spectrum described on the package instructions.
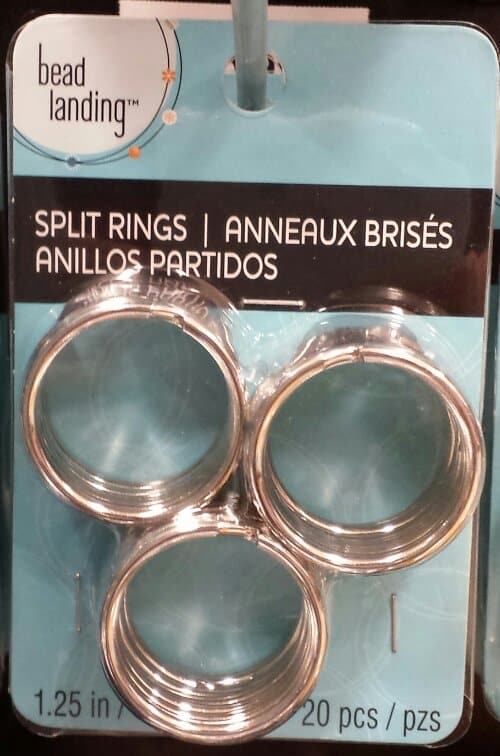
O Ring Option
O Ring Option

I found this package in the beading aisle at Michael’s, which was another option. I didn’t really want to buy 20 O rings, though. I don’t plan on making 10 of these bags.

In the finishing process, DH was helping me with the rivets. I told him about the O ring problem and he suggested a hardware store. He said Home Depot and Lowe’s are more home improvement and don’t have much hardware, but a real old fashioned type hardware store where you can buy individual pieces of metal thingy-ma-bobs might be a good source. I’ll have to check it out. I have heard of other quiltmakers finding supplies at hardware stores, but I never think of it.

Additional Supplies I Used

  • Aurifil 2250, a red, for the top stitching.
  • Free Spirit/Joel Dewberry Notting Hill Midnight Poppies (this is home dec weight)
  • Soft & Stable (instead of the canvas for the interfacing)
  • Good Morning by Me and My Sister for Moda (same fabric I used in the Star Sampler) for the lining
  • Pellon #100R Vinyl Fuse for the base
  • Shape Flex fusible interfacing
  • Saral paper to transfer markings from pattern to fabric. You might need two colors if you use a light and a dark. I wrote a post about Saral Paper that gives more information.

Directions

My first thought about the directions were that they were long and confusing. I always think that, though, because it is hard for me to read through the directions of something and understand what they mean until I start working through the steps. I am much better at figuring things out or being shown techniques BUT the former strategy doesn’t work for bags and the latter wasn’t available.

In the end, I thought there were a few things that could have been improved on the directions, but, in general, the directions were good.

There is a nice little chart that tells what to cut out of which fabric. In the chart, they list Primary Fabric, Contrast Fabric, Lining, Canvas. One immediate problem was that I didn’t know what pieces of the bag were going to be made out of which fabric. The section titled “Materials Needed” cleared that up a bit, but I was still unsure how the canvas (used for stabilizer) would be used until I read much further down the directions. I would have liked more of an explanation of the whys and wherefores of the fabric/supplies choices as well as a list of possible substitutes. For example, I would have liked to have known why the designer chose canvas rather than another kind of stabilizer. Look and feel? Weight? Availability? Cost?

It occurred to me that the pattern might not have been appropriate places for the whys I needed, so I went to Flickr and searched for “A Day in the Park” backpack. I found a Flickr group of these bags. You can get a good idea of the placement from the random photos and the photos in the group. I got a better idea of what pieces belonged in which fabrics. Hooray for Flickr! Nota bene: Please note that I said a better idea not that I knew exactly. There was some variation in the way pieces and fabrics were referenced, or, at least, in the way I understood them to be referenced. I would like to see the different supplies referred to in the same way on all of the pieces, the chart, the supply list and the instructions.

I didn’t find much on the Oliver+S blog through web searches, but there was a post about why she created the pattern (sewing class). I did see that shops who are teaching classes could, at the time (don’t know about now), purchase packs of the hardware along with the pattern. While that would not have worked for me, I could have called to see if the packs were available for purchase by non-wholesale customers.

I also saw one forum post, which had some helpful information about making the straps. I didn’t explore to see if there were more posts.
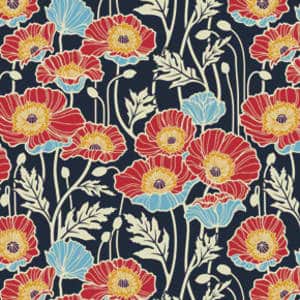
Joel Dewberry Notting Hill Pristine Poppy (midnight)

Once I decided which fabric to use (Joel Dewberry Notting Hill Midnight Poppies, home dec weight), and after I washed it, I got started on the cutting. The cutting was a bit daunting, like the Petrillo Bag, simply because there are a lot of pieces involved. [Nota bene: when I cut out the second one, I cut the main fabric, then the lining and stabilizer fabrics that went with that main fabric piece and the cutting seemed less daunting.] I persevered and found the chart of how much of each fabric, etc. to cut to be very helpful. I was able to use it as a check to ensure I had enough of everything cut properly.

Making the Petrillo Bag was still fresh in my mind, so I decided use some of the supplies from that project. Since I didn’t have the canvas and don’t like floopy bags, I decided to use Soft & Stable instead of the canvas. I knew I was taking a risk. I usually like to make things as per the instructions the first time through, then start making changes if I make the bag again. I have enough bag making experience and I wasn’t doing anything completely crazy, so I decided it wouldn’t be completely crazy to use Soft & Stable.

The other thing I did was use iron-on vinyl for the base. I have been wanting to do it for the bottom of bags for awhile and this was a good opportunity. Pam did it first and gave me courage. The Base pieces on the A Day in the Park Backpack tote were small, so it was a good test. They came out pretty well, but, mid-process, the vinyl was stickier than I expected. I used Pellon #100R Vinyl Fuse. I used an applique pressing sheet on my ironing board and the vinyl release paper on the top. If I had been able to find my second applique’ pressing sheet, I would have used that on top. Nothing came off on my iron. Remember to cut the Base piece a little large, apply the vinyl, then trim the fabric with vinyl to the size of the pattern. This will avoid any issues with shrinkage.

I lined all of my lining pieces with Shape Flex fusible interfacing,to help prevent floop. Floop is bad on the lining also, because it means that the inside pockets aren’t strong enough to hold your stuff, and pens, etc can flip out of your bag. I felt that having iron-on interfacing would work fine and give the pieces some added body. It also saved me time and used a product I already had on hand.

I also didn’t want to baste all of the pieces I needed to cut. I used the WonderClips to help prevent the need to baste. They are too thick to sew over, but keep all the layers together with no problem.

I don’t think the main fabric really needed interfacing since I was using home dec weight fabric, but I put it on anyway. I haven’t used a lot of home dec fabric, so I was not 100% confident. As I said, there is very little out on the web about this pattern so I didn’t have a lot of information and experience to choose from when looking at what other people did. FreeSpirit and Joel Dewberry both replied to my question about washing the home dec fabric, which was GREAT!

Instructions

I thought the instructions were detailed enough. The way the pattern is written makes it clear that there is a certain level of knowledge expected. I would make several bags, including something as complicated as the Petrillo Bag before tackling this bag. In the blog post I referenced above, this pattern is designated as an advanced beginner pattern. I think that is optimistic. Not to discourage beginners, but there are a lot of steps, a lot of supplies, including a zipper, and sewing through many, many layers. I’ll defer to Liesl Gibson, but would categorize this pattern as Intermediate.

The instructions were a little hard to follow. I think they needed a bit more testing by random makers with a variety of intermediate to advanced experience. The more I got done, the easier it was to navigate through the pattern, but the designer should revise it for consistency with terminology and add some additional explanation, especially at the beginning.
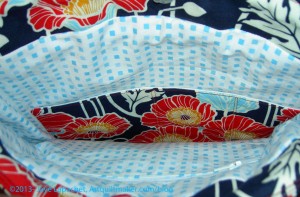
Inside A Day in the Park Backpack Tote

The instructions didn’t say how to put in a zipper (I don’t necessarily think they should), so make sure you know how to do that before starting the bag. Instead of making a zipper pocket, you could make two of the lining panels with the appliqued pocket. I do think that the directions for the appliqued pocket don’t tell the maker how to apply it in a nice way. The finishing isn’t very nice looking and I went around the pocket twice to make sure that it stayed on, if I put something heavy in it.

The fabric I used for the interior wouldn’t necessarily be my first choice again. I like it, but it frays. Definitely use a light colored fabric for the inside of your bags when making your own. A light colored lining makes it much easier to find things in the bottom of your bag. I am using a black on white for the second version.
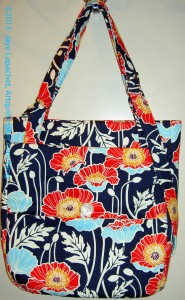
Finished A Day in the Park Backpack Tote

I am pleased with how the bag came out.

Things I Liked

  • No errors in the pattern
  • Shape of bag
  • The directions on how to make the zipper pocket. It came out really well

If I Made this Bag Again

  • I would try it with the canvas as the stabilizer
  • I would eliminate the facing and magnetic closure at the top and add a flap instead
  • I would add a larger pocket, such as a file folder pocket on the back
  • I would add a messenger bag type strap and not make the backpack straps
  • I would use a slightly larger seam allowance on the lining as cutting it per the instructions make it a bit large for the size of the outside of the bag. Alternatively, I could cut the pieces a little bit smaller
  • Leave a larger opening in the lining to turn the bag, especially if I used the Soft & Stable again. The Soft & Stable takes up more space and was kind of a problem to turn using the opening size indicated in the pattern
  • The lining bottom is made of two pieces sewed in the middle. I would try to cut one entire piece rather than two pieces. It is the lining, so who really cares, but I think it would look better and be one less step

Modifications to Materials

  • Iron-on interfacing (Shape Flex) instead of basting on interfacing
  • Soft & Stable instead of canvas
  • WonderClips instead of basting

I have already started a new version of this bag with the modifications described above. I am not very far along, so stay tuned.

Thanks to Sara for inviting me to join Purse Palooza. I really appreciated the opportunity to make a bag that had been on my list for awhile and write about it. Check out the other bags that will be shown in the next two weeks.

Get Ready!

FOR:

Announcing Purse Palooza 2013!!

I am happy to be participating in Purse Palooza this year with a special bag sewing pattern review! Here’s how the event works:

1. Every weekday from September 30th – October 25th, there are at least 2 amazing guest bloggers on the Sew Sweetness site scheduled to share with you a purse sewing pattern review. None of the purses reviewed from the event last year are being reviewed again, so these will be fresh sewing pattern reviews! Each review will contain detailed information about what the reviewer thought about the sewing pattern, modifications made, what kind of interfacing used, and more! There are a few technique and product review posts sprinkled in as well.

This is a great way to get inspired to make the bag you have always wanted to make. Having a buddy really helps. Remember when Pam and I did the Petrillo Bag-Aong?

Aeroplane Bags

2. Even more exciting…THERE WILL BE A GIVEAWAY EVERY WEEKDAY DURING THE EVENT! That’s right, 20 GIVEAWAYS! 

3. At the end of the event, you will get a chance to show me your purse in order to win some amazing prizes! Of course, international entries are welcome too!

Dot Dot Dash Bag


Pattern Review Schedule

All About Bag Interfacing

September 30

October 1

October 2

October 3

October 4

October 7

October 8

October 9

October 10

October 11

  • Sara – Sew Sweetness (Serendipity Studio – Media Frenzy Camera Bag)
  • Kerry – very kerry berry (Carolyn Friedlander/Noodlehead Social Tote)

October 14

October 15

  • DeeAnn (Rebecca Lambert Corduroy Patchwork Bag)
  • R0ssie – Fresh Modern Quilts (Lotta Jansdotter Gardening Tote)

October 16

October 17

October 18

October 21

October 22

October 23

October 24

October 25

Lapin Noir Bag

Contest Rules

1. Check out all the purse pattern reviews throughout the month and get inspired to sew up a purse of your own!

2. Link up your completed purse on the Purse Palooza 2013 page BETWEEN SEPTEMBER 30th AND NOVEMBER 11th. Your purse must be created and photographed between those dates; purses made prior to September 30, 2013 will be disqualified. The purse may be of your own design, or made from a sewing pattern. You can link from Flickr, your blog post, or wherever else you host your photos.

3. There is no limit to how many purses you may enter, as long as they were made between September 30th and November 11th. Only one link-up per purse please.

*Note: Besides bags and purses, for this event also acceptable are clutches, backpacks, wallets, etc.

Greenbacks Wallet Trio

Prizes

This year, there will be 1st-4th prize winners chosen from all those that submit a purse during the event. There will also be a randomly-drawn winner out of everyone who enters!

1st prize – 4th prize will receive an AWESOME prize pack courtesy of Pat Bravo, genius fabric designer extraordinaire! The prize packs will each include 3 Pat Bravo sewing patterns (La Boheme Skirt, Barcelona Bag, and Capri Bag), a pack of Pat Bravo Aurifil Threads (thread pack may vary, as there are 3 different packs), and 10 Pat Bravo fat quarters (fat quarters may vary).

In addition, the 1st prize – 4th prize winners will also receive a copy of Sara Lawson’s new book, Big-City Bags!! The book releases November 5th, and you can pre-order your book now!

Retail value of each prize pack: $127.


There will also be one randomly-drawn winner out of all purses entered, and this winner will receive a $50 gift certificate to Sara’s publisher, Martingale (as well as a copy of her new, not-yet-released book, Big-City Bags!).

Retail value of prize pack: $77.

Judging

Purse Palooza will be judged this year by Kay Whitt of Serendipity Studio. Kay writes the most stylish and fun-to-sew clothing patterns and bag patterns out there.

Thank you to all of the wonderful sponsors that are supporting this event!

Pat Bravo  //  Bari J.  //  Emmaline Bags  //   V. and Co.  //

Chris W. Designs  //  Betz White  //  Amy Butler  //  

Dog Under My Desk  //    By Annie’s  //  Studio Kat  //  

Grab a button!!

Sew Sweetness

<div align="center"><a href="http://www.sewsweetness.com/2013/09/purse-palooza-2013.html" title="Sew Sweetness"><img src="https://i869.photobucket.com/albums/ab257/bluemerleboutique/pursepalooza12.jpg" alt="Sew Sweetness" style="border:none;" /></a></div>

In a Clear Space You Can See Across the Room

As I mentioned in a previous (ok, really old) post, I talked about
my new/old cutting table. Normally, the table is in the middle of the room and working piles are scattered around. Not this week. The cutting table has been in the closet for over a week and the room looks strangely clean. I hope to change that this weekend by sewing.

Yes, I am able to sew today, because the machine is back. I picked it up on my way from Grama’s. The boys are gone at a band review (I really should go to one of those sometime) so the laundry and I will have the house to ourselves.

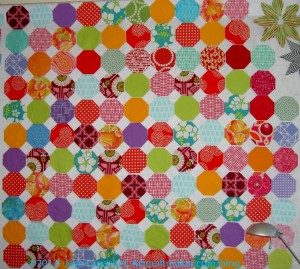
Russian Rubix Octagons

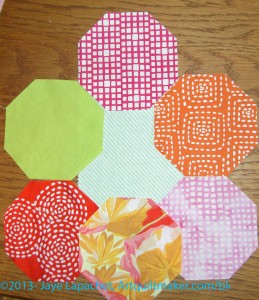
The Russian Rubix is on one of the design walls – all the little octagons crammed together jockeying for space.  On the other design wall is the Attack of the Hexies.

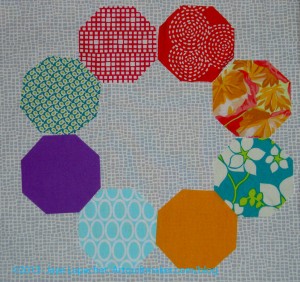
Russian Rubix with Grey

One plan is to pick a background for the Attack of the Hexies. I received the grey i ordered and it is the wrong grey. It is the darker version of the grey I used in the A-B-C Challenge (HAP 207 S not HAP 207 LS). I hope the company will let me return it, otherwise I’ll be calling Candy’s Quiltworks to see if they still have the one I want. I am not hopeful, so I have to plow through some of my other fabrics and see what will work with what grey I have.

Scrumptious Green
Scrumptious Green

My other idea is from the new Scrumptious line. It is a green stripe and there are a couple of things that concern me.

One, it is a stripe. What if all the stripes going in different directions drives me crazy?

It is a Moda fabric. I love the Moda designs, often, but I don’t love the way the fabric ravels. I am not sure I could stand working with it again on such a large project.

I do like that it is different.

We’ll see.

Finding Inspiration

This is a companion post to Pam’s Hip to be a Square podcast episode #148 where she and I talked about finding inspiration.

You won’t find inspiration unless you look and actually see what is around you. The texture of a building that was not a blip on your radar yesterday may inspire you today. In the podcast we talked about finding inspiration at a quilt show. Listen to find my tips about that.

Some examples of where to find inspiration:

  • junk mail
  • billboards
  • sidewalk cracks
  • what is around you on your walk to work? new flower springing up int he parking lot planter? Building decorated for the holidays?
  • glossy magazine ads.
  • Look at the CPP posts (yes, I had to throw that in)

Once you find inspiration, here are some things to do:

  • take a photo
  • make a drawing, rubbing or other kind of sketch
  • create your own personal 365 project where you look at the same statue, building, public art, fountain or parking garage every day.
  • Take a photo (or draw) and compare the photos (or drawings) you have taken over time (a Flickr set is good for this). What has changed? How is the light different? Do the colors change with the seasons? How does your artifact look in the rain?
  • What is it you like about the piece? Color? Shape? Pattern?

After this, it is a good time to translate your inspiration into a quilt. Use the essence of the inspiration, you don’t have to make a replica. Use what you like to make something reminiscent of your inspiration.

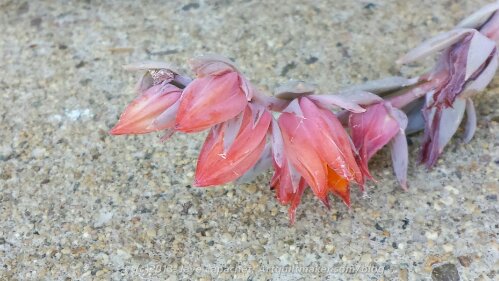
Creative Prompt #227: Blossom

TV Series

vegan restaurant in NYC

apple blossoms

Statistical software

Blossom magazine by Amy Butler

Blossom Music Center – Ohio

floral design studio in Brooklyn, NY

Wild Blossom Meadery & Winery

Lulu Blossom skincare

Burning Blossom (item in World of Warcraft)

Blossom is a non profit charity organization that empowers youth by providing important and meaningful volunteer opportunities.

The Blossom by William Blake
Merry, merry sparrow!
Under leaves so green
A happy blossom
Sees you, swift as arrow,
Seek your cradle narrow,
Near my bosom.
Pretty, pretty robin!
Under leaves so green
A happy blossom
Hears you sobbing, sobbing,
Pretty, pretty robin,
Near my bosom.

watching someone blossom

National Cherry Blossom Festival

Post the direct URL (link) where your drawing, doodle, artwork is posted (e.g. your blog, Flickr) in the comments area of this post. I would really like to keep all the artwork together and provide a way for others to see your work and/or your blog.

We are also talking about this on Twitter. Use the hashtag #CPP

The Creative Prompt Project, also, has a Flickr group, which you can join to  post your responses. I created this spot so those of you without blogs and websites would have a place to post your responses.

Definition: “In botany, blossom is a term given to the flowers of stone fruit trees (genus Prunus) and of some other plants with a similar appearance that flower profusely for a period of time in spring. Colloquially flowers of orange are referred to as such as well. Peach (including nectarine) blossoms, most cherry blossoms, and some almond blossoms are usually pink. Plum blossoms, apple blossoms, orange blossoms, some cherry blossoms, and most almond blossoms are white.

Blossoms provide pollen to pollinators such as bees, and initiate cross-pollination necessary for the trees to reproduce by producing fruit.

Blossom trees have a tendency to lose their flower petals in wind-blown cascades, often covering the surrounding ground in petals. This attribute tends to distinguish blossom trees from other flowering trees.” (Wikipedia)

Thank You

I just returned from Southern California Tuesday night late. My mom and I drove down Thursday to stay and take care of Grama and to help her celebrate her birthday. Grama’s birthday was Thursday. She turned 90.

She was really in bad shape when we got there and it turned out nobody had brought her dinner. 🙁 Miscommunication, but she was a little manic and confused when we got there.

It was a hard weekend. I did get to run off with Susan for a few hours on Sunday, but aside from that and a trip to return some clothes, it was all Grama all the time. At least she doesn’t get up in the night. I cleaned house. I shredded about a gazillion old bills and generally fetched and carried for Grama.

I have to say that I visited two quilt shops – one on the way down and one on the way back. I also picked up my sewing machine, which means that if I wake up, I can sew on the weekend.

I thought I was ok when I got home, but at work today, it was the last place I wanted to be. I should have taken the day off. I didn’t because PPTO days don’t grow on trees.

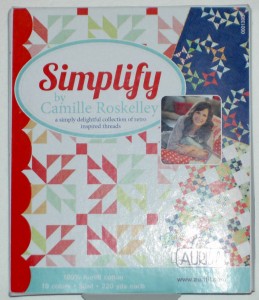
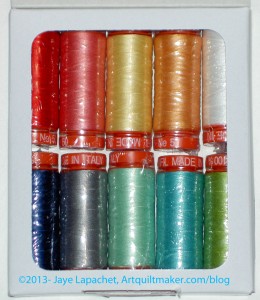
Simplify Aurifil
Simplify Aurifil

One of the packages had the most delicious treat in it. Now I know that at least one person reads my blog. 😉

Simplify Aurifil inside

The colors included are so fabulous. They are just what I wanted even though I didn’t know I wanted them.

That was my one special whine and you can be assured that I won’t indulge too much. Thanks, Mrs. K.


Shop Review: Candy’s Quiltworks

I was visiting Grama over the weekend and took a few minutes out of the constant care and cleaning to visit with Susan, have lunch and take a trip to the quilt shop in Northridge. I used to live near Northridge and the place looks so different now. I don’t know if my eyes have different standards for how streets should look or if the streets have really changed or if I never went to this area of Northridge. The area we drove in had lots of concrete, not much green, signs stacked on top of each other right near the sidewalk to announce the businesses in each strip mall. I guess I am not used to seeing the types of strip malls they have here. I don’t know.

Candy's Quiltworks  backdoor
Candy’s Quiltworks backdoor

Regardless, Susan came and got me (what a saint) so Mom and Grama could go to Grama’s lunch bunch. She also did all the research and found a pizza place that served GF pizza and a quilt store right down the street. Perfect!

The pizza place was called Pizza Rev and they had GREAT GF standards for handling the ingredients. The only thing I didn’t like was how loud the place was. However, Susan and I could hear each other and we couldn’t really hear the people around us, which was good. I would go there again in a heartbeat.

We chatted quite a bit at lunch. I am interested in Susan’s remodeling project. Of course, she had questions about Grama, we talked about our kids and, of course, quiltmaking!

Much too soon, we had to go to the quilt store. 😉 We could have talked for a long time.

Quilts on the wall
Quilts on the wall

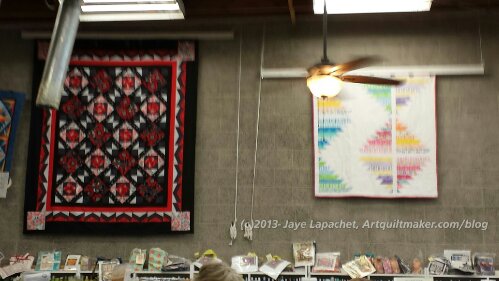
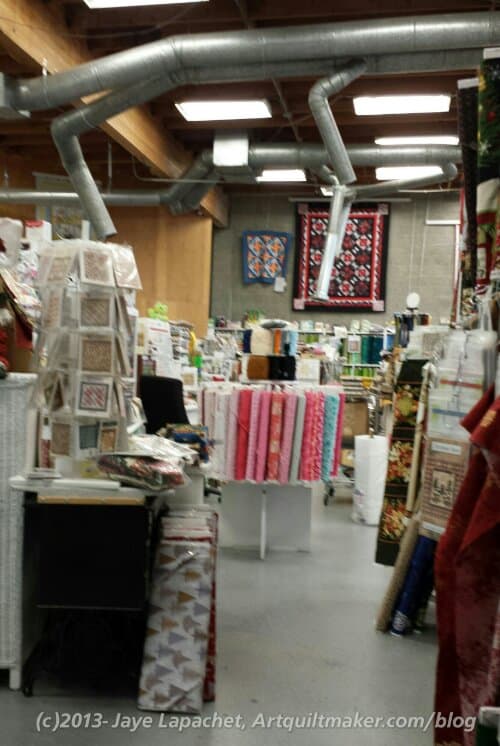
Candy’s Quiltworks is a big shop. In the picture above, you can see that there is one of those rolling doors like auto garages have. The walls were cinder block, which is odd to a girl from earthquake country. I assume it is reinforced, but in an earthquake, I think I would run outside.

None of the above has anything to do with the shop. Candy’s has over 10,000 bolts of fabric, at least according to one of the clerks. I believe it. Their entire front wall and one side was filled with bolts of batiks. One entire side wall was tone on tone fabrics. The middle was filled with different lines of fabric, mostly together, as well as an aisle of blacks on whites and whites on blacks.

The quilts in the photo above are two of the sample quilts they had hanging. I thought there was a lot more space for samples, but perhaps they were in between hangings? The one with the white background looked like it could be a Jelly Roll quilt. I thought it looked like an updated log cabin version.

Notions wall
Notions wall

This is part of the Notions area. They focused on Creative Grids rulers (saw a Tumbler and a strip maker as well as others), but also had some specialty rulers from Eleanor Burns.

I didn’t see any Fons & Porter rulers, but they have a wide variety of the Marti Michell rotary template sets and rotary rulers such as the 60 degree triangle rulers. I also saw the Clear Angle ruler needed to cut the hexagons in that strip piecing method I used (originally on Little Bluebell’s blog) a few years ago for the Attack of the Hexies quilt.

This is also where they keep their sale fabrics – $5.99/yard. Can you believe how many bolts of sale fabrics they have? I didn’t really do more than glance at them, but it seemed like a lot of novelty prints.

Books and Such
Books and Such

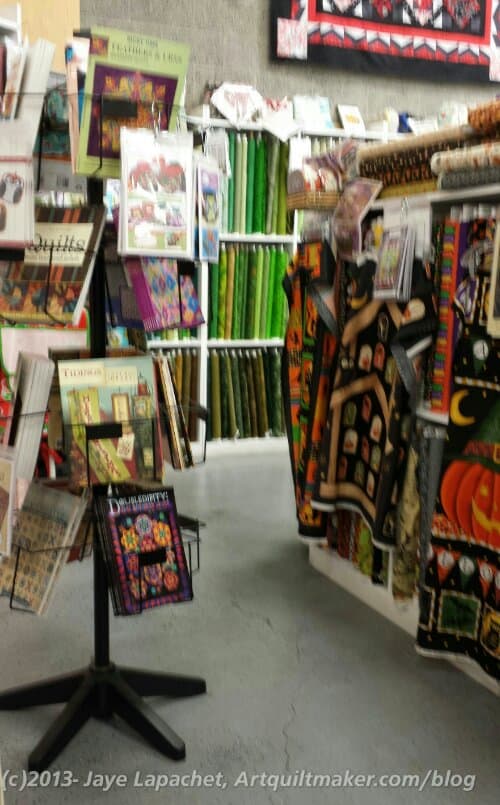
The shop had these racks of books all over the store. I wasn’t in the market for any books today, so I only took a quick look at them. From what I saw, they were a little off the beaten path. It was an interesting mix of books and I think you would find some interesting titles. I think it would have been a little difficult to find a specific book.

There were  a wide variety of panel projects hanging all over the store. In the photo with the books you can see some Halloween panels (the one with the pumpkin looks like it has a Halloween bunting as well), a gingerbread house panel. I saw panels from which you could make aprons and other small accessories.

These things are hard to display. I don’t see them in quilt shops up north, so I don’t know if they sell or not. I got one as part of a pack when I bought the fabric to make the Frosted Stars quilt. I thought it was fairly hideous, but I used it for the back anyway. This was a good way to display them as shoppers couldn’t avoid seeing them. The annoying thing was that we had to hold them out of the way for each other so we could see the fabric.

In another area, I saw Aurifil thread, mostly in neutrals. I saw a HUGE selection of DMC floss.

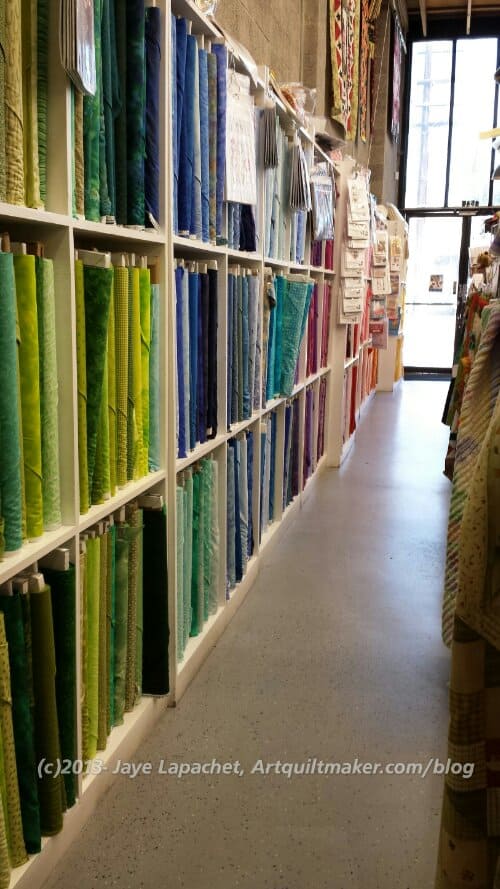
Tone-on-tone wall
Tone-on-tone wall

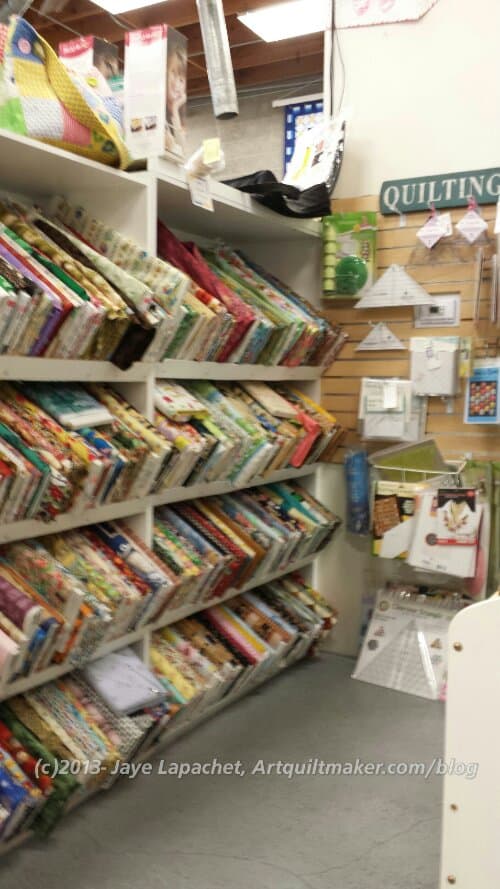
TFQ and I have been lamenting the lack of tone-on-tones now that solids have returned with force and bold modern prints are such the rage. I love solids, but sometimes you need a good tone-on-tone to add interest to your fabric selections.

Candy’s has you covered. This is a picture of HALF the wall of tone-on-tones. It looked like they had every tone, shade and hue of tone-on-tone imaginable there. I was very disappointed that I didn’t need to buy some tone-on-tones to fill in for a project.

Near different groups of fabrics, the staff has posted patterns and pamphlets with different ideas for quilts, bags and small accessories as well as baby projects.

You can see a little peek on the top of the bolt shelves of other stuff. The tops of the shelving were stuffed with different things: Jelly Rolls, patterns, kits for handbags (we saw some by Riley Blake that had everything you needed to go home and start sewing a gift.), fat quarter packs, though not a lot, and a multitude of other stuff that I can’t even remember.

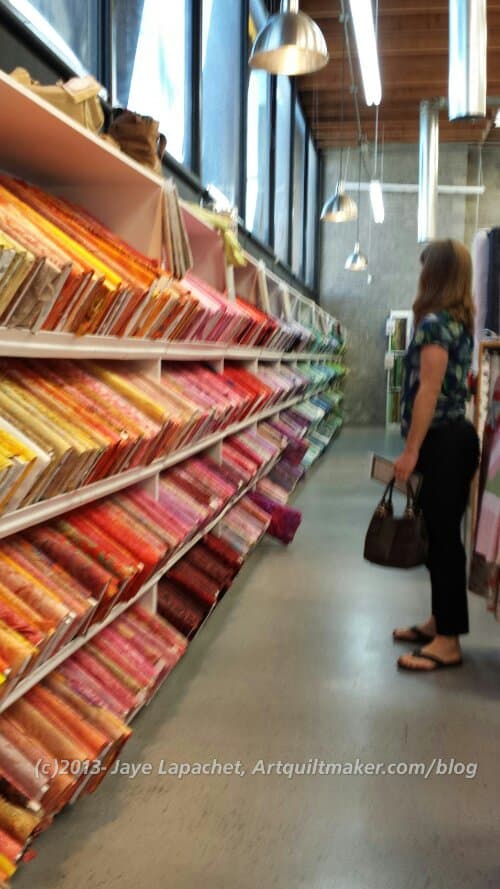
Batik wall (front)
Batik wall (front)

I don’t think I have ever seen this many batiks in one place. It was an amazing number of batiks.

I don’t like those kind of shelves, normally, but in this case I think it worked well for two reasons: 1) the aisle was big enough to so I could get far enough back to see the different shades and tones; and 2) there were a lot of bolts of batik fabric.

I was kind of looking for a background for the Russian Rubix. I was thinking of a white with some grey on it. Shockingly, we didn’t find any of those colors. There didn’t seem to be any white batiks at all.

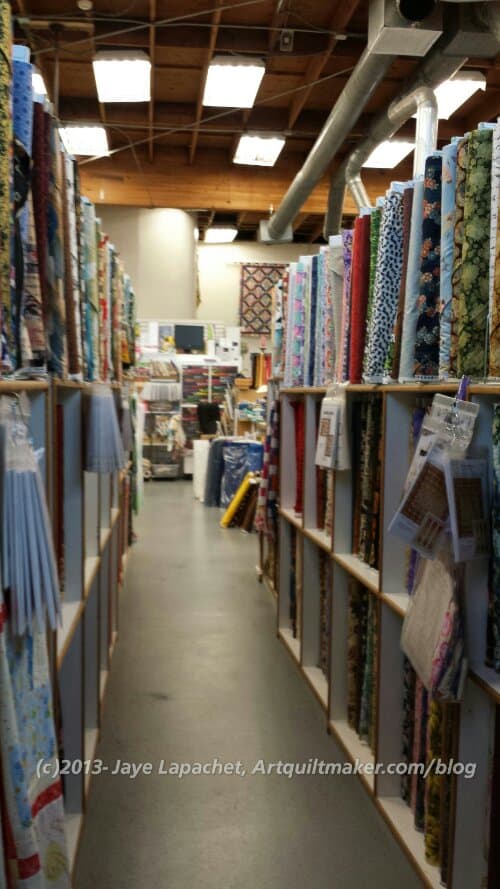
Rows and rows of fabric

I really could have bought a piece of almost every one of these batiks. I am really noticing how they glow in projects near regular quilting cotton.

On top of the shelves, you can see more of the samples and projects.

I have never seen as many novelty fabrics in one place. They had as many junk food fabrics as a person could wish for. I saw some of the RJR food fabrics and was tempted for the other two food quilts I want to make, but refrained.

We saw a ton of baby fabric. Susan noticed the American Jane Punctuation fabric and several other lines from a few years ago. They might be worth calling if you are looking for something out of print.

There was a whole aisle of Asian fabrics.

We really had a short amount of time to visit this store, so I wasn’t able to look in detail at all of the fabric. It will definitely be worth another trip.

Actually I may not have seen this much fabric in one place in California ever. I have seen this much fabric in one place in Lancaster County Pennsylvania.

Patterns and Pink
Patterns and Pink

This is a shot from the restroom across the store to the opposite wall. The back door, where we entered would be to your left if you were in the store.

In the area to the left of that rounder of pink were all of their charm packs. there were piles of Jelly Rolls that were just the beginning of the Jelly Roll Extravaganza (not to leave out Anthropologie strips and Bali Pops) available at Candy’s.

They also had patterns galore in that rack and all over the store.

The store was a bit messy. I think it is hard when there is so much inventory. All in all, though, worth the trip. As I said, I would go there again.

Vital Statistics:
Candy’s Quiltworks
8549 Reseda Blvd
Northridge, California
(818) 349-7397
(between Napa and Chase)

There is no sign in front and the windows are tinted black. We went around and parked in back, but found out that there was a front door later.

Why Should You Care: you might have to travel to Northridge someday. This would be a great shop to visit if you need to get away from a conference or a little too much family for a few minutes.

Mom’s Quilt Blocks

Blossom BOM block
Blossom BOM block

A few days ago, I talked about my mom’s quilt. I decided that you would probably appreciate some detail shots.

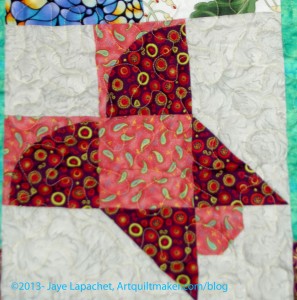
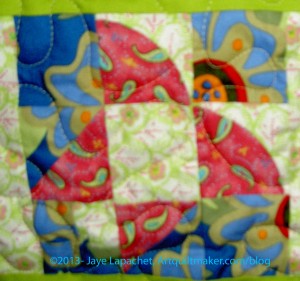
This is one of the Blossom BOM blocks. Now, I always thought that BOM blocks were supposed to encourage people to quilt more. This block is a tough block. My mom has garment sewing experience and she had a tough time with this block. Look at the pieces – curves and that little block in the lower right hand corner. Not impossible, but also not a nine patch.

My mom is tough and created a strategy. After screwing up a few blocks and not having enough fabric for the BOM block, she started making a practice block with her own fabric and then used the BOM fabric for the non-practice block. The above blocks are the practice blocks.

Blossom BOM block
Blossom BOM block

This is the same block, but made with a bolder selection of fabric. I believe that I gave my mom some of these fabrics. I feel like I make some bold choices in fabric selection, but my mom has me beat by a mile. I would not have thought to put the blue and the pink together.

I am glad that I took the time to look at these blocks.

They make me think. What would your interpretation of this block be? Even if you use fabric on paper with glue stick, what colors would you choose? What colors would take you out of your comfort zone?

Pinwheel
Pinwheel

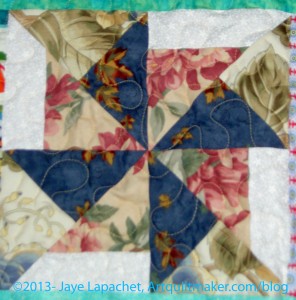
The pinwheel block is a pretty standard pattern. It is actually a pattern that you can really make look like it is spinning if you place the fabric a certain way.

Again, though, mom has made it her own. The blue and the cabbage rose/bold flower print are an interesting combination.

I really think my mom and I see color in different ways. Again, I wouldn’t have chosen these fabrics together, but they work. It kind of reminds me of the quilt Bill Kerr showed that included David Butler and Jo Morton fabrics together.

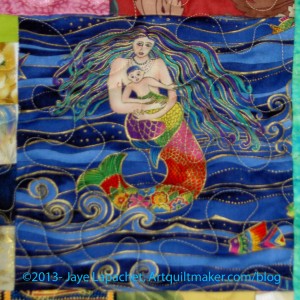
Mermaid Block
Mermaid Block

The mermaid block is some kind of panel. I have no idea what possessed her to add this to the quilt, but it works. Interesting.


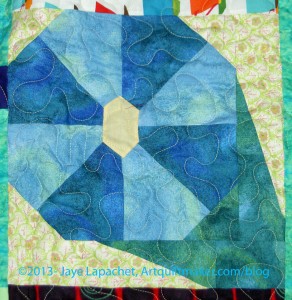
Morning Glory
Morning Glory

The Morning Glory block really looks like a morning glory. You can see that the center cannot have been easy to piece. I know that isn’t applique’ and am pretty sure it isn’t paper pieced either.

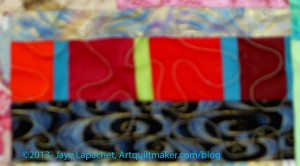
Improv Piecing
Improv Piecing

The very bottom block reminds me of one of Gwen Marston’s filler blocks. I also, though I am reluctant to say it, think it has qualities of the Gee’s Bend blocks.

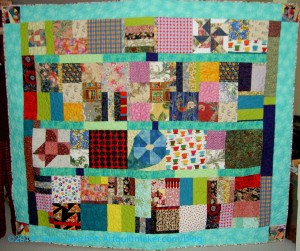
Mom’s Quilt

Mom's Quilt
Mom’s Quilt

My mom just finished a quilt – well, a month or so ago.

She has a really unique style. If I had to put a name to it, I would call it Gwen Marston-esque, but that isn’t quite right.

Recently she finished a quilt shop’s block of the month program. It was the first she had ever done. This program was made up of flower blocks. I believe it was called Blossom.

Very few people would have set these blocks the way my mom did, but if you have seen any of her quilts, you know this is totally her style.

And it is isn’t boring. She has a great view of quiltmaking and always sees settings and design in a whole new way.

This will be a gift for my stepsister.

Book Review: Contemporary Jewelry in Perspective

Contemporary Jewelry in PerspectiveContemporary Jewelry in Perspective by Art Jewelry Forum

Thanks to Lark for sending me this book to review.

This is more like a scholarly book than most of the books I have reviewed for Lark. This book sets out to distinguish why contemporary jewelry is not like the jewelry found in the local shopping mall (pg.7). It is clear that contemporary jewelry artists struggle with the same problem that art quiltmakers have: art v. craft. The book delves into detail about what craft is and how jewelry making fits into fine starts traditions.

This is a serious books that looks at contemporary jewelry from all angles. Discussion about the journals of contemporary jewelry have a place. Photography of contemporary jewelry is explored. the tools, spaces and materials are all discussed in a scholarly and serious way.

The book is lavishly illustrated with photographs, which are works of art on their own.Many, many contemporary pieces are shown throughout the book.

The title, Contemporary Jewelry in Perspective, really describes what this book is about. No stone related to contemporary jewelry goes unturned. If you want a thorough grounding in contemporary jewelery, this is your book.

View all my reviews

Sketching #199

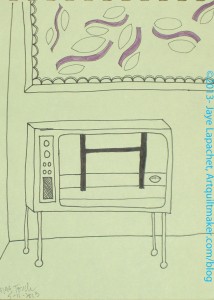
CPP Response #199: touch

You are probably wondering why this is on yellow paper. Well, I am almost at the end of my drawing book and in the back they have “conveniently” placed different types of paper. There is a sheet of lined paper, there are some other sheets and this piece of yellow paper. I was drawing at Starbuck’s and the lighting wasn’t good, so I didn’t realize the paper was yellow until I had started. I actually realized that the pens weren’t dealing well with the paper before I noticed the color. Derrrr, as the Young Man would say.

I was thinking Touchdown for this response.

What did you think when you saw the prompt?

I hope you have done a response. If you have, please post the direct URL (link) where your drawing, doodle, artwork is posted (e.g. your blog, Flickr) to the comments area of this post. I would really like to keep all the artwork together and provide a way for others to see your work and/or your blog.

We are also talking about the Creative Prompt Project on Twitter. Use the hashtag #CPP

Sketching #198

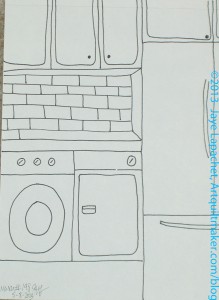
CPP Response #198: Wash

When I lived in Austria I first started seeing the washer in the kitchen. I thought it was weird.Now that I do a bunch of laundry every weekend, I think it would be very convenient. Of course, now, I don’t want to give up any counter space or cupboard space to a washer.

I am not as behind in drawing the responses as I am in posting them. I might post a few this week just to catch up a little bit.

I hope you have done a response. If you have, please post the direct URL (link) where your drawing, doodle, artwork is posted (e.g. your blog, Flickr) to the comments area of this post. I would really like to keep all the artwork together and provide a way for others to see your work and/or your blog.

We are also talking about the Creative Prompt Project on Twitter. Use the hashtag #CPP

There is also a Creative Prompt Project Flickr group, which you can join to post your own responses. I created this spot so those of you without blogs or websites would have a place to post your responses. Please join the fun!

Creative Prompt #226: Picture

A picture is worth a thousand words.

“Picture a Girl” – song Phi Mus sing at certain events, including notification ceremonies that some is getting engaged.

Seeing the Big Picture

Paramount Pictures

picture book

dynamic picture

Picture window

digital photos

Motion Picture Association of America

The Picture Show (NPR)

moving picture

Academy of Motion Pictures, Arts and Sciences

picture perfect

Rocky Horror Picture Show

picture this…

The Last Picture Show

get the picture?

The Picture of Dorian Gray by Oscar Wilde

Star Trek: The Motion Picture

picture dictionary

Universal Pictures

Compliments of the Young Man “framed picture of a pickle on a plate”

HTML5 <picture> element -Responsive design techniques are a way for developers to adapt a site layout to a wide range of devices, from desktops to iPhones, and have it consistently look sharp and load quickly. And no responsive design solution is complete without an adequate technique for dealing with images.

images

school picture

picture gallery

This Week in Pictures

photo

hang a picture

formulate a picture

draw a picture

This Year in Pictures

Post the direct URL (link) where your drawing, doodle, artwork is posted (e.g. your blog, Flickr) in the comments area of this post. I would really like to keep all the artwork together and provide a way for others to see your work and/or your blog.

We are also talking about this on Twitter. Use the hashtag #CPP

The Creative Prompt Project, also, has a Flickr group, which you can join to  post your responses. I created this spot so those of you without blogs and websites would have a place to post your responses.

Definition: “An image (from Latin: imago) is an artifact that depicts or records visual perception, for example a two-dimensional picture, that has a similar appearance to some subject – usually a physical object or a person, thus providing a depiction of it.” (Wikipedia)

26 Projects – September 2013 Update

I just noticed that I have only 7 projects on my WIPs list. I have really made progress, which is a good reminder that I need to focus my efforts on not filling up the list again. I don’t mind having a couple of projects going at once, but I don’t want projects that are stalled hanging around for years. I really don’t.

I talked this week about all the cutting that I did. All true. I don’t know why I cut for the Scrapitude mystery quilt, but I did. I didn’t cut all the pieces for each project, but I cut bunches of pieces for a variety of projects.

I made good progress on the cutting for the Russian Rubix and started talking about Easy Street.

Finished 2013 Projects:

  1. Corner Store: Finished on 1/1/2013 YAY!
  2. The Garden. Finished on 1/5/2013 YAY!
  3. Stepping Stones: Finished on 2/14/2013 YAY!
  4. Fabric of the Year 2011: Finished on 2/27/2013 YAY
  5. Calm: Finished on 3/14/2013 YAY!
  6. A-B-C Challenge: Finished on 3/31/2013 YAY!
  7. Petrillo Bag*: Finished on May 5, 2013 YAY!
  8. Super Secret Project #1: Finished on June 13, 2013
  9. Super Secret Project #2: Finished on June 23, 2013
  10. Sparkle Pink: Finished on August 20, 2013
  11. Swoon: Finished on August 27, 2013

Other non-quilt Projects finished

  • 5 donation Pillowcases
  • 2 fabric handbags/project bags
  • 6 cat beds
  • 12 napkins

Still WIPs

  1. Aqua-Red SamplerFrances  is working diligently, though I know she feels frustrated with the foundation pieced block. I think part of that is because she is left handed and I am right handed. I finished the foundation piecing tutorial, along with my block for this part of the class. I am not giving up on her. I hope she comes back.
  2. The Tarts Come to Tea: I still haven’t worked on this since April 2011, though I did think about working on it. I hope that counts for something. I really do need to get back to the quilting. I am still a little mad at myself for making such good progress and then getting sidetracked. I thought quilting the Whole Cloth quilt would get me back in the swing of quilting, but apparently not.
  3. Pointillist Palette #4: Fourth is a series of 6 quilts; needs tiny square patches sewn together. Mrs. K. gave me more PP fabric and I won some from a giveaway. I still think it is a sign that I need to work on this. Leaders and enders.
  4. See: needs satin stitching. Small, also a possibility for finishing. I really have the feeling I came so close to working on this project this month.
  5. Self Portrait: started in 2006 at a class at Quilting Adventures in Richmond, Virginia. I like the piece, but don’t know where to go from where I am. Mouth? Hair? The attitude I need to have is that I can’t ruin it; there is always more fabric.
  6. Under the Sea: class project; like the design, but not the colors much.
  7. Flower Sugar Hexagon: I have sewed enough of the hexagons together over the weekend to make the piece a normal shape. It is about half the size I want it to be, so I will work on sewing together the other half. I might start a new chunk and then sew that new chunk to the old chunk once I am done. It might be easier than sewing one or two hexagons together. We will see. I may make it a few rows longer, too.

Ready for Quilting

I took 5 quilts to the quilter last week: Infinity Blocks, which I had thought I would quilt myself, Fresh Fruit, FOTY 2013, Star Sampler, which nothing could induce me to quilt myself, and the Young Man’s t-shirt quilt. PROGRESS!

  1. Original Bullseye: At the quilter
  2. New:* Wonky 9 Patch: needs basting, quilting and binding. Not on original list
  3. Infinity blocks: blocks sewn together into a quilt top, borders on. Back and binding made; at the quilter.
  4. Spiderweb: Top is together, binding is made. This is at the quilter.
  5. New:* FOTY 2012: top, finished. Back and binding are complete; at the quilter.
  6. New:*Star Sampler: Top finished, back and binding finished; at the quilter. (not on original list)
  7. New:*Fresh Fruit: Top finished, back and binding finished; at the quilter.(not on original list)
  8. Young Man’s t-shirt quilt: Top, back and binding are all ready; at the quilter.

Please note that even if you combine the two lists above, I do not have 26 projects on this list anymore. I have made progress!!!

In the Finishing Process

  1. It doesn’t really count as finished, though I am putting a sleeve on the Swoon.

Abandoned

Nothing so far for 2013

Hunting and Gathering

  • Spin Wheel: really not started, but supplies gathered. I probably have enough fabrics and just need to decide to start.
  • Windmill quilt: Still hunting and gathering. Need to find a background, because if we use the cut fabrics, the pattern will be lost. The pieces are too oddly shaped to lose the pattern in a mass of scraps.
  • Stepping Stones #2 using Bonnie & Camille fabrics Bliss, Ruby, Vintage Modern: made two test blocks, but still in the thinking stage while I decide on the background colors. I want the contrast to be good.
  • Super Secret Project #3: working on color choices.

Last update for the 26 Projects List. Read it. There’s some interesting stuff there.

I thought you might want to take a look at the first list I made, the one with the 26 Projects. I started the list in October 2011. I have made progress. I plan to stop this post when I have no more projects from the original list to write about. I wonder when that will be?

*New – Project started after I started working on the 26 Projects list