I have been working on my Half Hexie English Paper Pieced Stars since August of 2012. I really wanted to see if I could actually take out the paper templates and use them again. I sewed four stars together and went from there.
I would have felt a lot better if TFQ were sitting with me supporting me (egging me on). She wasn’t and I needed a stiff upper lip.
EPP Stars with Papers
I did it. I took out the papers and the piece is fine. I was kind of shocked at how easy it was and how well it worked. It is tempting to take them all out, but I know I can only take out those that are surrounded on all sides by another piece.
I should have been, but I was a little surprised by how well the ‘free’ pieces kept their shape.
I don’t know how many stars I have completed, but I may pull out the box in which I keep them and start sewing them together. I would at least get an idea of how many more I need. I could also start putting a border on, once I decide what fabric to use for a border.
Back in December, I put a post up on the Bay Area Modern blog about making lanyards, which was a personal challenge that the president put out to the guild. I wanted to do it, but I haven’t done it for myself yet. It is on the list.
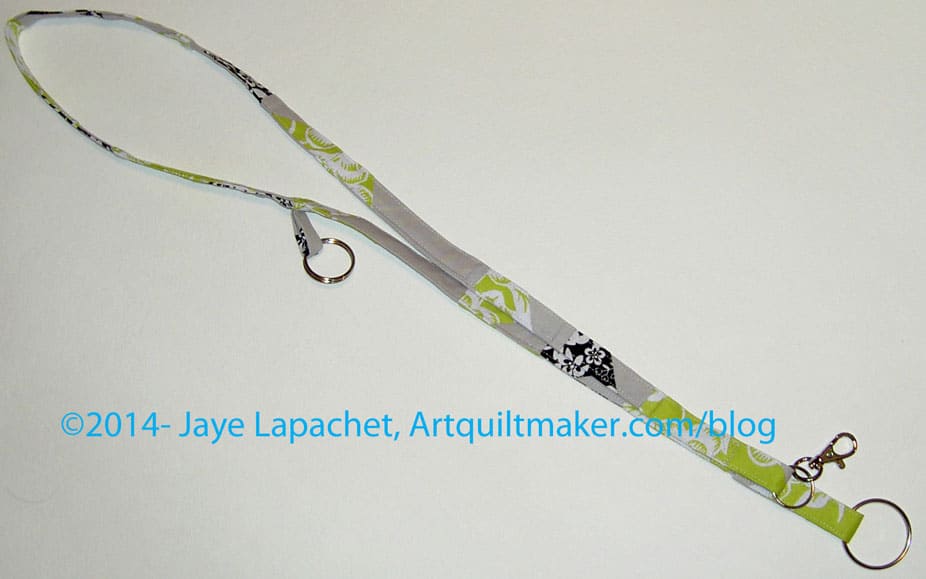
It took me some time to get around to making any kind of lanyard, but I finally did in response to the Orphan Block Challenge also put out by BAMQG. This one will be given in to a pool of small gifts and then I will get something back. I kind of like this lanyard, but am ok giving it away, too.The best part is that now I have a better idea about how to do it.
First I took a look at the Two Peas in a Pod tutorial. There are several tutorials listed. I picked this one, because it was the first one I looked at and I could follow it easily. Frankly, I already had an idea of how I was going to make the lanyard, but I needed to see how someone else did a few of the parts.
Then, I squared up the blocks a little bit to make sure the blocks to make them easier to cut into strips.
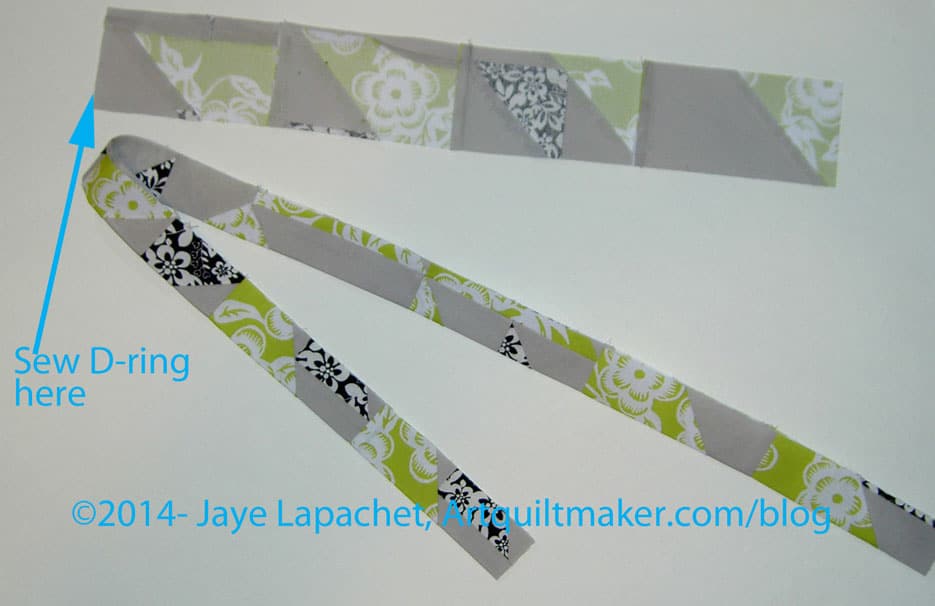
Since this was an orphan block challenge, next, I cut the blocks into 2.5″ strips. The blocks were 9″ or 10″ blocks (I don’t know -I didn’t measure) and I got about 3 strips from each one with skinnier bits leftover. It doesn’t matter what size they are as you can use regular fabric or a Jelly Roll strip and discard the leftovers.
After cutting, I sewed the strips together until I had a piece that was long enough to go from my belly button, around my neck to right below my collarbone (about an inch below or so).
Sew another strip that is long enough to go from your collarbone to your belly button.
Take both strips, fold them in half and press. Open them up and fold the raw edges to the center and press.
Sew D Ring Here
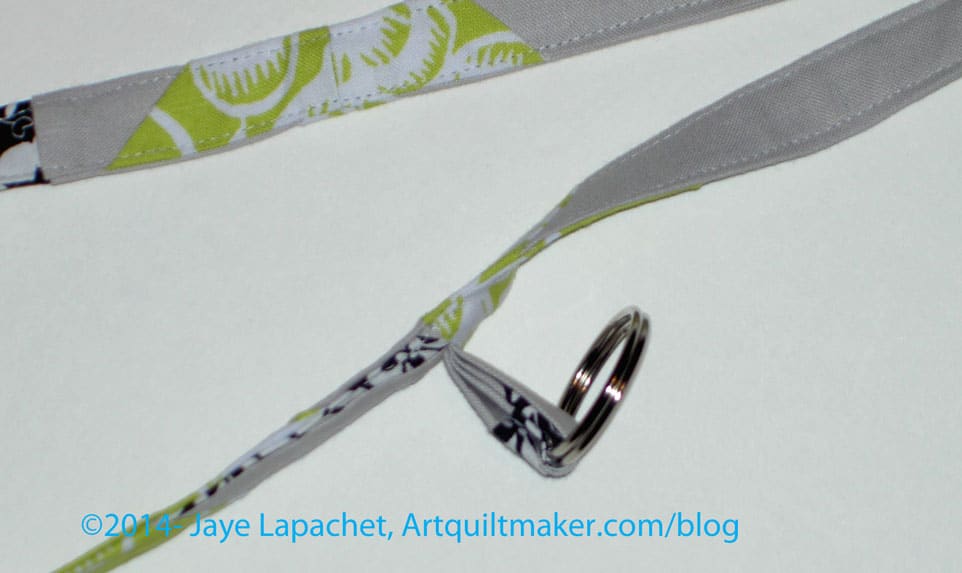
Then I wanted to add a loop at the shoulder so my nametag would be at eye level or I could use it to keep track of my glasses. Cut this piece about 4″.
I took one of the leftover skinny strips (from the block above), folded it in quarters, top stitched both sides, slid the fabric piece through a ring and sewed that piece to the right side of a strip that had not yet been sewed. Once you slide the strip of fabric through the ring, you will have a U if you hold both of the raw edges, one in each hand. The ring will be dangling from the bottom of the U.
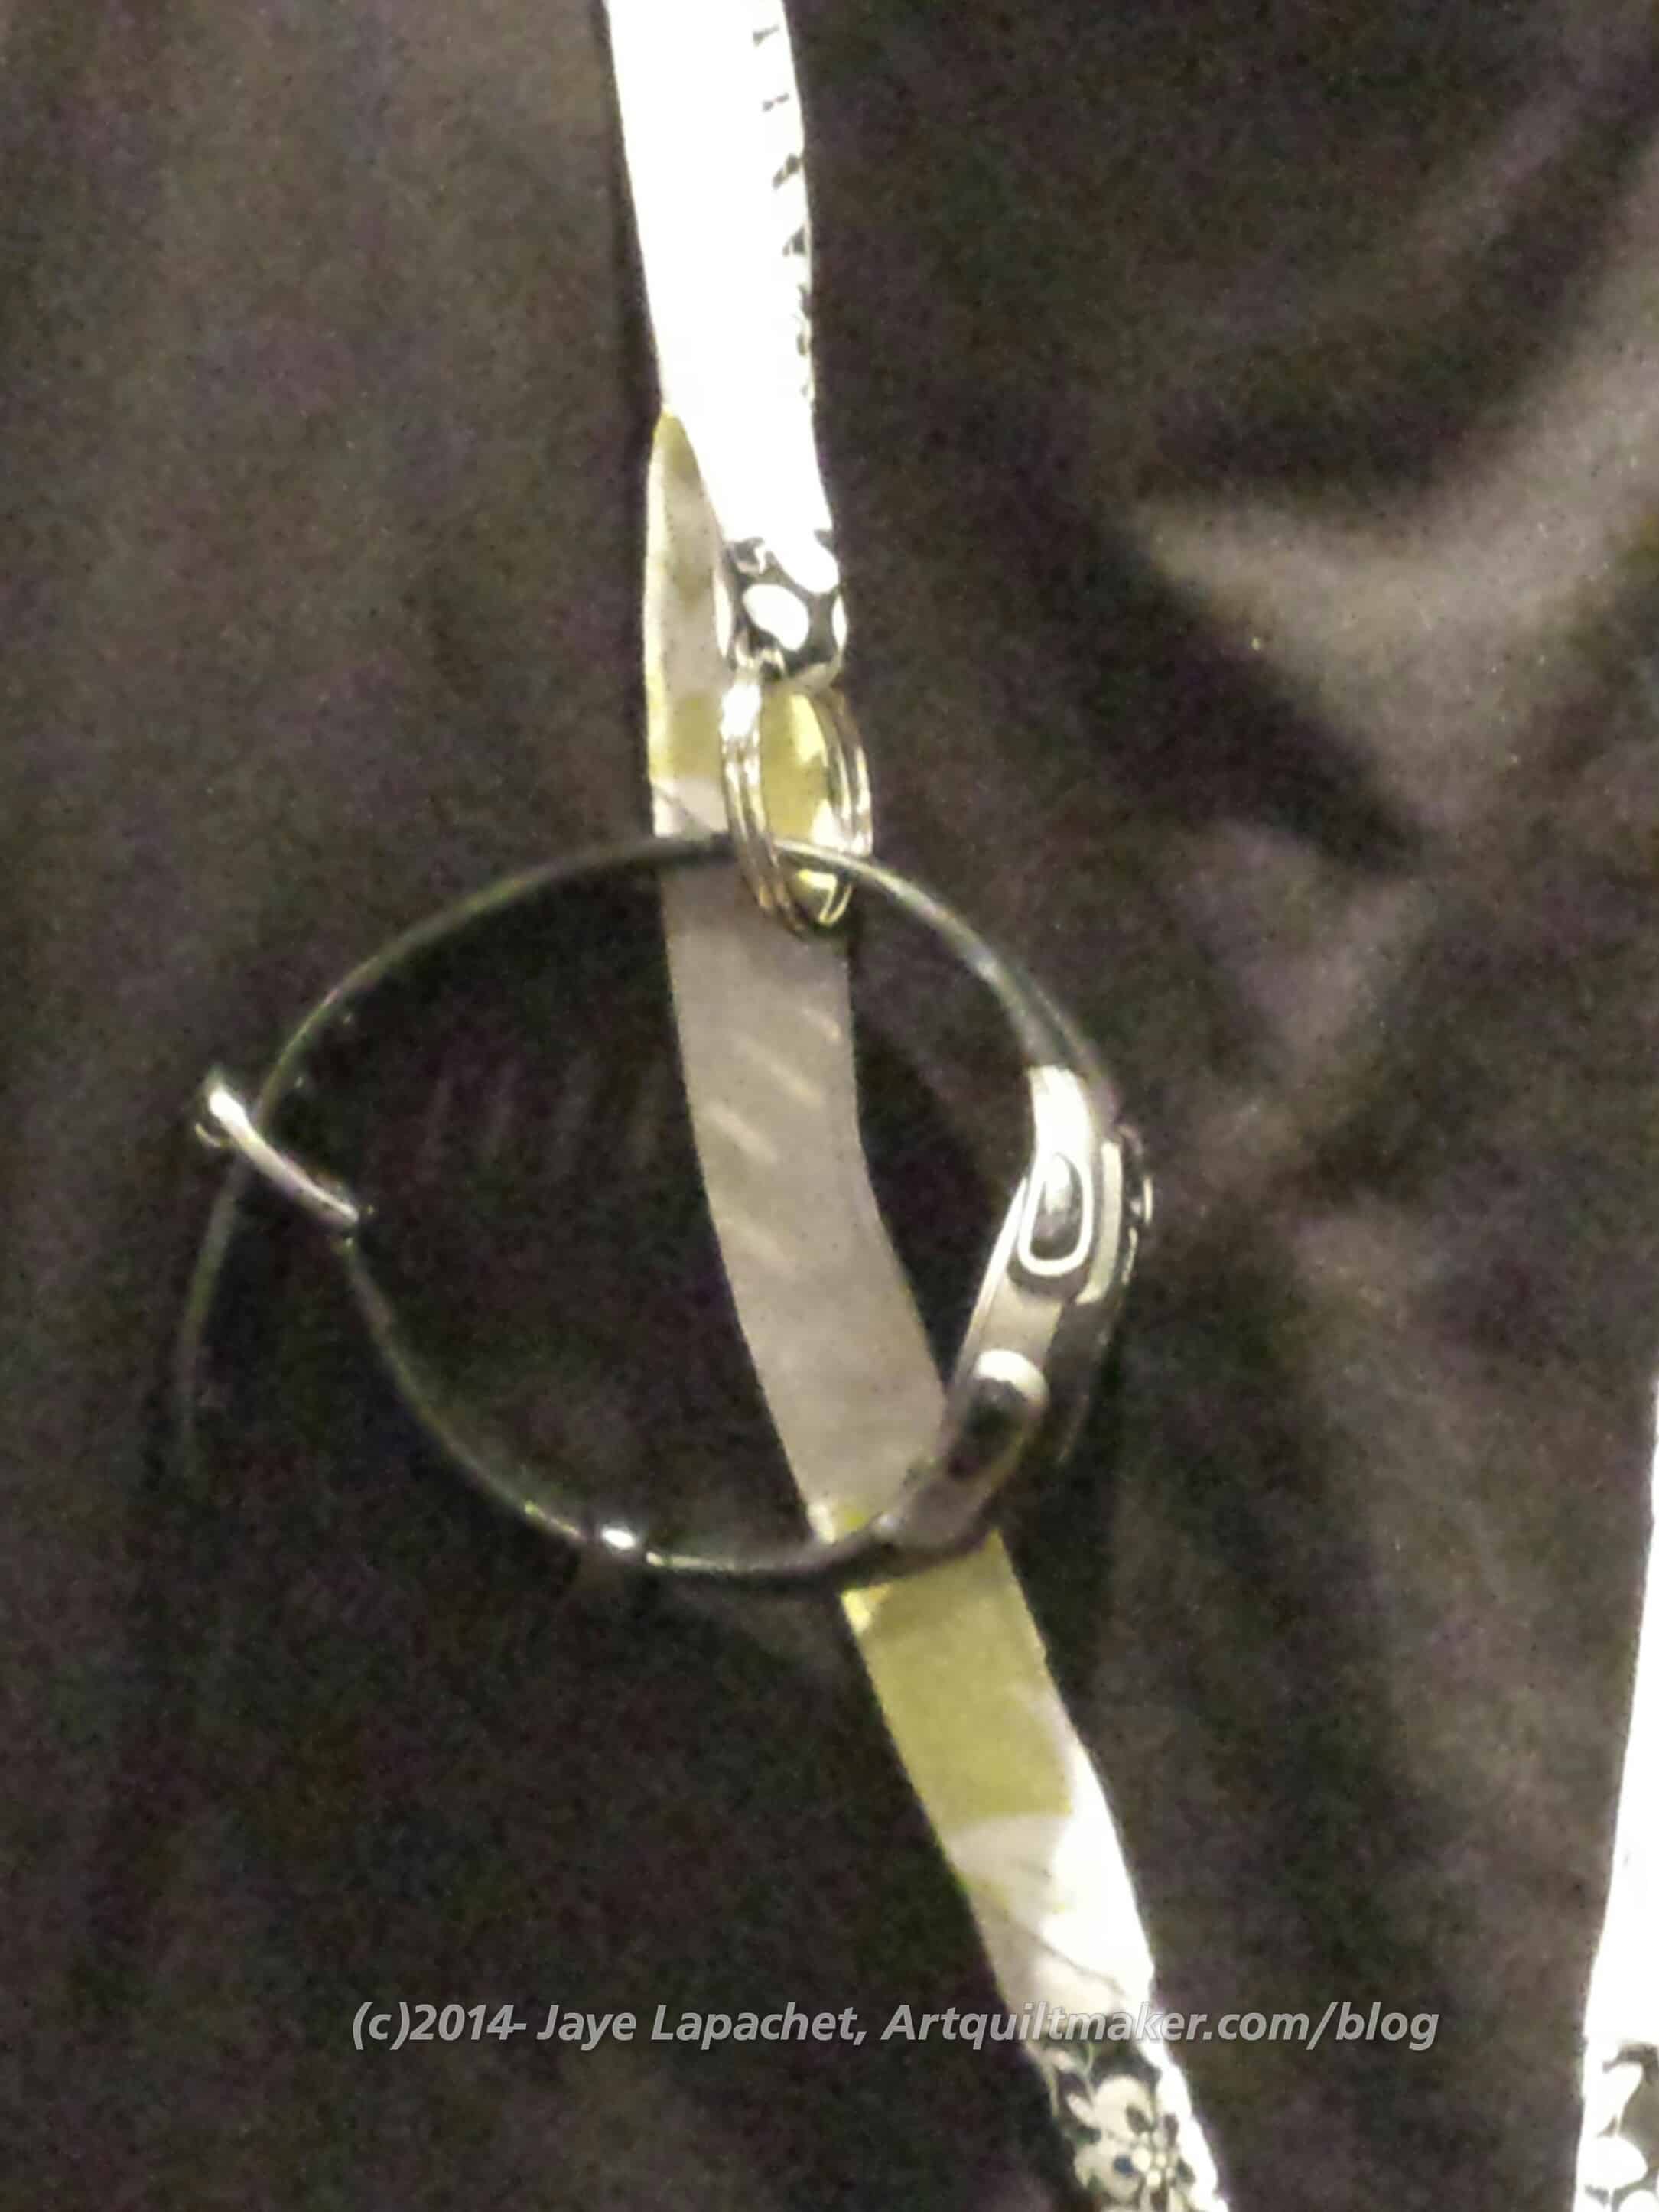
Collarbone Loop
Nota bene: In the picture, the strip to which you have to sew is upside down. Make sure you sew the the loop with the ring in the bottom to the right side of the strip. Nota bene due: In a subsequent step, you will fold the whole piece in quarters and top stitch. You may want to measure and sew this loop to avoid the folds that will take place later.
Collarbone Loop
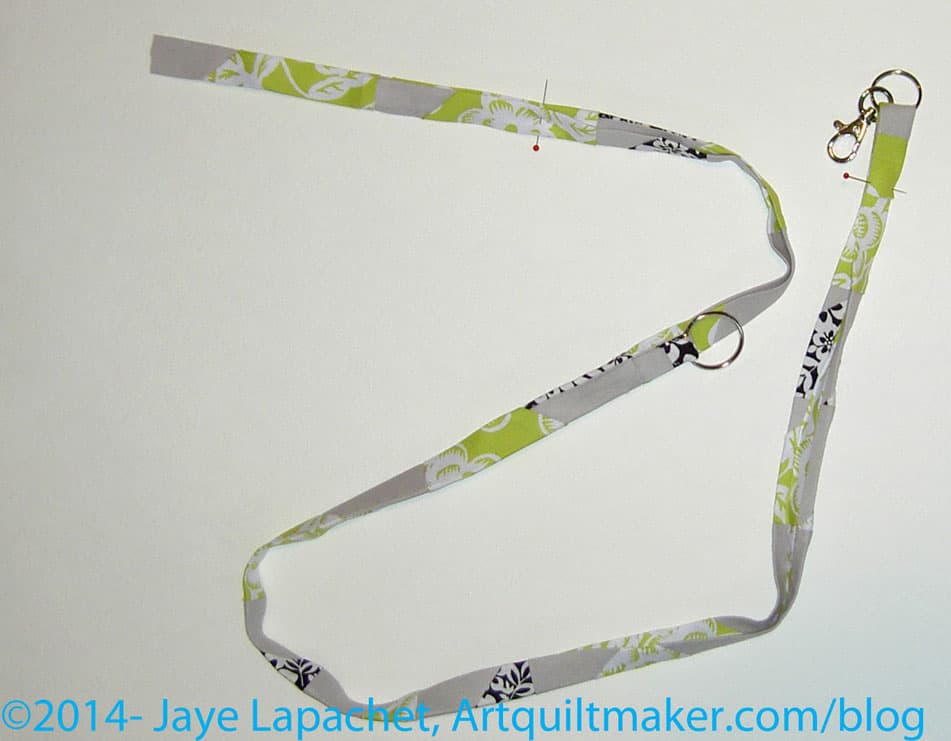
After you have your extra loop added, you should sew the strip to the other strips and keep adding strips until the piece is long enough. You will need a bit of extra length to fold up to accommodate the Swivel hook and other loop, so don’t cut it off too short.
Now you have a long strip about 37″ long. This measurement is from the Two Peas in a Pod tutorial. I cut mine a little shorter to accommodate my height and torso length.
Fold your long strip in half and press. Yes, the glasses loop will be a pain. I haven’t figured out how not to make it a pain. If you know of a way to make it easier, let me know.
Open your piece and fold the raw edges towards the crease in the center. Once you have completed this the raw edges will be encased in the center.
Top stitch very close to the edges on both sides. If you want to be fancy, you can do a double line of stitching or a decorative stitch. Depending on the size of the ring holder, you may have to skip the area where the ring holder is, or go around it.
Now hang the strip around your neck. Trim the ends if you think they are too long.
Take the loop and thread one end of your strip through it. Pin in place. WonderClips work well, too.
Thread Strip End Through
Take the other end of the strip and thread the swivel hook through it. Pin in place or use WonderClips.
Now you are ready to finish off the ends. The different tutorials tell you to do it in different ways. I went with the the way the Two Peas in a Pod tutorial suggested. I hadn’t really thought about dual hardware on the bottom, but it works.
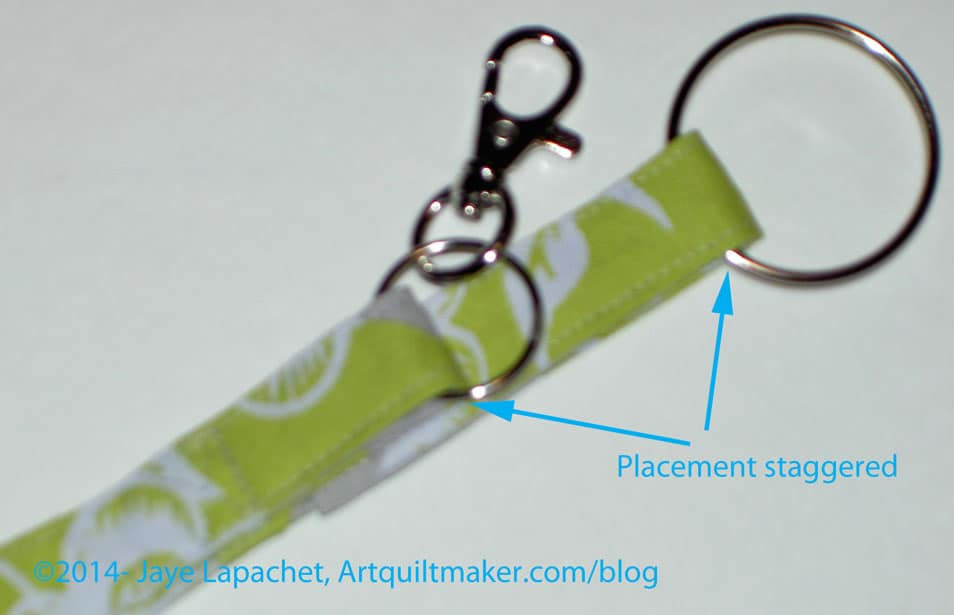
Staggered
I staggered the placement of my loop and swivel hook so they wouldn’t clank together as I (or the user) walked around. This means that I had to adjust the placement of the two pieces. It took a little bit of trial and error, but, ultimately, I am happy with the placement. As an added bonus, I had fewer layers to sew over as I finished the lanyard. That step is optional.
Think about what you might hook on to your loop and swivel hook before you decide on placement.
Place the lanyard carefully around your neck. Make sure to smooth out the twists, if any, so the lanyard lays flat around the back of your neck and on your chest.
Reinforcing Thread Box
Once you are sure everything is smooth, pin (or WonderClip) the two ends together and sew. I made “thread boxes” (the same technique you use to reinforce areas of stress when making a bag) out of my sewing line in order to keep the lanyard together and looking nice.
Change your needle so you are using a new and very sharp needle. Sew two reinforcing boxes, the top one going through all layers. Move the swivel hook out of the way to sew the bottom box to finish the lanyard.
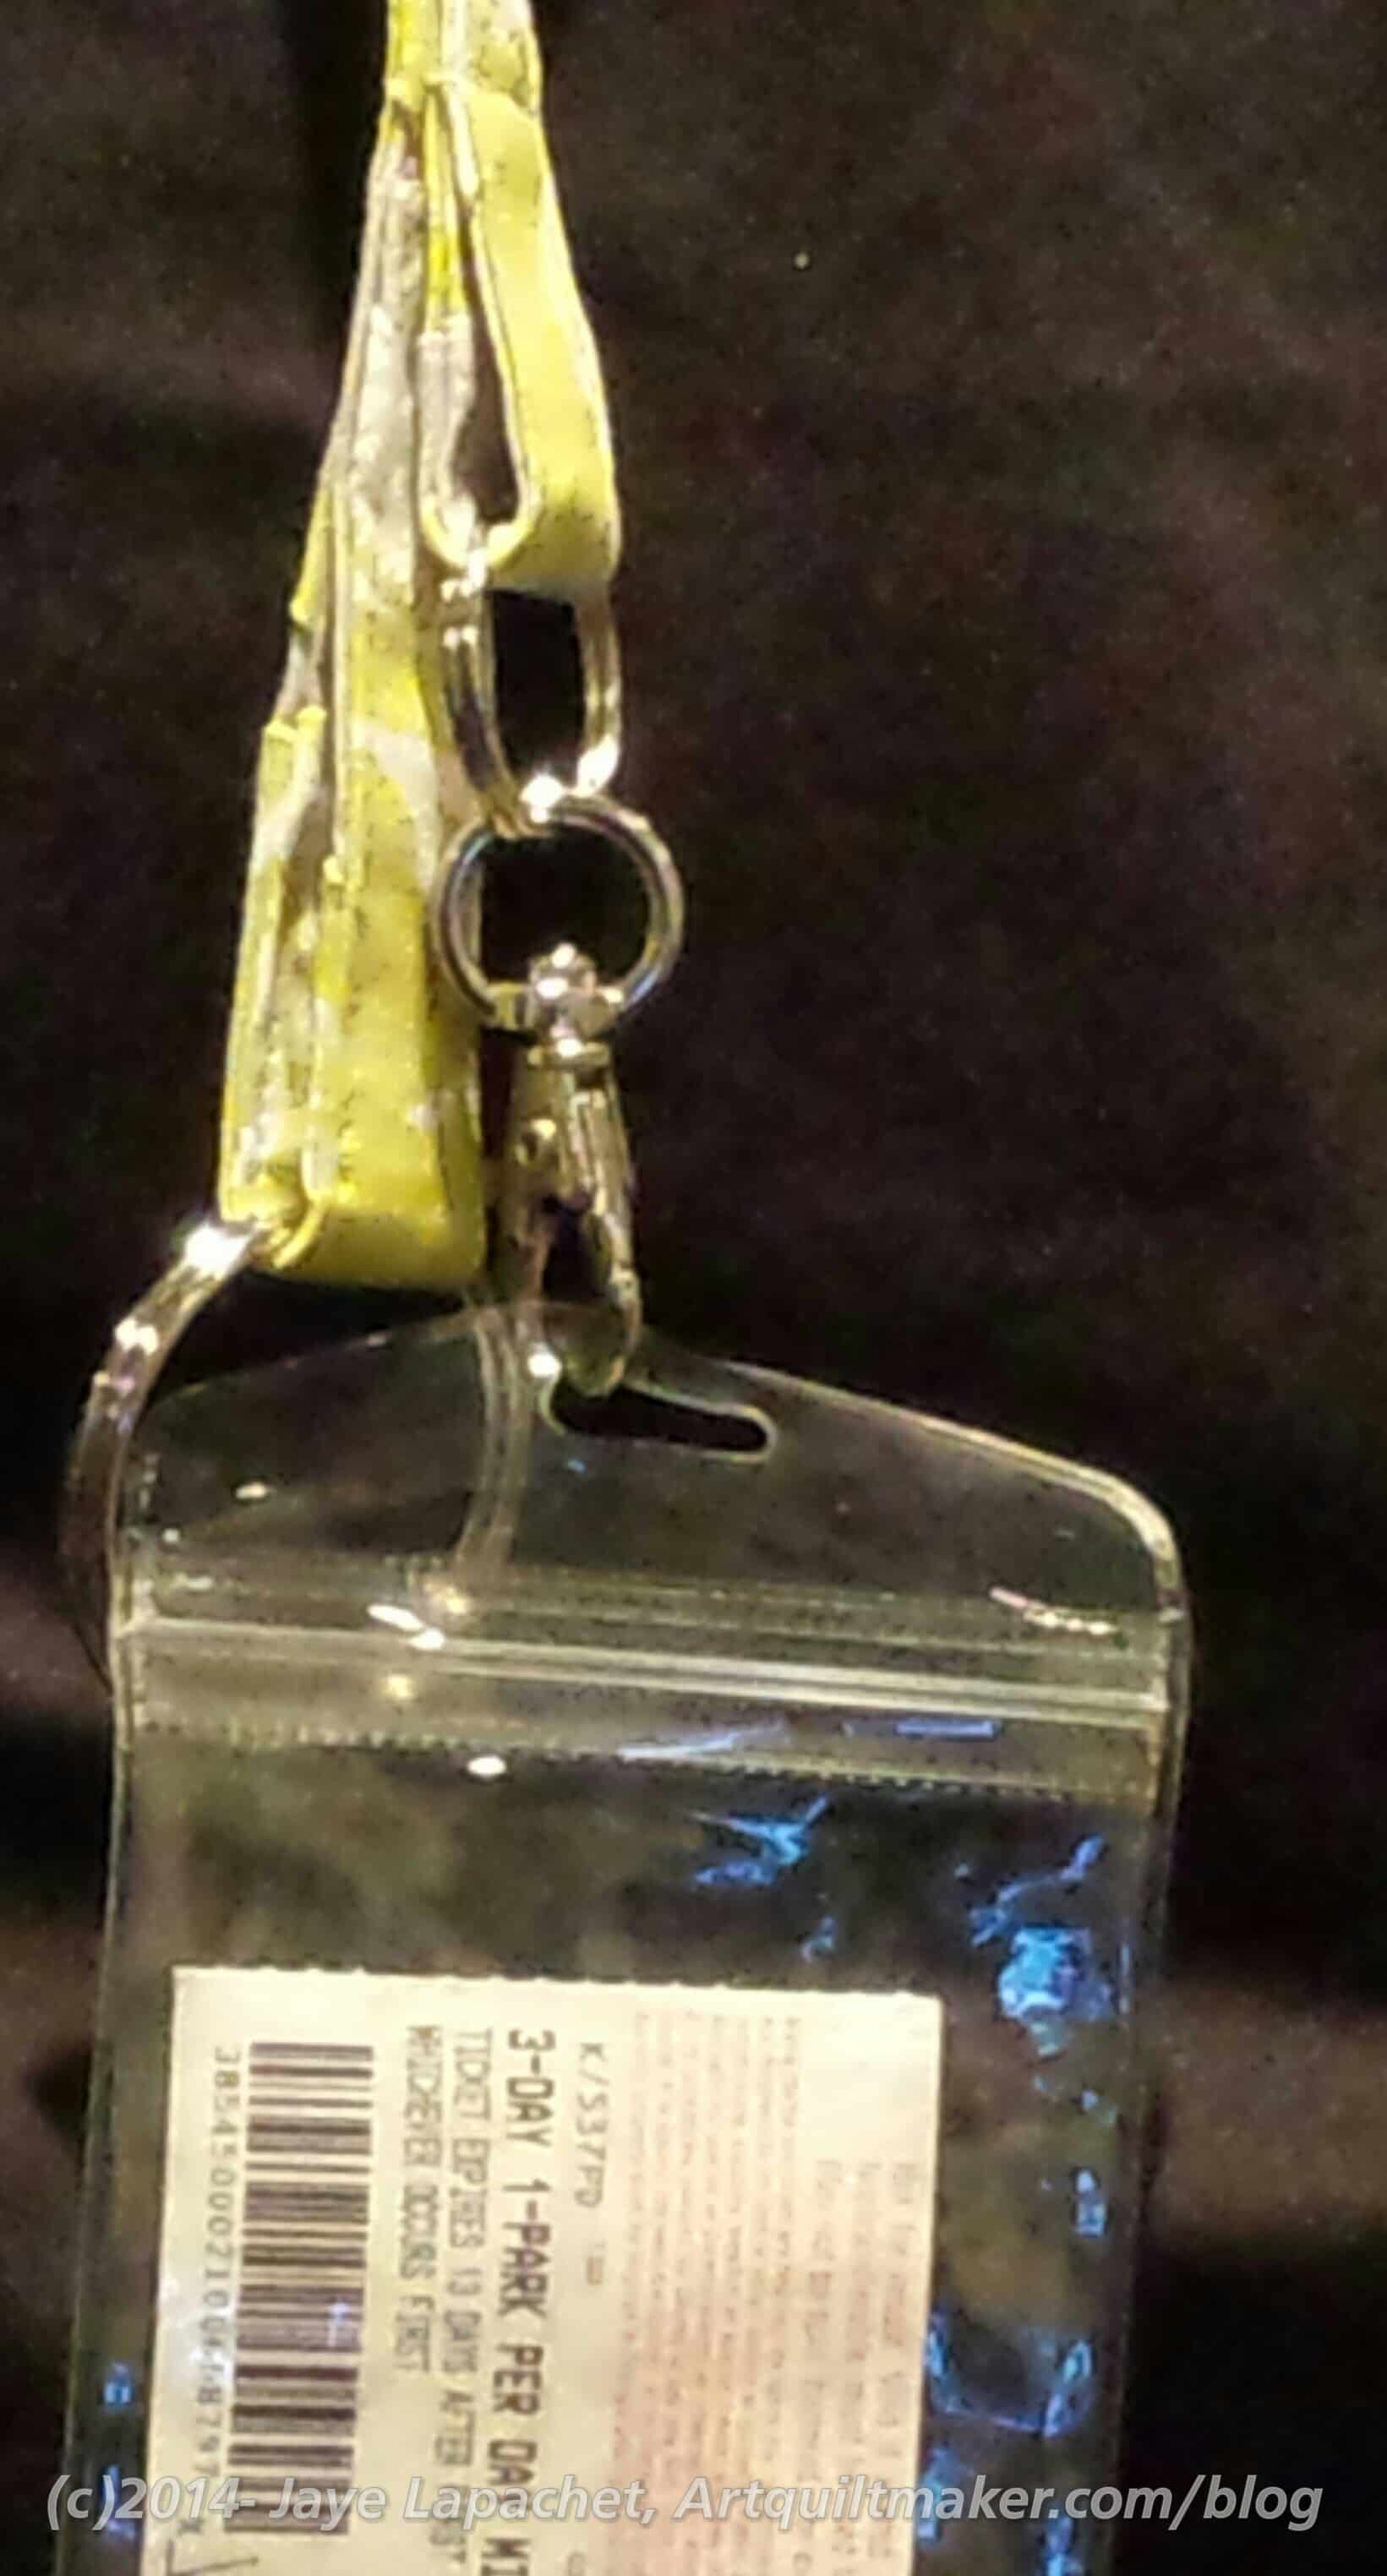
Collarbone ring in use
Pain and Suffering
There are a couple of places that will be difficult. Using orphan blocks or mosaic piecing means that there will be extra seam allowances. With these comes the possibility of really thick seams [See above where I refer to the glasses loop]. To mostly avoid these thick seams, use 3 unpieced lengths of fabric for the neck and loop pieces. 1 Jelly Roll strip (2.5″ wide strip) will work.
")