I realize that I have not discussed the One Block Wonder/Peacock quilt recently. The last time I talked about it was last June!!! I can’t believe so much time has passed.
Frankly, I was stuck and needed some hand holding. This is the main reason I get stuck on projects. Since Pam is in Atlanta, though very willing to help via email, I set up a date with Maureen to work through my issues at the Retreat.
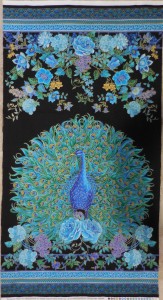
TA DAH! The peacock project is finally moving forward. During the time I spent with Maureen at the Retreat she talked me back from the ledge with regard to cutting up my panels.
I had read the One Block Wonder book, but being shown is different than reading. This technique is definitely a challenge to learn from a book. The technique is based on repeats, but since panels are panels, I decided that each of my panels would be one repeat. This worked out pretty well.
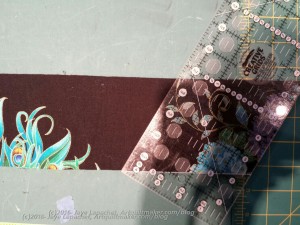
I had decided on a width for the strips with Pam’s guidance (3.75″, in case you are curious), so with Maureen’s help, I lined up the panels and eventually began cutting. It was good to do this at the Retreat, because we had big tables. I know now that I would not have been able to do this cutting in my workroom.
My panels were about 24″ x 44″. I had to lay out the complete panel flat and there are 6 layers stacked on top of each other after you have lined them up according to the directions in the book. It was helpful to have the big table. I put new blade in my rotary cutter and that was helpful. I only had a 45mm cutter. A 60mm cutter would have been very useful, but nobody had one to lend.
The key piece of helpful information during the cutting process was that there was a little wiggle room if I didn’t cut the panels quite right. One of my panels was not printed like the others and was causing me problems. Maureen’s comment helped me relax knowing that everything would be ok.
Another very helpful piece of info, which relates to wiggle room, was that the cut edge of the panel could be squared up before the next cut. The maker cuts through 6 layers of fabric, which is difficult in any case, but even more difficult when juggling a ruler, a big table you can’t reach across all with spectators watching. I had enough leftover to square the edges, but not enough to make another set of full sized blocks.
I did take what was leftover and make some smaller triangles that I will perhaps sprinkle around the edge.

Each set of triangles is pinned together waiting for its turn under the machine. Some of them look like they will make really interesting blocks. Others are mostly black and may not make it into the quilt.
I also have a number of solids that coordinate with the panel and I may sprinkle those throughout the the quilt. I’ll have to see.
I did start to sew blocks together after cutting them up, but I have not yet made very much progress. I had to try each one to see how I wanted to sew it together. Because you are essentially using triangles, there are three layout options for each block.
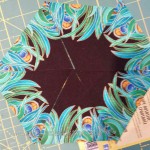
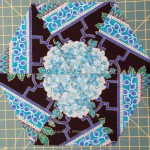
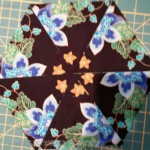
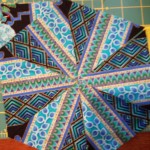
The above blocks are some samples. They look a little strange, because they are not sewn into hexagons. Three triangles are sewn together, two sets for each hexagon, then they are pinned together until the layout is finalized when all the blocks are sewn together in rows. I could sew the hexagons together and sew them using set in seams, but I am still not over Attack of the Hexies and I don’t want to go there again just yet.
Yes, I did save a panel to use for part of the back.
I am still a bit scattered with my projects. This will be a good leaders and enders project when I don’t have others ahead of it in line.