Judith asked about making the Flowering Snowball blocks, so here is a visual tutorial. Please note that this is the “Jaye-Way” and may not get you an prizes at Houston.
I would suggest that you read the book by Jinny Beyer on handpiecing (buy it through the link on the right and I get a few cents!), as she has a lot of good tips, though she doesn’t recommend using a felt tip. You can use a mechanical pencil to mark, if you want.
I am using templates and handpiecing them. I use a black or red Pilot (formerly SCUF) ultrafine point felt tip pen to mark around the templates. I use grey Aurifil thread and a thimble. Sometimes I put wax on the thread to keep it from tangling. Use whatever needles you like. I use betweens for piecing.
Practice with the felt tip on fabric. You want a thin line with no blobs at the end. I usually run over the end of the template a little and start lessening pressure on the tip right at the end of the template. If you leave it in one place too long, you get a blob. Blobs are bad for precise handpiecing and they look ugly, too.
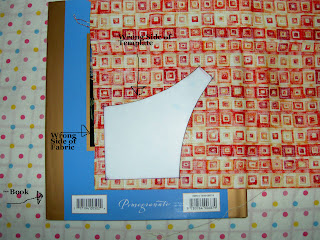 Trace around the templates on a hard surface. In this case, I am using the book as hard surface. Trace on the back/wrong side of the fabric.
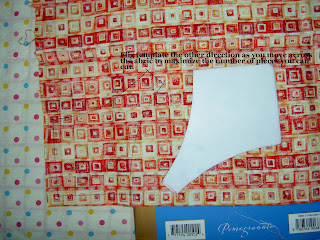 That tiny print says to flip the template 180 in order to get the most pieces out of your fabric. I was cutting 4 pieces from each fabric, but found that to be too many. I will use the ones I have, but am now only cutting one or two. I am trying to keep this quilt to a reasonable size (HA!) and to have as much variety in the fabrics as possible. If I like the fabric, I can always go back and cut more of it, right?
 I trim around the templates by eye. I don’t measure the seam allowance. I try to keep it to arounda quarter of an inch and not to get too close.
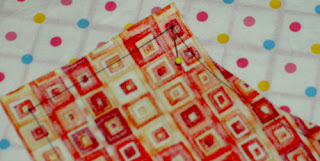 Here is the pinning. First, I pin right in the corner just inside the drawn line. I poke it through the foreground (colored) fabric first.
 This is the back of the pinning. Same deal goes here. I come up through the back. Get the pin right in the corner where the drawn lines intersect and just inside. Remember you have drawn around the template, so the drawn line is a little larger than the template. This is why I try to pin AND sew just inside the drawn line.
 Here (above), the pinning is done. Note that I put two pins close together at the beginning, but I take the first one out right when I am ready to sew, so I can start. The second one holds the pieces together while I get started. I try to make small, even stitches that are evenly spaced. Remember to look at the back as you sew so that you are poking through the back right inside the drawn line.
It is ok that the piece is wrinkly, because you want to match up two curves that are going in opposite directions. Use the bias to make them match.
How the Pieces Go Together
My whole philosophy, which I am pretty sure is a general quiltmaking philosophy, is to go from smaller to larger. This means to build the blocks by making the smallest patches into larger units and then putting the larger units together to make a whole block.
 First, take one corner piece and one background piece and sew them together. Sew/pin with right sides together. Curves require, at least for me, a lot of pinning. For pinning, start at each corner and put pins in by lining up the corners of each piece with each other.
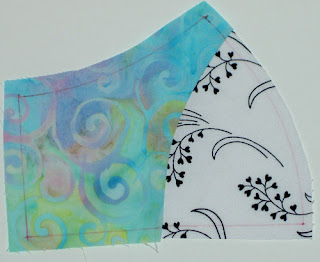 When you sew the corner and background together you will have a unit that looks like the above unit. You can see how the felt tip lines show through, which is another reason to sew just inside the drawn lines. They won’t show on the front of the quilt if you keep them in the seam allowance.
Seeing the felt tips lines here also allows you to see how they line up, if you do the piecing correctly.
 Add another background unit. Note: I am trying to use all different fabrics in each position in the block, but you don’t have to do that.
 Now you have quite a large unit. You will need two of these units per block.
 Sew the center patch to one of the corner (foreground) units.
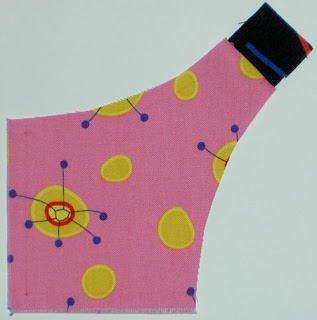 Here is how he unit looks once the middle patch is attached to a corner.
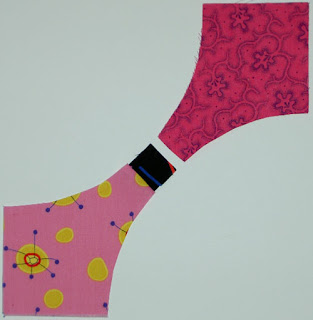 Sew a second corner to the center patch.
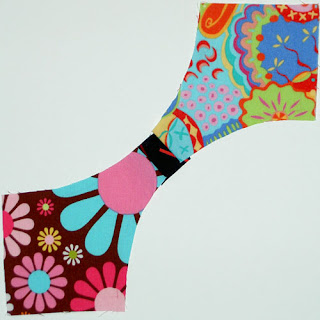 With this unit complete, you are ready to attach the side unit to the center.
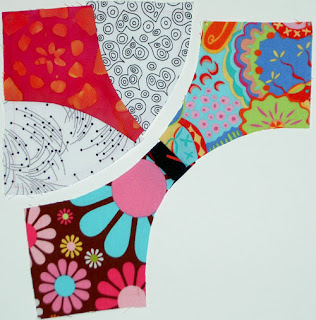 So, just do it. Attach a side unit to the center.
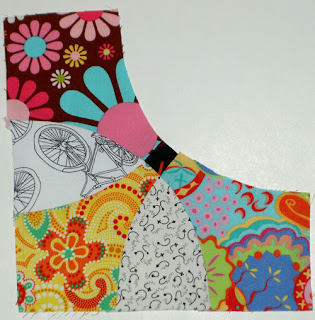 Once you add that unit to the middle piece you are nearly there. The above piecing is the hardest part (but not like you are taking the SATs without a prep course), because the seam is long and the middle section is quite floopy. It also takes a LOT of pins. Make sure you sew through where the seams match several times to keep it strong and make sure the seams line up. I care about that stuff, but you don’t have to match your seams.
I don’t always press the patches after I sew them, because I am sitting on the couch watching TV while I sew (why do you think I have a hand project?) and am too lazy to trudge upstairs to press. It makes the piecing a lot nicer if you press as you go.
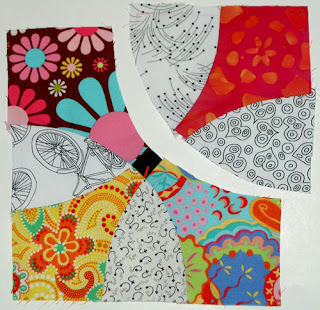 Add the last unit and you are done!
 Completed square. I usually trim the block after I am done with the hand piecing. Make sure you don’t cut over any of your seam lines, because your piecing will unravel if you do. This is not machine piecing.
Templates may not be sold.
Do you have a copy of the templates you will sell? I love this block, but can’t find anyone online willing to share the templates. the one place I found had 2″ sized templates and I don’t understand what to do about it. I’m so frustrated!
Thanks for any help you can give me!
My hard drive is unhappy, so I cannot access EQ at the moment. I’ll see how long it takes. This is not a difficult block to draft. My finished blocks are 8″.