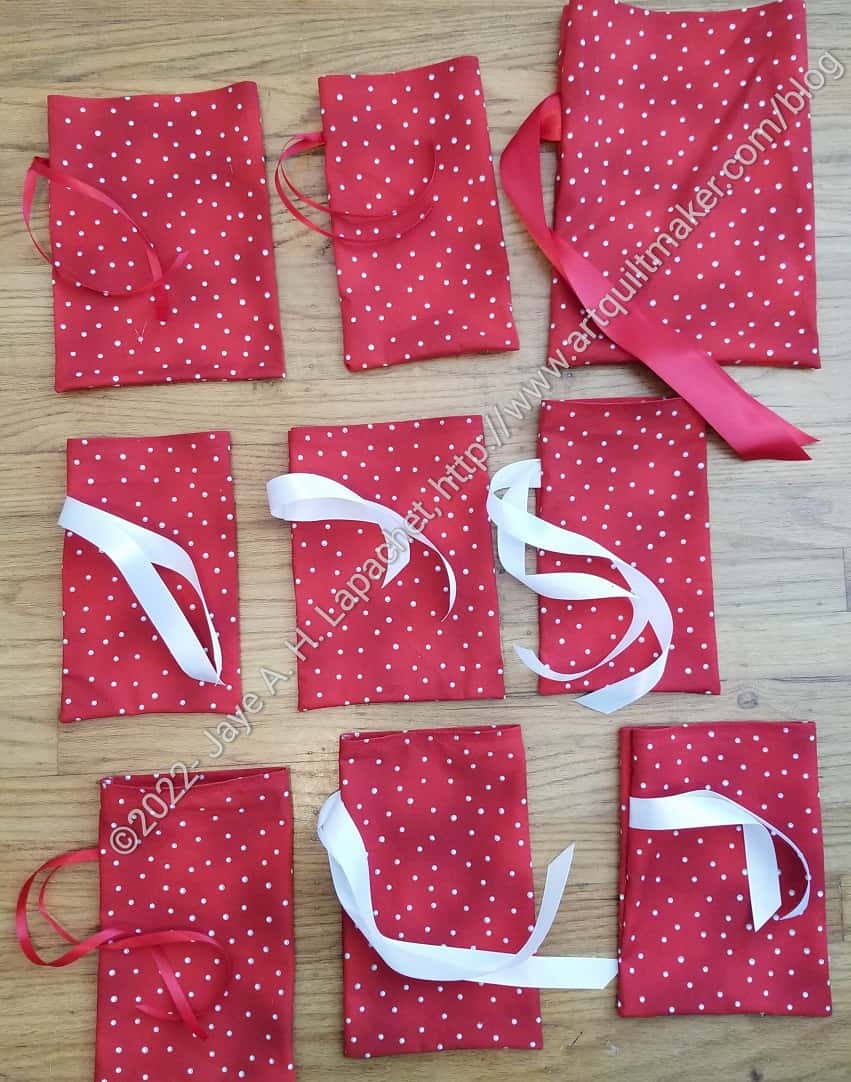
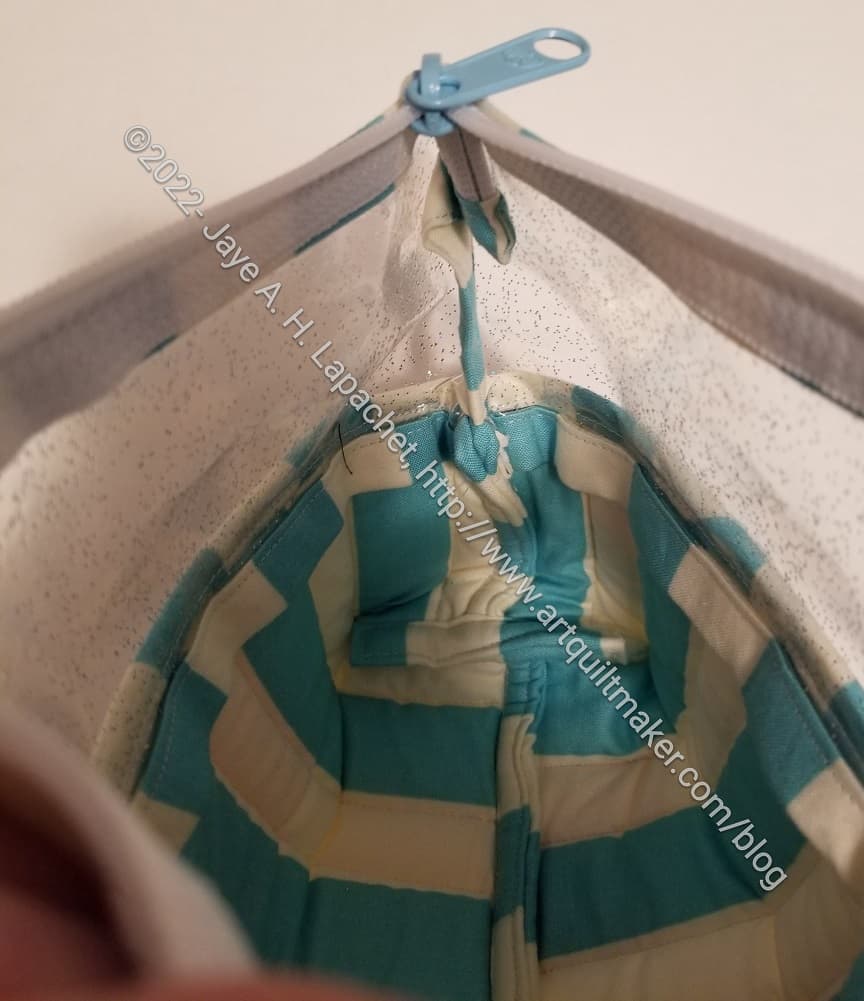
I finished a few more gift bags from the fabric I received for Christmas from Friend Julie.
As I think I mentioned, we needed small bags, so I have been concentrating on those. They take a long time just because there are more of them. These have been in process for a week or more, but I finally finished them over the weekend. Yay!
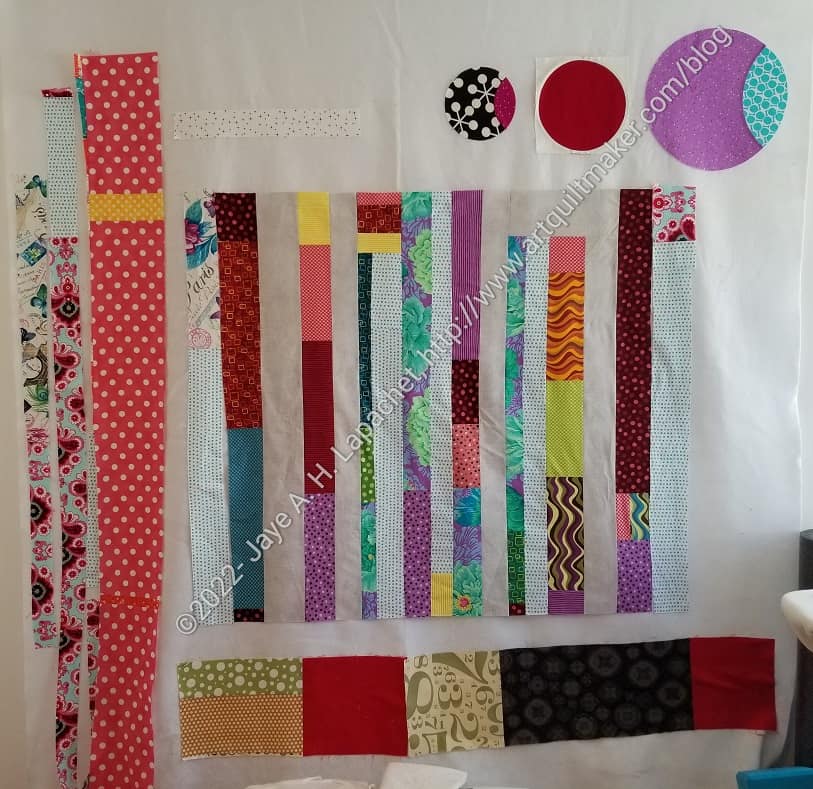
I knew I had left projects on there, but the mists of time clouded over which ones they actually were.
I took all the bits and bobs off the large design wall (pictured) and pressed all the pieces, then put them back up. I really thought I was finished with that Pop Parade Ends quilt. I was shocked to see it still in process. The crazy part is, which I am sure I mentioned before, is how many quilts I made out of the Pop Parade (great name) fabric bundle. Most were FQs, but some were half yards.
Still, I made two donation quilts, one improv-ish and one out of the leftover HSTs from the X quilt. I also made the X Quilt from this Pop Parade line.
Pop Parade Ends donation top in progress
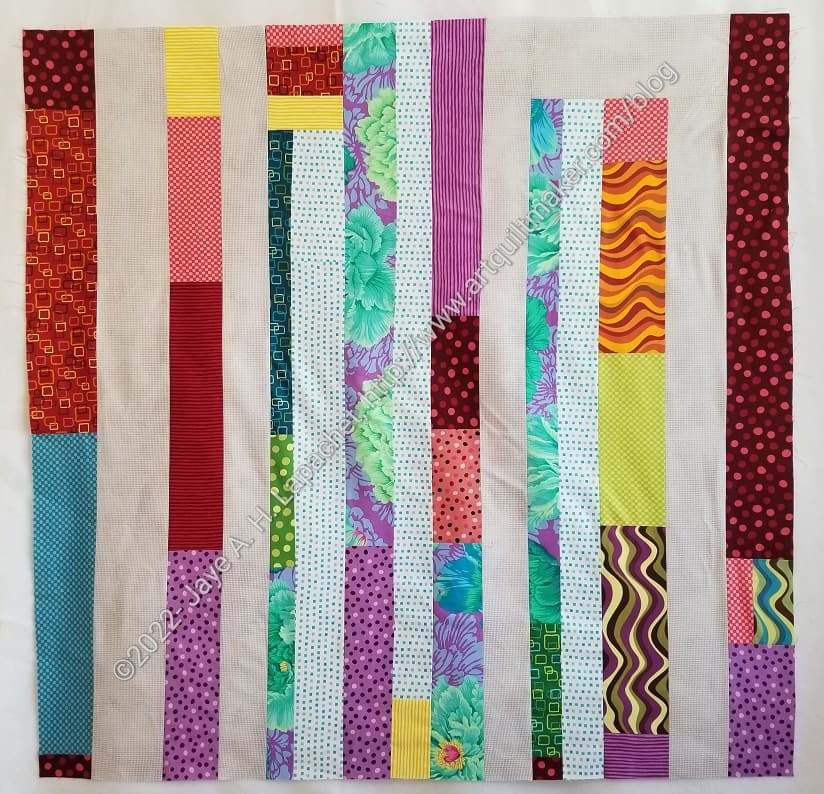
Granted, the last bits of leftover Pop Parade fabric is not much. I paired it with other ‘ends’. The two light pieces on the edges (only in the above photo, not the detail, right) aren’t sewn to the quilt yet. I have to see if I want them there. Part of that decision will be measuring.
It is a great feeling to see that I am almost done with a quilt and didn’t even realize it.
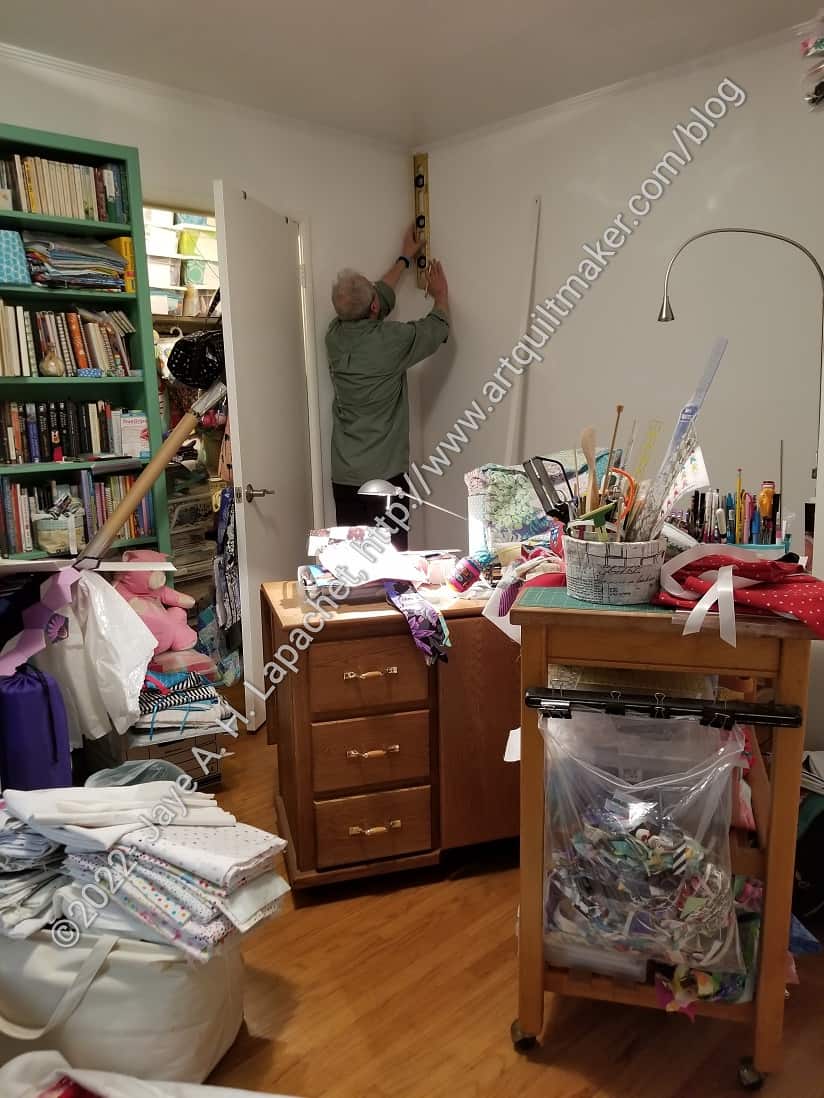
Finally, I finally got on DH’s schedule to get my design walls reinstalled. He had a three day weekend (I didn’t ), so he felt like he had the spare time.
He got a new white stick for one of the design walls so everything matches and looks nice. We put up both of the design walls and my refreshed inspiration board.
After a tough 1.5 weeks of family stuff, I wasn’t really up for the disruption, but it is hard to find a time that works, so I gritted my teeth and we got the work done.
In the photo, the room looks like a disaster. It really was. A lot of the furniture that needed to be moved was on wheels, so it was pushed out of the way easily and put back easily. I was surprised how easily, I got everything back into place so it wasn’t on my nerves.
We switched where the two design walls were. We installed the new one (large) where my sewing machine is now back in June of 2020, so it had to go on the other wall where my sewing machine used to be. I kind of like the new location. The light is better over there. I wonder if that will change my fabric choices? I’ll have to make sure not to keep projects on the design wall for too long.
I will say it was a shock to have stuff on the walls after months of bright white, empty walls. I didn’t like it at first. After letting the idea settle overnight I found the effect warmer and more cheerful. The room does look smaller.
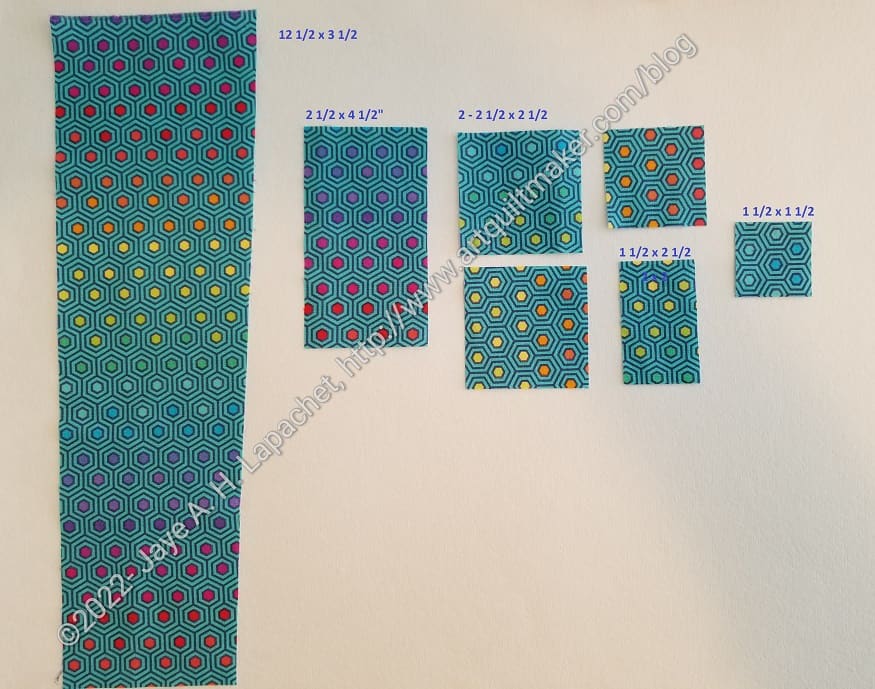
I finally figured out what I was cutting during 2022.
This guide details many fewer pieces than previous years. I have a lot of pieces I have cut and need to make into quilts, so I am scaling back.
3 1/2 x 12 1/2 – this piece is for the Half Hexie Star quilt
2 1/2 x 4 1/2 – blue gradation quilt
2 1/2 x 2 1/2 – FOTY 2022
2 1/2 x 2 1/2 -I cut 2 1/2″ squares to have them handy in case I need them. I can’t seem to give it up.
1 1/2 x 2 1/2 – pieces for another Scrap Dash. I am not sure I am cutting all the pieces I need to be ready.
1 1/2 x 1 1/2 – More for another Scrap Dash
I am not sure what happened to cutting charts for 2020 and 2021. Can we blame that on COVID? Based on my 2019 cutting chart, I may need to cut more for the pink gradation quilt. I also need backgrounds for the Spin Wheel quilt, which I’d like to get off my to do list this year.
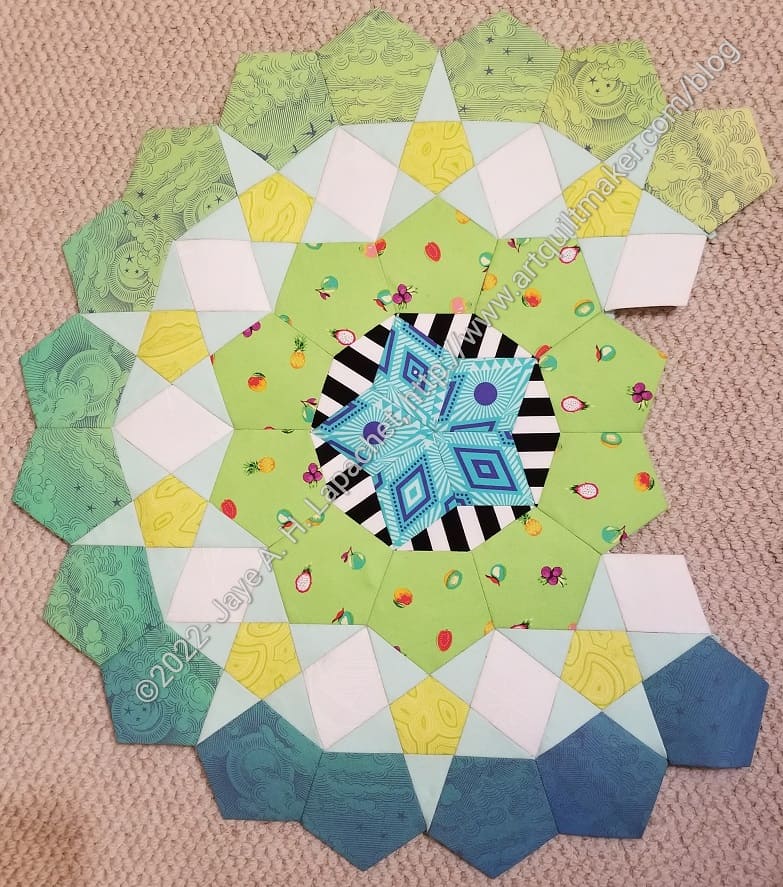
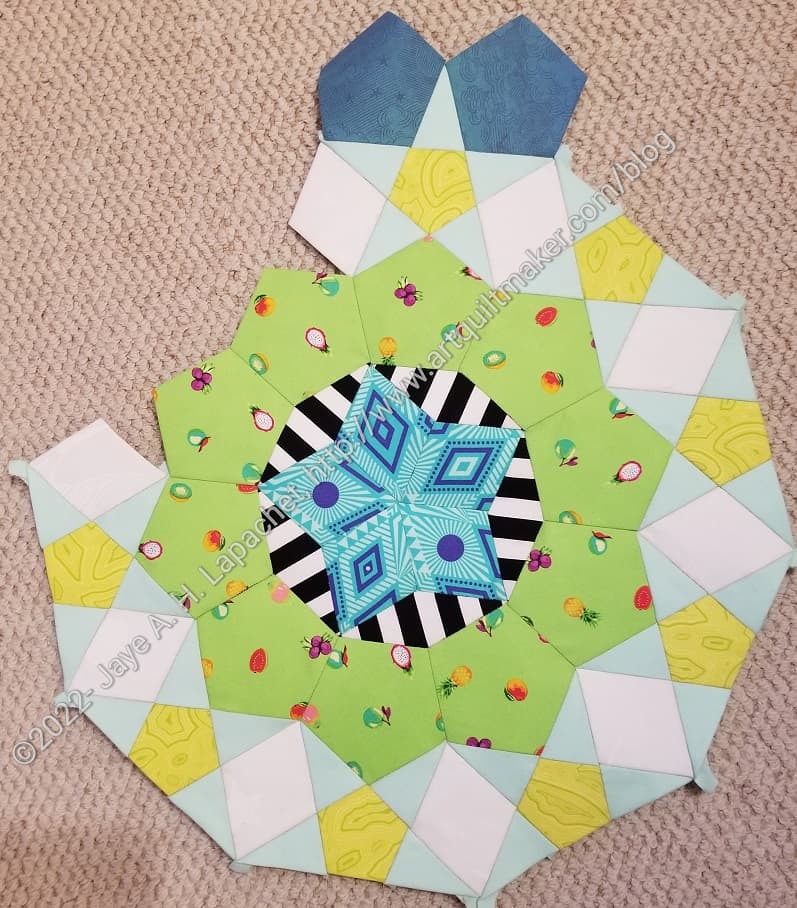
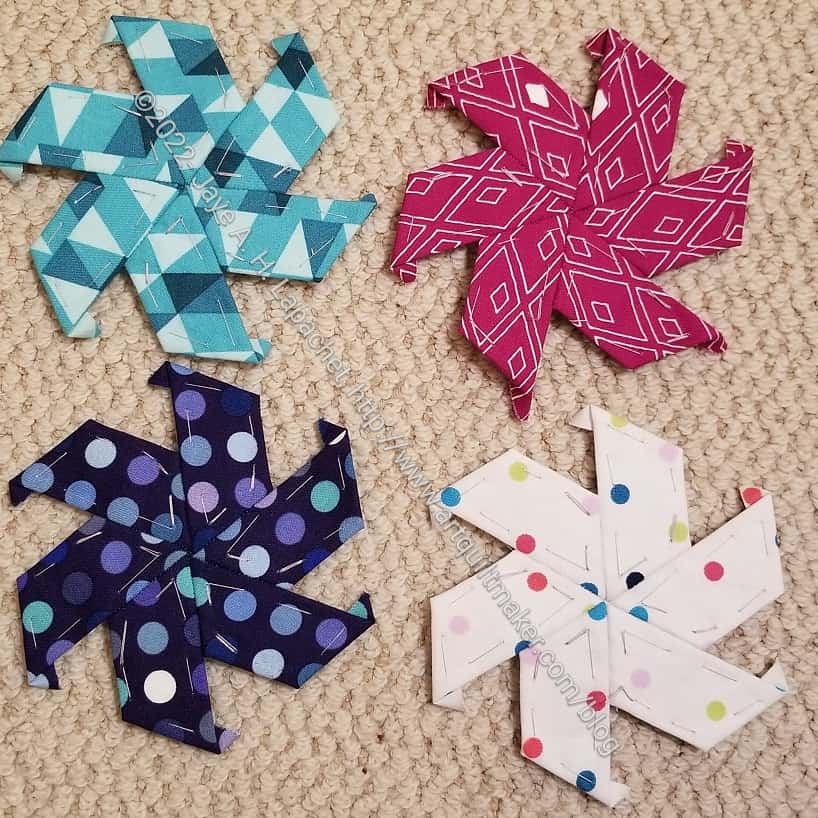
I finished the first rosette for month 7 and am pleased with how it came out. The ombre fabric looks good. I’ll be interested to see how it looks in the entire piece.
Now I am frantically working on the second rosette.
The notice came that Month 8 will shortly be in the mail so I need to speed along.
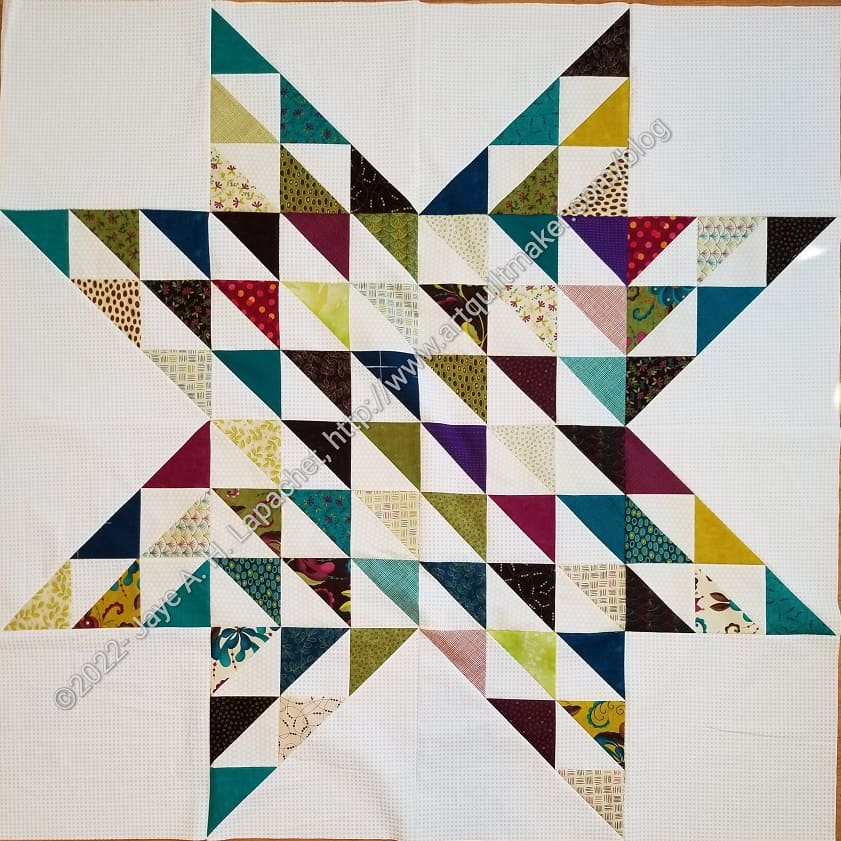
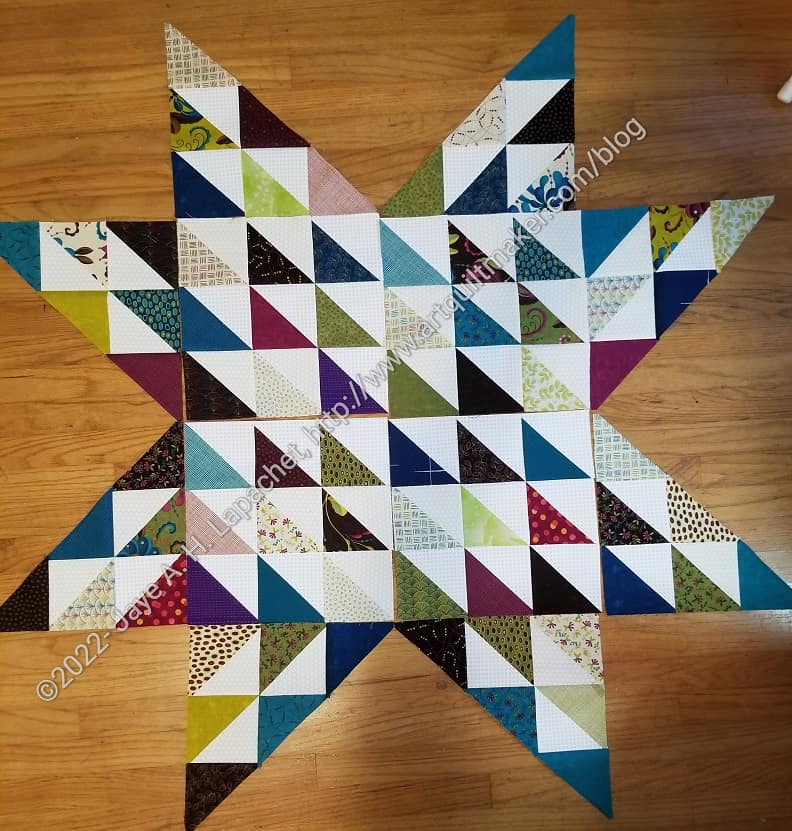
I finished the HST Star quilt in time to give it to the community quilts team.
I am pretty pleased with the way it came. A sort of dull charm pack (why did I buy it??) turned into a cheerful quilt top.
HST Star Finished Back
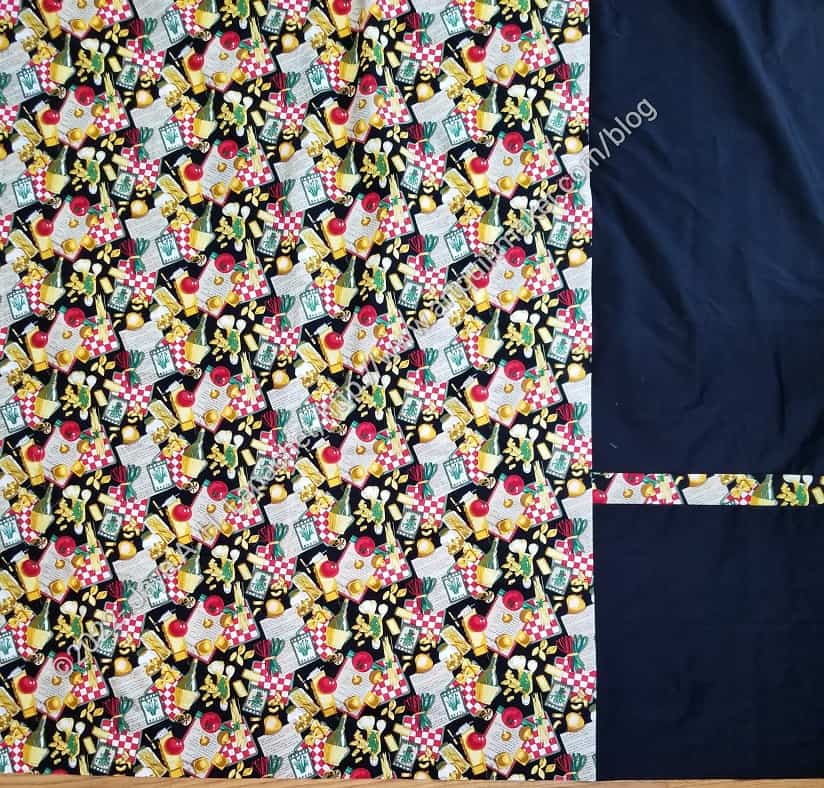
The quilt isn’t very girly and I wanted it to be suitable for boys as well, so I chose an Italian restaurant print I have had for years. It is time to use it and this is a good use of it.
You’d think that basting would be basting. As I mentioned the other day, there are a couple of different kinds of basting. The other day I found that I can improve upon my glue basting.
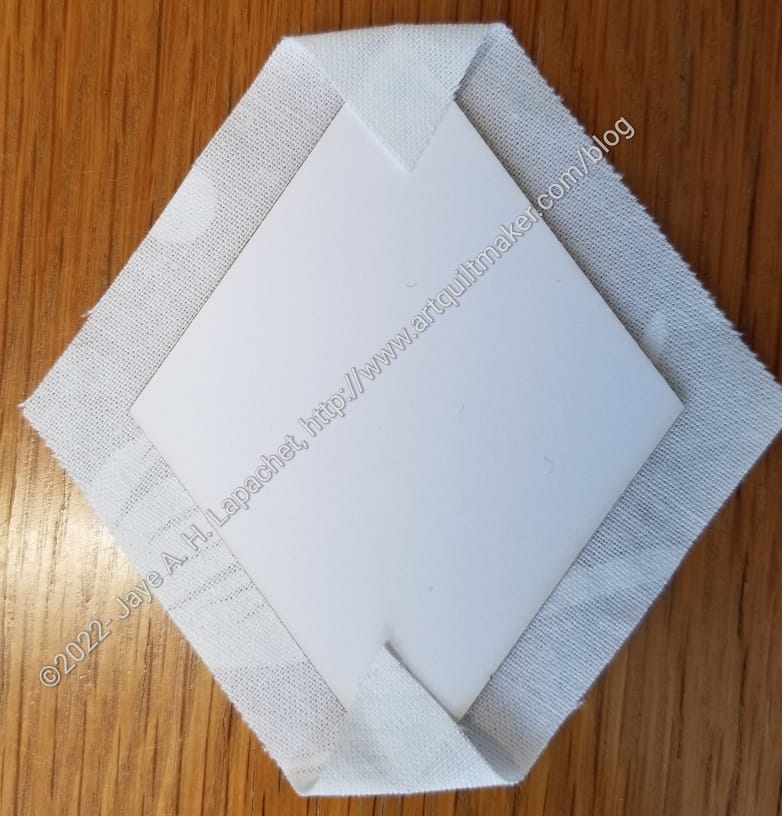
I have been trying to manage my bunny ears. Until now I have basted so the diamond bunny ears are folded in the same direction. For triangles, I make sure I fold them in all different directions, so all of the bunny ears don’t end up in one location when sewing.
Basting: folding the bunny ears in
Recently, I saw a picture that someone posted of their glue basting and realized I could fold the bunny ears in.
Don’t ask me why I didn’t think of this before. I just didn’t.
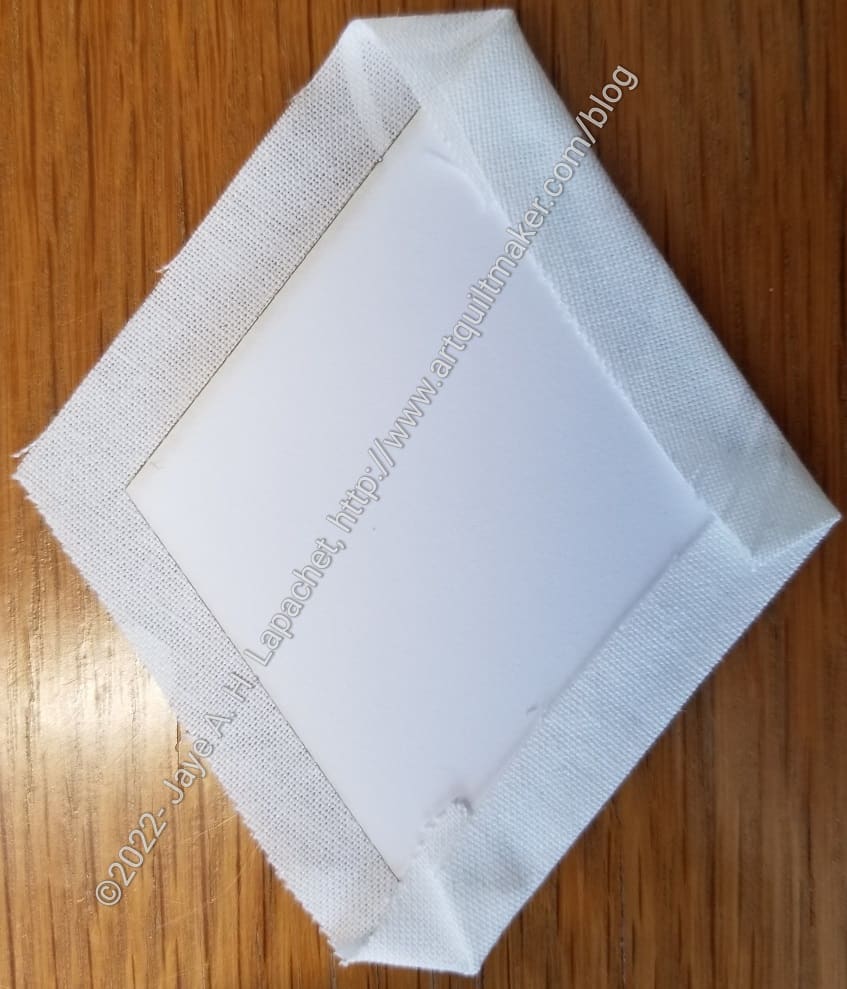
I wasn’t quite sure how this would work out and I didn’t realize I could do it until I had only two diamonds and one triangle to fill in.
Basting: bunny ears under control
The overall technique works. There are no bunny ears to manage. (photo right: shows the piece half basted).
The only potential issue I see is that the area where the bunny ears would be are a lot thicker than the other areas. There are also several layers of glue. The triangle points are particularly thick.
We’ll see if that is an issue and I’ll report back.
I made good progress over the weekend on the current donation quilt. I talked about it the other day. Talking about it really made me want to get it done so I could hand it in at the meeting next weekend. It has been a long time since I have made a quilt.
I didn’t know how this was going to shape up as the picture I saw was small and not very attractively styled. I knew that it wouldn’t look hideous regardless, so I stayed the course.
I had sewn a bunch of HSTs from the charm pack I had. To make the legs, I needed to rip off some of the white triangles in order to make the legs. I decided I didn’t want to make giant Flying Geese and would make the legs into giant HSTs.
HST Star – foreground complete
I was able to get the foreground part of the quilt done on Saturday, which was great.
The white brightens up the slightly subdued colors of the charm pack.
I finished the first M7 rosette or so I thought. I wanted to weave the outer pentagons and thought I would wait until Month 8 came to see what Pink Door did about the outer ring.
The outer pentagons use an ombre fabric and Pink Door has leveraged the ombre qualities for those pentagons.
I may want to keep the gradation smooth rather than including the weaving motif I have seen. Stay tuned.
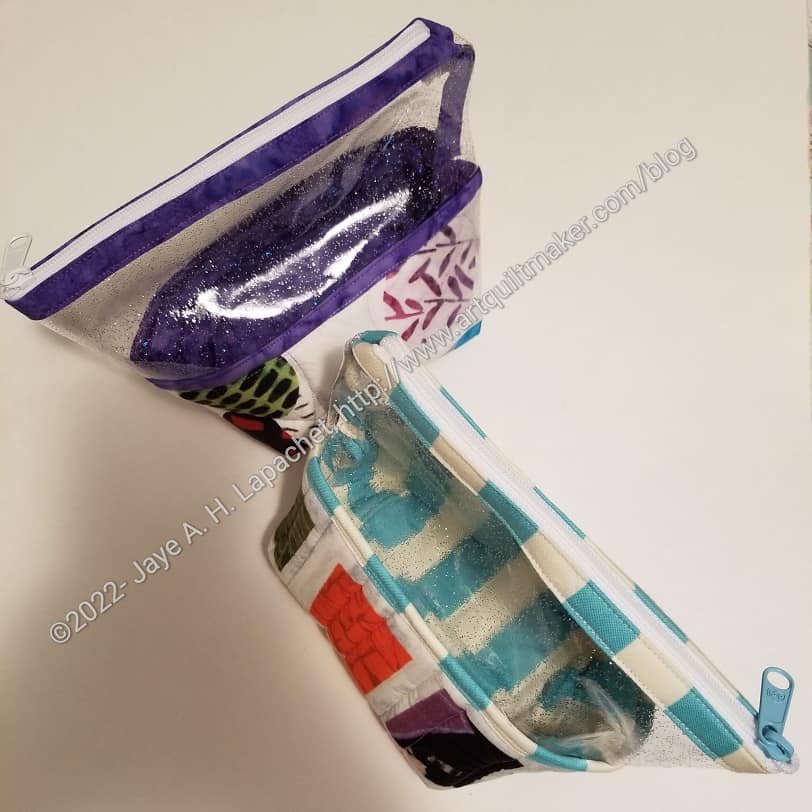
After writing the Hello Pouch pattern review, I couldn’t stop thinking about these pouches. The pattern has a lot of potential and by that I mean the design is good. I think the execution could be better. Regardless, I didn’t want to toss out these pouches even if they aren’t my best work.
Hello Pouch Vinyl Edge
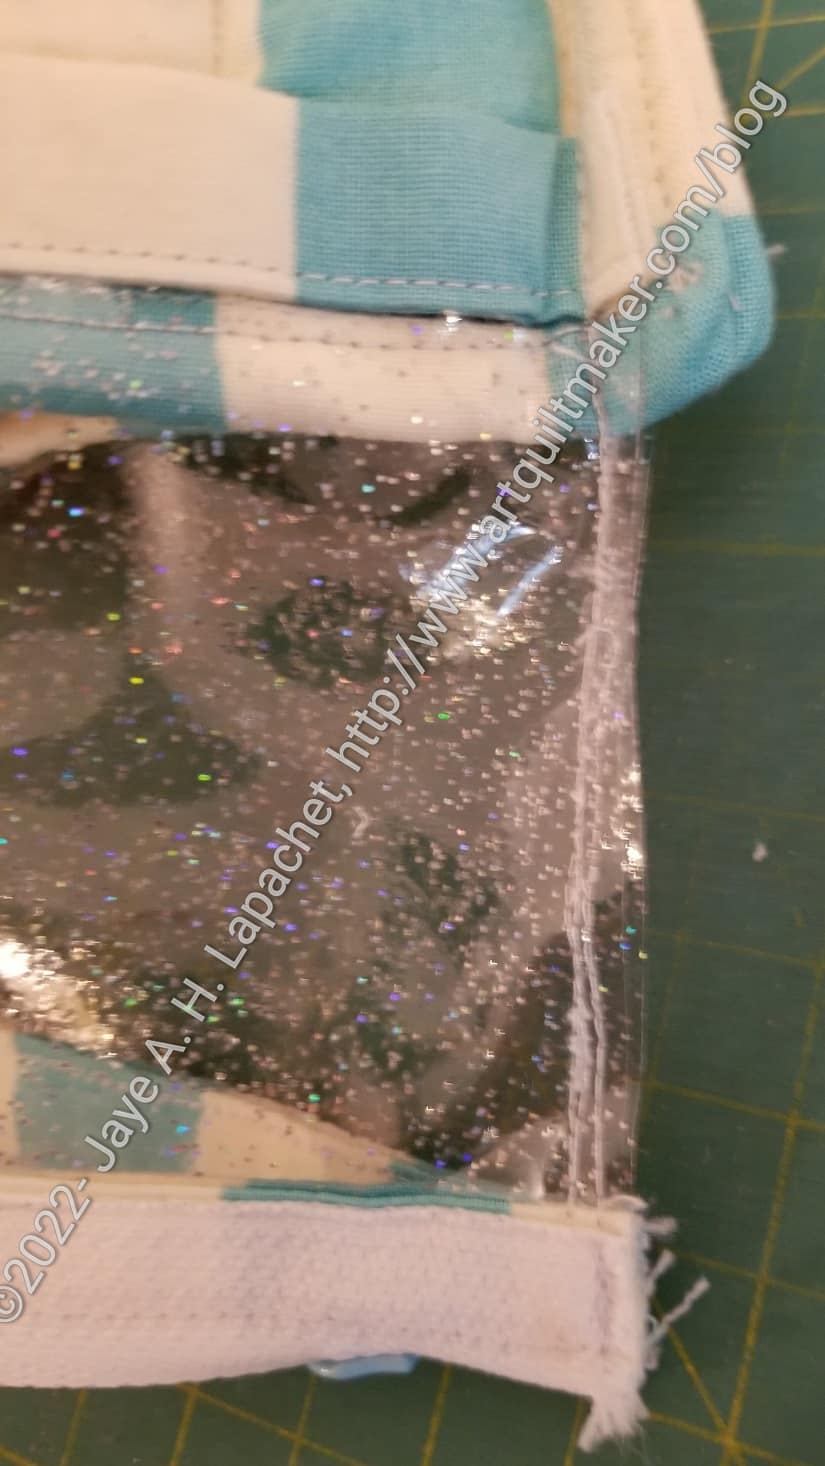
I looked at them and decided that the problem was the vinyl edge. The vinyl edge also included the zipper end, which was fraying like crazy. I didn’t like other parts, but I could live with them. That meant that I needed to get busy on the vinyl edge.
For the zipper edge, a little bit of glue (that dries clear) or Fray Check would be a big help. I cut some fabric strips and installed them over the zipper and down the side of the pouch to cover the vinyl. This did the job, but was a lot of extra work and I wouldn’t want to do it again.
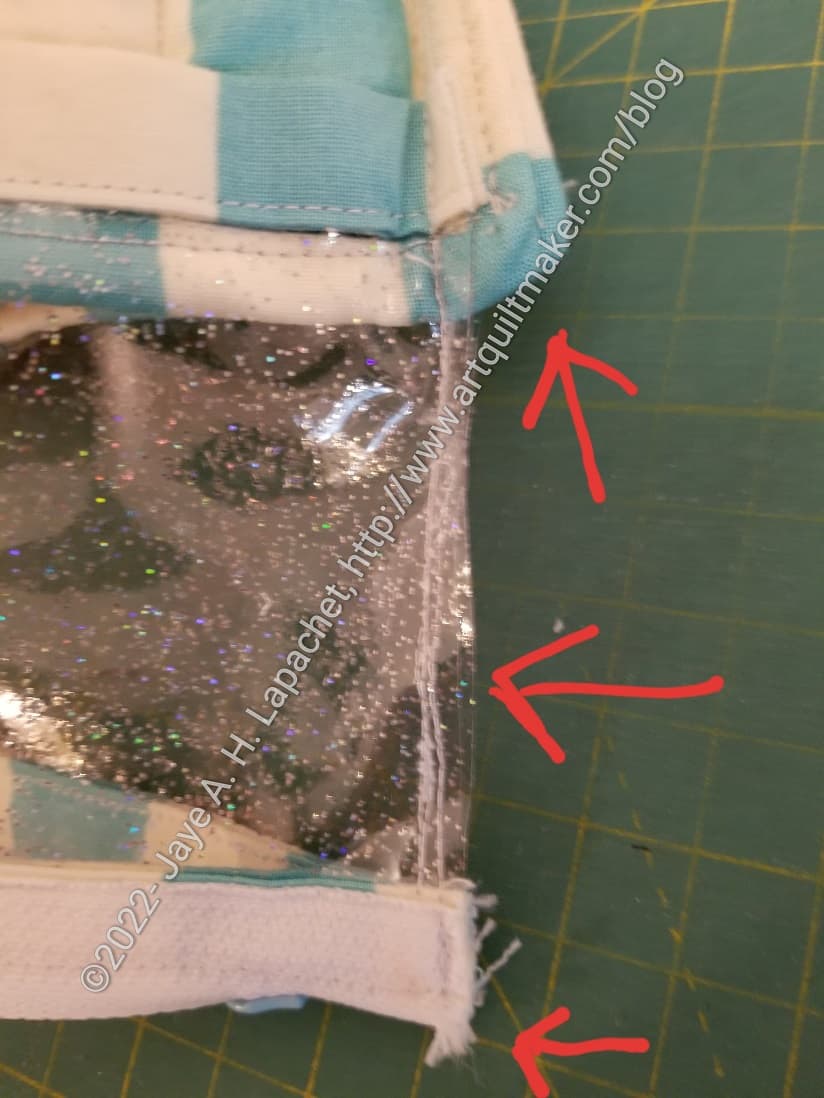
Hello Pouch Vinyl Edge – annotated
If I made this again, I would try to allieviate the things to which the arrows are pointing.
The top arrow points to the edge of the bottom that I quilted. It is much too thick and hard to sew through.
The second arrow points to the vinyl edge and I just dislike the look of uncovered vinyl (naked vinyl).
The edge of the zipper is shown by the third zipper. See how it is fraying? Blech! That looks so terrible. Also, I’m afraid that the zipper would be frayed and falling apart.
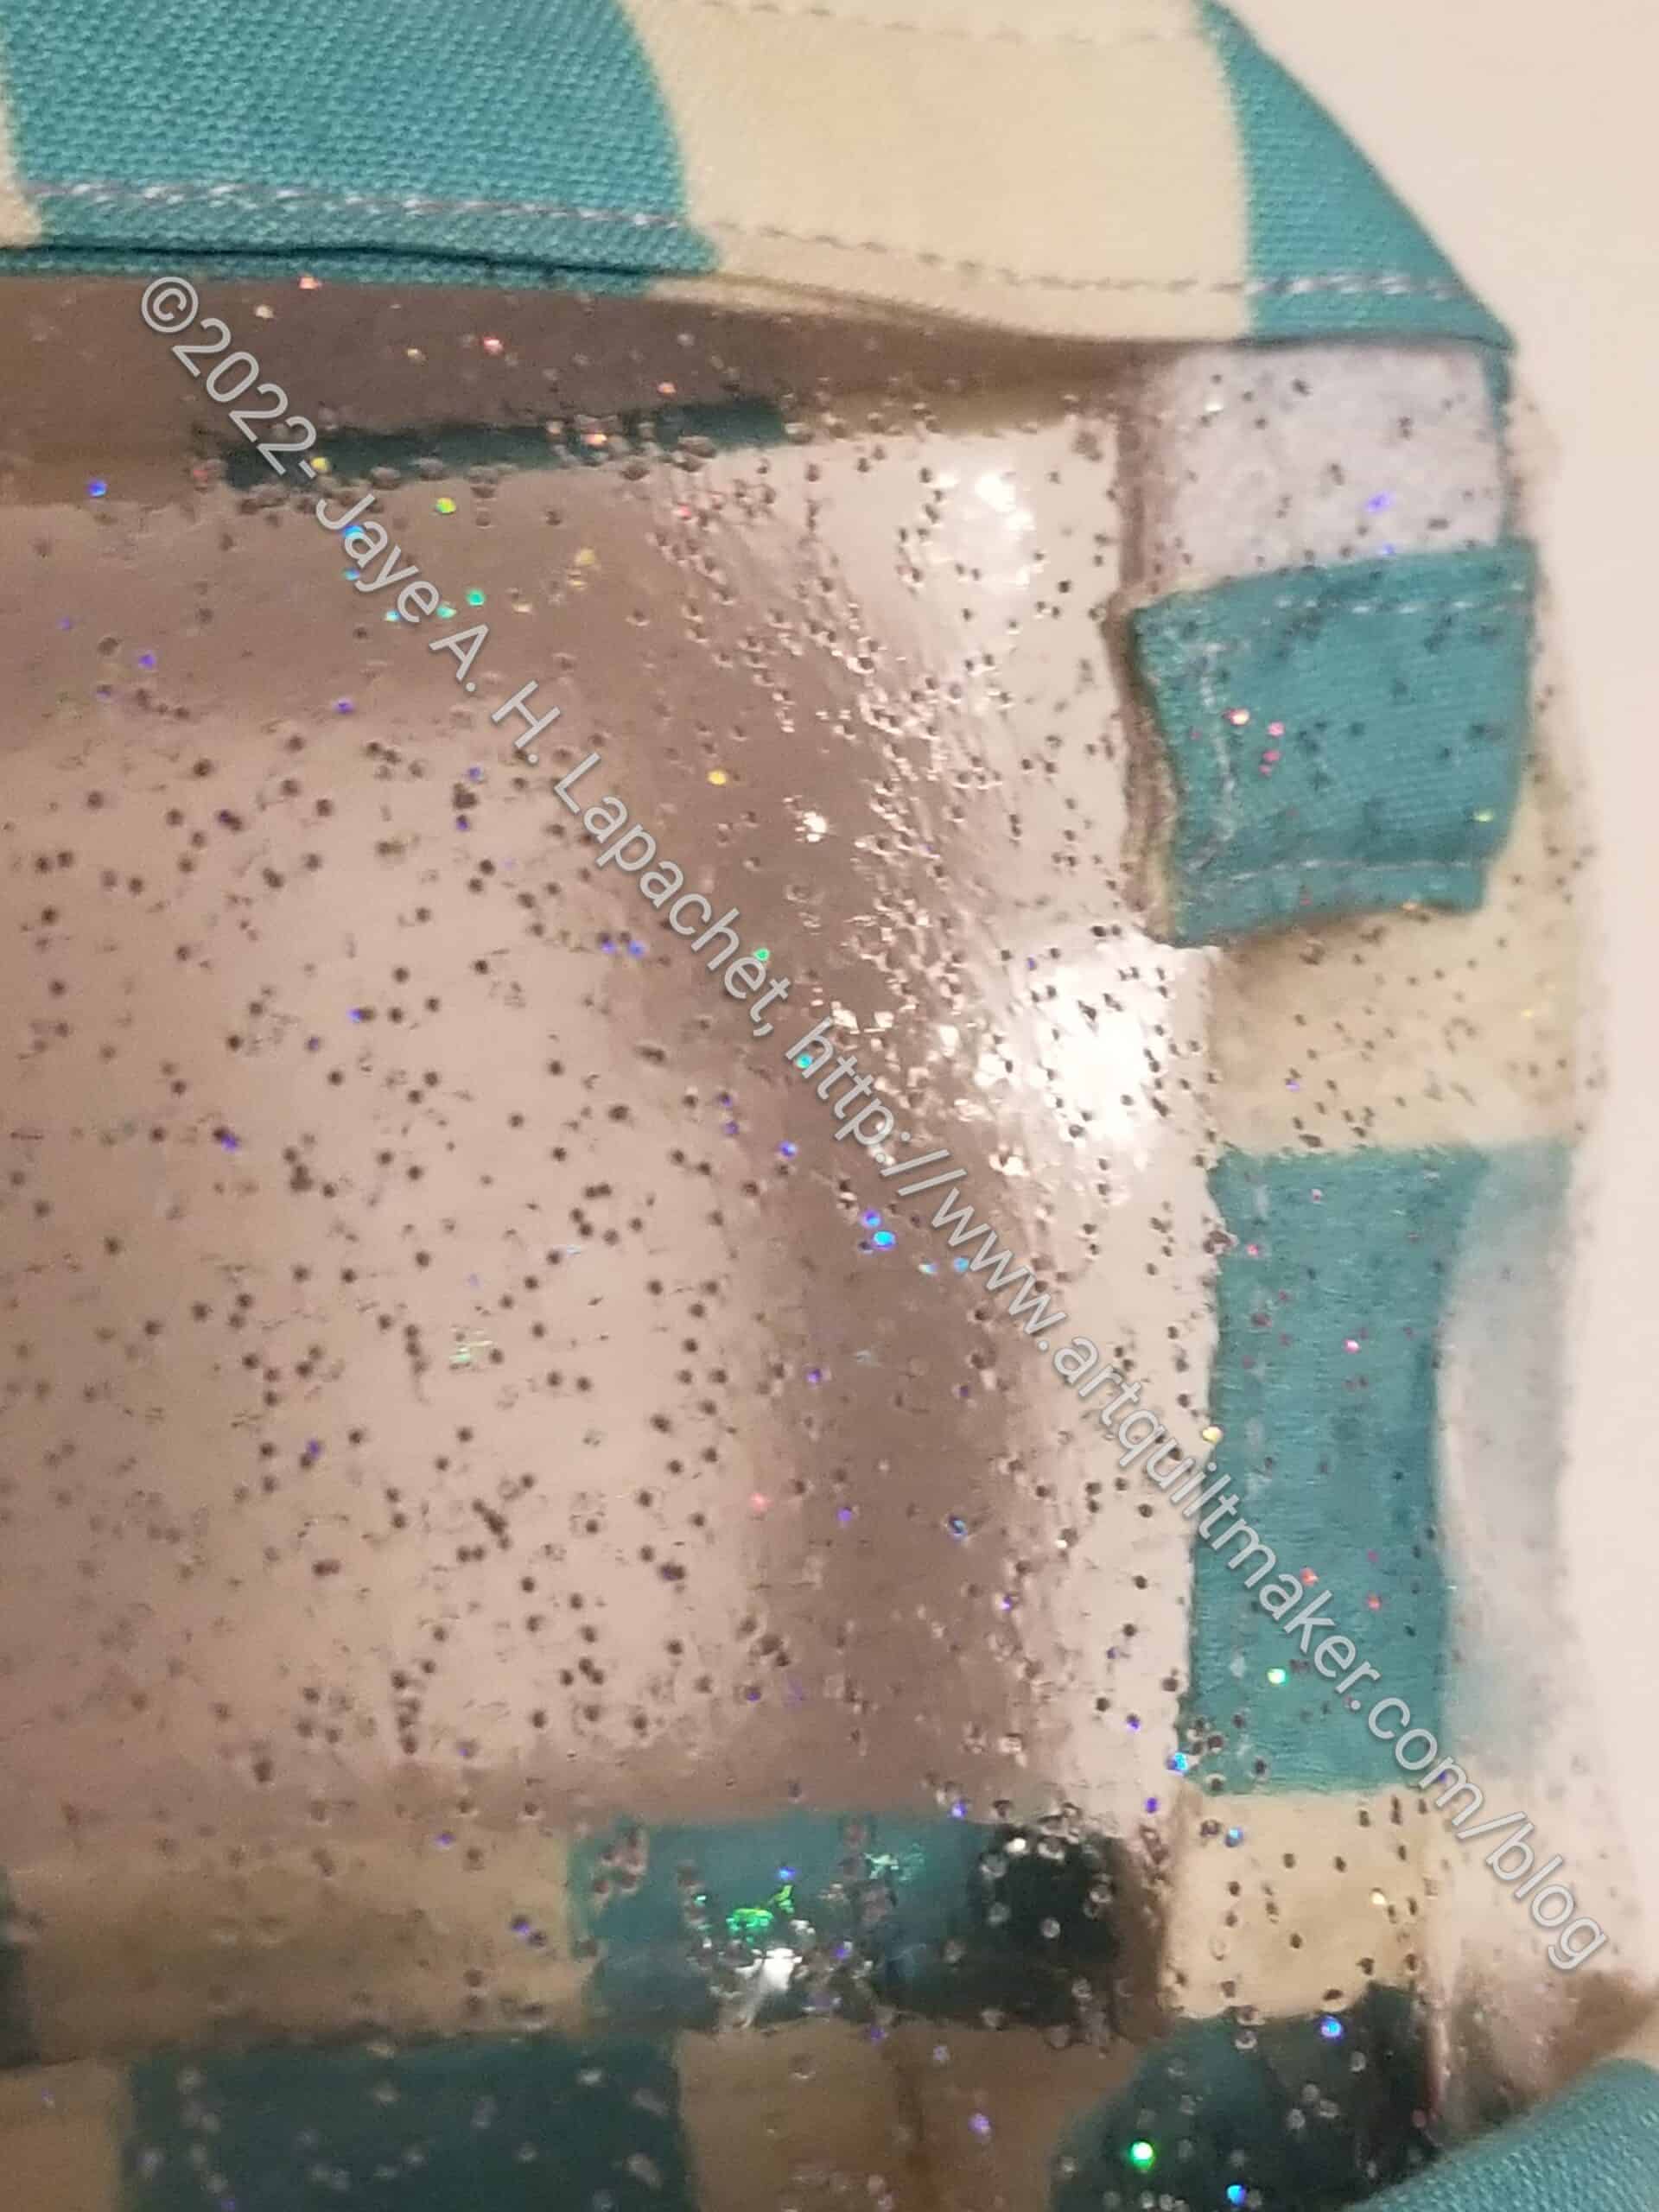
Covering the vinyl zipper
What I did was cover the edge with a strip of fabric. This picture shows the vinyl edge covered by the fabric strips. It isn’t a very good picture and you can see the zipper folded down, which I don’t like. While I do like the way they use the zipper, I don’t like the ending. It also inteferes with the way the pouch closes. the only thing I could figure out was for it to fold down on the inside. I think I would rather have the tail of the zipper hanging down like in the Inside Outside Pouch.
Inside of Hello Pouch
There are a lot of good reasons why the design is the way it is. I understand that. I just found the bottom really hard to sew through. You can see how thick and runscheled the inside looks. If I tried this pouch again, I think I would sew a lining to cover the edges instead of using a binding.
The design of this pattern is great. I just think some of the techniques used were unnecessary and overkill.
**Obviously, you should shop at local quilt shops. However, I use affiliate links and may be paid for your purchase of an item when you click on an item’s link in my post. There is no additional cost to you for clicking or purchasing items I recommend. I appreciate your clicks and purchases as it helps support this blog.
I am working on a donation top. I saw a picture in Today’s Quilter and thought it would give some relief to poor Peggy who has been the recipient of a 100 or so HSTs recently.
I started going through my charm packs after Peggy asked for HSTs for donation quilts. I used up 4 charm packs (2 of background) and sent the HSTs to her without making a quilt.
Donation 9 Patch blocks
Finally, I decided that was a little mean and I was inspired by a Sawtooth Star quilt made from HSTs. One day last week on my lunch hour I started sewing the center blocks together. I made three HST 9 patches in about half an hour, which made me very happy on a lot of levels.
Stay tuned for the finish (or another in progress shot.
I like cutting projects out at Sew Day and really struggled with whether I wanted to cut out a new bag or if I wanted to work on La Pass’ basting.
La Pass M7 basted
I ended up cutting and basting the rest of my La Pass M7 pieces during Sew Day. I had cut enough during a couple of work meetings on Monday to sew a bit in the evenings, but I really needed to finish the rest. Since I didn’t have any more of those types of meetings later in the week, I decided to do it at Sew Day.
I am glad I did. I am getting the first of the month 7 rosettes done, which is good.
As an aside, I put my A Place for Everything bag to use, as intended, and it was admired by a few people, which made me feel really good.
I did notice that the papers feel significantly flimsier than the La Pass pieces. Pink Door cuts their own papers. They must use better paper? I wonder if I would notice if I glue basted this project? I might try it.
Regardless, I am happy that I made a little progress.
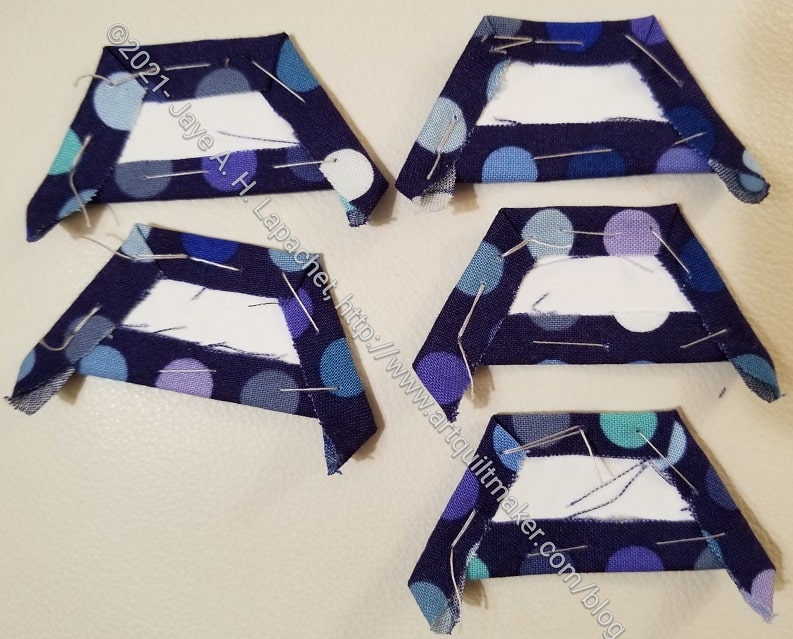
Before La Pass started, I was determined to thread baste. That is the way I am basting the Half Hexie Star project and it was what I knew. I was also concerned about putting glue on my fabric.
The BOM came with glue. I wasn’t worried since I have a lot of thread suitable for basting. I read through the posts on the Pink Door private group and some people talked about thread basting. I watched various videos on EPP that were recommended and they all talked about glue basting. This was so puzzling to me. Weren’t people worried about the glue on the fabric?
I ended up using the glue and I like it. It is faster and time is of the essence with this project. As you have noticed, the BOMs keep coming and I want to keep up.
Half Hexie Star – thread basted
For the first time, I noticed the differences in basting as I got into the process at Sew Day. As I mentioned, I did a little bit of work on the Half Hexie project while I was waiting for the month 7 installment of La Pass. For the Half Hexie Star project, I am thread basting. For La Pass, I am glue basting. What I noticed is that I like the tightness of the glue basting.
I have used the Half Hexie pieces over and over. I am not sure I could do that if they were glue basted. I haven’t taken out the papers from the La Pass project yet.
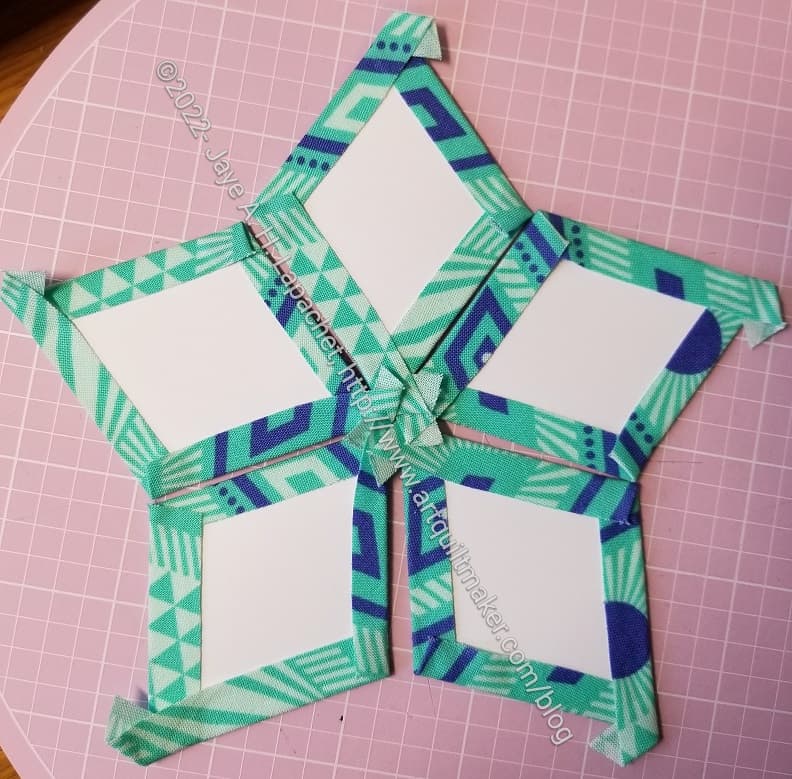
La Pass – glue basted
I didn’t think it would make much of a difference, but it really does. It can be difficult to get the needle into the edge, but I really like the way the pieces come together.
This makes me wonder if I should start glue basting for the Half Hexie Star project? I don’t know. Maybe I’ll try it. Do you have any experience?