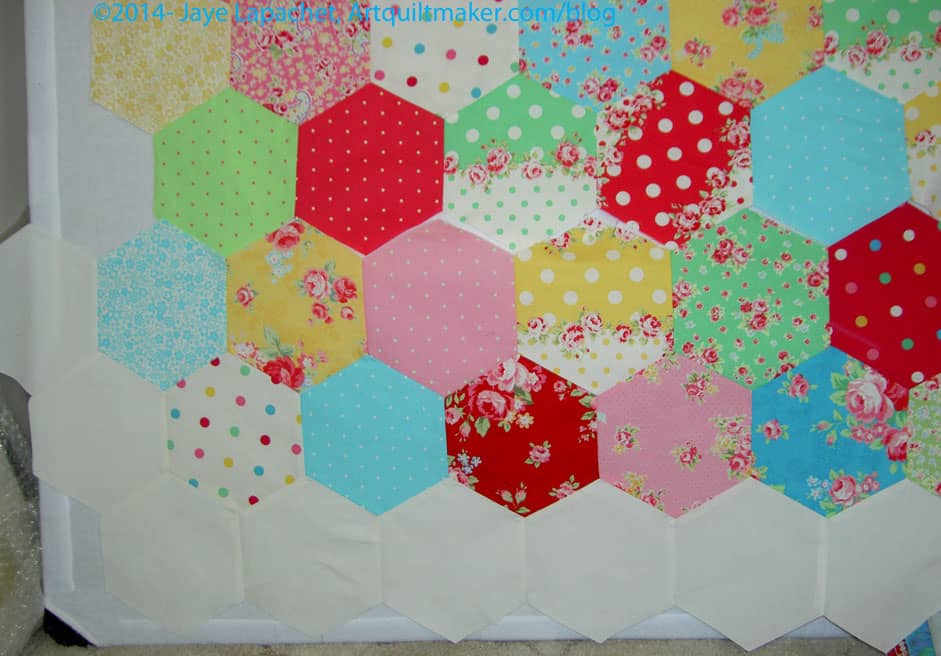
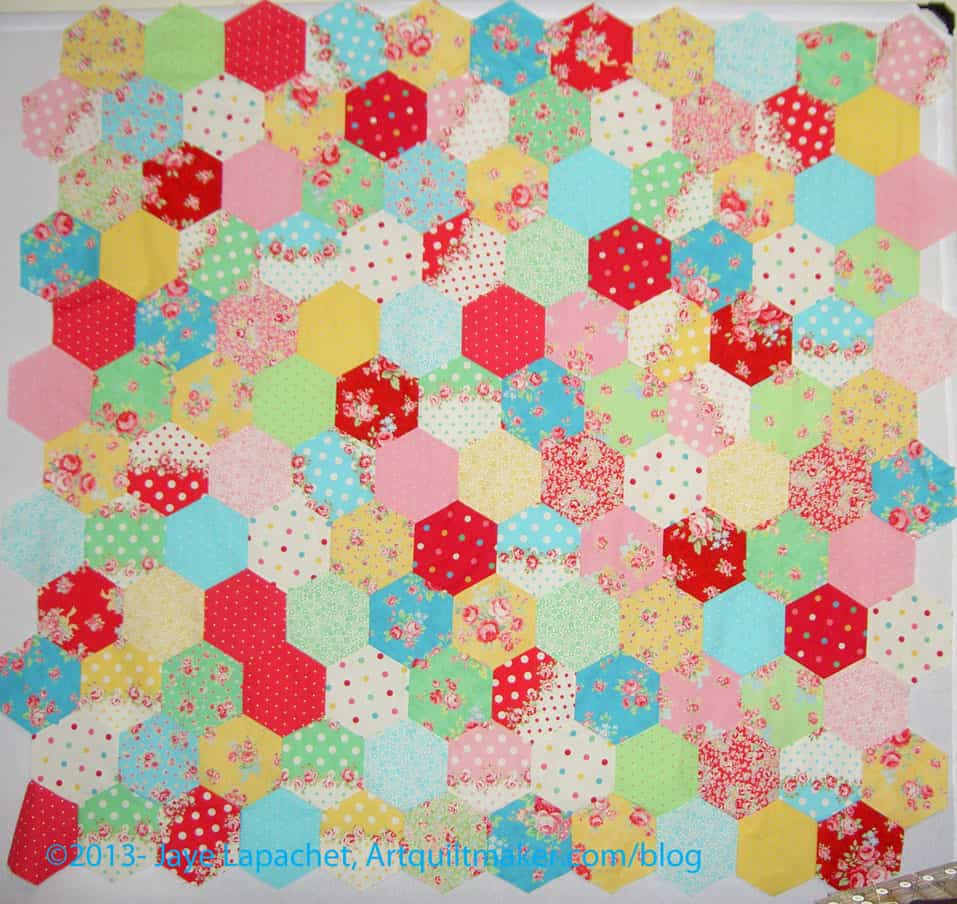
As I mentioned, all of a sudden, I am working fast and furiously on the Attack of the Hexies (Flower Sugar Hexagon). I spent all weekend trying, in vain, as it turned out, to finish the top, back and binding of Attack of the Hexies.
Attack of the Hexies border – in process
As I have said, Y seams are not hard, but they do take time. I decided to put a border on the piece and I needed to do it using hexagons. I don’t know another way to piece fabric into a hexagon piece without using hexagons. I could have cut off the hexagons on the edge, but I have always disliked that look for my own quilts and didn’t want to do that for this piece.
I also didn’t want to buy new fabric. Fortunately, I had enough of the Art Gallery solid Linen to use for the border. I didn’t even use all that I had, though my stock is significantly diminished.
The border is on the piece. I intend to trim it so the edges are square and still need to do that. I am all for wonky borders (Case in point: the Zig Zaggy Quilt), but not in this piece. I want the border to be square and subtle so that the center looks like it is floating on the border.
I am partway through the back as well. I lounged around for a long time on Sunday and didn’t have enough time to finish it. I had big pieces left over, so I didn’t have to piece a lot of small pieces together.
I know it is January 2014, but I am not quite ready to pack in the cutting for FOTY 2013. I’ll start arranging and piecing it later this month, with any luck.
I wanted to include these fabrics, because some of them are from projects in December. I also added a few from Attack of the Hexies and may add a few more, if I have any left.
I also have washed a few fabrics that I thought I would use for pillowcases, but it didn’t happen. I’d like to add those in as well.
I spent some time with Kelly’s Round Robin over the past week. I finished my portion on January 1 and was pleased to be able to move on to the Attack of the Hexies.
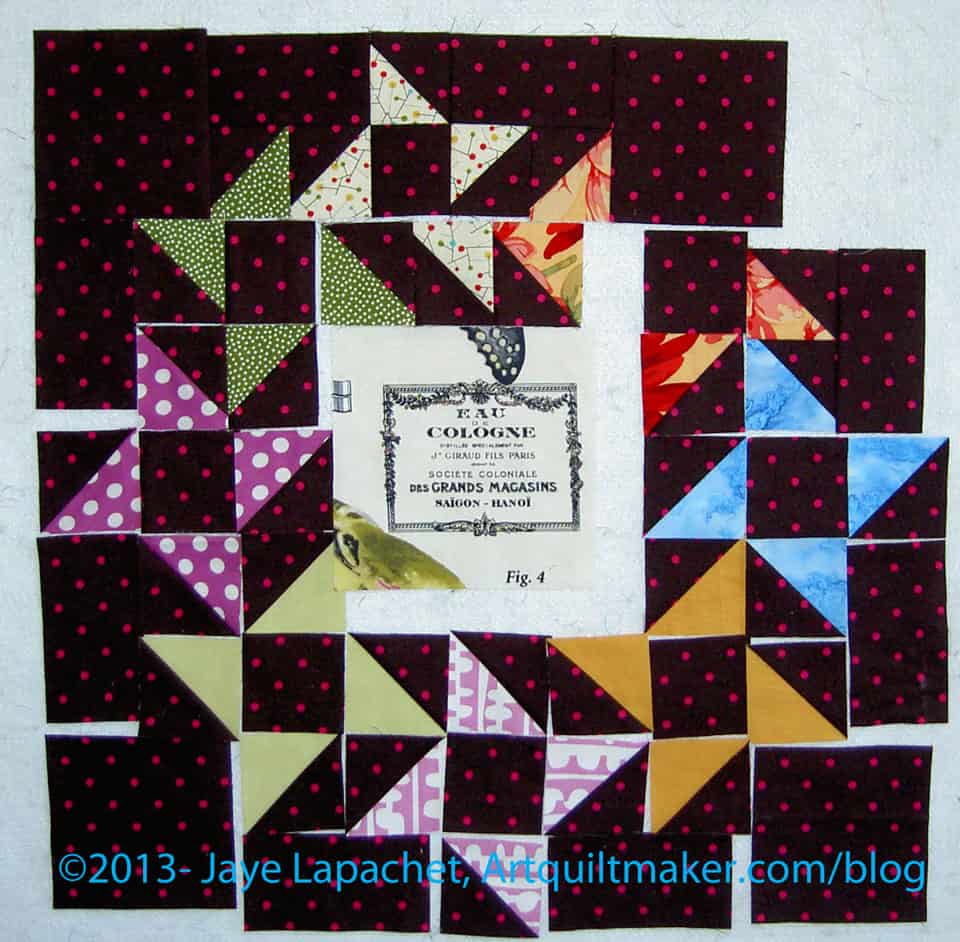
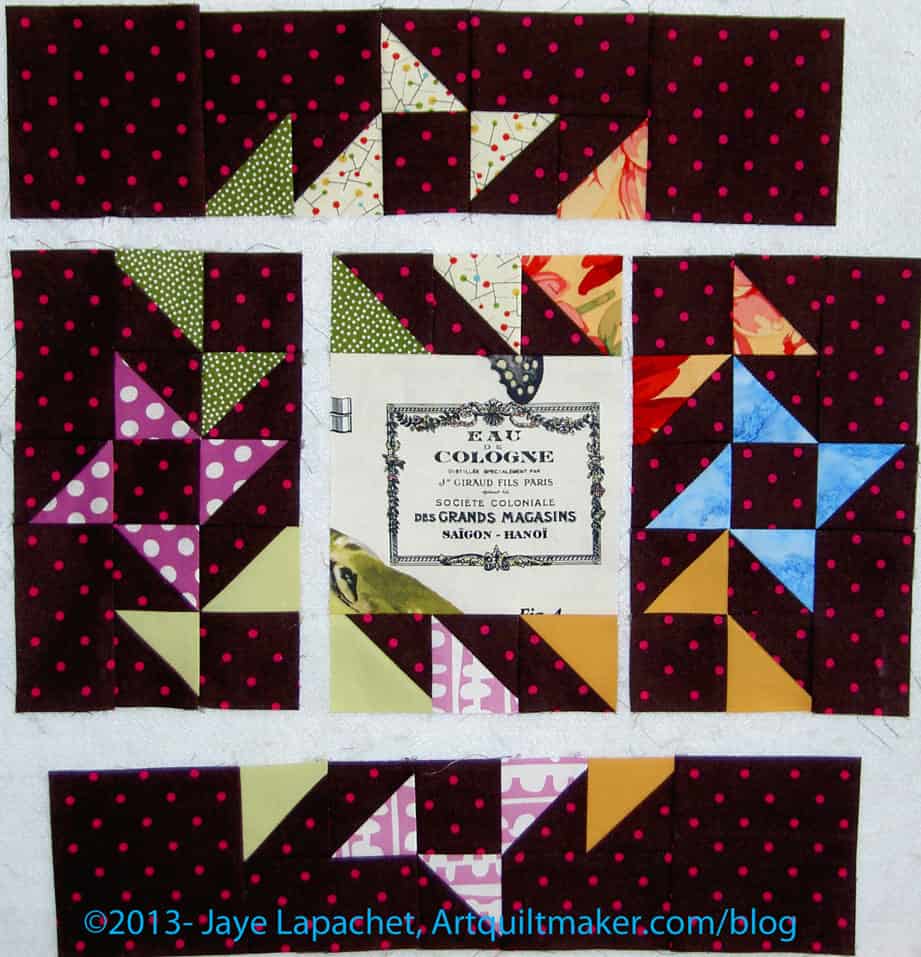
I saw Camille Roskelley’s Round and Round quilt and liked the basic block so much that I wanted to make it. The version from Around the Blocks blog really inspired me. I love the way the triangles seem to flutter or twirl on the background. The basic component is a Friendship Star, a block that I always thought had potential, but never quite liked. Now I know that making it smaller and combining it with others like it was the ticket. Camille Roskelley is a genius.
I didn’t think the block was the right size for the piece, but I decided the piece could use something bold. I resized the block and worked on the whole piece in EQ7. I could only get an idea of the outcome. The piece has special fabric and I didn’t feel like scanning and uploading it. From what I could see, I thought it would work.
Round and Round – one block
The block has 85 pieces. I reworked the piecing as well as resizing it, because some of the pieces didn’t need to be small squares. Also, I didn’t want, for example, to piece 4 squares together to make a larger square.
Chunking Round & Round
This made the final piecing of the block a little different than just piecing the block together in rows. I was able to chunk it. Once I was able to see how to chunk the piece, the piecing was no problem. I used the Triangle Technique to make all of the triangle squares (half square triangles).
Fussy cutting in Round & Round
SIL suggested that I fussy cut the special fabric and use that for the center rectangle in order to echo the original focal point of the piece. I thought that was a good idea and fussy cut different portions of the special fabric for the centers.
Kelly’s Round Robin
I think it came out well and I hope that Kelly is happy with my work. I was really pleased with the block. I can’t make it to the meeting in January, so I sent it off to Kelly.
For months I didn’t work on the Hexies project, then on the first I just dove in and added rows. I am not sure why except that it didn’t require cutting. The hexagons were there, the piece was there and I needed something to sew.
I got my head around the Y seams and did it. I didn’t want to sew one hexagon on at a time and I had a row started, so I finished the row and worked on sewing the whole row on at a time. It was a lot of stopping and starting, but I just did it. I developed a system and kept at it.
Things I have to figure out:
How big to make it. It seems small now, but I know that if I fill my design wall it makes a pretty big quilt.
Whether to unsew a section where I sewed two of the same fabrics together.
How to finish the border – to square it off or leave it jaggedy. I am not sure I can face all those mitered binding corners
I plan to just work on it until I am done with the top.
I had 25 items on my list last time. I have removed the ones I completed (you can see them in the December 2013 To Do List post) and have crossed off the ones I completed since December 4. This list is in no particular order.
Definition: “Gold is a chemical element with the symbol Au and atomic number 79. It is a dense, soft, malleable, and ductile metal with an attractive, bright yellow color and luster that is maintained without tarnishing in air or water.” Wikipedia
The Gold Card provides unemployed post-9/11 era veterans with the intensive and follow-up services they need to succeed in today’s job market.
Fool’s gold
Public television series with Huell Howser provides history and travel information about a range of California locations.
Gold fields
pan for gold
gold mine
Venturing Gold Award
red-gold
Gold Award (Girl Scouts)
mining for gold
Gold Eagle Co. has been an industry leader in the production and distribution of aftermarket fluids and additives since 1932.
Post the direct URL (link) where your drawing, doodle, artwork is posted (e.g. your blog, Flickr) in the comments area of this post. I would really like to keep all the artwork together and provide a way for others to see your work and/or your blog.
We are also talking about this on Twitter. Use the hashtag #CPP
The Creative Prompt Project, also, has a Flickr group, which you can join to post your responses. I created this spot so those of you without blogs and websites would have a place to post your responses.
A few years ago, TFQ gave me a tea towel which I thought was too pretty to cover with kitchen yuck. i really liked the motifs, which echo,in shape, if not color, the Tarts Come to Tea. It hung over the door of the fabric closet for quite awhile. The door of the fabric closet is a hybrid inspiration wall and I-know-what-I-want-to-do-with-this-but-haven’t-gotten-to-it space. I wasn’t quite sure what I wanted to do with the tea towel, but one day it came to me that I could fold it over and make a pillow.
I sewed it as described except for a space to stuff it last week. It was a quick trip around the edge with white thread. Yesterday I stuffed it with a combination of shards and tiny scraps and leftover batting. Then, I sewed it together on the machine.Voila! back pillow.
I really like finishing something on New Year’s Day as I like to think it sets the tone for the year. We will see.
I am finally getting around to posting the gifts I received for Christmas. It was actually, comparatively, quite a haul. DH and I didn’t really buy each other very many gifts. We usually buy a big gift for the house instead of individual gifts, but we couldn’t really think of anything we wanted. I want a new bed frame, but DH isn’t enthusiastic, so we are still at an impasse.
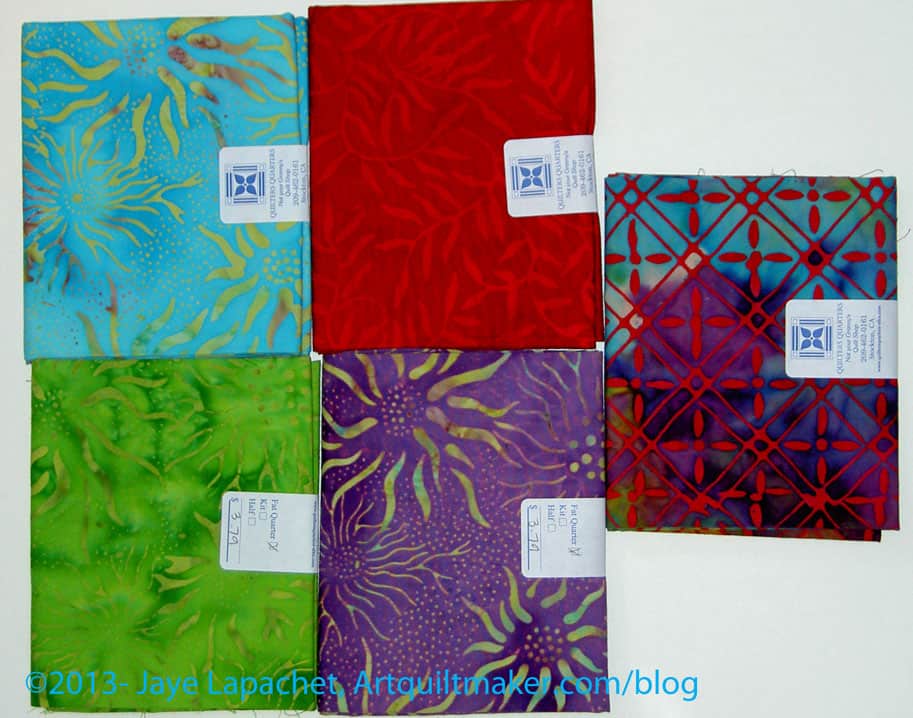
Batiks from Mom
You can give me batiks any time! Yum!
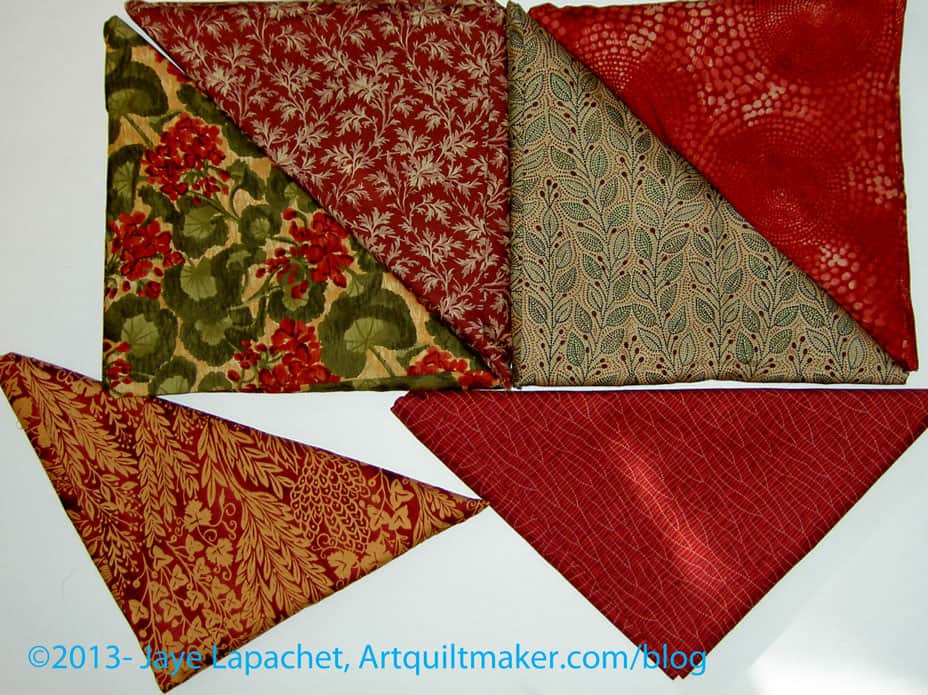
Kona from AmandaQuiltworks fabric from Paul
The above fabric from from a shop in the City to which I have never been. I have heard that they buy up partial bolts from shops that are closing. They also have space that they rent to those who want to have an event. Now that DH has been, I will have to go as well.
A few days ago, I talked about my mom’s quilt. I decided that you would probably appreciate some detail shots.
This is one of the Blossom BOM blocks. Now, I always thought that BOM blocks were supposed to encourage people to quilt more. This block is a tough block. My mom has garment sewing experience and she had a tough time with this block. Look at the pieces – curves and that little block in the lower right hand corner. Not impossible, but also not a nine patch.
My mom is tough and created a strategy. After screwing up a few blocks and not having enough fabric for the BOM block, she started making a practice block with her own fabric and then used the BOM fabric for the non-practice block. The above blocks are the practice blocks.
Blossom BOM block
This is the same block, but made with a bolder selection of fabric. I believe that I gave my mom some of these fabrics. I feel like I make some bold choices in fabric selection, but my mom has me beat by a mile. I would not have thought to put the blue and the pink together.
I am glad that I took the time to look at these blocks.
They make me think. What would your interpretation of this block be? Even if you use fabric on paper with glue stick, what colors would you choose? What colors would take you out of your comfort zone?
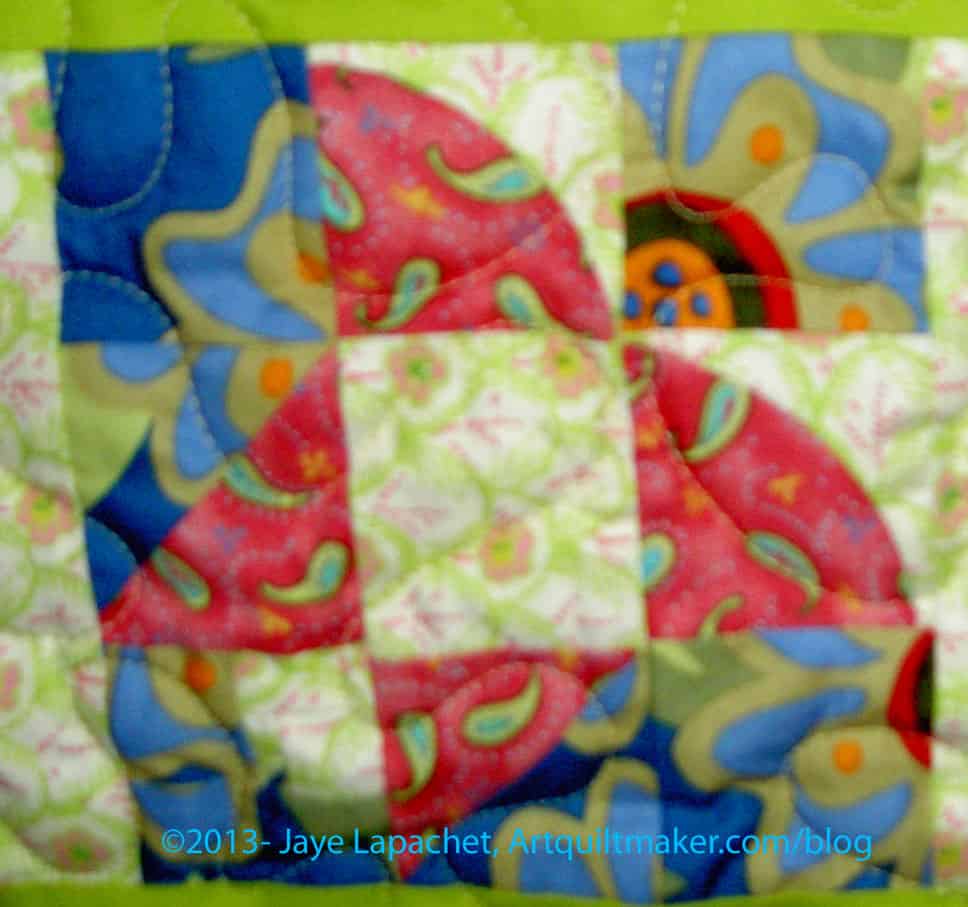
Pinwheel
The pinwheel block is a pretty standard pattern. It is actually a pattern that you can really make look like it is spinning if you place the fabric a certain way.
Again, though, mom has made it her own. The blue and the cabbage rose/bold flower print are an interesting combination.
I really think my mom and I see color in different ways. Again, I wouldn’t have chosen these fabrics together, but they work. It kind of reminds me of the quilt Bill Kerr showed that included David Butler and Jo Morton fabrics together.
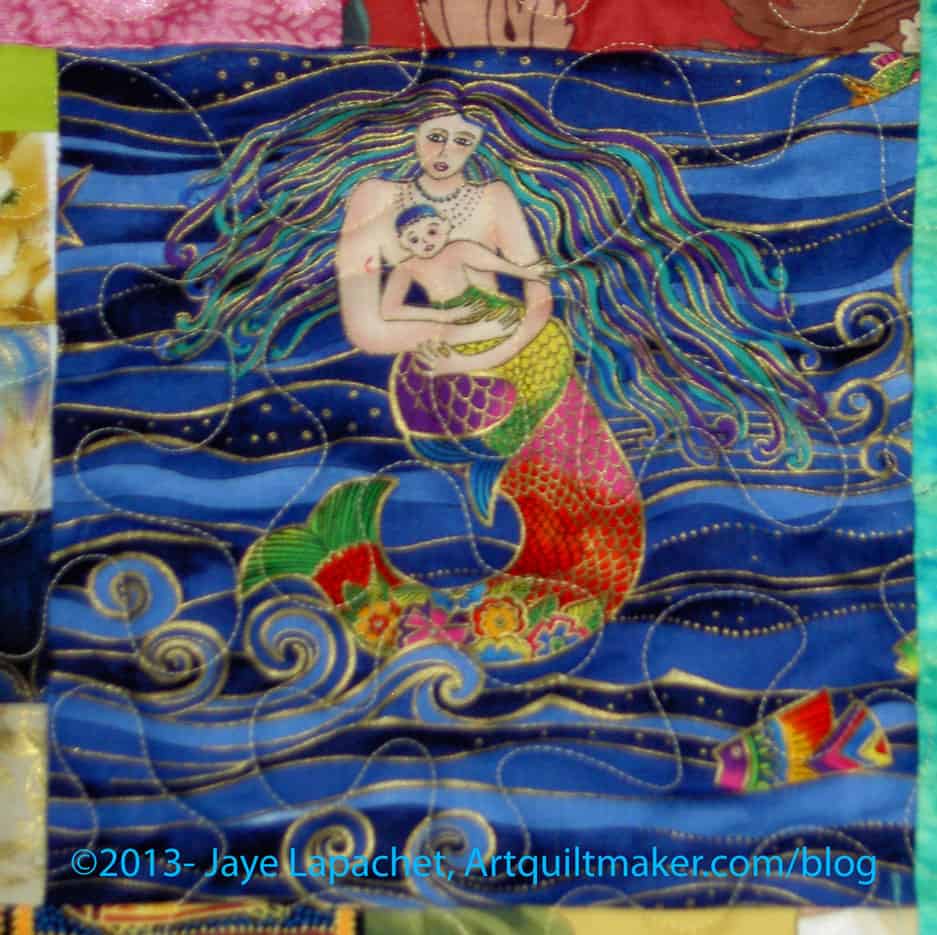
Mermaid Block
The mermaid block is some kind of panel. I have no idea what possessed her to add this to the quilt, but it works. Interesting.
Morning Glory
The Morning Glory block really looks like a morning glory. You can see that the center cannot have been easy to piece. I know that isn’t applique’ and am pretty sure it isn’t paper pieced either.
Improv Piecing
The very bottom block reminds me of one of Gwen Marston’s filler blocks. I also, though I am reluctant to say it, think it has qualities of the Gee’s Bend blocks.
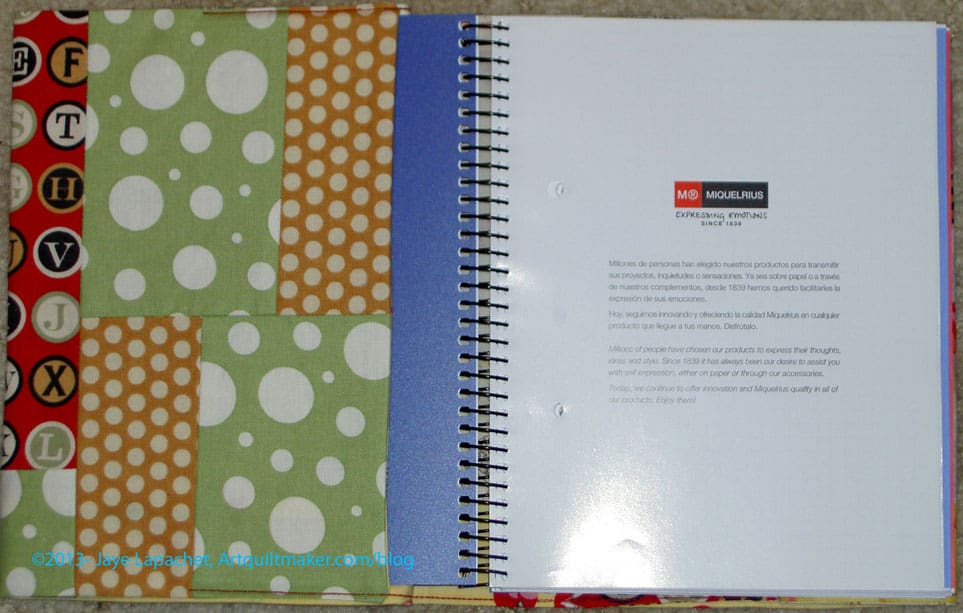
I am really in awe of pattern makers. The reason I am in awe is because of the journal covers. I have a tutorial for them for the Miquelrius journals, yet it is not perfect. I tinker with it all the time. Tinkering with it makes me loathe to expand it to other types of journals, though I know it would be useful to have the standard measurements for, say, composition books or even paperback books.
If a pattern maker is good s/he tests and tests until the pattern is right. I assume that is what the pattern maker does, anyway. I assume that s/he tests many, many variations. I also assume that there are fewer variations with quilt patterns than with patterns like bags and journal covers.
Inside Peek
I really do have the measurements for the Miquelrius journal correct now. I don’t need to trim, unsew and retrim and resew at all anymore. This is really a good thing and makes me very happy. Unsewing is part of the process, but I don’t like it as much as sewing fabric together.
Now I am tinkering with the filling. After the bonanza of journal covers that was my activity for sew day, I have decided that I need to find something else to fill the journals with. The batting is too fat. This is really a shame, because I have a lot of batting scraps. It would be nice if the batting were perfect.
It isn’t, though and we need to move on.
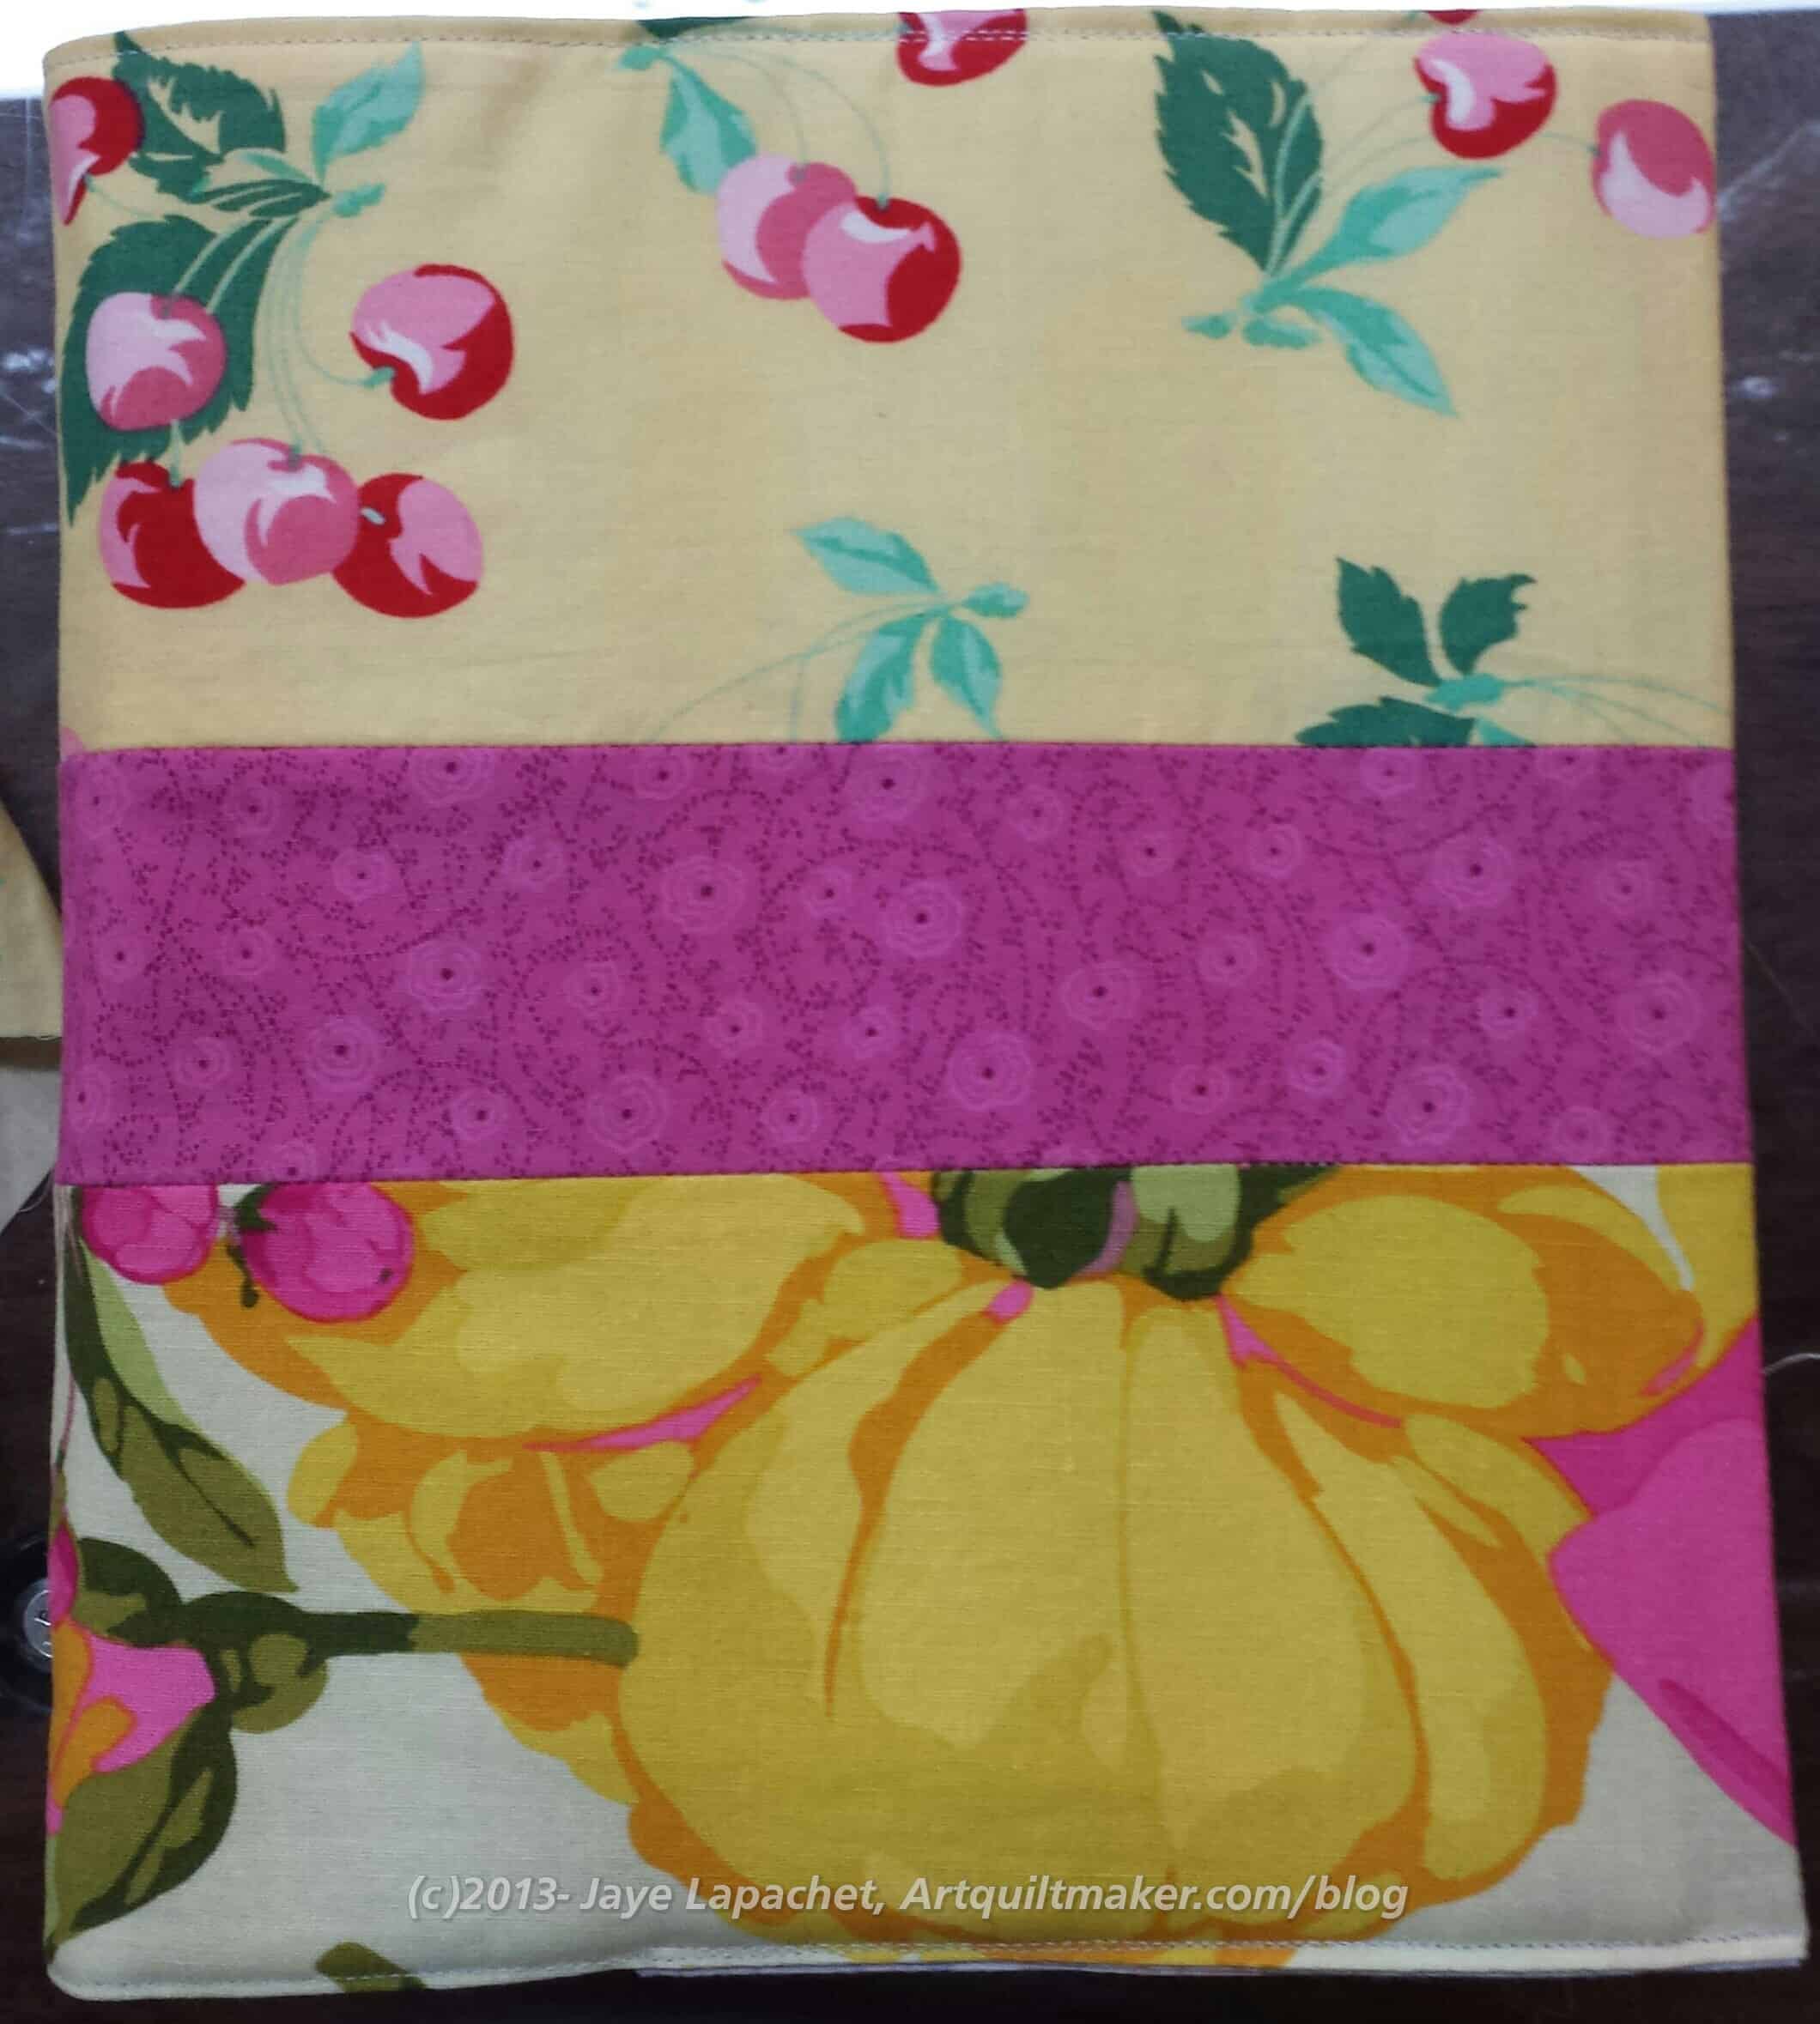
Combination Journal Cover
I tried the Pellon 806 Stitch-n-Tear interfacing on the combination journal cover. This is the cover I made with many different types of scraps. I didn’t try and keep the scraps from certain quilts together. I just sewed whatever pieces of fabric together that would fit and not look terrible.
I like the weight of the Stitch-n-Tear, but I don’t like the stiffness. I know that Stitch-n-Tear tears away (I use it for machine embroidery), but I don’t think that will be a problem. I have a lot of it on hand and it was convenient. I didn’t want to have to run out and buy something else.
For one journal cover it will be fine. I really like the thinness of the Stitch-n-Tear. Long term, for the tutorial, it won’t work. I am not sure what else to try. Perhaps I’ll try the Shape Flex I used in the Petrillo Bag?
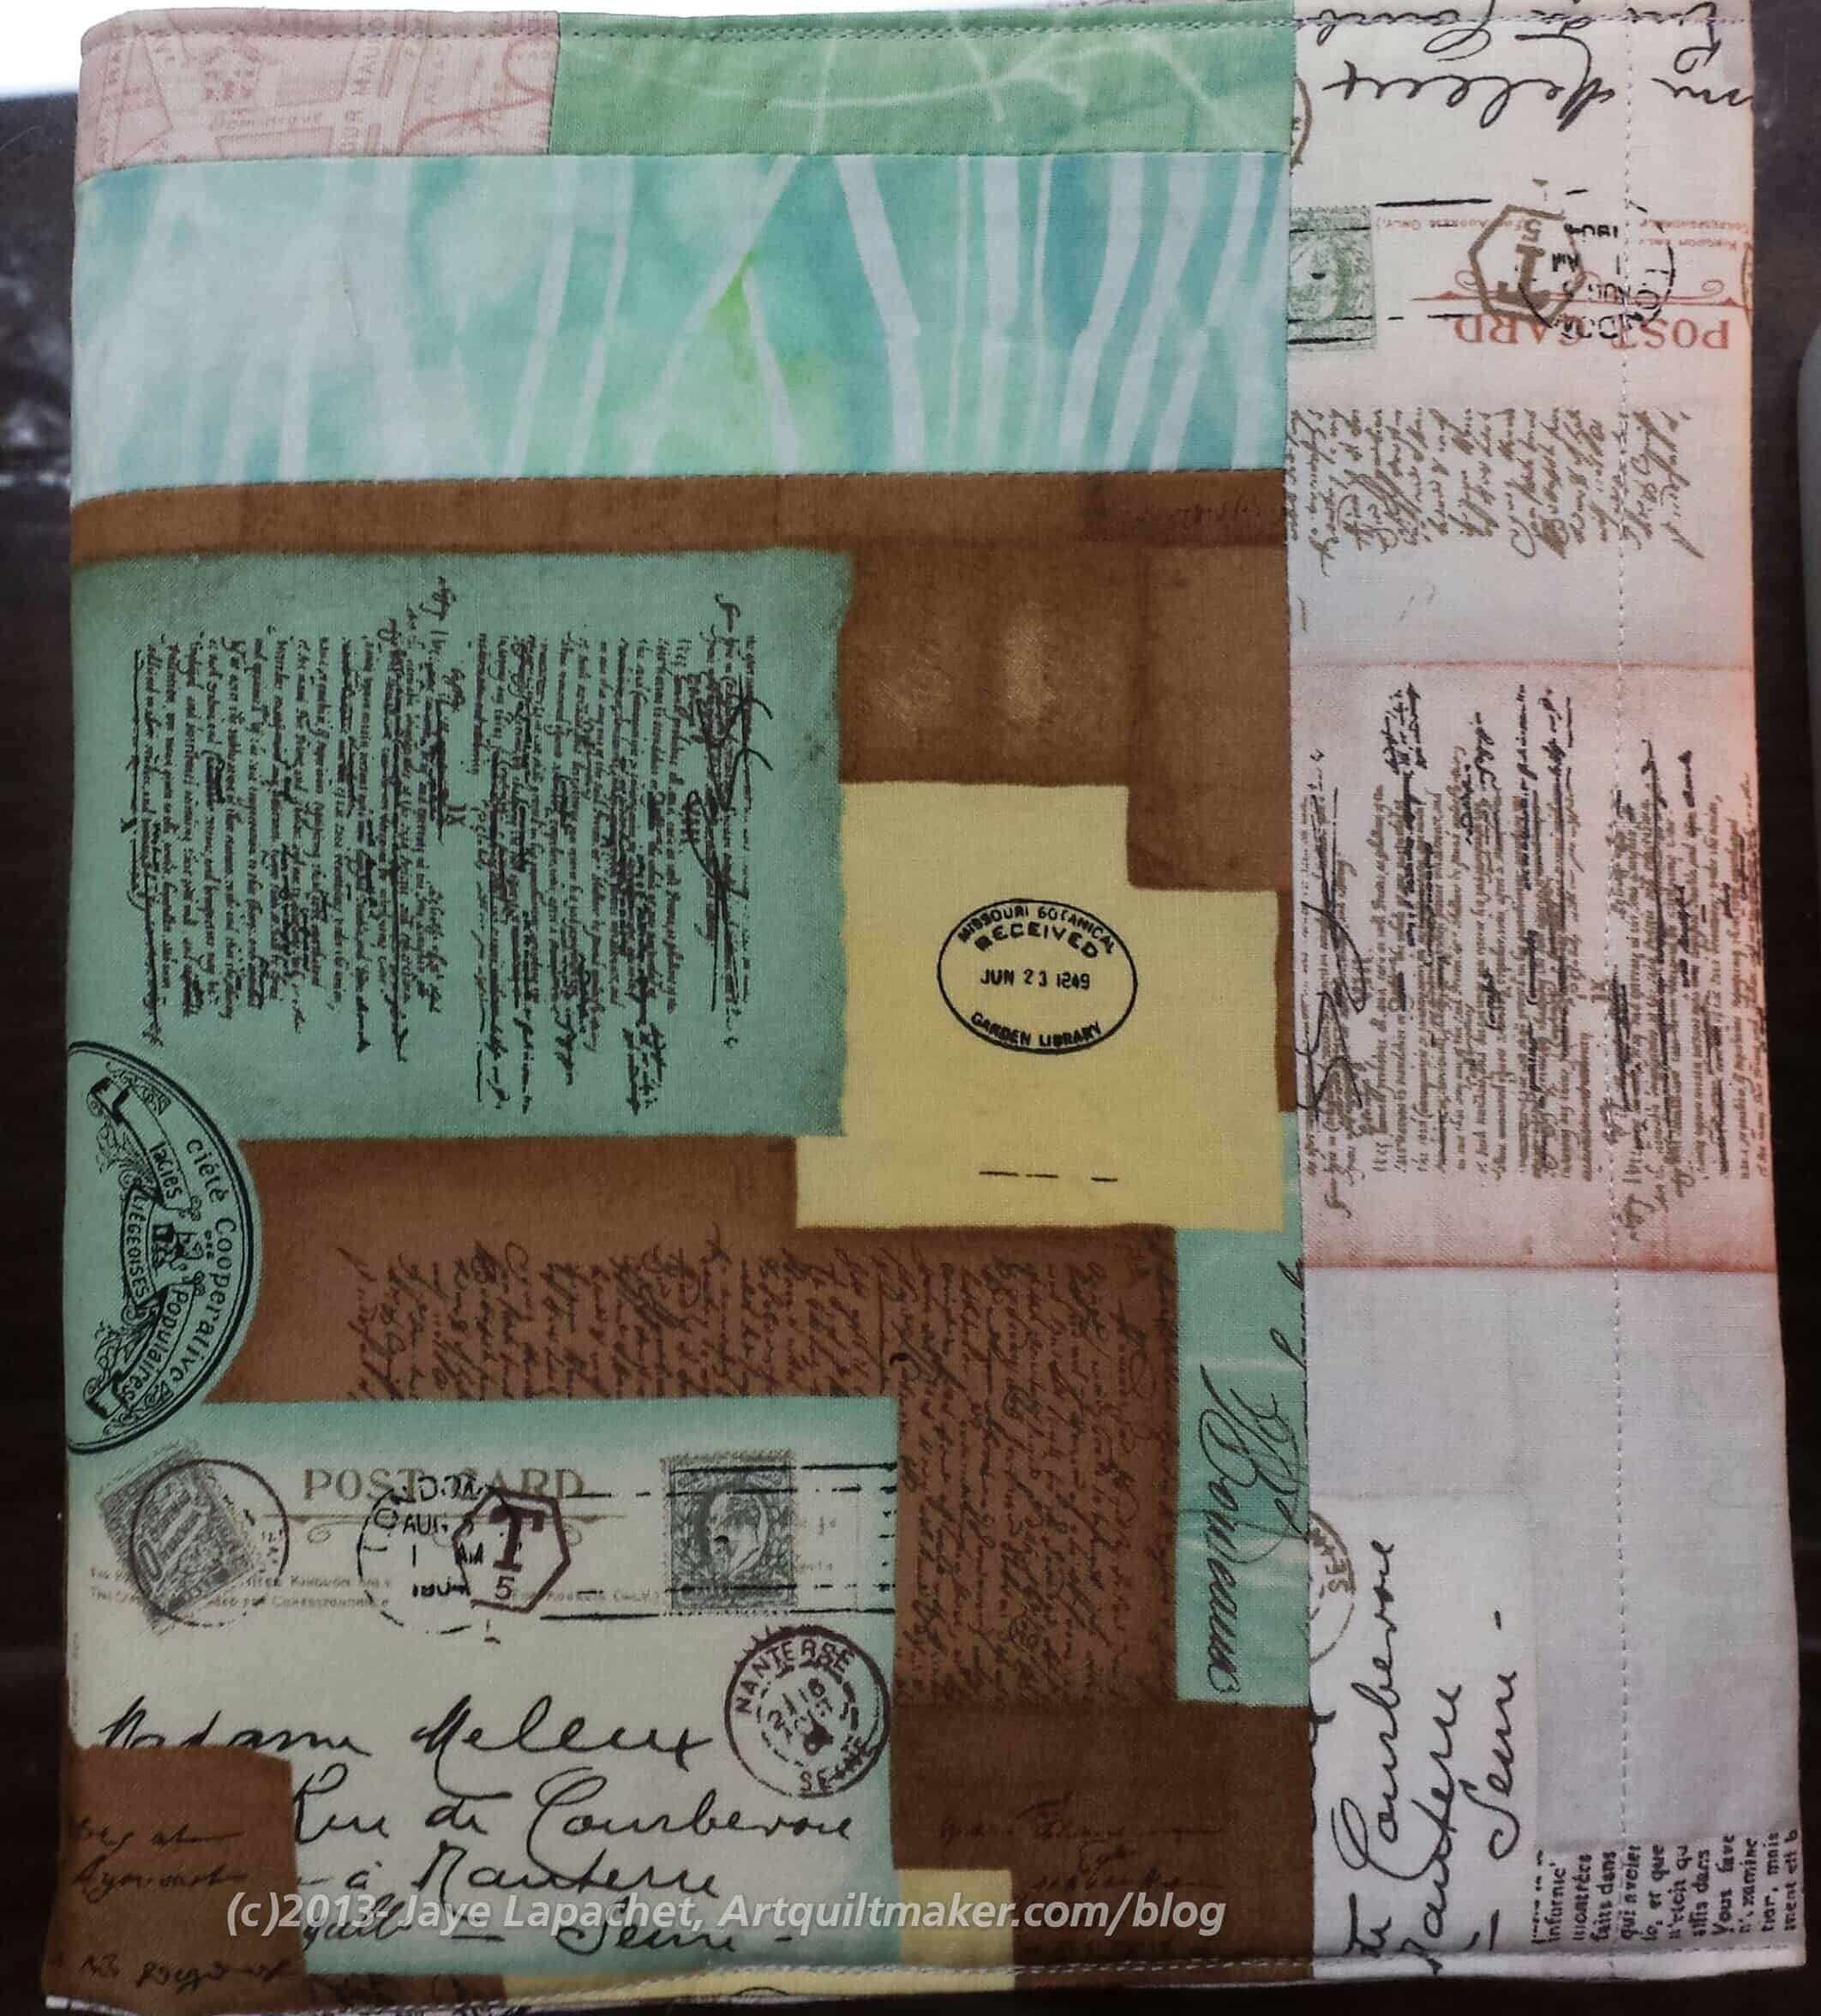
Green & Letters Journal
What is your favorite interfacing?
Is there a garment interfacing that might be the ticket?
Did I say that I liked working on the same type of project over and over? I do. I was reminded of that when I made the journals. I liked trying different things and making small changes and trying again. It is a great way to get better at something and lessen the fear factor.
Certainly, I am not afraid of sewing and I am not afraid of journals, but I really want these to be an easy, fast project that is more about the fabric than about the construction. I can challenge myself in construction techniques with quilts.
I just got two quilts back from Colleen. With them came a bag of scraps from the edges. I am still working on journal covers, but this means I will be working on more Any guesses what else I’ll be making more of? More small projects!
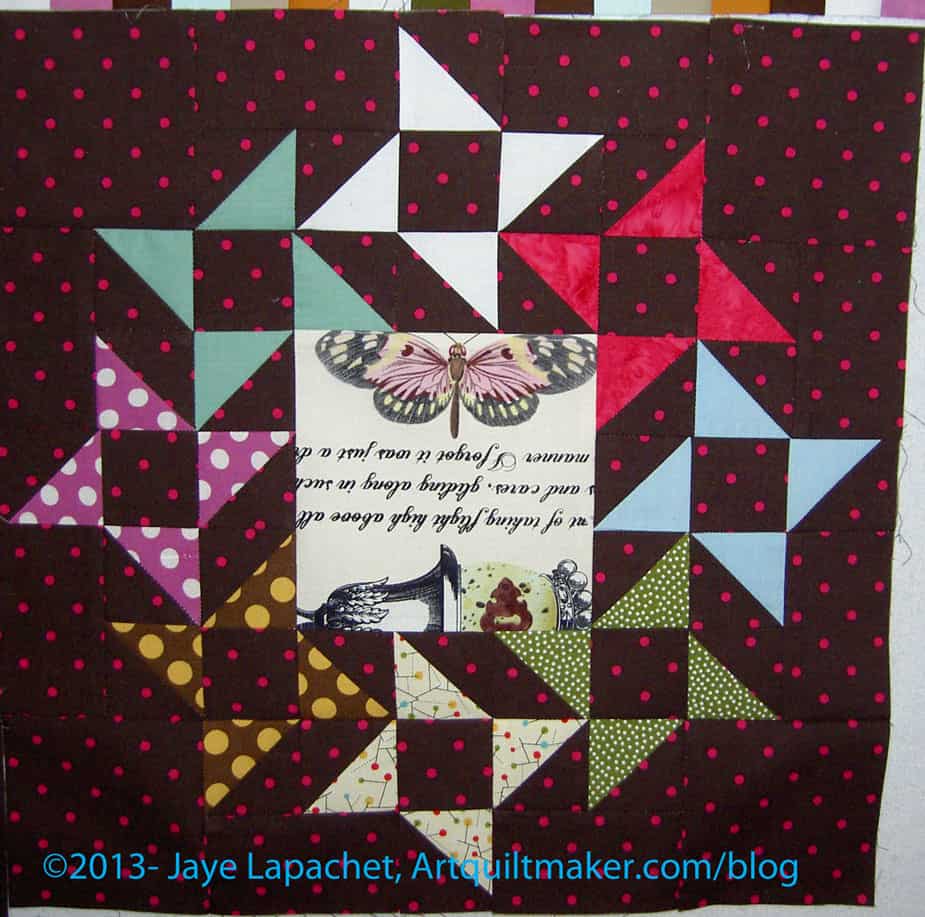
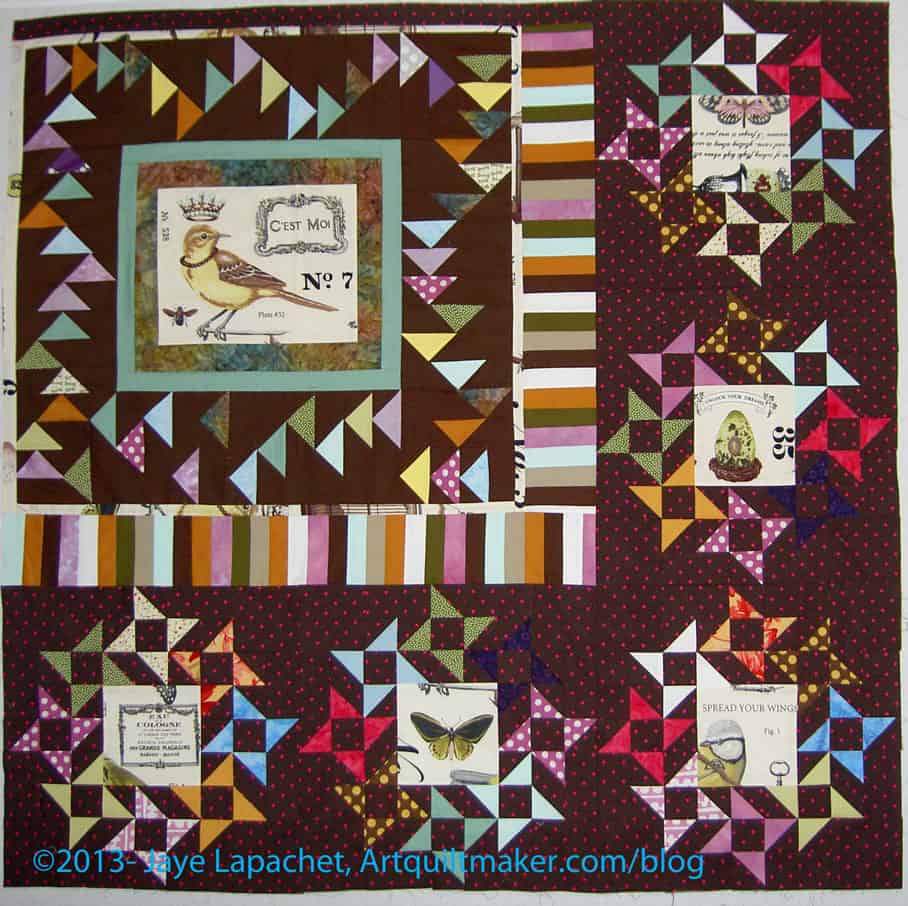
I finally finished the 4″ Sawtooth Stars over the weekend. This project is lingering a little too long for my tastes, but I wasn’t miserable making these little stars and the group of them makes for a very nice accomplishment.
Now I am ready to put the blocks together. I plan to follow the plan from the Oh My Stars QAL, because I think it is an interesting way to put the blocks together.