These are the blocks for this week. Or so I thought. TFQ took the time to go through our list and found, though not her intention, that I wasn’t ahead as I had thought. She found that I actually finished blocks for the end of the last week not the beginning of this week. I have to say I felt disheartened. I wanted to work on another project, which was why I got busy with these so early in the weekend. So much for clearing the decks.
We have a deadline of getting the 8″ blocks done by the beginning of May and I want to stick to that schedule. Her efforts, fortunately, got us back on our real schedule, rather than the schedule in my head, which is good.
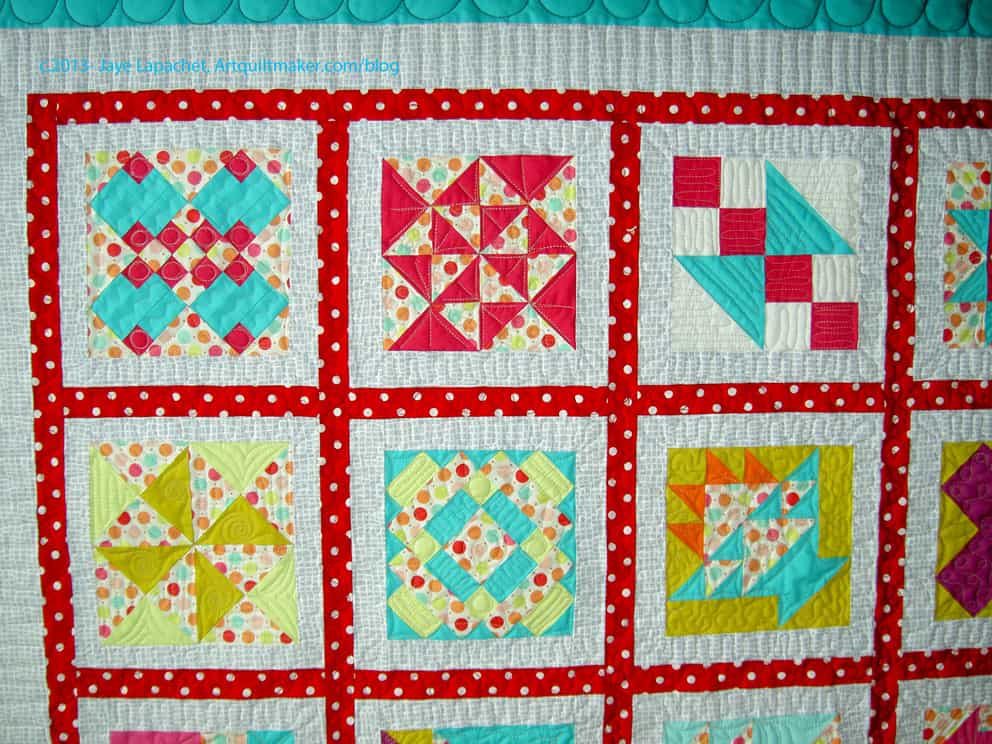
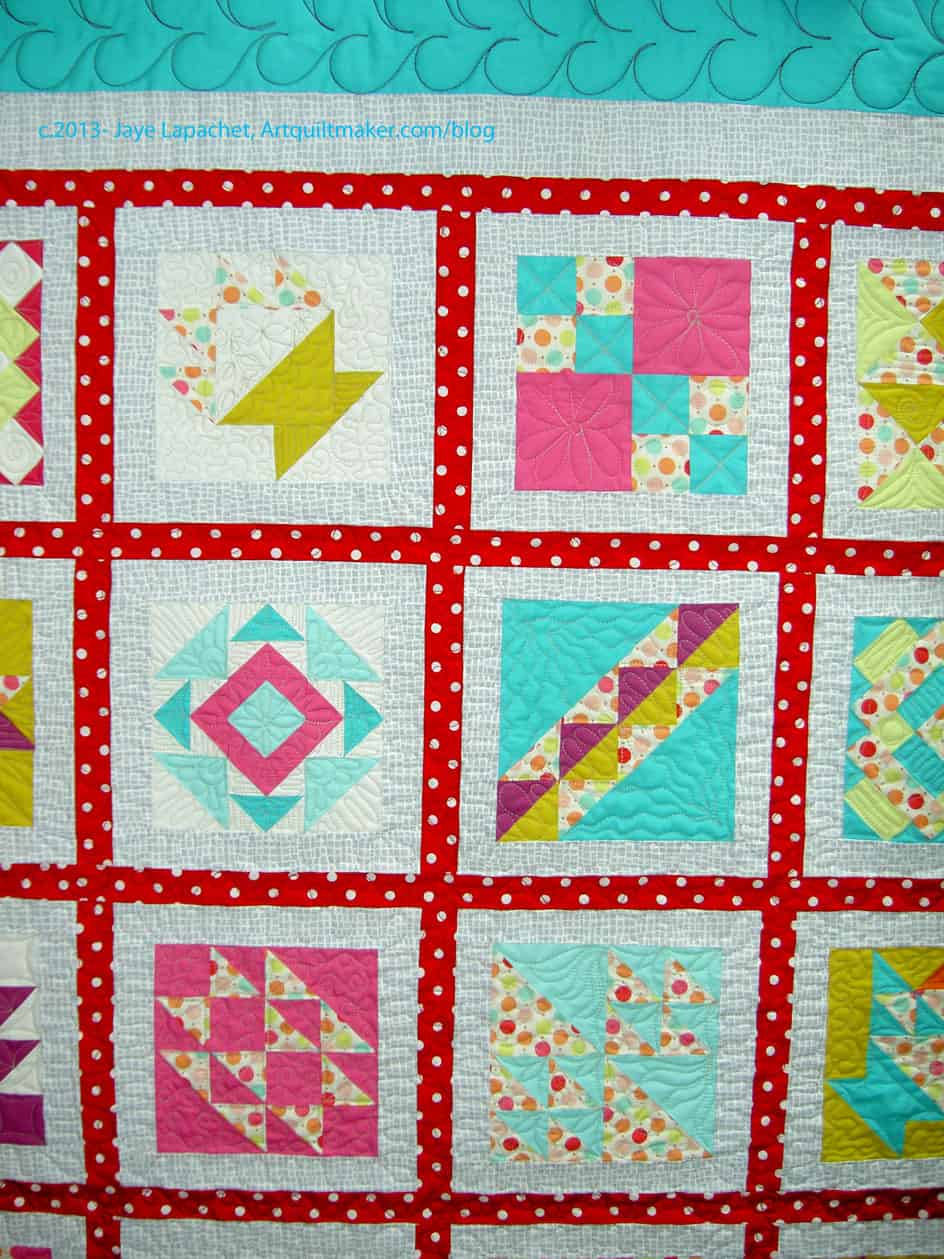
Still I didn’t want to work on any Sawtooth Stars at the moment, even the new patterns. I just left these on the design wall and pretended I wasn’t behind again. This is an interesting exercise in working on one project almost exclusively. It is difficult for me to dedicate so much time to one project, I am finding. This makes me think more about my process. More on that later, I think.
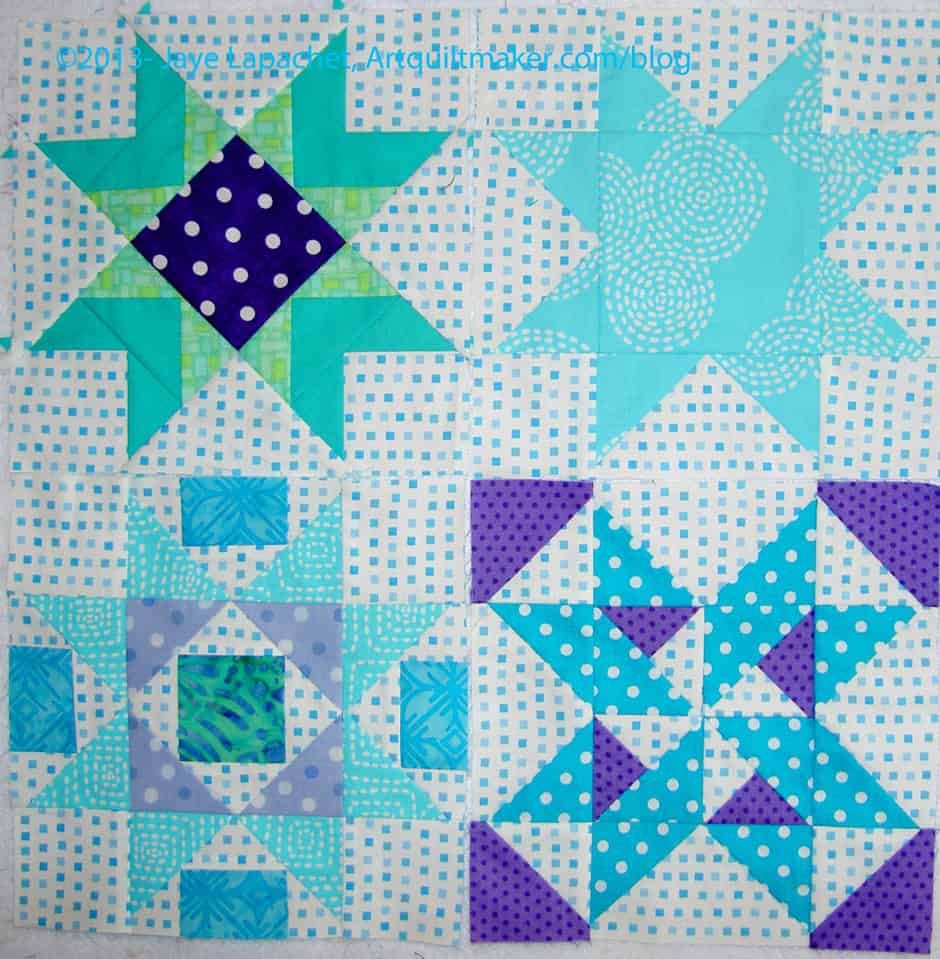
Above are: Chevron Star (actually from the week before as I made the wrong block previously) (upper left) Basic Star (upper right) Home Treasure (lower left) and Stars & Pinwheels (lower right). All of these can be found in one of the Around the Block books.
I am using some of the 12″ blocks as inspiration for the fabric combinations.
Yesterday, I decided to do some cutting and cut out the new blocks. Life goes on.
I am still plowing through the piles of fabric to iron. I iron fabric when I need to think and when I am under stress and it it calms me. I suppose the tactile nature of the fabric helps, but, as I probably don’t need to say, the color and design help, too.
You might remember that I saw this bag a few weeks ago and extolled its virtues, most of which had to do with it being a vertical bag that was good sized, but not a Rotator Cuff Injury inducing size. I posted a ‘warning’ in a post on March 18 that we would be starting soon and Pam, of Hip to Be a Square fame, talked about the bag along in her episode 121 podcast. We have finally gotten our acts together, other projects in order and are ready to go. Pam already posted the notice of the ‘Along’ yesterday and I am following along in her footsteps to catch my readers as well.
Here is the schedule that Pam laid out:
Week 1 (week of 4/7/2013) – assemble pattern pieces, supplies, and get fabric cut out.
Week 2 (next week, starting on 4/14) – sew the bag.
I may have to modify it to:
Week 1 (week of 4/7/2013) – assemble pattern pieces, and supplies
Week 2 (week of 4/14/2013) – Cut out the fabric
Week 3 (starting on 4/21) – sew the bag
Week 4 (starting 4/28) – finish up
I know that we all have a different working pace and obligations. Pam works quickly, so don’t be intimidated by her pace. I have to be out of town a couple of times this month and I like to work slowly on bags. Pick (or make up) the schedule that works for you. Pam is in the middle of her Labyrinth quilt, so the only hope I have of finishing the Petrillo bag anywhere close to when Pam does is to get started immediately and sew like a demon. 😉 I would advise you to focus on having fun.
If you need to buy the pattern you can get it instantly (or nearly instantly) as it is a downloadable pattern. It is only $8.
There are some specialty supplies you need to probably get online. Sara suggests different places to get the supplies. I had seen Soft & Stable at the Road to California quilt show I attended last year. I was interested in trying it, but didn’t buy any as I didn’t have a suitable project at the time. Thus, for this project, I ended up buying the Soft and Stable from ByAnnie.com. I am not affilated with that site and don’t think it was the absolute cheapest site, but I was in a rush and wanted to make sure I got the right stuff. Amazon was out at the time. The package was sent out really quickly. I received the Soft & Stable in a few days.
I bought the snaps from AGraffSupplies on Etsy. I am not affiliated with that site. They had the snaps cheaper than Sara’s preferred vendor. I compared and I am pretty sure the snaps were the same. The confusing part about both Etsy shops was that it was hard to tell how many I was buying. I ended up with a big bag of magnetic snaps – many more than I needed. I’ll have to go on a bag making binge to use them all up. Nota bene: These turned out to the wrong ones. You need to buy SEW-IN magnetic snaps. I didn’t even realize such a thing existed.
I bought the Shape Flex, which seems to be muslin with fusible on the back from Beverly’s online.
Pam made the Aeroplane bag pattern and says “Sara’s patterns are awesomely written with clear instructions and lots of pictures”. Pam is making one change to the bag construction; rather than using the Soft & Stable, she will be using “a combination of Pellon Decor Bond (a home dec weight interfacing) along with Pellon Fusible Fleece.” If you want to make changes like that, then Pam is your girl. I wasn’t happy with the floopy results of changing out fusible fleece for two layers of regular batting and some interfacing when I made my last Chubby Charmer, so I am going to stick with the directions on supplies for the most part. It is also a good opportunity for me to try the Soft & Stable as well.
As Pam said, in addition to posting my progress here, I’ll be posting pictures to Sara’s usual Flickr group so she can see our work as well.
Go forth and make a Petrillo bag!
**Thanks to Sara at Sew Sweetness for allowing me to use her image.
Weeks writes: “Share your work – volunteering to organize a quilting day to make quilts for your favorite charity, offer to give a lecture on your work at your aunt’s retirement community – you needn’t be famous or have written a book to share your quilts with others”
I was listening to a podcast the other day (Frances??) and the hostess said that a town near her had a Quilting Day. They had for years and it consisted of people working together on projects. Quiltmakers went to the local hgh school and worked with the kids on quilts. I love this idea because there is so much to share in quiltmaking – the camaraderie, math, love of fabric, the feeling of making something that will bring someone joy, whether your own family for friend or someone you don’t know.
This blog is all about sharing. While I write the blog for myself to keep track of my projects and progress, I have come to enjoy the comments and back and forth with readers. This has really become a venue for me to share. I like posting the tutorials. Well, I like posting the tutorials. Writing them can be a chore! I like sharing what I know and my opinions about quiltmaking.
I don’t like people stealing my content or my photos. That is the NOT FUN part of sharing. It is also a little sad when I don’t receive comments on a post or several, but I remind myself that I am writing this for me. It is a good exercise in not seeking attention.
I think there are a lot of different ways to share. Like Weeks says above, you can organize a quilting day, but you can also write a tutorial or help a friend to make some quilted placemats. I think that if we share, even just the project we are working on Flickr, then the community is richer for your contribution.
This segment discusses sewing the block together. In order to get to this point, you should have completed parts 1 and two and three as well as part four.
Like piecing all other blocks, you want to sew smaller pieces together to make larger pieces, then sew the larger pieces together to complete the block. In part three, you should have cut any fabric for templates that did not have matching fabric patches. so, inventory your templates and make sure you have a fabric patch for each template. If you don’t, go back to part three.
In part 4 you also pinned:
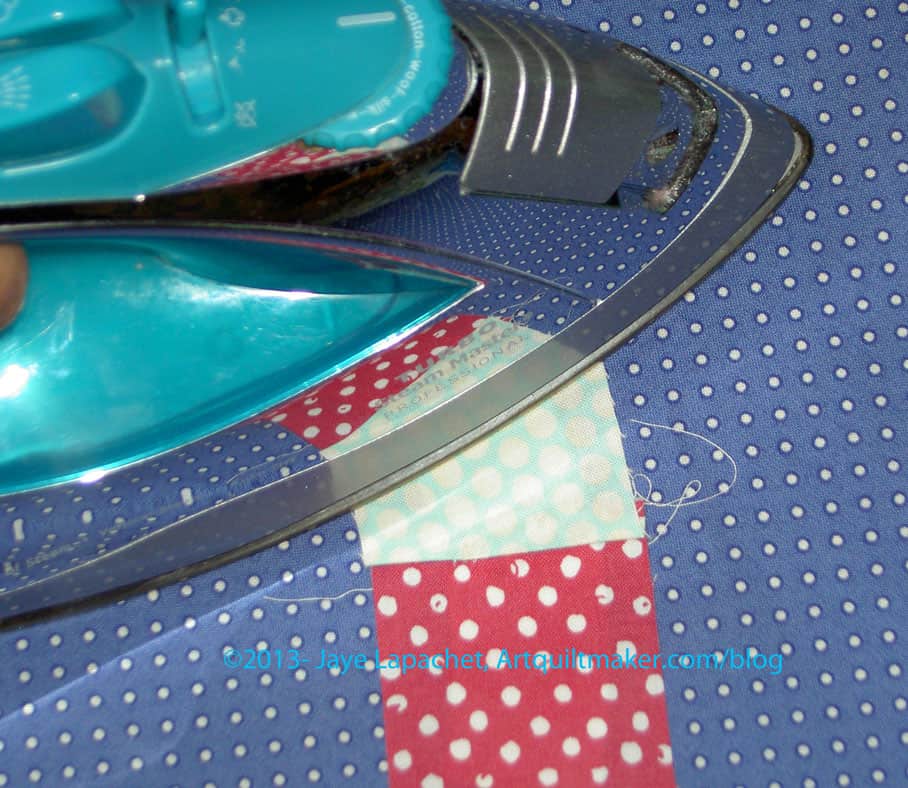
Remember that the edges are not quite as smooth on the other (blue) side, but that is ok. Just remember to sew slowly and carefully.
Outer patches sewnOuter patches sewn – blue side up
Once those two patches are sewn, they might look a little rumpled, but once you turn them both right side up and press the section, they will look great.
Outer sections pressed
Press which ever way you think will work best for your block.
Section D
Next, we will sew the corner section to the small pieced strip (Section D).
Nota bene: if you did not foundation piece the small strip, follow the directions in part 4 or part three to do so. If you haven’t done any foundation piecing you might want to start with this piece as it is smaller and less complex than the pointy triangles section.
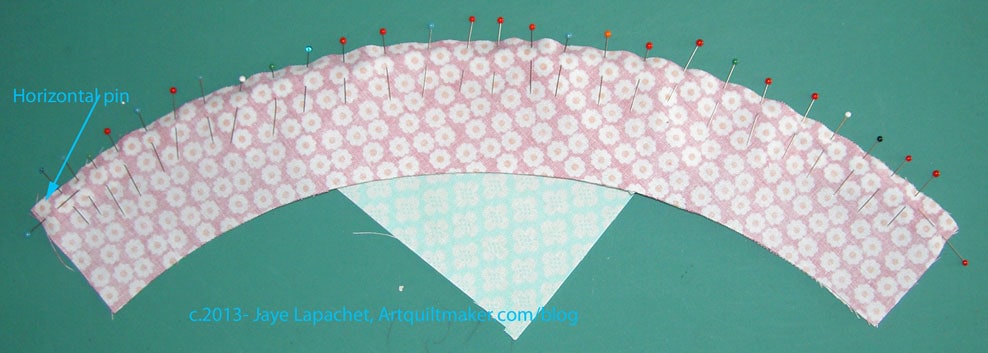
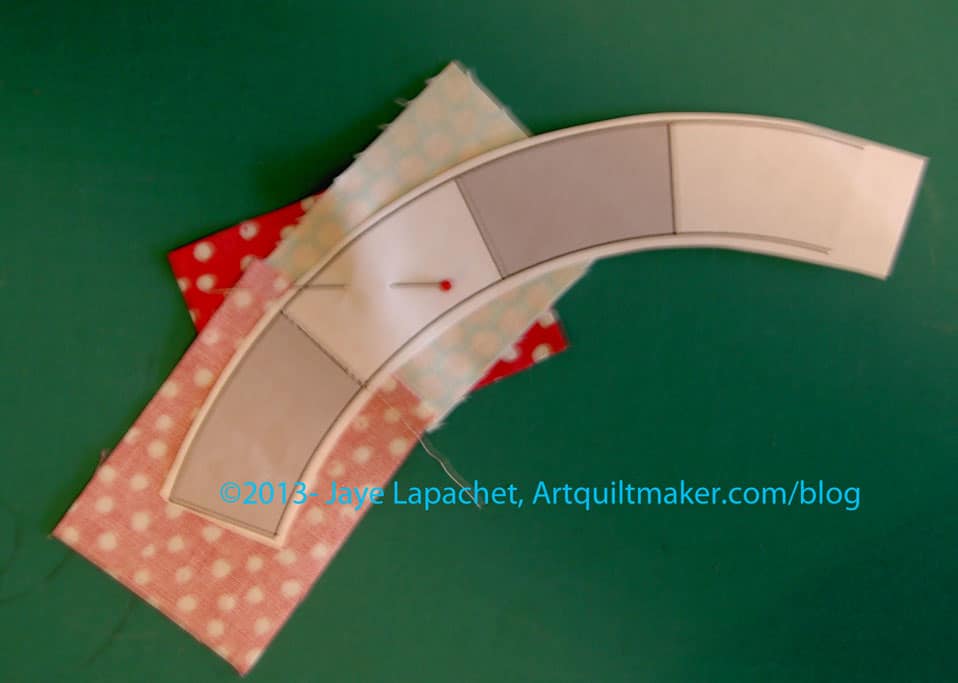
Again you will need to pin. This time you are pinning your quarter circle corner piece and your small foundation pieced strip.
Pin ends horizontally
Take your quarter circle corner piece and your small foundation pieced strip and pin them together. I, first, line up the straight edges on the ends and pin them together (horizontally). I make sure the horizontal pins are out of the way of other pins and the sewing machine foot. they are used just to make sure my piece is in place while I put the other pins in.
I use a lot of pins. It works for me. I know there are other tutorials that are pinless or use minimal pins, but I want precision and pins give me precision. Put these two pieces together the way it works for you. Remember: you only have two hands.
Sew 2 patches together
Once you are happy with your pinning, get ready to sew. I put the non-pieced corner quarter circle on the bottom and the pieced part on the top. I try to make this a habit, though it doesn’t matter with this particular foundation pieced section. In some sections, like our spiky triangle section, it matters.
You can rip off the paper before you piece or not. I was having some other problems, so I ripped it off, but normally, I would leave it on until the very last second I could, e.g. before I took the pieced top to the quilter!
Attach your quarter inch foot and sew your small foundation pieced strip to your corner quarter circle. If you don’t know how to sew curves, take a look at the curves tutorial.
Corner with 2 sections
Once you are finished, press carefully. I press to the side with the least number of seams, or to the side that the fabric seems to be naturally inclined to lay. Your corner will look gorgeous like the one above.
Once you have the small foundation pieced strip attached to your quarter circle, you will sew it to your spiky triangles piece. You will, again, pin a lot, using the horizontal pin trick to stabilize the piece.
Sew Sections Together
Again, as shown in the photo above, I put the foundation pieced part on top. In this case, you are sewing two foundation pieced sections together, so you can choose which you want on top. I chose the spiky triangles section to go on top, but it doesn’t really matter, since there are no points to worry about cutting off.
Next sew the two remaining sections together, press, again, towards the piece with the least number of seams and you should have a piece like the one below.
Finished: Foundation Pieced Block
After all that work, you have a beautiful foundation pieced block. Pat yourself on the back!
My aunt loves irises and I was thinking about her and flowers today. Although ‘Iris’ was not on my original list of prompts, I thought it would inspire some wonderful responses. What will you create today?
flower
part of the eye
bearded iris
Incorporated Research Institute for Seismology
Integrated Risk Information System (US EPA)
GooGoo Dolls song
OCR Software and Document Management Systems
IRIS from Cirque du Soleil
Impact Reporting & Investment Standards
restaurant in New Orleans
In Greek mythology, Iris is the personification of the rainbow and messenger of the gods. She is also known as one of the goddesses of the sea and the sky. (Wikipedia)
Illinois Research Information System
Iris Murdoch, born July 5, 1919
Iris Murdoch – “Love is the extremely difficult realization that something other than oneself is real.”
Definition: (Anatomy) “The iris (plural: irides or irises) is a thin, circular structure in the eye, responsible for controlling the diameter and size of the pupil and thus the amount of light reaching the retina. The color of the iris is often referred to as “eye color.”- (Wikipedia)
Definition: (Plant)- “Iris is a genus of 260–300[1][2]species of flowering plants with showy flowers. It takes its name from the Greek word for a rainbow, referring to the wide variety of flower colors found among the many species.[3] As well as being the scientific name, iris is also very widely used as a common name for all Iris species, though some plants called thus belong to other closely related genera. A common name for some species is ‘flags’, while the plants of the subgenusScorpiris are widely known as ‘junos‘, particularly in horticulture. It is a popular garden flower.
Post the direct URL (link) where your drawing, doodle, artwork is posted (e.g. your blog, Flickr) in the comments area of this post. I would really like to keep all the artwork together and provide a way for others to see your work and/or your blog.
We are also talking about this on Twitter. Use the hashtag #CPP
The Creative Prompt Project, also, has a Flickr group, which you can join to post your responses. I created this spot so those of you without blogs and websites would have a place to post your responses.
I am always interested in books about creativity and the creative process. If you want to read about process, this book is for you, regardless of whether or not you are a bead artist or not. The shapes and colors, alone, are enough to inspire ideas for a few years. The author makes a point of saying that she wanted to go beyond jewelry in showing what could be created with beads.
The artists are from many different countries and backgrounds. The first artist, Ulli Kaiser is dear to my heart simply because she comes from Austria. Her silver and aqua/turquoise (color not bead type) are beautiful.
Each section includes photos of the artists’ work, but also some biographical information. Many of the artists make jewelry, but Marina Dempster’s section includes several pairs of amazing beaded shoes. I particularly like the pair called Horny. I am not enamoured of the name, but can appreciate the play of words. I like the shape and color of the shoes. Another section, from South Africa, shows vessels. Other artist show tableau, consumer goods, sculpture, dolls and statues (Betsy Youngquist’s works are amazing, if a little creepy), wreaths, clothing, animals and much, much more.
Helena Markonsalo’s work reminds me of Susan Shie’s airbrushed quilts.
There are also a wide variety of designs rendered in beads. Markonsalo’s work could be described as “shabby chic” while Jan Huling’s work has a definite Native American feel. There are many other aesthetics to delight all readers.
If you ever wanted to know what, besides jewelry, could be created with beads, this book will provide hours of inspiration. There is so much included that I could not help, but go and visit websites of the artists and I have many more to view.
We are nearing the last part of the foundation piecing class. I know this is a long tutorial, but there are a lot of steps and it is difficult to explain when I am not in the same room with you. I also don’t have a crew, so photographing every single step with only two hands can be a challenge.
Mostly this segment discusses getting ready to sew the major parts of your block together. Yes, there is more prep before you can sew your blocks together. I will give some template tips as well. In order to get to this point, you should have completed parts 1, 2 and part 3. All of the supplies are listed in part 1.
Like all other parts of piecing, your goal is to sew smaller pieces together to make larger pieces. First, inventory your templates and make sure you have a fabric patch for each template.
NY Compass Outline
For any templates that do not have matching fabric patches, cut your fabric.
Based on the photo above, I need to cut 3 pieces. In some New York Beauty related patterns, these are pieced, but in ours we are using one fabric. You can certainly modify any of these pieces to do more foundation piecing.
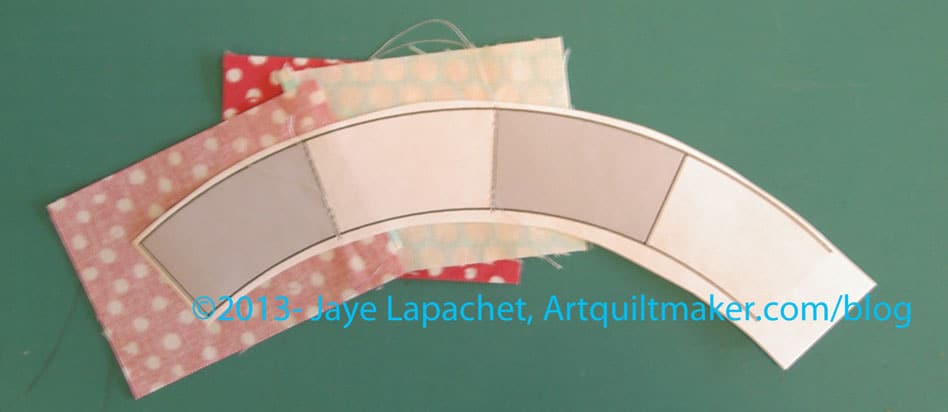
To cut out these templates, I place my fabric right side down and the template right side down and draw on the back of the fabric. This is the same for all three of the templates.
Your patches should look similar to your template once cut out. All of these templates have an element of bias, so handle them carefully.
Once you have drawn your template shape on the fabric, you can cut it out. Where possible, I use a rotary cutter and ruler. If I cannot use those tools, e.g. for the curves in the pieces of this block, I use very sharp scissors and cut slowly and carefully. Above you can see that I have cut as many parts of the patch as possible with my rotary kit and am ready to cut the curve with scissors.
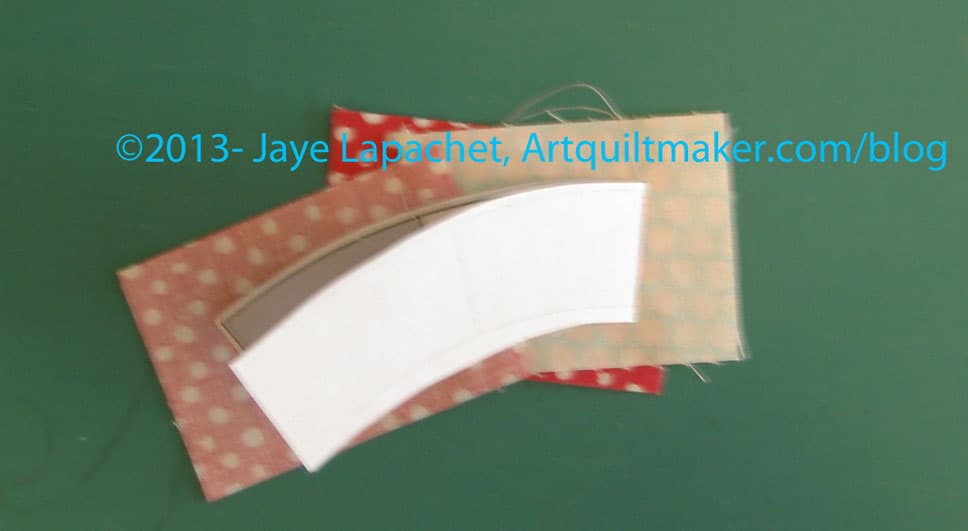
Corner template on fabric
Lay your fabric right side down and place the corner template on top, also face down. Draw around it with a Pigma Micron, or similar, pen.
Line drawn on fabric
Once you have drawn carefully around the template, remove it and make sure your line is continuous. If it is not continuous, carefully replace the template and fix the missing segments.
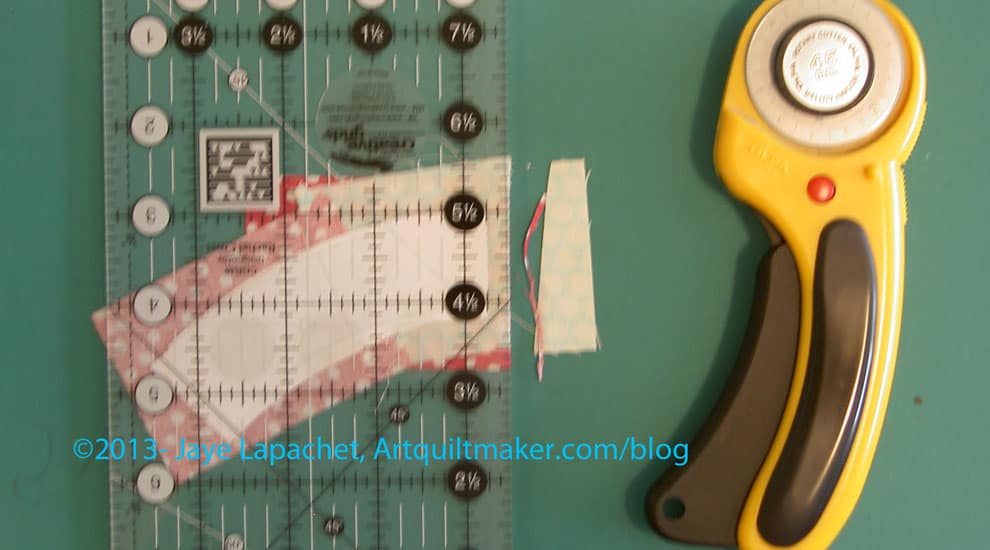
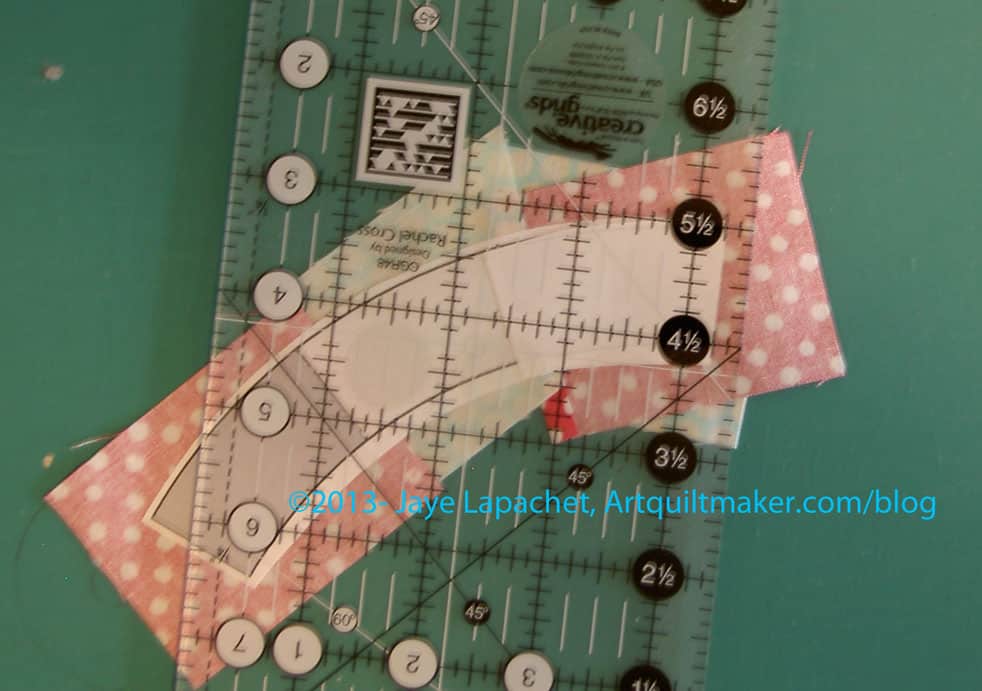
Line up ruler along 90 degree angle
Line up your ruler with the corner of the fabric patch. You may need to rough cut your fabric first, if there is too much yardage skewing the fabric as you try and cut.
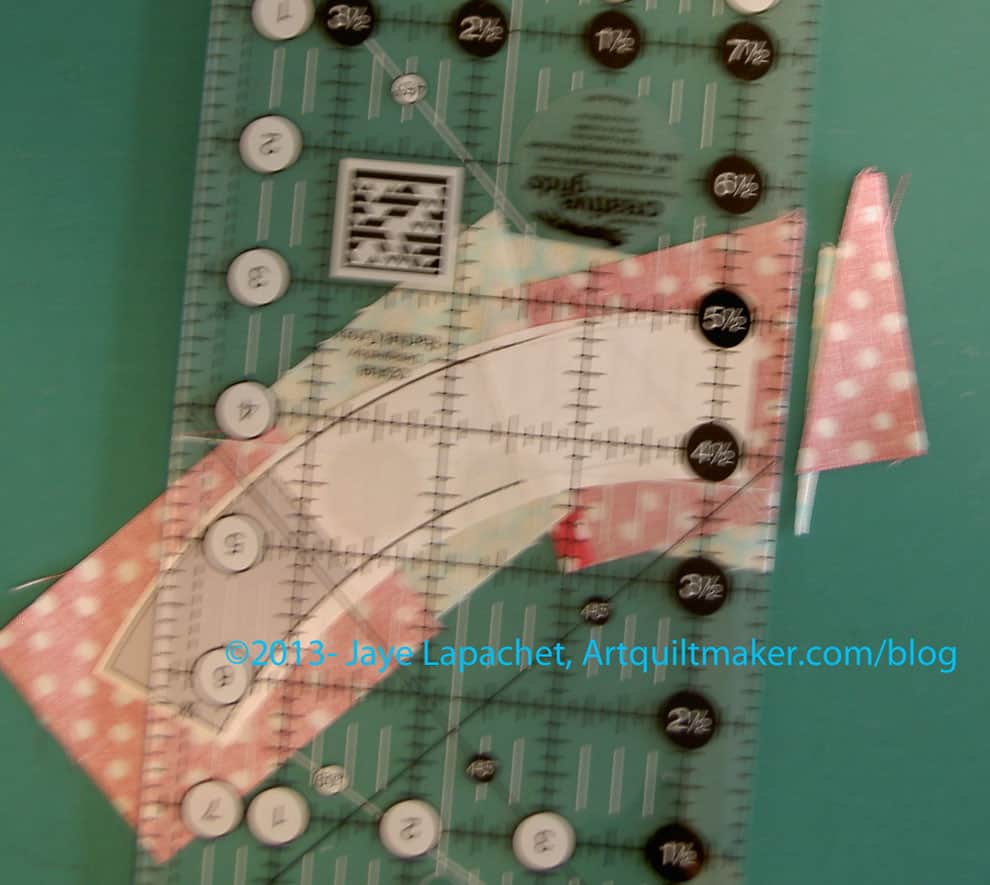
The corner quarter circle template has a quarter inch seam allowance, so you don’t have to do anything, but cut the line you drew (and all the fabric on the other side) off. You will want to cut so that the line is cut off, but you need to cut ONLY the line off.
Also, these pieces are large, so make sure you can hold your ruler down tight as you are cutting. You want to avoid ruining a whole large piece of fabric because your ruler shifted.
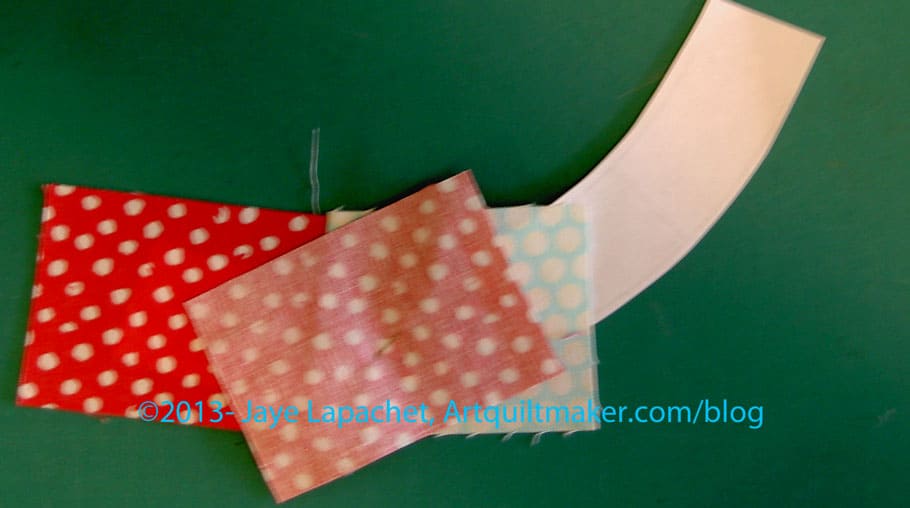
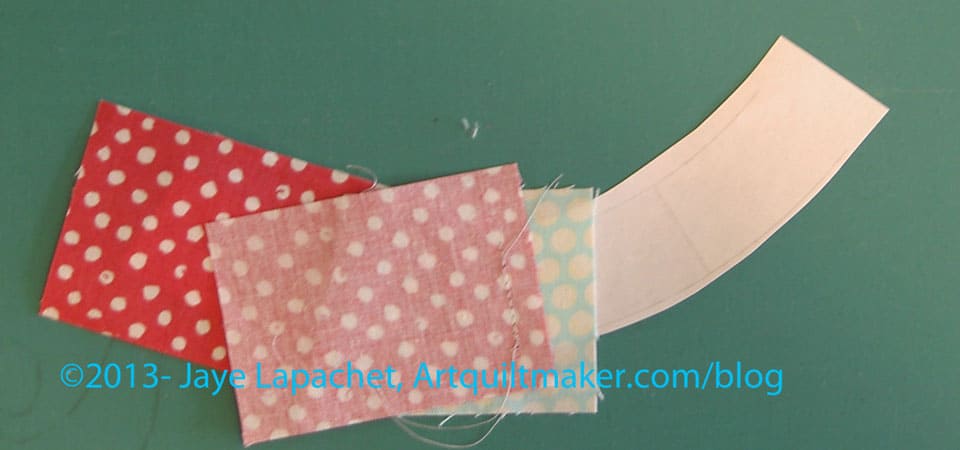
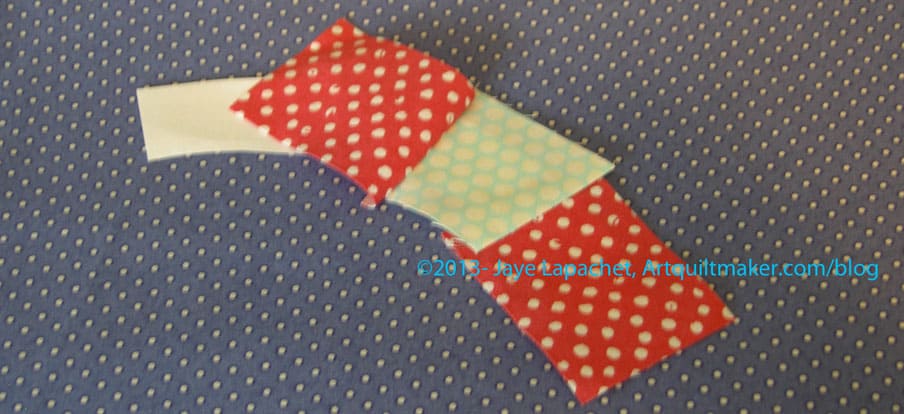
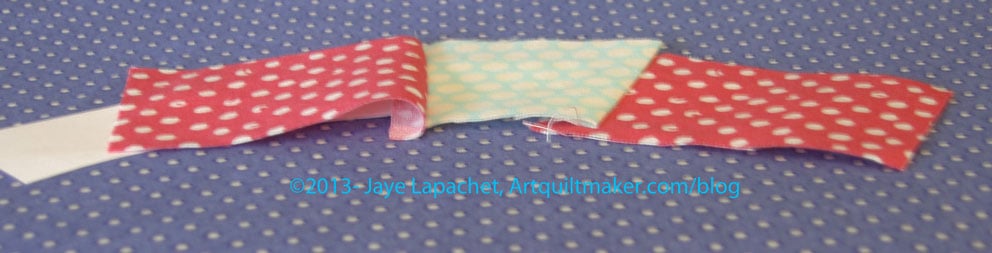
Once you have cut out your fabric patches, you will have pieces that look like those in the above photo.
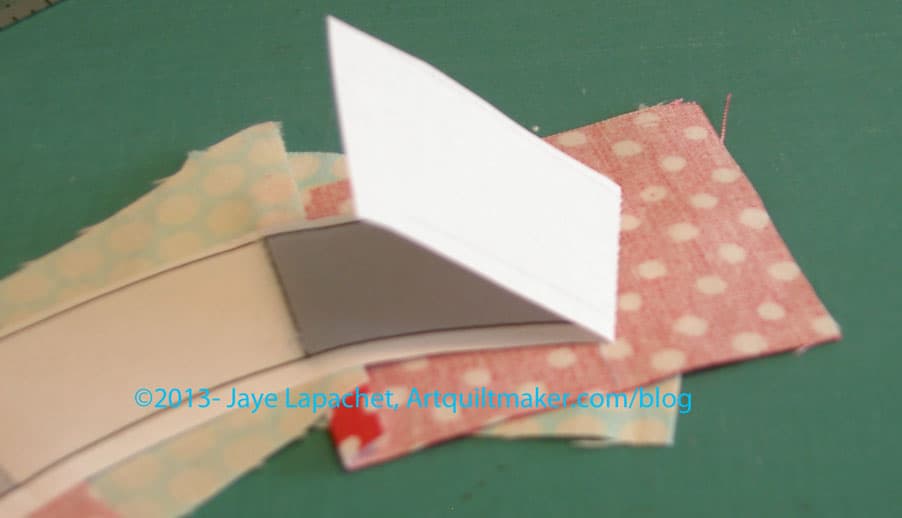
After seeing the above patches laid out, I decided to sew the two outer pieces together first. Again I want to join smaller pieces into larger sections. Also, the very outer piece has very skinny ends. I want to stabilize them a bit by sewing them to another piece before sewing them to the foundation pieced Section C.
The first order of business is to pin them together. I apply horizontal pins on the ends and a lot of pins in the middle. My goal is to make the seam smooth. You are working on the bias, so don’t yank too much.
For my advanced students: if you put the horizontal pin in the two fabrics as shown above, the horizontal pins on each side should be out of the way of your 1/4″ foot.
Pinned Endblue side up
It is not quite as smooth on the other side, but that is ok. Set this piece aside for now, but remember that when you are ready to sew, sew slowly and carefully. Next, we will sew the corner section (quarter circle, Section D) to the small pieced strip.
If you don’t know how to sew curves together, check out the curves tutorial.
Nota bene: if you did not foundation piece the small strip, follow the directions in part 3 or above to do so. If you haven’t done any foundation piecing before you might want to start with this piece as it is smaller and less complex than the pointy triangles section (Section C).
I use a lot of pins and I know there are other tutorials that are pinless or use minimal pins. Put these two pieces together the way it works for you.
Now you are ready for part 5, which is the last part, I promise. 😉
Tips:
If you have to rip out stitches, rip them out from the fabric side, not the paper side.
Pay attention to putting the next fabric piece on the foundation.
While this certainly won’t be a comprehensive post on everything there is to know about color and fabric choices, I thought I could pass along a little information while it was fresh in my mind.
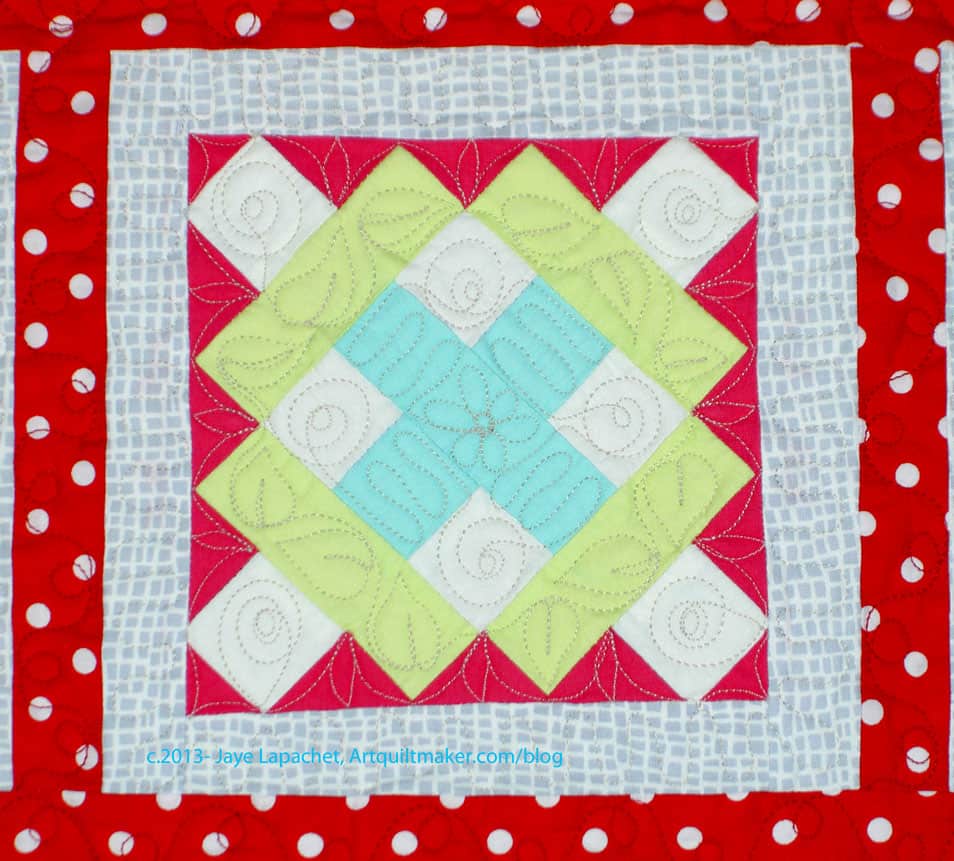
Finished: Foundation Pieced Block
Above is my completed foundation pieced New York Compass. If I were doing this block over again, I would not choose that specific aqua or that red for the small second foundation pieced strip (next to the corner quarter circle). In the grand scheme of the quilt, it will be fine, but this close up it really takes away from the fine piecing of those spiky triangles. The reds, especially run into each other.
That second foundation pieced part is tricky for my particular version, because my quilt is a two color quilt. I can’t introduce additional colors into the blocks at this late stage and maintain the integrity of my plan. I could have paid more attention to the particular reds and aquas I was choosing and chose fabrics for that small foundation pieced strip that stood out more against the red dot of the spiky triangles.
My mistake?
I grabbed fabrics and started cutting. I did not look at all the fabrics together before cutting. I didn’t try different fabrics to see what the change in look would be. I didn’t make my visual decisions visually. This lesson is a good reminder.
I thought I was off the jewelry book reviewers list, but I received two books last week. Lark was so great about supporting the Boxing Day Sew-in that I just can’t say no to reviewing this book. Like the other books in this series, they have a section on tools and supplies as well as a section on techniques. Both are well illustrated. I particularly like the font and layout chosen in this book. There are a couple of things that are really great in these sections. One is the ‘designer’s tip’, which points out, for example, what wire to chose. I also like the Wire Hardness Scale image (pg.10). It is a good illustration that probably would have taken about a 1,000 words and some hard science like physics to explain. 😉
Some of the illustrations are photographs and others are drawings. The mix is a nice change from other books I have seen. These sections are pretty short and then the author gets right into the projects.
I am not a big fan of wire jewelry for myself because of metal allergies, but I have to admit being tempted by some of the lovely shapes. the very first project, the Red Bone Necklace (pg.18), has a great clasp and I like the beads. The Silver & Moonstone Drops (earrings, pg.20) are beautiful and delicate. They would be great with a creamy summer dress. The Asymmetrical Amethyst Necklace (pg.74) reminds me of my aunt. I think she would like it very much. I also like the Star Swirl Earrings (pg.80). They are cheerful and happy. Who can’t like purple wire?
There are a wide variety of designs, shapes and different jewelry in the book. Some have a lot of wirework. Other projects have wire only to hold the piece together. The author also uses different colors of beads and wire, which adds to the variety of projects.
There is an index (YAY!), a list of designers and more about them as well as a wire gauge chart.
Weeks Ringle wrote “Experiment. Work with small prototypes that are a minimal investment of time and money – don’t get overwhelmed the thought of a big project. Experiment with different types of stitching, mix genres of fabric, play with unlikely color combinations, make sample pieces that are entirely unlike anything you’ve ever made before[.]”
My mantra is “there is always more fabric”. And there is. Really. Trust me on this one.
I like to say that there is always more fabric, because I want to remember it myself and also to remind my students that if they screw something up that it isn’t the end of the world. There is more fabric.
Why not try embroidery?
Why not try thread painting?
Why not try fusing? Or curved piecing? or taking a Craftsy class? Why not?
While I don’t always want to do something, because the technique is messy and I don’t know it well enough to contain the messiness, I have found ways around that ‘phobia.’ I take classes. I have to say that I have been most inspired when I have taken a random class. Sometimes I’ll take classes, because a friend wants someone to go with; sometimes I’ll take a class, because the time is convenient. I have found so much inspiration in these happy accidents.
As Weeks says, work small. Remember the journal quilts? You can embroider a whole quilt in a couple of evenings, if the quilt is 8.5″x 11″. I also like to try new materials and techniques on ATCs (2.5″x3.5″) works of art.
You don’t have to leave your family or pets and quit your job to experiment. Experimentation can be as simple as adding a new color to your palette, trying a new shape in a block, follow a tutorial for putting in a zipper or a new technique for making Flying Geese for Triangle Squares. A lot of experimentation doesn’t come out exactly as planned. These experiments can become bags or donation quilts or pet beds or the most amazing start to something wonderful. There is usually no waste, but the learning process is very important. Failure is part of the learning process.
Just try.
Just experiment.
*No copyright claimed on Modern Quilt Studio image. thanks to Bill Kerr and Weeks Ringle for allowing me to use it. See the original blog post on the Craft Nectar blog.
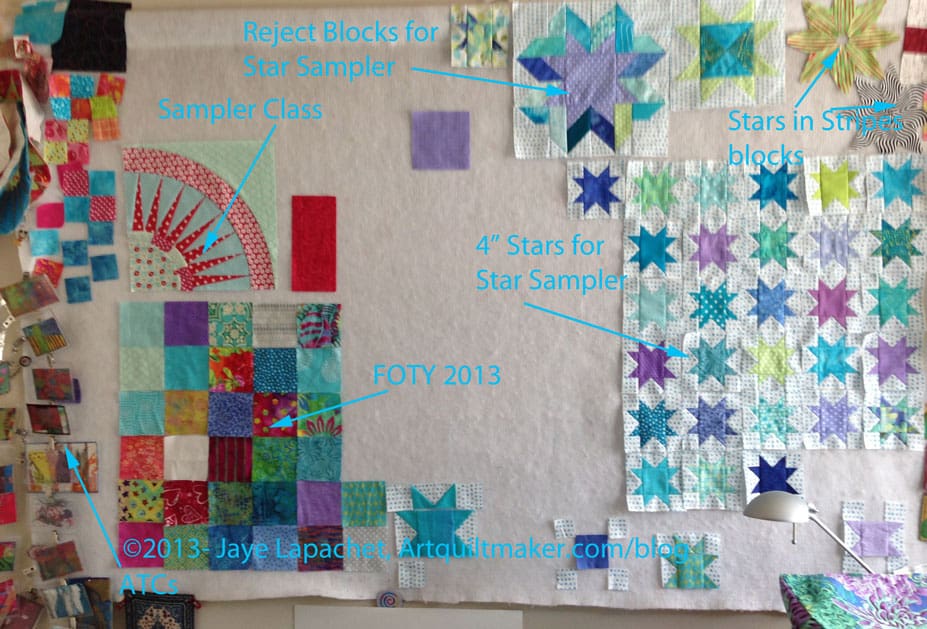
Kathleen asked in a recent post what was on everyone’s design wall. Here is what is on mine:
Design Wall #1Design Wall #2
What is on yours? Post a link to your blog, (Flickr stream, FB page, Picasa, Shutterfly), etc in the comments or in the comments in Kathleen’s post. Let’s see your creativity in action.
Design Wall #1 annotated
Here is the explanation of what is going on on my ‘working’ design wall. It is working, because it is right in front of my sewing machine and I can grab things off of it.
We are midway through the foundation piecing class. This is a long tutorial, but there are a lot of steps and I want all of the parts to be clear. This would be a great tutorial for a video, but A) I don’t have a crew and B) I don’t do video.
This segment discusses more foundation piecing. In order to get to this point, you should have completed parts 1 and 2. All of the supplies are listed in Part 1
Remember our goal:
NY Compass Outline
Next, we need to foundation piece the small strip called Section D.
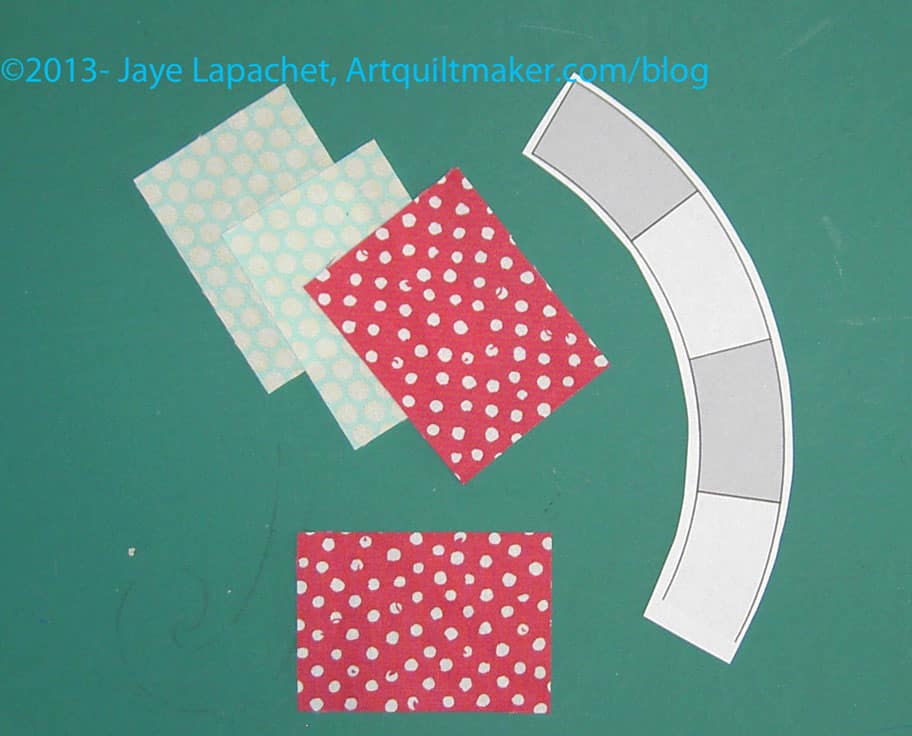
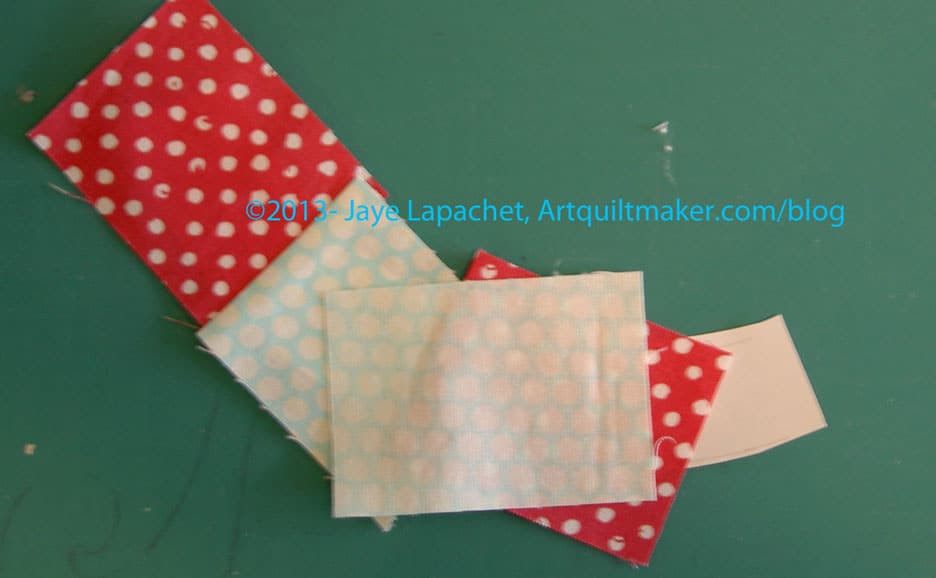
Cut fabric4 Pieces of fabric
Cut 4 pieces of fabric that coordinate with the fabrics of your block. The pieces should be about 2.5″x 1.75″, which is generous. You may be able to use scraps for these pieces. (Please ignore the messy cutting table)
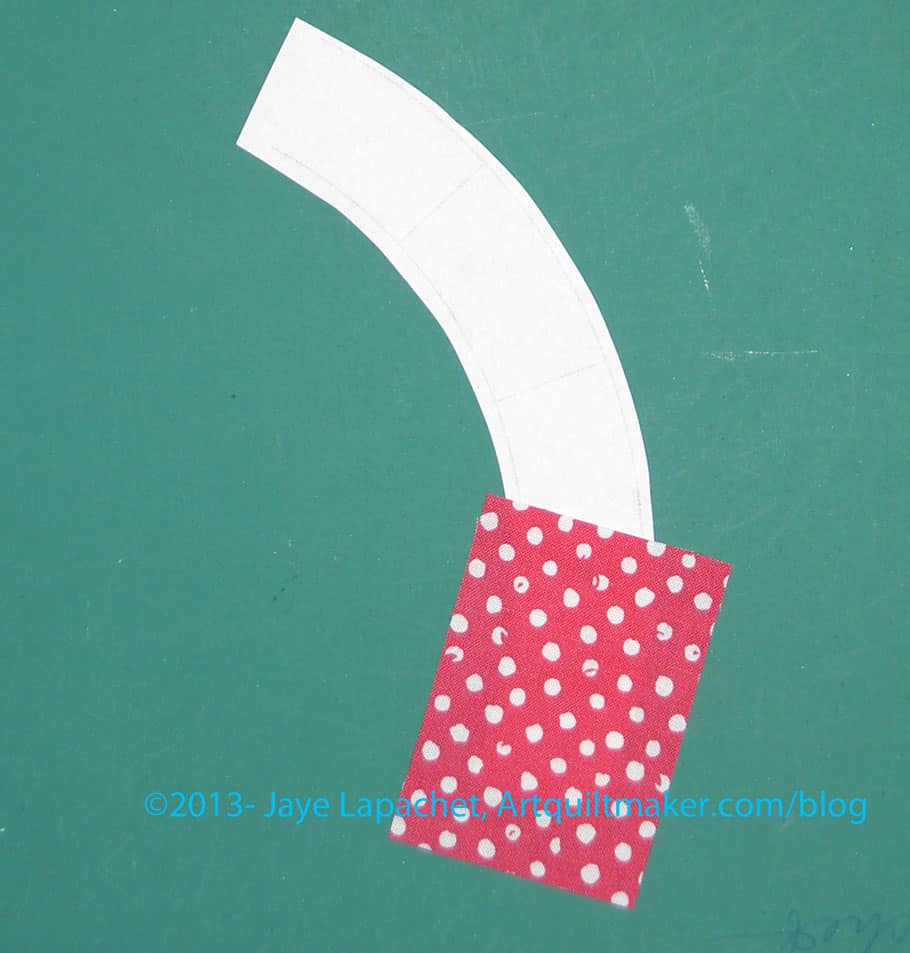
Place fabric on pattern
As you did in Part 2, you will work on placing 2 fabrics on the line between D1 & D2 with about a quarter inch hanging over into D2 as a seam allowance. Note the printed part of the pattern (the lines on which you sew) are face down for this step.
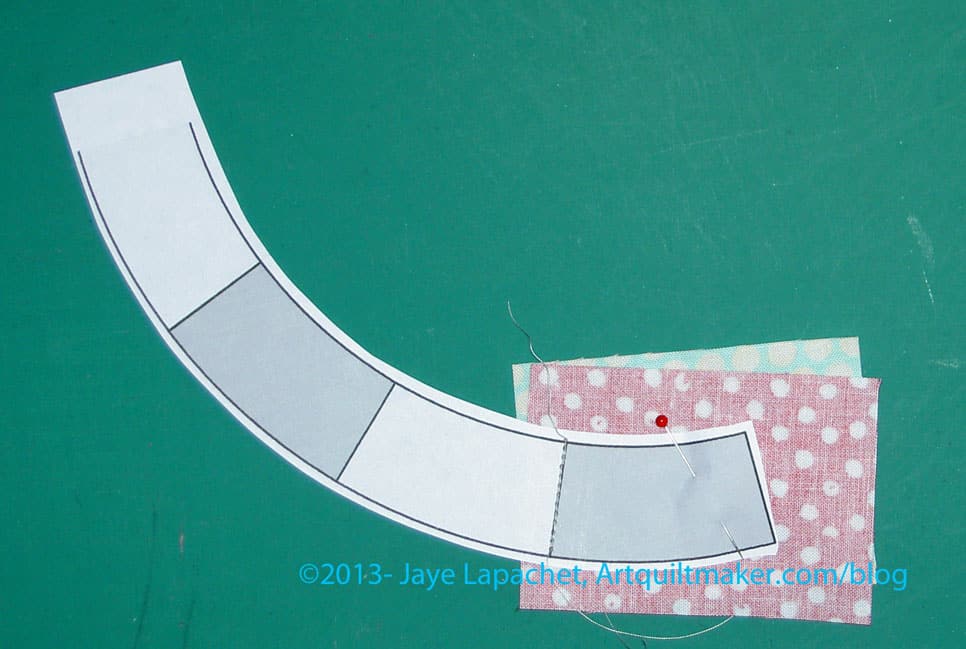
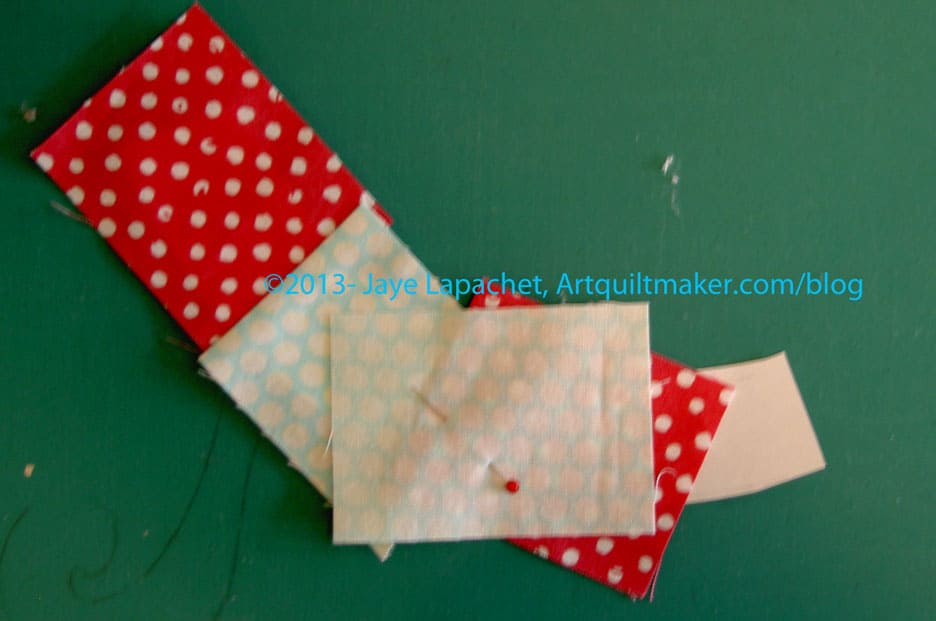
Pin fabric
I like to pin the first piece of fabric to my pattern. It helps keep the fabric from shifting as I work on the second piece of fabric. Note the printed part of the pattern (the lines on which you sew) are face up for this step.
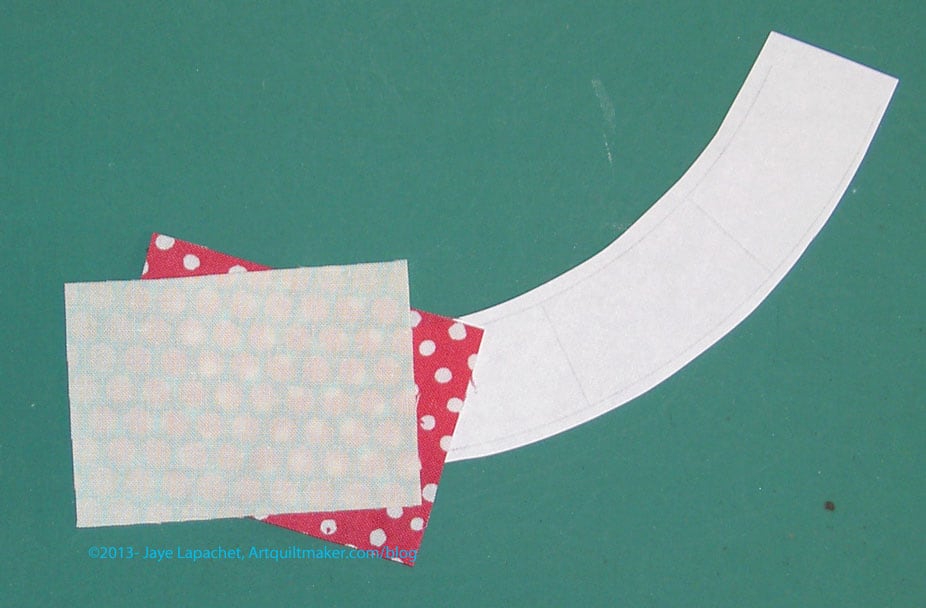
Position 2d piece of fabric
Flip Section D back over and position the second piece of fabric over the first.
Ready to Sew
When you have both of your pieces placed like you like them, pin in place. I like to use thin pins. Your piece should now look like the above photo.
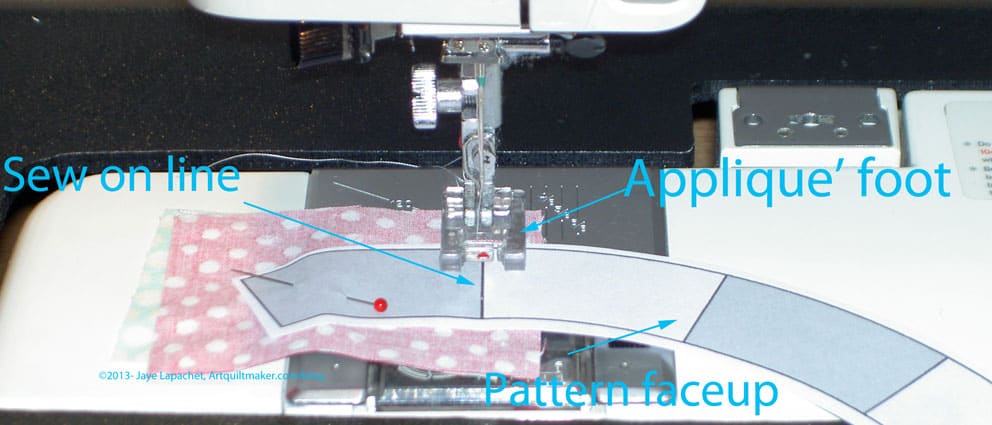
Sew on lineSew on the line (#2)
With the applique’ foot on your machine. Sew on the line between D1 & D2. Do not cross the perpendicular line at the top or bottom. Back stitch one stitch at the beginning and the end.
Section D sewn
Once you have sewn on the line, your piece should look like the above photo.
Press first sewn pieces
Open up both pieces and make sure they cover D1 & D2. Once you are convinced that you have covered both D1 & D2 with your fabric and there is a 1/4″ seam allowance, press your piece. Press with the pattern on top. Note the pattern is face up and you can see the sewing lines. (Nota bene: if you have taped your pattern, use a press cloth so that you do not get melted tape on your iron)
Sewn, pressed Section D back
Flip your Section D over again, so you are ready to trim.
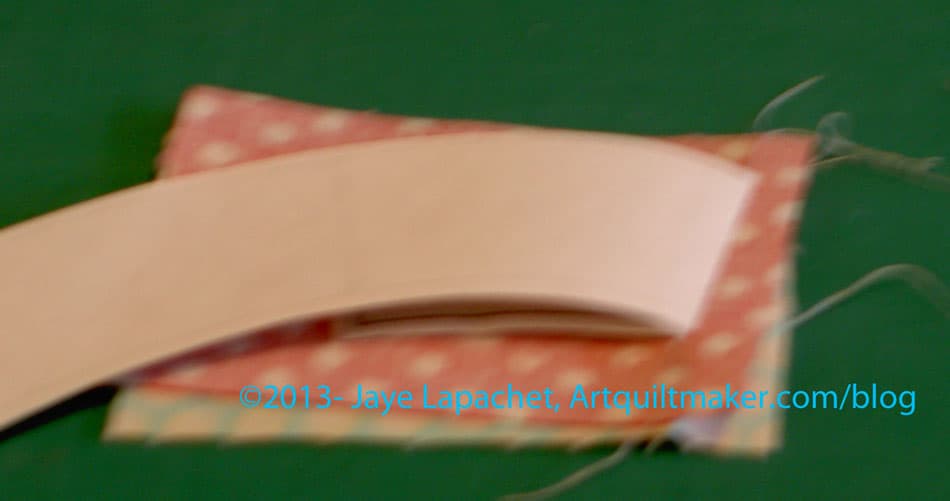
Ready to trim
Lay your pattern, with sewn fabric, pattern side up (fabric down) on your cutting mat. The inside part of the curve will be facing your body. You may want to flip Section D around if you are left handed.
Fold the longer piece of the pattern over to the left using the seam line as the fold line. This will expose the fabric that will be your seam allowance.
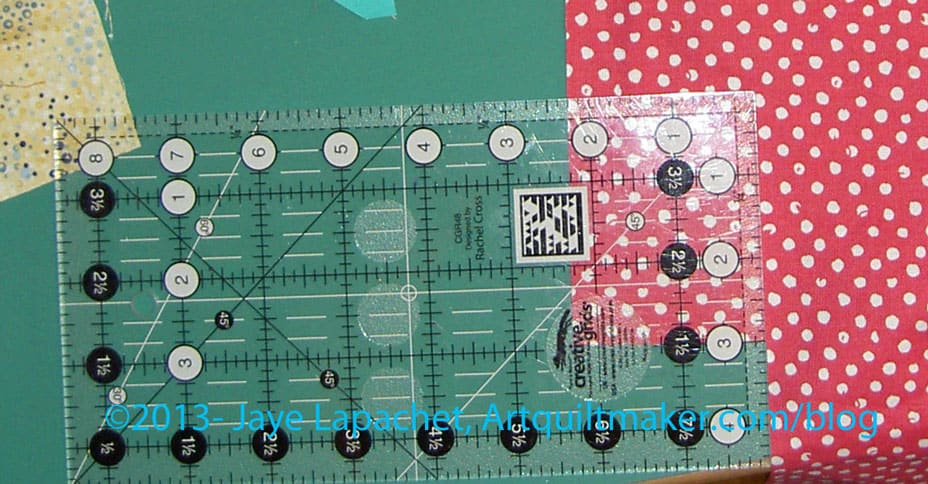
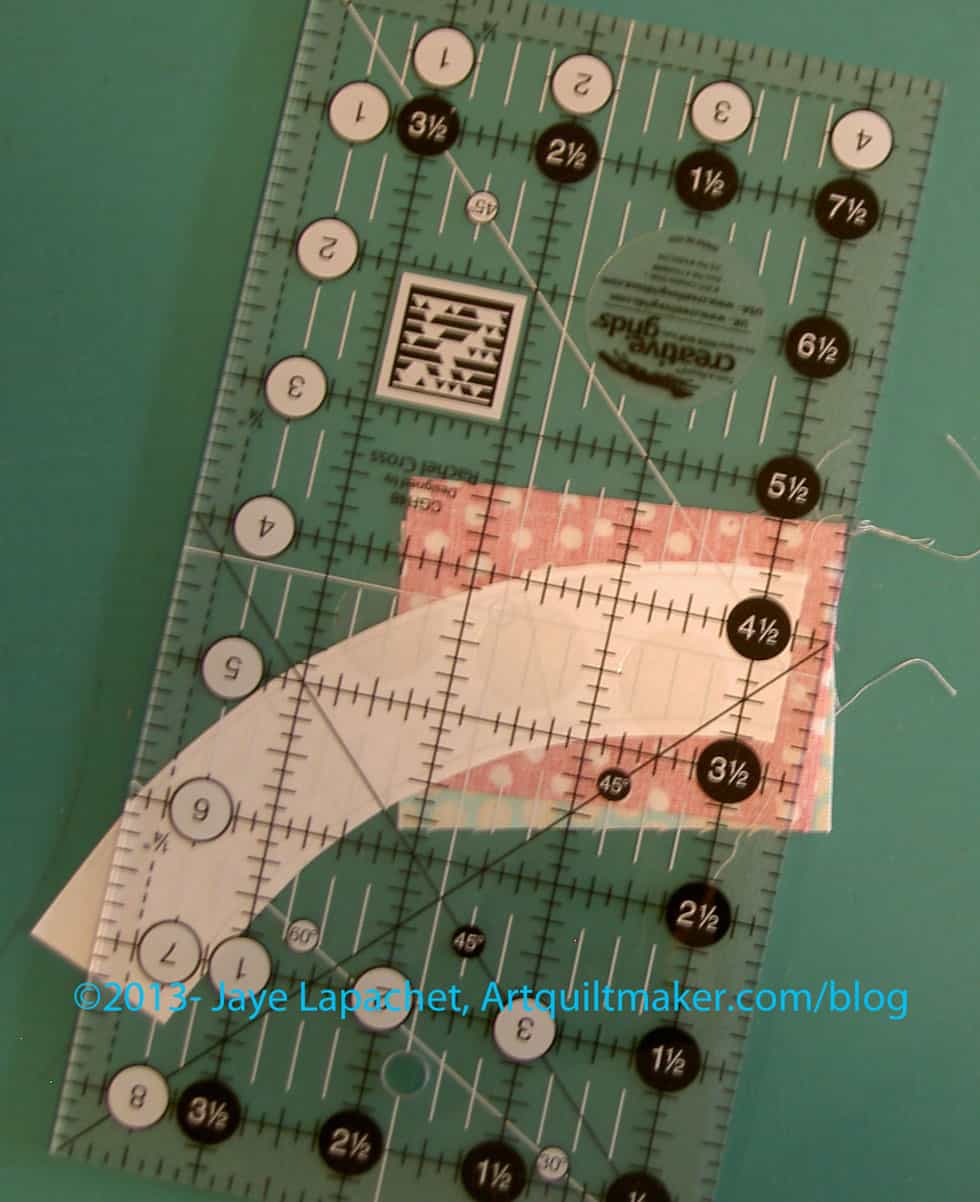
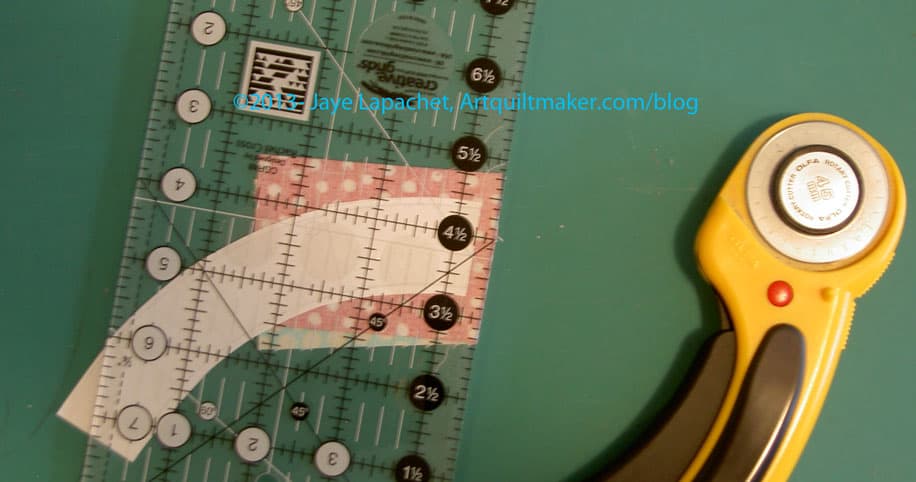
Place ruler on sewn line
Line up your ruler’s 1/4″ mark on the seam/fold line and trim your seam allowance to 1/4″.
TrimTrimmed
Trim seam allowance to 1/4″.
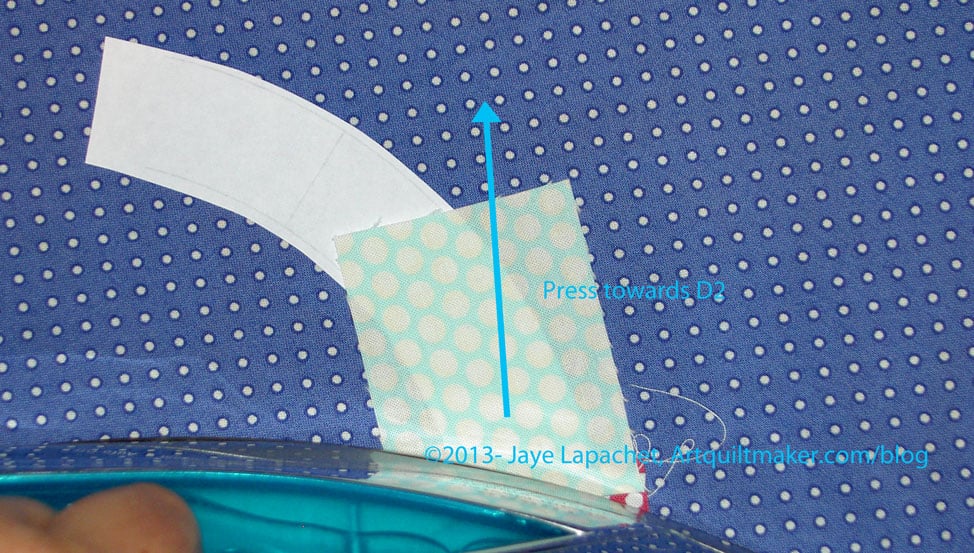
Ready to press pieces into place
Go back to the ironing board and position your piece so the fabric is up, pattern side down and smooth the fabric towards D2, lightly finger pressing.
Press towards D2Press towards D2
Take the piece to the iron and press carefully towards D2.
Place D3 fabric
Place your next fabric with the longer part towards D2 and the future seam allowance closer to D3. Hold the whole piece up to the light to make sure your placement is correct.
Place D3 fabric in place
Pin in place.
Get ready to sew on the line between D2 & D3.
Sewn D3
Once sewn, your piece should look like the photo above.
Check to make sure fabric covers D3
Check to make sure your fabric covers pattern section D3. You do this by folding the fabric over and looking to see that you have about 1/4″ on all sides.
Pattern side up
Now, get ready to trim. Put your piece on the cutting mat pattern side up.
Folder pattern back
Fold your pattern to the left again, like you did before.
Ready to trimTrimmed
Line up your ruler’s 1/4″ mark on the seam/fold line and trim your seam allowance to 1/4″.
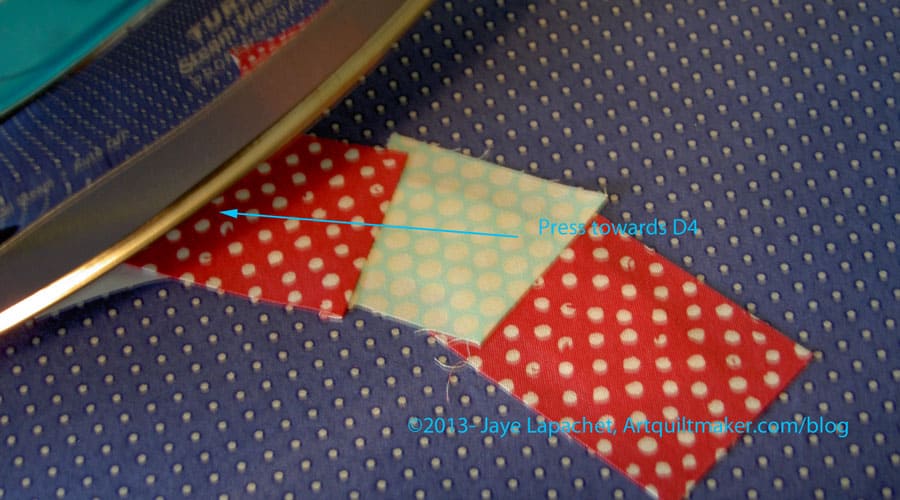
Avoid the bump
See that bump in the photo above? You do not want that bump to show once you have pieced D4 on to the parts of Section D you have already pieced. Press again, this time towards D4. Avoid the bump by pressing!
Press towards D4
Press towards D4. No ironing!
We are heading to the home stretch!
Position D5
Position your last piece as you have done before. It is going to look at little weird and out of alignment, because you are working with a curve. Remember to position the fabric so it covers D5 plus 1/4″ seam allowance. Pay no attention to the edges of the other pieces, such as D4, that you have already sewn.
Check placement
It is easier for me to see whether or not piece D5 was in the right position by pinning it. Note, I would pin it on the pattern side to sew, because then I can see where the pin is in relation to where my sewing machine foot and needle are. the pin in the photo is temporary.
Sewn D5
Once you have the placement finalized, go ahead and sew.
Fold back pattern and prepare to trim seam allowanceAlign ruler for 1/4″ seam allowance
Now you have to fold back the pattern one last time and prepare to trim the seam allowance.
D5 trimmed!
Trim!
Section D Complete!
Now your piece is done. Fold back the D5 fabric and press. Place your ruler on the lines at the end of the pattern and trim a 1/4″ seam allowance. I know you can do this without photos.
Now you have to trim the curved parts of Section D
Untrimmed Section D
It is too difficult to sew the untrimmed Section D, so you will have to trim.
Dots mark 1/4″
To trim, mark 1/4″ away from the dark line. The dots in the photo above mark 1/4″. I have trimmed the straight ends with a rotary cutter and I am ready to play “dot to dot” with my scissors. I am going to cut from dot to dot to create a 1/4″ seam allowance.
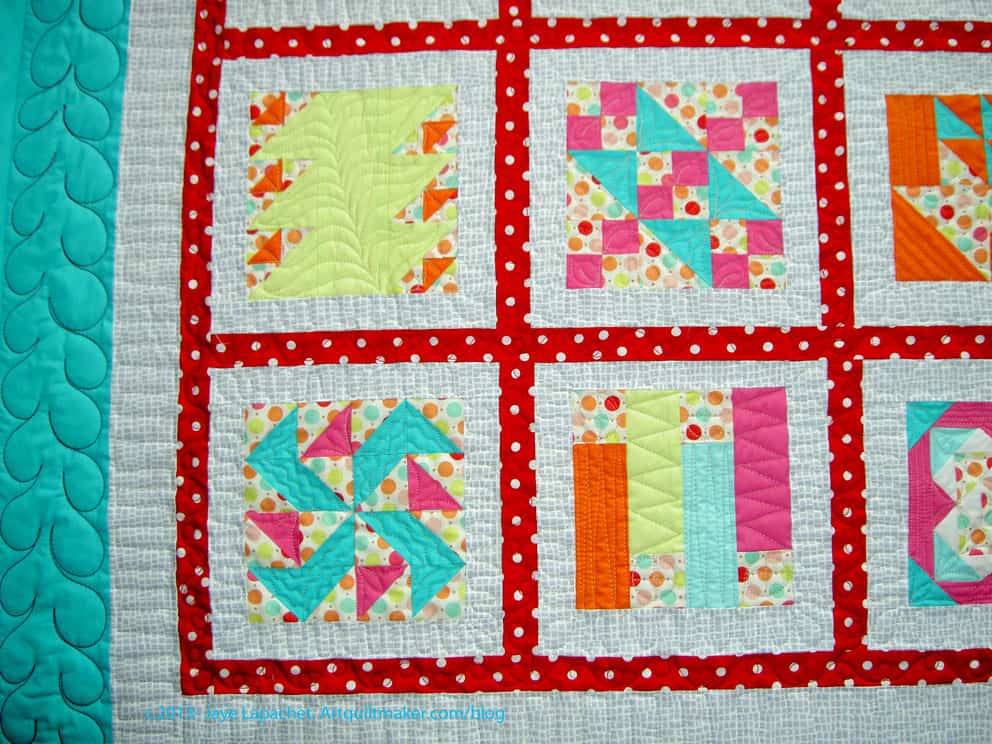
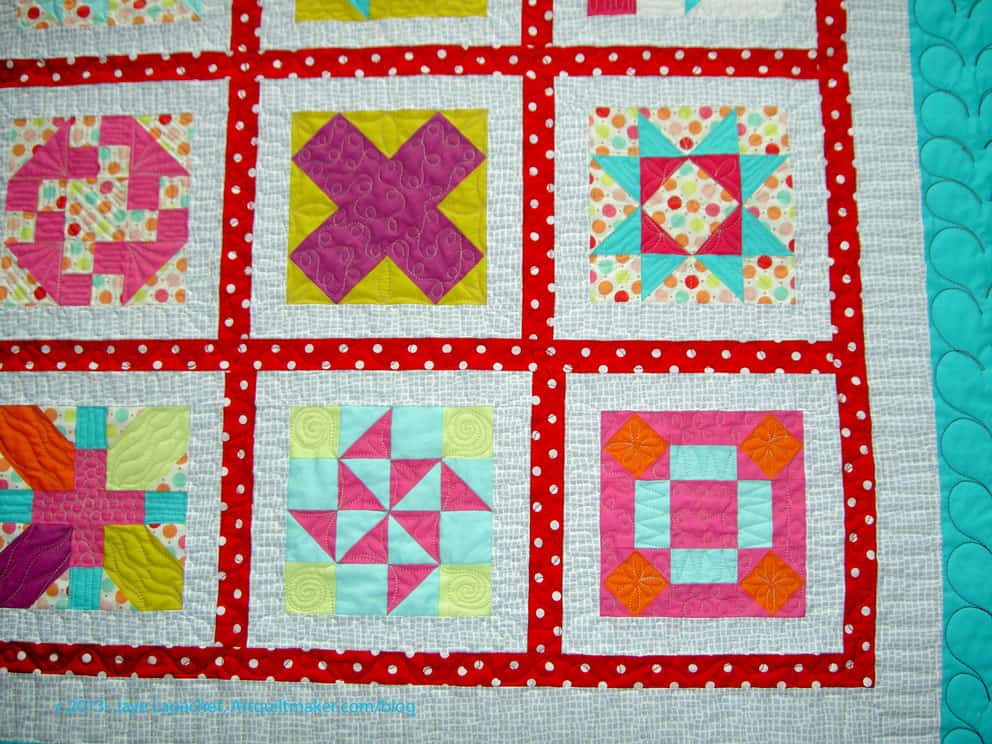
The A-B-C Challenge is finished. I hope the others in the group will finish theirs so we can enter the County Fair as a group. It was fun to do that last year.
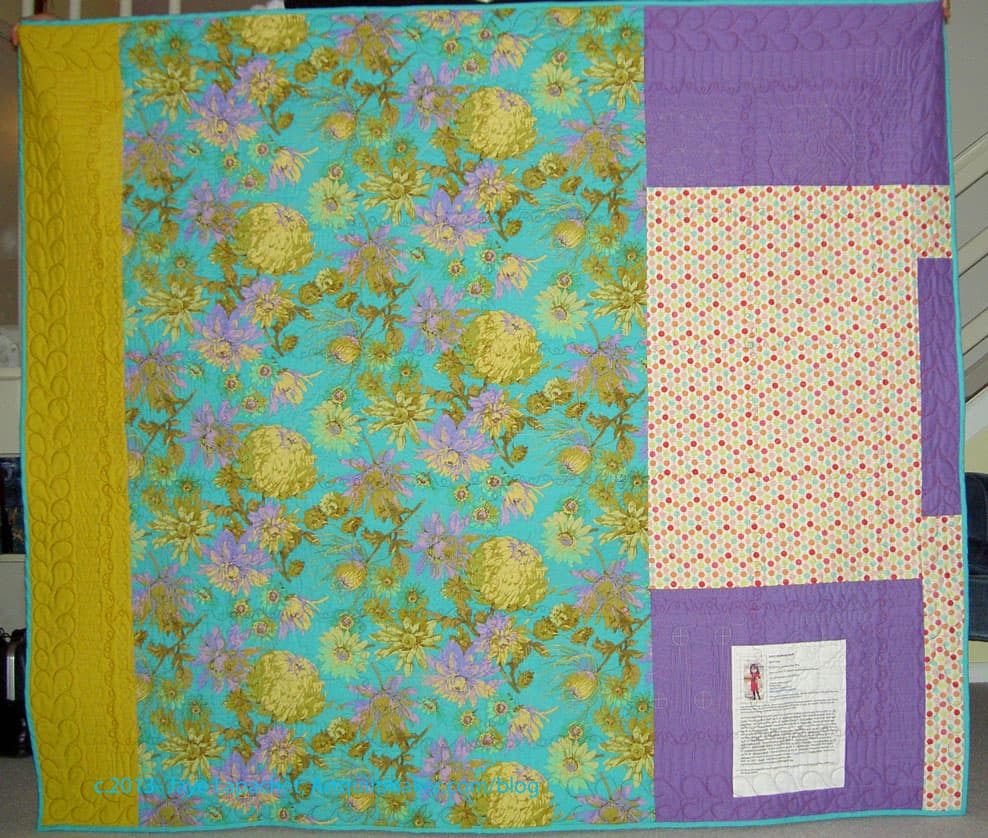
The quilting is magnificent, though I have to say using the Art Gallery Fabric as binding was not magnificent. It is very fine fabric, which I think is why there was a lot of pulling as I stitched the binding down to the back. I found it was very hard to hide the stitches. I love Art Gallery Fabrics, because they are so soft and fine, but will have to remember not to use it for binding.
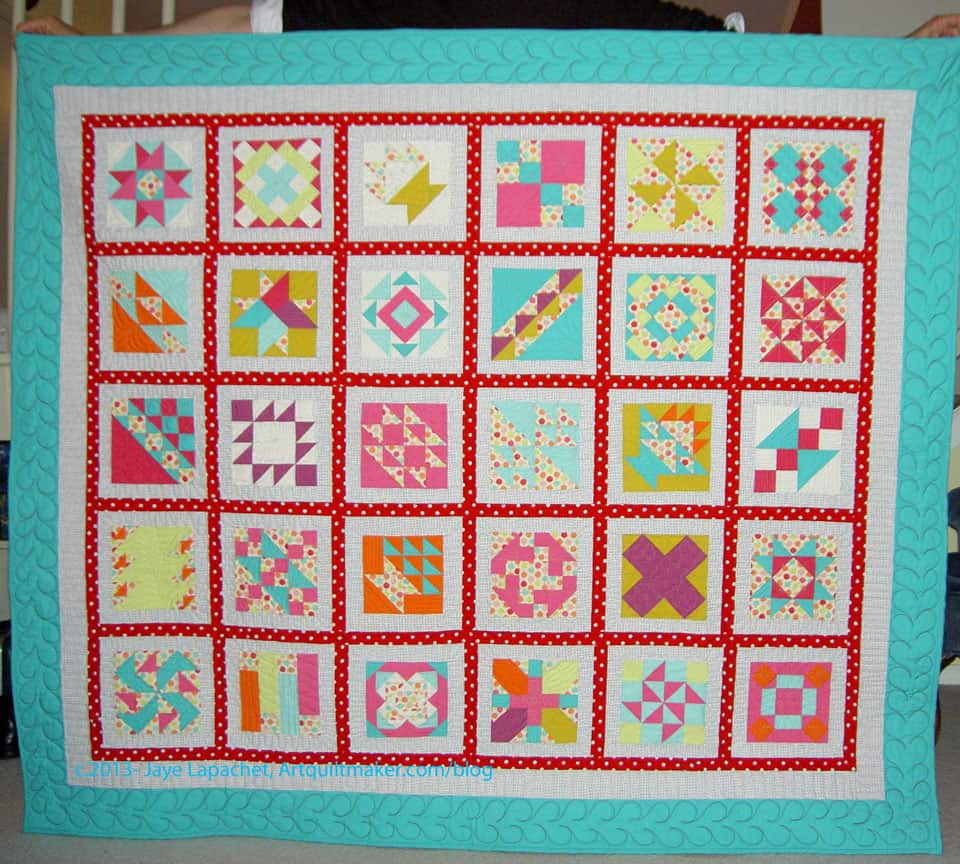
A-B-C Challenge: Rambler block
The quilting is extremely magnificent. I was thrilled when I got the quilt back from my quilter. She has had a tough time in the past year or so and when I saw this quilt, I realized that she was back. I have to show you a few details of quilt’s fabulosity.
I wasn’t sure about the thread when I saw the quilted quilt. I don’t like beige, remember?After looking at this quilt for awhile, I think it works. It doesn’t take away anything yet the viewer can see the quilting if s/he walks up and looks closely.
You have to click on the blocks to see the awesomeness.
A-B-C challenge: Lincoln
Lincoln turned from kind of pale, restful, background block into a ‘reward block’. That isn’t a real term; I just made it up. Remember how I talked about quilts that reward you if you look closer? Well, this block is completely like that. It is a nice block with which you could do some great things if you pieced a lot of them. In this quilt, it is the reward block. If you look at it closely you see the really great quilting that my quilter did.
See those great leaves?
The spirals? Sigh. I am over the moon with the quilting of this quilt. As you can see, this is much more than a drive by “Hey, I’m done! See you later post”
A-B-C Challenge
I decided to take photos of the various corners and sections of the quilt so you see, more closely, how nicely these blocks play together. I am really glad I used a limited palette.
A-B-C ChallengeA-B-C ChallengeA-B-C ChallengeA-B-C ChallengeA-B-C challenge: Japanese X block
And I have included a few more blocks for their detail
A-B-C challenge: Eva’s DelightA-B-C Challenge Back
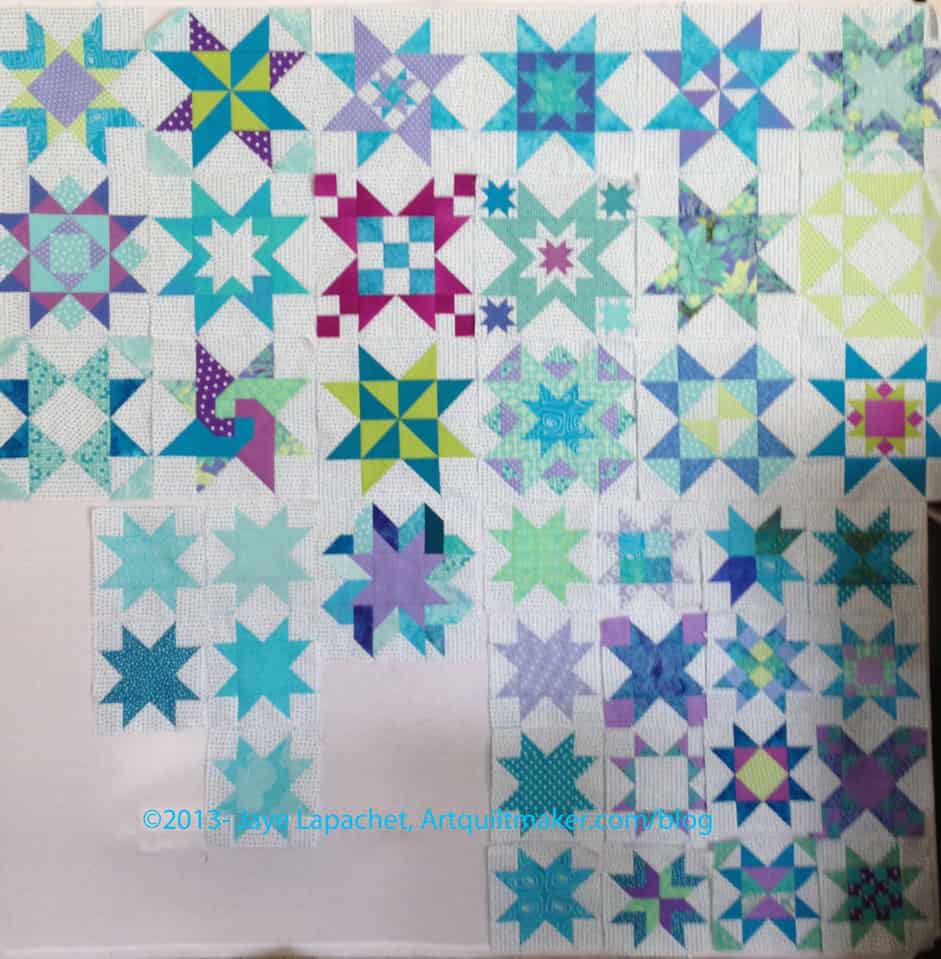
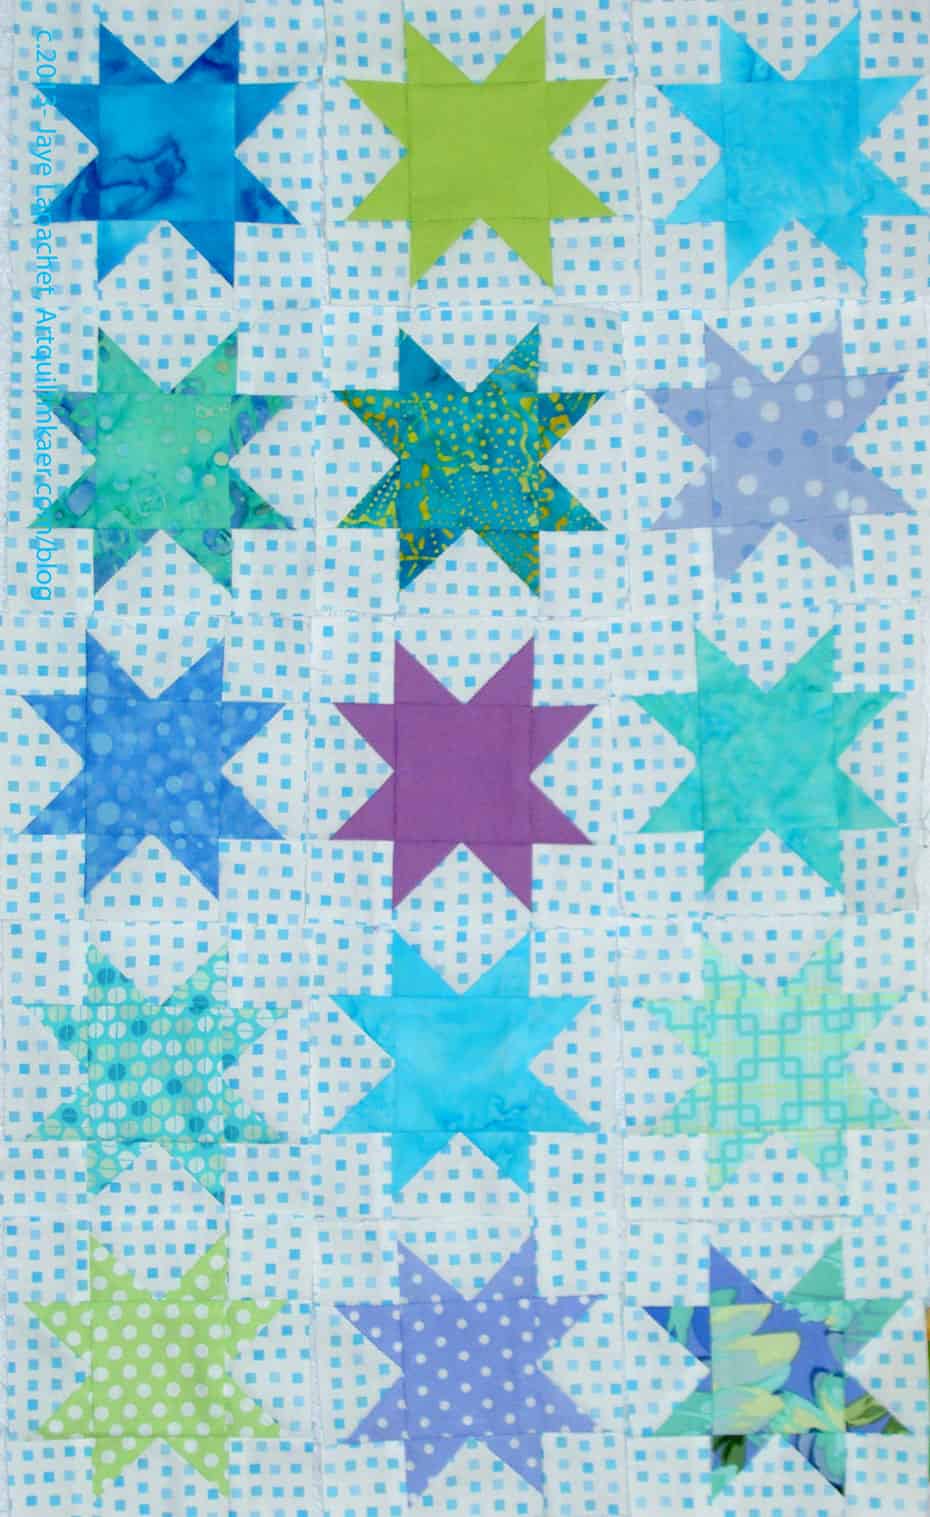
Here are my little group of 4″ stars. This group is not growing as fast as I would like it to grow, but they all look great. I am very pleased with the way they look together. Even the ones that are running towards red-violet add a spark to the group.
There are two things annoying about these stars:
There are not enough of them and they are not reproducing fast enough. Have I told you I need 89 of them? No? I need 89. I am not even a quarter of the way there.
I have a nice little violet star on my design wall half sewed. Why half sewed? I lost 2 of the Flying Geese I need to finish this one star. They HAVE to be around here somewhere. I even cleaned up my cutting table. No luck. I can make more. I probably have enough fabric, but really. To where could 2 Flying Geese have flown?