Books & Printed Materials
I received 4 books recently from Lark. Hey! Thanks, Lark! I don’t have time to do full on reviews this time, but here are some mentions of 3 of them:
Dimensional Bead Embroidery by Jamie Cloud Eakin (hardcover): some really nice pieces in the large gallery; beading techniques you could use for embroidery on a quilt
Color, Texture & Casting by Carles Codina (paperback): very modern looking layout, great photos; shapes within photos that could be useful for quilting design inspiration.
Rachel Nelson-Smith’s Bead Riffs (hardcover): lots and lots of encrusted seed bead pieces, Billie’s Bounce looks like it could be a very cool Christmas garland.
The Quilters Strip Ticket that TFQ sent me some time ago came in handy the other day when I was making the binding for the Food Quilt. The number I came up with for the length needed for the binding was right on the chart! Often the number I have is different and I have to figure it out anyway, but this time it was there. I was pretty excited.
Tools & Supplies
I tried out the True Grips (remember the rant?), which I bought from the Intrepid Thread, and they are awesome. I put them on some of the specialty rulers I am working with at the moment and those rulers don’t slide a bit. I think I’ll have to buy more.
I got a bug in my ear to try a binding tool to make the ends of my bindings meet perfectly. I went and bought the Fons & Porter version at Joann, but also would like to try the Wendt version (Follow the link and scroll down a bit. If your LQS doesn’t have it and can’t get it for you, Joyce will) that Joyce of Quilting Adventures mentioned to me. I was amazed at how well it worked. It is confusing and the directions are complete, but could uses a few more pictures. If you are a member of QNNTV, there might be some videos that you can watch, too.
I was able to finish the ends of Pavers and Stars for San Bruno #2 really nicely. Much better than the big end lumps of the past. I am really pleased with how the ends came out. Now those two quilts are ready to have the binding hand stitched down. (and then there will be 24!)
Patterns & Inspiration
Oliver & S has their first digital pattern out. it is called Puppet Show. It is a basic dress pattern for little girls. It looks nothing like a puppet show, but I thought I’d tell you. 😉
Media
Mark and Jodie were at Keepsake Quilting (also taken over by New Track Media!) and the KQ Kids posted about their visit. Some of the outtake photos were funny.
Did you like Mary Engelbreit’s Home Companion? Well, go over to their blog and tell them so. They are thinking of bringing it back, but you need to put your money where your mouth is.
I am finally catching up with Creative Mojo. I have about 4 episodes to which to listen, so I listened to Creative Mojo 9-13-2011 the other day and it was a fabulous episode. It one that is going in the favorites pile. Harriet and Carrie Hargrave and Dr. Barton Goldsmith were on the show and those segments were the best I have heard in a long time. Harriet and Carrie were talking about teaching quiltmaking in conjunction with their Quilter’s Academy, Junior Year coming out soon. Harriet said that you can’t learn how to quilt by taking a project class. I think that is true, which is one of the reasons I offered to teach the sampler class. Before anyone has a heart attack and starts yelling at me, I do think that project classes can get people started and keep people interested. However, I do think that to progress, you need to know the basics of good technique. Dr. Barton Goldsmith was talking about self esteem and he said a lot of things that I say to myself (that came from my mother, probably) such as “don’t should on yourself”. He made a lot of sense and I have added his book, 100 Ways to Boost Your Self Confidence, to my to-read list.
On another Creative Mojo Show, Mark talked with the editor of Cloth Paper Scissors about their new iPad emag called Collage in Color. It looks like a free app with the short preview version of the magazine, if you have an iPad. The individual issues are $9.95. There is also a windows version you can access from the Interweave website. You only need to be connected to the Internet to download the magazine. Once you download it, the videos, etc all work without a connection. Obviously, if you want to to go an external website, you will need to be connected. I haven’t tried it yet, but I plan on downloading it. It sounds like a cool way of looking at media. Stay tuned; I’ll let you know.
I wanted to remind you about Hearts for Christchurch. Evie is still collecting hearts and my friend, Faye, who lives about 4 hours away from Christchurch tells me that they are having magnitude 4+ earthquakes every day and may not be able to rebuild the downtown because of the instability. Students have dropped out of Canterbury University and gone to a different school and people are moving away.
I have to admit that I like pretty, cheerful art. I also like pushing the boundaries, which isn’t always pretty. This book make stitchery (do they call it that anymore??) cool, but not always pretty.
This book arrived on my doorstep from Lark (Hey! Thanks, Lark!) at an interesting time, because I was stitching madly on my Kissy Fish project. Compared to the work in this book, my work is extremely simple.
This book has a lot of intimate imagery. There are images of people in bed together, faces stare out at you imploringly from the pages,nakedness, roadkill and the jostling crowds of people that make up the daily life of those of who take public transportation. there are flaming eye sockets (pg.124), plenty of skulls, and sex. One of the artists says “The things that interest me are shock, sex, violence, love, laughter, absurdity, beauty, and contrasts” (pg.116). This quote describes the book pretty well. These pieces are more like paintings than the kind of embroidery to which I am accustomed.
Vintage linens are used in various pieces. Pieces are also mixed with non-textile elements including china and metal. All different types of stitching are used as well: machine, hand, variety of threads and stitches, etc.
I think of embroidery and stitchery as crafts where women dominate. There are a large number of men represented in this book.
Some of my favorite pieces are the stamps (pg.46-47, the image of the carafe and cup (pg.27), London Calling Paris (pg.104) and Driving (pg.158). The pieces and the imagery are the stars of this book. The text was minimal, both in amount and layout. It was not the star of the show and that allowed me to immerse myself in the images. The photography is really good in this book. I was able to see the detail of the stitching in most of the pieces.
Lark is really putting themselves out there by producing catalogs of different types of crafts. I really appreciate the risk they are taking and suggest that you support their efforts.
Thank you for taking the time to quilt my quilt. I really appreciate your assistance, your artistry and your attention to detail.
I want to support your small business, which is one reason I come to you. I want you to be successful and I want to be able to recommend you to my friends. I was a small business owner in the not-too-distant-past, so I know it is hard work and can be thankless at times.
I have very high standards, which I will warn you about in advance. I have even higher standards for charity quilts. I do my best work on these quilts, so the recipients know I care. I expect the same from you. If you feel anxious about meeting those standards, please send me away with my quilt. I want my quilt done well and I don’t want to increase your anxiety level. I will respect you for being honest.
Please remember that this is a collaborative effort and what I say to you in our initial meeting is pertinent to how I want my quilt quilted. I have worked hard on the piecing and want your quilting to fit well with my piecing design. Please do not overshadow my piecing with inappropriate quilting. Please do not try to sell me on your designs. Listen to what I want and tell me if you can’t, or don’t want, to do what I want. My quilt is not your playground to show off the quilting that would be much better suited for a whole cloth quilt.
I will tell you that my backs are always pieced and I don’t always press the seams open, that my quilts are almost never square (though not terribly off), and that I use fusible and raw edge applique’. If you can’t, or don’t want to, deal with any of these peculiarities, please tell me upfront. I’d rather know and find someone else. I will respect you for being honest.
Please act professionally. Do not whine, after the fact, about my unsquare quilts, pieced backs or fusible applique’. If you whine afterwards, I will suspect you are blaming me for your own poor longarming skills and I am not interested in excuses. If you have, or think you might have, a problem with my quilt, please don’t take it on in the first place. I will respect you for being honest.
Please be generous about your competitors. Making snide comments about them does not endear me to you or make me loyal.
Please make sure your machine is in good working order. Please make sure you know how to load the back tightly so there are no pleats. Please clean the oil up so it doesn’t stain my quilt. If you do get a pleat or have a problem, I expect you to rip out the quilting and do it over AND not charge me for the time. Your mistake = your problem.
Please have the quilt done when you say it will be done. If it isn’t done, please call me and we can work out a new time to get the quilt. If I arrive and the quilt is not done and you are not working on it, I won’t be happy. Please be realistic about your commitments. Can you really finish my 5 quilts this week? REALLY?
Finally, if someone else picks up my quilts for me, don’t tell them that you screwed up and are glad they picked up the quilts instead of me since you knew I would be angry. If you think I will be mad, fix the problem. I have a phone and can call you. I can be angry over the phone.
If you have made blocks or a quilt from these patterns, please post a link in the comments section of the relevant block or on the AQ Block-a-Long Flickr group. I would love to see what you have made.
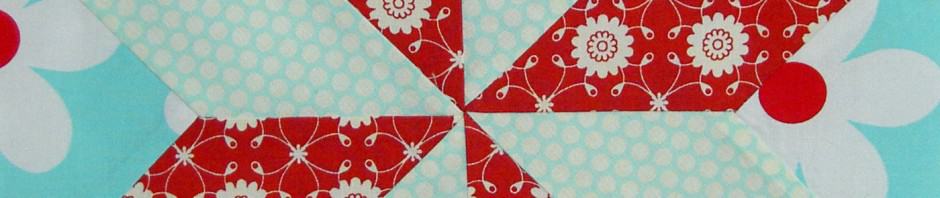
This is a tutorial on making a LeMoyne Star. This block is also called an Eight Pointed Star. This is one of the ways that I make it. There are many methods and I encourage you to try different techniques.
Alex Anderson has a great tutorial on one of the Quilt Show episodes on making a Split LeMoyne Star.
Before you do anything else, print the rotary cutting instructions below (first item under supplies). All the sizes, etc are there.
These directions use a quarter inch seam allowance.
You will be creating Y seams.
Chain piecing is not part of this tutorial.
Respect the bias.
Do not sew into the seam allowance.
Cutting
Line Up Ruler to Cut 1 Side of Diamond
Cut a 3″x23″ strips. That should be long enough for 4 diamonds (parallelograms). Cutting a 3″ strip across the width of a half yard of fabric will generate a strip that is long enough. You will need two and using 2 different fabrics looks good.
As shown (left), line your ruler up so the 45 degree angle on your ruler is along the bottom of the strip.The side of the ruler should be lined up right in the corner of your strip.
The idea is to cut off the end of the strip, so you have the correct angle of one pointy end of the diamond. I did try my diamond ruler, but none of the lines were quite the right size, so I couldn’t use it for this particular block.
Line Up Rulers to Cut the Second End
I used the two rulers to make sure that the diamond were accurate. The first ruler, on the left, should be even with the far left [soon to be] diamond point so that it would measure 4.25″ along the bottom edge. I used that measurement to line up the 45 degree angle of the second ruler so I could cut the angle in the right place. I butted the second ruler up against the first ruler (carefully) so everything was in alignment. The second ruler (on the right) must have a 45 degree angle that intersects with a corner or this trick won’t work.
I removed the left ruler before I started cutting, as it was easier to cut with just one ruler on the mat. I was careful not to jostle the ruler in the 45 degree angle position. Line your ruler up exactly as shown in the photo. You don’t have to have exactly the rulers I have. You can use any rulers with the correct lines.
Cut 2d End of Diamond
I found that the method really does work. You will need to repeat the step above 8 times to get 8 diamonds. After the first diamond, it will be easier, since you can use the 2d cut for each diamond as the first cut for the next diamond.
Aside from having to watch out for ruler jostling, I was really pleased with how easy this was and well these diamonds came out. Don’t get me wrong, I wouldn’t have wanted to cut the 300+ diamonds for FOTY 2010 using this method, but for a LeMoyne Star, it works very well.
I cut all the diamonds at once from two strips of two different fabrics. My fabrics are:
background: Lil Plain Jane
red diamonds: Moda Bliss #55021
aqua dot diamonds: Moda Bliss #55023
Side Triangles
Cut the squares and triangles according to the cutting directions on the PDF in the supply list. The triangles are quarter square triangles, which means that you cut the triangles so the straight of the grain will be along the hypotenuse (the long side of the traingle).
If you have some reason for not being able to cut the side triangles as shown, be careful sewing the block together and then stay stitch the outside of the block once you are finished.
Pieces cut
Once your pieces are cut, lay them out or adhere them to your design wall, so you know what you have.
Cut Diamond, Face down
I like to keep them where I can see them because it helps me know where I am. As I sew, I put the sewn elements of the block back up on the design wall.
Once you have cut all the diamonds, you will need to mark them. You need to mark 1/4″ away from the seam line, because if you want this block to come out right, you cannot sew into the seam allowance. The biggest rule I have for making the LeMoyne/8 pointed star block is NOT to sew into the seam allowance. There are exceptions, but I am not going into those now.
Put your diamonds face down on a writing surface and prepare to mark. As you can see from the photo, I used my cutting mat as the hard surface. You can use a table or whatever else works for your work area. I used the Sewline pencil to make the marks. Pilot SCUF pens, a mechanical pencil, etc also work.
Get ready to mark the seam allowance on all of your pieces (squares, triangles, diamonds).
Mark with Perfect Piecer
I like using the Perfect Piecer ruler by Jinny Beyer for marking weird angles, because I only have to move the ruler once to mark the ‘corner.’
With the Perfect Piecer (they aren’t giving me free stuff, BTW!), you put the ruler in the ‘corner’ as shown in the photo. Where I have placed the circle is a hole. Note it is a small hole, so a regular No.2 pencil usually won’t work. Stick your Sewline (or other fabric marking implement with a very thin point) in there and make a dot. Voilà!
You will need to use two different parts of
Ruler Angle Does Not Fit Side
the Perfect Piecer ruler to make the marks on all four ‘corners’. There is no angle for the sides of the diamonds, so just use the straight edge (as I describe below). You don’t need to know the angles, if angles make you crazy. Just match up the shape of the ruler with your cut piece.
Use Straight Edge for Marking
You can certainly use any kind of ruler. Take your regular ruler and line up the 1/4″ line with the cut edge. Make a line around where you think the quarter inch would be. Make it longer, so you don’t have to go back and do it over. Move the ruler to the opposite cut edge of the diamond and cross your first line with a new line. It makes an X. I have done this numerous time and there is no problem using an X instead of the Perfect Piecer dot.
Beautiful marks!
In case you were wondering what the marks look like, the photo (red diamond with blue circles, left) shows examples.
The upper left hand mark inside the blue circle is the mark made with a Perfect Piecer and the Sewline pencil.
The lower right hand mark is made using a regular rotary cutting ruler and the Sewline pencil. Either mark works, as I said. You will use these marks to stop and start your seam lines. NO sewing into the seam allowance!
You will need to mark the squares and the triangles, too. You can use the Perfect Piecer to mark those pieces as well.
At this point, you might want to use some Mary Ellen’s Best Press to stiffen your pieces since you will be sewing along a lot of bias edges. You can either spray it on all of your pieces all at once, or as you are getting ready to sew. If you don’t want to use Mary Ellen’s Best Press or spray starch, no problem. Just keep in mind that you are working with bias edges, so work with them carefully. You don’t need to be afraid of bias edges. Just work slowly and carefully. Respect the Bias! 😉
Position Triangle over Diamond
Sew Segments Together
Now you are ready to sew!
First, position one of your side triangles over the diamond as shown, right sides together. You are lining up the diamond with the left non-hypotenuse side of the side triangle.
Line up the marks you have made on the diamond with the marks you made on the triangles.
I used pins, but only stuck them through vertically one time to keep them in place until I got to the sewing machine.
You can give the pieces a little press to stick them together, too, if you want.
Sew from Mark to Mark
Next you sew from mark to mark. Stay out of the seam allowance! You can back stitch, if you want, but stay out of the seam allowance. Start sewing at one mark and stop at the second mark. Easy!
An Aside: You are probably wondering about the lemon fabric. I press fabric on my ironing board and if I am pressing a lot of pieces, then I will put a larger piece of fabric so that I can get more bang for my buck. As I press the smaller pieces the larger piece gets pressed as well.
Press Carefully
You can press now. If you do, press carefully (remember the bias, respect the bias) towards the diamond. If you don’t want to press until later, that is ok, too. I usually create the entire segment (2 diamonds, one triangle) before I press.
Now you have your first piece. YAY!
Not hard or scary, right?
Repeat this step for all of the diamonds that will be in the same position as my aqua with white dot diamonds.
2d Diamond with Pieced
The next step is to sew the second diamond on to the segment (above: aqua with white dot & Lil Plain Jane fabrics) you have just made. You will be doing an inset seam. An inset seam is also called a Y seam. A lot of people hear this and panic. It isn’t difficult, but you can’t chain piece them and you have to pay attention. This method is similar to sewing hexagons together. Y seams really expand your quilt block piecing repertoire.
As you can see I have lined the red diamond up with the segment I sewed and am ready to line up the pieces, pin and sew.
Line Up 2d Diamond & Pin
First, line up the marks on the triangle and the diamond.
I just used vertical pins to make sure that everything was lined up before I sewed. I put a pin in the middle of seam line right before I sewed just to hold everything together.
You will be sewing in two stages. I like to sew the triangle to the second diamond before I sew the two diamonds together.
Sew 2d Diamond
Next, place the group of 3 patches (2 diamonds and a triangle) under the needle, lining up the marks so that the needle misses the seam allowance and goes straight into the first mark.
Sew from mark to mark. The triangle and the second diamond will now be sewed together.
Sew from Top to Middle
Second, line up the new diamond with the diamond you have already sewed to the triangle.
Line Up 2d Diamond & Pin
Match up the marks on the top and sides of the diamond. Right sides should be together.
Put the top of the 2 diamonds into the machine. You will start sewing at the mark, which is 1/4″ in from the top of the diamond. Sew between the two marks, avoiding the seam allowance.
Top View of Sewing Mark to Mark
Sew down to the mark at the bottom of the diamond. If the pressed seam allowance looks like it will go under the needle, move it out of the way with your finger, the tip of some sharp scissors or a stiletto.
Stop at the second mark.
Remove the piece from the machine.
Segment 1 Complete
Once you have sewed the the three patches together, you will have one full segment completed.
Next, press the 3 seam allowances into a swirl. This is similar to what you do with hexagons. As a guide, use the first seam that you pressed after sewing the first diamond to your triangle.
The reason I suggest the ‘Swirl’ is that it reduces bulk later. This particular pressing point isn’t as important in terms of bulk as the center, which has a crazy number of layers, once finished. Consistency is good, though.
Repeat to make four of the above segments.
Sew Quarters into Halves
Segment and SquareSew Square to Segment
Line up the square to the [red] diamond, matching the marks.
Arrange your pieces like I have done.
Line up the marks in the square with the marks on the outside side of the bottom (in the picture it is red) diamond.
Press, if you like. Pin, if you like. Go back to the sewing machine and sew from mark to mark.
Repeat this step for all four segments.
Sew Square to Segment 1
If you just look at the next photo, you might have a heart attack. Please don’t. Add the square is not hard. The key is to NOT sew into the seam allowance.
Two Quarters of the Block
Once you have two segments sewn to two squares, prepare to sew the two quarters together.
An Aside: You can actually sew into the seam allowance on any seam that will end up on the outside of the block. If this thought is going to make your head explode, then just remember my mantra: don’t sew into the seam allowance and you will be fine.
Line up 2 Halves along the Center Diamond
Sew Diamond Only
Sew the [red] diamond to the aqua diamond on the bottom. Stay out of the seam allowance and sew mark to mark.
Seam Line After Sewing Diamonds
After Diamonds are Sewn
It looks weird once you have sewn the diamonds together, but it will work out.
Line up Square
Line up the square with the [aqua] diamond and sew from mark to mark.
You Finished Half of Your LeMoyne Star
Two Halves of Block
Center detail
Finally, we are ready to sew the two halves together. You should have pressed in such a way that you can nestle the diamonds together using your pressed opposing seams.
Match up the marks with pins. I used really thin ones this time. I normally use the kind shown in the center detail photo, but switched to thinner ones as I worked on this step, because my normal pins weren’t giving me the results I needed for this tricky piecing. Note that I don’t pin right in the center. I pin well where I am not going to sew and may put another vertical pin in the center temporarily. There are so many layers in the center that it doesn’t always make sense to pin there. Do what works for you.
Sew Halves Together
Line up your piece carefully.
Hold on to your pinned halves tightly.
Sew over the center only. Start about an inch from one side of the center and stop about an inch after the center.
Sewing only a couple of inches makes it much easier to rip out, which I had to do. You might think that this will be a piece of cake, which it might be for you. It can be tricky also, because of the many layers of fabric that you are sewing through. My sewing machine did not want to go straight over that center section, which is why I had to rip out the first time.
Take the piece out of your machine, open it and see if you were able to match the center.
Once you have the center matched to your satisfaction, sew from the edge of one diamond across the entire center to the edge of the opposite diamond. Remember the mantra? Refrain from sewing into the seam allowance.
Finished and Pressed (full)
Once you have sewn the squares to the last sides of the last diamonds, pressing becomes very important. I have indicated with the circles how your pressing should look. If you need to re-press, spray the piece with water and that will make it easier.
By creating a swirl during the pressing of the center, you will reduce bulk for your quilting step. You will thank yourself if you quilt your own quilts. Your quilter will thank you, if you have someone quilt your quilts.
Finished and Pressed (detail)
Once you have sewn the squares to the last sides of the last diamonds and pressed the piece, you should have a gorgeous block and feel very proud of yourself.
I went to Minnesota for a series of meetings a few weeks ago. I am on an Advisory Board for a company and this is the third year I attended the meetings. It is not as important as a Board of Trustees, but important enough. This will be the last year I attend, and since I have no plans to head back to Minnesota in the near future, I told the organizer I wanted to come a day early and visit quilt shops. She graciously arranged for an extra day at the hotel and found a quiltmaker in the company who was willing to drive me around to quilt shops. Michele, my fabulous ‘driver’ was excellent. She sent me a huge list of quilt shops, mapped out a plan and came to pick me up at an agreed upon time and then drove all over the Twin Cities visiting quilt shops.
Glad Creations
Glad Creations was the first shop we visited. It was a small shop neatly crammed with tons of fabric, books, tools and notions. I bought some Wonder Clips, which I had never seen anywhere before. They also had a large selection of Jo Morton fabric and books, which I had also never seen before. I am not really interested in her fabric or projects, just in her triangle techniques. They had a Sew Day going on upstairs.
Blast from the Past
You are probably wondering why I have a photo of the Glad Creations restroom here? See that wallpaper? That is the exact wallpaper that the kitchen in my childhood home had. The only difference is that this colorway is a little more green. The colorway in our kitchen was more blue.
I posted it to Facebook. My sister screamed 9virtually) and my parents laughed. I didn’t ask, but I wonder if this wallpaper has been here for awhile or if that pattern is still available to hang? Perhaps I should find out and buy some rolls of it and send them to my sister? I wonder if she would scream more? Heh heh.
It could also be used as inspiration for a Kaleidoscope quilt a la Paula Nadelstern.
Glad Creations Classroom
Did I mention that Glad Creations was crammed? It was. They had fabric, notions, tools, books, kits, batting, and samples EVERYWHERE. Everywhere I turned there was another something that was gorgeous. There was lots to see and look at and to give a person inspiration.
I took this photo of the classroom, because you could see at least 3 samples from this little slice of the room. On the right side – just out of the photo was another wall with 4-5 other samples.
Glad Creations Quilt Block 3400 Bloomington Ave. S. Minneapolis, MN 55407. Phone: 612-724-1079. E-Mail: nancy [at] gladcreationsquilts [dot] com
Bear Patch Quilting
Bear Patch Quilting was in a place called White Bear Lake. I wanted to see the white bear, but it wasn’t possible, apparently. Bear Patch Quilting is a large store with a wide variety of everything quilt related. The stock was different than Glad Creations and the lighting was good. There was also a selection of rug hooking materials and several ladies were in the back of the store hooking away. They had lots and lots of 1930s fabrics. I wished, then, that TFQ had an online swatch inventory so I could have picked out some 30s fabrics for her hexagon quilt. I saw a number of embroidery projects and they were more than willing to cut me some FQs. As I result I added a couple of pieces to the Food Quilt fabric stash.
Bear Patch Quilting
2199 4th Street
White Bear Lake, MN 55110-3014
(651) 429-1039
Hours: Sun 12:00–4:00pm; Mon-Thu 9:00am–9:00pm; Fri-Sat 9:00am–5:00pm
Rosebud’s Cottage
Rosebud’s Cottage was down the street and around the corner from Bear Patch, so if you go to White Bear Lake, you can hit two quilt shops!
I am not sure why I expected Rosebud’s Cottage to be larger, but I did. It has a nice selection, but is pretty small. They also had a small selection of cards and scrapbook materials. There were a group of ladies there stitching. We talked to them about their interesting Block of the Month. Some of the ladies were working on Halloween blocks. The shop had great bag samples!
Rosebud’s Cottage
2154 3rd Street
White Bear Lake, MN 55110-3233
(651) 426-1885
Quilt Haven
Quilter’s Haven was a shop on the bottom level of a newish looking condo complex. I didn’t see a sign. Michele knew where it was, but the only reason I knew we had arrived was from the Bernina sign. They must have some ordinance about signage.
The building was new, the space was filled with fabric and there was a large class going on. The woman at the counter showed us a quilt she had made that, despite the Civil War repros, was gorgeous. They had a great selection of books and I was able to look at the Zentangle quilting book (forgot the name).
Quilter’s Haven
2930 146th Street
Rosemount, MN 55068-3163
(651) 322-7071
Fabric Town
When we pulled into the mall (outdoor type mall with a Dollar Store),I thought Fabric Town would be kind of a remnants or cut rate/discount store. WRONG! This was a regular quilt store sandwiched into a strip mall. (As an aside, a lot of the MN quilt stores were in strip malls and all I can think is that they can guarantee someone will plow their parking lot, if they set up shop in a strip mall). Walking into the store was walking into a completely different world. The store is filled with all kind of reproduction fabrics, embroidery and aprons, but it didn’t feel dark and depressing. The store is arranged in such a way that it looks like you are on Main Street of your local small town. It is really a gorgeous store with a lot of interesting samples and patterns. The way they put their reproduction fabrics together was different than repro quilts I have seen in the past.
Fabric Town Quilt
Their quilts, even the Civil War quilts, were not dark or depressing looking. I know not all repro quilts are dark and depressing, but until this shop I had seen very few.
Do you remember those dishcloths that your grandmother or auntie used to make that had “Wednesday” with a picture of a girl doing laundry on it? The shop had a large number of block of the month type embroidery patterns that were similar in style. I saw one set that had patterns for baskets. I resisted, but I was sorely tempted. The pictures were so graceful and the flowers were so pretty. These were patterns that I knew would completely change my life if I bought them. 😉
One thing I really wanted from this shop was their pattern for a baking dish carrier. Sadly, they only had kits and none of the fabrics in any of the kits were remotely appealing. I have a covered dish/baking dish carrier pattern and haven’t made it yet. I am sure there are other equally useful patterns for the same sort of thing out there. Michele is going to check back and see if they start selling the pattern. That pattern would look great made with one of Martha Negley’s large vegetable prints.
FabricTown
7655 148th Street West
Apple Valley, MN 55124-7800
(952) 432-1827
Quilt Cove
Michele saved the best for last. I liked the other stores, but Quilt Cove had more fabric – MUCH more, more tools, notions and supplies and more patterns. I didn’t even look at the patterns. I didn’t have time. We stayed there for a long time and it was so enormous that I didn’t have the time to look at everything. I also became a little overwhelmed at the amount of stuff in the store. I am not sure I have ever been in a quilt shop as large as this store was. Again, this store was in a mall. It was in a mall with a Target and I think that would be great to have. After fighting the crazy people at Target, I could go and give myself a treat at the quilt shop. Might be dangerous.
The cool thing was that I saw fabric I had not seen before. One of them was Mixmaster Dot to Dot by Patrick Lose. You know what a sucker I am for lines of nice tone-on-tones in a variety of colorways. I promise to do another Interlocking Triangles quilt in the near future with some of the lines I have been collecting. You will be proud that I did not buy all that I saw. I tried to be discerning, even though it was difficult. I would highly recommend a trip to Quilt Cove.
Here are the various patterns, books & tools I bought. Yes, I bought a Jo Morton book. It was on sale and I wanted to be able to study her flying geese technique. I think she self publishes and her books are on the pricey side.
The This & That pattern is the great pattern I bought at Rosebud’s Cottage. I thought I would use a Jelly Roll, but now that I remember that I sincerely dislike Jelly Rolls again, I’ll cut my own strips.
If I ever get any quilts quilted again, I can’t wait to try the Wonder Clips. I also think they will work well for laminates.
Mixmaster & Friends
These fabrics aren’t specifically designated for anything just yet, but soon. Some of the pinks and yellows may going into a quilt for which i have inadvertently gathered quite a little pile of fabric.
I bought a couple of yards of the two Mixmaster greys thinking I could them as backgrounds for the Interlocking Triangles quilts I am planning.
Like everything, we will see. I counted up my in process projects and that number was enough to scare me off of starting anything new in the near future.
Funky Bundle
These fabrics were a little off from what I usually buy, but they appealed to me when I saw them at the Quilt Cove. they are completely on ‘spec, so I will have to think of something stellar to do with them. A bag, I think, and perhaps the This & That bag. Hhmm.
Bits and Turquoise
I couldn’t leave without some turquoise and aqua.
It was a great day thanks to Michele. We had a great time chatting about our quilt projects and our families. It was a very pleasant day.
I am going to try to do a series of Halloween related words to change up the way I inspire your creativity. Enjoy.
dark room
dark energy
Dark Nights of the Soul by Thomas Moore
“It was a dark and stormy night…”
Definition: devoid or partially devoid of light : not receiving, reflecting, transmitting, or radiating light
dark glasses
dark planet
Dark Knight
dark matter
International Dark Sky Association
The Dark Tower by Stephen King (no, I haven’t read this series; his books are too creepy for me)
darkness engulfed the City
Dark Hunter
Dark Void
Post the direct URL (link) where your drawing, doodle, artwork is posted (e.g. your blog, Flickr) in the comments area of this post. I would really like to keep all the artwork together and provide a way for others to see your work and/or your blog, and how your work relates to the other responses.
The Creative Prompt Project, also, has a Flickr group, which you can join to post your responses. Are you already a member? I created that spot so those of you without blogs and websites would have a place to post your responses. Please join and look at all of the great artwork that people have posted.
Whatever they are I have a love-hate relationship with them. I love to look through charm packs and dream about the finished projects that will magically appear in my house made – from that very charm pack fabric – and change my life.
In reality, I really like the little bits of one whole line!
I have to admit that I sincerely dislike actually working with pre-cuts, but I tend to forget. I get an idea (did you see the Jelly Roll Race post?) and live another day to learn the same lesson.
The really big thing I don’t like is pinked edge. I like the idea of it, but what a &^%%$#ing mess! I open a Jelly Roll and there are bits of fuzz everywhere. EVERYWHERE!!!
The other thing I don’t like about pre-cuts are that they are not cut properly. Recently, I posted a tutorial about making 8 half square triangles at a time. I decided that I would get a neutral charm pack and use my Hoopla charm pack and just make a boatload of HSTs. Why not? I am sure a cool pattern will come to mind once I am rolling in HSTs.
I got a Kona White Charm pack and dutifully sat in front of the TV and marked all the White charms with an X. The pinked edges did not make this easy. I had to kind of guess where the marks went. I don’t like to guess. I like to be as exact as possible.
I went to line them up with the Hoopla charms and what a pain! They did not really line up very well, despite both being 5″ charm packs.
Folded charm
Folding a charm looked ok, except for the bit on the left. I finger pressed and thought I could line up the finger pressed line with the X on the neutral charm.
As an aside, I don’t really want to mark charms inexactly and then have to finger press a bunch as well. If I end up with that as my only alternative, I will just press the charms with the iron. It will be a lot easier on my hands.
Finger pressed fold
As you can see from the photo (sorry about the quality of this one, it is the victim of my camera problems) the finger pressed line does not go corner to corner.
I don’t think there is anything I can do to force Moda to make their accuracy better. That is not a fight I want to fight today. Or tomorrow. I just have to deal with it in my own work.
Perhaps using pre-cuts as decorations is better than using it as fabric? Kind of an expensive decorating idea, though.
Sandy and I got busy on the second class in the design series. See her blog for more information. See her supplemental post for even further information.
During my research travels into Line this past week, I found a great definition for design in Ann Johnston’s The Quilter’s Book of Design, 2d. This is an adjunct to the definitions we gave you in the last podcast. It is: Design is a problem solving activity within all the arts, placing or creating subject matter so it is of visual significance and interesting to the artist.
Line is an Element of Design.
Double 4 PatchIrish Chain
Definition: Line is a mark on the surface that describes a shape or outline. A line is a mark made by a moving point and having psychological impact according to its direction, weight, and the variations in its direction and weight. Lines in quilt blocks can draw the eye around the quilt. For example, a Double Four Patch set in diagonal lines will draw the eye from top to bottom diagonally. An Irish Chain quilt setting can frame plain blocks filled with quilting or applique’ blocks.
Irish Chain FrameDouble 4 Patch- with Lines
Line is a mark on the surface that describes a shape or outline. Types of lines can include actual, implied, vertical, horizontal, diagonal and contour lines. The line quality makes the work more expressive. Lines act as a connector or boundary between shapes. They divide, but also connect. Lines may be:
thick or thin (Perl cotton v. Aurifil)
fast
slow
serene
agitated
jagged
lyrical
aggressive.
Line brings energy to the design. (Liz Berg handout)
lines in quilts are generally seam lines or quilting lines.
hand quilting
machine quilting
Pressing also creates a line.
When you press to one side, you have 3 layers of fabric bulking up the seam. This can be used to highlight areas (see Ruth McDowell’s Piecing Beyond the Basics book)
lines on quilts can also be embroidery (hand or machine)
piece of blank paper (can be the back of junk mail)
catalog or magazine pictures you are willing to cut up
paper scissors
drawing or writing implement (You can use anything, but one with a smooth line is great!)
glue stick
Find a picture in your magazine or catalog and cut a 3×3″ square out of it.
Take a piece of blank paper and lay it on the table in front of you
Glue the 3×3″ square somewhere towards the middle on the paper. There should be at least 2″ of white space around each side of the magazine picture.
Turn the paper upside down so the image is upside down.
Continue the image out from each side of the paper using your pen
“Simplify the design in the square and its drawn continuation.” Use the cut off edges to make a new design.
Perform this exercise over and over on different pieces of paper with different pictures until you are happy with the result.
Use the simplified design as a starting point for a quilt.
(adapted from Fearless Design for Every Quilter by Lorraine Torrence, pg. 63)
Exercise #2
You can do exercise #2 with free motion quilting as well using a 3×3″ square of fabric on top of a small (11×11″ or so) quilt sandwich.
Supplies you will need:
a charm pack OR
a group of approximately 50 3-5″ paper squares of all colors and designs (junkmail works well, you could use a scrapbooking paper punch if you have that) OR
cut a group of 3-5″ squares of fabric (approximately 50)
notebook or paper (reusing junk mail is just fine)
pen or other writing implement
Directions:
Put all the squares on the floor or on a table right next to each other. Do not arrange them yet.
Look at them and see if you see any dominate lines. Make a note of how the lines show up (because of the color? because of the design on the fabric or paper? Other?)
If you have a camera, take a photo.
Rearrange the squares in some kind of order.
Look at them and see if you see any dominate lines. Make a note of how the lines show up (because of the color? because of the design on the fabric or paper? Other?)
If you have a camera, take a photo.
Based on what you saw in the squares of your fabric, draw simple lines in your notebook or on paper.
Optional: think about and take note of design ideas that are suggested to you by the images you have created.
This looks similar to the block from last week, Off Center 4 Patch Rectangle. There are some differences in the cutting, but you could make a second version of last week’s block and use that instead.
If you have made blocks or a quilt from these patterns, please post a link in the comments section of the relevant block or on the AQ Block-a-Long Flickr group. I would love to see what you have made.
I have mixed feelings about 12″ blocks. They are big. I don’t like making them, because they take up so much fabric. I can’t use scraps, in general for them. However, I seem to be making a lot of them lately. I can use up a lot of fabric making 12″ blocks. I can also use these large expanses of patchwork to showcase the luscious large prints that I adore.
The latest batch of 12″ squares are 9 patch blocks for BAMQG. Not only are the 12″ finished, but they are also Halloween colors. Not my favorite, but not brown and beige either. I was kind of hoping I didn’t win the blocks (I didn’t), but then I remembered the Disappearing 9 Patch. I thought that this group wouldn’t be as controlled as the Food Quilt, but using the Disappearing 9 Patch pattern would also alleviate the large expanse of fabric problem.
Any size 9 Patches are so easy to make that they are like candy. I don’t seem to be able to make just one.
2 9 PatchesAdrianne's Lozenge 9 Patch
It turned out that we were able to use any 9 patch grid pattern not just the regular simple 9 patch. I am not sure why I didn’t know that.
I had a problem with my camera and didn’t take many photos, but people did some really great blocks and wonderful color combinations. I have that lozenge shape on my mind, so Adrianne’s block (left) really appealed to me. I think that it is more Fall than Halloweenish, but still a very nice block, and one I might want to try sometime. My blocks looked a little sad in comparison.
Angela's Rose
Local quilt work is really good and the BAMQGers work is no exception. Angela, in particular, is really taking off in terms of work. Kathleen asked me to write down the names and descriptions of the quilts as she took photos, so I didn’t hear all the details about this quilt. I do know that she took a class in reverse applique and that this technique was different from traditional reverse applique’. I really am excited that Angela is trying new things and really pushing herself in her quilt work.
Her Kona Challenge quilt was accepted into the New Quilts for Northern California along with the Zig Zaggy quilt.
The next challenge will be with a line called Heirloom. I am not familiar with it, but what I saw of it I liked. This is a guild sponsored challenge. Adrianne was going to hand out fabric, but the block the group voted on required some solids, which people wanted to coordinate, so there was a little back and forth about that. The Board decided to decide what to do about the solid and hand out fabric next month. I am not going to do that challenge, because I don’t want to do a challenge where the fabric and block are dictated to me. I like the Roman strip block, but not enough to take time away from my own projects.
C&T Goodies
The awesome, Lisa, at C&T sent us a prize pack. We did a giveaway and I handed out all the postcards. I asked her for the Studio Color Wheel postcards to hand out and she sent me a giant box of goodies, including a copy of the Studio Color Wheel, which Deborah won, and an Ultimate Color Tool.
There was a lot of business and I felt the generational gap hit me. I like to have some privacy online (I know I am walking the line having a blog and a big online presence) and that view isn’t shared by some of the younger crowd at the meeting. I felt old.
At the September BAMQG meeting, Claudia mentioned the Jelly Roll Race as an activity for the meeting. I liked the idea, but wasn’t that enthusiastic about doing it for an activity at a meeting. I like to sew slowly and my machine has been behaving badly lately, which sounded like a recipe for disaster. I am not one for Disasters with an Audience. Still, as I said, I liked the idea.
I know I said I was done with precuts, but, apparently, I can’t help myself. I bought a Terrain Jelly Roll and began the process on my own. Later, I saw an explanation of how the process should work and I was interested to see that the writer suggests mitering the strips together.
For a person who doesn’t like really long seams, this project was kind of a nightmare of long seams.
I finally finished the center of the quilt and kind of liked it. it is large enough to be the center of a large throw. I also like that I can see how much fabric a Jelly Roll really is. I want to put some borders on it, but am not sure what yet.
Pokey Bolton announced that there is a shakeup at Quilting Arts. You can read the whole deal on her blog. I’d like my title to be Chief Creative Officer. I’ll get right on that.
I would have kept this news for a Various and Sundry post, since this is the perfect tidbit for that kind of post. I didn’t want to be posting it in 3-4 weeks, however.
Yes, it has been an angry and busy week for me, thus the inspiration for today’s word (better late than never right?).
Controlling anger before it controls you
12 Angry Men
Anger management
Definition: Anger is an automatic response to ill treatment. It is the way a person indicates he or she will not tolerate certain types of behaviour. It is a feedback mechanism in which an unpleasant stimulus is met with an unpleasant response. (great definition, don’t you think?)
Quote: Always write angry letters to your enemies. Never mail them. James Fallows
Quote: “Heaven has no rage like love to hatred turned, Nor hell a fury like a woman scorned,” spoken by Zara in Act III, Scene VIII.[1] (This is usually paraphrased as “Hell hath no fury like a woman scorned”) William Congreve (I always thought the quote was”Hell hath no fury like a woman’s anger” You get the idea, just go with it)
Post the direct URL (link) where your drawing, doodle, artwork is posted (e.g. your blog, Flickr) in the comments area of this post. I would really like to keep all the artwork together and provide a way for others to see your work and/or your blog, and how your work relates to the other responses.
The Creative Prompt Project, also, has a Flickr group, which you can join to post your responses. Are you already a member? I created that spot so those of you without blogs and websites would have a place to post your responses. Please join and look at all of the great artwork that people have posted.


")
")


")


