Block-a-Long #23: Off Center 4 Patch Rectangle

Off Center 4 Patch Rectangle #23

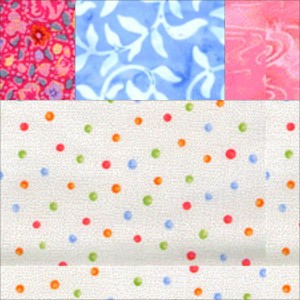
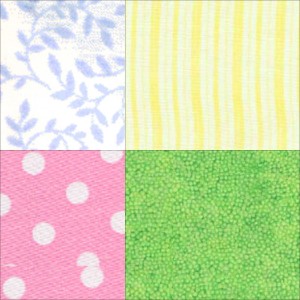
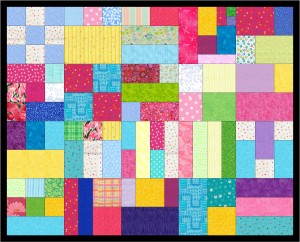
This blocks is similar to the four patch and the other rectangle block I have posted, which I called Rectangle Four Patch.

This blocks is slightly off center, so the squares and rectangle are slightly different sizes than what you have been cutting.
This block is also suitable for 3 fabrics.

Off Center 4 Patch Rectangle Directions

If you have made blocks or a quilt from these patterns, please post a link in the comments section of the relevant block or on the AQ Block-a-Long Flickr group. I would love to see what you have made.

Triangle Technique

The other night I caught a new episode of Love of Quilting and Jo Morton was a guest again. She was showing another technique for making half square triangles. I first became aware of Jo last year when I watched a previous episode of Love of Quilting.

Jo Morton is a fabric designer, writer and quilt designer. She has a website, where she sells, apparently, self-published, books, and a blog. She is also a designer for Andover Fabrics and has a large number of collections and projects on their site.

Based on what I saw Marianne and Jo do on the show, I tried the technique and was pleased with the results.

I got in touch with Jo, who was very quick about getting back to me, and asked whether she had technique sheets or sections in her books discussing the scalability of her techniques. She said that the market is geared towards projects and she didn’t have technique sheets. Too bad. I had trouble with her Flying Geese technique, but found the half square triangle (HST ) technique to be one of the best I have seen. It is straightforward, there is a minimum of dealing with bias and the squares magically appear all at once.

Since she didn’t have technique sheets, searched the web.  I found a similar one posted on Wet Canvas. The Wet Canvas tutorial does a good job of showing the different ways of using the half square triangles. Most of the techniques were the square method (like what I describe below, but with one square making 2 HSTs, rather than a larger square making 8 HSTs) like the p.s. i quilt tutorial. I am also interested in the Quilt in a Day method and this tutorial talks about that. B’s Modern Quilting has the fish tutorial method.

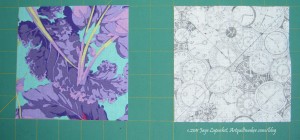
I started with 5″ squares, which is the size they used on the show. The 5″ squares make 8 HSTs. I thought this would be a great way to use charm packs.

2 5
2 5
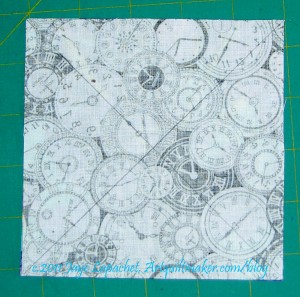
Draw an X
Draw an X
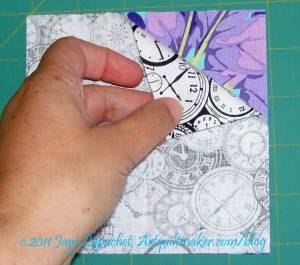
Put 2 squares together

First, I drew an X, corner to corner, on the lighter square. Then I put the 2 squares right sides together and pressed them. If I had wanted to pin I would have pinned far away from any of the lines. I walked on the wild side and didn’t use pins.

Next, I sewed on each side of the lines, 1/4″ away from each line

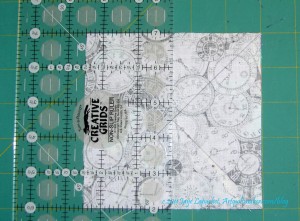
Measure 2.5
Measure 2.5

After sewing, I measured 2.5″ from the side of the square.

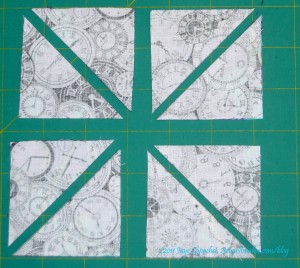
Cut in a + Configuration

Cut the square in a plus configuration 2.5″ (middle of the X). I think you could cut on the pencil lines, but you have to cut in a plus configuration at some point and it seems to make sense to cut in the plus configuration first.

Cut in +, then X
Cut in +, then X

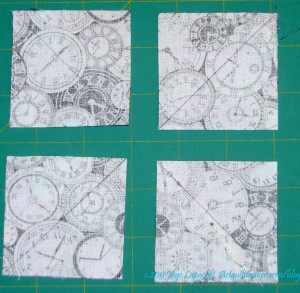
After you cut the plus, you will have four squares, each with a line drawn diagonally across the middle. Cut the squares in half diagonally. You can use the line as a guide. It is more important to line your ruler up corner to corner.

HSTs from 5
HSTs from 5

The result is 8 2″ half square triangles. The above are actually a thread or two larger than 2″, which leaves the perfect opportunity for trimming to make them an absolutely perfect 2″.

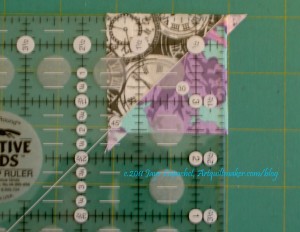
Trim
Trim

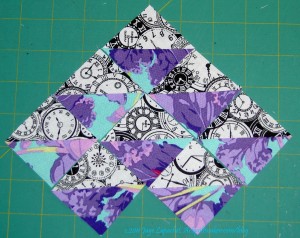
Trim the squares to 2″. Trim on all four sides. Don’t be tempted to trim just on two sides. Line the 45 degree angle line on your ruler up with the diagonal seam line on your HST and trim on all four sides.

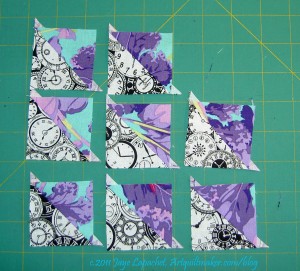
Beautiful HSTs
Beautiful HSTs

Now you have 8 beautiful HSTs. The bias edges shouldn’t be scary for you on the regular method, but this method makes HSTs much easier. I think this would be a fabulous method to make a lot of HSTs in a short amount of time. It is similar to a tutorial that p.s. i quilt posted, but times 4. I am planning to try out different sized beginning squares to see what sized HSTs I come up with.

I talked over the math with my DH and came up with a chart showing the different sizes you can make with this technique.

AQ HST Size Chart

Links:

  1. Jo Morton website
  2. Jo Morton blog
  3. Jo Morton on Andover
  4. Wet Canvas tutorial
  5. Carole’s Quilting Adventures tutorial
  6. B’s Modern Quilting Fish Tutorial
  7. p.s. i quilt HST tutorial

Sampler Quilt: LeMoyne Star

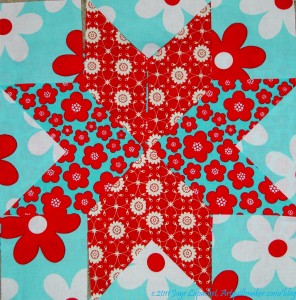
LeMoyne Star
LeMoyne Star

I worked on the LeMoyne Star today. I had some work, which languished while I was out of town,so I had to do that as well, but it was great to get back to sewing a bit.

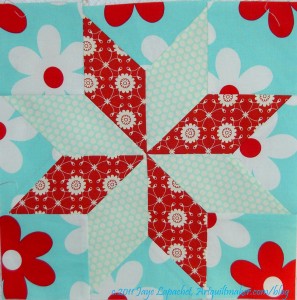
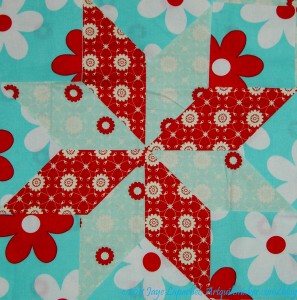
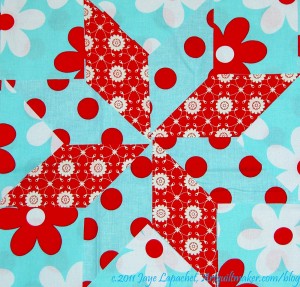
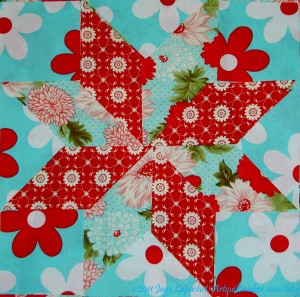
The LeMoyne Star has some tricks, but is not very difficult to piece. I took pictures as I pieced it and will work on a tutorial for a future post. The key trick is to NEVER sew into the seam allowances. I did sew into the seam allowances along the outside edge towards the end of the process, but otherwise, I stopped shy of the seam allowance, or moved it out of the way as I was sewing. My stilletto came in handy. Choosing fabrics was a key piece of the process and took longer than I expected. The ‘make visual decisions visually’ adage worked well, though, because what I thought would look good didn’t look good at all. Below are some of the choices I considered:

Alternate colorway from the Moda Bliss line
Dots from Quilted Fish
Bright Flowers
Bright Flowers
Another Bliss Fabric
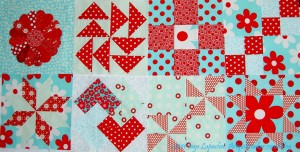
Aqua-Red Sampler Quilt Blocks -September 2011

Above are all of the blocks I have made for the class so far. Don’t they look nice? They are hogging up space on my design wall, so I will need to take them down, but I am pleased with how they are coming out.

Mean Teacher

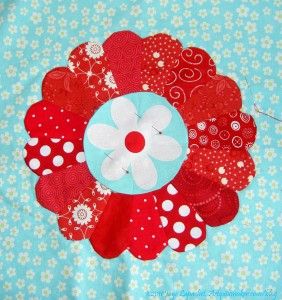
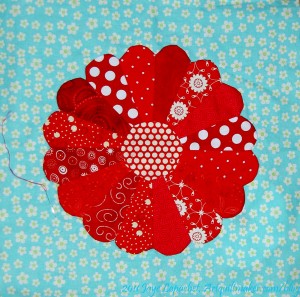
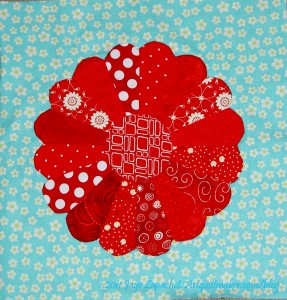
Dresden Plate in progress

I had to be mean teacher to Frances. Do you know how hard it is to be mean to Frances? She is such a nice person and has such a lovely podcast that I found it difficult. I had to do it, though, because our class wasn’t progressing and we need to move on.

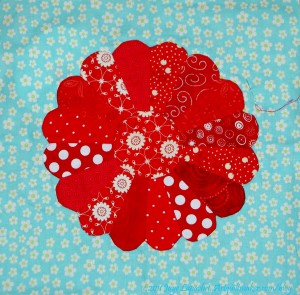
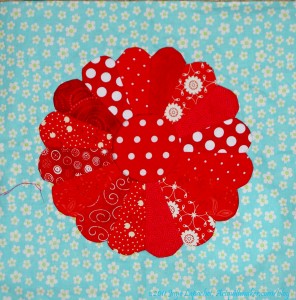
The irony is that when I spoke to her I hadn’t sewn (sewed?) down the middle circle for my DP either! I confessed and she was gracious about it. My problem is 1) I can’t decide the size of the circle I want to applique’ and 2) I can’t decide on the fabric. The 2 go hand-in-hand, I think. I thought I had figured out what I want with the lovely Little Plain Jane flowers from Michael Miller. As Lorraine Torrence says “make visual decisions visually,” so I cut one out, pinned it on (see above) and looked it. No go. I think the size of the Little Plain Jane flowers from Michael Miller is a little too big, but it might look ok in a different fabric. The fabric just wasn’t working for me in this context. I love it, don’t get me wrong, but not for the center of my Dresden Plate.

My next thought was to find another red that has a bit more white in the design and see if that works.

DP with Bliss dot circle
DP with Bliss circle
DP with Pimatex Basics Dot circle
DP with an RK print, Mingle


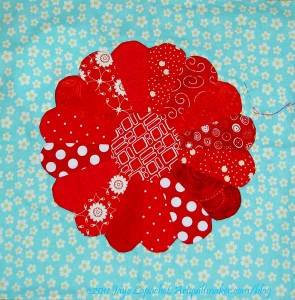
In different ways, I liked all of the choices, but I finally decided on the Mingle circle and appliqued that on.

Dresden Plate with Mingle Circle - Final

Just a note about the applique’. Hand applique’ is not my strong suit. Still, I firmly believe that a quiltmaker should learn all different techniques so s/he can select the appropriate technique when making quilts. I know that Frances struggled with the hand applique’, but at least she knows how to do it. This was the hardest lesson yet, because it really requires looking at someone actually doing the applique’. Frances is a trooper for trying.

Creative Prompt #123: Butterfly

May the wings of the butterfly kiss the sun
And find your shoulder to light on,
To bring you luck, happiness and riches
Today, tomorrow and beyond.
~Irish Blessing
(quotegarden.com)

Post the direct URL (link) where your drawing, doodle, artwork is posted (e.g. your blog, Flickr) in the comments area of this post. I would really like to keep all the artwork together and provide a way for others to see your work and/or your blog, and how your work relates to the other responses.

The Creative Prompt Project, also, has a Flickr group, which you can join to post your responses. Are you already a member? I created that spot so those of you without blogs and websites would have a place to post your responses. Please join and look at all of the great artwork that people have posted.

A butterfly is a mainly day-flying insect of the order Lepidoptera, the butterflies and moths.  (Wikipedia)

Madame Butterfly

Butterfly Restaurant, Pier 33 San Francisco

Butterfly table tennis and ping pong accessories

butterfly garden

the butterfly effect

Monarch

butterfly wings


FOTY 2011 Triangles – Mid September

Mid Sept Triangles
Mid Sept Triangles

Mid September already! The CQFA Retreat has been set, so now I have a working deadline. I am pretty good in the fabric washing department. The cutting of triangles for fabrics I have used this year (already in my fabric closet) has been spotty. I am not going back to make that up and will try and do better. No promises. It will be what will be.

WIP Wednesday

Some of the blogs do a feature every week called WIP Wednesday where they show a work in progress. I don’t want to do that every week, but somehow this week it seems appropriate.

Original Bullseye
Original Bullseye

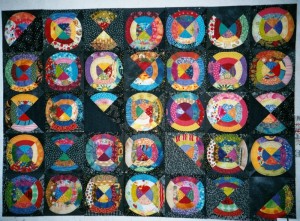
This is the project that started the whole Bullseye project. This has been on my mind lately, for some reason that I don’t know. I always planned to do a border with curves in it, so it would look like a curve was going all the way around the quilt. I found directions. I have a test piece and I just decided that was not the way to go.

This quilt doesn’t lend itself to the self bordering technique. I have a lot of leftover circles that I could use in some way, but I don’t know what way. Aside from slapping on some borders and calling it good, I don’t have any ideas. Do YOU have any ideas? Even a little spark would be helpful. Let me know.

Book Review: Layer Cakes, Jelly Rolls & Charm Packs

Jelly Roll, Layer Cake & Charm QuiltsJelly Roll, Layer Cake & Charm Quilts by Pam Lintott

This is almost a pure project book and I wouldn’t have picked it up if Frances and Sandy hadn’t talked about it over and over. Frances has definitely made my favorites from the quilt projects in this book.

There is a lot to like about this book. There are a variety of patterns for every skill level. The authors clearly state how many precuts are needed to make the quilt. A lot of the quilts have colors that really appeal to me, but there are also reproduction and more muted fabrics used, so that the book covers a lot of bases in terms of tastes in fabric. Almost every quilt is made twice with the second quilt using very different fabrics. I like this aspect, because it is hard for me not to be influenced by the fabric choices in the photos. Seeing a second quilt in different colors reminds me to the design of the quilt rather than the colors.

There are small introductions to each quilt, which are similar, if not as detailed, as the color stories in The Gentle Art of Quiltmaking. They suggest other options, talk about the fabrics chosen and encourage the quiltmaker, as in the description of Little Houses (pg.102-109) where the pieces are on the small side.
One pattern I can’t get out of my mind is Stepping Stones, pg.72-79. It is one of the more complex patterns and it  includes four patches, so what is not to like? 😉 If I made it, I would want to use fabric on hand, so I have spent some, otherwise unpleasant commute time, daydreaming about various color variations, cutting strategies, etc.  Using fabric on hand (I am thinking green. I have lots of green I don’t use much)  would I start cutting 10″ squares and then start the quilt when I was finished cutting them? Would I cut half green 10″ squares and half cream or another light? Three quarters green and a quarter light? There is a lot of piecing in this this pattern and there are some areas in the example quilt that could use a bit more contrast.

I liked the border on the Raspberry Ripple quilt (pg.14-17) because it has the ‘self-bordering’ effect that I like so much. It fits well into the design of the quilt and finishes some of the motifs, which really completes the overall design. High Flying Geese (pg.30-35) is very similar to Serendipity Puzzle, a classic Dutchman’s Puzzle pattern. The colors are so fresh and appealing in the Lintott version that I would consider making another version just because I am inspired by that freshness.

Some of the blocks in the book are so easy and so large that you could do a quilt really quickly. Those quilts don’t appeal to me, but I know they might appeal to others. Some of the photos aren’t very crisp. I was disappointed in the photo of Damask Rose (pg.48-53), because the piecing is very hard to see with the fabrics the authors chose. This is one of the more complicated quilts and I would want to show off the piecing. It may be that the authors wanted a soft chintz feel to the quilt. This is also one of the few quilts in the book that does not have a second colorway.

Hexagon Hip Hop (pg.64-71) is version of a hexagon quilt, like the Attack of the Hexies quilts, but using half hexagons. It has a really interesting and well thought out border that fits the overall design. I also like that the second colorway shows how nice a gift a hexagon quilt would make for that special guy (dad, brother, etc) in your life.

If you want a wide variety of patterns to use with Jelly Rolls and other precuts, then you might enjoy this book.

View all my reviews, including non-quilt related reviews

Block-a-Long #22: Square House

Square House #22
Square House #22

I have house blocks on my mind this week.

Chris from Quilt Bits sent me the directions to make a cover for a composition book. I bought one to test the directions (which I am sure are perfect!), but haven’t done it yet.

DH & I thought that having a book where we could write things about the house would be a good idea. I further thought that I would use Chris’ directions to make a cover for the composition book and incorporate a Liberated Quilting house block into the cover. I haven’t done it yet, but that whole thought process led me to the name for this block.

PDF Directions for Square House #22

If you have made blocks or a quilt, post a link in the comments section of the relevant block or on the AQ Block-a=Long Flickr group.

Food Quilt, part 2

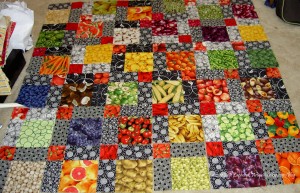
Full top sans borders

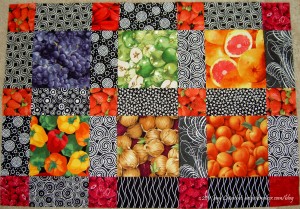
As I mentioned in a previous post, back in July, this quilt is all about the fabric. I got down to it over Labor Day weekend and made the top. I still need to add borders, but the top is basically done.

You can see that the Disappearing 9 patch block means that there is an automatic border on two sides of the quilt. I don’t want a border on two sides of the quilt. I want the border (a border in this case) to be symmetrical, so I added a row of rectangles and squares.

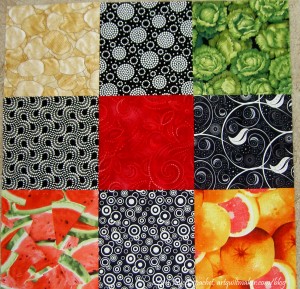
Giant Food 9 Patch
Giant Food 9 Patch
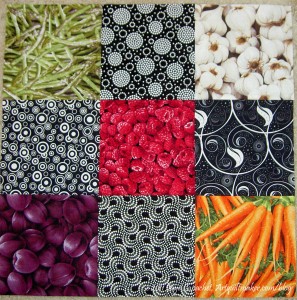
Giant Food 9 Patch #2


These blocks actually are quite large. Each square in the block is 6.5″. Once you cut them into quarters they become a manageable size.

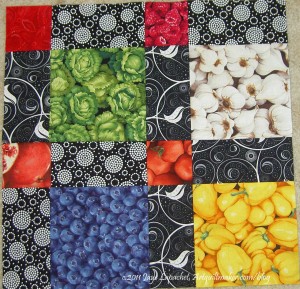
I was consistent about placement of red and black, so that the red would end up as cornerstones and the black would be the sashing. I fiddled around with the arrangement quite a bit, as I am wont to do. I wanted to vary the food prints that were next to each other as well as the location of the blacks.

Arranging
Arranging

This is what you get once you cut a 9 patch block into quarters and rearrange them. In fairness and honesty, the above are quarters from 4 different 9 patches. You would see the same red, if they were from the same 9 patch, but you get the point. Even if this was from the same 9 patch, there would be variety, because of the different blacks and the different focus fabrics.

Chunkin' It
Chunkin' It

Per TFQ’s instructions, I did chunk this quilt together. That method of putting together quilts works so much better for me than sewing blocks together in rows. I also find it easier to keep my blocks placed where I want them placed.

Design Overview

Recently, Sandy, of Quilting for the Rest of Us, and I recorded a podcast where we started to talk about design. Several months ago, she asked me if I would considering talking with her and her listeners about design. I was reluctant. I am not an expert, but Sandy is pretty good at convincing people to do stuff and I am good at research. It has taken me some time to find the time, coalesce my thoughts and to start to do the research.

The first podcast we recorded was an overview of design. We discussed the principles and elements of design. We talked about what the principles and elements are in design and some examples of how to use them. We tried to talk about why a classic quiltmaker who uses patterns and books should care about design. I’d like to know if you have examples of how you have used design.

Some of my thoughts…

Knowing about design principles and elements helps refine your innate skill. Everyone has innate design skills.

Concept: I use patterns why do I need to know about design?

  • Color is an element of design. To make beautiful quilts, you need to know about color. If you buy a kit, there may be one color you do not like and by knowing about design, you will be able to replace it successfully.
  • Balance is a principle of design. If your eye sees an element of the quilt as being unbalanced, then knowing about design will help you adjust it.

Concept: I am not an art quiltmaker, why do I need to know about design principles and elements?

  • “Some designs lack that indefinable life – or spark – that lifts them out of the mundane, the predictable, the commonplace …. learning about design elements and principles helps you train your vision and refine your subconscious decision making.” (Fearless Design for Every Quilter by Lorraine Torrence, pg.57)
  • Negative space in fabric: “When choosing prints for a patchwork, think about how they’ll look when cut up. Does that small print have so much negative (empty) space that the actual print part won’t show up on half of the pieces? Is that large print so big that the pieces cut from it will look like they’re from entirely different pieces of fabric? (Elizabeth Hartman, The Practical Guide to Patchwork, pg.24).
  • Borders: does slapping on 4 lengths of fabric work with the design you have chosen or would a bit of piecing enhance your excellent quilt top?
  • Books: when looking at books and evaluating whether you want to spend money on it, you can evaluate the various elements and principles of  design included in the patterns of the book.

Many quiltmakers, though not formally trained in art (e.g. an MFA in fine art) have intuitive art sensibilities. (Fearless Design for Every Quilter by Lorraine Torrence, pg.5)

I have been thinking about design for awhile. I never took a dedicated design class in school and have never found one that fit into my schedule since. Also, I am too lazy to leave my house again once I get home. If I did sign up I would go, so the laziness is really me thinking that I would be lazy and not go to class even before I sign up. Sigh!

I have pages and pages of notes I have taken on design elements and principles as I have tried to make the design elements and principles part of my working toolbox.

Design is a way of organizing a piece of visual work. According to the Quilter’s Book of Design, 2d by Ann Johnston, “Design is a  problem-solving activity within all the arts, placing or creating subject matter so it is of visual significance and interesting to the artist.” (pg.xi). I like this definition, because it is understandable and doable. It also isn’t scary for people who have no MFA. When I think about solving a problem with my quilt, I relax about design and try to review the skills in my design toolbox. Remember, though, that “we all have personal experiences, subjective leanings, and differences in personality that make us prefer one thing to another…” (Fearless Design for Every Quilter by Lorraine Torrence, pg.57)

Good design requires practice and is the “result of of a successful combination of design elements … and principles…”(Fearless Design for Every Quilter by Lorraine Torrence, pg.6)

Elements of Design
The elements form the ‘vocabulary‘ of the design (Wikipedia, design elements and principles).

The Elements of Design are the language of the visual arts (http://www.wiu.edu/art/courses/design/elements.htm).

The elements are components or parts which can be isolated and defined in any visual design or work of art. They are the structure of the work, and can carry a wide variety of messages (http://char.txa.cornell.edu/language/element/element.htm).

  • Line
  • Shape
  • Value
  • Color
  • Movement
  • Size
  • Pattern

Principles of Design
The principles constitute the broader structural aspects of the design’s composition (Wikipedia, design elements and principles).

Principles (http://www.wiu.edu/art/courses/design/principles.htm).

The Principles are concepts used to organize or arrange the structural elements of design. Again, the way in which these principles are applied affects the expressive content, or the message of the work (http://char.txa.cornell.edu/language/principl/principl.htm).

  • Unity
  • Harmony
  • Contrast
  • Rhythm
  • Repetition
  • Gradation
  • Balance
  • Dominance

The principles of design, according to my research, are usually taught first. I think they are also a little harder to explain to an audio audience, so I told Sandy we should start with the elements. After getting into it a bit, I am thinking that we might bounce around. Hope you tune in to find out!

Creative Prompt #122: Dress

A garment

special occasion dresses

formal dress

dress a salad

wedding dress

get dressed

dress your hair

put on a dress

wear a dress

dress-up box

dress code

dress uniform

dress rehersal

Dress quote: Enjoy life. This is not a dress rehearsal and another quote “Sometimes I wish I could go back to the days when I was six and my biggest problem was what kind of dress to put on Barbie or whether or not I had enough Legos to build a fort”

cocktail dress

Post the direct URL (link) where your drawing, doodle, artwork is posted (e.g. your blog, Flickr) in the comments area of this post. I would really like to keep all the artwork together and provide a way for others to see your work and/or your blog, and how your work relates to the other responses.

The Creative Prompt Project, also, has a Flickr group, which you can join to post your responses. Are you already a member? I created that spot so those of you without blogs and websites would have a place to post your responses. Please join and look at all of the great artwork that people have posted.

apply dressings

party dress

Definitions: [verb] a : to make or set straight b : to arrange (as troops) in a straight line and at proper intervals ; 2: to prepare for use or service; specifically : to prepare for cooking or for the table <dress a salad>; 3: to add decorative details or accessories to : embellish ; 4 a : to put clothes on <dress a child> b : to provide with clothing <feed and dress a growing family>; 5 archaic : dress down ; 6 a : to apply dressings or medicaments to <dress a wound> b (1) : to arrange (as the hair) by combing, brushing, or curling (2) : to groom and curry (an animal) c : to kill and prepare for market or for consumption —often used with out d : cultivate, tend; especially : to apply manure or fertilizer to <dress a field> e : to put through a finishing process; especially : to trim and smooth the surface of (as lumber or stone); [intransitive verb] 1a : to put on clothing b : to put on or wear formal, elaborate, or fancy clothes <dress for dinner>; 2 of a food animal : to weigh after being dressed —often used with out; 3: to align oneself with the next soldier in a line to make the line straight ; — dress ship : to ornament a ship for a celebration by hoisting national ensigns at the mastheads and running a line of signal flags and pennants from bow to stern

Definitions [noun]: 1: apparel, clothing; 2: an outer garment (as for a woman or girl) usually consisting of a one-piece bodice and skirt; 3: covering, adornment, or appearance appropriate or peculiar to a particular time; 4: a particular form of presentation : guise

Definition [adjective]: 1: suitable for a formal occasion <dress clothes> <dress shoes>; 2: requiring or permitting formal dress <a dress affair>; 3: relating to or used for a dress <dress material>

prom dress

bridesmaid dress

gown

dress-up dolls

dress meat


Various & Sundry 2011 #17

I was so thrilled at the response I received to my last Various & Sundry post that I am excited to start this one. I really appreciate the comments you leave and I do read all of them. One person didn’t agree with me on some points and I appreciated hearing her viewpoints, especially since she disagreed nicely and didn’t imply that I am an idiot! 😉

Projects

Attack of the Hexies

Attack of the Hexies is still going strong, though I think people are silently sewing them together. Sew Excited posted some tips on her blog that I thought were useful, especially for people who don’t sew in blobs, but like to sew in rows.

Pam over at Hip to be a Square podcast also posted about working on her hexagons. I thought about working on my hexagon piece over the weekend, but was derailed by the Food Quilt. She said she will win the race. I didn’t know there was a race, but I am already ahead.

Tools
Janome came out with a new machine over the weekend, The Horizon Memory Craft 12000. I would love to get one of those in the mail, kind of like the review books I sometimes receive, so that I could review it. I don’t think the machine actually hit the stores until October 1 and I didn’t pay attention to the launch party on Saturday, so I don’t know all the features and details. It looks like a hybrid between the Memory Craft 11K and the Horizon. I always thought I would buy another Janome for a lot of reasons, but after my recent servicing drama, I am not so sure. I have to be fair, though. I don’t know how much of the issues were the age of the machine vs. technician error. Buying a new machine isn’t in my future for at least the next 8 years, so the point is moot. It will be interesting to see what machines are available in the next 8-9 years!

Adrianne, over at Little Bluebell has posted a great post on color palette tools. While some of the tools are quite sophisticated and require special software, most are readily available to you on the web. Check out her post and expand your color horizons!

Media
Jennifer Ackerman-Haywood, Craftsanity interview maven gets interviewed n Petit Purls blog. Check out the post. I love the weaving loom photo. The paper envelope/book project Jennifer has on the CraftSanity site has, as Anne Shirley would say, lots of scope for imagination.

As if SeamedUp, Creating the Hive (slightly different) and My Sewing Circle weren’t enough, now we have Tomspoolery! They have a pink and green brand and launched in beta on 9/6. I read over the welcome message, which I thought was well done. How is this crazy competition going to shake out?

Other Artists
Camille Roskelley is part of the Moda County Fair blog hop. Her post was on 9/9. Her family has the most gorgeous skin! I love the colors of her blog. If she posted 5 times a day, I wouldn’t get tired of looking at the polka dot chair and the aqua she uses. Anyway, the post shows all the blocks she has made for the Farmer’s Wife Quilt-a-Long and I love them. I want them. I don’t want to make them, but I want hers! I know I went back and forth about making them. Blocks are always tempting for me, but I just can’t devote the time right now.

Book Review: Gentle Art of Quiltmaking

The Gentle Art of Quiltmaking: 15 Projects Inspired by Everyday BeautyThe Gentle Art of Quiltmaking: 15 Projects Inspired by Everyday Beauty by Jane Brocket

My normal practice for writing reviews is to read the whole book and review the whole book. Occasionally, I’ll glance through a book and write a short review based on my impressions. That was my intent with The Gentle Art of Quiltmaking.

My first impression was that it was a project book and I could churn out the review quickly. The book stayed in my bag and I slogged through the beginning, which covers fabric quantities, cutting fabric and calculating binding. I found the book hard to read and understand. I wasn’t getting the point and I couldn’t figure out the problem. The books is a nice hardcover, with gorgeous photos and pleasant font. The tone is pleasant to read.

One day I found myself with an hour or more to sit and nothing else to claim my attention. Having time, being able to slow down allowed me ‘get’ this book. I was able to fall into the mindset of the author and start to enjoy her writing. I was able to spend a couple additional hours focused on the text of the book. After finishing, I went back and read the beginning, which I found to be much more enjoyable. I realized, in going back, that Brocket says, at the very beginning of the introduction “This is a book about quilt inspiration.” And it is. I missed that crucial line.

This book is a project book, but if you buy this book because of fascinating projects, you will be disappointed. Buy the book for the inspiration and not the projects. Buy the book for the color stories. The subtitle is a complete misnomer and should have been something like “how to write color stories in fabric.” If you buy this book because of color stories, you will adore it.

Color stories seem to be coming into fashion as a way of narrowing a color palette for a quilt. Bill Kerr and Weeks Ringle talk about the “Big Idea” in their books. Michael Miller, a fabric manufacturer, is posting color stories on their blog.

The color stories are the best part of this book and what drew me in. Brocket does a great job of giving us insight into the inner workings of a creative person’s mind. The color stories also don’t shortchange the design process. They are an integral part of the design process. Brocket’s quilts have a story to tell, or a Big Idea to convey, like Bill Kerr and Weeks Ringle discuss in Quilts Made Modern. Jane Brocket‘s writing about the creative process demonstrates to the reader the work that goes into designing a quilt.

The stories start on page 31 with Beach Hut. Each quilt pattern is introduced by a few pages describing the thought that started it all, how the design fits into her idea, her story and how she selected the fabrics. In this section Brocket talks about books or other materials that entered into the design equation.

Fabric selection is also, clearly, a major factor in Brocket’s quilts. In some cases, she found a fabric and built a story and a quilt around it. In other instances, like with Beach Hut, Lisbon Tile and Summer Day, she has made a second quilt in order to expand the story or make the fabric work for her idea.

The fabrics are also not shortchanged. The author and publisher acknowledge the intelligence of the readers by saying exactly (from the selvedge) what fabrics were used. They also give ideas of what other fabrics could be used and acknowledge that fabrics go out of print fast. I saw this information also included in Pam Lintott‘s book,Layer Cake Jelly Roll Charm Quilts.

In quiltmaking, design, and especially color, are very important. In fact, design and color can be the raison d’être of the quilt, yet both design and color are often given short shrift in project books. Books and articles delve deeply into the how, but talk very little about the WHY of the quilt. Why that fabric? Why that fabric combination? Why the juxtaposition of the simplicity and complexity between fabric choices and piecing? This aspect is underrepresented in most current quilt books. As a result, it seems to be something that quiltmakers are not comfortable discussing or attempting.

Jane Brocket covers the WHY very well. She delves into the WHY in minute detail. She covers the creative process very well enabling the reader to understand that there isa process (not magic. Hopefully, the information described will give people permission to explore their own creative process.

A note about the styling: I was not enamored with the styling of the quilt photos. Most of the quilts are photographed in locations that appear to be beyond Shabby Chic and well into ramshackle and derelict. In the picture of the Beach Quilt, Candy version, the viewer sees more of the wall than the quilt. The book designer did include a quilt gallery with 4 photos to a page (this book is on the larger side) so the reader can see the quilts laid out flat without the creativity of the stylist.

View all my reviews
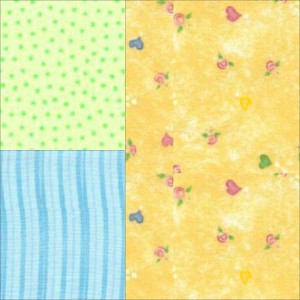
Block-a-Long #21: Off Center 4 Patch

Off Center 4 Patch #21

I love the 4 patch block. Mostly I like the simplicity, but I also like how it can be used as a building block for other blocks and projects.

You can use two fabrics, placing them on the diagonal from each other or you can use 4 fabrics for a more scrappy look.

This is block number 20 (I put up the 9 patch twice and haven’t replaced it yet), so I have made a quilt from all the blocks in the project to show you.

The quilt is made from all 20 blocks and you can see how complex it looks, even though each block is pretty easy to piece.

20 Block Quilt
20 Block Quilt

I probably wouldn’t put a black border on the quilt again, but it does contain the variety.

If you have made blocks or a quilt, post a link in the comments section of the relevant block or on the AQ Block-a=Long Flickr group.