Book Review: Masters Art Quilts v.2

UPDATE 8/26/2011: Giveaway is closed. See information about the winner in the 8/26 post. Please leave other comments in the comments section. I love hearing from you.

Masters: Art Quilts, Vol. 2: Major Works by Leading ArtistsMasters: Art Quilts, Vol. 2: Major Works by Leading Artists by Ray Hemachandra

Another 39 quiltmakers have been included in this volume of Masters:Art Quilts Vol.2, which makes me happy for a number of reasons. First, I think the first volume was successful. Second, there may be more volumes to come. Third, Lark may be setting a trend of inspiration and essay type quilt books. Fourth, more eye candy for me. 😉 I wrote a review of the previous edition in which I wrote the possibility of a series of books on inspiration and I also talked about some of the artists included.

This second volume continues all the good included in the first book. This book also includes different artists, some with whom I am familiar, some of whom are new to me, others who have been absent from my sphere for awhile.

I received this book, again, for free to review from Lark Books. Thanks to Amanda and Ray for keeping me on their list! As if that weren’t enough,  Lark has, once again, agreed to give away a copy of this book in conjunction with this book review to one of you lucky readers! See the rules below.

This book is thick, square and heavy. Each of the 39 artists, again, have multiple pages on which their works are displayed. As I mentioned in my previous review, this layout gives the reader an idea of the breadth of work each artist has produced. Additionally, the layout celebrates the artists throughout the book: the title page has their names. The back cover has the artists’ names. The table of contents lists them and each section devoted to the artist has their name on the edge of the page. This layout seems makes me feel good about reading this book.

Martha Sielman curated this group of quilts. She reminds us, in her introduction, that the point of art quilts is to look beyond the obvious imagery to what the artist is trying to say. Art quilts have been on my mind, in particular my art quiltmaking since I co-hosted Creative Mojo with Mark Lipinski, and reading the introduction helping me move towards understanding what I am thinking about in relation to art quilts. In some respects art quilts are about a story and Sielman says “you’ll discover many stories that enrich your appreciation of both art and the world around you.” (pg.7). So far, I think this is true for me. The introduction, which I read after I perused some of the photos made me wonder about photo realistic quilts again. The question in my mind is whether or not the artists that use this technique trust their own drawing or painting or image development skills? I wonder…

I noticed a lot of neutrals throughout the book. I expect that in an art quilt book because a lot of the artists use nature imagery.

Nelda Warkentin’s work looks like fractured ice crystals. Her piece, Tropical Dream (pg.140) is spare compared to other works and it contrasts with other dense complicated work. It gives the reader the opportunity to meditate on the wide variety of art quilt imagery.

Reiko Naganuma’s quilts are bright and cheerful. They are a contrast to many of the other quilts, but they still fit in. Her quilts also appear to have visible texture (pg.169, 171).

I was very pleased to see Rise Nagin show up in this book. Her quilt, Target: On the Beach (pg.221), has been on my mind lately. I remember seeing it in the early 1990s and, lately, I was wondering if she had moved on to a different medium. Her older work has an ethereal quality while her new work has more color and layers. Seeing Nagin’s work again makes me wish for more biographical information in this book.

In looking through this book, with its wide variety of quilts, I found that many art quilts are messy. It occurred to me that messy quilts could be a turn off for some people and made me wonder if art quilts could be made neatly. Warkentin’s piece, Tropical Dream (pg.140) is fairly neat, which further led me to wonder what role the neatness/messiness of the quilt plays in the quilt’s story?

My favorite piece is probably Letters Lost by Margery Goodall (pg.293). I am surprised at the name, but that makes me like it all the more. This quilt has rectangles laid down in vertical rows. The rectangles are sewn with one straight line through each column of rectangles. The colors are very light as well. Not one color, but very pale with hints of brighter colors. I like the texture of the fabric that is not completely sewn down.

I also like the paper doll feeling of Rachel Brumer’s quilt Triplets (pg. 320). I would have liked to see an index with all of the names of the quiltmakers and their quilts in alphabetical order.

There is a lot of piecing in this book and many of the artists used commercial fabric. There are a lot of faces depicted in this book. The editors have not highlighted one technique or image. There is a wide variety of work and artists, so that all quiltmakers could enjoy this book. This book should definitely be on your ‘to purchase’ list.

View all my reviews

Giveaway Rules:

1. Go to the Lark Crafts site and find something quilt related that you enjoy

2. Come back here and tell me about it in a comment on this post. Write something meaningful or thoughtful.

3. The giveaway deadline is 8/19. I’ll pick a winner after midnight on 8/19 and post it over the weekend.

4. Make sure I can get a hold of you.
Block-a-Long #17: 9 Patch Tile

9 Patch Tile #17
9 Patch Tile #17

This block reminded me of a part of a tile floor. I wanted to name it tile floor. I am trying to keep these blocks organized by grid. This is, essentially, a 9 patch grid and shares a lot of elements with the 9 Patch Go Round. You probably need at least 3 colors for this, but 5 would add interest.
9 Patch Tile #17 Rotary Cutting Directions

Creative Prompt #117: Numbers

TV Show
iWork Numbers
the things you count with
vast amounts
Numbers Music
by the numbers
Can everyone give me their numbers?
credit card numbers
Powerball numbers
Numbers Night Club, San Diego
Numbers and strings (programming in Java)
Library of Congress Poetry 180 Project: Numbers
Port numbers
ISBN Numbers
algebraic number
LCCN numbers
Library of Congress call numbers
running the numbers
Dewey Decimal numbers
prime numbers
Nielsen ratings numbers
Bank routing numbers
Account numbers
800 numbers
whole numbers

Post the direct URL (link) where your drawing, doodle, artwork is posted (e.g. your blog, Flickr) in the comments area of this post. I would really like to keep all the artwork together and provide a way for others to see your work and/or your blog, and how your work relates to the other responses.

The Creative Prompt Project, also, has a Flickr group, which you can join to post your responses. Are you already a member? I created that spot so those of you without blogs and websites would have a place to post your responses. Please join and look at all of the great artwork that people have posted. Post yours and get kudos!

ABC Challenge

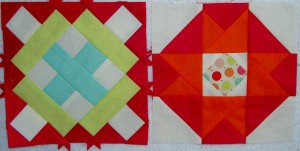
Two ABC Challenge Blocks

I really did want to do the Farmer’s Wife Quilt-a-Long, the Summer Sampler Series and the ABC Challenge at BAMQG, but decided that I can’t do everything. I have other projects to get busy on, too. As much as I would like to just make blocks forever, I have to do other things. The most important group block project right now to me is the guild’s ABC Challenge. The group is doing two 12″ blocks every month. I am doing one 6″ block.I want to support the BAMQG, so, finally, after getting behind by 2 letters, I sewed two blocks on Sunday.

I might do two if I have time and find two block patterns I like, then I will do two. For now my parameters are:

  • 6″x6″ blocks
  • One per month
  • Pat Bravo Pure Elements solids
  • Riley Blake Sweet Nothings by Zoe Pearn dot

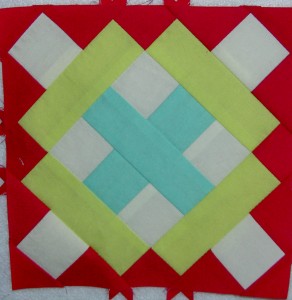
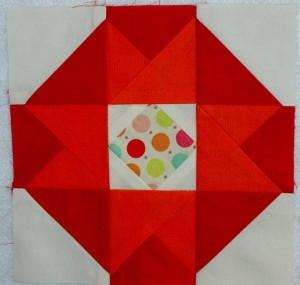
I didn’t find any blocks I felt like making in my favorite block book, Around the Block, so I pulled out Around the Block Again and Once More Around the Block and found the two blocks I made in the former. I was shocked to find that some of the directions included ‘T5’ and ‘T42’ rather than a number of how to cut the patch. It turns out that there are templates in the back. I assume the author intends me to cut them out and use them that way. Instead I measured them and realized that she used templates, because the sizes are weird: 1 5/8, 2 7/8, somewhere in between 3 5/8 and 3 3/4, etc. I just cut to the nearest larger size and trimmed as I was making the blocks. Perhaps that is why I haven’t used this book much until now?

Basement Window
Basement Window
Air Castle
Air Castle


Yes, the blocks are bright. I want bright and I want to use some of the new fabric I have purchased recently. I may add other prints. I will use more of the Riley Blake/Zoe Pearn dots. For now, I am still experimenting with how much white works and how the solids I have look with each other. The next block may be different.

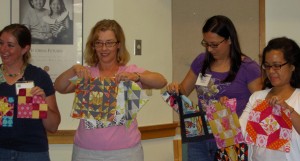
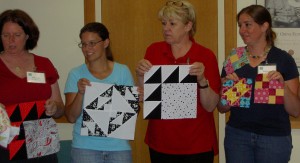
Some of the blocks that other members made are below.

BAMQG ABC Challenge Blocks

I have always enjoyed making blocks. I don’t do it enough. As I have been walking past these blocks all week (they are displayed on my design wall) they are making me feel happy. Perhaps they don’t have as much interest as some blocks with other fabrics would, but they are really cheerful and are making me itch to get back to the sewing machine. I wonder what block is next?

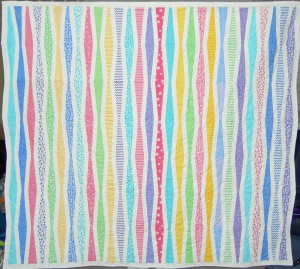
Finished: Zig Zaggy Quilt

Zig Zaggy - final
Zig Zaggy - final

I find this to be an odd quilt. It was a fun challenge to put together, but it looks so out of place with all of my other quilts. I like it, but don’t know what to do with it.

Nota Bene: my quilt hanger said that this is about the largest quilt he can hold for me. I suggested he train The Young Man and they work in tandem for larger quilts.

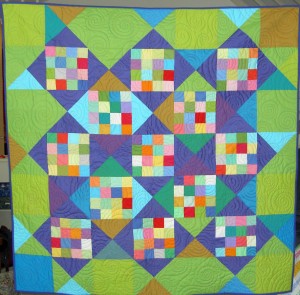
Finished: Kona Challenge

BAMQG RK Kona Challenge

On Friday, I made the sleeve for this and the Zig Zaggy quilt. As a result I can say that this quilt is completely finished! Hooray!

Making the sleeves is another one of those tasks that I don’t like that much. I have to say, though, that using Robbi Joy Eklow’s directions from her book Free Expression. It may seem like a lot of fabric, but I love the way these sleeves look: professional and finished.

The BAMQG Board got charm packs from Robert Kaufman.

Block-a-Long #16: Bow Block

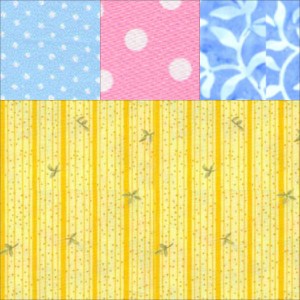
Bow Block #16Bow Block #16
Bow Block #16

Somehow I got it into my mind that this looked like a gift. Not sure why, thus the name.

To make this block, please print or look at the rotary cutting guide (see below). Piece the 3 small squares and then sew them to large rectangle.

I would suggest a minimum of 3 different colors or fabrics, but 4, as I have used, would work well, too.

Bow Block Directions

Sketching #114

CPP Response #114
CPP Response #114

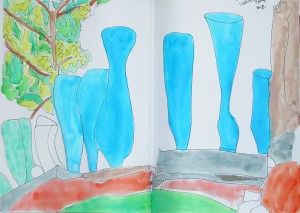
This is not part of my regular series of responses. I just had a desire to try my hand at responding in watercolors this time. I didn’t follow the color of the original photo, exactly. I used colors that were similar and made me happy, well, at least for the bottles and the tree. I drew the picture in a modified kind of not looking at the photo kind of way. I tried to look at the picture and not my paper, but I did glance at the paper now and again just to orient my pen. I didn’t draw enough lines for the tree and had to add them later. The tree needed more definition than the paint gave it.

The supplies I used were a set of Crayola water colors and a medium Pitt pen.


Book Reviews: 3 Jewelry Books

Chains Chains Chains: 25 Necklaces, Bracelets & EarringsChains Chains Chains: 25 Necklaces, Bracelets & Earrings by Joanna Gollberg

This book was sent to me for free by Sterling Publishing. Thanks to Ray at Lark and his whole team for thinking of me. I am not a jewelry maker, so this will be a basic review.

The first thing I noticed about this book is the binding. I don’t know what it is called, but the books lays flat even though it does not have a spiral. Interesting. There is a comprehensive table of contents and an index (YAY!). The authors, Joanna Gollberg and Nathalie Mornu exploit the chain part of necklaces throughout the book, starting with “A Chain Letter”, which is the introduction or foreword.

After a page of tools, the book starts into projects. The photos are large and appealing. The page layouts are light and airy and I like the circle motif the publisher used throughout the book. The projects come from different designers, but the projects have a modern feel with a lot of space between the elements. The projects do become denser as the maker works his/her way through the book. The projects look cohesive.

There is a basics section at the end, which talks about metals and their properties, including precious metals, and tools and equipment. The techniques section, which follows includes cleaning metal, transferring designs, chasing, bending sheet metal and much more. There are also sections on soldering and finishing, which I am guessing are the quilting and binding of the jewelry world. A very useful Mandrel and Ring Size conversion chart is also included.

I enjoyed looking at the inspiration section, which includes a gallery of additional pieces (not projects). I really like the Double Circle Bracelet on page 134.

Maggie Meister's Classical Elegance: 20 Beaded Jewelry Designs (Beadweaving Master Class)Maggie Meister’s Classical Elegance: 20 Beaded Jewelry Designs by Maggie Meister

Maggie Meister’s Classical Elegance: 20 Beaded Jewelry was also sent to me from Lark Crafts/Sterling Publishing for free. Again, there is a comprehensive table of contents and an index as well as a very small bibliography. The gallery at the end shows several pages of amazing necklaces, which look more like museum pieces than jewelry. When I looked at some of them, I thought they might be historical reproductions, but I don’t see anything that says one way or another.

The first part of the book goes over basic tools and stitches. The author talks a bit about the pros and cons of different clasps, the Great Thread Wars, and different types of ear wires and posts. I like it that she injects a bit of humor into what can be a boring, rote section. Stitches, both in the beginning and in the projects include a lot of diagrams so the maker can clearly see the author’s method of creating. The stitches section would be good for quiltmakers who are embellishing their quilts.

I like it that Ms. Meister talks about her inspiration, which, in part, comes from ancient pieces. Each project has a brief description of something historical that influenced the piece. The inspiration could be common practices at the time, marriage jewelry, and torques worn in ancient Ireland. I would have liked to have seen some footnotes for these comments.

I think most of the projects in the book walk the fine line between lush and over-the-top very well.

Chapter 5, starting on page 96, is called Architectural elements as Inspiration. The facing page (pg.97) has photos of chimneys, title, a Russian (or maybe Greek?) Orthodox church and other architectural elements that can serve as inspiration for any kind of creativity.

Check this book out and see how different things in the world around you can inspire your creative work.

21st Century Jewelry: The Best of the 500 Series21st Century Jewelry: The Best of the 500 Series by Marthe Le Van

For my purposes, this book is definitely the best of the three. This book is pure eye candy. Thanks to Ray at Lark for sending me this book for free!

The foreword and juror statements are a little bit strangely formatted. The designer of the book used different sizes within the same sentences, which makes parts of the text jump out at’ me when I read. I wonder if I just read the larger text if there would be some kind of subliminal message? I didn’t take the time to try that.

Starting on page 12, there is very little text – just artists’ names and the names of pieces as well as size and materials used. The major part of the book is all about inspiration. Most of these pieces are art and could not really be worn anywhere where you had to get in a car or pick up a drink much less to work or to pick up the kids at daycare. The Puddle Series Bracelet is one such piece. It doesn’t matter, though, because these one of a kind (presumably) pieces are gorgeous to look at

These pieces are also not the thrown together pieces that can be made in a few hours. The shapes and forms are, in many cases, organic and curvilinear. The colors are also, mostly, neutrals and golds. There are a few pieces with other colors and they really shine. Most of the pieces are metal, but I saw a few fiber pieces. One of my favorite pieces is I Long for Your Touch (pg. 99) by Roberta and David Williamson. I like the face and leaf shapes.

It is not clear to me what type of jewelry many of the pieces are intended to be. I am not bothered by this, because I won’t be buying or wearing these pieces and can be inspired from bracelets and broaches. If you need to rev up your creativity, take a look at this book, regardless of your medium.

Check the A Work of Heart blog for a giveaway of one of these books. A Work of Heart is San Jose is an awesome art studio where experienced artists teach a variety of jewelry classes as well as other classes. It takes me an hour to get there and it is well worth the drive. In a way it is good that the studio is not around the corner. If it was, i would not see my child grow up or remember my family and I would be broke, because I would be there all. the. time. If you haven’t been there, make the time. Not only will you have fun, you will be inspired.

Creative Prompt #116: Breakfast

Watch this video from Danny Gregory and be inspired to do something wonderful for your response.

Post the direct URL (link) where your drawing, doodle, artwork is posted (e.g. your blog, Flickr) in the comments area of this post. I would really like to keep all the artwork together and provide a way for others to see your work and/or your blog, and how your work relates to the other responses.

The Creative Prompt Project, also, has a Flickr group, which you can join to post your responses. Are you already a member? I created that spot so those of you without blogs and websites would have a place to post your responses. Please join and look at all of the great artwork that people have posted. Post yours and get kudos!

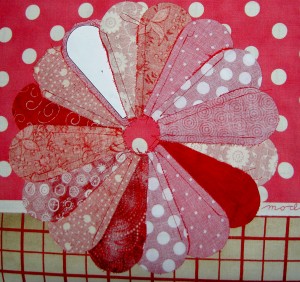
Sampler Class: Making a Dresden Plate

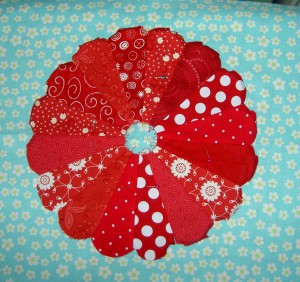
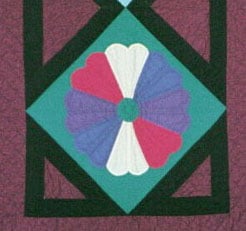
The next block is the Dresden Plate, which we are making using templates. If you would like to see a wide variety of Dresden Plates, you can do a Flickr search to see what others are doing.

Supply list:

  • pen
  • heat resistant template plastic
  • Glue stick
  • paper scissors
  • Pilot SCUF black thin point pen or Pigma Micron or Sewline pencil
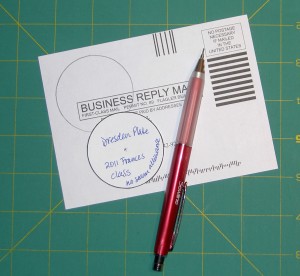
  • magazine subscription postcard or small piece of scrap card stock
  • pins
  • 12.5″x12.5″ or larger square rotary cutting ruler
  • fabric
  • Mary Ellen’s Best Press (or similar)
  • stiletto or similar (popsicle stick might work)
  • sharp fabric scissors
  • thread for piecing
  • sewing machine
  • basic sewing kit
Auditioning Fabric
Auditioning Fabric

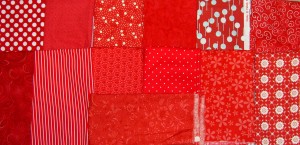
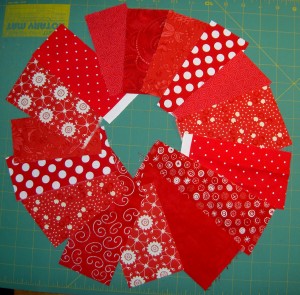
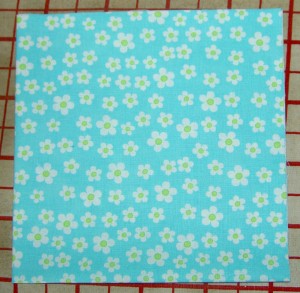
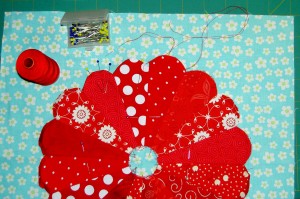
1. Select your petal fabrics. You can use 2 or many. You want to be able to see the work you have put into this block. Above are all of my options. I didn’t end up using all of them.

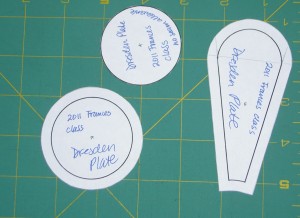
2. Print 3 copies of Dresden Plate Templates pattern. Two you will cut out and one you will keep for future reference.

Rough cut templates out of pattern sheet

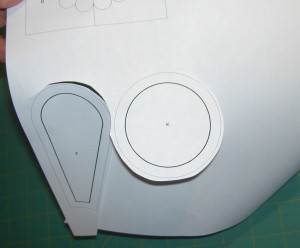
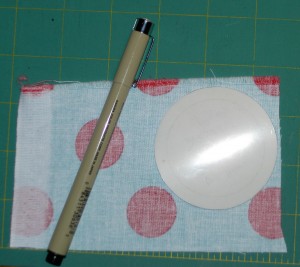
3. From one pattern sheet rough cut around the petal and the circle including the seam allowance.

4. From one pattern sheet rough cut around the circle template and the petal template excluding the seam allowance. On the petal, cut off the thick black line. For the circle, leave the thick black line on the template.

Optional: Write ‘Dresden Plate” on each piece (or some way of identifying why you made these templates for later). Make a notation on the circle with no seam allowance so you don’t it mixed up with the other circle.

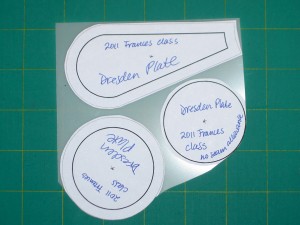
Glue paper patterns to template plastic

5. Glue circle and petal templates to template plastic

Templates Cut Out
Templates Cut Out

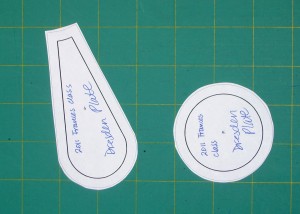
6. Carefully cut templates out of template plastic just outside of thin outside line.

Extend Lines
Extend Lines

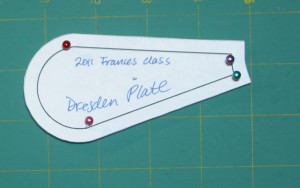
7. Extend the straight line into the seam allowance with a ruler and a very sharp pencil or pen.

8. Right where the curve starts to move away from the straight line of the template, draw a line between those two points.

Poke Corners
Poke Corners

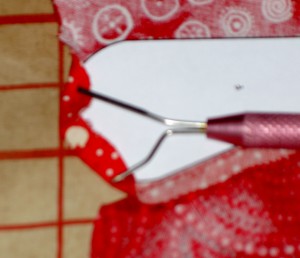
9. At the intersection, poke the corner of the petals to mark sewing start and stop points. I used a pin and then enlarged the holes with a seam ripper.

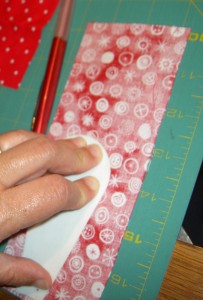
Optional: Spray rectangles of petal fabric with Mary Ellen’s Best Press to control the bias.

Trace Around Petal Templates

10. Trace around the petal template face down on the wrong side of the fabric. Hold the template tight down on the fabric with your fingers near where your pencil or pen is moving around the template.

Note: test to make sure that your quarter inch seam line covers the mark you made. If it doesn’t use a pencil.

Fabrics Ready to Trace

11. Use at least 2 different fabrics to trace 16 petals. You can use many more. You want to be able to see the work you have put into this block. If you use two, alternate them.

Trace Circle on Fabric for Center
Cut out Center Circle

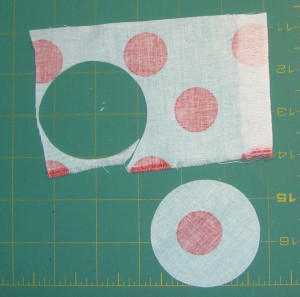
12. Trace a circle using the template with the seam allowance. Cut out the fabric circle with a generous seam allowance (more than 1/4″).

13. Cut fabrics using very sharp fabric scissors OR cut straight lines with rotary cutter and curved seams with fabric scissors.

Petals on Dots
Petals on Dots
Petals on Flowers
Petals on Flowers

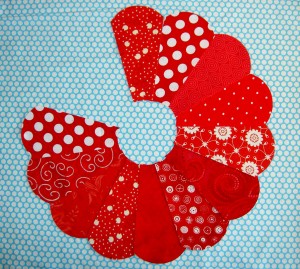
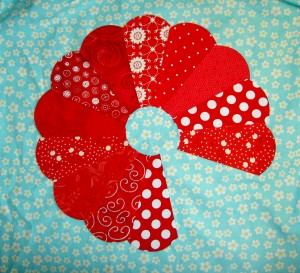
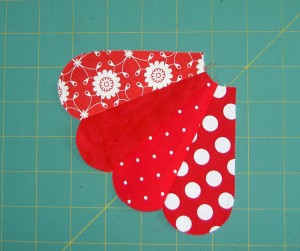
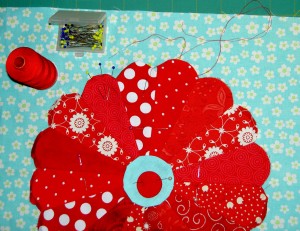
14. Choose your background fabric by laying the petals on the possible background fabrics, approximating the shape of the Dresden plate.

15. Cut a 13.5″x13.5″ background piece. Your Dresden Plate will be appliqued to this piece. Make sure it is square by using a 15″x15″or larger square ruler. You want to cut a larger block, because the sewing of the block may make it shrink up. You will trim the background piece once your block has been completed. Set this aside for now.

16. Line up two petals, right sides together.

17. Pin pieces together by lining up the holes you made when you traced around the template.

Sew from Point to Point

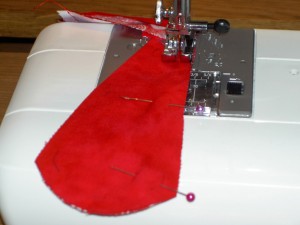
18. Sew from point to point, back stitching at each end. DO NOT sew into the seam allowance.

19. Press seams open.

Group of 4
Group of 4
4 Groups of 4
4 Groups of 4

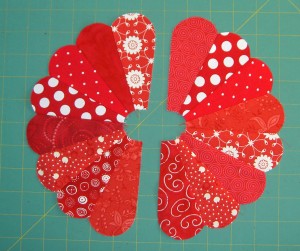
20. Sew petals together in groups of 2, then sew the groups of twos to each other to make groups of 4, etc.

21. Sew between points, back stitching at each end. DO NOT sew into the seam allowance.

Completed Plate
Completed Plate

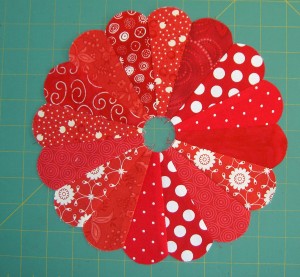
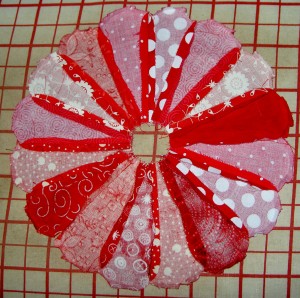
22. Sew all petals to each other, back stitching at each end, making a ring.

23. Press all seams open.

24. Trim threads.

25. Lay petal ring face down on your ironing board.

Plate face down
Plate face down

26. Lay the petal template without the seam allowance (which must be made from heat resistant template plastic or cardboard. Don’t use something that will melt) on the back face up.

Press Curve
Press Curve

You probably won’t be able to get the seam allowances flat, but press enough so the fabric knows where the curve is. It will help you when you go to stitch it down.

Press Curve
Press Curve
Finished Pressing all Curves

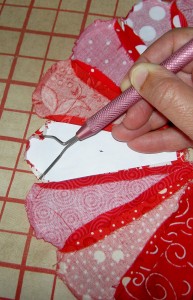
27. Press the curve into the outer edge of each petal. Use the stiletto to hold down the edge and iron right over the stiletto tip and the template. This is the miserable step, so intersperse some chocolate or some other sewing. Lay aside.

28. Take your cut piece of background fabric. Fold it in half and press lightly.

Fold Background in 1/2, then 1/4s

29. Fold your background fabric in half again (in quarters) and press lightly.

30. Open and you should be able to see the cross you have pressed into your background piece.

Center Plate on Background

31. Take your plate of petals and line up 4 of the seam allowances with the pressed cross on your background fabric. This will center the plate on the background. Make sure you pay attention to the vertical as well as the horizontal.

32. Pin in place

33. Use thread that matches the plate or is neutral for hand applique’ or a blanket stitch to sew plate to background. You can also machine applique’ the plate to the background. We will cover that technique in another lesson, but there are many other tutorials available.

Move Pins as you Stitch

34. Pin curved edges of plate as you move around the plate to applique’.

35.Know the thread so the knot does not pop through the background.

36. Bring the thread up from the back through the fold of the plate (where you pressed the seam allowance).

37. Tug gently and put the needle into the background, just catching it, and pull the needle tight through the fold of the plate again.

38. Go around the entire plate in this manner, using the needle to tuck in the seam allowance so it has a smooth round shape.

Trace
Trace

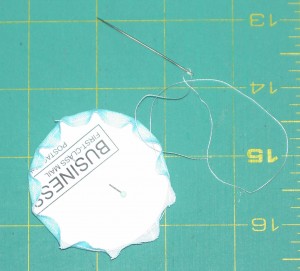
39. Trace the circle template without the seam allowance onto the magazine subscription card.

Cut out Circle
Cut out Circle

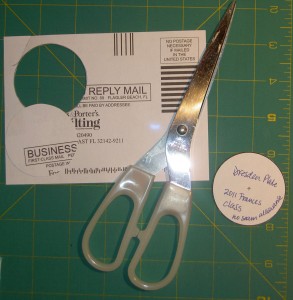
40. Cut out the magazine subscription card circle, being sure to cut off the pencil/pen line.

41. Take the circle fabric you have cut and wrap it around the magazine subscription card circle.

Use a Running Stitch to Draw up the Circle

42. Using any thread, take a running stitch in the seam allowance of the circle fabric and tighten it, keeping the magazine subscription card circle flat. If the magazine subscription card does not have enough body, you can also use the circle template without the seam allowance.

Pressed, Drawn up Circle

43. Press the drawn up circle well, so it is flat and a perfect circle. You will need to tug on the thread to draw the circle up as you press the first time. Once the fabric knows it needs be pressed you can pull the thread tight and make a knot.

Center Circle Ready to Applique'

44. Pin the circle to the center of the block, covering the raw edges of the center petals.

45. Applique’ using the same directions you used to applique’ the plate.

46. Trim block to 12.5″x12.5″. You might want to wait until you start assembling the quilt.

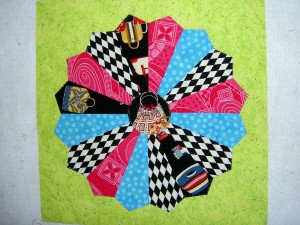
Dresden Plate Sample

The green, turquoise, black and pink sample Dresden Plate was made for the class I taught in 2006/2007. I did this one a little differently. I machine stitched the plate to the background and the circle to the center.

As you can see, I also fussy cut fabrics to take advantage of larger spaces in the quilt block.

Dresden Plate detail

In the solid Dresden Plate, I placed like fabrics into groups of two for a slightly different look. The center circle was a good showcase for a bit of hand quilting.

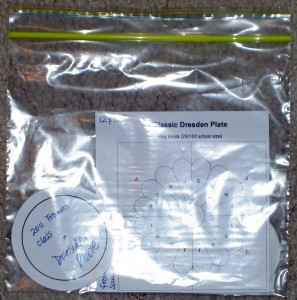
Store Templates in a Ziploc Bag

I may add some more photos to illustrate steps better and will link to this tutorial from the Artquiltmaker Info–>AQ Tutorials link under the header (see above).

I store my templates in a ziploc bag with a picture of the block or a label with the name and size of the block on it.

Various & Sundry 2011 #14

Save 20% this week from Cafe Press using the code TA0802. You can buy from any shop, but especially the Artquiltmaker Store. 😉

Learning
Everyone on the web seems to be way better at Photoshop Elements than I am. My friend, La, tries to give me little tips, but I forget by the time I get home. As result, I have helped to organize a class at Always Quilting on August 27, 2011, 10-4 and is taught by Lynn Koolish of C&T fame. It is open to everyone though the BAMQG and CQFA folks have had a two week headstart on sign ups. The class is now on the shop’s website. You can register via the website or by calling their shop at (650) 458-8580. Hope to see you there!

I was listening to an episode of Creative Mojo the other day (via podcast) and Mark was interviewing Patrick Doughty, an artist whose medium is sticks. I wasn’t terribly interested in the work, but find that I can always learn something. He said something really profound in response to a question about getting stuck. He said (paraphrasing) that it takes time to get into the groove of creating. He creates every day or only takes short breaks. this helps him not to have to get back into the groove, because he is already in the groove. This is a really important part of how I work. I think, write or read about quiltmaking every day I cannot be at the sewing machine. I cut, press, fold and organize fabric when I can’t sew (like last week when my machine was getting services). Every other time, I sew. I am always in the groove, because my work is in the forefront of my mind.  I do get stuck on projects, but then I move to another project or cut, press, fold and organize my fabric.

Quilt-a-Longs
I think I talked about the Farmer’s Wife Quilt-a-Long. There are a lot of blog posts, discussions and projects blooming out of it. I saw on the ModaLissa site that the United Notions people are having a Hen Party (go read the post) that also has to do with FWQAL. Perhaps I do need to jump in…meaning ‘need’ in the broadest and most non-committal sense of the word.

Camille Roskelley of the gorgeous red dotted chair blog, ok the Simplify blog, has posted another group of her Farmer’s Wife blocks. I love them! Perhaps I do like grey after all. I think I have get out my Ultimate 3-in-1 color tool and see what I can learn from her color scheme.

How about my Block-a-Long? Have you made any blocks? Let’s see them? Are they boring?

Color
I am reading a book (review soon-ish) and I realized the author was not doing complicated piecing, but was creating complex color stories to tell in the form of a quilt. I am intrigued by this concept, especially after working on FOTY 2011. I ran across the Michael Miller site, which is doing color stories every week also. During the week of July 20 they had an aqua and red color way, which you know I love.

Media
I am feeling like Miss (Ms?) Popularity lately. I never was one of the cool kids at school so I am not quite sure how to handle it. I was recently interviewed on episode 2 of the SeamedUp podcast. It was fun to talk to the SeamedUp ‘girls’ and get to talk about design a little bit, my blog and life a little bit. They produce their podcast in a very professional way, I think, but laugh a lot along the way.

I was listening to a recent Annie Smith episode and heard about Cori Blunt. I took a look at her website and blog. Her drawings are really sweet, I especially like her bike pillow. Of course, I probably wouldn’t do any of those quilts, but I can admire them. I do like the way she did the sashing around the star blocks in the Cherry Tweets quilt. Very clever.

In conjunction with her episode #166, Amy of Creative Mom Podcast post GORGEOUS pictures of stairs with mosaics on the risers. Even if you don’t listen to her podcast (which you should!), go take a look at these photos. They are wonderful and make me want to do some mosaic work on my stairs.

I think I heard about GenerationQ magazine from Adrianne at some point in the not so distant past. I was reintroduced to it last week via an article they did on smartphone quilting apps. There are two that are interesting to me. One is block pattern app similar in concept to Around the Block, one of the most useful books in my library. The other, which constantly made me think of TFQ is the Fabric Stash by Blueshift Software app. She needs this app. This one does not get high marks, but the writers say that the portion where you can document your fabric stash works really well. It seems easy to photograph your fabric and keep it handy on your phone when I go shopping, especially for projects like the Food Quilt where I am trying to get one piece of many different fabrics. it is on the pricey side for apps, but it may be worth trying out. Now to get Blueshift together with SeamedUp so I can zap my fabric from my phone straight into SeamedUp. That would be awesome (at least in my head).

Other Artists

Lil Sissy passed on a  good blog post from Kelly Rae Roberts. I think it worth reading and keeping in mind. Short version: there is a time to dream and a time to savor.

Vicki posted an Art Saves story on Crescendoh. I didn’t know about those stories until I saw a link on Vicki’s site and happened to click on it. Very interesting. I like the stories.

Fabric

Last week, Julie of The Intrepid Thread post some photos of new fabrics in her shop. She posted:

  • Sweet Treats http://fb.me/16eeAMWIt
  • Licorice Cloud http://fb.me/SdMcvn79
  • Cotton Candy http://fb.me/wwGp0deq
  • Sapphire http://fb.me/Ez55AJPA
  • Ruby http://fb.me/TwMwQ24o
  • Citrine http://fb.me/160LGuNQ8

They were some fabrics I saw when I was on my quilt journey a few weeks ago. When I saw them at New Pieces I thought that I couldn’t possibly use such fabrics, but when I saw the pictures Julie posted, I thought they might be fine if I cut them up. Is there a meeting point between fussy cutting and strip piecing that would allow the beauty of some of the larger motifs to come through? What do you think?

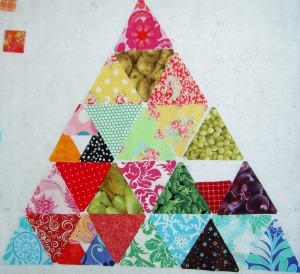
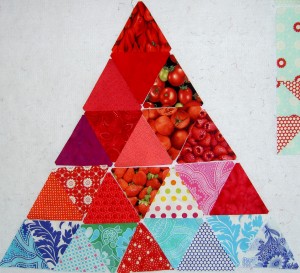
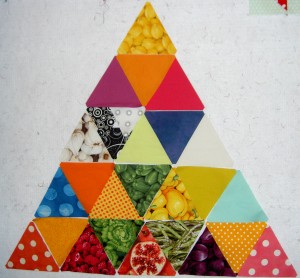
FOTY 2011 Triangles – End of July 2011

FOTY 2011 Triangles
FOTY 2011 Triangles

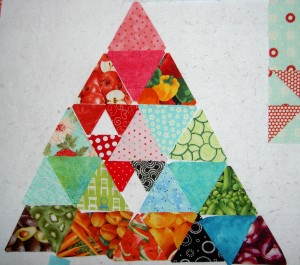
The triangle collection is growing, but not fast enough. The halfway mark for the year is long past and I have piles of fabric to wash and cut. Sigh.

I pressed a bunch while I was on the phone over the weekend. Being on the phone is an excellent time to press fabric. Get yourself a headset and try it out.

Still I have to cut the bits I need for various projects, too and I am behind on that. I realized that part of what was holding me up was the difficult to read list of patches I need to cut, so I have to redo that. Hopefully, that little project will speed up my process.

_______________________________________________

FOTY Triangles, also late July 2011

After writing the above, I got busy pressing and cutting. I have a much larger collection of triangles now and a slightly smaller pile of fabric to press and cut. I got into a routine and ended up getting a lot of prep work done for the Food Quilt.

All the fabric I bought is now washed and just waiting to be pressed.