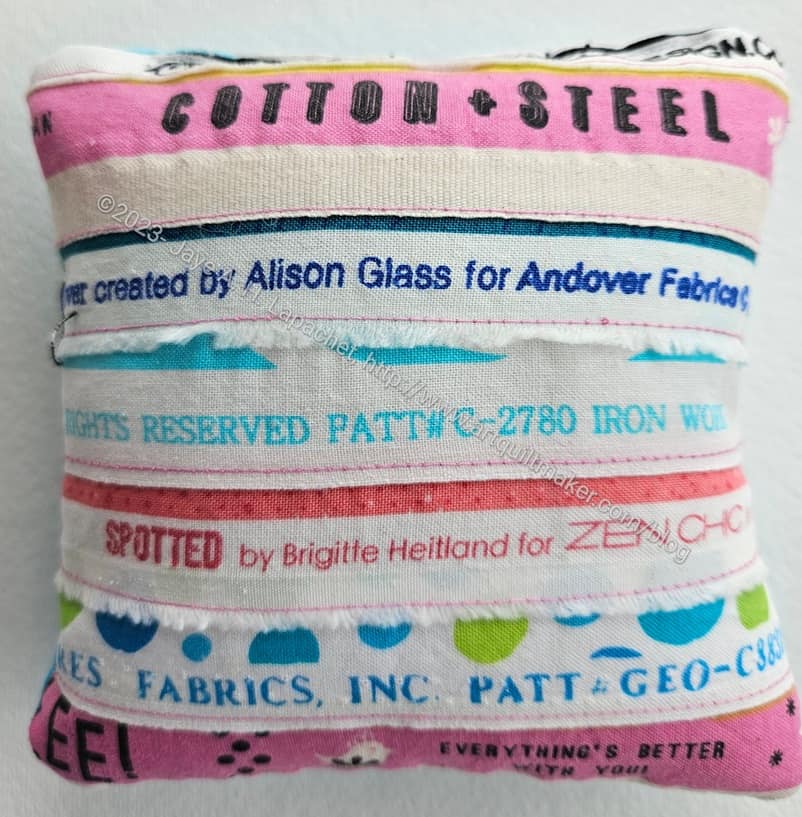
I decided to participate in the BAM swap, which was a pincushion swap. I was a little overwhelmed with life, so I just sewed my old standby pincushion, the Clippy Pincushion. The pattern is from Love of Patchwork and Quilting, issue 39. The pattern is also available digitally in the Apple and Google Play stores. I used this pattern to make the Clippy Pockets in the UCAB, which I find to be very useful. It isn’t rocket science, so I am sure you can make something similar without the pattern.
BAM Swap pincushion 2023
I did supersize this one a little bit. I wanted to make it slightly larger to accommodate the cool selvedges from which I made the back.
At first I machine sewed the stuffing hole closed, but then I unstitched and hand sewed it closed. I think it looks better hand stitched.
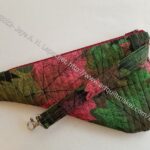
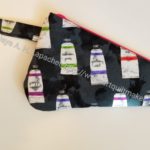
SueS asked me to make scissor cozies, as mentioned. I forgot to post about Maria’s. I made one for her before. I didn’t have the same fabric, so I picked out some coordinating fabric, so the two would go together.
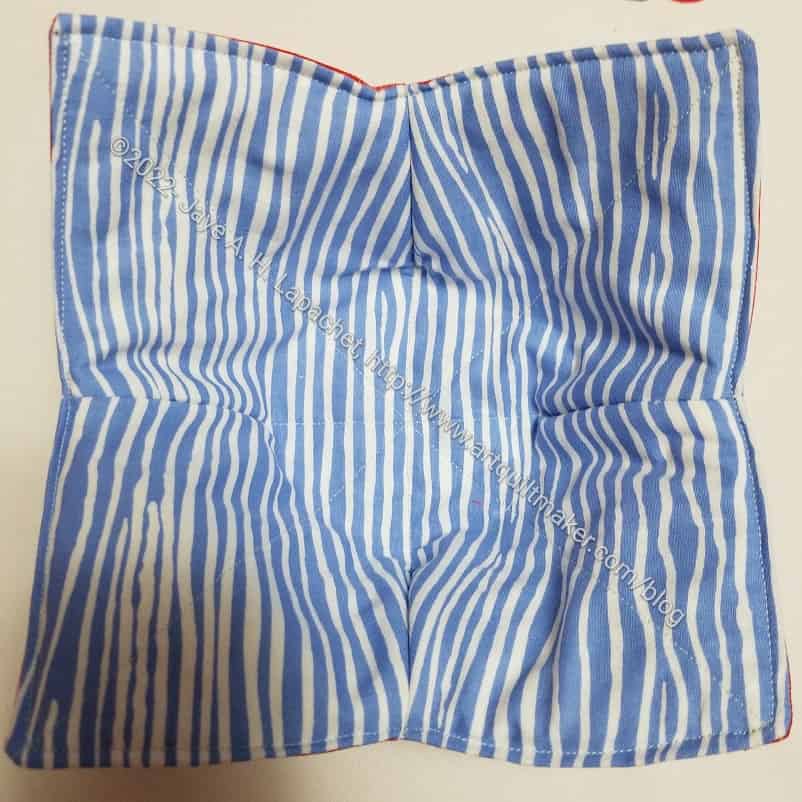
Maria’s Scissor Cozy #2 – interior
I am really pleased with the interior of this one. It came together very well and the stripes look nice.
I closed the bottom with a machine stitch. The handstitching looks better, but I didn’t want to spend the time
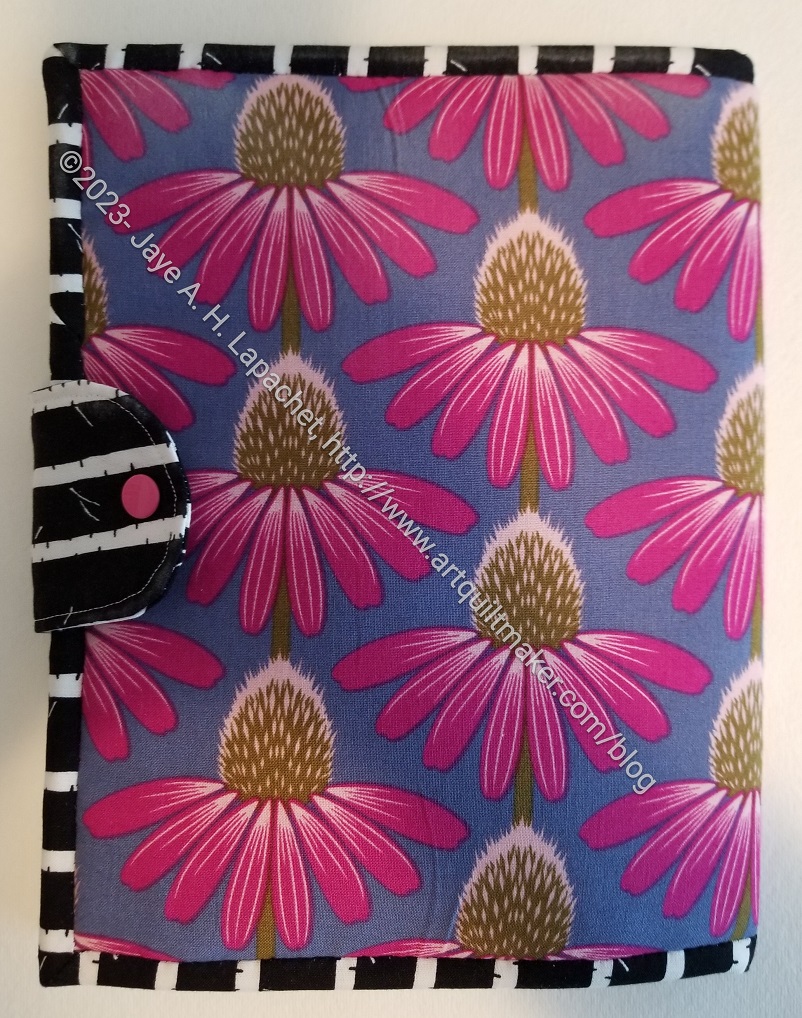
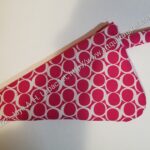
This project started off so well and wasn’t difficult. There was one crucial line missing from the directions that threw me off.
That line was “Remember, this needs to open like a book”.
It is perfectly usable. It would work very well for someone who was left handed. As you can see the opening is on the left. If the directions had said “Remember, this needs to open like a book”, I think I would have been able to better picture the directions in my mind. Instead there were a lot of words describing flipping the exterior in different ways, which was confusing.
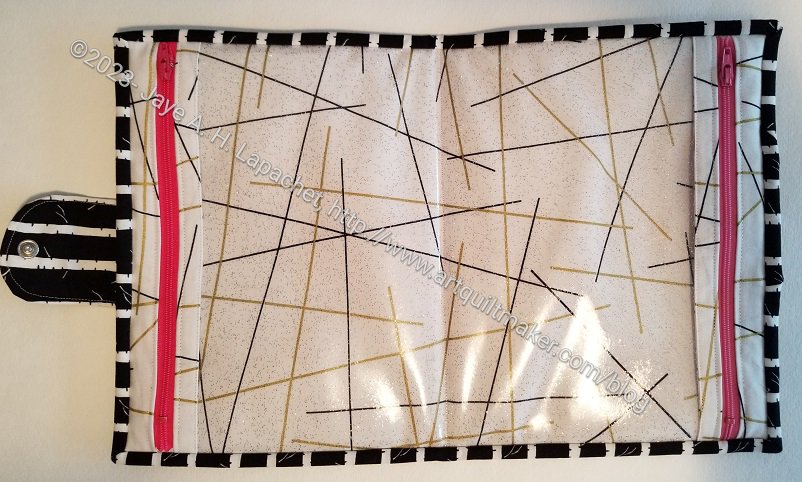
2-in-1 Case #1 interior
Also, I used a snap instead of the magnetic clasp called for, which I know had an effect.
I also added a piece of foam in addition to the fusible batting. I like the heft. I might try two layers of fusible batting next time. Yes, there will be a next time. I think this is a useful pouch/booklet, but also not difficult, so it is a good item for a door prize.
Despite the problems, I found this a fairly easy project. It also gave me practice in using my Snap Setter. I always wonder what my DH thinks I am doing when he hears me pounding away. I am always amazed that the tool doesn’t break.
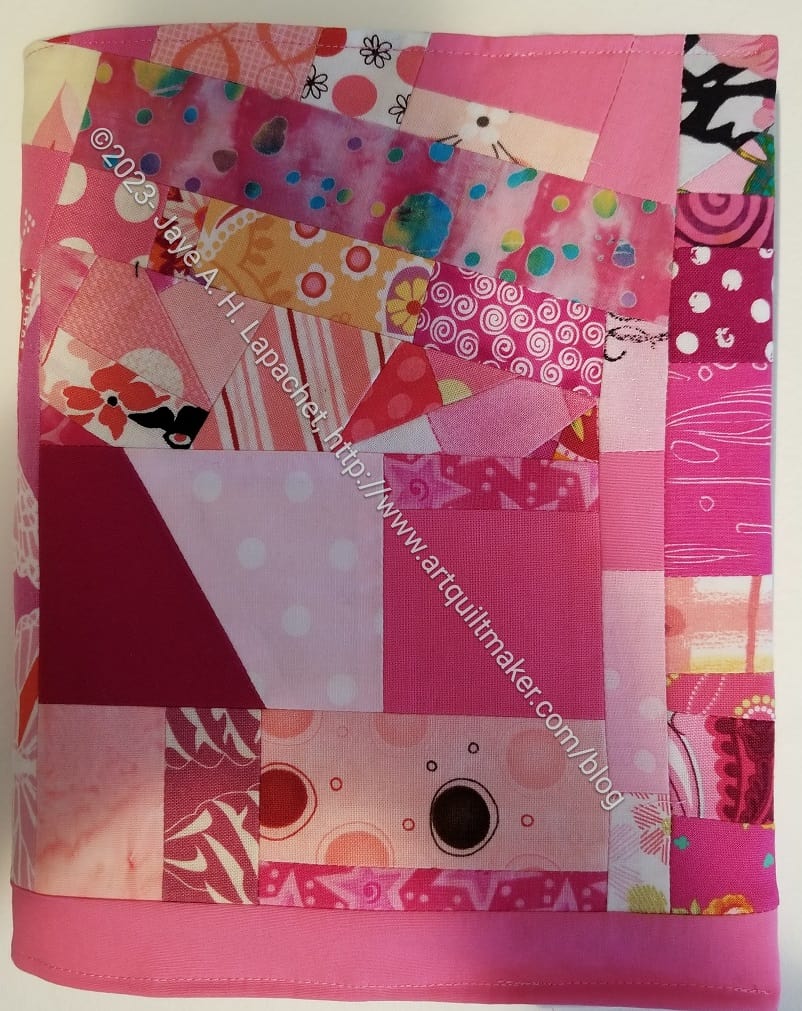
I had some bits of made fabric in my pink scrap drawer and they were getting in the way of me making new donation blocks. I decided to make another journal cover. The project also served as a palate cleanser after I finished another project.
This version isn’t as long as the tutorial demands. Basically, I was lazy and it works fine as is. There won’t be as much security if I were to put things in the cover, but this is a journal from 2009 and I don’t think I will be taking it off the shelves that often.
Another Pink Journal cover – back
I took the opportunity to look through it. I saw a lot of studies for the Creative Prompt project. Those made me smile. I liked doing those drawings. It was a great thing to do while I waited for the YM.
This one includes some fun fabrics.
I am out of practice making them so there was quite a bit of ripping at the assembly stage. The inside doesn’t look that great, but it doesn’t matter.
I know I finished pretty fast considering the quilts were returned to me not that long ago, but, yes, I finished the Lobster. It is now on my dining room buffet protecting the surface. It also brightens up the space.
I want to use it for the July timeframe, but I still have so few non-holiday tablerunners that I will use it for awhile and then switch it out for another. I guess I need to work on tablerunners for all the holidays like I made napkins for many holidays.
Colleen sent back the three quilts, a tablerunner and two pieces of foam -soon to be future bags – that I brought to her in October. What a bonanza!
Also, I have a LOT of binding to do, but soon I will be able to add a lot of quilts to my ‘Finished’ list.
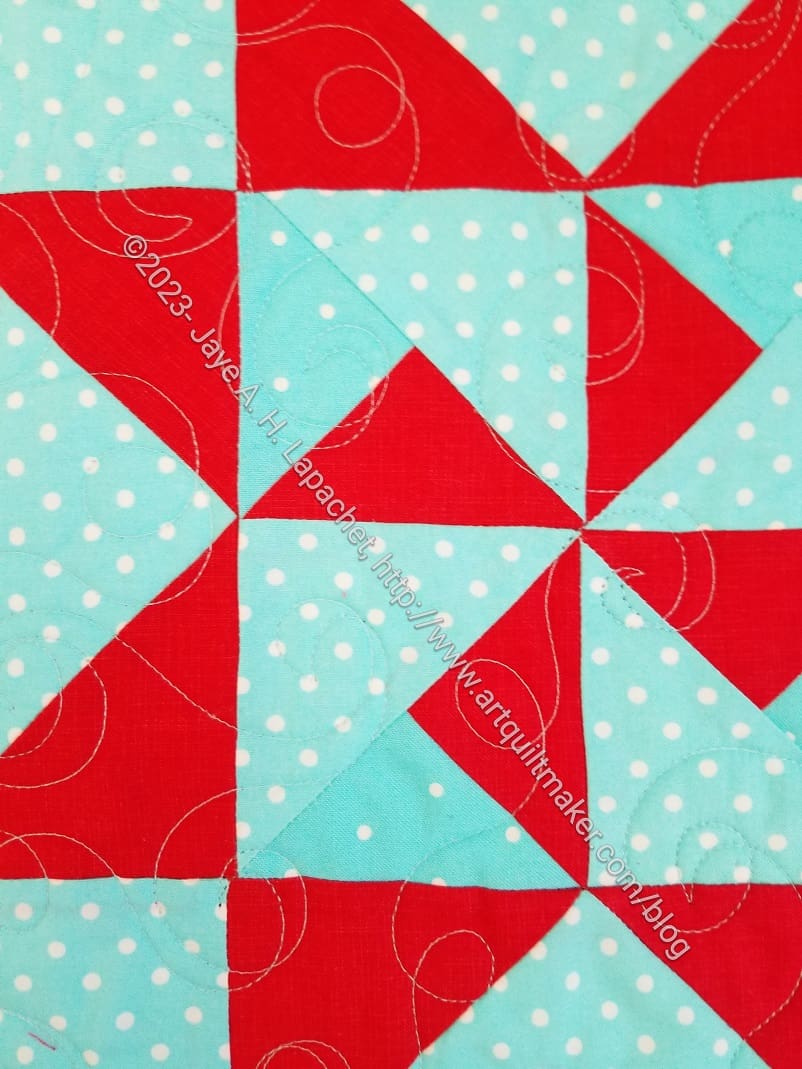
The Lobster – quilted
The Lobster looks great and it is first on my list for binding since I can use it right away. I know I thought about it for July, but I am sick of looking at the Cha Cha Cha tablerunner. I want something lighter and fresher.
The Lobster – quilted detail
As usual, Colleen did a great job quilting all of the pieces. She took particular care with the Lobster. On one hand, she quilted with two different colors of thread in some places as requested.
She was really careful around the embroidery I already did as well as the beads. Of course, she had an incentive to stay away from the beads since I am sure they would have done some damage to her machine, which I absolutely don’t want.
The Lobster – quilted detail
The Sawtooth Star blocks also look good. Sometimes those basic blocks can be super boring to quilt, but I like what she did.
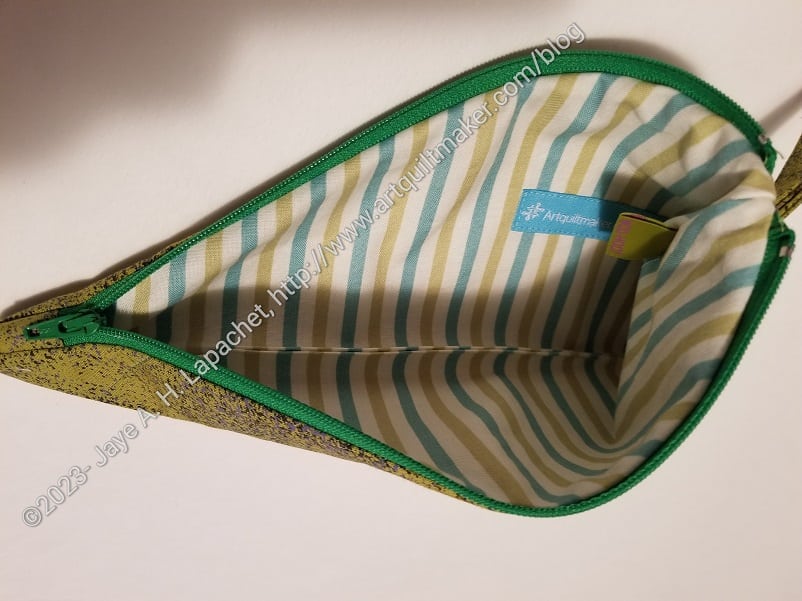
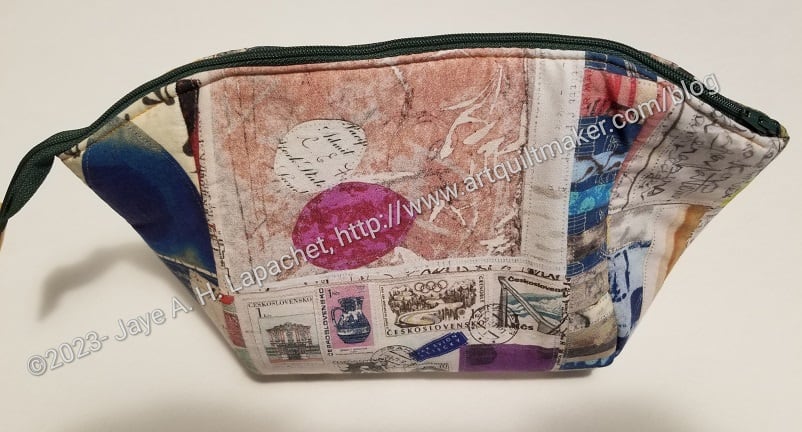
I can’t remember when I finished this pouch, but I did finish it. I remembered to check to see if I showed it to you after I mailed it. Since I haven’t had time to sew lately, I am running out of projects to show you, so I am glad to show you this one.
The zipper, from this angle, looks a little strange, but it works fine. I am not sure why it looks like that, but I will try again harder next time.
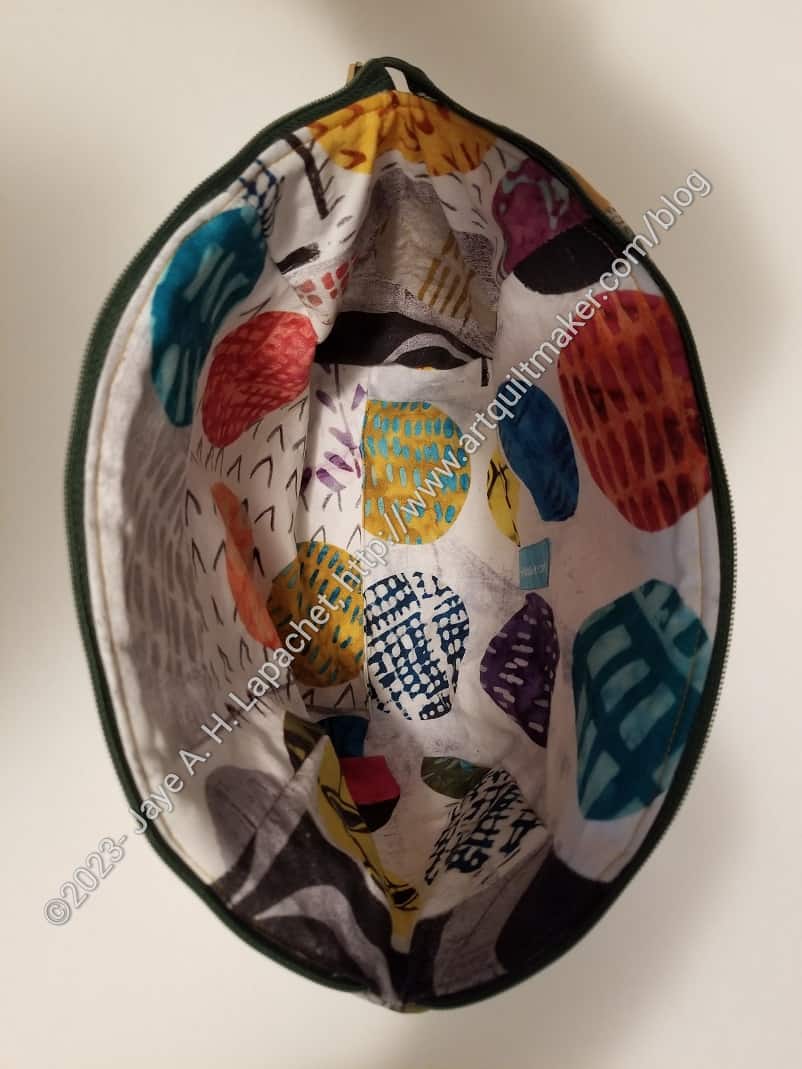
Venetia’s Cotton Candy Pouch -interior
The inside is also a Marcia Derse fabric and is really fun. This is the large size. It is big so you can fit a lot in it. I know Venetia brings a large bag to work, so perhaps she can use it for cords or something like that.
I am still thinking about the Odicoat and how to incorporate that substance into more of my bagmaking. From what I know, this pattern doesn’t lend itself to Odicoat application. I’ll have to try it some time. I’d like to try it after I put a pouch together. I will have to try it on a test pouch in case it gets ruined.
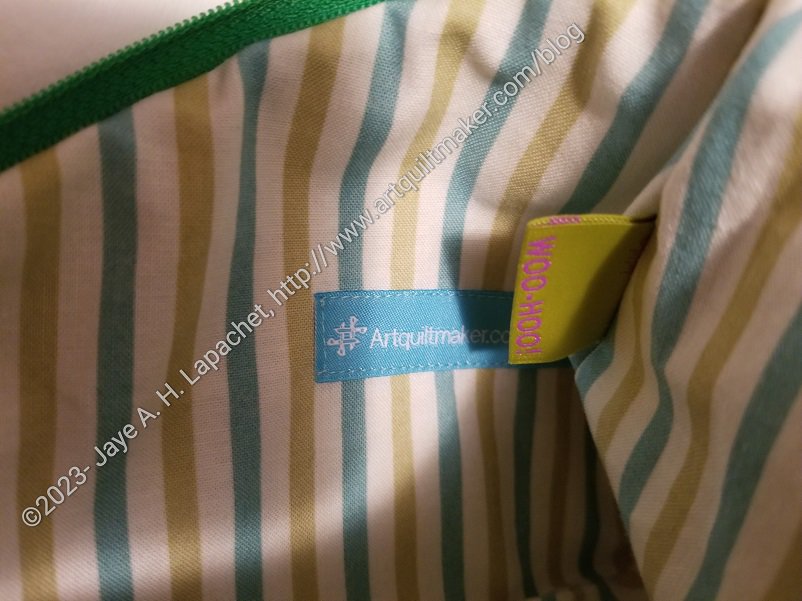
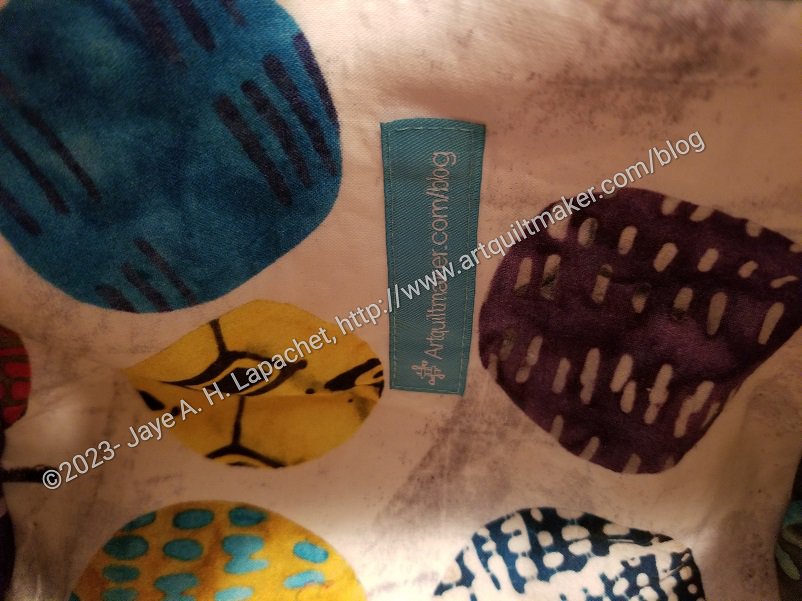
Venetia’s Cotton Candy Pouch -interior label
I used another Wunderlabel for this pouch and am pleased to see it not clash with the fabric.
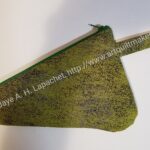
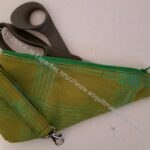
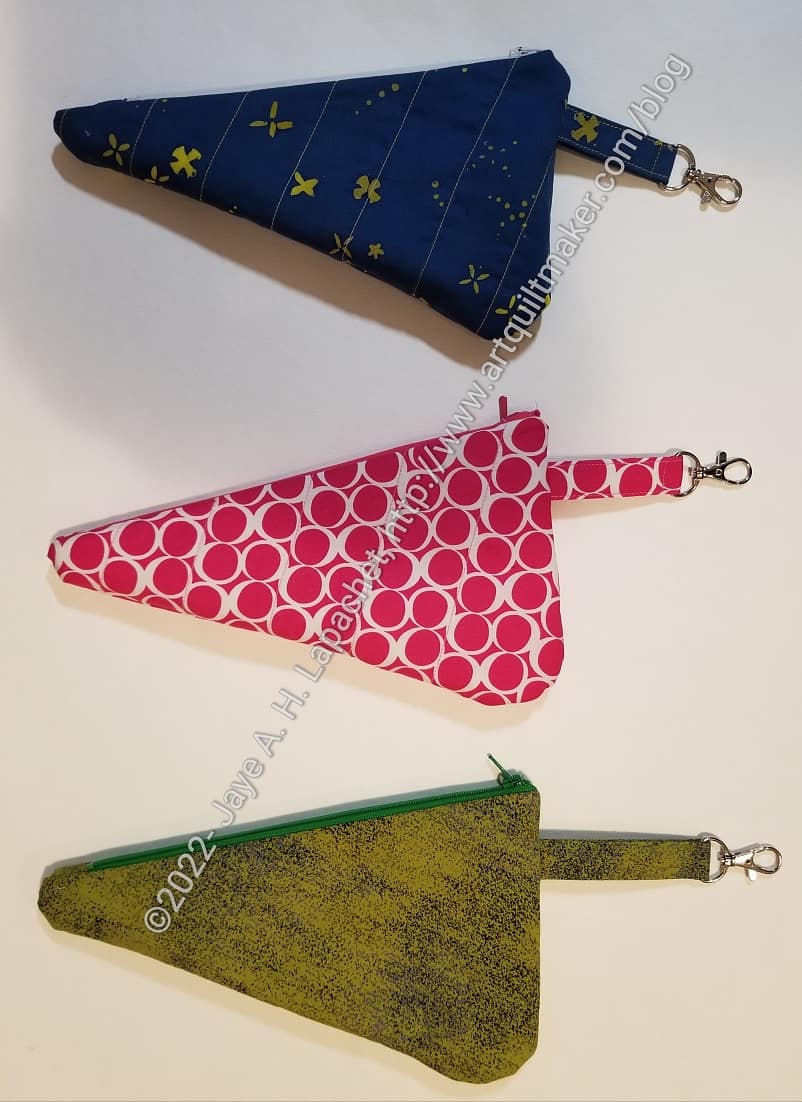
In the process of making the scissor cozies, I realized how many of these I have made. I know it is strange to constantly be looking at the various iterations of one particular pattern, but I seem to enjoy it.Scissor cozies are quick gift to make. It is also a unique pouch, so it makes an impressive gift.
Also, one reason, I enjoy making the same pattern over and over is that I am able to improve my skills at making and get a better understanding of the pattern. I am constantly trying to improve my skills and I find making one pattern a few times helps with that.
Sue’s Scissor Cozy
Maria’s Scissor Cozy #2
Cyndi’s Scissor Cozy
Leaf Scissor Cozy
Scissor Cozy for Gerre
Scissor Cozy for Maria
Scissor Cozy for Julie
Mom’s Scissor Keeper
It’s fewer than I thought, but still a good number.
SueS asked me to make scissor cozies for a couple of the officers. She bought them scissors and had them engraved. The two really went above and beyond during COVID. They entered a difficult situation, before COVID, and stepped up magnificently.
This is a Sotak Handmade pattern. Again, I watched a little of the video, but mostly read the directions and my notes on the directions. I made some additional notes to make these easier next time. I have to print some photos to keep with the directions.
I’ll write more about the specifics of each cozy later.
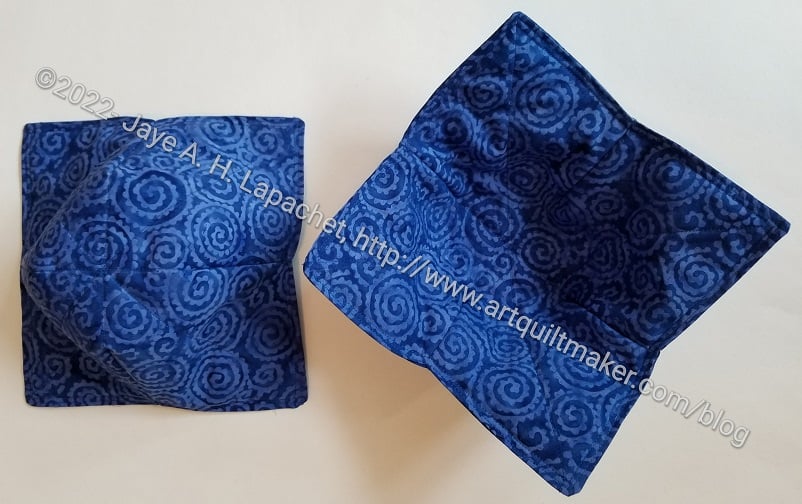
One of DH’s cousins no longer eats sugar and made a kind of deal about it with me last year. I have a lot of feelings about this, but put them aside and made a bowl cozy for them.
I like the way this one came out. I didn’t think too hard when I chose the stripes, but they came together in the darts really well. DH asked for red and blue and this was a blue that I thought would look good but not too patriotic.
Bowl Cozy bottom for B&D
This might be the first bowl cozy where I didn’t have to rip out any seams!
I really wanted to make Mary something for helping me with the Westchester top.
When she made the ballgown I needed for Political Wifery, I made her a group of gifts, including Tooly McToolston. I don’t think she really liked the colors I chose, because I have never seen them again. I don’t mind since it is the thought that counts and once I give a gift, people can do with it what they want. Mary C. is also a GREAT seamstress, quiltmaker and bagmaker, so she make whatever she wants. However, I wanted to use the gift grouping experience to inform my future fabric choices. I took the opportunity to look around her studio at everything there to see what I could see in terms of colors and patterns. It is a great space!
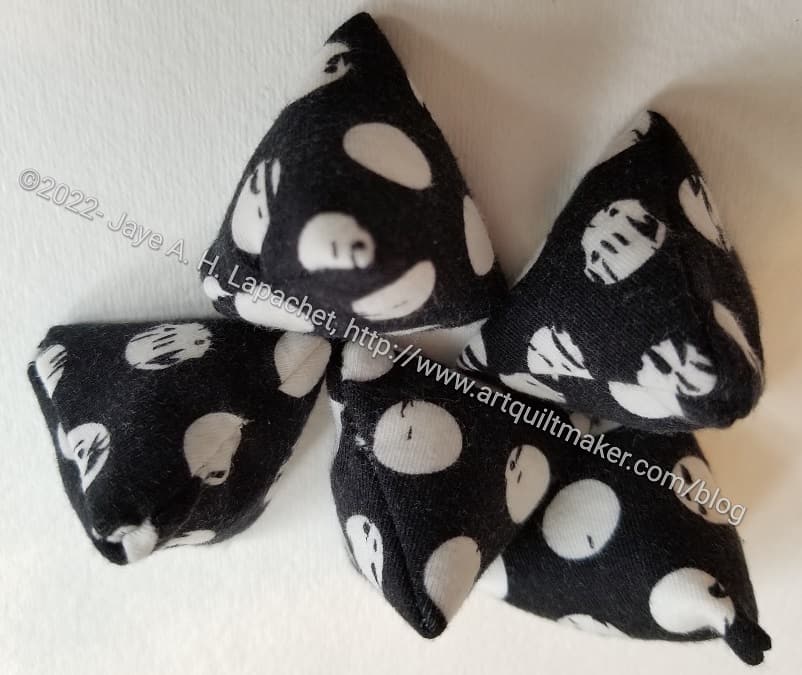
Small Pattern Weights for Mary
I had some of the t-shirt material left, so I decided to use that. For some reason, pattern weights were on my mind. I knew Mary would use them. I found some patterns for the weights. The pattern I used, basically, was from Tea Rose Home. I had to request access to the free template, but the owner was very quick about responding. I made a small batch of those pattern weights. I found them small and not very heavy.
She uses rice for the filling, but I used Beanie Baby pellets**. Rice is a little on the pricey side right now and the Beanie Baby pellets (Poly Pellets) are more hypo-allergenic than something like crushed walnut shells.
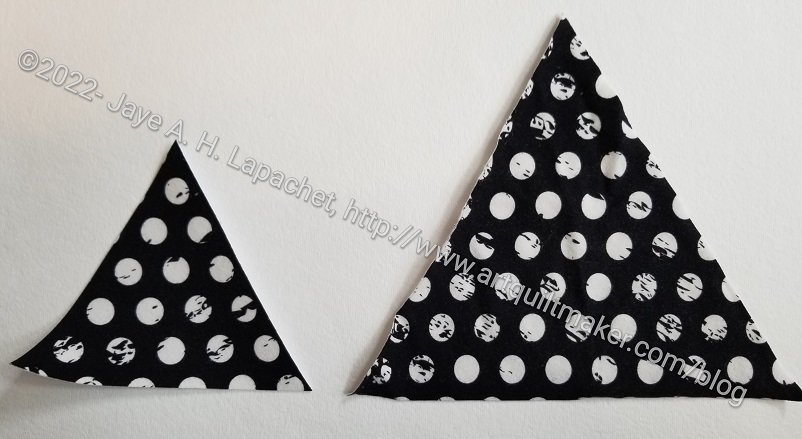
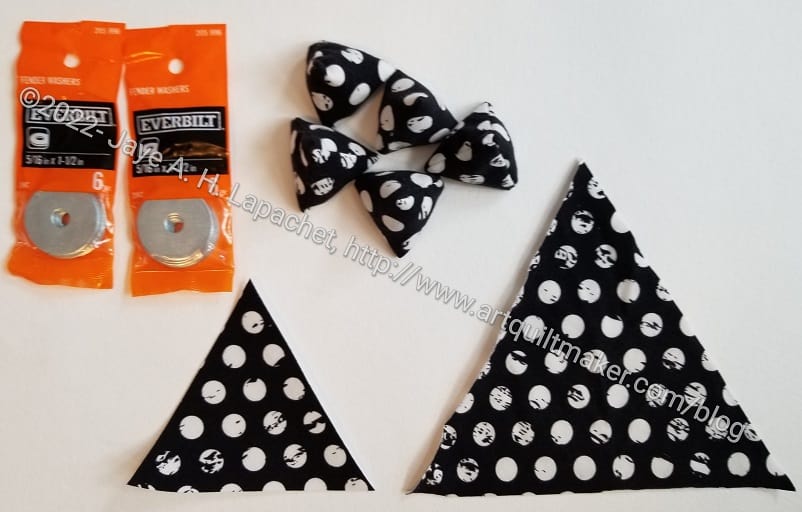
I used the full size of the ruler rather than the size of the template. When finished, the weights were larger, but not a weird size. They were also heavier and, thus, more useful, I thought.
Pattern Weights and all the accoutrements
I did augment the weight with some washers I bought at Home Depot. I measured the side of the larger weights so I knew what would fit once each weight was sewn. I put the washers in and then filled the rest with Beanie Baby pellets**.
Pattern Weights for Mary C.
I was pleased with the set in general. I gave them all to Mary at Sew Day following our t-shirt session. She said she uses pattern weights all the time, so I hope this will be something she can use.
**Obviously, you should shop at local fabric, knitting shops or quilt shops. However, if you can’t, please know that I use affiliate links. I may be paid for your purchase of an item when you click on an item’s link in my post. There is no additional cost to you for clicking or purchasing items I recommend. I do not recommend items I don’t like. I appreciate your clicks and purchases as it helps support this blog.
I have a former co-worker who is super kind. I wanted to make him and his new wife a gift. I know mug rugs and some other fabric gifts quiltmakers give to each other are a bit strange to non-quiltmakers. I decided to make some bowl cozies because they are universally useful. I was able to finish them relatively quickly after I ripped out the same mistake I made last time. My error was to sandwich one piece of batting between two pieces of fabric and sew. Instead, I need to layer ONE piece of batting and one piece of fabric then sew. I need two of these elements (top and bottom) for each bowl cozy. Either I assumed or it was hard to see on the instructions. Using the blog post works better for me than just the PDF instructions.
Bowl cozies for Kirk
Once I got that cleared up, the project went quickly. I am pleased with the results and need to send them off.
The Easter fabric I bought at Just For Fun in Vancouver, Washington (haven’t written about it yet, but have photos) was intended for masks. I bought all the other fabric at Pioneer Quilts. I decided to make napkins instead, because most places want us to wear N95 masks.
I don’t like making napkins, but I made it a little easier on myself by 1) adjusting my attitude and 2) rounding the corners. Rounding the corners meant that I didn’t have to pivot while using a fancy stitch, which made the whole process go faster.
I used the 2.5 inch circle from the Creative Grids Circle Set** to trim the corners of a fat quarter to a round shape. I would have done well to also use a rotating mat** while I cut using the circle, but I didn’t have mine handy. Acrobatics were required.
I found the 2.5 inch circle to work really well. It looks pretty good in terms of shape and size and, as I said, made sewing pretty much a breeze. I don’t know why I didn’t do it sooner.
I used different fabrics on the back, so we can tell them apart. We use cloth napkins all the time, but only change them out about once a week unless something happens.
**Obviously, you should shop at local quilt shops. However, I use affiliate links and may be paid for your purchase of an item when you click on an item’s link in my post. There is no additional cost to you for clicking or purchasing items I recommend. I appreciate your clicks and purchases as it helps support this blog.
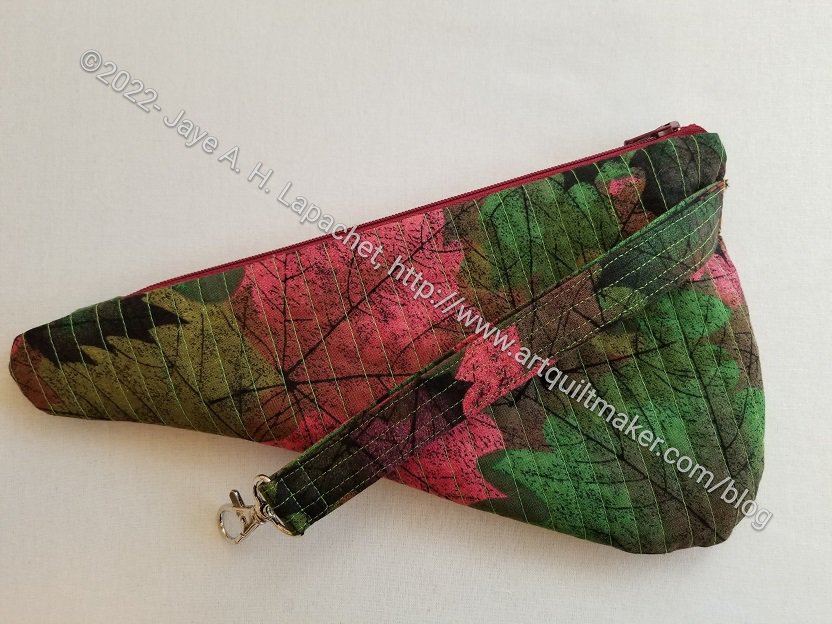
I made another scissor cozy the other day to give as a hostess gift. As I said when I made Maria’s and Gerre‘s, I like making these. I don’t know if they are useful, but they are kind of a unique gift and something not everyone makes.
For once I remembered to quilt the piece before cutting it out. It was quite a bit of quilting, but I think it looks nice.
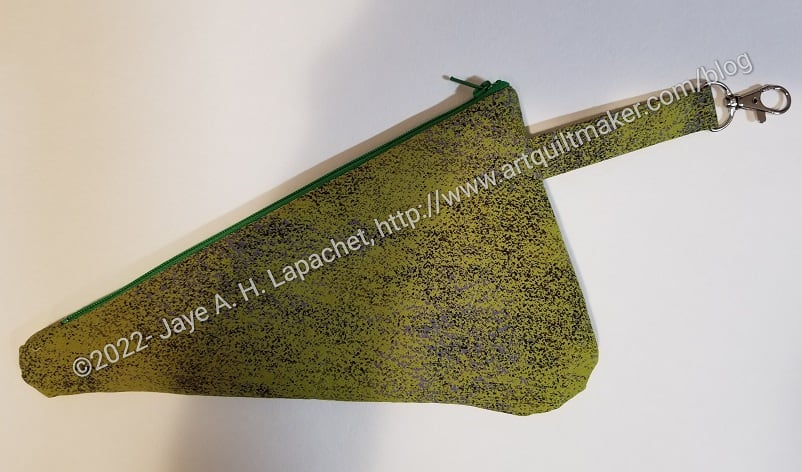
I can’t quite decide how long to make the leash, so this one is pretty long.
I used some fabric I have had for ages, which turned out well.