Face Mask Details

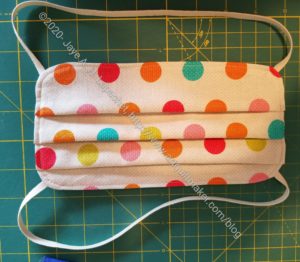
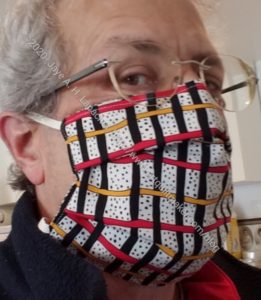
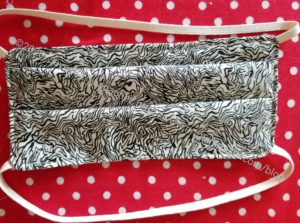
I said in a previous face mask post that I needed to fix some details in the DIY Cloth Face Mask pattern.
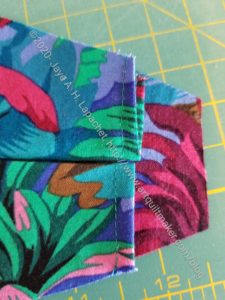
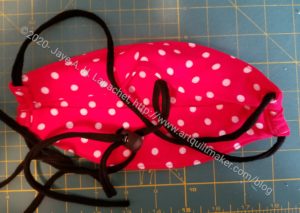
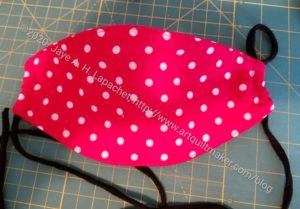
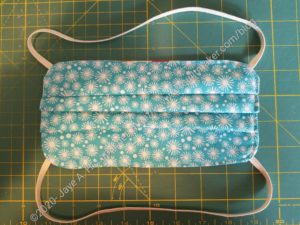
Chrysanthemum Face Mask -closed gusset raw edges

First, the gussets needed to have, for certain, the raw edges covered. After adding the nose pieces, I did one fold and sewed the raw edge closed.

This adds an extra layer of fabric, which is a challenge later, but with the covering of the longer main mask panel (you can see it sticking out past the 12 on my mat), I think it will keep the raw edges from unraveling.

I could have sewed the raw edges closed before adding the nose piece, but I didn’t. Feel free to do it that way.
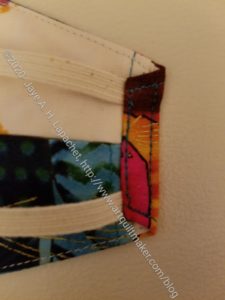
Chrysanthemum Face Mask Elastic

In my post the other day, I mentioned using elastic. My elastic goes all the way around the back of my head as opposed to just over the ears as the video shows. With glasses and headphones, I have too much stuff on my ears already to add a mask to the poor overburdened body part.

I am not sure this is the best way to add elastic across the back. The folded over edges stick out a little so the look isn’t sleek.

Once the raw edges of the gussets were secured, I fold over  the edges of the main mask panel and tucked the elastic inside. Then I sewed in a rectangle, going over the stitching closest to the middle of the mask twice.
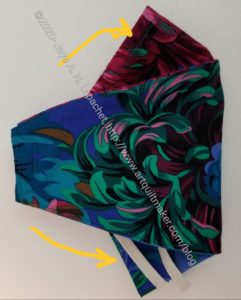
Chrysanthemum Face Mask -changes

I add the nose piece to the pattern by aligning the middle of the nose piece with the mark on the fabric, then surrounding the nose piece with pins, so I know where it is. I sew around it, removing the pins as I go and being careful not to sew over them or the nose piece.

The top arrow shows where the  nose piece is.

The bottom arrow shows the two strands of elastic. I measured them at 10 inches for my head. Of course, you can adjust them to your needs.

I don’t know when I will have the opportunity to wear this mask out. When I do, I will report back.
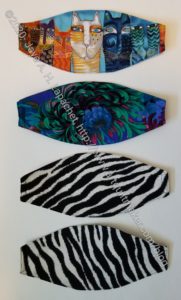
 

Face Mask Saga Continues

The guild had Virtual Sew  Day on Saturday. There were 9-10 people at any one time, which seemed  like a good number. After I put some rectangles on the design wall (empty after taking FOTY 2018 to the longarmer), I worked on masks.

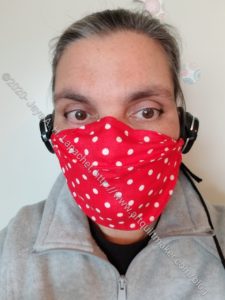
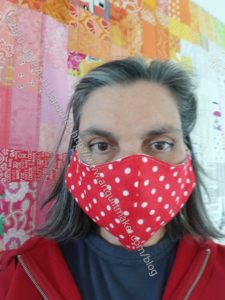
I am still using the DIY Cloth Face Mask video pattern and I am getting more familiar and more confident with it. After wearing the mask I made with this pattern and a cord lock for several hours on Friday, I decided to make another mask using this pattern with elastic instead of a cord lock.

This pattern works very well with my glasses. I added a nose piece, thanks to Friend Julie and her husband for keeping me supplied! With the nose piece well adjusted, I get very little, if any fogging. Allergies are torturing me, though, so I sneezed a few times while wearing the mask which reminded me why I need multiple masks.

Also, the cord lock and cording works well if I am wearing a ponytail. I can hook the top cord over my ponytail and then tighten the cord lock behind my neck. Getting the mask tight helps with preventing fogging. The problem is that I was wearing my hair down and by the time I got home I think large chucks of hair were embedded in the cord lock. 🙁

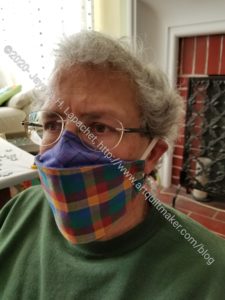
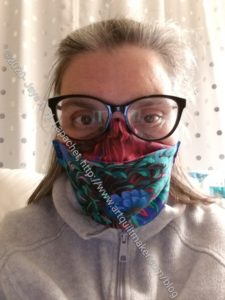
Chrysanthemum Face Mask

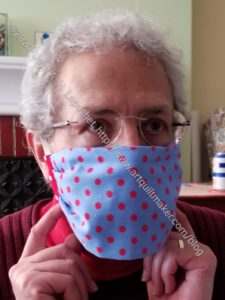
My new mask, which is the exact same pattern as the red dot mask, has elastic instead of a cord lock. It fits well and the nose piece fits tightly around my nose. The real test will be when I wear it out.

The elastic is slightly better for this test on the couch, but I can tell any kind of mask wearing is better with my hair up. I think a hairdresser/stylist who designs a hair cut for mask wearing will be a genius.

DH has his collection and didn’t want anymore for the moment. I will make him one to wear with his tuxedo, assuming we ever get to dress up again, but I am going to wait until I get the pattern exactly right.

Four Masks - early July
Four Masks – early July

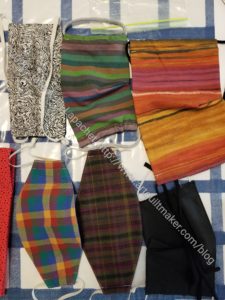
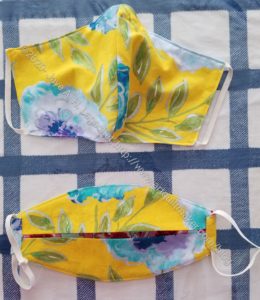
I made four masks. I experimented with fussy cutting and was pretty successful on the mask main panel. I wasn’t as successful with  the gussets, but I can do better next time.

One is for the YM, because it makes me feel better to make him masks. The other two are gifts as well.

Best Face Mask Yet

Best Face Mask Yet
Best Face Mask Yet

I feel like I made progress on a face mask I can make quickly that will work with my/DH’s/ YM’s glasses. The original pattern for this one came from the video tutorial I talked about before. I like this pattern because of the shape and the ease of making it. I tweaked the pattern to make it work better for us.

Some of the changes I made:

I added a nose piece. Julie sent me some nose pieces, which work really well. Since they help keep our glasses from fogging up, I have been adding them to masks I make.

I made the top and bottom gussets (not sure if that piece is a gusset or not) longer to try and ensure that the raw edges were covered. That is something that didn’t work as well as I had hoped. All the pieces were too thick and hard to sew through when I went to make the channels.

Face mask with stretchy cord

I used stretchy cord from Maker’s Mercantile and a cordlock. This allows me to really pull the  mask tight around my face. The bad part is that I was wearing my hair down and the cordlock got caught in my hair. 🙁 I think it would work ok while wearing a ponytail. I don’t, however, want to have to always wear a ponytail.

It is still not ideal, but the good points are:

  • doesn’t fog up my glasses as much
  • I can pull it tight because of the cordlock
  • relatively quick to make
  • The good part of the stretchy cord/cordlock combo was that it didn’t add more stuff to my ears. I went out to drop off a gift wearing this mask and wearing glasses, headphones and elastic on my ears is too much.

Points on which to work

  • encasing raw edges  – I think I will keep the gussets the original size from the pattern and sew the raw edges closed.
  • try adding elastic around the back instead of stretchy cord
  • The channels were to small to insert the cord. I used the Purple Thang, which worked pretty well, though it kept getting stuck on a seam, I think, inside the channel. Inserting the cord was not a smooth process. Deirdre talked about using a stainless steel straw to keep the channel open. I don’t have one of those, but my get one and try it.
Face Mask front
Face Mask front

This is not the same pattern that I used before, but I did use the same fabric. It is double gauze and I thought it would be comfy.

I haven’t given up on other patterns, especially the one my friend Deirdre sent me. I will try that one with a nose piece and elastic around the back to see if that works for me.

Mask Collection

PDL Mask Collection
PDL Mask Collection

DH got some masks in the mail from my mom. He now has quite the collection! She uses different patterns than I have used, but she has also made a lot more.

I am still experimenting, as I have said, so I try and pick fabrics that he will wear, but may not be fabrics that he will wear to work. That will come when I find the pattern and style that works for us. My mom made him a black one that he can wear with his tuxedo. Of course, I have no idea if we will ever attend a black tie event again.

More Masks

Gail's masks
Gail’s masks

In an effort to help out my neighbor, I made her some more masks. I am also using her as a guinea pig. She will tell me what she likes and doesn’t like about the masks, I hope.

The top one (Martelli pattern) I modified and put a nose piece in it. I like the pattern for that mask, because it goes together really quickly. We have decided, however, that we prefer straps that go around the back of our head, so we can loop the masks around our neck when they aren’t actually covering our faces (in the car or when we aren’t around people). Also, additional things around our ears compete for space with glasses and headphones. I’ll probably make this one again with straps/elastic that go all the way around the back.

The bottom mask is from the video pattern I talked about. It has those wings on the top and bottom. I need to try making it with straps around the back as well. I wonder how it would be if I made an X on the back with the straps (elastic)?

I don’t think I mentioned it before, but our neighbor only had one mask which is why I offered to make her some. She is keeping that one for ‘good’ and since I had more of the same fabric, I made a couple more. I don’t think she understands how much fabric I have. It’s nice for me to be able to do something for someone. She also makes lemon curd for us and supplies us with lemons. It’s a fair trade.

Inside Outside Pouch

Inside Outside Pouch in process

After making the Boxy Clear Pouch, I decided to try the Inside Outside Pouch. I was so pleased with how quickly the Boxy Clear Pouch went together that I thought 2 additional zippers wouldn’t be so bad. I am still working on small projects while I wait for my design wall materials to arrive.

I cut the pieces out during Virtual Craft Night on Monday and felt like it didn’t take much time at all. I think I felt like I was cutting out similar pieces to the ones I cut for the Boxy Clear Pouch.

On Tuesday night, I started sewing right after work and spent about an hour on the project. I really got a fair way into the process before I stopped because it was getting late.

There are many aspects of this project that are the same as the Boxy Clear pouch so it feels like I am reinforcing skills or pattern steps that I did the other day. also, I think I am used to working on the complicated (but fabulous!) ByAnnie patterns and this one is much easier, though just as effective.

I did not want to stop working on it. I was having such a good time and making such good progress that I wanted to keep the feeling going. I may be able to finish tonight. Then I may have to start working on a second version!!!

Boxy Clear Pouch pt.2

Boxy Clear Pouch
Boxy Clear Pouch

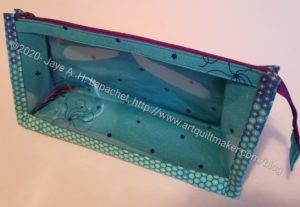
I talked about the Boxy Clear Pouch yesterday. I realized I had more to say about this project, which surprised me since it is a small project.

Boxy Clear Pouch - zipper end detail
Boxy Clear Pouch – zipper end detail

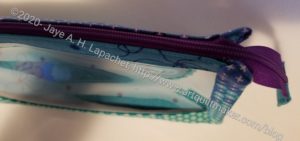
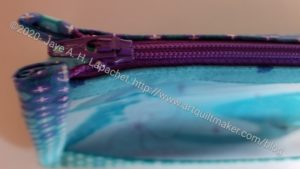
One of the things I liked was the finishing on the zipper.  On the stop end, the designer, Aneela Hoey, has the maker stop 5/8 inch from the end. I didn’t know why, but realized that it was to accommodate the zipper draping over the end of the pouch.

Boxy Clear Pouch - inside detail
Boxy Clear Pouch – inside detail

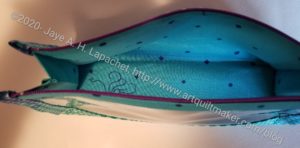
In general, I try to avoid zippers hanging over the end of a pouch, but this pattern’s design makes me realize what the designer is trying to do.  Utilizing a long zipper makes the pouch into one that opens wide. This means that things can’t get hidden inside. Somehow I didn’t realize it or realized it only briefly and then forgot.

Boxy Clear Pouch - zipper detail
Boxy Clear Pouch – zipper detail

I could have done a bit better job on the beginning of the zipper, but, again, Ms. Hoey does a great job with the design. The beginning of the zipper is far enough back so the binding doesn’t get in the way and there is no issue with sewing through a million thickness layers on the end.

My one criticism, which is the same criticism I had with another one of her patterns, Speedy Pouches, the binding ends. The designer doesn’t really say what she does to tuck in the ends. I cut them off and tucked them in as well as I could to make them even with the top edge of the pouch, then I handstitched them down. I’ll have to take a look at her website to see if she ever talks about it.

The one thing I did wrong, which ended up not mattering much, was switch the lining and the exterior fabric. The pieces were fairly uniform and the pouch ended up looking fine with the lining fabric on the outside.

I am pleased, as I said, with how this project turned. The pouch was larger than I expected even though I made the small size. I would have liked an even smaller version

Boxy Clear Pouch

Boxy Clear Pouch
Boxy Clear Pouch

I finally broke into my stash of Aneela Hoey patterns. I have one of her books, Stitched Sewing Organizers** and a couple of her patterns. I hadn’t made anything from any of them. Recently I started thinking about the various patterns I have that I have not made. I decided, while I am waiting for the parts for my design wall, to concentrate on some small projects. Since I had been talking about the Aneela Hoey patterns with Angela, I decided to make the Boxy Clear pouch.

This whole project took me about 4 hours of work. I didn’t rush because I didn’t expect to get this project done in one sewing session. However, I was able to finish it!

The directions are very clear and the drawings help a lot. I did have to read over the directions a few times as I made the pouch, but everything was pretty clear as long as I went slowly.

The pattern comes with two sizes and I made the small size as I thought I might want to use one for my bias tape makers. It turned out to be larger than I thought it would be, though I may still make one for the bias tape makers. I have to put them somewhere, after all!


**I use affiliate links and may be paid for your purchase of an item when you click on an item link in my post. There is no additional cost to you for clicking or purchasing items I recommend. I appreciate your clicks and purchases as it helps support this blog.

Face Mask Pseudo Success

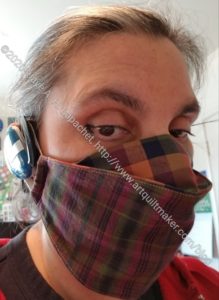
DH Plaid mask
DH Plaid mask

I finally had some success with face masks over the weekend. This has been an ongoing problem for me. Not because we don’t have masks, but because I feel bad that I haven’t been successful.

I think I needed to find the right pattern. This one seems like it might work for me.

Mask Testing
Mask Testing

The pattern I used is a video pattern and was recommended by a quilting friend. She has the same glasses problem that we have. While I still have some things I want to adjust, this is the most successful I have been with masks so far.

One thing I need to play with is the edges where the elastic attaches. I am not convinced the raw edges are sufficiently closed. I played around with different ways of dealing with them and still have not found the best method.

The one above with the purple plaid on the top has a nose piece in it. I was annoying DH with trying on masks (they are for him after all) and he wanted to play around with the nose piece before he pronounced judgment.

Thanks to Friend Julie for the nose pieces.

Sewing Room Stand

As mentioned, I had (took) Friday-Monday off for Memorial Day weekend. While I had to clean the house, I also took the time to finish a few projects that needed finishing or knocking other must-do projects off my list.

Minikins 2: Sewing Room Stand

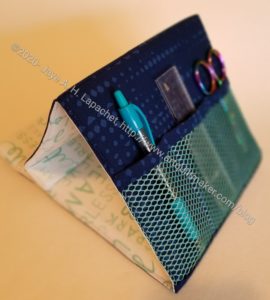
One thing I started and finished was a Sewing Room Stand from the Minikins Season 2 patterns.

I made the item in a couple of hours. I used the video portion of the pattern (Sew Sweetness Minikin patterns comes with a video as well as the printed pattern). I didn’t find it difficult. I thought it was a lot easier than Tooly McToolston, though the Sewing Room Stand is smaller and doesn’t have as many pockets. It is the same idea.

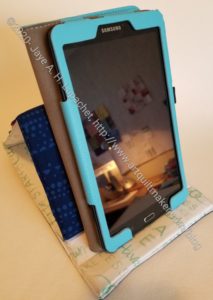
Minikins 2: Sewing Room Stand tablet side

One of the things I like about this pattern is the possibility of standing a tablet on it and having the tablet oriented in such a way that I could see a pattern as I was working on it.

I thought the stand would come out larger based on the picture on Sara’s website. My tablet is not large (*inches?), but the one in Sara’s photo seems larger and the stand is still larger. Granted, my tablet does not hang over the ends, but still seems like it is overwhelming the Sewing Room Stand.

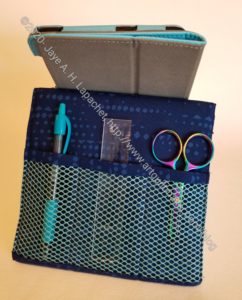
Minikins 2: Sewing Room Stand tool side

Thetool side is tall enough to accommodate a medium sized tool, so you could have your tools and your tablet in use at the same time.

I turned pretty quickly to the video to make this item. I was not getting what the printed pattern was saying. The video made it very clear, so I was glad to have it.

As far as I can tell, the pattern doesn’t fold up into a flat package.

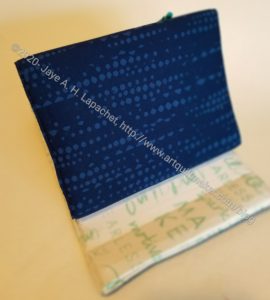
Minikins 2: Sewing Room Stand empty

I chose the colors as this will be a swap gift and these are the colors the person requested!

Even More Face Masks

Deirdre mask pattern

I am still flailing away at face masks. Deirdre has made tons and she sent me a pattern that I tried over the weekend. Even with curves (which don’t’ scare me), this mask came out a lot better. It still isn’t ideal as I didn’t have anything to put in it as a nose-shaper, but it was easier to sew and came out a lot better.

As usual, cutting out took the longest. I didn’t buy the rotary templates as I don’t plan on making enough to make it worthwhile. Also, D reported problems going around the template with a rotary cutter. I pinned the pattern to the fabric and used scissors, which worked fine. I might trace another pattern with tracing paper, but regular printer paper worked well for now.

DH is working on a nose shaper for us and Friend Julie will send me a few of what she is using. I want to make a few masks, especially for the YM. He takes the bus every day and works packing orders. I would be a lot happier if he had a bunch of masks to use. SIL #2 made him several, which are tiding him over.

I am really still trying to figure out a pattern that works well for us (me) and how to make it. I have high hopes for this pattern.

Face Masks Again

Mask #3 - front
Mask #3 – front

Push came to shove this past weekend. I couldn’t put off making masks any longer. I had a dentist appointment in the City. The City requires that N95 masks be covered, if you wear that kind of mask. That is the mask I have been wearing on the few occasions I go out. They have to be covered since your breath goes out the filter (meaning I could breath on someone). Thus, I had to have something else. DH’s mask is more like one you would wear so you don’t breath in dust and it is getting a little worn, so I had to make two.

Mask #3 - back
Mask #3 – back

Before I did any other sewing I got down to business. I had printed out a new pattern from Madeeveryday.com. It was laying on my desk and looked easy enough, so I went for it. Except for the bottom elastic length, these came out pretty well. They are not excellent, but better than my first effort.

I made DH’s mask first. He has been great at trying masks on and providing kind feedback.

DH's mask
DH’s mask

After making his, I decided to use a 1/4 inch seam allowance instead of half as suggested on the pattern. I also rounded the corners of mine using a 2.5 inch rotary cutting circle. I think I need a new blade for my small rotary cutter, because it did not roll as smoothly as my regular rotary cutter. Still, I added the rounded corners so I could just zoom around the whole thing without having to deal with corners. Also, I thought it would reduce bulk. I might cut little darts in the seam allowance of the curves on the next one.

DH's mask
DH’s mask

At least we are set for this week. I promised my ‘mature’ neighbor a mask, so I’ll make one for her this week.

I might have to create a blog hashtag for face masks, but for now, I am filing these posts under accessories. I have a feeling we may be making face masks to match our outfits in the not too distant future. I also think gloves will come back into fashion.

First Face Mask

First Face Mask
First Face Mask

I finally made a face mask.

I am ashamed to say that I have only been encouraging/enabling others to make masks. One thing I did was post a list of face mask patterns. This is the first one I have made. I don’t know why I haven’t been able to get it done. I have planned to, but this is the first one.

I used the Fat Quarter Shop pattern and didn’t like it. The mask came out terribly. It is too small lengthwise and too long width-wise. I think it will fit someone; it just doesn’t fit us.

Mary sent me elastic and I am determined not to waste it. I am going to try another one; I just haven’t done it yet.

Gift Post: Cotton Candy Pouch

I finally bought the Minikins Seasons 1 & 2 (no affiliation) a few weeks ago when I received a bonus from a vendor with whom I work on occasion. I talked about being obsessed with these patterns back in January since they came out. They are on sale when they first come out and then they went up in price. I plan to buy Season 3, if there ever is one, when it is on sale.

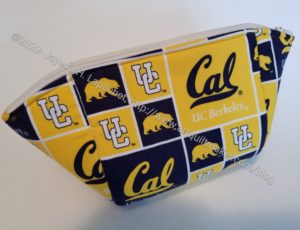
Cal themed Cotton Candy Pouch

Anyway, I made my first project from the patterns, the Cotton Candy Pouch. I made this for my SIL for her birthday. Fortunately, she lives around the corner, so I just put the bag on her doorstep during my morning walk and then texted her to take a look. Not as good a party with cake, but something during this shelter-in-place situation.

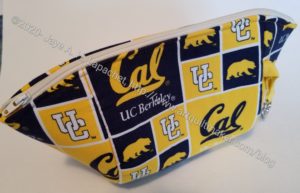
There are a few things I had trouble with. I am pretty pleased with the evenness of the zipper, but the ends were a bit of a problem. Next time, I think I will use a coordinating or solid fabric for the side pieces. I think it will highlight the themed fabric better. I find that making a project the first time is always an adventure and a learning experience.

Cal themed Cotton Candy Pouch

I also added a leash. I don’t know if she has a bag with a D-ring, but when she does, she will be able to attach it.

This pouch takes an 18″ zipper, which I thought was long. I don’t have many that size, so I’ll have to think about getting some.

Vinyl Pouch Test

I was trolling YouTube for some some reason I can’t remember and found a video for a vinyl pouch. I actually found several, but one from So Sew Easy caught my attention. I think it caught my attention because I have been thinking about the vinyl pouches in the UCAB pattern and how I could make something more useful. I was thinking about making pouches similar to the Comfort Stitching Speedy pouches I made for the officer gifts. That pattern has a lot of binding, which is nice looking, but annoying to sew. All of these random bits of information contributed to my thoughts. The thoughts all sort of dovetailed when I saw this video.

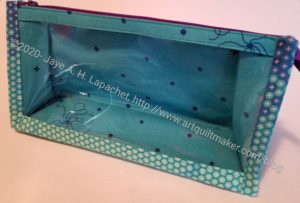
Vinyl Pouch
Vinyl Pouch

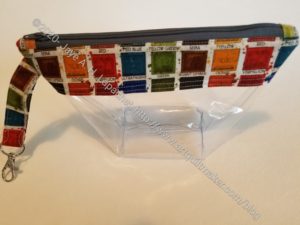
I decided to use some scraps to make a pouch loosely based on this video. As you can see, I used some fabric scraps from the projects I have made for mom. I was lazy and the scraps were handy.

Instead of having the ends of the zipper sticking out, I wanted to try encasing them in the seam.I am pleased with the way the ends came out, but I finished the zipper tab and it meant there were a lot of layers through which to sew. In the future, I will leave the sides of the zipper tab open in order to reduce the number of layers. This assumes, of course, I can finish them and they don’t show on the inside. Unlike in the video, encasing the zipper in the ends of the pouch means that this will not be a widemouth pouch.

I also wanted to try boxing corners. Boxing corners means that the pouch will not be as tall, but the user will be able to put 3D objects inside. I was thinking of thread. The boxing worked well, but I had two problems. First boxing vinyl is a hassle. The video shows fabric on the top. I think, if i make something like this again, I will put a fabric strip on the bottom as well. One of the benefits of this pouch is seeing inside and I would want to preserve that feature. Second, I chose a size (1.5 inches) that was a little too small. I think I would try a 2 inch square next time.

The seams aren’t finished and that is always a problem for me, but I didn’t want to take the time. I would if there was fabric on the bottom.

This project is not a loss. It may not meet my perfectionist standards, but I think it is perfectly serviceable.