Sampler Class: Fusible Machine Applique’ Tutorial Part 1

Frances and I are back in action with the Sampler class. I am excited, but nervous because I haven’t done this in awhile. The next class is about fusible machine applique’.
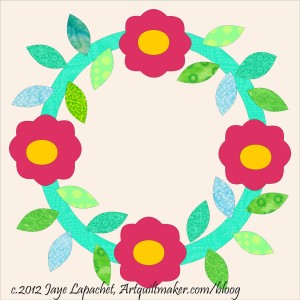
Flower Wreath
Flower Wreath

Supply List:

  • Notebook for notes
  • Pen to take notes 😉
  • Mechanical Pencil
  • Fabric (at least 4 different, preferably more greens to create variety in the leaves; scraps work well)
  • Fabric Scissors
  • Paper scissors
  • Small ruler
  • Glue stick
  • Template plastic
  • Dinner plate or compass
  • Fusible web, such as Misty Fuse or Steam-a-Seam 2 or Steam-a-Seam Lite
  • Applique’ pressing sheet
  • Tear away stabilizer (the size of your background)
  • Iron
  • Ironing surface
  • 3″x5″  piece of fabric backed with 2 layers of tearaway stabilizer
  • Flower Wreath pattern sheets
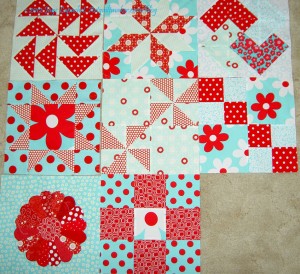
    1. Aqua-Red Sampler Blocks
      Aqua-Red Sampler Blocks

      Cut a piece of fabric for the background .5″ to 1″ bigger than the finished size of the block. If you have a regular background fabric, use that, if not use a coordinating fabric. I took a look at my current blocks to help me decide what background I wanted to choose. This is a coordinated scrappy quilt, but I also wanted to find a background that would work well with the applique pieces that I was planning to put on top of it.

    2. After cutting out a background, you need to put it aside for the time being. You will need it after you make the templates and the ring.
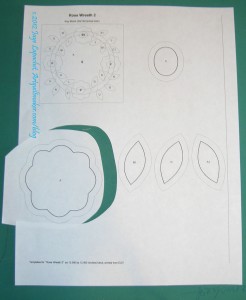
    3. Rough cut pattern out for templates
      Rough cut pattern out for templates

      Cut out all the templates from the paper. Leave a little of the paper around the edges. Feel free to adjust the design of the flowers or leaves, if you want the shapes to be a little different.

      All patterns rough cut
      All patterns rough cut

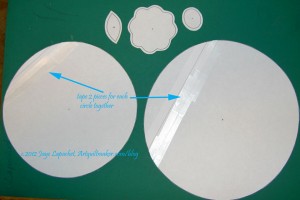
In the photo above, you can see all of them templates rough cut out, except the circles. The circles print from EQ7 on two sheets of paper. You will need to rough cut the two pieces for each circle and then tape them together. In order to tape the pieces together, hold each piece for one circle in a hand up to the light and match them up you. Before you hold them up, have the tape ready just to tack the pieces together. You can use a light box for this procedure also.
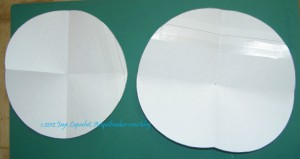
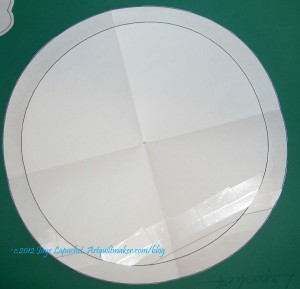
Fold circles in quarters

Fold circles in quarters to make a line down the centers. This will help you line them up to make the ring for the wreath.

I never did this before and had to figure it out, but it works pretty well.
Layer Circles
Layer Circles

Using the folds, layer the circles together so you can see the black line of the upper circle. Draw a line around the smaller circle using the smaller circle as a template. You will be drawing on the larger circle. Use a soft implement (pencil or roller ball pen) that doesn’t skip to draw the circle. Once you have drawn the circle, you can put the smaller circle away with your other templates. I use a zipper bag for all of the pieces and parts.
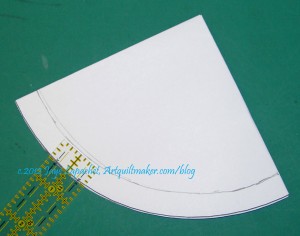
Check width
Check width

Fold up the larger circle. Check the width of the ring of the wreath using a small ruler to make sure it is even. Once you are happy with the line. Cut along the line without opening the circle.
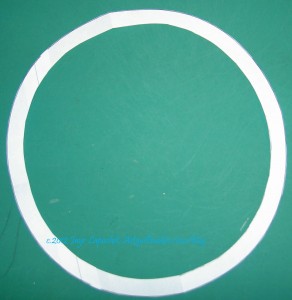
Complete Ring Pattern

Once you have cut out the ring, open up the ring.

Now you are ready to make the templates. Grab all of your patterns, your template plastic and your glue stick.

  1. Glue the paper templates to the template plastic.
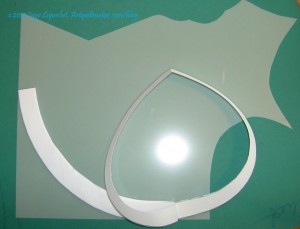
    No template plastic on folds
    No template plastic on folds

    The only tricky part is for the ring. I avoid the folds in the pattern and only put the template plastic on the parts of the ring where the fold isn’t. Why? Because I want to be able to fold this piece and put it in a zipper bag. Also, by adding the template plastic in quarters you save template plastic and you can use smaller pieces. Finally, you don’t end up with a circle of leftover template plastic.

  2. Trim the templates to the line on the pattern.
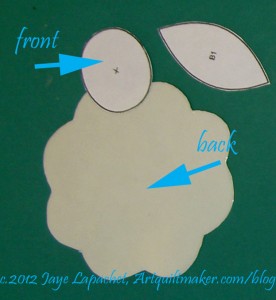
Front & back of templates

Depending on the kind of template plastic you have, your templates will look something like the photo above.

Part 2 will talk about choosing fabrics etc.

You can find more detail about machine appliqueing directional motifs, such as letters in a separate tutorial.
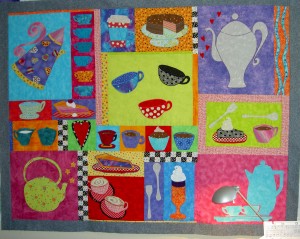
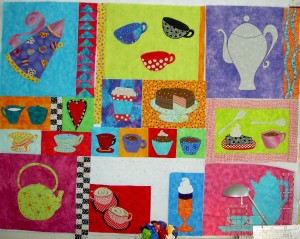
Hideous Tarts

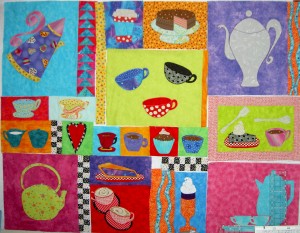
Tarts Come to Tea, April 2010

Ta Da!

The Tarts are ready to quilt. Don’t have a heart attack when you see the grey border. I know it is ugly fabric that does not coordinate with the bright cheerfulness of the rest of the quilt. It is a quilting border and will be removed or cut off after the quilting is done.

I worked on the last bit of applique’ over the weekend and sewed on the quilting border. Except for the basting, the Tarts are ready to quilt. I didn’t realize that this piece was acting like a creativity dam. It was stopping up my creative problem solving for other projects. As soon as I did the applique’ and put the border on, I felt like I could do anything. It was an awesome feeling.

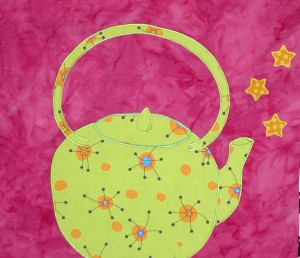
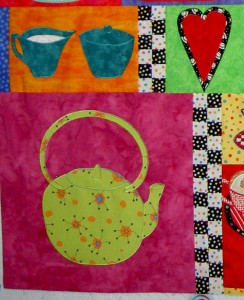
Tea Kettle with Stars

I tried a number of slight variations in location for the stars, for about 2 minutes, and then I just appliqued them on. Mentally, I am done with the project and hope I can make it through the quilting.

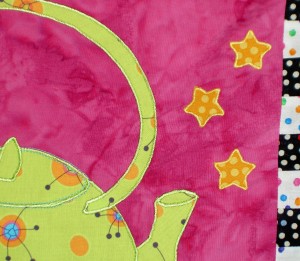
Tea Kettle with Stars, detail

I am pleased with the way the block looks.

Lesson: stop thinking and just do it!

Applique’ From the Past

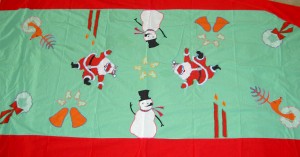
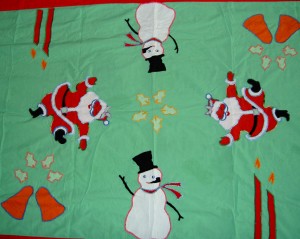
My mom often cleans out some part of her house or storage and tries to give me things. I have a lot of things. Probably too many, so I try and refuse. She got me in a weak moment over the holidays and I ended up with a plastic bag containing something that was a very odd shade of green. She said it was Aunt Grace’s Holiday tablecloth.

I have a holiday tablecloth and during one of the massive cleanups during this holiday season, the plastic-bag-with-green-who-knows-what got shoved in a closet downstairs. As luck would have it, or perhaps some goddess of table linens was smiling on my dead Aunt Grace, The Child spilled chocolate milk on my holiday tablecloth right before a party, so I went in search of the green thing to see what it was and if I could stand looking at it.

Oh Me of little faith!

Holiday Tablecloth
Holiday Tablecloth

Well, I have to say I do like this tablecloth. My mom said that Aunt Grace had one of the first zigzag sewing machines in the 1950s and made this tablecloth with her own drawings. I have no idea if that is true (when were zigzag machines available to home sewists??) or just family lore. I can relate, however, as I did a wild and complicated machine applique’ project when I first got the 9K because I was so excited about having zigzag capability.

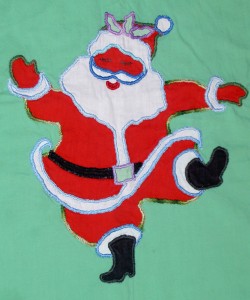
Dancing Santa
Dancing Santa

We had a big discussion in my house about the meaning of the Happy Dancing Santa and his red face. Too much dancing?

Santa has long and luxurious hand embroidered eyelashes!

The satin stitch  on all the pieces is really thick, so we have had discussions about that as well. I can’t tell if she used thick thread or if the fabric bunched up under the zigzag. I guess there could also be some stabilizer in there, but I didn’t see any when I looked at the back.

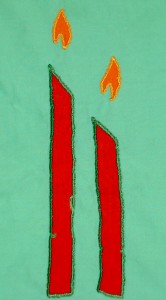
Candles
Candles

One thing I noticed is that there is a lot of movement in these designs. The slanted top of the candles is an example of this. The shape of the candles echoes the shape of the holly, wreath and other motifs.

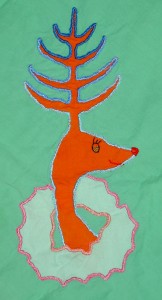
Reindeer
Reindeer

We all agreed that this reindeer looks very Seussian. I would love it if Aunt Grace had a journal or blog where she talked about her inspiration. Was she reading Dr. Seuss at the time? It gives me renewed resolve in continuing to post about my projects and quiltmaking encounters!

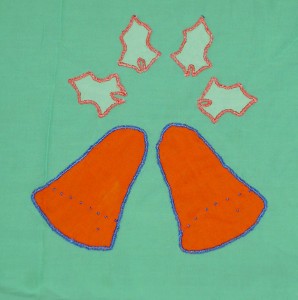
Bells
Bells

As you may be able to see (click to enlarge the picture), Aunt Grace has used French knots for the edge (lip??) of the bell. Notice how she used one towards the bottom to highlight the shape. Very subtle, IMO.

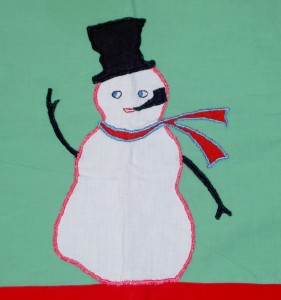
Snowman
Snowman

The very un-PC snowman with his prominent pipe! She used some hand embroidery stitching for the eyes, which she also used on the reindeer. I also like the way the stitching around the sections of the motifs do not match the fabric.

Tablecloth detail
Tablecloth detail

I love the detail in the designs and also the variety of thread used. I also like it that everything is not perfect. I don’t mean that she put in fake mistakes. She just did what she could do. It looks real to me.

Tarts Again

The Big Drip
The Big Drip

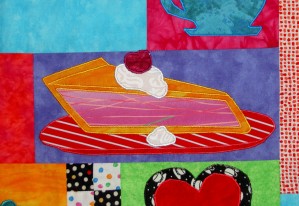
Yes, I am obsessing. This is the last time I will force you to read my obsessive, compulsive rantings on, what I am now calling, The Big Drip. The reason? The Big Drip is done. It is glued and appliqued down for eternity. Or at least until the glue from the fusible rots away and the fabric underneath is no longer viable.

I am pretty pleased with how it came out and will be even more pleased when I am at the point where I can embroider a stem on the cherry. Stay tuned for that drama! 😉

Fluttering Hearts
Fluttering Hearts

After successfully appliqueing The Big Drip to the piece, I had the idea that, perhaps, I should add some other little, appliqued embellishments to some of the other blocks.

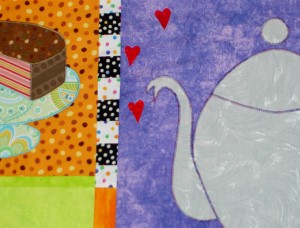
I have to admit that the big grey teapot needs some spicing up. I cut out, and am trying, these little hearts. They do add a bit of a spark and draw the eye up towards that corner of the quilt, which is good. I don’t want the piece to look like I copied Mary Engelbreit. I also want it to be fun and not cutesy. Let me know what you think.

Tarts Cream Drips

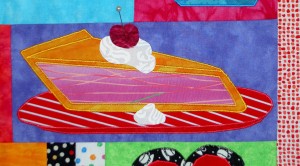
Tarts, Small Drip
Tarts, Small Drip

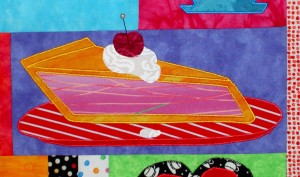
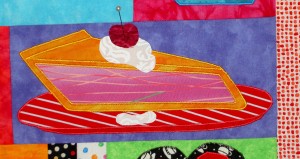
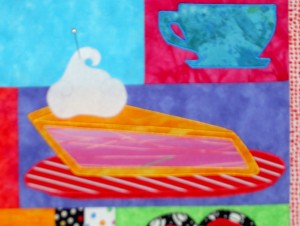
This is the piece of pie and whipped cream, which you have seen four dozen times. I am forced to continue to show it to you until you scream for mercy. Only because you asked for it. 😉

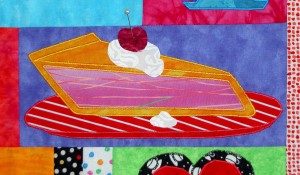
Okay! Okay! I am not so mean. This is actually a slightly larger drip than before. I took your advice and decided to make the drip a little larger. I don’t think it is large enough here. When I stand back, it still looks like a speck. I don’t want people to think I made a big boo-boo on the applique’.

Tarts, Big Drip
Tarts, Big Drip

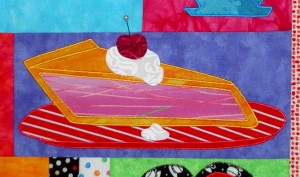
Here is the big drip. It looks like something! I used the same shape; just made it a bit bigger. I like it and it will probably be sewed down this weekend.

Sewing it down would be very nice, because then I can get it off of my design wall and put something else up.

Oh. The back. I still have to make the back. Sigh.

Whipped Cream Drama

I know you thought I forgot about the Tarts. Or, perhaps, you thought I abandoned the piece for another 3 years?

Oh ye of little faith!

Non quilt parts of my life have been busier than usual. I have still taken the time to diligently test your ideas for the whipped cream on the second piece of pie after I posted some thoughts in a previous blog post. I thought it would be easy and fast. HA! When will I ever learn?
Another issue is that the 9K is back in the shop. It is fixed now, but I won’t be able to pick it up (80+ mile round trip) until Friday since I am going out of town on Tuesday and the shop is closed on Monday. I tested an approximation of a satin stitch on the Jem. The Jem is a great machine, but the satin stitch it makes doesn’t compare to the 9K’s satin stitch. I need to wait until the 9K returns from his/her vacation. I’ll get everything ready, however.

Below are the candidates:

Whipped Cream #3
Whipped Cream #3

I liked this one, but didn’t think it was enough. I thought it needed more of something. Someone mentioned a drip in a comment, so I started working on that.

Whipped Cream #4
Whipped Cream #4

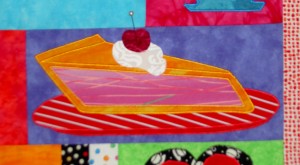
The drip above is too small. I want it to stand out a bit more against the plate.
Whipped Cream Test #5

The one above is pretty good in terms of having more than just an element on the top. However, the indentation in the top of the dripped whipped cream on the plate looks strange. It may be realistic, but it doesn’t look fun or interesting.

Whipped Cream #6
Whipped Cream #6

The one above is the option I have decided to use. I like the more engaged shape of the drip. I don’t think that is how drips really look, but this quilt isn’t reality.

As you can see, I take Lorraine Torrence’s admonishment to “make visual decisions visually” to heart.

Whipped Cream

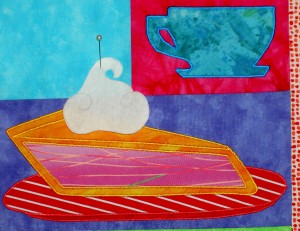
I’d like to baste the Tarts at the next CQFA meeting on Saturday. In order to accomplish that goal, I need to get the whipped cream on the pie. I made the pattern and have been auditioning it in slightly varied locations all over the pie.

Pie Cream #1
Pie Cream #1

The above photo shows the crust stitching (see below), but I still don’t like the placement.

Pie Cream, in context

The above shows the whipped cream on the pie from a little further back, so it can be seen in context. It does look better from this distance.

Pie Cream #2
Pie Cream #2

The above location does not work. I am rather proud of that crust and the location of the whipped cream covers up my lovely stitching.

I am thinking that the ultimate problem is that I made the pattern too big and it should be a smaller mound of whipped cream, like on the cupcake. I am also thinking about adding a cherry instead of whipped cream.

Tarts Milestone

I have a box of Recchiuti that I have been slowly savoring as I work on the Tarts project. The box is almost empty and, TA DAH, I have reached a major milestone in the work on the Tarts project!

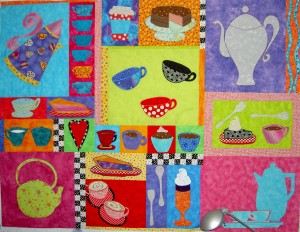
Tarts Top Complete, August 2009

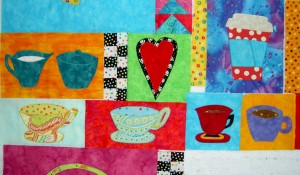
Your eyes do not deceive you. The Tarts Come to Tea top is completely sewn together. I had some bits of time over the weekend and used those bits to work on the Tarts. I really need to get this piece off my design wall and work on something easy. I resisted the urge, especially after all this time, to just throw the thing together. I really looked at it as my last opportunity to fix any despicable design decisions.

My first order of business was to replace the yellow cup.

Yellow Print Cup
Yellow Print Cup

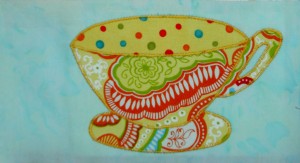
I like the cup itself and am pleased with the fussy cutting and satin stitch quality. As part of the complete Tarts Come to Tea design,  it didn’t work. My eye kept jumping to it. While I want the viewer’s eye to move around the piece, I didn’t want it to be glued to the yellow cup.

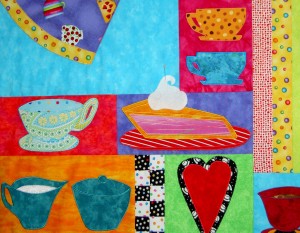
New Pie, August 2009

TFQ suggested pie.  Since I was thinking along the lines of a pastry or tart as well, I appliqued another piece of pie. I used the same design as the original piece of pie.

Old Pie, August 2009

The problem was that they were too similar. I didn’t make enough changes to the design, even though the colors/fabrics are different. The similarities are highlighted because the two elements are close together in the piece.

I resolved the issue in my mind, however. I am going to applique’ some whipped cream on top of the new piece of pie, and perhaps a cherry. It will overlap on to the blue block above it. I planned to do it before the entire piece was sewn together, but I got caught up in the excitement and focus of the sewing and forgot. I’ll add it later this week or on the weekend.

Upper Left, August 2009

I had already started to sew sections together last weekend when I tried to tell myself I was finished. Still, there was a lot of piecing to do, so I got too it.

Upper Middle, August 2009

One thing I forgot about improvisational piecing is that one has to add bits and pieces in between. I really didn’t want to do much of that, because I liked the look of the blocks being next to each other. That meant some trimming and adding little bits, which I did, and which will, hopefully, be mostly hidden once the piece is completed. I couldn’t avoid adding some bits and I had to pay attention to the checkerboards, because I didn’t want to cut them off in the middle of a square.

Lower Left, August 2009

There were a few places where I couldn’t trim and augment. Those spots should be readily apparent from the photo. In general, I am pleased with the way the piece turned out.

Quilting is next, of course. As I mentioned in the last post about the Tarts, I seriously thinking about quilting the piece myself. I want it to be done a certain way. I don’t think I am good enough yet on the longarm to quilt the detailed design I have in mind. I really want the cups and pastries to stand out. More thinking on this is required.

I can’t really believe that it is together. It has been such a long process!

Tarts Progress Also

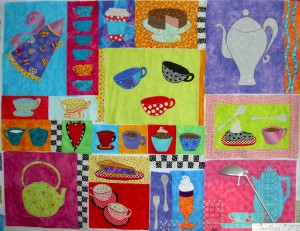
Tarts, August 2009
Tarts, August 2009

Yes, your eyes do not deceive you. All the bits and pieces that I have wanted to change are done and I can start sewing the whole piece together. I don’t really think that it is nearing completion, because I have lot of ideas for handwork and embellishment in my mind. I just have to figure out the order of the next steps.

After I determined that the 9K was behaving admirably yesterday, I didn’t listen to anyone’s 2 cents about this space and made the stack of cups the way I wanted. I am pretty pleased with how they came out, though I think the pink I chose is a little bit darker than the flying geese background. It works, so it is fine.

Tarts cups
Tarts cups

Confession time: After I put the stack of cups up next to the curly pot, I started not to like the yellow print cup very much. I started to think how nicely a slice of cake would work in that area. I even had a fleeting thought that a scone or chocolate chip cookie would work. (SherriD: stop laughing!)

Yellow Print Cup
Yellow Print Cup

Really, I am trying to stop fiddling, but I may not be able to finish the piece with that cup on the front. I started to sew the sections together, but I have stayed away from this section until I can decide if I can live with this cup. The other issue is that I don’t have a replacement design in mind. I really want to get this top off the design wall in one piece and do something easy.

I am shocked to admit that quilting this myself actually entered my mind last night, as I worked on Beach Town. This piece is pretty large, so I’ll have to really think about that. Beach Town is small and I am still working on the last bits. The last quilt I tried to quilt was Seeing Red. I densly quilted about a 14″ square,  then ripped all the quilting out and took it to my machine quilter.  I don’t want a repeat of that.

Cookies in the Tarts?

quilted cookies

SherriD has been encouraging me to include some cookies in the Tarts. I have a bunch of good reasons why I can’t or won’t. Mostly, I haven’t been successful at drawing them so viewers know they are a cookie. Of course, SherriD, resourceful quiltmaker that she is, found this quilt. I am sticking to my guns, but you can weigh in with your opinion below.

Tarts Progress Nearing Finish Line

I was out of the house almost all of last weekend, which is not my usual routine.  While I had fun, I was disappointed not to get to spend copious amounts of time working on my projects. Still, as I mentioned on Wednesday, I did fit in a bit of work around the edges on the Tarts.

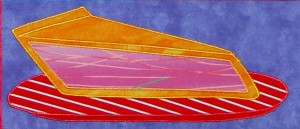
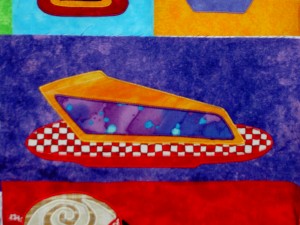
Tarts, Pie with no stitching

I played around with different looks for the piece of pie. I drew one, first, that the viewer looked at straight at, e.g. the viewer did not see the top of the pie at all.  It didn’t really work for me. I didn’t like the look, so I reworked it so that the view had a more angled view.

I didn’t have a good pie crust color that I wanted to use (‘wanted to use’ being the critical phrase, here) The orange makes the viewer do a double take, IMO. I will do something, perhaps, with the quilting on the piece to tone down the orange a bit. The orange does blend in with the other orange fabrics in the whole piece.

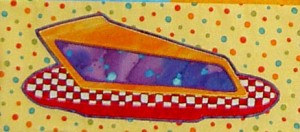
Tarts, Pie with Stitching

After I place everything the way I want it on the background, I stitch it down. In the last few pieces I have also been topstitching in addition to the machine appliqued zigzag stitching. I don’t think you can see the topstitching in this picture, but people who are able to view the piece in person will be able to see it, I think.

I picked the background to make a triangle with other purple pieces at the top of the piece. I picked it after I picked the ‘filling’ fabric. I wonder if they don’t allow each other to shine? I think this particular block looks better as part of the whole than by itself.

I left a bit of the fabrics above and below showing so you can see how it fits in close up.

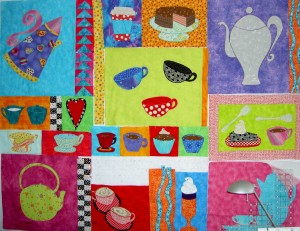
Tarts, June 14, 2009, with Pie

Here is the whole current piece. I kind of miss that big white rectangle at the bottom and am having trouble assimilating the pie. I think I will manage to get used to it. I can’t imagine a big white rectangle in the piece would be a great design decision.

Am going to try to get to some studies for the silverware next to the red cups. I am also thinking I will add a few more black and white squares to the checkerboard on top of the frothy drink.

Tarts Update

Tarts, May 31, 2009
Tarts, May 31, 2009

Most of the work on the Tarts has been mental lately. Those of you thinking mental case, may be right. 😉

With all of the rote sewing I have been doing lately I haven’t made the time to sit down and do the next drawing, which will be another pastry.

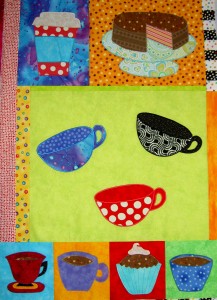
I am liking this layout. I think it adds a bit of movement at the top, though I am not sure why.  I like the vertical checkerboard next to the tea kettle and will put a piece of it above the tall frothy drink as well. The orange squiggles between the red cappucino cups and the tall frothy drink will probably be replaced by some vertical silverware. Onward!

Tarts Progress

Tarts, May 10, 2009
Tarts, May 10, 2009

I wasn’t done with the Tarts, as TFQ suggested. I feel like I made some significant progress yesterday. the blocks take a long time for me to make. I have to do the drawing, trace a couple of times, put the pattern on fusible, cut out the fabric, make sure the pieces are all going in the correct direction and then I can press and machine stitch.

Tarts detail, May 10, 2009

Here is the whole section that I worked on, so you can see how it fits into the whole. I thought the area needed a bi of blue. I wanted to use turquoise, but didn’t want to overwelm the piece with it, thus the aqua color. I think it is a little light to be on the edge, but we’ll see how I like it once my brain has a chance to rest from it.

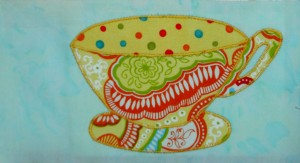
Yellow China Cup, May 2009

The yellow “china” cup wasn’t planned, but entered my head and got a place at the table, temporarily, a least. I am not sure I like the fabric for this area, though a plainer yellow would have melted into the aqua. As I mentioned, I really like the juxtaposition of different patterns on the fabric and that is what I was going for with this cup. Also, the fabric design relates to the blue china cup. They may even be part of the same group.

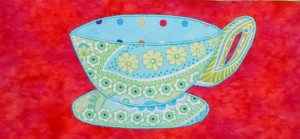
Blue China Cup, May 2009

I am pretty pleased with the blue china cup as I was able to work in that pinky rose fabric that I wanted to use for the background of the green teapot. I think it is a good transition fabric between the background of the green and the orange of the sugar and creamer.

I realized recently that showing you all of these process shots means that you never get a surprise. I will have to think of a project I never show you just to give my readers a surprise once in a while.

All Quiet on the Quilt Front

Or maybe not.

I have been struggling with the Tarts lately and with traveling so much in the past three weeks it has been hard to get back into the creative mode. TFQ and I had a nice looong chat last night which helped to get me back into the groove. She knows about design. Aside from the fact that we share a lot of the same ideas about design,  I really trust her judgment. If I ask for advice, she will give me good advice. I appreciate the way she helps me through the design process when I feel like I am struggling. As I mentioned in my essay, design, etc is partly an intellectual effort for me. TFQ and I can have the right mix of intellectual and creative in our discussions.

I talked with her about my struggles. She suggested that I take the Tarts off the wall for a month and let the project simmer in the back of my mind for awhile. The idea appealed to me, in a way, because I worked on the Infinity (Crazy Eight) blocks and I was really wishing that I had more design wall space. If I take he Tarts off the wall, I’ll have the space. It might be time to get the portable design wall out of the closet again…or stop working on so many projects at once.

I don’t really want to take the Tarts off the wall, because a month can easily turn into a year and by the time I drag it out again, I might want to remake all the blocks AGAIN. Needless to say, despite the merits, I wasn’t thrilled with the idea. When TFQ suggests something, I give it serious thought because she usually has a point.

That was the start of the conversation, however. We looked at the piece using the Tarts Arrangement post, the way I had arranged the different blocks and what was working and what wasn’t working. Now I am all fired up to rearrange the pieces, make some new blocks and move forward a bit more. I am not ruling out putting it away again (with a calendar reminder!), but I am not doing it quite yet.

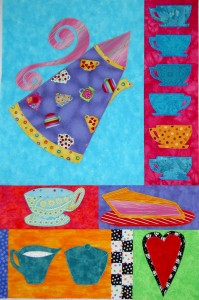
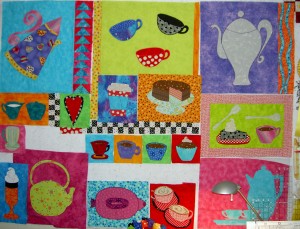
Tarts, May 10, 2009
Tarts, May 10, 2009

I do know that the teapot block (bottom middle, mauve with blue bubble background) with the view from the top is going. It was damaged somehow and I can’t fix it. Since I have to remake it anyway, I am taking it out and putting in a new block. TFQ made a good point about that block. It is a different view than all the other pieces and, thus, really stands out. Not sure what yet. TFQ suggested another tart or pastry. I don’t have any ideas for one, but since there are only two in the piece, another would a good design choice.

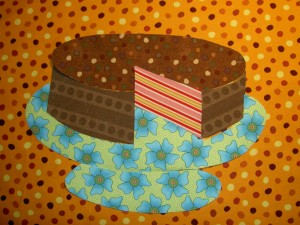
You also get to see the cake plate block in it’s native environment.

FOTY Blocks, May 10, 2009

Here are some new Fabric of the Year blocks. I haven’t pressed any fabric lately, so this is the end for the moment. I am not short of fabric to press, I just haven’t done it. I love that red polka dot. It is the same fabric I used for the to go cup.