Mel Beach Workshop

Shockingly, I took a machine quilting workshop.

Yes, I have done so in the past, but it has been awhile.

Mel Beach Machine Quilting Sampler

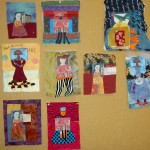
After seeing Mel’s sampler of designs up close and thinking for awhile that I wanted to pull out my walking foot for use more often, I signed up for the class. I love taking BAMQG classes. The people there are really fun, so even if the class it awful (and there hasn’t been an awful one yet), I know we would laugh and have a good time.

I will never be a great quilter like Colleen or Kelly, but I can be adequate and competent. My method of machine quilt is to follow the designs of fabric, as you saw in the Thanksgiving tablerunners. I usually use my applique’ foot and go very slowly. The applique’ foot allows me to see exactly where the needle is going and I can be a bit exacting when I quilt. I used to free motion quilt, but I haven’t done it in a long time and it doesn’t really suit my style of quilts.

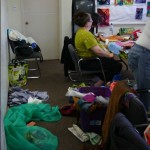
The workshop was held at Grace Lutheran on Saturday a week or so ago. The task was to learn to use to the walking foot or become more comfortable in its use. In the process we would create a sampler (or two) of several different quilting patterns. Most of the patterns were straight line, but Mel included some gentle curves as well.

Mel was well organized and had obviously worked hard to develop her handouts. She covered taking breaks and caring for your body, which is skipped over in many classes. We also learned to use tape to mark, tips and tricks for pivoting, decorative stitches and much more. Mel is a calm and well prepared instructor.

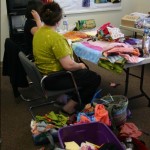
The workshop was organized so that the group would get together to learn information then go to the machines to practice. There was a lot of back and forth, which was great because it encouraged everyone to take breaks.

Result of problem with tape

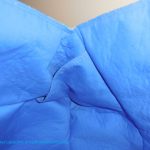
I had a problem sewing on the correct side of the tape at the beginning. This put me behind, because I ended up with a whole bunch of ripping to do. Still I was able to finish one sampler.

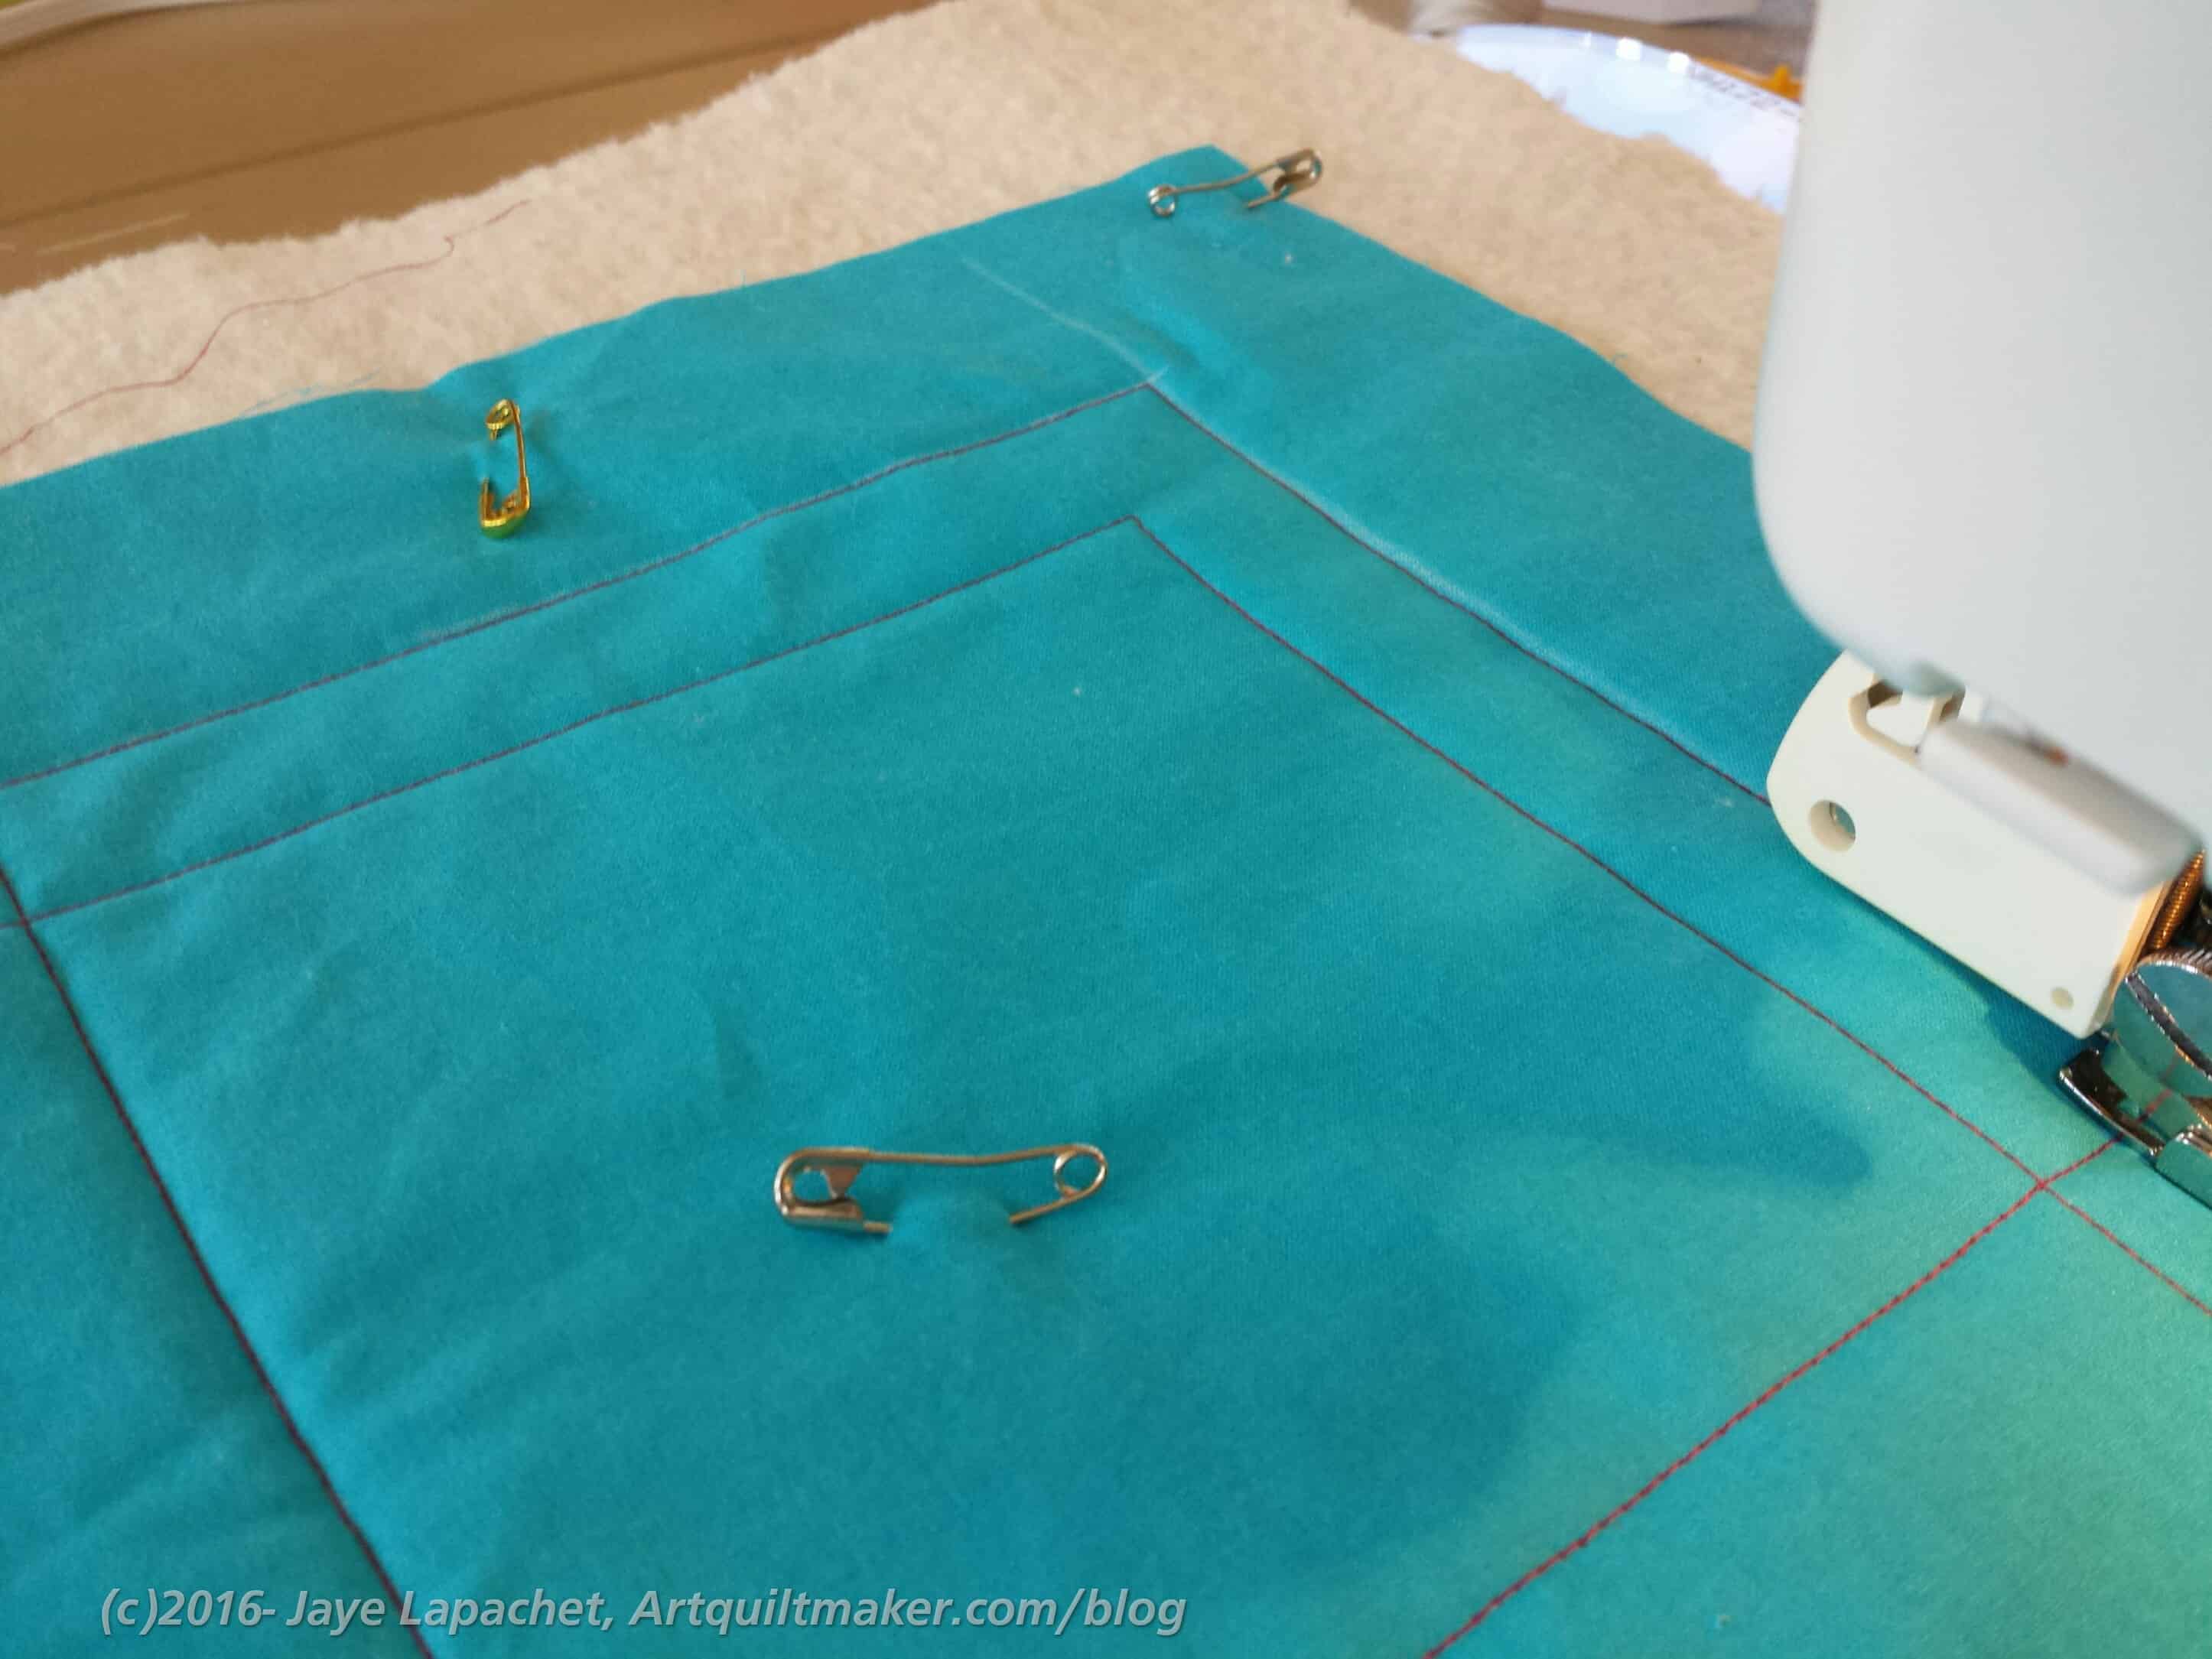
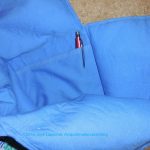
I ended up marking an arrow on the tape telling me at a glance on which side to sew. Simple, and possibly unnecessary, but it helped me. I also marked some of the places with my Nonce pencil, a tool I learned to use when I first started quiltmaking. I didn’t have a Sewline with me.

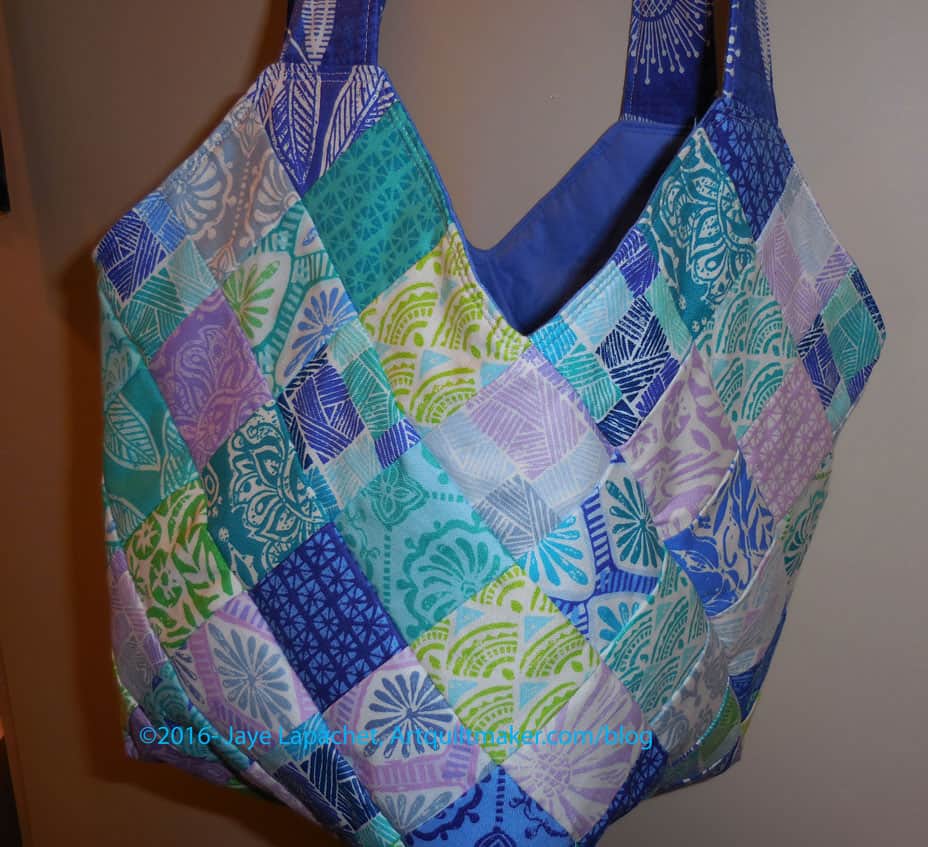
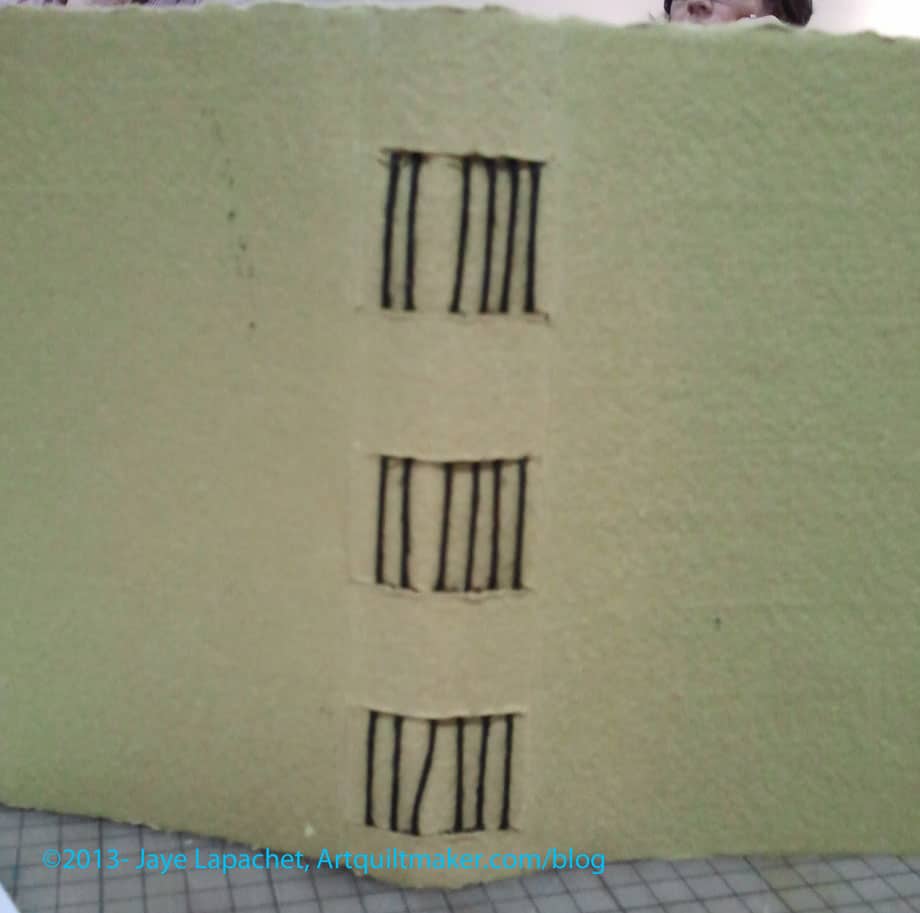
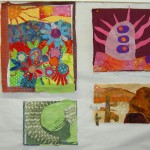
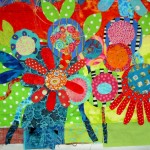
The first thing we did was create squares on the sandwich we had created at home. Like the example above, we were to have a 9 patch layout in which to quilt our designs. I was moving along fine until I sewed on the wrong side of the tape and suddenly my squares were too small. After ripping, I drew the lines on and sewed over those drawn lines rather than using tape. Note that I didn’t make a big deal out of *my* error, as I have seen some people do in other classes. I calmly ripped enough so I could sew the next lesson and then ripped more while I listened to another lecture. Yes, I was frustrated, but this had nothing to do with Mel.

My Machine Quilting Sampler

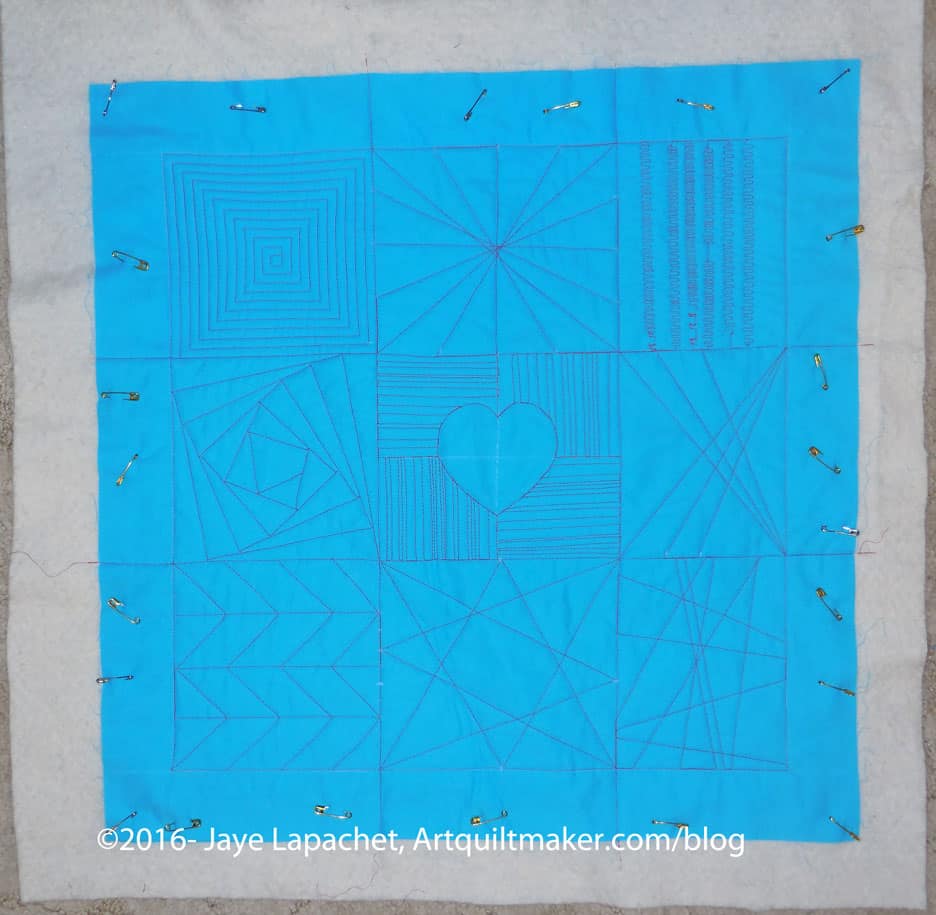
Eventually, I got back on track and was able to finish all but a quarter of one square.

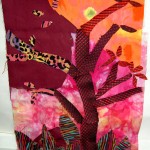
All of the designs are straight line designs except for the heart in the center, which, as you can see, has only a very slight curve. The straight line designs were mostly done using tape in some way to mark out the lines, though in the spiral (upper left hand corner) I used the side of the walking foot, as instructed.

One of the reasons I took the class was to try and find background designs, that fit my quilting style, to use to finish the Tarts. I am not sure I found what I needed, though I think I can use some of the designs for that purpose

Machine Quilting Sampler: Chevron

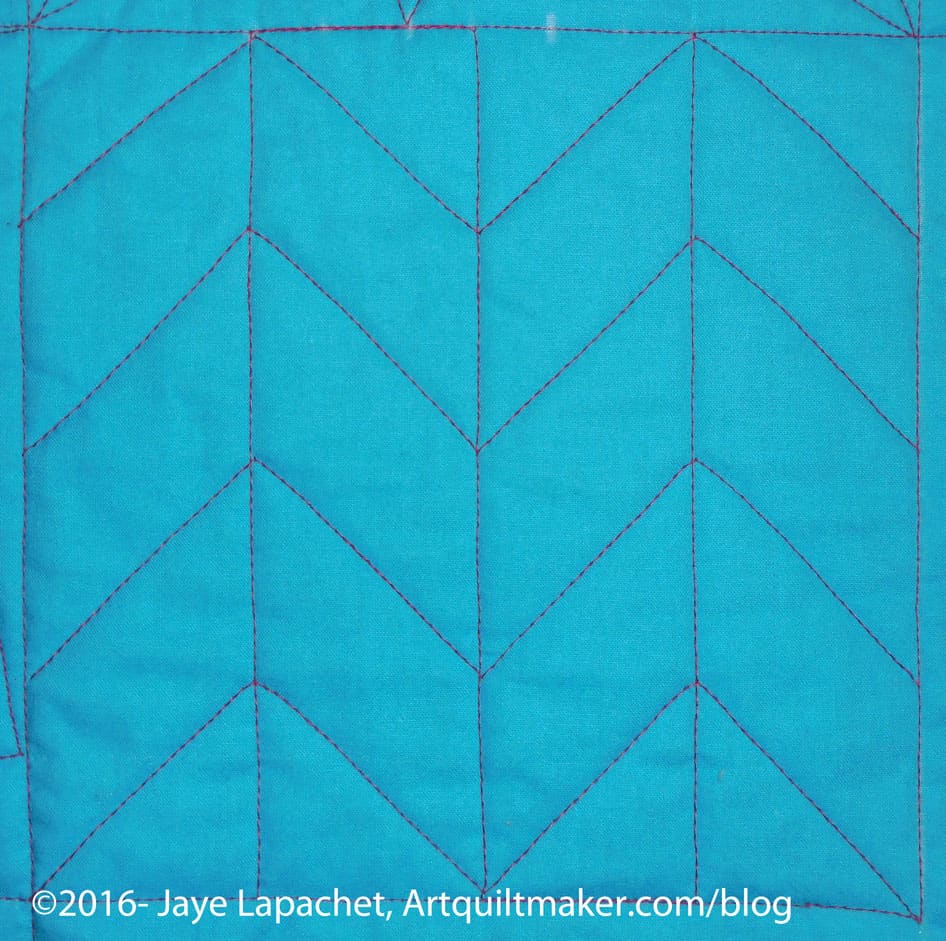
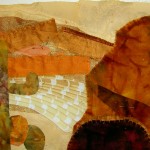
My favorite design was probably the Chevron, though I am not sure when I would use it. It isn’t as hard as it looks.

The class was worthwhile and I am glad I took it. I am not sure whether I am more inspired to quilt more in a new way or just have more knowledge. I don’t have a wild desire to machine quilt everything in sight. I suppose time will tell.

I have another sandwich made and continue to try to decide whether I want to start my own sampler, trying out the designs I wasn’t able to try in class. The problem is that if I am quilting, I am not piecing. Also, I can’t switch back and forth as I have to set the machine up for one or the other. For the moment, I will continue to piece.

Walking Foot Students with Projects
Walking Foot Students with Projects*

You can read more about Mel’s thoughts on her blog post.


*Thanks to Mel for the photo

Midi Bag Finished!

Midi Bag - Full
Midi Bag – Full

It has been over a month since I took the Midi Bag class, – WOW! time sure flies – but I finally finished the bag.

After the class, I only had to topstitch then close up the opening in the lining. I really just didn’t have a spare moment to sew those last few steps. It isn’t as though I have been sitting around, but the Midi Bag just did not come to the top of the list.

After finishing the Heart Bag, I decided to take a few minutes to finish the Midi Bag. I am really thrilled that it is done. The Memorial Day weekend unexpectedly turned into a few days of finishing. Although I had to go with DH for a little bit of #Politicalwifery, I was able to sew a lot and finish a few projects. It was so relaxing and I am so thrilled I got to all of the projects I was able to finish.

Midi Bag - detail
Midi Bag – detail

I really like the way the bag turned out from a fabric point of view. The colors are very appealing and it has a bit of a tropical/Hawaiian art feel. I used Horizon by Kate Spain mini-charm packs for the body, a random solid for the inside and more Kate Spain yardage for the handles. The color combination is really great. I especially love the fabric I used for the handles. There is something about that blue that is very appealing.

It is a very strangely shaped bag, however, and I am not sure of the purpose for which I would use it. Also, I feel like it needs some kind of closure. SIL and I talked about grommets and buttonholes. I am not a fan of grommets after the Scrap Lab Backpack, so buttonholes are more likely. We’ll see.

The pocket came out well. I put a little decorative stitch on the edge and I am glad I did.

I still have a few of the same charm packs left and I might see about making this bag again in the Mondo size. Perhaps the proportions for the larger bag will be better and that one won’t look as strange. I am not sure I would be able to carry a Mondo sized bag full of stuff. I don’t that pattern and would like to use the second sheet of interfacing from the Midi Bag pattern before I buy another pattern. Nota bene: Each pattern comes with 2 sheets of interfacing.

Midi Bag Class

Midi Bag in progress - full
Midi Bag in progress – full

A week ago, I took a class at Scruffy Quilts to make the Midi Bag from QuiltSmart. I have had the pattern and the charm squares for awhile. Despite the short notice, it turned out that I was free so I signed up right away when Katrina sent out the class notice. I also wrangled Julie into taking the class with me.

One reason I wanted to take the class was to learn how to use the QuiltSmart fusible interfacing. I could not understand the directions on the pattern, thus the project had been languishing. It is very helpful for me to have someone walk me through the pattern the first time and this class was no exception.

Tips such as fabric placement is something you get in a class that you don’t get from a pattern.

Midi bag - detail
Midi bag – detail

I am pleased with the colors of the charm pack as I thought I would be. I used mostly the blues and the greens. I didn’t use as many of the lighter lavender squares, so those will show up in some donation quilts.

I am totally in love with the handle fabric and think I need to get more of it. The blue is not quite a navy, but is dark. I love it!

The bag is a little bit of a weird shape and I am not sure how I will use it, though I think it would be an excellent knitting bag. I have another sheet of the fusible interfacing (two come with the pattern, which is nice!) and I may add some kind of closure to the second one. I think having a closure would make it more useful. I think I would like to make the Mondo bag. It seems that size would better for a bag without a closure. I think it would be like having a shopping bag along rather than a purse.

I still have a few steps to do, but I got pretty far in the class. I laid out all of my charm squares and fused them. I was glad that I had charm squares and didn’t have to cut fabric. I made the lining and the handles and sewed the whole bag together. I could have made the handles at home, but was confused about how they wanted the handles made. I didn’t want to make them wrong and have to make them over. It turns out that there was nothing special about making them. I still have to poke out the corners, topstitch the top edge and sew the lining shut.

Learning how to use this interfacing makes me want the interfacing for the FOTY quilts. I am not sure how that would work since the sizes are different each year. Perhaps, if there was a general grid, I could overlap some of the seam lines when the patches didn’t quite match up with the lines? Oh well, if wishes were horses….

This is a pattern where you could use VinylFuse for the bottom squares. I didn’t, but may in the future. If you take this class, do with your 2.5″ squares already cut and your handles already made.

Reno’s Premier Quiltmaking Event: Make it Modern

Make It Modern
Make It Modern

My friend Kathleen is organizing a great event in beautiful Reno: Make it Modern. This is the premier Reno event for modern quiltmakers. It is a great opportunity to work with a couple of QuiltCon 2016’s hottest designers.

What: Fun and fabulous days of creating, led by modern quilters Christina Cameli and Libs Elliott. Additional help, discussions, and general shenanigans each evening at the sewing salon, and a trunk show on Sunday morning.

Where: Peppermill Resort, Reno, Nevada

When: June 9-12, 2016

Who: Christina Cameli and Libs Elliot will be teaching

Why: Because it is fun to meet up with other like minded quiltmakers and have some fun sewing

How: easy access by car and plane

Find out more information and register on the Make It Modern Events website.

Make it Modern – Reno

Make It Modern
Make It Modern

My friend, Kathleen, is organizing a great event in beautiful Reno: Make it Modern.

What: Fun and fabulous days of creating, led by modern quilters Christina Cameli and Libs Elliott. Additional help, discussions, and general shenanigans each evening at the sewing salon, and a trunk show on Sunday morning.

Where: Peppermill Resort, Reno, Nevada

When: June 9-12, 2016

Who: Christina Cameli and Libs Elliot will be teaching

Why: Because it is fun to meet up with other like minded quiltmakers and have some fun sewing

How: easy access by car and plane

Find out more information and register on the Make It Modern Events website.

Book Making

Sometimes, very occasionally, my personal creative world and my professional world meet.

Books I Made 3/2013
Books I Made 3/2013

This happened a few weeks ago when the social committee of one of the organizations to which I belong scheduled an outing to the San Francisco Center of the Book. Of course, it was a week where a thousand things were happening and I almost cancelled. I am glad I didn’t, though, because it was a great class and it got me moving in the direction of bookmaking, like the Red, Purple, Well Done and Good Job journals, again.

Until it is in Flame

Not every participant had arrived, so I took some time to look at the exhibit on display. I don’t remember the name of the exhibit, but the books all looked like they had hidden messages.

The piece, Until it is in Flame, is by Beau Beausoleil and Andrea Hassiba. While I do not like the burned and destroyed book, I do like the way a part of the book is hollowed out. The space could hold additional artworks, messages or other books. It makes me think of how to do this sort of idea in the structure of the books I make, but it also makes me wonder whether I should.

Healing Wounded Words

Healing Wounded Words is a piece about the power of words by Marina Salmaso, a Danish artist from KØbenhavn. I find this piece to be very light, but the words and the red are not boring. I also like the format.

You really have to click the photos to see them larger. The thumbnails don’t do them justice.

Exhibit
Exhibit

Another exhibit was in another room and it was equally as intriguing as the one in the main room.

I really like the variety of different bindings and different types of books. It was so fun to learn how make a few of them.

My Favorite Binding
My Favorite Binding

Rhianna, the instructor, passed around lots of different types of books with different bindings. We did 4-5 separate books and bindings. Of course when I saw the binding on the green book, I immediately thought it would make a fantastic journal binding.

Guess what?

This book was a teaser for another class! I really want to take that class so I can learn how to make the binding. If I made it I can decide whether I can translate the binding/bookmaking type into fabric.

Inside of My Favorite Binding

From the inside, this binding looks like it would hold a lot more pages than the other types of bindings we learned.

It also looks like one could see some of the fabric through the binding.

Type cases
Type cases

The San Francisco Center for the Book is a great place. It is in a hip, up and coming neighborhood that still has a bit of grit with their Whole Foods.

Type case label
Type case label

There are a lot of interesting things to look at in the facility and it is light and airy as well. The exhibits I looked at were two in a series of ongoing exhibits.

If you are making a trip to San Francisco and want to get off the Fisherman’s Wharf-Ghirardelli Square-Cable Car beaten path, you might want to check out the San Francisco Center for the Book.

Photoshop Elements Class

Denver Flower Mashup

This Pièce de résistance for the Photoshop Elements class I took yesterday. It is not that useful for quiltmaking, but I am pleased that it came out well and is pleasing to the eye. I also learned a lot in that class and this piece shows a lot of what I learned.

I am so glad that people came out and took the class. I was nervous up until earlier this week when Lynn sent me a note saying 12 people had signed up. I wasn’t sure the class would go forward, but it did. I think everyone learned a lot. I think that Lynn put in the right amount of information.

Lynn Koolish teaches a variety of different classes, but they all seem to relate to printing on fabric, fabric dying and other fabric manipulation techniques. Lynn works at C&T Publishing as an editor. She contributes to the C&T Blog and teaches as well.

One of the things I wanted to learn was how to put multiple images into one space. I don’t always want to load 37 images that you, my dear reader, would also have to load, especially if I really want you to get the flavor of what I am discussing. I learned how to do that and the example above has that technique. In that case, I used the same image and put it into one file multiple times.

I also learned how to deal with layers, which was very confusing to me until yesterday. In the photo above, I was able to flip each image, because they were in different layers.

Breakfast of Champions

The reason the above is called Breakfaast of Champions is because the image started out as a picture of my breakfast. First we talked about various things you could do with color such as replacing color. I changed the colors using saturation and hue, etc so that my breakfast turned lovely shades of purple and blue. We also talked about different filters and effects, which is how I ended up with the spiky kind of image above. It is tempting to think of making it into a quilt, but I don’t know if I have it in me to do the colorwork required. Nice thought, though.

I also learned about adding text to an image. I don’t know why it seemed so scary before, but it isn’t scary.

Denver Flower Mashup 2

By the end of the class, I felt pretty confident. I am not expert, of course, but I have some confidence, so I changed the frame (from above photo) to see what the difference in look would be.


AWOH Journal Class

Journal Cover in Progress

The A Work of Heart Spontaneous Scraps Journal class really caught me unawares. I feel like everything is sneaking up on me lately. My head is definitely not in its normal spot.

The idea of the class was the a few people were invited (or that was my impression) and would bring scraps to make a journal with a fabric cover. As I was thinking about getting ready for the class on Friday and Saturday, I decided to bring the red mosaic pieces to use to make the cover. I also brought the Malka Dubrawsky piece that TFQ gave me for my birthday and used that for the inside.

I used the mosaic quilting piece to make the journal cover. I had gotten away from it, but am now in love with that process again. I was feeling like I would never use that fabric, because it was too precious. I also couldn’t think of what project would be appropriate. Anything too fiddly wouldn’t work, because there are so many seam allowances right next to each other. The pressing was a bit of a challenge, but I think the journal cover came out very well.

Journal Supplies
Journal Supplies

The class called for a nice ribbon for a closure. I brought it, but I didn’t attach it yet. I am thinking that I want to put a button (or a Mah Jong tile with a hole drilled in it – something out of the ordinary/interesting) and some elastic to wrap around it. I need to get that settled before I do much else. I don’t have any of that thin elastic nor do I know how to attach it after the piece has been made.

Journal Cover in Progress (open)

That bit of mosaic quilting is a pocket on the inside. I guess I can use it for pens. Andrea suggested that putting a pocket in the piece was an option, so I did it. I am pleased with how it came out.

The red dotted page on the left is one of the journal pages. The embellishment (the paper with the white dots) is paper clipped to the page, because it has not been attached to the page yet. I did complete the sewing on some of the pages, but not all. I want to work on that before the concluding class.

Mosaic Quilting Scrap Fabric

I brought some strips that were piling up as well, so I was also able to add bits and pieces to make the piece big enough. Above is what I have left and I am back in the mindset of making this type of fabric. I used the bits and pieces as leaders and enders as I was sewing the journal cover together.

I am thinking that I would like to make at least one more as a gift. We will see how making the pages goes.

Dale Fleming Class

Butterfly by Dale Fleming

I took the Dale Fleming circles class through EBHQ last weekend. Short Answer: AWESOME.

I was a little skeptical when I saw the supply list and began trying to gather the items required for the class. I talked about this class a few times in various posts in the last few months. The supplies required me to get out of my comfort zone, which is good, but never welcome.

Freezer paper for Background
Freezer paper on Background
Background trimmed around Freezer paper

The effort was totally worth it. There was nothing on the list that was a waste. This class used A LOT of freezer paper. The above circle steps use two layers of freezer paper and, apparently, I can only use the freezer paper template once, because of something to do with the amount of glue stick glue required for the process. I didn’t really ask, because it was so early in the process I was still floundering a bit. I’ll have to try using the templates over and see if there is a problem.  If I were going to make a circle quilt, as I had planned, I would use TV time to make the freezer paper templates.

Step outs
JL Second Circle

Ms. Fleming was an excellent teacher. I found out later that she has magnificently minded (LD) children so she was very cognizant of the different learning styles a teacher has to teach. She had detailed step outs for each part of the process, to which we could refer. She also explained the process and then showed us the process.

I didn’t find Ms. Fleming to be a prima donna. She was generous in allowing us photograph her quilts, step outs and her demos.

JL Second Circle
JL Second Circle

I feel really confident, after the class, that I can piece a perfect circle. The circle + background above is my second circle and I think it looks great! I used a pairing of fabric that you may be wondering about. I wanted to use fabrics that were really different that I could see well. No, they don’t really go together, but the above block will stay in my class file and not become part of a quilt. Perhaps that circle quilt that has been on my mind for a few months will come to fruition?

If you don’t want to take a class with Dale, or there is not one happening in your area, you can buy her book: Pieced Curves So Simple. If you don’t like that either, check out Becky’s blog where she talks about creating and using a circle stitcher.

JL Waves
JL Waves

Dale taught us a variety of techniques, including hearts (tips and cleavage!), layered circles (see photo below) and waves. There just wasn’t enough time for me to focus on learning all of them. 6 hours was definitely not enough time with her and I really could have spent at least a whole additional day just working on really getting the technique in my mind. I suggested that she have a work day for students who had taken a workshop. She said she had never thought of that, but would contact me if she decided to do it.

One that I tried was the waves. Her version is a lot easier than the version that I learned in 1989 when I was taking my second quilt class at the adult school. It took a lot of freezer paper, but I finally found a use for the freezer paper roll I have had for a long time. Also, it is possible to make the strips on your piece really thin. Borders are rolling around in my head, especially for the Original Bullseye.

Dale said that after making 5 circles, you can make them on your own without notes. I got up to three during the class and in the few days thereafter. I haven’t gotten back to it.

Circle Making Alone
Circle Making Alone

I really like technique workshops rather than project workshops. I like to be able to put a technique into my arsenal and then pull it out when I need it. I think I will be a lot less reluctant to think about adding circles to my quilts now that I have taken this class.

To date, I haven’t gotten back to circle making. The circle above is hanging, all alone, on my design wall. As I mentioned, my original thought in taking this class was to make a circle quilt. I think the above fabrics don’t express the idea in my mind, but I am also thinking that, perhaps I don’t really want to make a circle quilt. I haven’t decided. I think I need to make a few more test blocks just to see. I definitely want to try making a really small circle and see if I can do it.

An unexpected bonus of this class is that I am now not reluctant to change feet.Changing the snapoff feet is not an issue, but changing fee that required the foot holder to be removed somehow stopped me. After putting on and taking off the zipper foot 37 times, I have no reason to worry about changing feet.

Gallery of Dale Fleming Quilts

Butterfly by Dale Fleming
Butterfly Quilt by Dale Fleming (detail)
Waves by Dale Fleming
It's all about the Fabric style by Dale Fleming
It's all about the Fabric style by Dale Fleming (detail)

Notice the slightly wonky sashing.

Circles by Dale Fleming

This was probably my favorite quilt. She did this using a different method than we learned. I tried to understand it, but my brain was very full.

Circles by Dale Fleming (detail)
Circle Quilt by Dale Fleming

This quilt was made using the method we learned. After putting on the first circle, the maker uses that piece (circle and background) as the background.

Flower Petals by Dale Fleming

These look like flowers. I really like how the quilts show she is exploring the technique a lot of different ways. I think that shows mastery.

Flower Petals by Dale Fleming (detail)
Straight Flower Petals by Dale Fleming
Four Patch Circles by Dale Fleming

Summary: I highly recommend her as a teacher! Get her book! Take her class! Make some circles!

N.b. I think my camera is acting up, so I apologize for any bleary photos!

Share and Share Alike

George X's Monkey
George X's Monkey

Sadly, no child close to me is really very interested in learning to make quilts or about any fabric related opportunities at all. I am hopeful that Kathy‘s Jessie may take an interest, or one of the nieces will come around eventually.

You can imagine how thrilled I was when George X (11YO) came over and was interested in making a small stuffed animal. One reason he was interested was that The Child was not home and George X had nothing really to do. I explained the basic process to him and we got started.

I gave him a large sheet of paper folded in half. On one half, he drew the detailed version – his ideal. On the other side, we drew the pattern together. He drew and I told him how to do it.

Detailed picture
Detailed picture

I knew I needed to get him to stitching pretty quickly, so I tried to keep the process simple. After he cut out the pattern, we picked fabric, pressed fabric, cut out the fabric and he began stitching. I tried to show him what to do, inspire confidence and supervise. I tried really hard not to hover. It was easier since I had a project I was working on as well.

Monkey Project
Monkey Project

I wanted him to do as much handwork as possible for two reasons. First, I wanted him to get the feel of the piece. Second, I was using the machine.

Learning to Stitch
Learning to Stitch

I had him sew the tummy on with a running stitch. Yes, it is raw edge applique’. I know that the tummy will ravel, but I will help him fix any problems.

George IX came home and George X lost interest in fabric. Video games were just too tempting. I put the piece away – with all the parts – for the next time.

I was pleased when George X excitedly wanted to show his parents what he had done. I look forward to working on the monkey with him again.

Pamela Allen Class Continued

Summary: this post follows up on Saturday’s post about the Pamela Allen class.

I realized that when I am in a class with Pamela, I do think outside of my own quiltmaking box. I also realized that if I just listen and do what she says  I succeed. I also feel a bit freer in my work. I really have a strong feeling that I need to make a much larger piece in Pamela’s style.

Pamela gave us tips and I interpreted them as:

  • make lots of art because not all of it will be good; small is good
  • your first idea will be crap, so don’t cling to it
  • put the big shapes down first
  • move things around; try a new view
  • if you are bored by your piece everyone else will be as well

We talked a lot about art quilts at our dinner out together. I feel strongly that all quilts need to have a good design. Block type quilts have a basic structure which helps with good design. Most art quilts do not have a basic, inherent structure and some go astray because the quiltmaker doesn’t care, doesn’t know how to initiate and then evaluate a design or doesn’t have the technique foundation. I think it is easy to find out about these things. There are a lot of good principles of design type books, such as Pentak and Lauer’s Design Basics. The basic thing concerning technique in art quilts is that they don’t fall apart upon hanging. Pamela doesn’t have the classic quilt background that many quiltmakers have, but she has learned what she needs to keep the quilts structurally sound and then applied her art and design training. This is the best of both worlds and this is where I really want to be.

You can see from the gallery above how she inspires great and different work. Diane is a wonderful silk painter. She normally paints a whole cloth piece on silk and then quilts it. Her blue trees piece is really different from her normal style and really, truly wonderful. Kristen is very busy with her family and doesn’t have tons of time to sew, but made some fantastic pieces that her children would enjoy. I love that space alien monster! Kristen’s pieces are also cheerful and imaginative and wonderfully creative. Mrs. K’s sauguaro cactus/Suspicion Mountains piece has a calmness to I that I love. I hope she finishes it and hangs it somewhere where it can inspire other people. Everyone really did fantastic work and I am sorry I didn’t take more photos.

Creative Mess #2
Creative Mess #2
Creative Mess #1
Creative Mess #1

We made a creative mess. Mess is the wrong word; we had supplies and we needed to use them. When you only have 15 minutes to make a piece of art, the fabric will be flying and it was. I brought my scraps which kept ending up on the floor. People would stop by, pick up some bit of fabric and ask to whom it belonged. It became quite hilarious. We really couldn’t have done the workshop without Mrs. K. She brought tubs of fabric which allowed us to actually have backs and batting and such things. I seemed to conveniently forget those supplies when I go to Pamela’s workshops! DUH!

The AHA Moment

I have been in class for the past two days with Pamela Allen. Pamela is much more than a quilt teacher. She is truly an art teacher who works and encourages work in fabric. I had THE Aha moment in her class today and it really thrilled me. I could feel the difference in my work after that moment.

As you may have read, or noticed, I felt crappy all week. Barely any blogging got done even though I have a pile of sticky notes with reminders of things to tell you. My house is a wreck and my to-do list is still long. A cold was really beating me down and I was doing everything I could to conserve energy so I could go to class. A good move on my part was to take Thursday off of work rather than working straight through and then going directly to class.

I have taken several classes with Pamela. The first one I took was in Richmond, Virginia at Quilting Adventures. I actually took two different classes in one weekend. The first was a self portrait class and the second was on composition. I started one piece in each class.

Self Portrait
Self Portrait
Garden (before)
Garden

Pamela also came to California in 2008 to teach at EBHQ. I took her class there as well. I don’t think I ever wrote a blog post about that one, but Julie wrote one, which is probably what I would have written anyway. 😉

The quiltlet, House and Garden, that I did at EBHQ has been worked on more since the class and I am almost finished with it.  Maureen sent me a link to facing directions from Jeri Riggs site and I plan to use them to make a faced edging as soon as I finish the beading.

House and Garden
House and Garden

I brought all three of these pieces to the workshop with the intention of working on them and not starting anything new.

The first exercise was a monochromatic exercise. I didn’t do it. Don’t worry! I warned Pamela that I was planning to bring projects from previous classes. I did enjoy the pieces that others in the class made.

I worked and made progress on the Garden. I am actually ready to handstitch on it, though I do still have a bit of piecing to add. I am really pleased with the work I did on the Garden. I think it looks very different from what it was when I started.  I also think it looks a lot better.

Garden (after)
Garden (after)

I am really pleased with the petals that I added. I wanted to create a little more interest in the space where the blue petals are now.

Garden (detail 1)
Garden (detail 1)
Garden (detail 2)
Garden (detail 2)

In the bottom part of the piece, the flowers were all middle ground. Pamela helped me create a foreground by putting some darker blue behind the red flower with the petals. I also created a little bit of a different foreground with the flower in the bottom right hand corner. I was thinking of it as kind of a coneflower, but some people said that it also looked like the petals had dropped off. I have a little work to do on the bottom. During the critique, Pamela and the other students suggested that I extend some of the stems to the bottom of the piece and make the bottom of the piece longer as well. They also like the brown border. That brown is currently the back, but I will cut it off and add it to the new front, but only on a couple of sides.

I didn’t succeed in doing my own thing. Pamela is such an engaging teacher that it just wasn’t possible for me to ignore her completely. She did help me with the projects I was trying to work on, though.

After a quick litle quiltlet exercise (15 min), she gave  us a piece of fabric and we had to make something with it. My piece was brown. No other colors. None of my colors. Bleah!

The exercise was about accentuating or extending existing lines in the fabric she gave us. I liked the idea of the exercise.

Line Exercise
Line Exercise

This is the piece that came out of it. The colors aren’t me, and you can see that I injected quite a lot of blue into the surface.

Today, we worked on critiques and one piece using stripes and prints to create movement.

Final piece, stripes and prints

This piece brought the AHA moment for me. The AHA moment was a point where I finally got all that I have been learning from Pamela. I finally understood about the background and how to put stripes and prints on the piece in different ways in order to achieve movement and the illusion of something. I am really pleased with this piece and think it is very strong.

I can see how some of what I learned today will help me with the Tarts. I am going to use some of the techniques and thoughts to get that piece finished.

Thanks, Pamela!

Longarm Class 1/9/2009

I want this to be a year of creativity. I can’t say that this is on my to do list, but it is in the back of my mind. One way to do that is to sew as much as possible.

To that end, I took the longarm certification course at Always Quilting on January 9, 2009. As a result, I am now a certified longarmer at Always Quilting. Don’t be too impressed as this certification only gives me the privilege of renting their longarm to quilt my quilts. Still: YAY!

After seeing the demo in November with the CQFA team, I signed up for the class. I was curious about the whole longarm process and because I wanted to see how I could incorporate the longarm as a tool into my repertoire.

That being said, I learned a few things about longarming:

  1. Using the machine takes practice and people who machine quilt well should be admired greatly
  2. There is much more to learn
  3. I will never be Colleen. I also don’t want to be her and will still use her fabulous services for some of my quilts
  4. I am not going to quilt all of my quilts myself
  5. Using a pantograph is hard
  6. Taking the class will improve the quilts I prepare for someone else to quilt

I really enjoyed the class. It was an expanded version of what we learned at the demo. It was great to hear some of the same information again as it helps to cement it into my mind. Some of the information she gave about preparing quilts, especially, applies to the computerized machine they use to quilt quilts for customers. It is a large computerized machine.

One thing I learned was that the longarm professionals vary, but if you understand some of the background and the way the process works, you can work with your longarm professional of choice much more effectively.

Always Quilting wants you to have square corners. No lopped off edges or strangely shaped corners, because you use the corners to pin the quilt to the machine. Oh! Now I get it. Better fix that I Spy quilt.

Kit also suggested practicing good pressing habits in order to reduce bulk where seams meet. The centers of pinwheels and 8 pointed stars can be a challenge for the machine. I was surprised to learn that the machines have a hard time going through selvedges! I’ll have to look at some of the quilts that Colleen has quilted for me to see what she does in this circumstance.

  • The Always Quilting staff wants the backs 6″ wider than the quilt and had several suggestions for the back. The back needs to be longer than the top, but they don’t care how long.
  • It is ok to piece the back, but they don’t encourage it and the same rules about bulk and bulky seams apply.
  • Kit suggested using large pieces of fabric rather than piecing a second top for the back.
  • She also said to consider pressing seams open on the back and using a larger seam allowance to help reduce bulk.
  • Both top and back should be square and FLAT. Kit reiterated that quilting does not cure all evils. She gave some tips about measuring the top before one cuts and attaches borders that were really interesting, especially to make sure that there isn’t more fabric in your border than in the quilt top.

Always Quilting prefers batting such as Hobbs Natural and Warm & Natural, both of which they carry. A quiltmaker can bring her own batting but they reserve the right to not allow you to use it. Apparently, batting with scrim works best. As you know, Colleen has quilted my quilts using Hobbs Organic for awhile with no problem, so I am not sure what I am going to do about that.

Kit said that they want a quiltmaker to use the shop thread, because of the way it interacts with the machine. Again, you can bring your own, but they reserve the right to not let you use it. They use Signature, King Tut by Superior and Permacore, which is their preference. The Permacore is polyester wrapped in cotton. Bad thread can incapacitate the machine, which is why they encourage quiltmakers to use the shop thread. They have hundreds of colors.

To put the quilt on the machine:

  1. Put the back on first, right side DOWN. You could put a quilt on the machine sideways. This orientation works well for row quilts because it is easier to quilt different things in rows.
  2. Find the center of the back by folding it in half.
  3. Pin the back to the leader about 1/4″ down from the edge of the leader. There are notes in Sharpie on what attaches to what leader. There is a black mark in the center. Pin from the center out.
  4. Ask your helper if the machine has been oiled
  5. Brush the lint out of the bobbin area. There is a very important disk in the bobbin. Hold on to it when changing or cleaning the bobbin.
  6. Line up batting on backing right below the pins on the leader.
  7. Use a single stitch to baste the batting to the backing.
  8. Baste top to batting, lining it up just under the batting.


I have found it important to doodle a bit before going to class. It seems to train your brain to sew a continuous line. It helps with practicing for achieving a smooth, continuous line. I assume this would be rule for going to quilt as well. It gears up your muscles for the quilting motion. Above are doodles I made during class. They are my own variations inspired by designs from the various books the shop had. I wasn’t able to try them all out on the machine.

One of the books we were able to look at was one by Trillium House Designs. They have a set of three books called Pocket Guides to Freehanding containing a multitude of quilting designs. Kit said Always Quilting didn’t carry them, because books 2&3 were too advanced and the company did not sell book 1 separately. The price for the set is also $55, which is a bit steep.

I think that there are a lot of continuous quilting designs out there you can use as a guide for your own quilting. It would pay off to start collecting some of those designs and practicing them with pencil and paper before renting the longarm.


My section of free motion quilting loops. This is the pattern they encourage their students to use for most quilting project. They also encourage people to use this size of pattern when quilting.


My attempts at using the pantograph (above). It was very hard to get the shapes smooth and I thought I would have an easier time posting the design on the wall and following it with my eyes, rather than trying to trace it using the laser.

I am scheduled to quilt one of my own quilts on February 6. I am planning to quilt the Crazy Test. I was planning to quilt the hexagon/I Spy quilt, but decided to do something I didn’t care about much before quilting something I did care about. I do have to make the back before I can quilt it. The longarm doesn’t work very well without a back!

I was really pleased with this class. I thought it was well run and thorough.

Saturday Project

I brought two projects to the CQFA meeting yesterday and didn’t even finish one. Better safe than sorry, I say!

The first was the Pamela project that I started at EBHQ in a class with Pamela. I want to get this done before she comes out for the next class in April. If I can also finish the flower garden, that would be great.

I had worked on it, as you know, during the summer. I did mostly handwork. I came to a point where I decided I needed to machine quilt it and that sent the project to a screeching halt. This sewing time with CQFA seemed like a good time to get that machine quilting out of the way. I got about 2/3s of the way done yesterday and finished up the quilting today.

I always have a couple of issues when I am contemplating machine quilting something. Getting started is primary and the biggest problem. I never want to do it, don’t think I will be good enough, haven’t practiced in a long time blah blah blah. On this project’s machine quilting, I just went for it. I used a simple design and my regular open toe foot and just pretended I was sewing. The second problem comes up after I get going on the quilting. I start to see the quilting add to the design and some of the motifs not being quilted pop out. This makes me want to do more and more quilting.

I can never envision how the quilting will look while I am piecing and I always think of it as interfering with my great piecing design. It usually turns out just fine.

Here is some of the detail of the quilting part way done.

Gabrielle Swain Class Day 2

The second day of the Gabrielle Swain class was about the technical steps of putting the blocks together. Swain does all of her applique’ by hand and all of her piecing by machine. She wanted us to follow her through her process, but didn’t care, ultimately, whether we used her process to put the leaves together.

I thought this was an important lesson for me. I often go to class skeptical and with preconceived notions, mostly because I have had teachers who put stupid useless supplies on their list or don’t know how to teach. I am not saying that I am better than them; I am saying that you can’t be a teacher just because you say you are. I have high expectations for teachers. Anyway, when I heard that we were going to do needleturn applique, I groaned inwardly. I was too exhausted to fight and just went with the flow. As the class unfolded, I could see why she makes her quilts the way she does. She has a point and, while I may never make a whole quilt the way she taught us, I am glad I know about it so I have another technique in my arsenal and can choose it among others in the future.

In the first part of the class, GS talked about placing the fabric in such a way take advantage of the shifts in color of the hand dyed fabric. She was basically talking about fussy cutting. You end up with Swiss chees fabric, but she wanted us to understand that by paying attention to the color you could expose light and shadow to make a more interesting quilt. She also wanted us to ensure that we didn’t have big breaks in the colors, that the colors flowed together in a way that looked natural.

Swain also talked about the properties of color. She said:

  • Value: light, medium and dark
  • Temperature: warm (reds and oranges), cool (blues and greens)
  • Intensity: how true or saturated the color is; how much grey is in the mix of the color
  • Hue: more color you get in a quilt the less value

I need to do more research on intensity and hue. I have never really taken a serious color class and cannot vouch for what she said about color and hue.

The other color tip GS provided was not to use equal amounts of opposite colors. I think the ratio she mentioned was 60/40, but it could have been 80/20. Another thing for me to look up. You comments on the color theory aspect are most welcome.

Before we started the applique’, I was thinking that hand applique’ would be too much work. I took an Elly Sienkiewicz class a long time ago and really hand a hard time with the needleturn applique’. I made two blocks in the ES class. One was some kind of flower block and the other was a folded snowflake. I did finish them, but decided that my dream of a full, needleturn applique’ BAQ would never happen in my lifetime. Those two blocks will eventually go into my miscellaneous blocks quilt – a quilt I intend to make from trial, test and class blocks… someday. If I find the ES class blocks, I will post them here.

In order to transfer our pattern to the fabric, we had to ink over the lines of the pattern. I used a Sharpie, which worked very well. I taped the pattern to the lightbox and traced over the pattern straight on to the fabric with a Pilot Scuf pen. GS recommended a Pigma Micron pen, but somehow, I didn’t have the right one with me. The Pilot Scuf worked fine, but you have to make sure that the point is not squished otherwise you will get a very thick line. You have to turn the black line under, so you want it to be as fine as possible.

Before you actually start the applique’, you need to decide which way the seam lines will go once you applique’ them. You start with the piece that will be on the very bottom and build on top of the pieces on the bottom. For the applique’, the supplies recommended are:

  • Mettler 50w thread
  • Thread Heaven thread conditioner (instead of wax)
  • #11 sharp needles (I used a between and it worked fine. I bought some sharps later and will try them outthe next time I work on this quilt)

GS cuts her thread at an angle and threads the cut, angled piece through the eye of the needle. I have never understood this tip and am thrilled that I do now.


She also showed us a much easier way of doing needleturn applique’. After basting the pieces together with junk thread (who really has junk thread???), you hold the pieces in your left hand and scrape the needle above the raw edge you want to hide, towards the unsewn part of the seam, with your right hand. You hold the piece below where you have already sewn with your left thumb. This allows the appliqued edge to be smoother. It also sends the give towards the unsewn area, which prevents ripples, I think. I found it to be much easier and much faster than the way ES taught. I am not saying that the Queen of Applique’ is wrong. There are many ways of doing things and not every way works for every person. It is important to find the way that works for you and if your results are good, then you should continue to work in the method that suits you.

It was readily apparent how you have much more control when you do this work by hand. However, I can also see how, with care, this work could be done by machine.

Gabrielle Swain does a lot of colored pencil and ink work on her quilts. She showed us that as well. You can see my colored pencil work in the purple accent above.

Great class. Take her class if you have the opportunity. This post is a good description, but the real thing is well worth the money.