Selecting Fabric

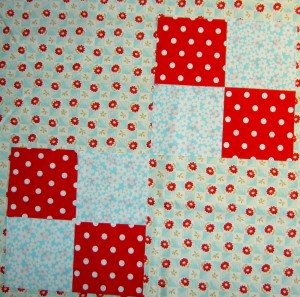
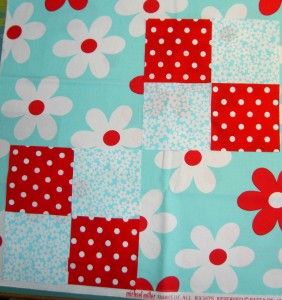
Selecting fabric is a very personal choice. I have a group of fabrics for my sampler class with Frances and I needed to choose some background-esque fabric to go with the Four Patches for my Double Four patch block. These are large blocks and I don’t normally work in this size, so I found it challenging.

I fell back on Lorraine Torrence‘s old adage: Make Visual Decisions Visually. That is the best advice I have EVER gotten in quiltmaking. Go take a class from Lorraine and buy her books. She is awesome.

Plain Jane
Plain Jane

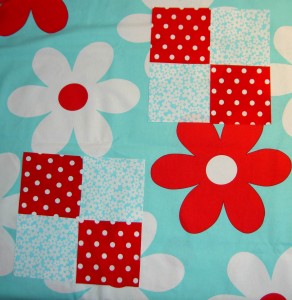
I liked the bold graphic-ness of this print, but thought it might be too large.

Cherries
Cherries

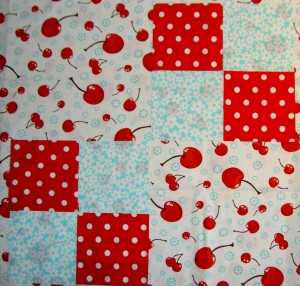
I thought for sure this would work, but the cherries felt too scattered. They need to be hemmed in a little.


Bliss
Bliss

Something in the color was off with this print. The aqua in the Bliss print is more green while the small flowered print is more on the turquoise side.

Plain Jane (smaller flowers)

This is the same print as the first one, but the flowers are smaller. I like the way you can see more of the flowers. Success!


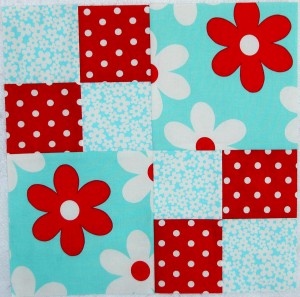
Final
Final

I chose the last print and above is how the finished block looks.


Teaching a Young Sewist

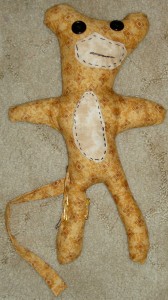
George X's Monkey
George X's Monkey

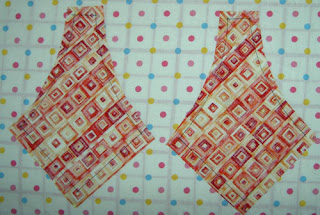
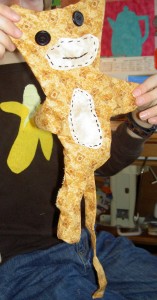
My nephew made this monkey with my guidance.

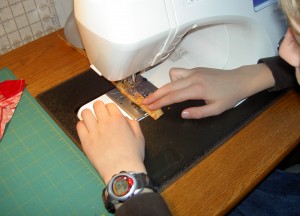
Monkey Tail
Monkey Tail

I first showed him how to use the machine to make the tail.

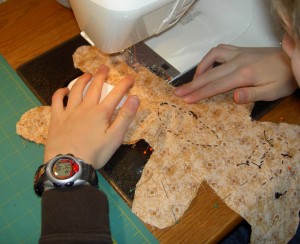
Sewing the Body Together

Next, I made him pin the body pieces together and then I let him sew them on the machine.

Finished Sewing & Turning

Here is the piece after he finished sewing and turning it, but before stuffing.

Share and Share Alike

George X's Monkey
George X's Monkey

Sadly, no child close to me is really very interested in learning to make quilts or about any fabric related opportunities at all. I am hopeful that Kathy‘s Jessie may take an interest, or one of the nieces will come around eventually.

You can imagine how thrilled I was when George X (11YO) came over and was interested in making a small stuffed animal. One reason he was interested was that The Child was not home and George X had nothing really to do. I explained the basic process to him and we got started.

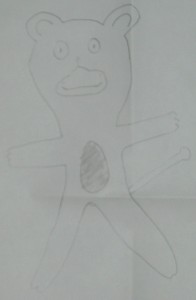
I gave him a large sheet of paper folded in half. On one half, he drew the detailed version – his ideal. On the other side, we drew the pattern together. He drew and I told him how to do it.

Detailed picture
Detailed picture

I knew I needed to get him to stitching pretty quickly, so I tried to keep the process simple. After he cut out the pattern, we picked fabric, pressed fabric, cut out the fabric and he began stitching. I tried to show him what to do, inspire confidence and supervise. I tried really hard not to hover. It was easier since I had a project I was working on as well.

Monkey Project
Monkey Project

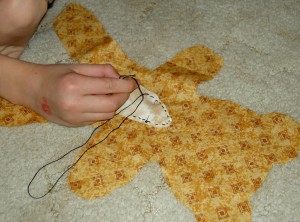
I wanted him to do as much handwork as possible for two reasons. First, I wanted him to get the feel of the piece. Second, I was using the machine.

Learning to Stitch
Learning to Stitch

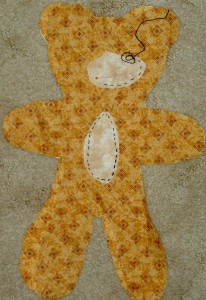
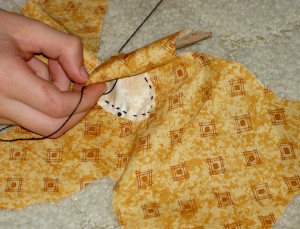
I had him sew the tummy on with a running stitch. Yes, it is raw edge applique’. I know that the tummy will ravel, but I will help him fix any problems.

George IX came home and George X lost interest in fabric. Video games were just too tempting. I put the piece away – with all the parts – for the next time.

I was pleased when George X excitedly wanted to show his parents what he had done. I look forward to working on the monkey with him again.

Responding to the Readers

The Girl with the Green Lips

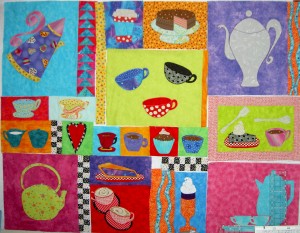
Last weekend I posted the latest iteration of the Tarts. Mostly, I get really nice, short comments on my posts. I was surprised and delighted to find a long and thought provoking comment from SherriD.  She wrote:

“You are more of a trained artist than I am, I think. You’ve taken classes or studied art perhaps? So I am only asking these questions in order to understand as I have not taken any art classes or quilting classes for that matter. :)

1. Why did you choose to have the purple background and the pie’s innerds almost the same shade? (btw, I like the orange crust very much!)

2. On three of big corner pots, are you going to embellish them with perhaps something like thread painting?

3. Have you considered adding cookies or scones? I noticed that you have in a row, cream and sugar, then two cups, then a cupcake with another cup.

I hate to say things about someone else’s work but I really am curious as to the “why” in your projects. This is such a happy quilt in process. I love the colors and have really enjoyed watching the progress.”

Thanks to SherriD for taking the time to post a comment – a long and thoughtful comment. I thought responding through a post would be a great way to spark conversation about SherriD’s thoughts among all of my readers.

I was not an art major in college, though my major did allow me a lot of opportunities to take classes outside of the required courses. I took art history classes, studio art classes, Swedish, German, political science (blech!) and many others. I have also taken a lot of continuing ed and adult ed classes in art practice. I am not so much trained in art as informed by the classes I have taken.

In a roundabout way, I have tried to answer SherriD’s questions below.

I have taken a number of art classes and lots of quiltmaking classes. Many people think it is a badge of honor or courage not to have taken any classes and to have taught themselves. I applaud you for your fortitude. I just don’t have it in me to learn by myself. I learn by someone showing me and by doing, so I take classes regularly. While I am not interested in taking art practice classes right now and I am interested in taking more quiltmaking classes, I enjoy taking classes, in general, for a number of reasons:

  1. I don’t learn well by myself with books, especially something completely new.
  2. Even if I never finish a class project I always take something away from the class or the teacher.
  3. I like being a  room with other people. I enjoy seeing what they are doing and how they are reacting to the teacher.
  4. I work mostly alone, so classes get me out of the workroom.
  5. Classes re-energize me when I get back into my workroom.
  6. I get turned on to new sources of inspiration, such as books, blogs and websites by the teacher and students in a class.
  7. Classes clarify things that I don’t understand.
  8. I am a visual learner so I learn best when someone shows me how to do something.
  9. Classes make me think about things in different ways.
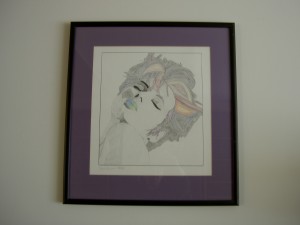
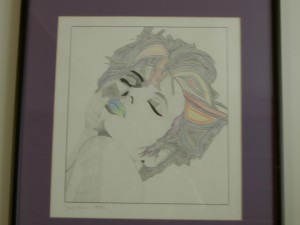
The Girl with the Green Lips, detail

This is one of my favorite pieces from a studio art class. It is colored pencil on Bristol Board and I took the class from Wayne Thiebaud’s assistant at the time. I wish I remembered his name, because I would LOVE to thank him. You might recognize the image from an old Lancome ad featuring Isabella Rossellini. I also took a framing class after college and framed this piece myself.

The other thing I do is practice. When you see a piece of pie appliqued down as part of the Tarts, what you see is the final piece. Sometimes I sketch many, many drawings before I make a pattern and cut fabric. I don’t consider myself to be an accomplished drawer (if that is a word). I do feel like I am getting better and I feel like I am getting better because I practice. Drawing skill is not something with which I was born. I feel that most people don’t have it when they are born. Drawing is a skill a person needs to practice. If you want to draw well, practice. You will draw a lot of crap before you draw something great. The thing to remember is that if you practice you will draw something great.

Tarts, June 14, 2009, with Pie

SD: “1. Why did you choose to have the purple background and the pie’s innerds almost the same shade? (btw, I like the orange crust very much!)”

In this piece, and often in other pieces, I struggle with the limits placed on me by the color wheel. I love color and, sometimes there just aren’t enough. When selecting fabrics for pieces like the piece of pie, I often decide on the background based on other large pieces in the quilt top first. My criteria for background vary, but often have nothing to do with the image on top of the background. I never thought about it before SherriD asked about my choices.
I examined my process and found that I figure out a good background and then go to work on the main image. In this case, I wanted to use the purple fabric for the inside of the pie because it looked like blueberries. It turns out that I didn’t put all the pieces together in my mind or on the wall until I started to stitch the pieces down. Normally, my rule is to “make visual decisions visually.” This is a classic line from Lorraine Torrence.
I always know that I can remake a block, so I decided to put the block up and look at it for awhile to see if it was too purple.

SD: “2. On three of big corner pots, are you going to embellish them with perhaps something like thread painting?”

The piecing and machine applique’ I am working on now has come to be barely the first step. My thinking on this piece was clarified, somewhat, after I took the Pamela Allen class. I decided that I needed, and wanted, to embellish this piece. At this time, I am focusing on getting the top together. I need the piece together to use as a canvas for the embellishment. I don’t know right now if I will use transparent fabrics, like organza, or Perl cotton, or beads or all of the above. I will, almost certainly, add some steam in appropriate places and some designs to areas I think are too plain.

As I often say: Stay Tuned.

SD: “3. Have you considered adding cookies or scones? I noticed that you have in a row, cream and sugar, then two cups, then a cupcake with another cup.”

Yes, I have considered cookies and scones. Because of their shapes, they don’t make good candidates for standing out and people knowing what they are. They are too flat, I guess. I also don’t want to introduce many more whites and beiges to the piece.

One of my goals with my quiltmaking has been to be about the process. It is hard, because my personality makes me very goal oriented. I realized a year or two ago that making a lot of quilts wasn’t as important to be as making good quilts that interested me. Since I don’t make my living by quiltmaking, I felt it was more important for me to enjoy what I was doing more than just getting it done. It is a struggle for me, but I have to keep trying.

Facing Tutorial

I started out with Jeri Riggs’ directions, which Maureen pointed out to me. You need those directions. I needed some clarification and my additions to Jeri’s post comprises the info below.

You need to know the length of each side of your quilt before you start.

A=Top of quilt
B= bottom of quilt
C/D= sides of quilt

Facing on Side A & B

Cut your facing pieces as follows:

A: 5″ x width of quilt
B: 5″ x width of quilt

You can change the 5″ size of the A/B pieces depending on whether you have a large quilt or a small quilt. 5″ is my starting point and I look at the size of the quilt and adjust from there. You want to be able to double the the fabric so you don’t have to make a hem and not have the two sides of the facing meet each other in the center of the quilt.

C: 5″ x width of quilt minus 4″
D: 5″ x width of quilt minus 4″

You make the C/D pieces shorter because you want to reduce the bulk in the corners. The C/D pieces will be positions on top of the A/B pieces.

One of the things I really had a hard time understanding in Jeri Riggs tutorial was the difference between what I needed do on the top/bottom (designated as A and B) versus the left/right sides (designated as C & D). The whole idea for the different facing sizes is to reduce bulk in the corners.

Cutting facings: For the A/B (top/bottom) of the quilt cut a facing rectangle that covers the entire top or entire bottom from side to side and is your preferred width. I cut mine, as noted above 5″ for large quilts x the width of the quilt. Adjust as necessary.

I cut the piece a little longer (mostly because I am too lazy to measure more than approximately unless I MUST). Trim off most of the excess after pinning the facing to the top and bottom. You can see in the photo that I followed Jeri Riggs directions by pressing a 1/4″ on the long side of the facing that would NOT be machine sewed to the quilt. Instead of doing this, fold your strip in half and pin the raw edge side to the edge of the quilt.

Sewing

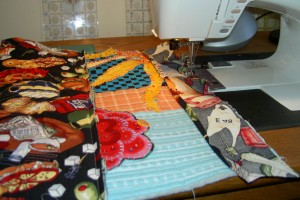
Once the facing pieces are laid out, trimmed and pinned, I machine sewed one facing to the top (A) and the bottom (B). Note on the sewing: The key is to sew starting on the short side (Side C) of the A/B facing starting at the edge of the pressed over 1/4″ seam, go around the corner, continue on the long side (very top of the quilt t0 Side A), go around the corner and continue along Side D to the edge of of the facing where you have pressed over the 1/4″ seam. You are sewing the A/B facings using a seam that is shaped like a big U. You will have no part of the A & B facings flooping around.

Sewing Facing for A & B

Nota bene: The only reason I flipped the bottom of the quilt over (photo right) is because I have a small sewing table. You don’t need to do this. If you have a large sewing table, you only need to flip it if it is creating drag on the quilt as you sew it.

Nota bene: This is a small piece and I would recommend trying the process out on a small piece so you get the feel of the process. If you have an unused machine quilting test piece, it would be a perfect piece to use to try this technique out. Of course, you can always make a little quilt-let. 😉

Aligning C & D
Aligning C & D

This photo (left) is a little bit blurry and I apologize for that. In the photo you can see Side D laid over Side B (bottom). Note how it does not extend to the bottom of the quilt. You need to cut the facing pieces  for Sides C & D shorter than the facing pieces for Sides A & B. By cutting the facing pieces only 1/4″ – 3/4s” over the A & B facings, you reduce the bulk in the corners.

On Sides C & D, only sew along the long side of the facing. The raw edge of the short side of the facing will be covered by facings on Sides A & B once you flip the facings to the back.

Now the machine sewing is complete and you are ready to flip the facings to the back of the quilt.

Flip over Side C & D

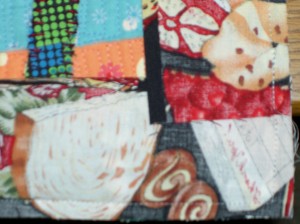
The picture to the right shows the quilt after I flipped Sides C & D. Look at the bottom right hand corner (by the green olive) and you can see the seam with the batting. This means that after you complete the machine sewing you flip sides C & D to the back. I pressed the folded edge (edge of the quilt where you machine sewed) so that the facing would stay to the back. After pressing, I pinned the Sides C & D facings to the back of the quilt to keep it in place until I could hand sew it down.

Finished and Flipped Piece

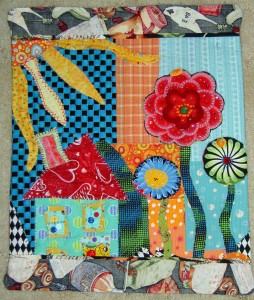
This picture is serving two purposes. First, it shows how the piece looks after you flip all the sides. Flip Sides A & B after you have successfully flipped, pressed and pinned Sides C & D. After flipping Sides A & B, press and pin those facings as well. Because Sides A & B have been machine sewed in a U shape, pinning is optional.

After you flip all the sides, I finished the piece using hand sewing. I think this technique requires hand sewing as I can’t think of another way to finish it. You machine only people may be able to think of another way to finish the piece. If you do I would like to know. I don’t mind handwork, as you have probably noticed. 😉 I just sat down and did it with some matching thread and a Harry Potter movie. Only got through a small amount of the HP movie as the handsewing went really quickly.

After pressing and pinning, the only problem I had was not poking myself with the pins as I hand sewed. Normally, I use metal hairclips on a regular binding, however they won’t work on this facing technique, because it is too wide.

The picture above also shows how the quilt looks when the facing has been completed.

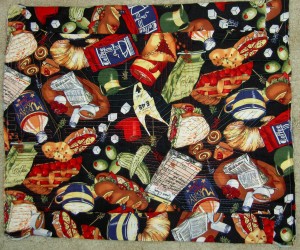
One thought about this process, which Maureen pointed out to me, but I didn’t understand until I did the process, is that the facing becomes a design element on the back depending on what fabric you use. In House & Garden, above, I used the same fabric I had used for the back, because I don’t really care about this back (may frame this piece; we’ll see ). One thing about testing this process is that you can see what you are facing on the back.

Remember I couldn’t have done this without Jeri Riggs laying the groundwork and Maureen helping me figure out the practical details.

Let me know if you have any questions or need further clarification. I also want to hear your stories of making facings. I may update this page based on new information and things that you tell me.

See * Draw * Quilt * Learn

Sarah Ann Smith of  Art & Quilting in Camden has set up a new blog, soon to be a group blog, with the intent of encouraging people to learn to see so they can improve their drawing.

Sarah started the blog on May 5, so you are not too far behind. She mentions The New Drawing on the Right Side of the Brain book as one of the resources. You can add this to your list of drawing sites to review, in addition to Gabi Campanario (who now posts at the Seattle Times site) and Urban Sketchers.

How to Machine Applique’ – TJW

When I started working on the Tarts Come to Tea again I really could not remember how to machine applique’. It was the strangest feeling. I knew the general principles (trace pattern, iron it on fabric, satin stitch around the shapes), but all the details had left my mind. I felt like I had to start over.

Being a good librarian I looked at some books, but could only find references to needle-turn and raw-edged applique’. I fumbled around for awhile and came up with the following process.

Cake block pattern
Cake block pattern

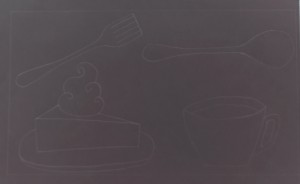
First, I draw the pattern out life size on a white sheet of sketch paper. (I know this doesn’t look like white paper, but see the Weekend Work post for an explanation). I usually draw in pencil to start.

Machine Applique' Pattern
Machine Applique’ Pattern

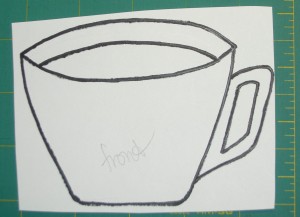
Next I draw out the patterns on individual smaller sheets of paper. If there are parts that need to be in different colors or need to be separated for some reason, then I make separate patterns for them. For example, I made a separate pattern each for the cake, plate and whipped cream, above.

Tracing Machine Applique' Pattern
Tracing Machine Applique’ Pattern

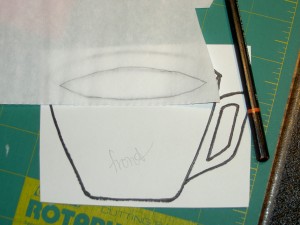
I put the  Steam-a-Seam 2, or other fusible of your choice, over the pattern and trace the pattern onto Steam-a-Seam 2.

Traced Pattern on Fabric

After that is done, I trim the fabric to the approximate size, then press the SAS2 (or other appropriate fusible) on to the wrong side of that piece of fabric.

Cake block detail

Finally, I put all the pieces together, press the fusible on to the background and satin stitch around the edges.

See the Fusible Applique’ tutorial for more information. See the Machine Applique’ using Directional Motifs for more information on making sure your designs go the right way.

More about Machine Quilting

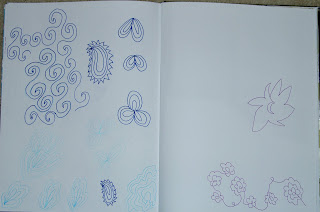
One of the things I did to prepare for my longarm day was to doodle. I got out the sketchbook and did some doodling in it. It wasn’t true doodling, because I used some reference materials, including some designs from a Melody Johnson class I attended in 1999 as well as some worksheets and the book from a Sue Nickels (nice little bio) class I took sometime later, perhaps around 2002 or 2003. This was all before Diane Gaudynski exploded on to the scene.


The paisleys and little 3-petal flowers would be too difficult for me at this stage, but perhaps later. Still, the whole idea is to get your muscle memory into shape. That flowing doodling kind of motion is what you want to achieve when longarming.


You can see how into those sashing curved designs I was. I really wanted them to work. I may still use them in another quilt even if they aren’t perfect.

One of the things I did when I was in the machine quilting groove was make a worksheet of designs for my quilt class. It has some basic designs and ideas on it. I still need to make the other class information, but at least this part is done.

I know I haven’t mentioned it in a while. Frankly, they all kind of bailed on the basting part and I don’t know if they will continue. It is a little disheartening, but I have an idea in my mind to teach a class like this elsewhere at some point (no plans at this time), so perhaps the work won’t all be wasted.

Prairie Point Tutorial from Melody Johnson

You never know when you might need to know how to make a prairie point. Her recent blog posts are full of color, too. Just what we need in the midst of grey January. Here is a post on making prairie points.

Prairie Points Two Ways


3. Fold down one edge………………………………..4. Fold down the other edge. Prairie Point made.
 
  blog it

Longarm Demo


I went to the CQFA Meeting yesterday, which was held at Always Quilting in San Mateo. One of the reasons we went there was to get a demo of their longarm quilting machine and find out about learning to use it. I took the above video at the demo.

I tried out the machine as well and found it very easy to drive. Kit, one of the shop owners, had already loaded the machine with fabric for us to work on. She gave us a lecture on preparing the quilt for the machine and how their program of learning to load and use the machine worked. I thought she was a good lecturer and gave many good hints for preparing a quilt to be longarm quilted.

I have worked with a longarm quilter for awhile and know how she wants things prepared. I was surprised to hear that Always Quilting likes things a little differently done.

After the demo, we went to the back room, had lunch, worked on projects (see later post for pics of my work) and had our regular meeting.

I ended up signing up to take their their longarm quilting training in January. Their policy is to take the training and then you are allowed to rent the machine. I don’t expect that I will quilt all of my quilts myself, but I think it will be good to quilt some of them myself, and perhaps, less expensive. In any case, education is always a good thing.

All in all it was a fun day.

Silk crazy

BE told me about a strip piecing technique where you can create crazy quilt blocks. The steps are:
 
1. Cut sets of strips 2″, 3″ and 5″ wide. Each should be a different, but related fabric.
2. Sew strips together into one big piece of fabric in the following order 235235235235 etc.
3. Take new piece of fabric and cut strips 2″, 3″ and 5″ wide on the bias.
4. Reorder the strips into an attractive grouping and sew them together again in the 235235235 etc order.
5. Take new piece of fabric and cut strips 2″, 3″ and 5″ wide on the bias.Cut them in the opposite direction as step #3.
6.  Reorder the strips into an attractive grouping and sew them together again in the 235235235 etc order.
7. Cut blocks from the new fabric in a variety of sizes.
8. Sew blocks together with sashing in between.
9. Label and finish as you would normally.
 
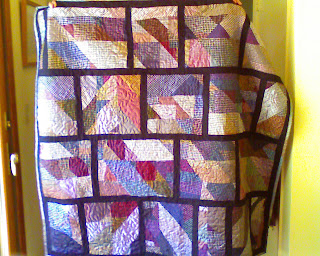
BE got the fabric from a fabric company that was going out of business, so she made the ends of the bolts and the strips do for this quilt.
 

Making Bullseyes, Part 2

In the previous post about making bullseyes, I left you ready to sew the circles on. Tips on appliqueing the circles to the background:

  • use a quarter inch foot.
  • start sewing less that a quarter inch from one of the folds. This ensures that your stops and starts will be covered when you sew the pieces of the bullseye together later.

Then you sew. Once you sew the circle on, you get the finished product pictured above.

To cut out the back, carefully separate the top and the back of the block. Pinch a little bit of the back, inside the sewn line about a quarter inch from the sewn line. Make a small cut, being careful not to cut through to the front. Cut around the inside of the sewn line. I use a pair of applique scissors, which help to protect the front from cutting through.

Here is a block once I have cut out the back.

Here is a close up of the sewn line and the cutting line.

New Inspirations (and A New Danger to You)

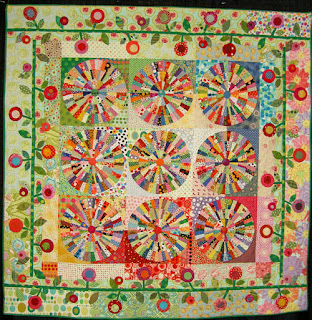
As you may remember from a previous post that I am teaching a class at work (other life). Above is the gorgeous quilt from one of my students. The photo is not so gorgeous, unfortunately. Alice has used all batiks and the quilt just glows.

I got a new phone for work and it has a camera. Danger! Now I have a camera with me AT ALL TIMES. WOW! This is great for me, because every time I see something I can snap a picture. The color isn’t as good as my other camera, but at least I have it with me all the time.

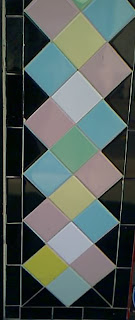
These are tiles I have been walking past for years. Finally, I was able to take a photo. This is a simple tile pattern, but I love the contrast between black and the pastels.

I stopped by Stone Mountain and Daughter to buy some fabric for pants. While, I was there I saw this quilt (yes, I asked and received permission to photograph). It reminds me of the Piece O’Cake pattern (below-pic from APNQ 2006). I like the subtlety of the fabrics that the maker chose.

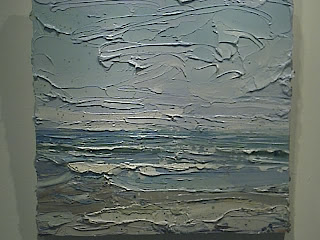
This is painting by Carolyn Meyer. Ms. Meyer is the Assistant Director of Fine Art at the Academy of Art. The Academy of Art gallery was one that I went to visit a few weeks ago. I went back, because I love this painting. It has some qualities of Wayne Thiebaud’s work, but this painting is very restful to me. It is called Summer and I would love to have this piece to hang in my house. Unfortunately, it is $1900 and I don’t have it to spent on a painting right now.

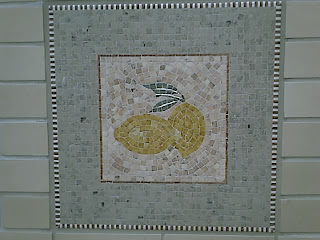
One of the mosaics in the building where I work.


September and October provide some of the best weather in my area. One day, after work, I couldn’t shake the need to go and sit by the ocean for a few minutes. Despite the weird looks that Darling Boy gave me and the several questions about what exactly this action meant for his future, we went. We went to a place where they have recently remodeled a few benches and a parking lot at the top of one of the cliffs. While there I saw this tree. I couldn’t shake the idea that the trunks would make a wonderful quilting pattern.
I applied some filters to the photo to try and outline the pattern of the trunks.

Rugs – good quilt patterns?
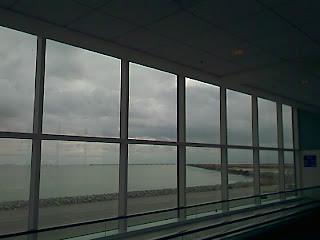
I like the repetition of the windows with the estuary in the background. The color didn’t come through very well, though.

Making Cross Blocks (Flowering Snowballs) Tutorial

Judith asked about making the Flowering Snowball blocks, so here is a visual tutorial. Please note that this is the “Jaye-Way” and may not get you an prizes at Houston.

I would suggest that you read the book by Jinny Beyer on handpiecing, as she has a lot of good tips, though she doesn’t recommend using a felt tip. You can use a mechanical pencil to mark, if you want.

I am using templates and handpiecing them. I use a black or red Pilot (formerly SCUF) ultrafine point felt tip pen to mark around the templates. I use grey Aurifil thread and a thimble. Sometimes I put wax on the thread to keep it from tangling. Use whatever needles you like. I use betweens for piecing.

Practice with the felt tip on fabric. You want a thin line with no blobs at the end. I usually run over the end of the template a little and start lessening pressure on the tip right at the end of the template. If you leave it in one place too long, you get a blob. Blobs are bad for precise handpiecing and they look ugly, too.
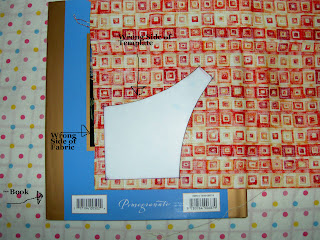
Trace around the templates on a hard surface. In this case, I am using the book as hard surface. Trace on the back/wrong side of the fabric.
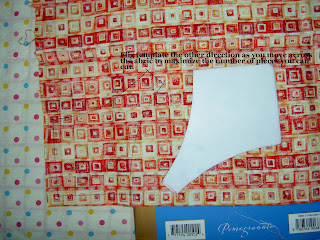
That tiny print says to flip the template 180 in order to get the most pieces out of your fabric. I was cutting 4 pieces from each fabric, but found that to be too many. I will use the ones I have, but am now only cutting one or two. I am trying to keep this quilt to a reasonable size (HA!) and to have as much variety in the fabrics as possible. If I like the fabric, I can always go back and cut more of it, right?

I trim around the templates by eye. I don’t measure the seam allowance. I try to keep it to arounda quarter of an inch and not to get too close.
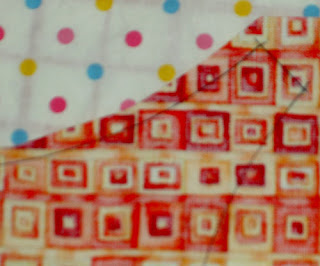
Detail of trimming.

Here are the pieces cut out.

Here is the pinning. First, I pin right in the corner just inside the drawn line. I poke it through the foreground (colored) fabric first.
This is the back of the pinning. Same deal goes here. I come up through the back. Get the pin right in the corner where the drawn lines intersect and just inside. Remember you have drawn around the template, so the drawn line is a little larger than the template. This is why I try to pin AND sew just inside the drawn line.

Here (above), the pinning is done. Note that I put two pins close together at the beginning, but I take the first one out right when I am ready to sew, so I can start. The second one holds the pieces together while I get started. I try to make small, even stitches that are evenly spaced. Remember to look at the back as you sew so that you are poking through the back right inside the drawn line.

It is ok that the piece is wrinkly, because you want to match up two curves that are going in opposite directions. Use the bias to make them match.

How the Pieces Go Together

My whole philosophy, which I am pretty sure is a general quiltmaking philosophy, is to go from smaller to larger. This means to build the blocks by making the smallest patches into larger units and then putting the larger units together to make a whole block.

First, take one corner piece and one background piece and sew them together. Sew/pin with right sides together. Curves require, at least for me, a lot of pinning. For pinning, start at each corner and put pins in by lining up the corners of each piece with each other.
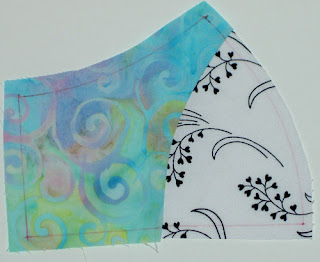
When you sew the corner and background together you will have a unit that looks like the above unit. You can see how the felt tip lines show through, which is another reason to sew just inside the drawn lines. They won’t show on the front of the quilt if you keep them in the seam allowance.

Seeing the felt tips lines here also allows you to see how they line up, if you do the piecing correctly.

Add another background unit. Note: I am trying to use all different fabrics in each position in the block, but you don’t have to do that.

Now you have quite a large unit. You will need two of these units per block.

Sew the center patch to one of the corner (foreground) units.
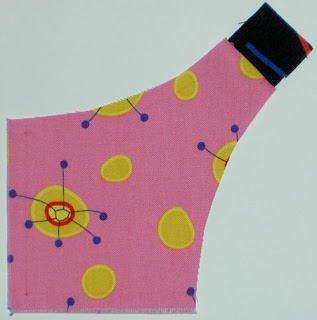
Here is how he unit looks once the middle patch is attached to a corner.
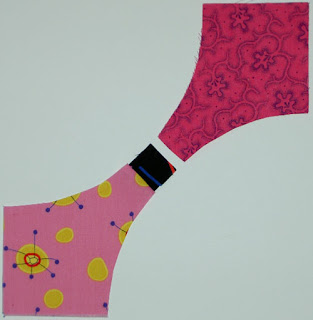
Sew a second corner to the center patch.
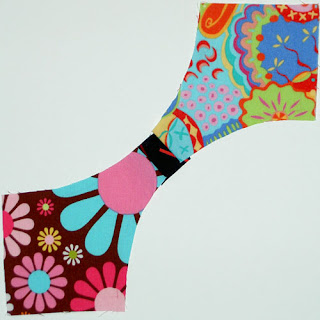
With this unit complete, you are ready to attach the side unit to the center.
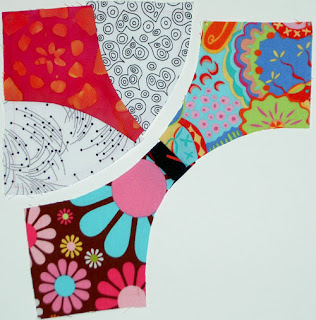
So, just do it. Attach a side unit to the center.
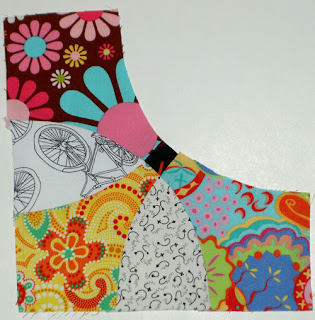
Once you add that unit to the middle piece you are nearly there. The above piecing is the hardest part (but not like you are taking the SATs without a prep course), because the seam is long and the middle section is quite floopy. It also takes a LOT of pins. Make sure you sew through where the seams match several times to keep it strong and make sure the seams line up. I care about that stuff, but you don’t have to match your seams.

I don’t always press the patches after I sew them, because I am sitting on the couch watching TV while I sew (why do you think I have a hand project?) and am too lazy to trudge upstairs to press. It makes the piecing a lot nicer if you press as you go.
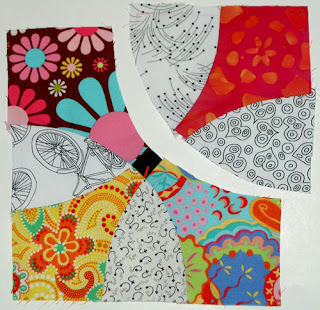
Add the last unit and you are done!

Completed square. I usually trim the block after I am done with the hand piecing. Make sure you don’t cut over any of your seam lines, because your piecing will unravel if you do. This is not machine piecing.
Inspiration and Some Work

I have spent a lot of time working lately and no time on the Pineapple. Bleah! Still, I am trying to keep up and keep you all entertained.

First the inspiration:


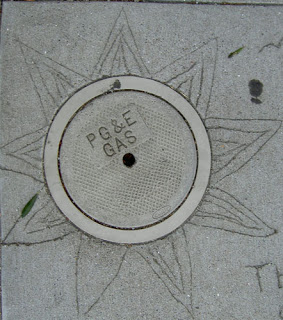
This sun can be found in the sidewalk on 30th near Church and I have been admiring it for years. I was finally carrying my camera around this week trying to get a photo of a really stupid bus ad (not successful), so I took the opportunity to snap a pic of this sun. One thing I like about it is the detail in the rays.


I saw this flower on 2nd Ave near Cabrillo, which looks much better in the photo than in person. I like the way the composition came out. I also thing those little lines (stamen???) are cool. This flower looked flat, but was very 3D when I looked at it.

Now on to the work. Just to warn you the following work is only indirectly mine.

As some of you may remember, I have been teaching a beginning quilt class for the past ~2+ years. We had been on extended hiatus and I finally forced the class to meet in order to see where they were in the process so we could either move forward or agree to give up on the class. Fortunately, they agreed to go on, because I would have been a bit depressed if they just wanted to bag it.

We looked at each of the sets of blocks and agreed to work on machine quilting next. I had another type of machine applique’ on the agenda, but I think the students are done with making blocks.
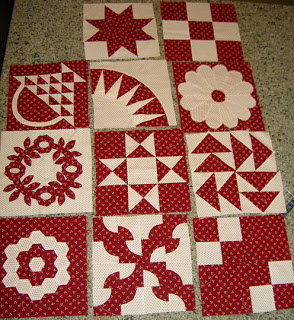
Above are the blocks that Beth has done. She started out making two color blocks, which posed different issues during class. It was good, because we had to discuss issues of contrast and placement of color in the blocks. That is the kind of look that she wanted and her blocks turned out very well. She needs to make one more block and we had a long discussion about the color of sashing. The problem is that a number of the patches in each block will drop out if she uses the fabric she has used. We discussed muslin, navy and black. My advice was to go to the quilt store and lay the blocks on top of a lot of different colors to see what look was best for her.

All of the blocks are supposed to be 12″ finished. One problem both students reported is that their blocks are wildly different sizes, ranging from 10 1/2″ – 13″. I gave them all of the templates, so something happened between then and the sewing. There is a lot of margin for error, but I didn’t have a pat answer for them. I’ll need to refer them to Sally Collins’ book. I’ll have to think about that problem, though, so I can address it in my next class, if I ever teach again. The solution for this class is that they will have to add frames to their blocks to make them a uniform size.


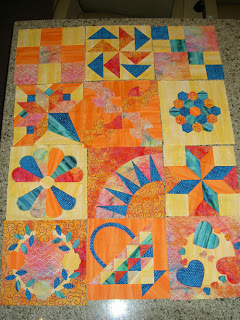
These are Alice’s blocks. Alice is Indonesian and does beading and Indonesian dancing. These blocks really reflect her personality: friendly, bubbly and very creative.
The two photos above are details.

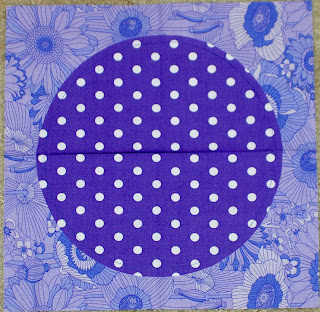
Alice had a lot of fabric with her so we were able to discuss how to pick out the fabric for the sashing.
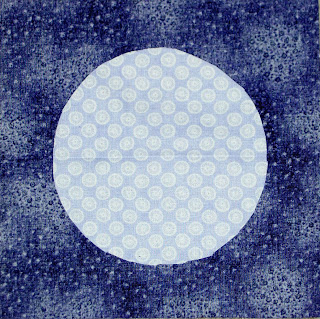
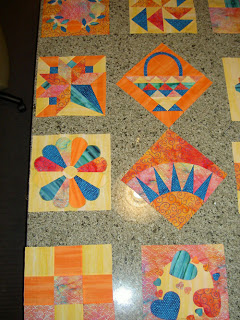
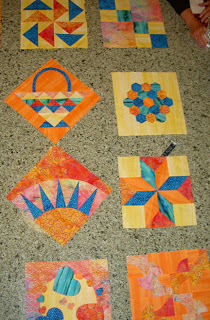
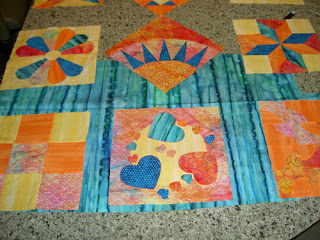
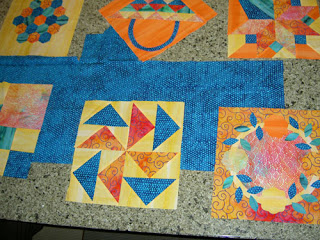
For various reasons, only some of which are related to quiltmaking, I have been thinking about commitment lately. I know that people are busy, but it seems odd to me that people give up on activities they enjoy so easily. I have not been able to sew a lot lately, but I have been reading magazines and working a little bit on my hand piecing (photos to follow). I understand that people are busy; I am the queen of juggling. I understand that people have to prioritize and that life intervenes. Still, it is annoying that people will just give up on something and not care if another has spent a lot of time organizing. I wonder if people really value time.