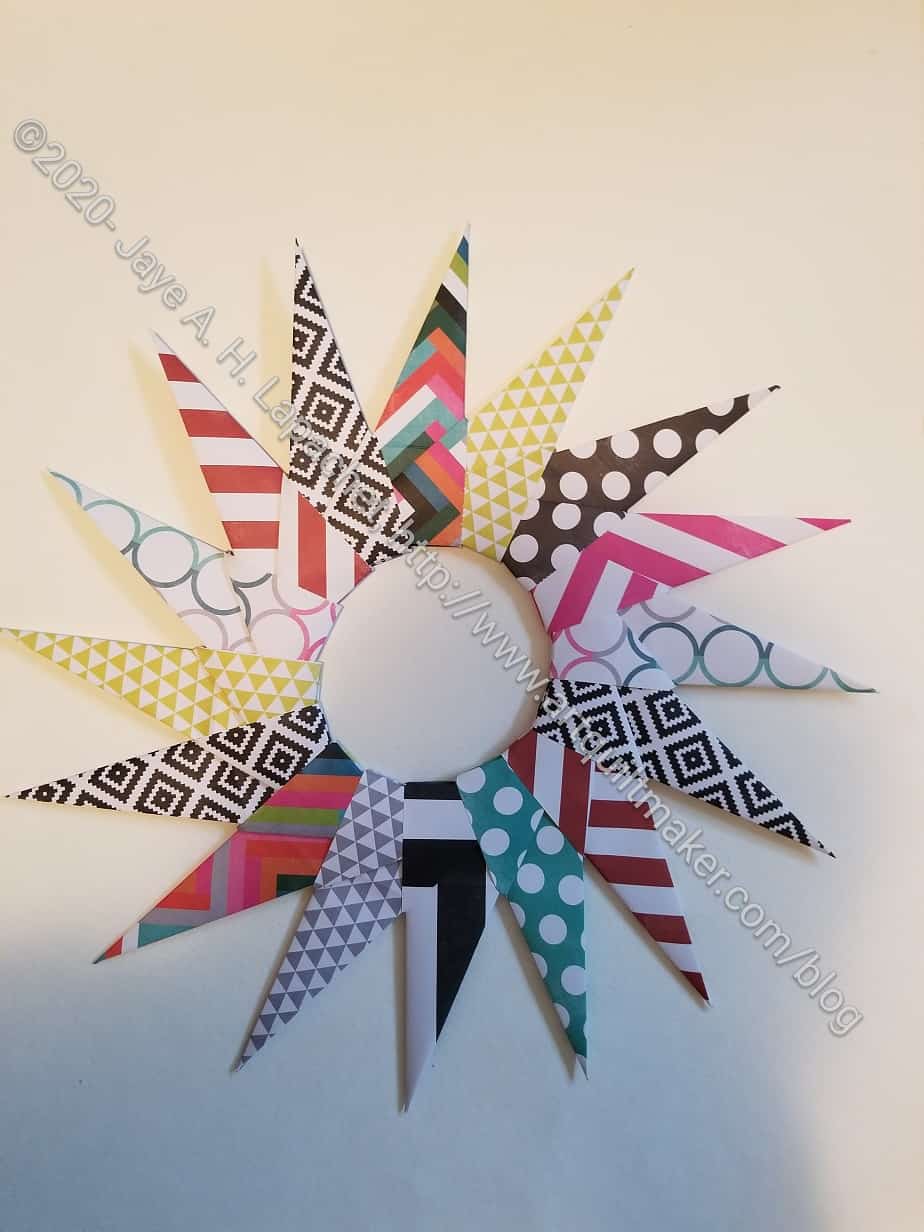
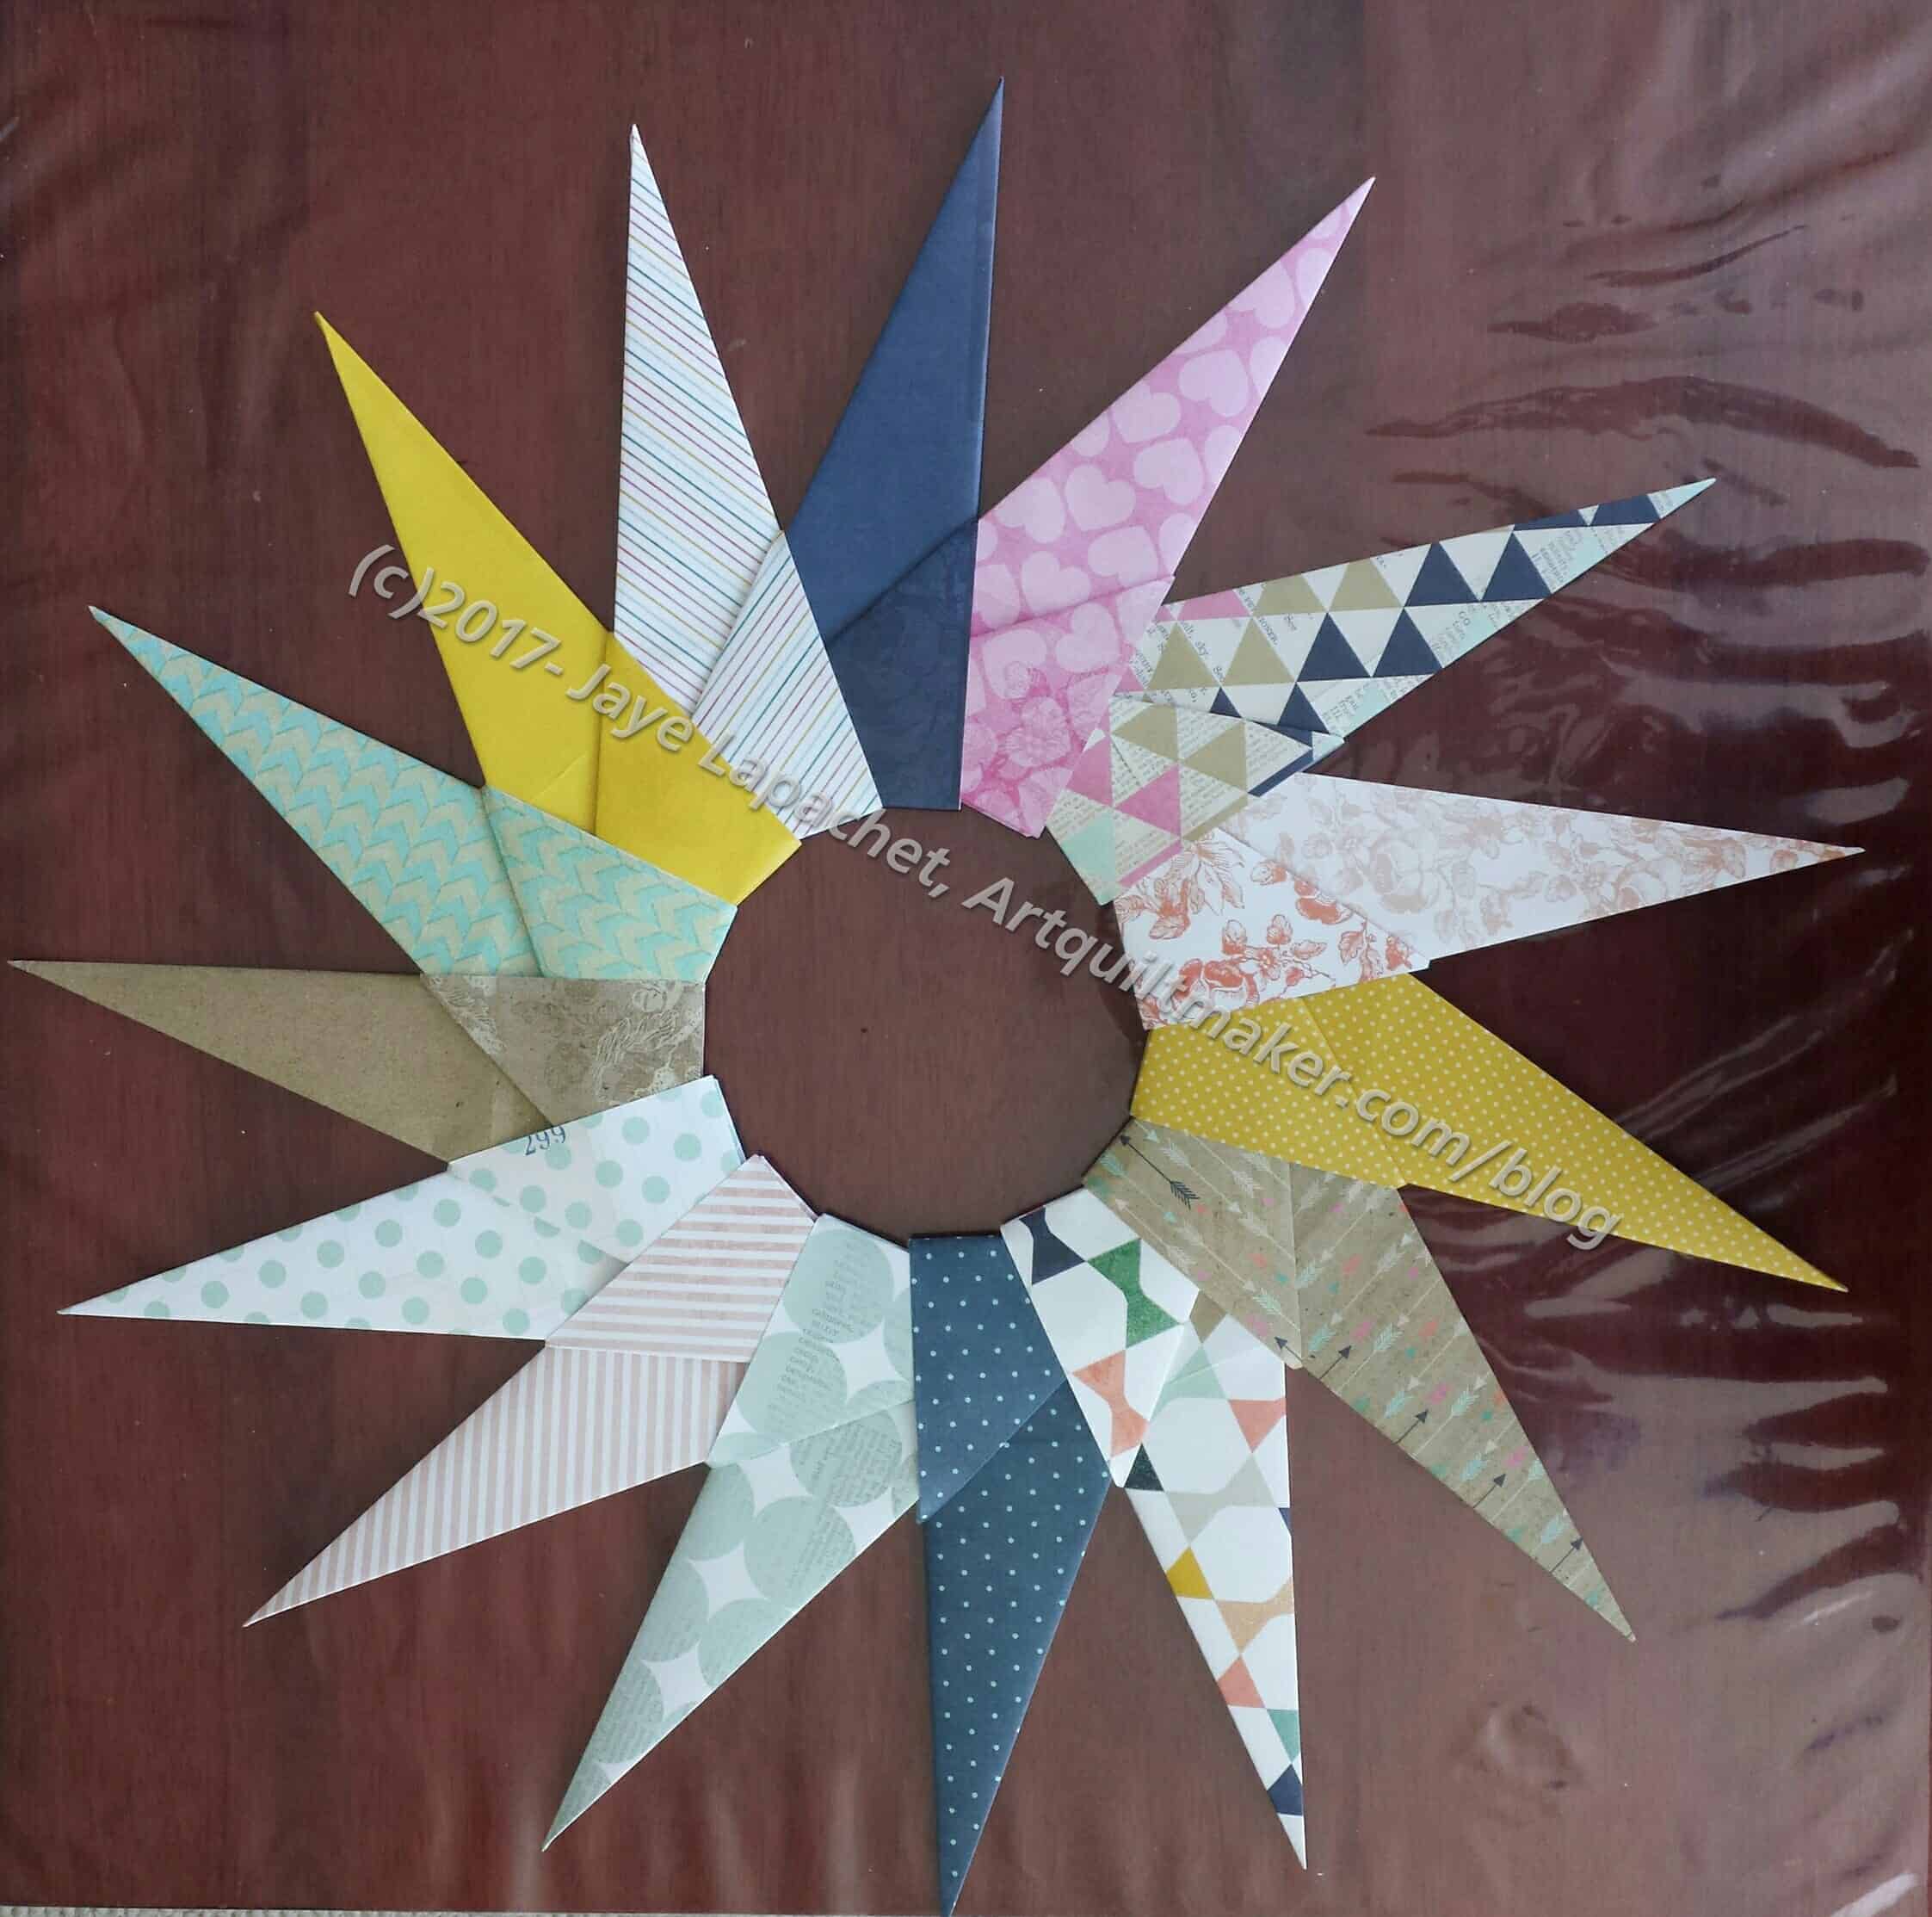
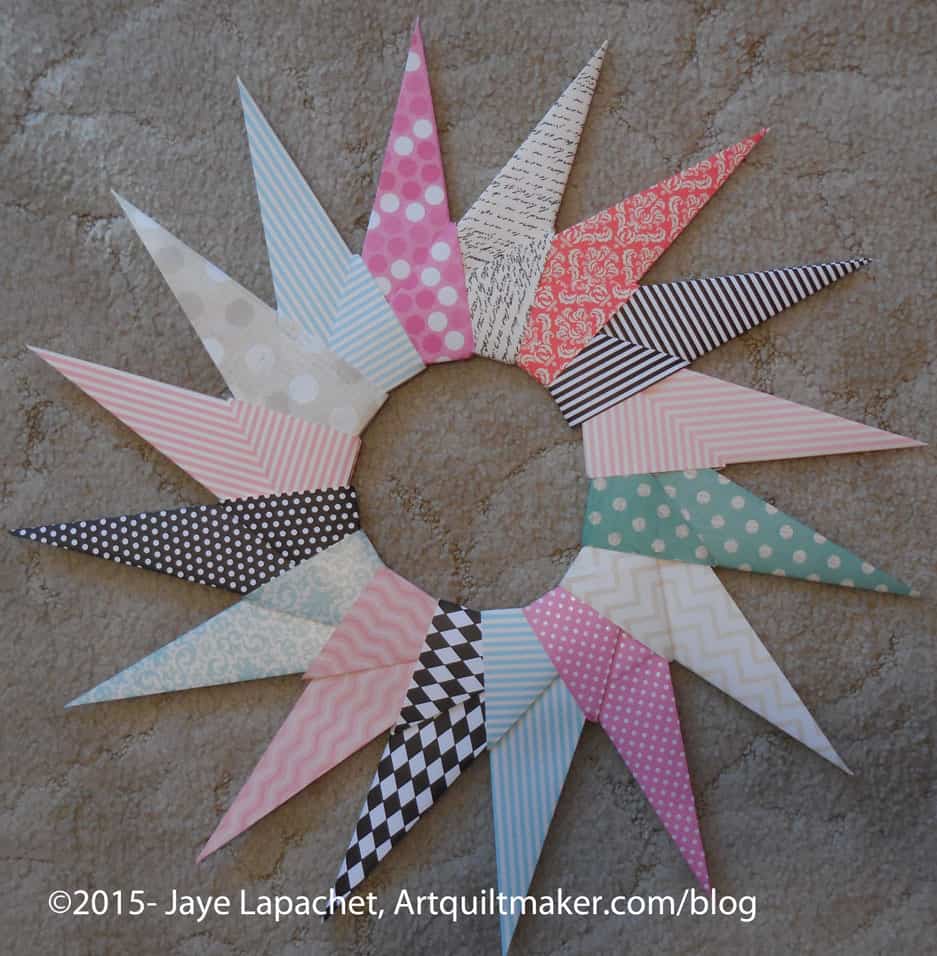
While I was waiting for pages to load ‘at work’ (e.g. one part of my workroom) I folded the legs for a new paper wreath. I find that keeping my hands busy keeps me from fretting.
This wreath has not been glued together yet, nor does it have a home. I may give it to my friend who will be NSGW First Lady starting….soon (it should be May, but Grand Parlor is postponed). She’ll need some prizes for various events and the paper wreaths are popular.
The combination of paper designs are kind of crazy! I don’t know if people will like them.
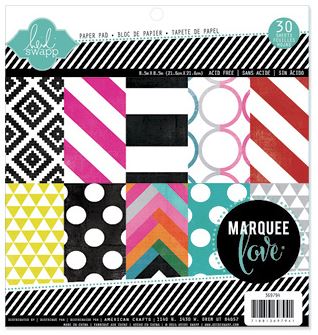
Marquee Love Paper
Since the S-i-P started, I have been getting rid of one thing per day. Often this means I clear out a drawer and get rid of several things. I have also been finding things, such as the paper I used for this wreath.
The sheets are 8.5 in by 8.5 in, which means the wreath is smaller than the other wreaths I have made.
This paper is also slightly thinner than the cardstock I have used. I have used copier paper and it works fine. I have never tried tissue paper, but every other paper I have used works. Fabric also works, but you need to augment it. Try making your own using the tutorial.
I spent a happy evening with friends, catching up and solving the world’s problems. As an added bonus one of them wanted to learn to make paper wreaths. She had found another tutorial (not mine!) and brought paper.
I love making these paper wreaths as they look so impressive. I want to enter another in the fair, but the large one has been entered twice. The judges commented that they had seen it before. Thus, I decided to make a series of small ones. Either I will make a mobile or some kind of wall sculpture. Not sure yet.
It was fun to work with my friends, share paper and tools as well as give them the tips and tricks I have learned.
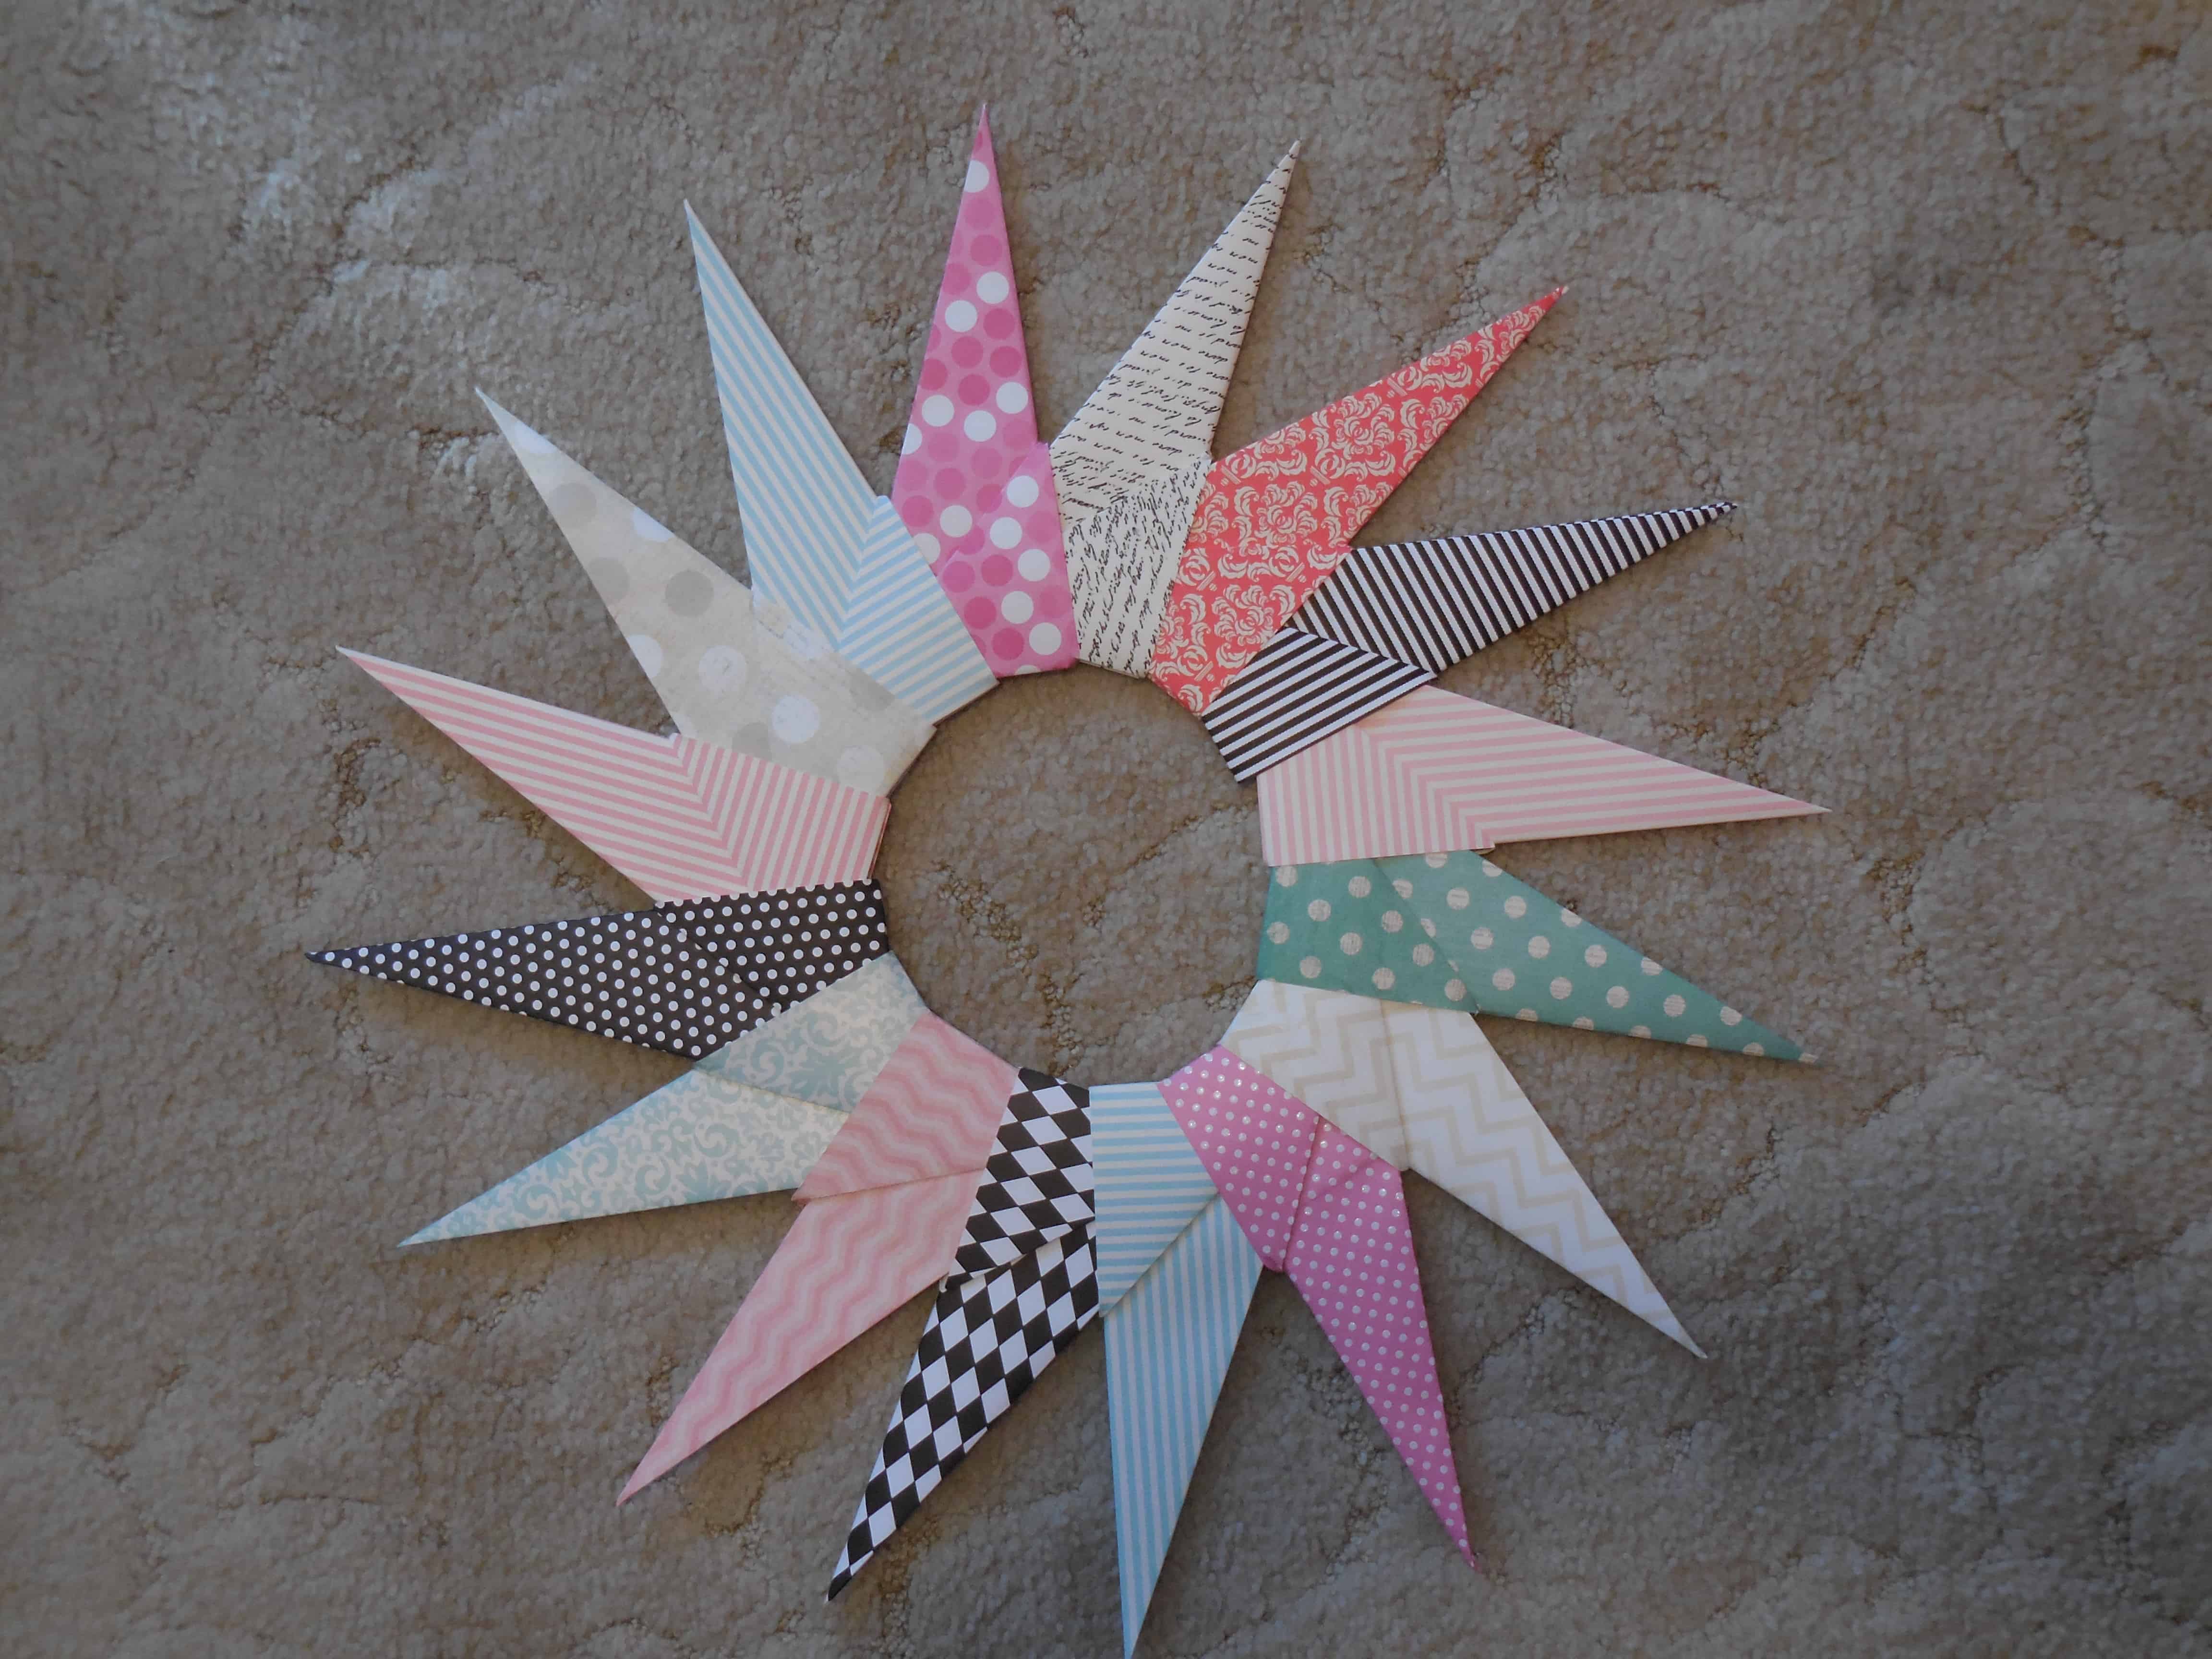
I made another paper wreath to enter into the fair. I actually made two, one for the Fair and one for Grand Parlor, but the one for Grand Parlor had some issues and I am going to throw it out. The lady in charge of the Ladies events at Grand Parlor did not want the wreath anyway.
I really like the one that came out well.
I folded the legs for both wreaths at Craft Night – yes we are resuming Craft Night. I hadn’t made the time and took the opportunity to cross this task off my list. I wasn’t sure what I was going to do with the wreath after the Fair so I offered it to SIL#3. She helped me pick out the papers and I am pleased it will go to a good home.
Paper selection
I am entering a wreath, because I can certainly win in that category with it.
This is the fourth paper wreath I have made during the last few months. I really like making these, though I find making one rather than three at once is a lot easier on my hands.
This was another door prize for the Ladies Luncheon at Grand Parlor (that was one of Monday’s events). I have a tutorial so you can make your own.
The other day I posted the Origami Starburst tutorial with a second wreath picture at the bottom.
The top picture was made out of paper and very straight forward. After I made several starbursts out of paper, I couldn’t help wondering what would happen if I made one out of fabric.
The Starburst in the photo is made from charm squares from the Fresh Cuts line of fabric. You can use any size square of any 16 fabrics as long as the squares are allthe same size. It took some special maneuvering to get it to work.
You make the legs the same way you do the paper legs except you need to back them with some kind of interfacing like ShapeFlex. The interfacing makes the squares less floopy. Once your 16 Charm Squares have interfacing only to within a 1/4 or 1/8 inch from the edge, spray each square with Mary Ellen’s Best Press, so the squares are quite stiff. Once the squares are stiff, you are ready to start folding each square of fabric per the tutorial. After each fold you will need to press each fold. Press each fold really well and, then, spray each fold with Mary Ellen’s Best Press or something similar to keep them stiff and in place.
Once you start to put the legs together, you need to glue with Aleene’s or Elmer’s glue as you do it, being very careful to only put the glue on the tips of the legs. Let the piece dry thoroughly before trying to pick it up.
The paper starbursts stay together even if not glued, but the fabric starbursts are too heavy and too floopy, so glue them right away.
The fabric starbursts are much more three dimensional, much more fragile and much heavier than their paper counterparts, so decorate with and use them with care. They make great gifts.
I was so thrilled to find a tutorial on the origami starburst (paper wreath). It is a great tutorial, but I like to do my own, as you know. I made several of these and have enough paper to make a few more. We might use these to give out as gifts at the Ladies Lunch at DH’s Grand Parlor. These make great hostess gifts.
Supplies
16 pieces SQUARE paper (any size) – almost all paper is suitable except very thin paper. Super thick paper will be hard to fold
bone folder
glue (Elmer’s or Aleene’s are both fine)
Nota bene: you can use fabric. If you do, you will also need the following items:
Mary Ellen’s Best Press
ShapeFlex or other lightweight interfacing
16 square patches (any size)
Directions:
Make legs:
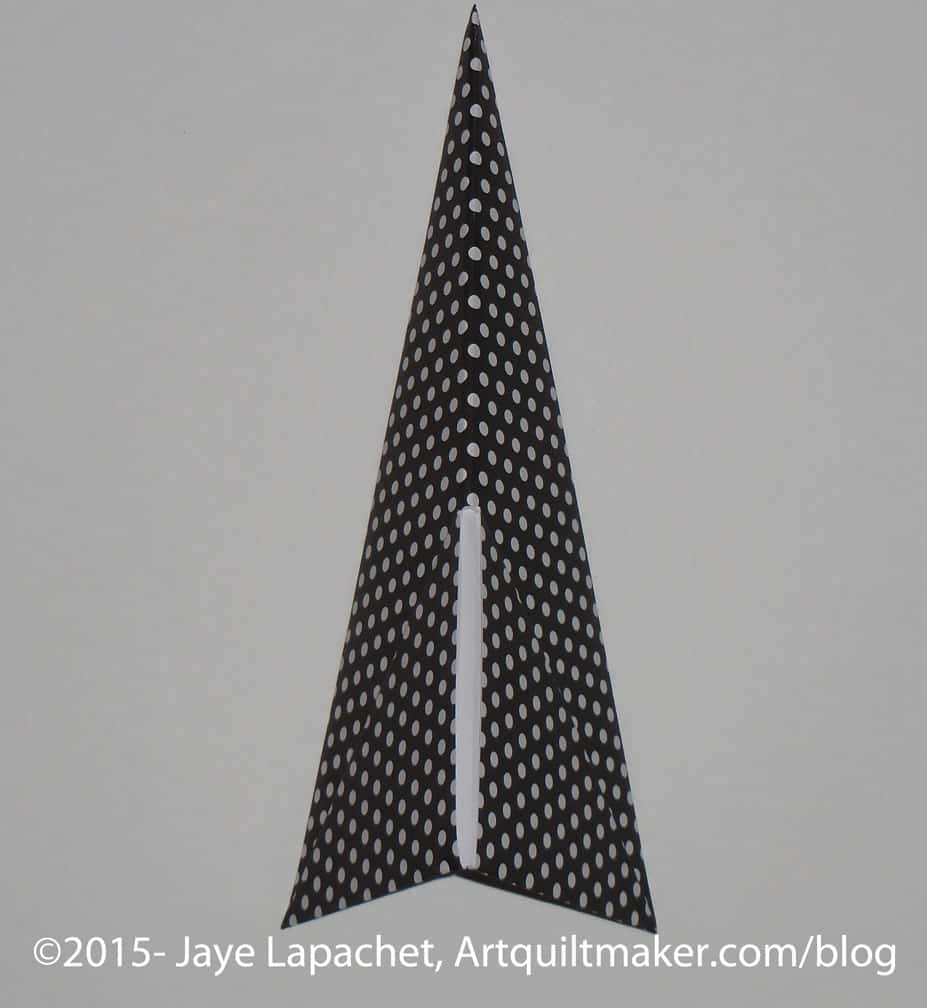
Fold square paper in half
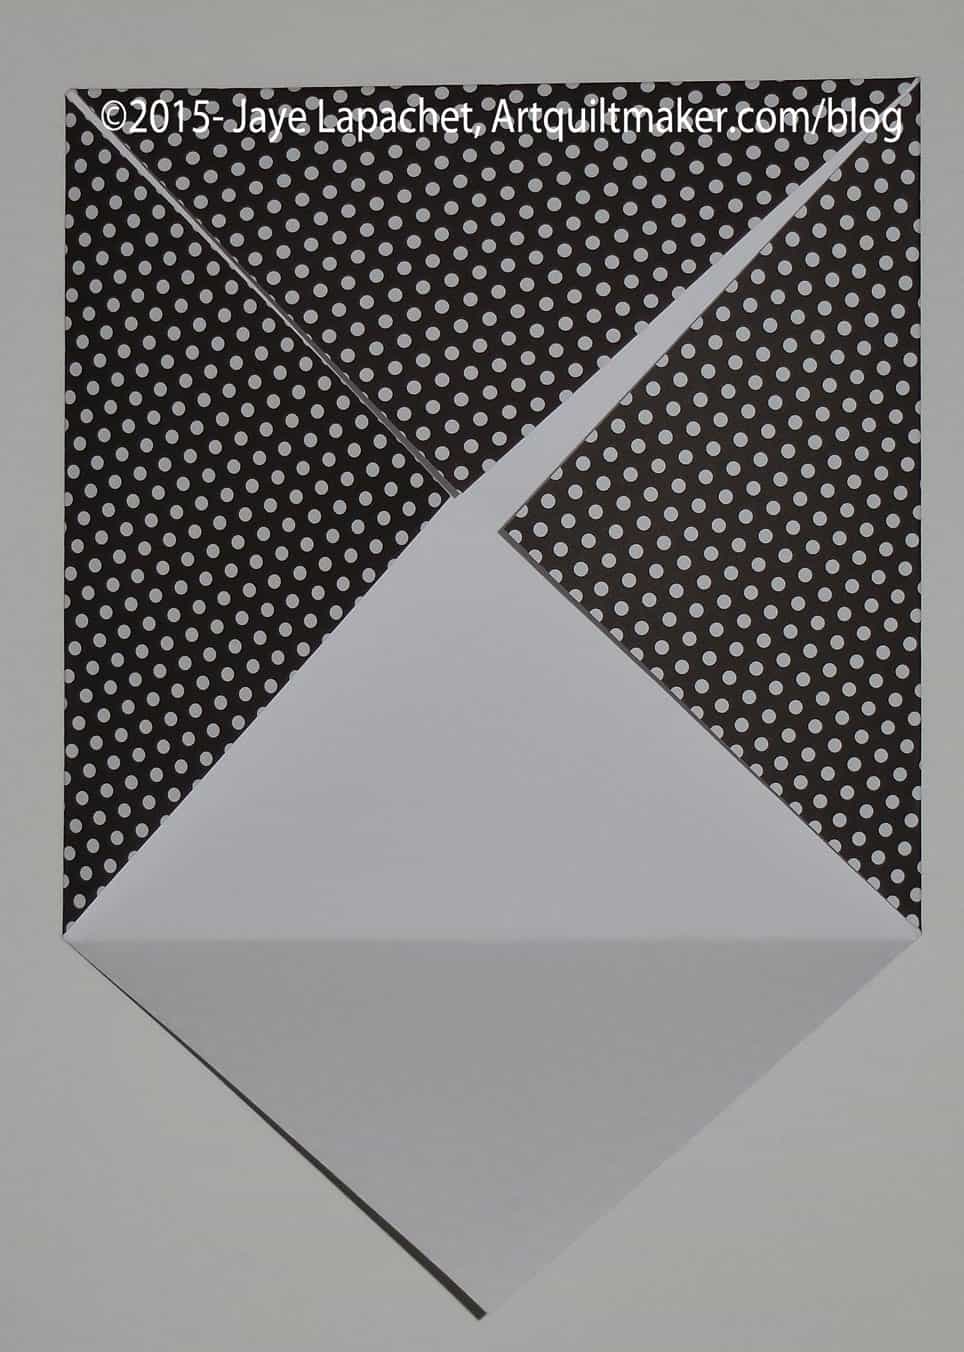
1. Take square piece of paper and fold paper in half.
Fold square paper in half
2. Open and fold in half the other way
Fold corners into centerFold corners into center
3. Fold corners in to center point
Use bone folder
4. Use your bone folder to make the folds nice and sharp
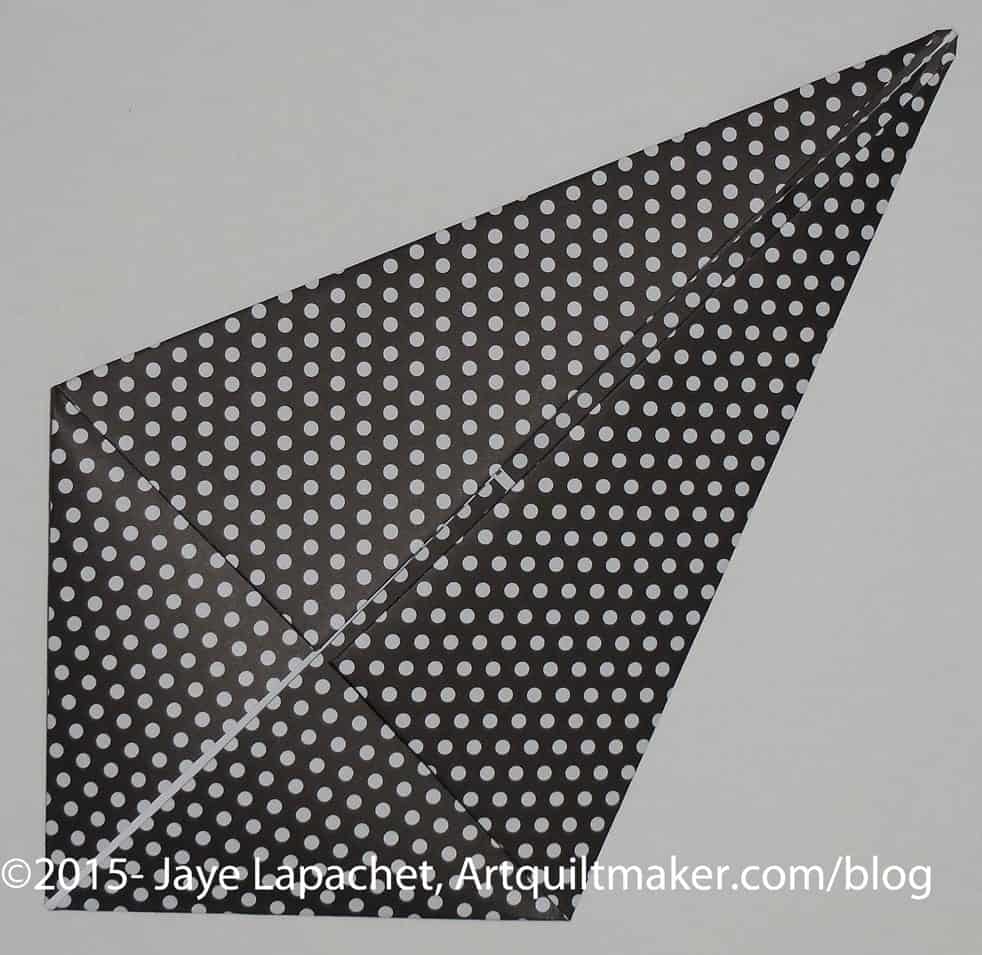
With a point facing you, fold the bottom half up to meet the center crease.
5. With a point facing you, fold the bottom half up to meet the center crease.
Fold to a kite shape
6. Do the same to the other point. Now you will have a piece that looks like a kite.
Fold bottom of kite up
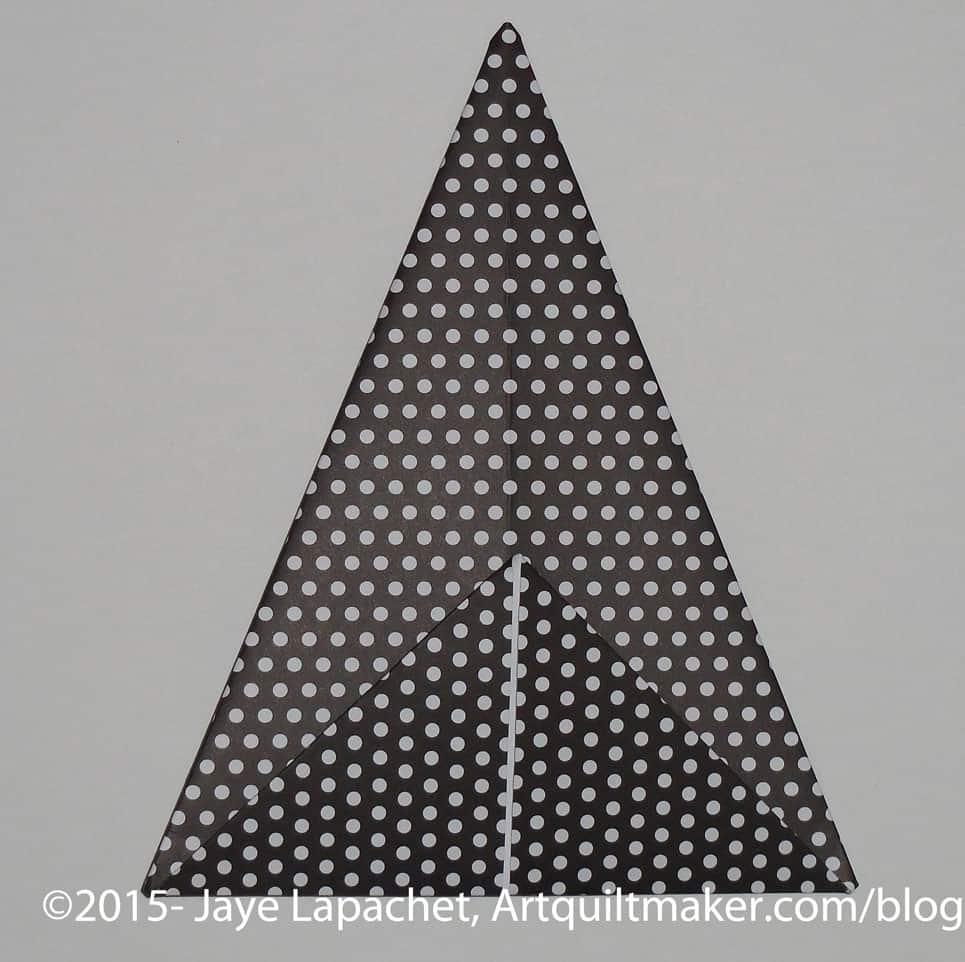
7. Flip the piece so the open bits are face down. Fold the short piece so you can see the open spot between the folded piece again.
Fold in halfFold in half
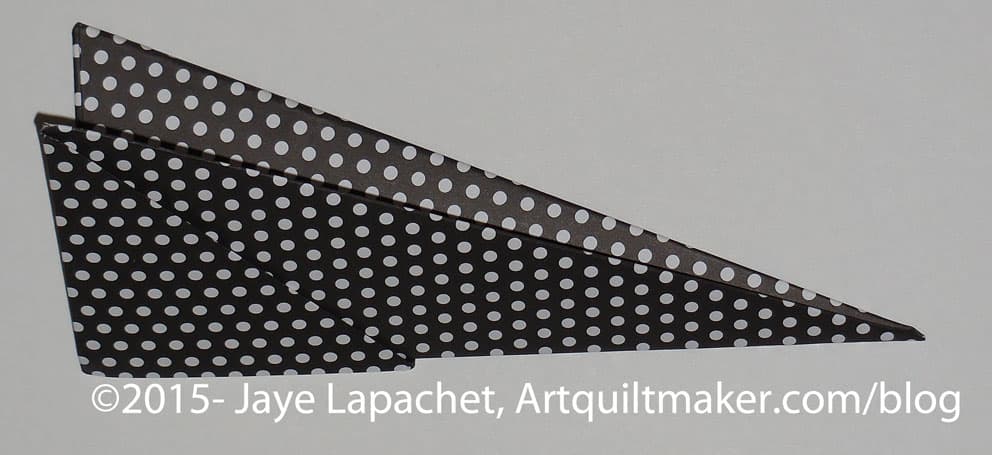
8. Fold leg in half with short side out. That opening will be where you put the other legs.
Make Wreath
1. Make 16 legs (directions above)
2. Put a little glue on to the tip of one leg
3. Insert each leg into 2 holes in another leg to make four quarters
4. Glue tip of each leg until you have a circle or wreath.
5. Before the glue dries, arrange the wreath so the inner circle is smooth.
Now you can carefully hang your wreath on the wall
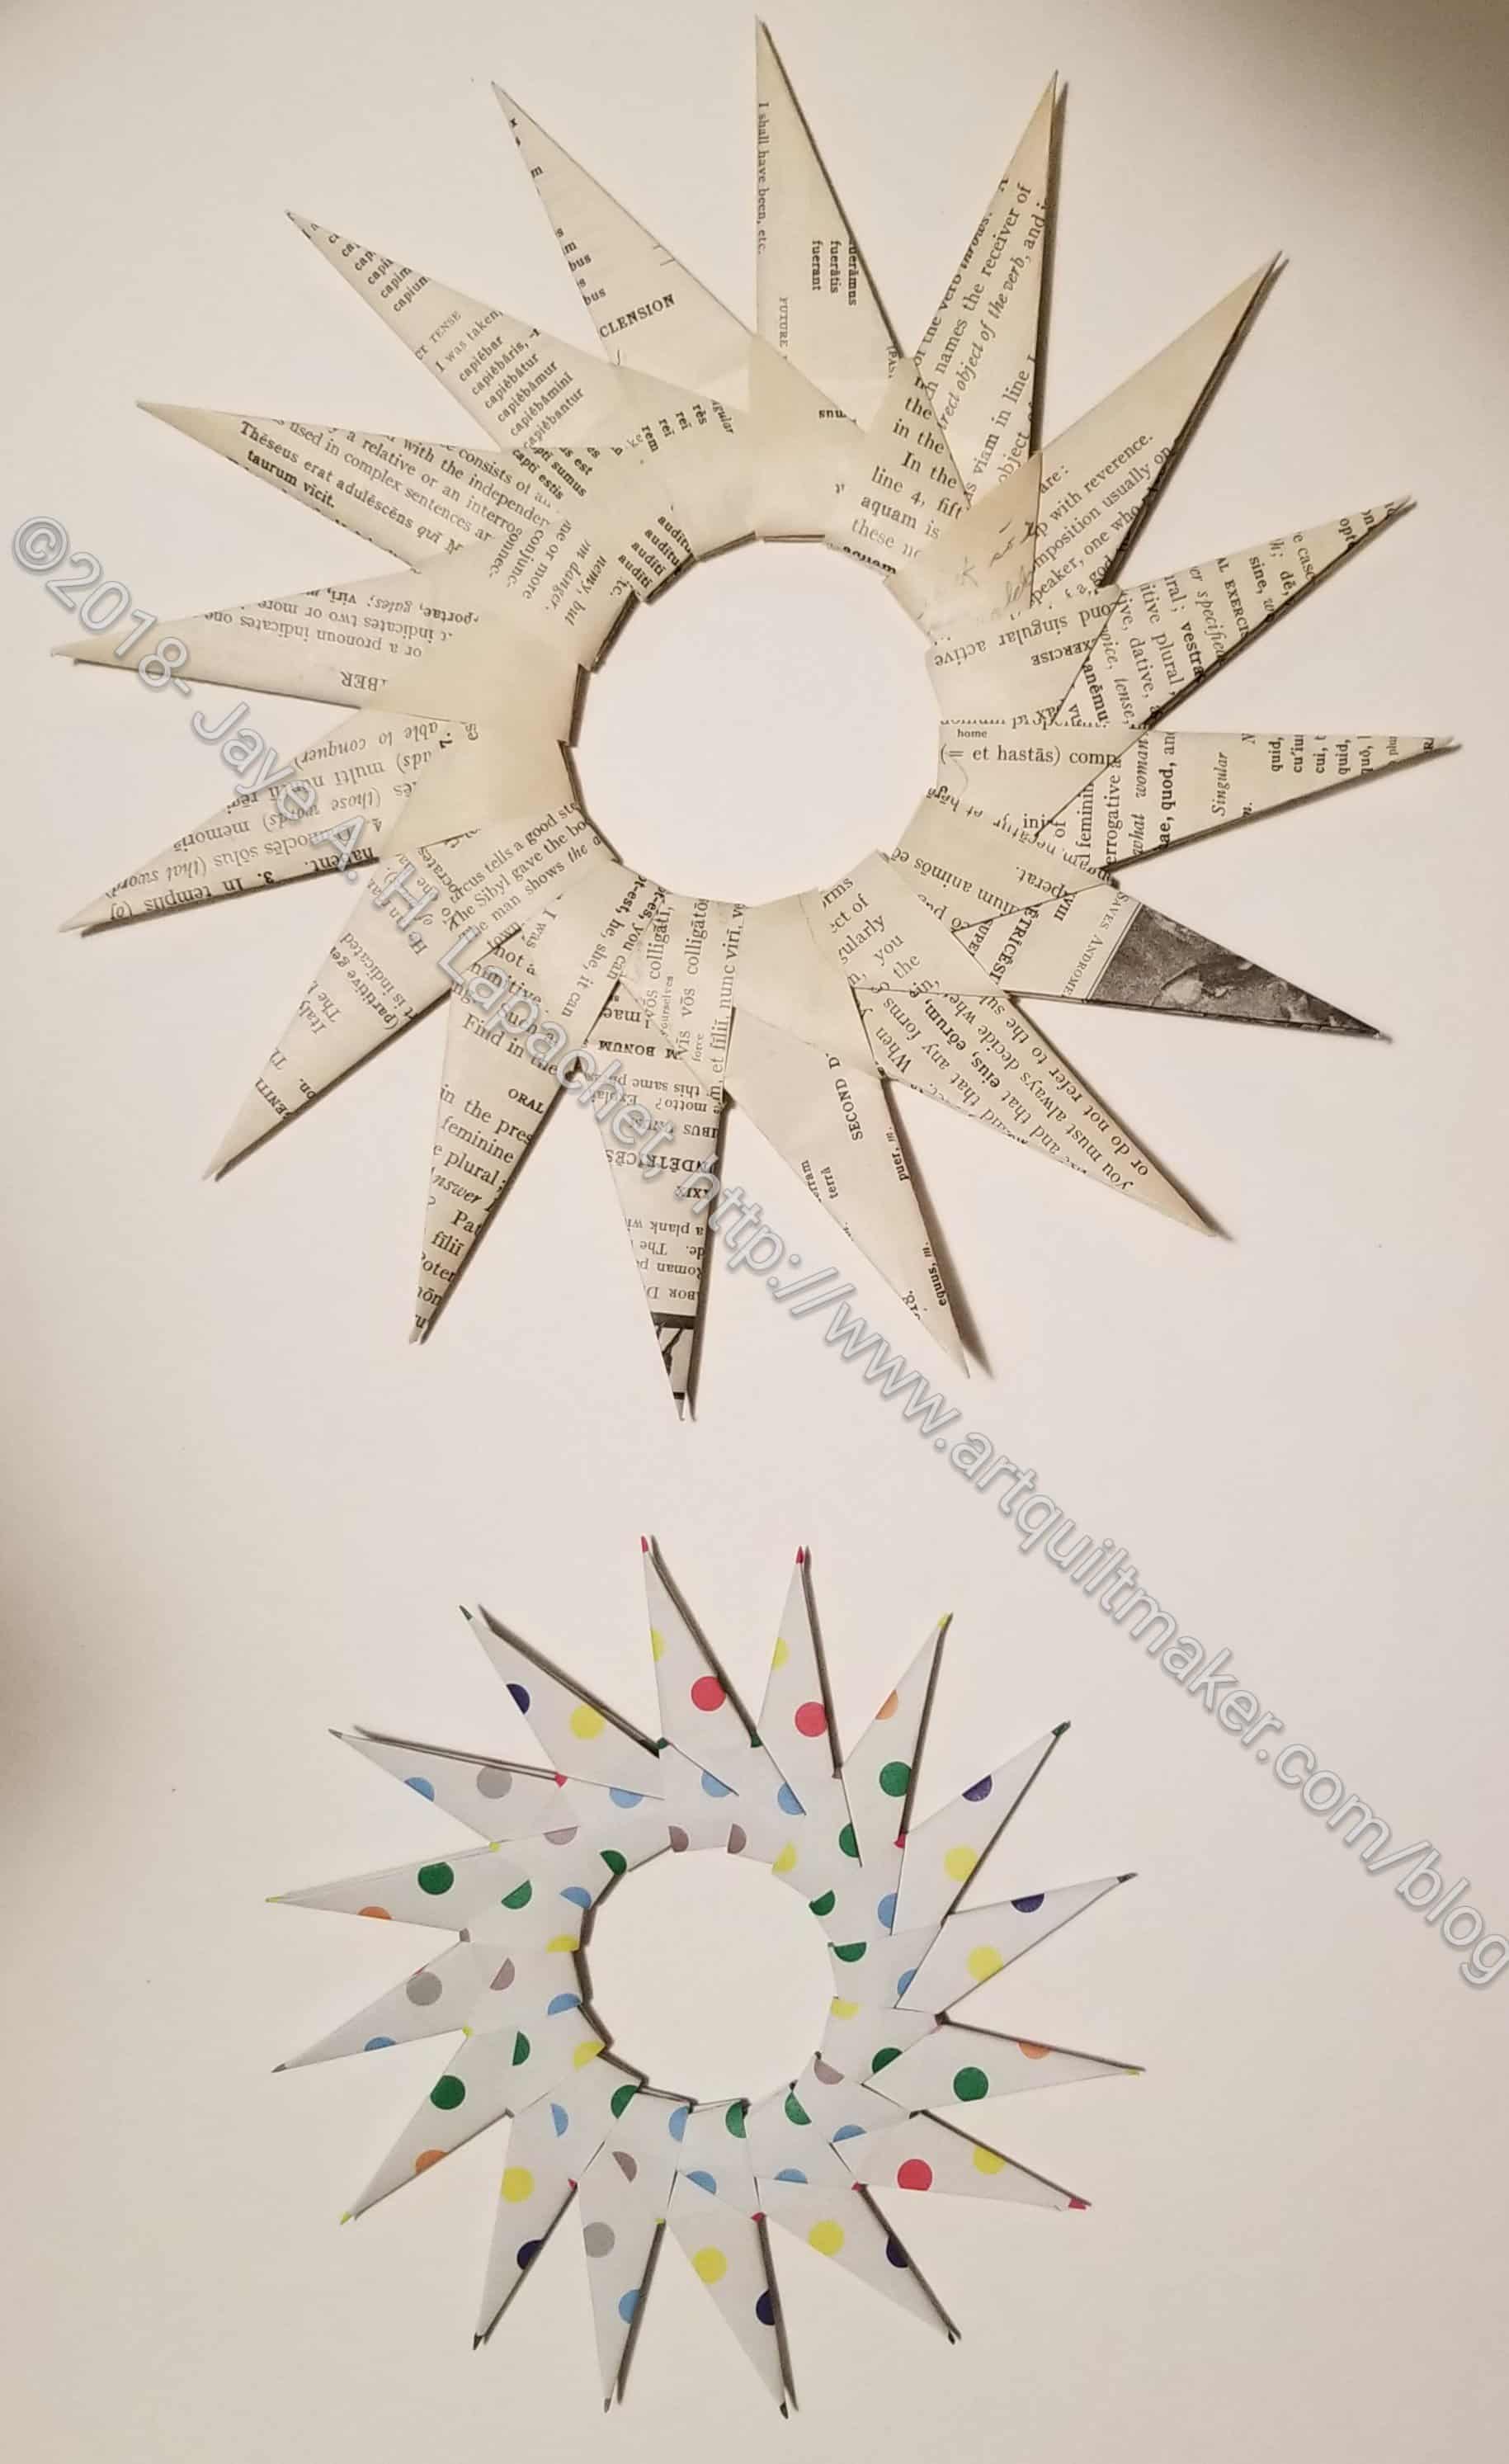
A long time ago, I met up with a friend and she taught me to make folded paper stars. Later, I found out that they are actually called starbursts.
Back in the day, I only had copy paper and I made a practice star from that. You need 16 squares of paper to make one starburst, so it is not an insignificant amount of paper and I didn’t have that much pretty paper on hand. I was pretty proud of that simple white star. At some point, I glued it together.
It was a good technique and the results are impressive, so one Christmas, not long after, DH and I folded up bunches of legs to make ornaments for gifts. We also made some larger ones as gifts and Christmas passed. Then the process kind of fell off my radar and I forgot how to make these starbursts. Sadly, I couldn’t figure out how to make them by reengineering, because I glued the one I had left together.
So, time passed, but I kept looking at that star at the top of my design wall. I started to become obsessed by making one again. I searched the web and couldn’t find instructions. I was infuriated. I am a librarian, for goodness sake, I should have been able to find one measley set of instrustions.
I firmly put the problem into the back of my mind to torture me there – uh, rumble around – and let my subconscious work on it.
One day I was on a boring call and clicked over to Pinterest to peruse while I listened. Suddenly, I saw a folded paper star!!! It finally dawned on me to search Pinterest and after trying ‘starburst’, within moments, I found instructions on a blog!!! I know I reported on this in the last V& S post.
For awhile I basked in the knowledge that I had the instructions and could make a starburst anytime I wanted.
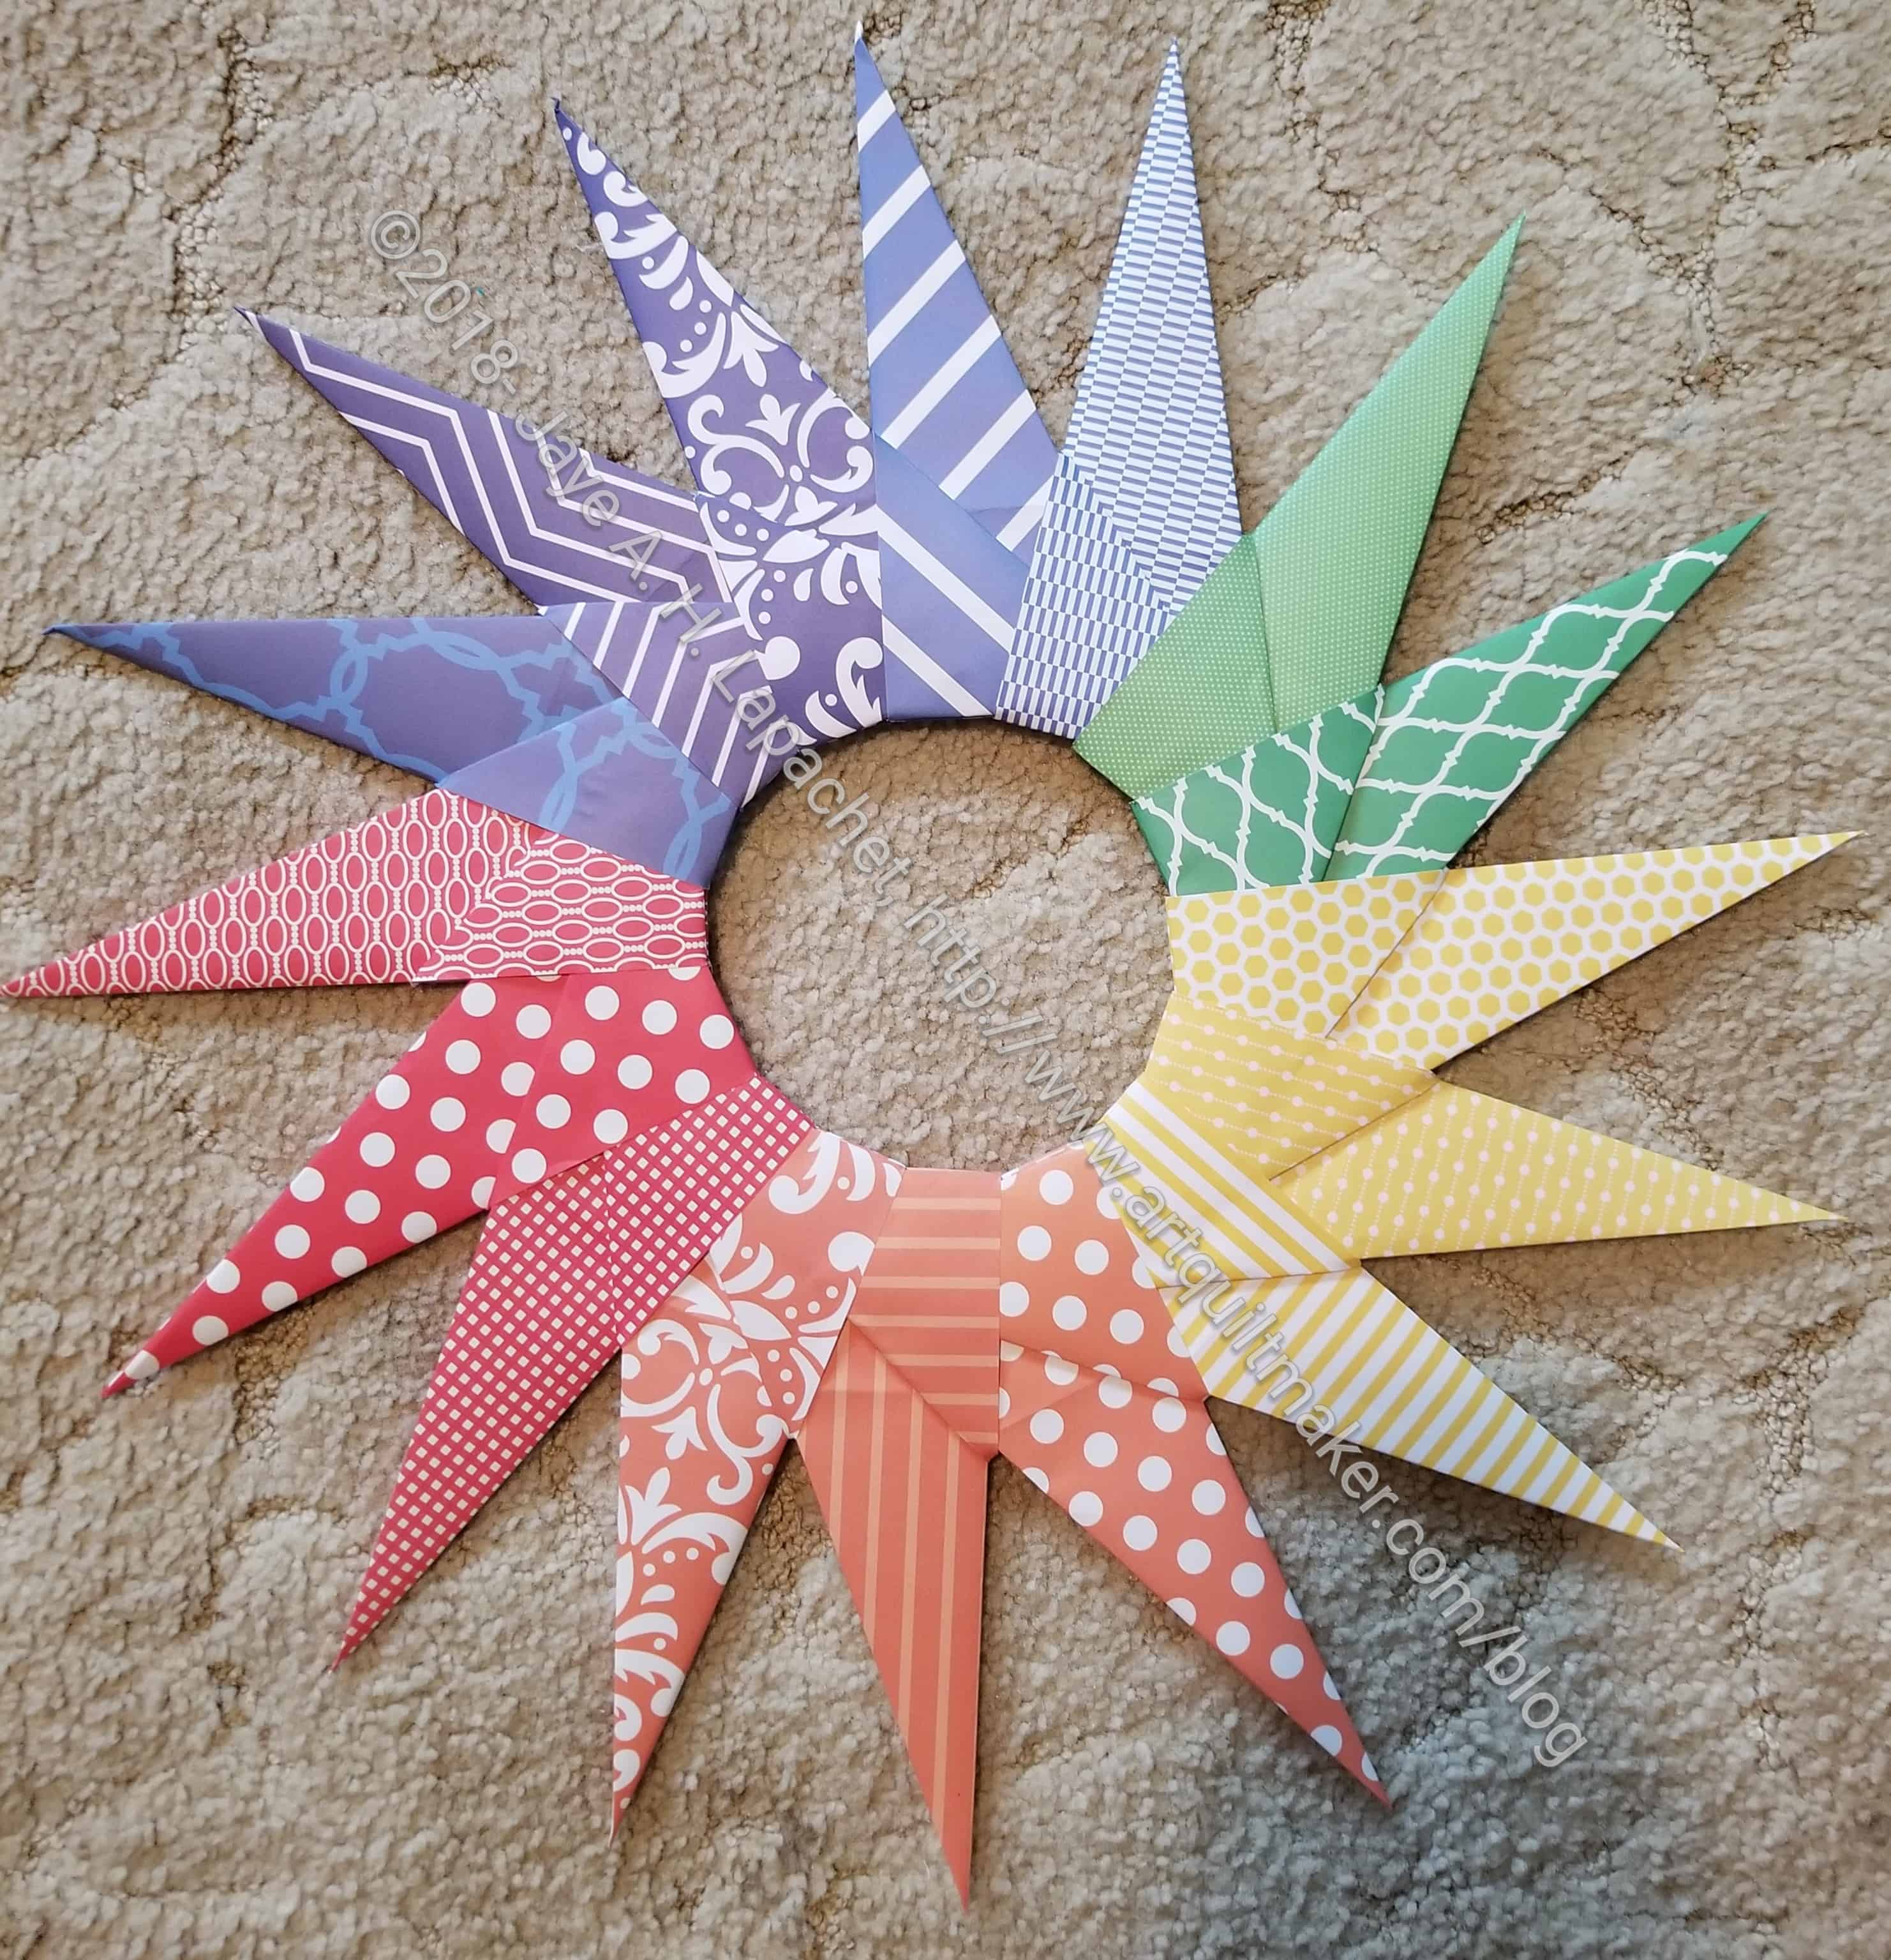
Last week, I decided to make one to see if works. Now I can’t really stop. I haven’t been doing much scrapbooking lately, so I took some paper and made a first star. I cut the paper to 8.5″ squares and made a pretty big starburst.
Origami Starburst
Next I went, coupon in hand, and bought some special pieces of 12″x12″ scrapbook paper and make them into another even more giant starburst. The paper I picked wasn’t matchy-matchy, but it reminded me of a line of fabric that kind of had a Paris theme with lots of pink and black. I just felt like these were the right patterns and motifs.
Paper is fun and everything, but I have a lot of fabric and I began wondering if I could make a starburst from fabric. I let the idea rattle around in my head and decided that one big problem was cutting 32 pieces of square fabric – well 16 pieces of fabric and 16 pieces of interfacing. Regardless of how much I cut in other projects, it seemed daunting for this starburst. I think it was a problem in my mind, because of the uncertainty of whether it would work.
Finally, I came up with charm squares. I got a Fresh Cuts charm pack out of my drawer and picked out 16 squares that I thought would work together. I worked on it at Sew Day and then finished it at home. You need Flatter or Best Press to make the pieces really flat.
Fresh Cuts Origami Starburst
The idea worked. I think the starburst came out really well. It is a little bright and cheerful. The only thing I need to think about is how to keep it together. Normally, the tension keeps them together, but the starburst wreath is kind of fragile if it gets handled too much. Sewing or gluing are my options.