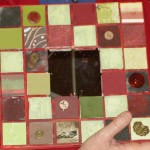
I made this top from the leftovers of the Frosted Stars. Looking at it in the picture I like it as is. However, I do think that the border is a bit too thin and will get distorted in the quilting process. As a result, I have been looking at borders.
Frosted Stars Leftovers w/Blue
I have enough of the blue fabric to go around the whole piece (but not to show the whole to you).What do you think?
Frosted Stars Leftovers w/Blue & White
Alternatively, I can go with blue and white. I kind of like the blue and white, but one of the boys pointed out that the white disappears next to the blue. I think the values are similar.
My other idea was to put a bit of a piping border in orange in and then add another red border. I didn’t have time to set that up so you could see what it looked like. Perhaps I will.
I am sick of Wordless Week. It was great while I was gone, because I didn’t have to worry about posting, but now that I am back (yes, I will tell you all the details) I want to toss up some words and get some words back from YOU!
I am sitting here listening to Patrick Monahan and Train singing “Hey, Soul Sister” and “Save Me, San Francisco.” Suddenly, I am obsessed with these two songs and have been listening to them over and over for the past half hour or so. I don’t know what they mean, but I love the sound. I first heard “Hey, Soul Sister” on a re-run of CSI: NY, then I found the performance on YouTube and, then, had to buy the song. Now I can listen to it, as well as “Save Me, San Francisco” whenever I want. It is a good thing I am home alone (as I write this), because I am sure the family would be screaming for me to stop torturing them.
Along the lines of obsession, I have been making pillowcases for the past 24 hours. I have 4 cut out and two made. Of the two, one has already been mailed as a special gift. I hope the recipient is still where I mailed it when it arrives! She told me today she is leaving! Oh well!
Hoffman Fish
The fish pillowcase is made from an oooolllllddd Hoffman print. TFQ informs me that it is at least 15 years old. It was in my stack of fabrics that are designated for backs or ‘other.’ Often I buy a half yard or less (though I am having a crisis of how much fabric I should buy), which is not enough for a pillowcase.
Unless I have bought specific fabric for a pillowcase, then my general collection does not provide large enough pieces for the main piece of the pillowcase, so I dug into the back stash. If I haven’t used the fabric, it should be fair game, right? I have a lot of conversationals in this group, so they will work well for the cheerful pillowcases being requested.
I have mentioned the Million Pillowcase Challenge a couple of times. I went to the website to try and figure out where to send the pillowcases and encountered a problem. Quilt shops are collecting them. I have to donate them locally and don’t really have a local quilt shop. One is a few towns over, but they don’t seem to be collecting them. I was determined to forge ahead when CraftHope came through.
CraftHope just finished their largest project, related to the oil spill clean up in the Gulf of Mexico, ever. As is their M.O., they started Project #9, a collection of pillowcases for the Con Kerr Cancer Project. The good thing (for me) about this particular project is that they provide a regional directory of hospitals to which I can send or take the pillowcases with contact information. The deadline is September 15 for the CraftHope project. Can you make some pillowcases?
As I mentioned, The Child and I will be making the taco and robot pillowcases tomorrow. I cut all the pieces and made the fish pillowcase so that I have the steps firmly lodged in my head. He would lose what little interest he has if he had to wait around while I tried to figure out the directions. TFQ walked me through the first pillowcase (see below) and, thus, was instrumental in getting me started.
One big problem is suitable fabrics for the 12-17 year old boy set. After all, all agesa nd genders get sick. I looked at the various quilt shops I visited last week and saw some that would be ok. I saw a great selection at VooDoo Rabbit.
Sweet Dreams Pillowcase
I saw the chocolate fabric at Britex when I was inspired to make a Sweet Dreams pillowcase for my mom. She has ongoing problems sleeping and is having a hard go of it taking care of Grama in SoCal.
The fabric has been around since the end of June and I finally got my act together and made the piece. I am happy with the way it turned out. She is coming home next week. I sent the pillowcase today and hope it arrives before she leaves.
I used the Twiddletails pattern and it is great! It seems bizarre, but works very well and I learned to make French seams! She has a store, so go buy a pillowcase kit and make one for Con Kerr. Thanks, Anina!
I have graduated from Train to Semisonic singing Closing Time, so I will end this post and work on my CPP responses, pillowcases, napkins, and all the projects I am fired up to make!
I decided to name this quilt the Blue Janus quilt, because Janus is the Greek God of doorways, gateways and transitions. This quilt is going to someone who is embarking on a huge transition. More on that later!
I started out with 6.5″ patches. Each one of those squares is 6.5″, which makes the block about 24′. I needed 16 of the 6.5′ patches across and down to make the desired sized quilt. Yet another monster!
Big Blocks of Big Patches
These are the first of several blocks this size.
Quilt Top Finished
I cannot spread the whole thing out in my workroom, so you get a little piece of the action. It took me about a day plus a couple of hours to sew the whole thing together. Since I want the edges to be straight I added a quilting border that will get cut off later.
Completed Top
You can see a little of the quilting border in this picture.
I am almost finished with the back. It is causing me a few headaches so I wasn’t able to finished before I had to be away from my sewing machine for a week. I plan to quilt this baby at my next longarm appointment at the end of the month so I need to get it done. I am sure I can since I have only a few more seams to get a back that is large enough.
Pencil rolls usually take me about 3 hours to make. That assumes, of course, that I don’t sew the ties to the back as I am making the pencil pockets and have to rip out.
This one took me three days for a number of reasons. First, not being one to make simple requests, she wanted one that would accommodate the colored pencils she had cut in half so she could have half of her collection at her job in SF and half at home in Santa Barbara. This meant that the pocket had to be smaller, which meant adjusting the pattern and not just sewing like a demon. I mulled this over for some time and finally came upon the idea of two pockets. The green and white city fabric is used to make a pocket on both top and bottom, so there isn’t really a top. Looking at it now, I should have made those pockets a wee bit wider or the whole piece a bit smaller, but it will work.
Second, I was sick almost all of last week, the weekend and the previous Friday. No kidding and no fooling around kind of sick. Stay in bed and don’t do anything kind of sick except read and sleep kind of sick. I don’t remember being that sick in a long while. The only thing I really accomplished was cooking dinner one night, breakfast one morning, loading the dishwasher twice and reading 4 books.
Finally, I made a lot of mistakes in this project. I blame it on the illness and the mad desire not to waste all this time at home. Getting well just doesn’t seem like enough, but apparently it had to be.
Lil Sissy Pencil Roll Closed
Yes, that is a ribbon or tie from the Merry & Bright Jelly Roll I used for the It’s a Merry & Bright Wrap quilt. It really was the perfect length to tie up this pencil roll. It also fit with the linen feel of the fabric I used for the outside.
Yes, that grape fabric is another fabulous FabMo fabric. I only used half the piece, too, so I’ll have to think of another accessory to make for Lil Sissy with the rest.
Lil Sissy Pencil Roll back
I don’t really get a sense of the fabric until I start working with it. This backing fabric was more loosely woven than the quilting cottons I normally use. One of the good things about the FabMo fabrics is that they are generally of good quality. At least I think they are of good quality. Despite the looser weave (and I am NOT saying it was holey), I had no problem with fraying or raveling or any of the sewing. Looking at the back of the piece, I find that the leaves and grapes really look 3 dimensional.
Lil Sissy Pencil Roll piecing
Kathy Mack of Pink Chalk Studio‘s pencil roll pattern has EXCELLENT directions. I really like this pattern and think that you should go off, as soon as you are done reading this post, and have opened a new window, and buy that pattern. I know I have waxes rhapsodic before about her pattern. I like this pencil roll pattern, because the font is the right size, and there are enough visual cues: boxes and borders, drawings, etc for me not to get lost in a mire of directions.
All that being said, I almost never pay attention to making a 12 or 24 slot pencil roll. I see what size FabMo fabrics I have and make as many slots as will fit the piecing of backing fabric I have, so I don’t have to waste or cut it. The thing is that I am probably not going to use these weird fabrics for anything else and it seems a shame to throw them away. Nobody to whom I have gifted an 11 slot pencil roll or an 8 slot pencil roll has complained, so I am going to keep doing what I am doing. One thing about making the same thing over and over (remember all of those Eco Market Totes I made?) is that I get to know the pattern and how the item goes together. This method works for me.
As you probably remember, I tried out the Jelly Roll last week and got pretty far along making the blocks. I had a lot of events this weekend, but was still able to put the quilt together. It provided a bit of a quiet haven for me.
One thing I found was that some of the strips, such as the sashing strips were too long. I cut them all the same size, so I am not sure why that happened. As I sewed the blocks together, I was diligent about trimming the excess as well as pinning carefully. The quilt went together really well. I am happy about the matching of seams (most matched!).
I forgot to mention that I tried the Mary Ellen’s Best Press on this quilt. TFQ warned me that the strips were stretchy upfront, so I pressed all the strips with Mary Ellen’s Best Press (MEBP) before I did any cutting. I think it helped. The feel of the fabric strips after I pressed with the MEBP was firm, but not stiff or tacky feeling. I didn’t have any noticeable problems with stretching or bias. I bought my own bottle of it and will probably use it for half and quarter square triangles.
It's a Merry & Bright Wrap!
It is about the size of a large lap quilt. I went to sleep the other night thinking about borders. I found some half yards of some of the Merry & Bright prints that I might use for the border, but I am not sure about what configuration. I don’t have enough just to slap a couple of borders on it. The borders will have to be pieced in some way.
I have had a Sandy Gervais Merry and Bright Jelly Roll for a long time. This past weekend, I decided it was time to take the fabric strips and make the It’s a Wrap quilt. I had some other things to do, but I spent a lot of time just sewing and learning.
It was a somewhat strange experience. First, someone said they couldn’t believe I was using a Jelly Roll. I was hesitant to tell them about the pattern. I did tell her for shock value and I thought she would keel over. Sometimes, I think, by limiting choices, a quiltmaker can focus on other elements of the process. That is what I was doing, even though I didn’t start out with that intent.
Merry & Bright Jelly Roll
One thing I learned is that there is value in trying things out: different fiber content, different construction techniques, different tools, etc. Having a pattern and the fabric choices taken care of gave me fewer decisions and I could focus on learning the pros and cons of the Jelly Roll.
There is no doubt in my mind that the Moda Bakeshop offerings are a brilliant marketing scheme. My biggest confusion with the one Jelly Roll I had was that many of the pieces were cut off grain. Nadine Ruggles mentioned this in one of her blog posts, but I got to experience it first hand. This means that my strips weren’t straight, but bowed – tending towards Cs and Ls rather than Is. This phenomenon was frustrating, but I also learned a lot about strip cutting and grain. I know that I need to line up the selvedges and trim the sides to make a straight cut. Seeing the bow in the the Jelly Roll strips made me understand (in an embedded in my mind sort of way) what cutting off grain does to strips.
I don’t have a Jelly Roll book, but I would like to know if they address that problem in the directions of the various projects. Nothing was said on my pattern.
Unrolled Jelly Roll
The things I liked about the Jelly Roll:
I got a little taste of a number of different fabrics. I could do this by cutting a strip off of fabrics that I buy (on grain, of course) and saving them for a future project.
I like working with full lines of fabric just to see how the designers patterns work together. A whole line of fabric is like a complete painting to me. I get a lot of joy out of working with a designer’s creation.
The strips were already cut, so I could take my small cutting mat down to the coffee table and cut and watch TV. If I cut a bunch of strips on ‘spec, I could do this as well.
I didn’t have to decide how many yards of each to buy.
I had a limited palette to work with.
I like the fabric and a Jelly Roll was just enough to satisfy me, especially since the only reason I buy Christmas fabrics is to make gift bags.
I saw this quilt on a blog called Sister’s Choice Quilts. She also used the Merry and Bright fabric line. I have always loved the Chinese Coins pattern and the combination of Chinese coins and 4patches make this a winner. I love seeing the same fabrics in different patterns and similar patterns in different fabrics. That concept is one of the things I really like about quiltmaking.
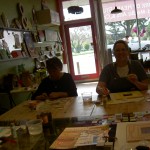
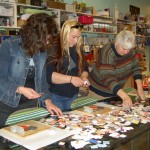
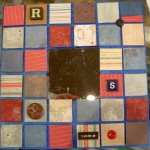
I went to A Work of Heart on Sunday with a group of friends to belatedly celebrate my birthday. I LOVE LOVELOVE that place! I love the space, the creative energy, Andrea (the owner). I want that creative wonderland to be down the street from my house. Really, I want to live there, but I would settle for it being down the street from my house.
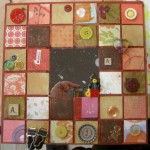
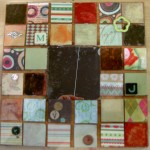
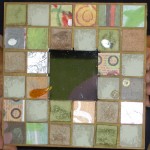
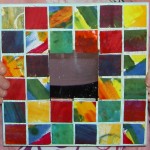
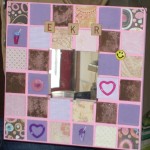
I invited some non-crafty people so Andrea the Awesome suggested the Altered Mirror project. I wasn’t that excited about that project, but went with it and am very pleased at how mind came out (top), how successfully everyone was able to work and how well all the mirrors came out.
Adrienne’s
Valerie’s
Kathy’s piece
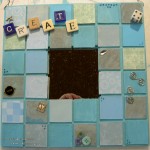
Step Near the End: Embellishing
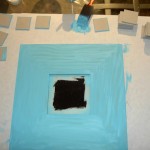
Step 1: Paint the Frame
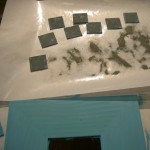
Step ?: Distress Some Squares
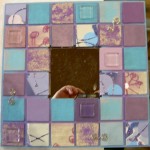
Creativity Mirror
Maureen, Andrea, Sharon, Julie etc
Mary & Maggie
Helen, Adrienne, Maureen
Julie & Sharon
Kathy, Kim, Terri & Bron
Valerie, Helen & Bron
Kim & Jaye
Andrea, Maureen & Sharon
Helen’s
Bron’s
Mary’s
Maureen’s
Terri’s
Camille’s
Maggie’s
Kim’s
Kim’s also
Sharon’s
Julie’s
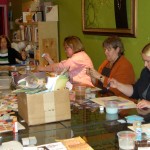
The place is great and all of the supplies you see in the backgrounds of the above photos are available to use.
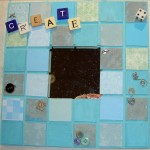
Step 1: Paint the Frame
The first step was to paint the frame and the little chipboard squares. I ended up painting all of them (top and sides). Above it shows the squares as I was painting the sides.
The color scheme I chose was to coordinate with the way we are going to paint our bedroom. I didn’t mean to put ‘CREATE’ as the message, but creativity is on my mind lately and it seemed like the right thing. I don’t know if the mirror will end up in our room ultimately, but we will see.
Step ?: Distress Some Squares
Each of the squares has something done to them: cover with paper, paint with crackle paint, ink, etc. Above I was using distressing/embossing powder on some of the squares. BLECH!!! I sincerely disliked how they came out and the effort was not worth the result. Live and Learn, though. I am glad I tried it and now I know.
Step Near the End: Embellishing
Above I have lined up all of the squares and glued them to the frame. I have also started to embellish. Andrea has FABULOUS glue and I only had to stick down some of the papers a little bit. The glue used to stick the squares down is different from that she suggested I use to apply the embellishments.
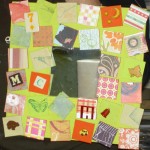
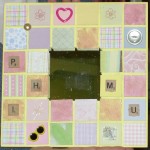
Kathy's piece
Kathy, from Everyday Bliss, wrote a great post about the day. She expresses some self doubt in the post, but I didn’t see that at all. I saw her start looking at the paper and dive right in. Kathy’s piece, with its orange base, reminds me so totally of her. It has whimsy and a little reality check (see the martini glass? She is the parent of a 2YO, after all) and a fabulous girly, but elegant girly look. Check it, and her project out, at the Everyday Bliss blog.
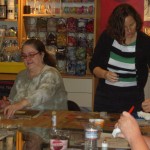
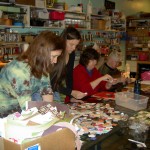
One of the great things about the afternoon, as I mentioned, was that everyone was successful. Everyone worked on their mirrors and created beautiful pieces. Everyone seemed happy and to have a good time. There was a nice creative and relaxed feeling that permeated the event.
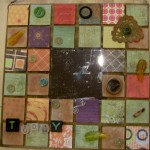
Julie's
I love Julie’s message. Her message of “Today” makes me think about not looking to the future too much. It is a good reminder to be in the moment – or to balance planning for the future while living in the moment.
Helen's
Helen seemed really uncomfortable when she started. I don’t know what Helen’s creative experience is to date. She did the most amazing work. I love the color scheme and her selections of paper and embellishments. It was so fantastic to watch her work.
Bron's
Bron’s embellishments came across to me as delicate.
Mary's
Mary knew not getting the squares straight would drive her crazy, so she made the squares wonky. That small changed added movement and now the straightness is not an issue. I adore her background color.
Maureen's
Maureen used her hand dyed fabric instead of paper to cover the chipboard squares. It reminds me of a painting I saw at the SFMOMA. I’ll amend this post if I remember which one it was.
Terri's
I love the red that Terri used for the background color. Her piece has a bit of an Asian feel.
Camille's
Camille insisted that she was not crafty. Her piece, for her daughter’s new bedroom, tells me otherwise. I had a pink and purple bedroom when I was a girl, so I am partial to this piece.
Maggie's
Maggie wanted to make a piece to commemorate our sorority. I love it that she used yellow to to prevent the pink from getting to sickly sweet. This piece is very cheerful.
Kim's
Kim has more experience than anyone with the various tools and supplies. If you look closely at her piece, you can see where she used a rubber stamp and then embossed. The embossing actually came out well on hers.
Kim's also
I think the above photo reflects the colors she used a little better.
Sharon's
Sharon’s piece reminds me of sailing and code flags. She says that she chose a color scheme that would coordinate with her duvet cover.
Adrienne's
Adrienne, or AJA, is one of the quiltmakers with whom I do the Bullseye Project. She came all the way from Tucson to be at my party. I was so happy! She and Julie and I went to dinner after the party. I love the way she used the bottle cap and the garter hooks.
Valerie's
Valerie and I see each other once a year. We met in the baby class when we were both pregnant and our kids used to play together when they were small. Now we see each other about once a year, but it is great. She is a great sport at being creative with me.
I am thinking of having my birthday there again next year.
Update: 9/12/2011: due to spam this post no longer allows comments. Sorry!
I get a Janome email periodically and when I have a chance to look at it, I am usually impressed with something. One thing I like about the photos below is the different colors – not the usual red and green – they use for Christmas. The ideas are still holiday-ish, but very fresh. Even if you are not a Janome owner (or don’t do Christmas), check it out. There are some fun ideas.
The above blocks are the blocks I made over the weekend. Except for the one in the lower left hand corner, which I made last week. I put it in to make the photo square and so you wouldn’t see my ugly carpet.
2 Sorbet Blocks, August 2009
Last week I made two blocks for the Sorbet quilt (left). They sat on my design wall all week and as I looked at them a new idea formed in my head: a baby.
When I made these, I just wanted to make some of the quickest blocks to cut and sew. I wanted to get some endorphins going and some quick satisfaction.
What I didn’t realize was that these two could be merged to make yet another block. I didn’t need to make a pattern, which is part of the fun and joy of this quilt.
I can’t shake the idea that these two blocks got together and had a baby!
Baby block
Silly, I know, but it is what it is.
The others I made were from the patterns I already designed in EQ6. I think this quilt will be one that I can longarm myself.
Four Patch Corner
Not really sure why the above block is called Four Patch Corner. I didn’t make up the name, it was in EQ6.
9 Patch
Regular old 9 Patch fits the size and shape requirements. Easy to make and I think it looks great.
In a recent post, I posted a partially colored view of the patterns I had created in EQ6 for the Quilt Sorbet Quilt (not sure whether I will call it Sorbet or Quilt Sorbet or something else). Here is a fully colored rendering.
Some of the blocks are pretty obvious, but others kind of blend together.
My other thought was to create an EQ6 rendering where I color the blocks as I sew them. That might make my life too complicated, but we will see. It might, on the other hand, make it easy for me to keep track of blocks I have made.
I talked about Barsha’s silk crazy in a Sept. 16 post. I kept not posting about this project for some reason. I think I just never got around to it. Here is the finished top. I still need to make the back, but it shouldn’t take too long. This will be a project I will give away, but to whom, I don’t know.
I made it with one of the packs of Moda squares I bought in Maryland. The fabrics were Friends and Flowers by Mary Engelbreit. I found that I didn’t have to cut and resew as many times, which was nice. I thought it was a good thing to do with those fabric packs. I found that I didn’t like the fabrics that much and was glad I hadn’t bought a Jelly Roll.
One of my favorite blogs is Be*mused blog (link on clip). She puts fabrics together beautifully and shows wonderful pictures. This link to one of her old posts from a current post discussing Christmas gifts dovetails nicely with another fabric avalanche, this one involving DH. He was not bemused or amused. He was rooting around in my fabric closet (first mistake), which doubles as a place to store filing cabinets and Christmas gifts, when the pile of dots, conveniently, but precariously, piled right at the front of a bunch of fabric piles fell on his feet. He claims it covered his knees as well. Totally untrue, but I can see how he might think that. He told me to stop buying fabric. HA!
Anyway, Be*mused makes an excellent point. Pillow cases are GREAT for gifts as well as using up conversationals. I have some great conversations that I doubt will ever make it into quilts. They are currently in the “back of the quilt” stack. Pillowcases for the nieces and nephews might be another good way to avoid the Pineapple. Not this year as Christmas is already only 24 days away, but I could think about it for next year assuming I ever get any additional free time.
Now that I’ve decided to hand deliver my Christmas gifts to family members at Thanksgiving, I’m awash in lists and plans. And, ironically, still cranky over the too-early commercial bombardment of Christmas music and decor. Scrambling to find gift ideas for those always-difficult people, I’ve had to concede that what hasn’t been decided yet will be purchased, not handmade.
Are you looking for some gift ideas that you can sew? One of my old standbys has been the lowly and much overlooked pillowcase, which I’ve made mostly for kids, preschool to college age. I’ve made them to coordinate with gift quilts and occasionally they’ve been an extra something-to-open when I’m sending a gift card or cash. With all of the great fabrics available today, the theme possibilities are endless and there isn’t a simpler item to sew. Here are a few of the combinations I’ve used.
I was randomly surfing blogs and websites today (studiously avoiding the laundry, the Christmas cards and the Pineapple!) when I came across Make Lounge via Juju Love Polka dots blog. I saw this cushion cover and thought it was very fun. Sadly, Make Lounge is in London and I am not. Still, perhaps I will take out Pamela’s project and be inspired.
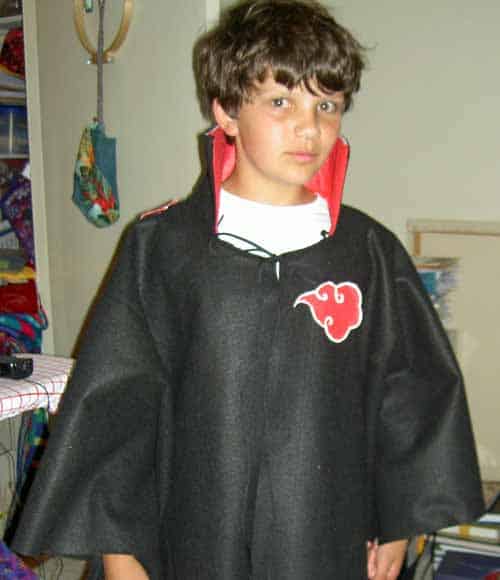
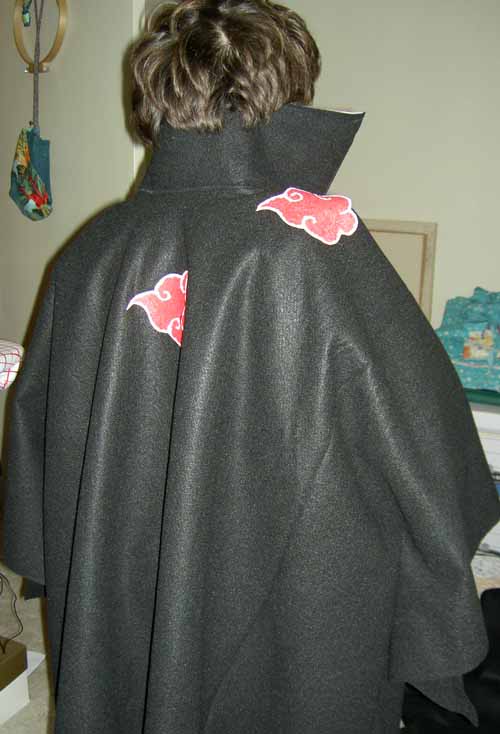
The Halloween costume, except for some decoration, which are drying, is finished. The Darling Child is happy and I didn’t have to buy anything except 2 yards of black felt. I like using felt for Halloween costumes, because the raw edges don’t ravel. You can also just cut it off, glue things to it and cut strange shapes out of it with no problem. The costumes are a bit fragile and don’t usually last long. You can see the cloak that I made by looking at this picture from Wikipedia.
I didn’t have any white paint, so I used Liquid Paper to create the whorls on the red emblem the Darling Child needed.
I only had enough red to make five of the emblems, so we had to place them carefully for maximum effect.
It is kind of fun to make the Halloween costumes – to make a child’s Halloween dream come true. It is also fun to kind of figure out how to make something work with what you have on hand. I always buy enough felt to get through the main part of the project, but inevitably, I don’t think farther than that. One costume I made needed a fat tail that stood up. I used a paint stirrer to keep it stiff enough. That was before I knew about Timtex.


