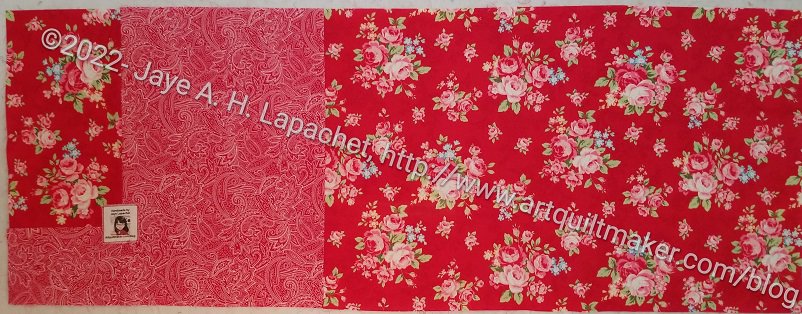
The Lobster table runner did not take very long to finish. I struggled with the piecing of the Sawtooth Stars for some reason, but eventually got them together and was able to finish the top. As you can see, I added a border to contain the blue.
The Lobster back finished
I also made a back and a binding and will take this piece to Colleen to quilt.
I cross this off my to do list with a great amount of glee.
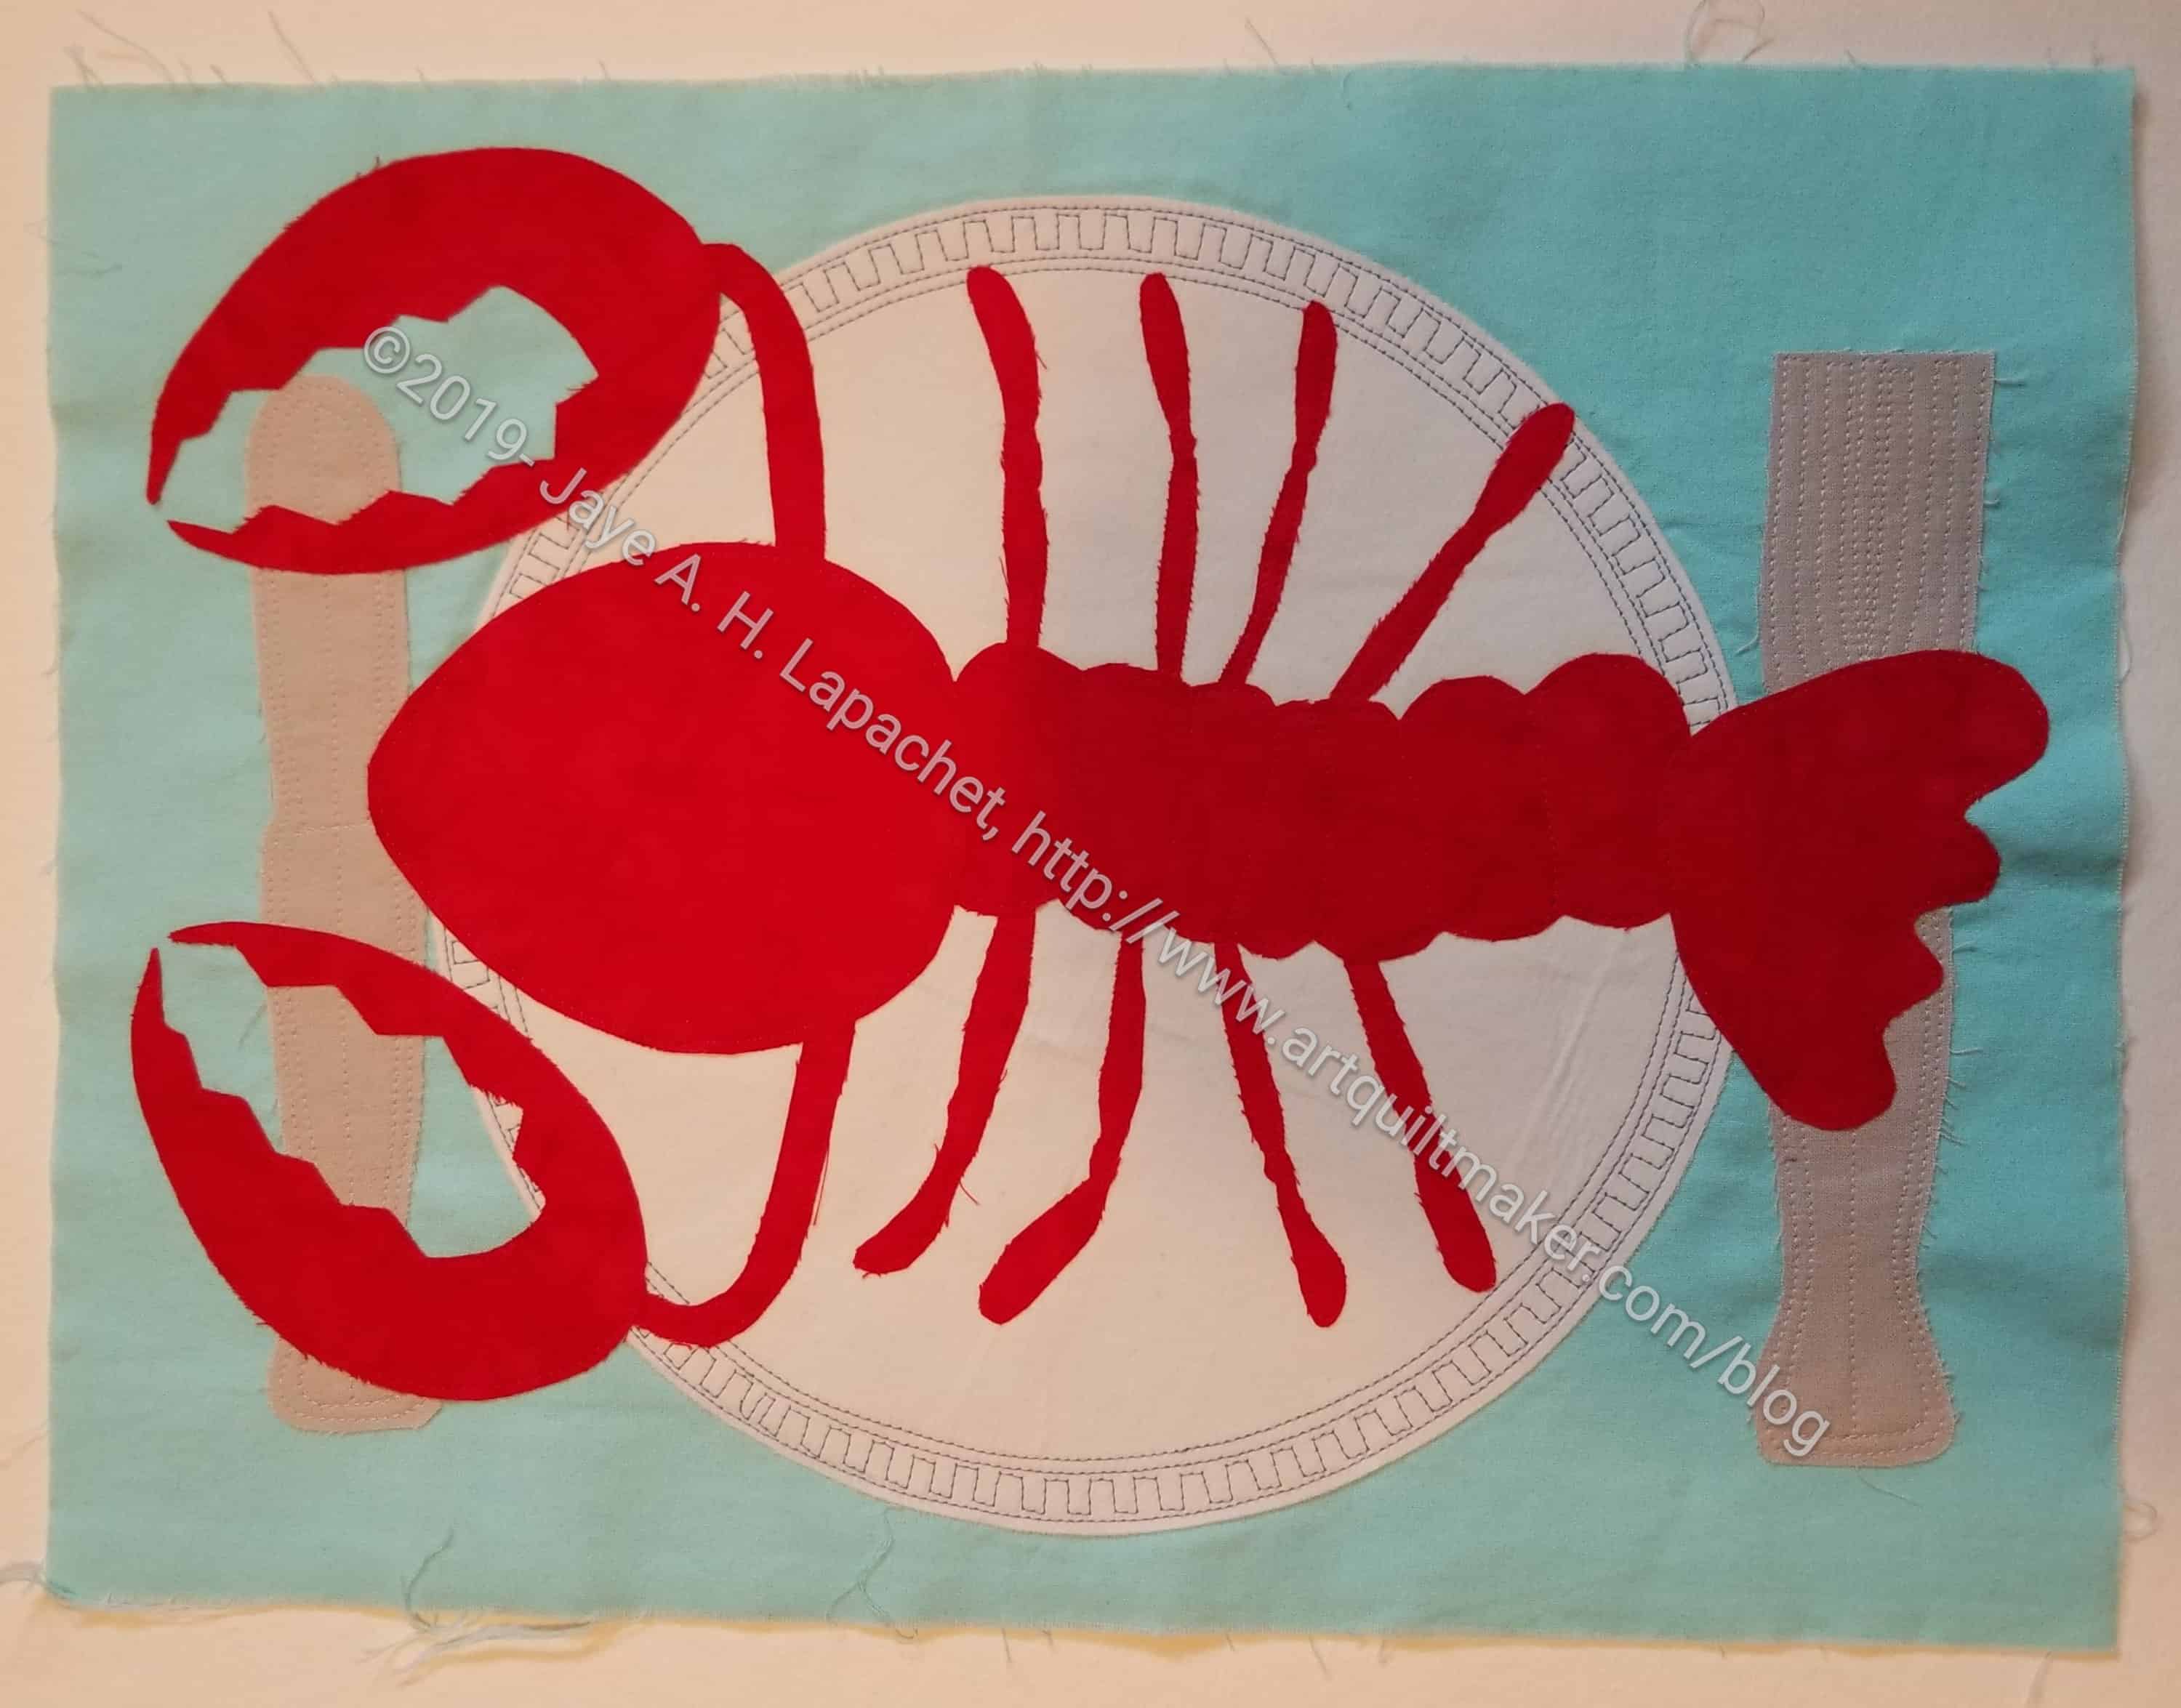
Amazing, I know! I finished the stitching on the Lobster. It wasn’t really very much and I am kind of embarrassed that it took me so long. I thought it was much more, which kind of validates what I learned in Lorraine Torrence’s class a long time ago: Make visual decisions visually. This isn’t exactly a visual decision as choosing one fabric over another would be. It is a visual decision in that if I had looked at this piece carefully, I would have seen how little I had left to stitch.
I’m not done yet. I want to hand embroider the feelers on the lobster’s head. I have to finish it. I don’t think I will quilt it. I think that there is a enough stitching. I do have to finish it in some way. Framing seems the best, but I don’t have a spare wall to hang it. I am still thinking about what to do.
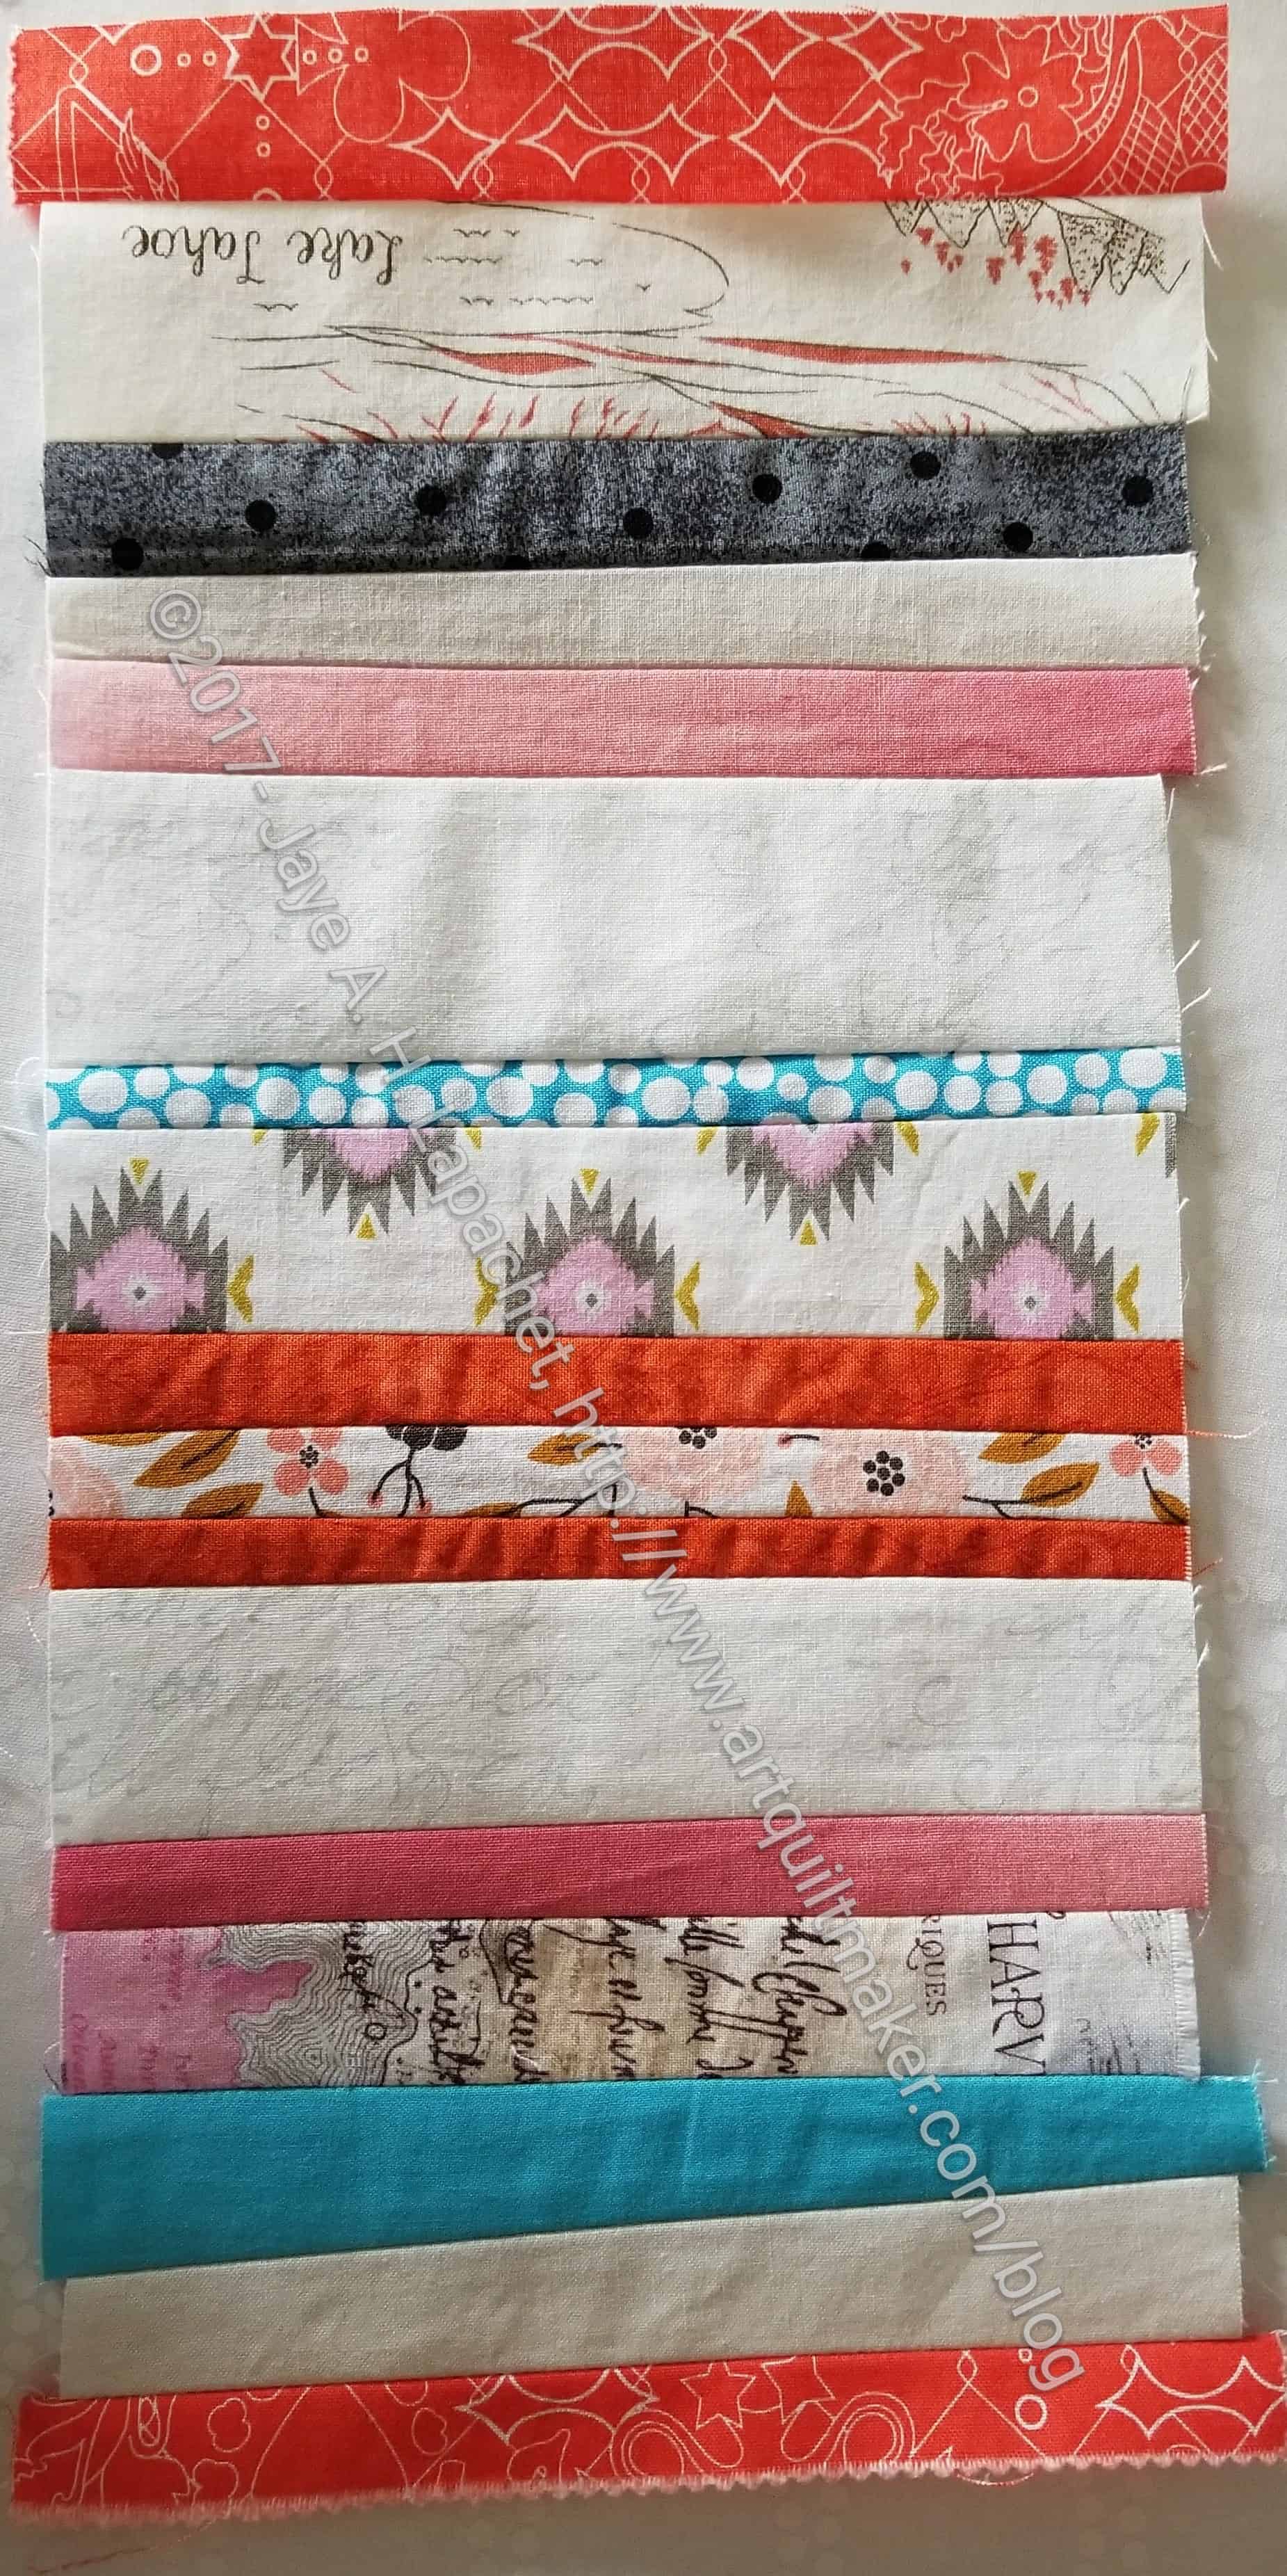
After hearing Karen talk about her quilt, I decided that I would do more of a strip piece for Amy, so she would have some pieces she could use to connect other pieces. I tried to keep the pieces long and thin-ish.
Amy’s Color My Quilt piece in process
Partway through the process, as I mentioned, I took out the piece and took a look at it.
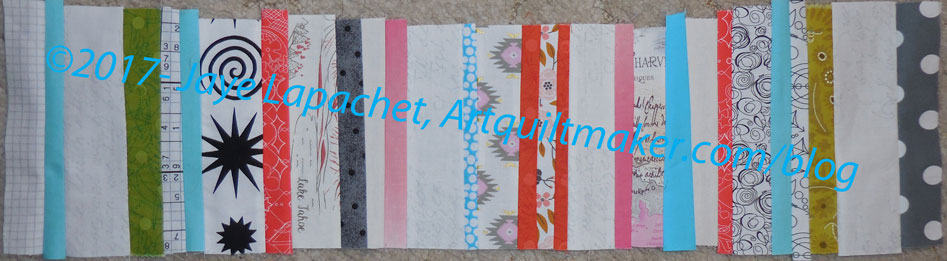
I was trying very hard to adhere to the spirit of the words, but color balance kept creeping in to my work. In the case of color balance, left, of the in process piece, I thought it needed more blue towards the top.
After working through all of my thoughts and feelings, I am pleased with the way this came out. I worked on it over the course of several weeks in between other things until I ran out of time. I also focused on the placement of the color rather than the width of the strips, etc. I did try to keep the strips from getting to wide, though I really wanted it to be long, so some are quite wide.
Amy’s Color My Quilt piece
I wanted to make it about a foot longer, but ran out of time. I am pleased and hope Amy will be, too.
I decided that I would start work on Amy’s Color My Quilt piece right away. I used it as leaders and enders while I sewed fabric pieces that didn’t require a 1/4″ foot. It was a good plan as I have made enough progress to hand it in today even if I do nothing else.
Don’t get the idea that I was doing a shoddy job. I was eyeballing a seam allowance rather than using the 1/4″ foot guide so I could make progress, but not being shoddy. If anything most of the seam allowances are larger than 1/4″.
Of course, I want to do more. I think it needs more blue. If I don’t do anymore, I’ll be happy and not embarrassed to give what I have to Amy.
The BAMQG meeting was….sometime in the recent past. I have a lot going on and can’t quite remember.
Karen M. Color My Quilt
Anyway, one fabulous thing that happened was that Karen M brought her finished ‘Color My Quilt’ piece. I thought it looked fabulous. She talked quite a bit about how she put it together and where she added strips and bits and pieces.
Keeping the colors in the same family with a bit of spark really made this quilt come together.
Karen was asked to do a workshop on teaching people to put their own pieces together. She may do a hands on tutorial at the next meeting.
The guild meeting was Saturday. It was a good time, but I wasn’t really in the mood for some reason. Last week was busy and I had a lot of people to deal with in stressful situations, so I might have just been overloaded with external stimulus. Still, I was glad I went.
I always feel like I am offloading a truck when I go to a BAM meeting. I hand off donation quilts, pet beds, donation blocks, free table items. At the meeting last weekend I also had a Color My Quilt piece to show and give.
Kelly’s group of Color My World chunks
It was Kelly‘s month and she she had an interesting idea. The responses were very cohesive, I thought, which was great. Some others seem to think we weren’t doing the challenge right, but I like cohesion in a quilt, so I thought this group was very successful.
My Color My Quilt Piece for Kelly
My piece is at the top and I was pretty happy with it. It was one of the largest, as you can see. As someone pointed out, I don’t make small quilts. 😉
I learned this technique when I took my second quiltmaking class at Fort Mason from Sonya Lee Barrington back in the Dark Ages. I really had fun using it this time. It was nice to make swooping curves. I didn’t want to use black and didn’t have the Pepper that Kelly suggested on her sheet, so I stayed with brights.
There was some discussion about ‘chunks’ at the meeting.I have used free form piecing on two of the pieces. I thought I used that technique on all of them, but I made a checkerboard for Cheryl’s. This has led me to think about what could be a chunk besides free form piecing. I know a strip of Flying Geese could be a chunk, but blocks seem to be out of favor in terms of chunks. If I get a month, it probably won’t be until next year, so I have a long time to think about it.
Kelly seemed pretty happy with her chunks. I talked with her about her thoughts regarding putting them together. Obviously, it is too soon to really know what she will do. In the course of the discussion, it occurred to me that I could make chunks to intersperse among those from friends and that could help to bring the different pieces together.
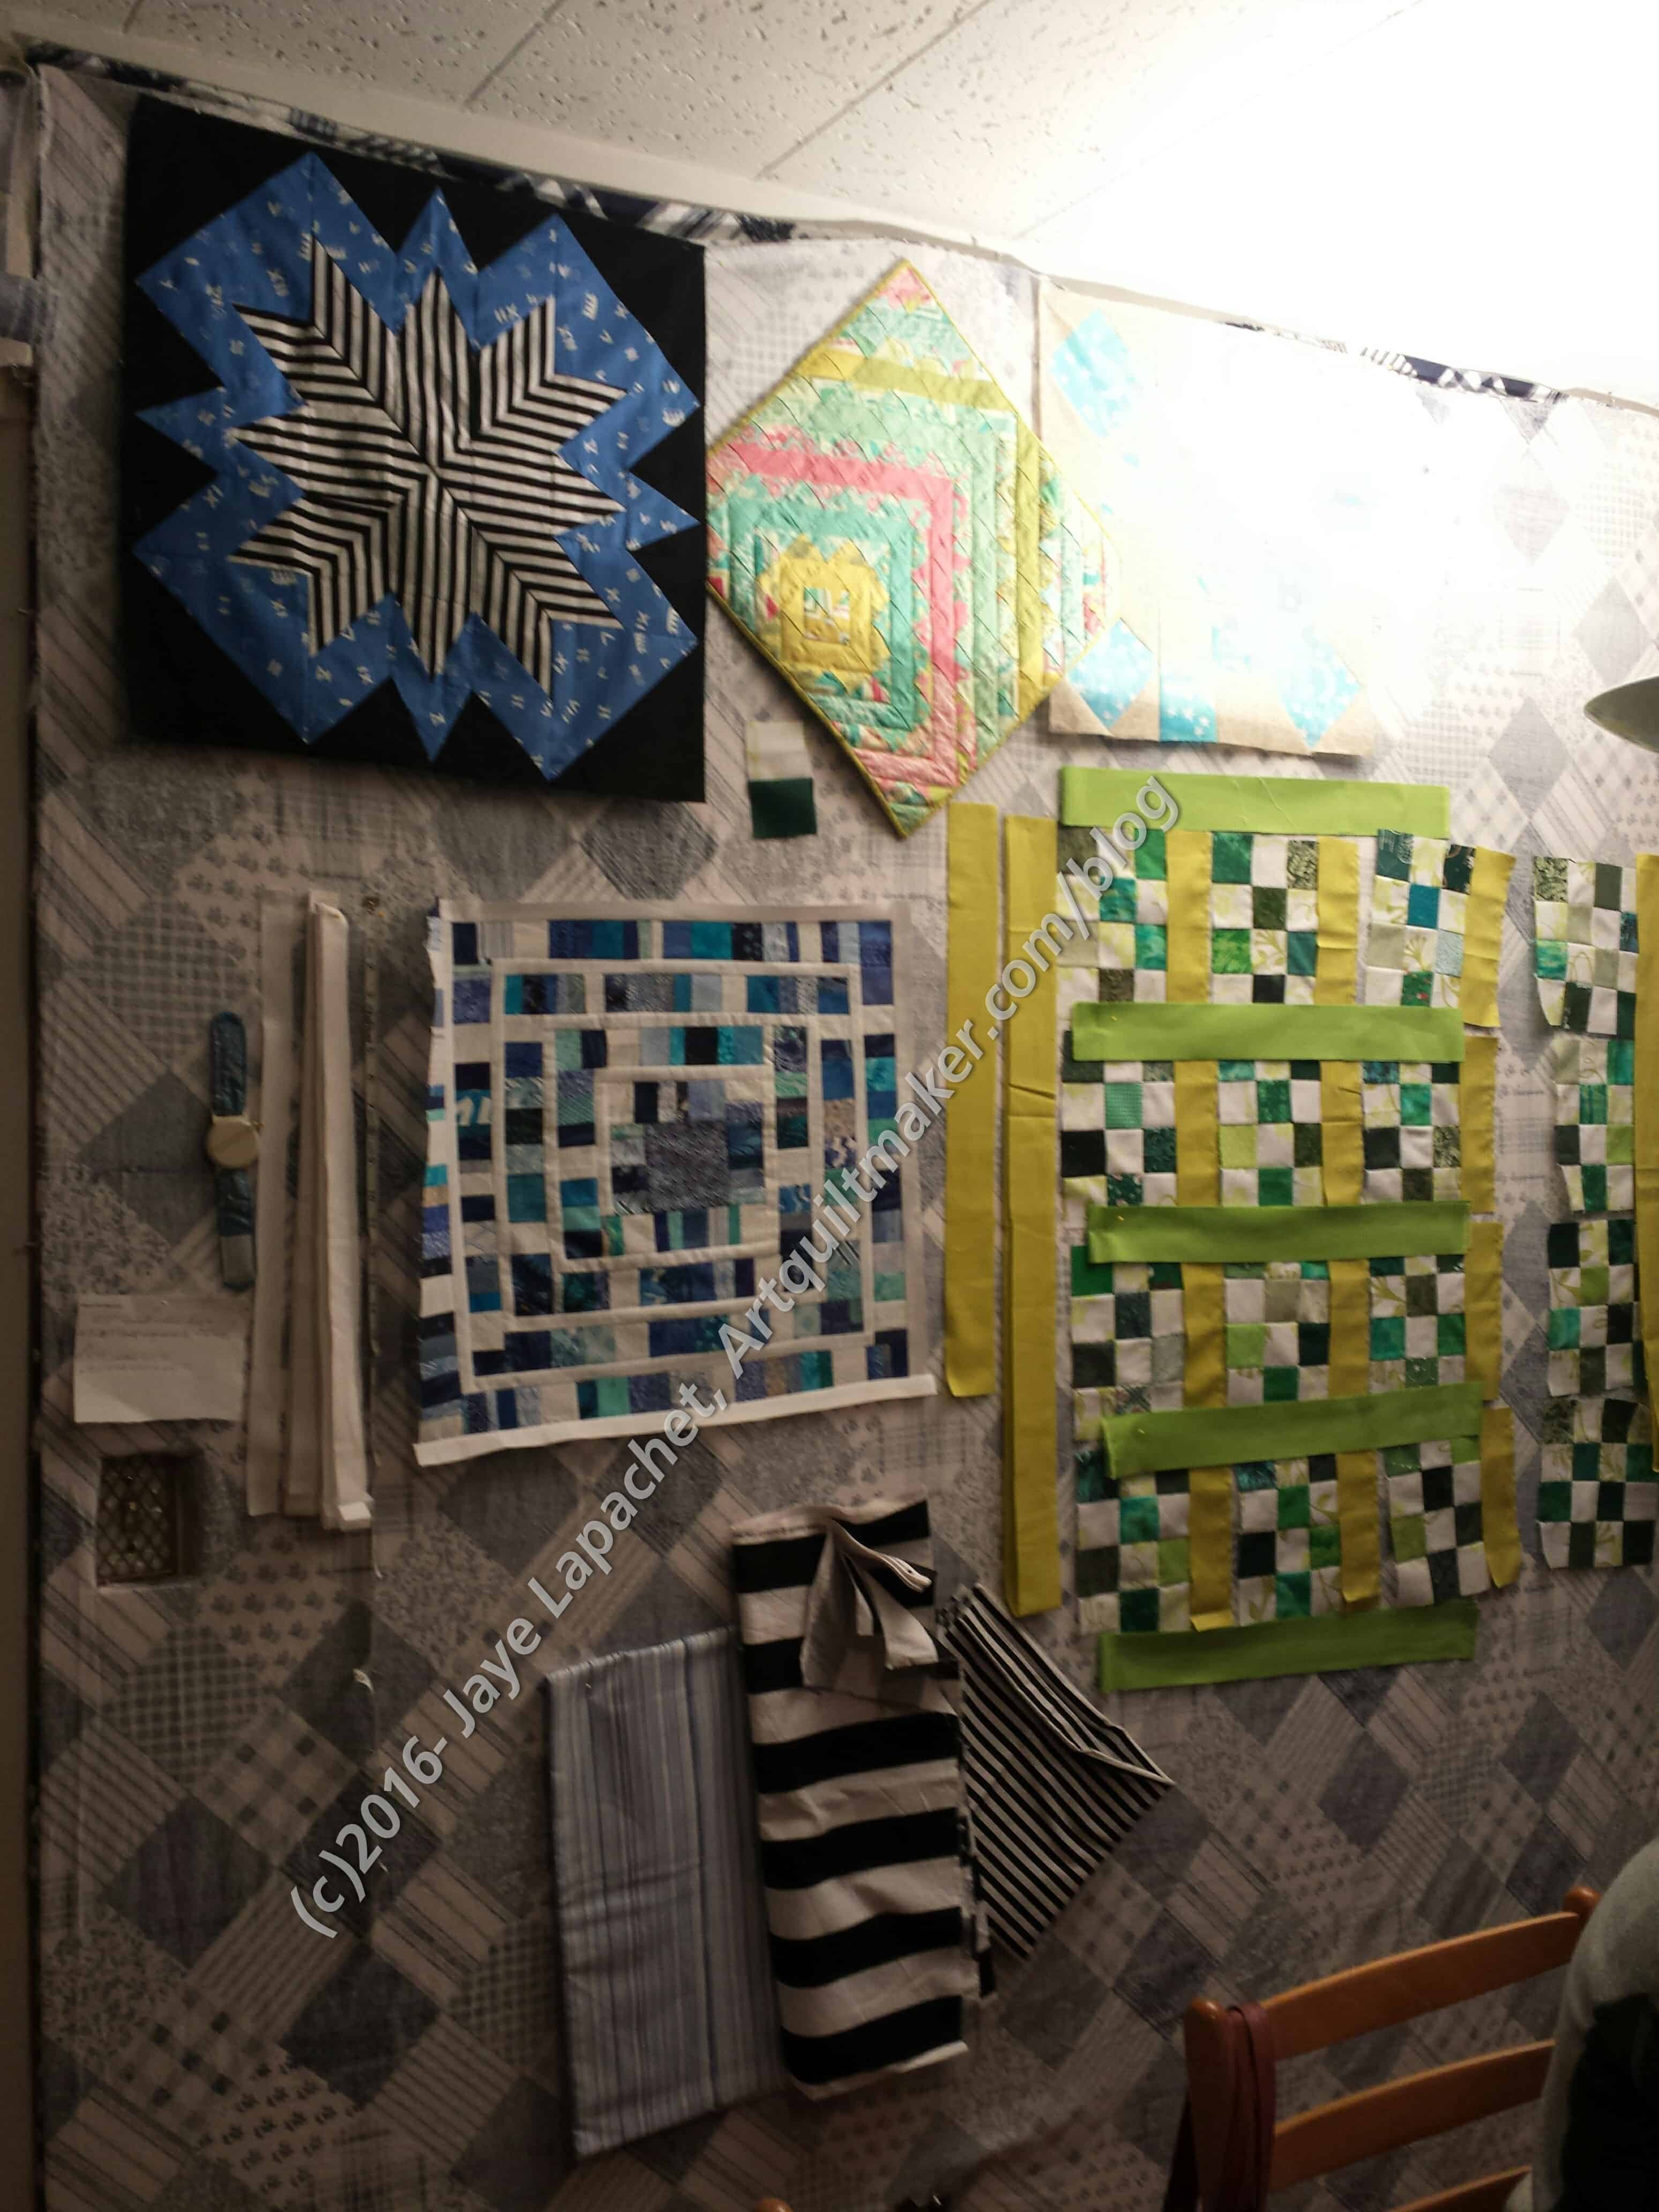
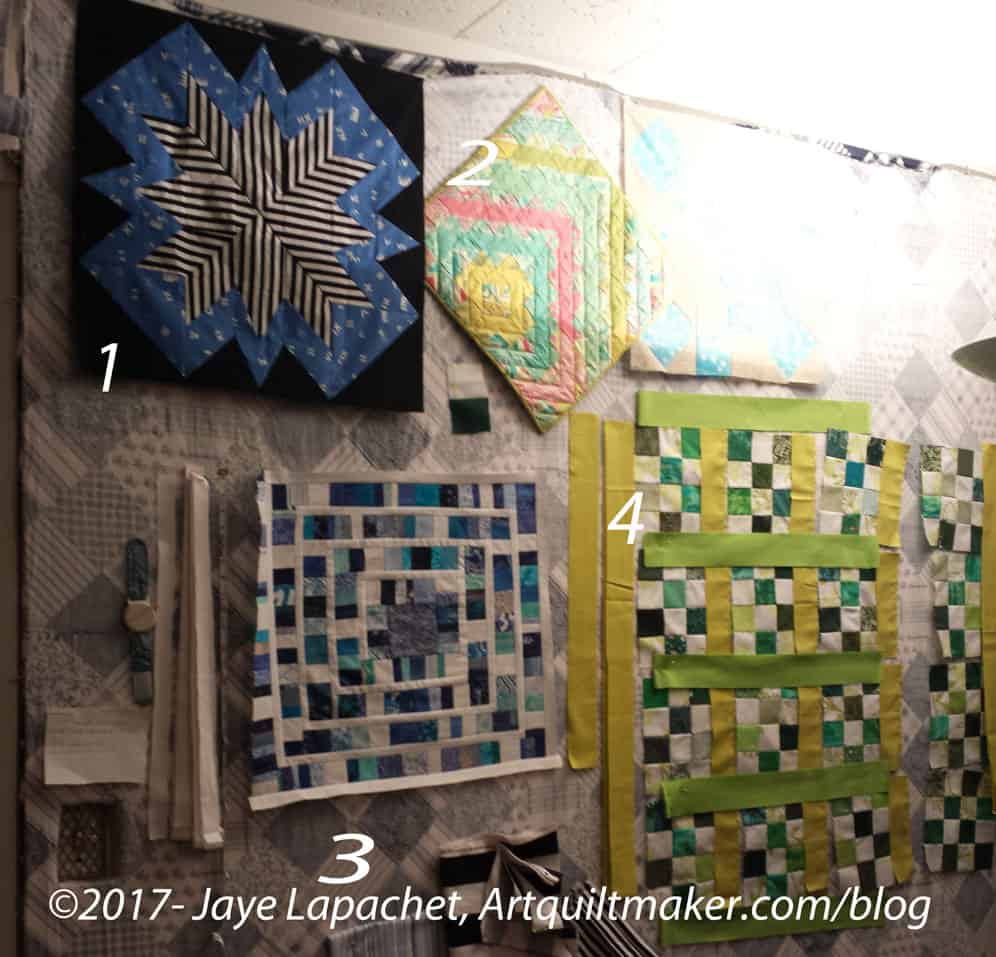
We had Craft Night at SIL’s the other night. Her design wall was awash with BAMQG projects.
One thing that is cool about this is that SIL never belonged to any guilds (that I remember her talking about) when she lived back East. The other thing is that she does more of the various challenges than I do.
SIL’s Design Wall n.2
The first project is the text project. SIL is smart and makes small projects for the challenges. The blue fabric is a text print and her piecing of the striped fabric is truly genius.
The green and pink piece is actually a quillow. That fabric was truly a challenge for SIL as she normally works in a different palette.
The blue and white square and rectangle piece is the latest challenge from BAMQG. This year’s theme is scraps and the first challenge has to do with using scraps to make a piece from squares and rectangles. I like the white as I think it adds a lot the the piece.
You might recognize the postage stamp blocks from the various posts I have written about donation blocks and quilts. SIL is using sashing on hers as I often do.
There is a certain cohesiveness on her design wall that appealed to me.
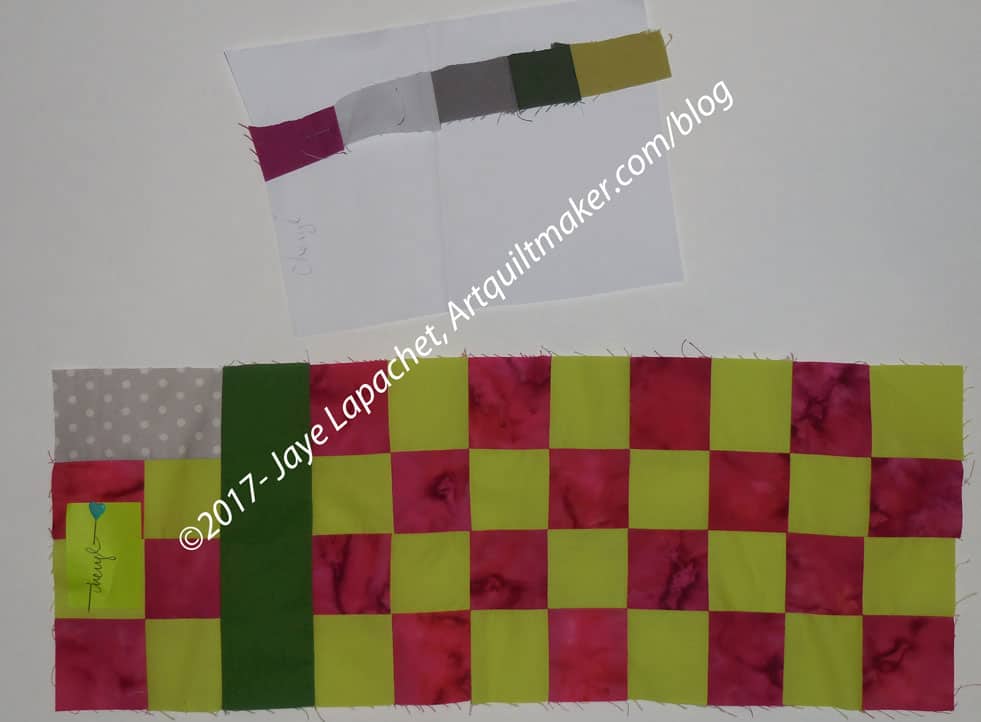
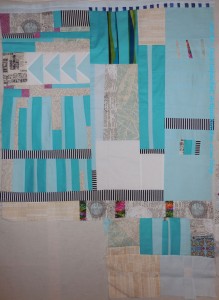
Cheryl was fortunate enough to grab the February spot and her piece was the second on which I worked. As I said Saturday, I had two pieces on which to work right off the bat. I missed the February meeting, but got my hands on the color sheet and made a piece.
Cheryl’s Color My World
For some reason I wanted to do something a bit more straight-laced and block-like. It couldn’t be too straight-laced, so decided on a checkerboard.
Kelly is next and I am curious to see what she comes up with as her colors.
I have making my own color sheet on my list. I have an idea in mind, but need to find a photo. I’ll wait a few months so I can see what other people bring to the meeting. I doubt my slot will come up before next year.
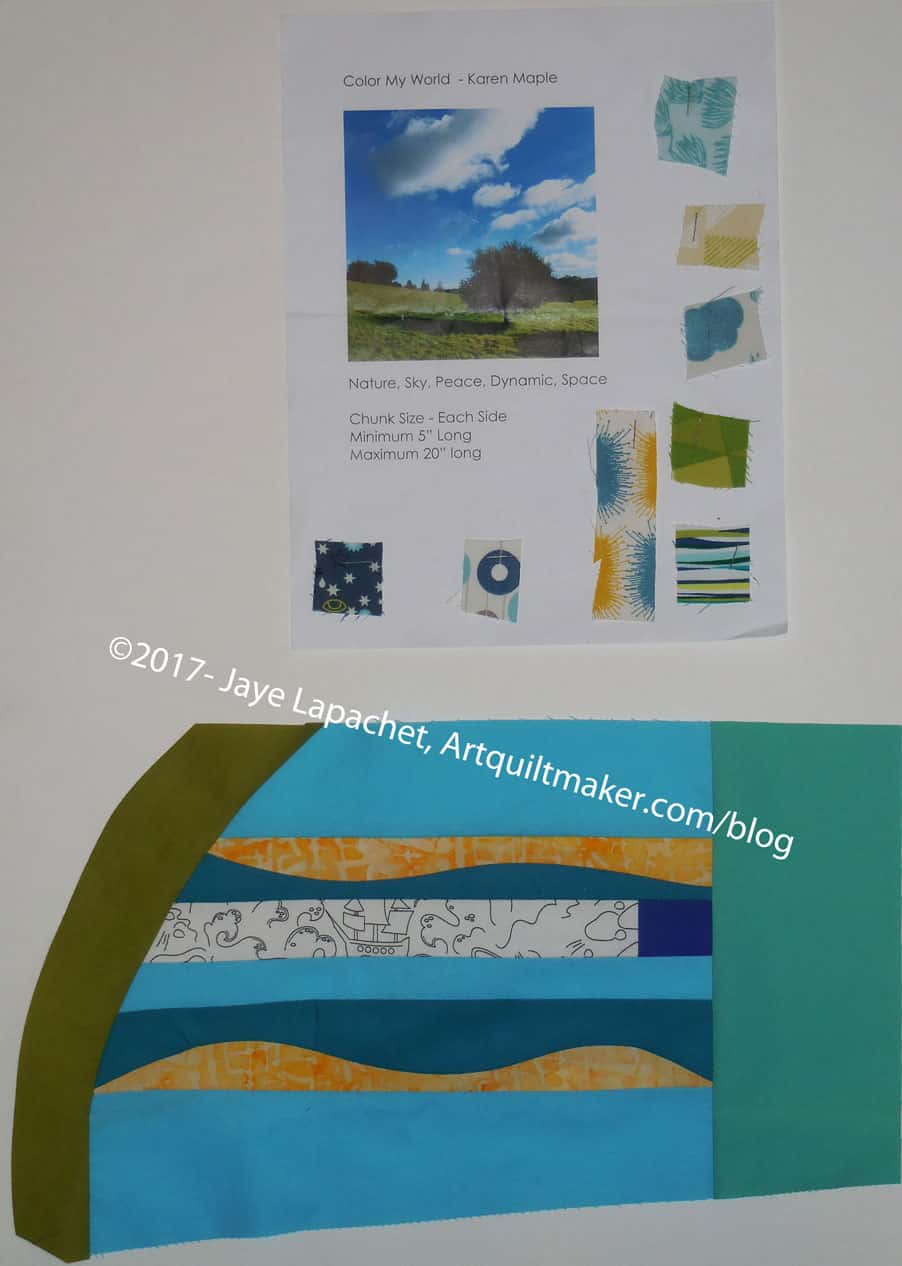
Karen, last year’s guild challenge coordinator is leading a new challenge. This challenge is in addition to whatever challenges the new challenge coordinator comes up with. I have decided to join the Color My World challenge.
As is her right, Karen was the first person to provide a color sheet for the challenge. As I join somewhat behind the rest of the group I had two to complete at once. I did Karen’s first and will talk about the other one tomorrow.
Karen’s Color My World
Karen used a landscape photo as the inspiration. I followed that idea and used curve strip piecing techniques to mimic the landscape idea. I am pleased with the way my piece came out.
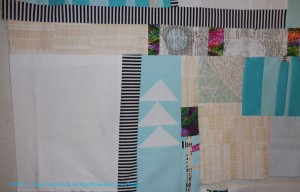
I don’t actually have any IRRs right now and I wasn’t at the BAMQG meeting, so I couldn’t take another. I had three in quick succession, with Cheryl’s being the last before my brief hiatus. Ruth‘s and Claire‘s pieces were the other two in the trio.
Michelle and I met at Trader Joe’s again and exchanged IRRs. I took Claire’s to pass along as she wouldn’t be at the meeting either. I headed up to the North Coast again with DH for NSGW/#politicalwifery events and Michelle was headed to Spain. Rhonda was kind enough to take both bags to the meeting for us and I gave them to her at the CQFA meeting.
All of this meant that I had to get Cheryl’s done in time to get it to Rhonda. I had about a day once I figured out all of the timing, so I got down to business.
Cheryl’s IRR – before
Cheryl’s piece looked great when I got it and I was loathe to wreck it, but Michelle had added half a row, so that missing section was perfect for me to complete.
Cheryl’s piece is turning out really well. I love it, thus the feelings of avoiding wreckage. I really wanted to use the Paris map fabric, but couldn’t really fit it in once all was said and done.
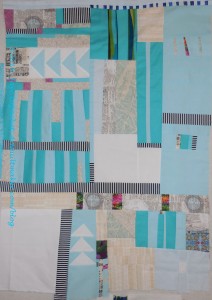
I walked around with it on my design wall for a few days and decided to add some Flying Geese. Yes, I am still in love with Flying Geese.
I also needed to add my signature fabric, but I didn’t want to add a large patch or strip as I have on other pieces, because I wanted to preserve the mainly white and turquoise color story.
There were a few small strips left over from other piecing, so I pieced a few of those together to make another strip large enough to handle my signature fabric. I wanted something that would look like it fit in.
Cheryl’s IRR – my part
I made some Flying Geese. Since those were the main parts, I started working getting Michelle’s strip completed. I added some white and a strip of the black and white stripe, which came to me after looking at the piece.
After making my piece, I think the white on the edge needs to be corralled, but someone else, or Cheryl, will have to worry about that. I am pleased with how my part came out and I think my signature fabric piece fits in well without overwhelming the whole design.
Cheryl’s IRR – finished with my part
I also think the piece needs some space at the top. The bottom is getting to be quite breezy while the top is looking a little cramped. Not fatally so, but a little. It will be interesting to see what happens.
I saw the Mighty Lucky February Challenge and groaned. the basic theme was minimalism and I was not interested.
Then I had an idea. Then I saw the notice for the CQFA meeting and that the activity would be working on quilts for the Fibershots fundraiser at SJMQT. I decided that I could get the challenge done and do some good.
Two quilt birds one stone.
I had the materials I needed at hand and got down to business.
Mighty Lucky February Challenge
As I wanted the pieces were quickly pieced. I was pretty happy, though I can see where a whole series of these would make the designs better. I felt like there was something, but didn’t know what.
I kept the pieces on my design wall for a day or two and then took them to the CQFA meeting to quilt during the work party. I took my thread with me and quilted the pieces in a simple straight line design. I had a brain flash as I progressed across the piece where I decided to add a few lines of colored thread to the quilting.
When I got home I added some triangles as a hanging mechanism as I zigzagged around the edge of the piece. Maureen suggested using some Perl cotton to stabilize the edge as I quilted so I tried that and the edges don’t seem to curl as much.
Minimalist Fiber 1 & 2
As I mentioned, my Mighty Lucky Challenge will be heading off to be displayed with other Fibershots quilts and sold (hopefully) for $100. You, too, can make one. Talk to the Museum if you want to buy one. Like mine. Buy mine. All the money goes to support the museum.
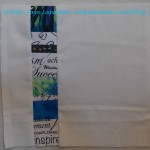
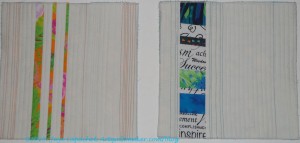
I already wrote a little bit about the February challenge, but look for a full fledged post about it soon. I am just catching up with the January challenge. I am happy with my first effort with bias tape. It was interesting and a good learning experience, but I want to try this picture again. I like the image, but my rendition didn’t come out as I had hoped.
Mighty Lucky January Challenge
I really like the thin beak of the original picture. I didn’t get the beak as thin as I would have liked. I used a lot of pins, but it was hard to keep the bias in place as I sewed and I am not sure why. The wobble also resulted in all of the straight lines ending up wobbly. This is because I didn’t have the Wonder tape called for in the directions (I have it now). I didn’t add fusible to my bias tape, which was an option I didn’t think about.
Still, I made something for the challenge. I was also expecting progress not perfection. WooHoo!
I was excited about this challenge, because I had been wanting to learn to make bias tape using bias tape makers. It might useful for embellishing or design purposes in the future. This was the perfect opportunity.
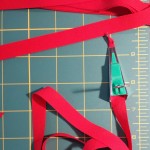
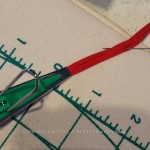
Bias Tape Start
Insert Pin
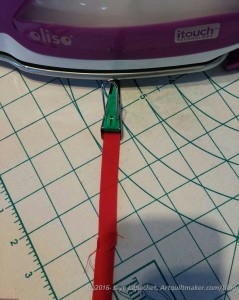
After cutting and sewing the bias, I fed the piece through using a pin and the device started making bias tape! I couldn’t believe it that the process worked. Once I got going, I found it incredibly useful to poke a pin into my pressing surface to hold the bias in place. As I reached the end of my pressing mat with the iron, I had to move the pin.
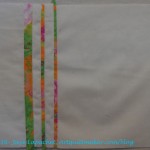
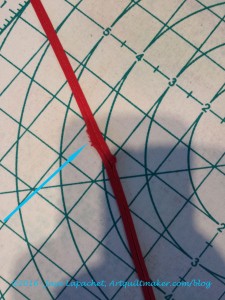
Bias tape maker seam allowance problem
I was disappointed that the directions did not talk about type of fabric or any challenges that might occur. I found a couple of things that were challenging.
First, I used a Kona Solid for the red bias tape. As I have mentioned in the past there is a lot to like about Kona, but its loose weave is not a bonus. I cut my strips about 1/2″ wide and as I fed them through the bias tape maker to make 1/4″ bias, the seams got hung up on the device. The bias tape maker had a real problem going over them as I pulled the tape through. I ended up helping them with a stiletto, but the seams looked terrible once the tape was made, as you can see in the photo with the blue arrow. The photo is of completed bias tape. You can see that the line is not smooth and there is a marked bump in the tape. Yes, I pressed the seams flat and they are still not attractive. The seams are also already starting to fray.
I am thinking that the problem could have been the fabric, as mentioned, combined with the size of the bias tape I chose to make. I’ll have to experiment some more to see what works. Looser weave fabric might work just fine with a larger sized bias tape maker. I do think I might try this technique with Art Gallery Pure Elements Solids as they are thin and tightly woven. I am not sure if that line has a bright scarlet.
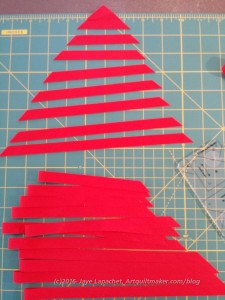
Look How Many Bias Strips!!
Second, there was no way of knowing how much bias tape could be made. There was no chart like a bias binding chart included with the directions. Would a bias binding chart used for binding a quilt work? I tried looking at one, but it don’t go down to a small enough width of tape. I now have about 500 yards of bias tape still to use, which is why I am not concerned about a do over.
Yes, I had to sew all of those tiny strips together, which was another ordeal in itself. I should have used the tube bias method.
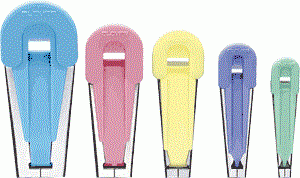
Next, I used the 1/4″ bias tape maker. It worked like a charm, but is very small. I would recommend using a 1/2″ or 3/8″ bias tape maker on your first time out.
Fourth, the directions did not talk about using a Point Trimmer. A Point Trimmer helps you line up the edges of the bias tape to sew it together in a long string. You can use it for your binding strips as well if you don’t use the tube binding method. As an aside, if you don’t have Point Trimmer ruler, you really need to get one. I like the Judy Martin version because it helps you trim two types of triangles in one tool BUT there are other manufacturers who make them and almost any are good.
Bias tape makers
Fifth, these bias tape makers are not readily available. I went to three stores, checked Amazon, Fabric.com and some other places before I found a full selection at Beverly’s. The quilt stores didn’t have them. Amazon, etc had a few, but not all the sizes and not sold in sets. None of the online places could get them to me in a timely manner. I now have a set of them and won’t need to buy them again, but I was surprised. If I were Lucky Spools, I would have made a deal with some shop to sell kits of the bias tape makers and the Wonder Tape.
Pressing Matters
Sixth, there were very few instructions about pressing. The author of this ‘lesson’ did say to keep your fingers away from the hot iron, but not much else. I used a type of stiletto, which prevented me from burned fingers. It is two pronged, which gives me more ‘holding’ surface. I think I bought it at a booth at the county fair or PIQF where they sell every kind of scissor and small metal tool known to mankind.
There is more come on this technique as I will post about my next effort.
Mighty Lucky Member
Learning is not a smooth process. I am not complaining about any of the above; I am just telling you my story. One lesson for me is to try different brands of solids. Kona is just so easy to find! I am glad I tried this technique and learned how to make bias tape with these devices.
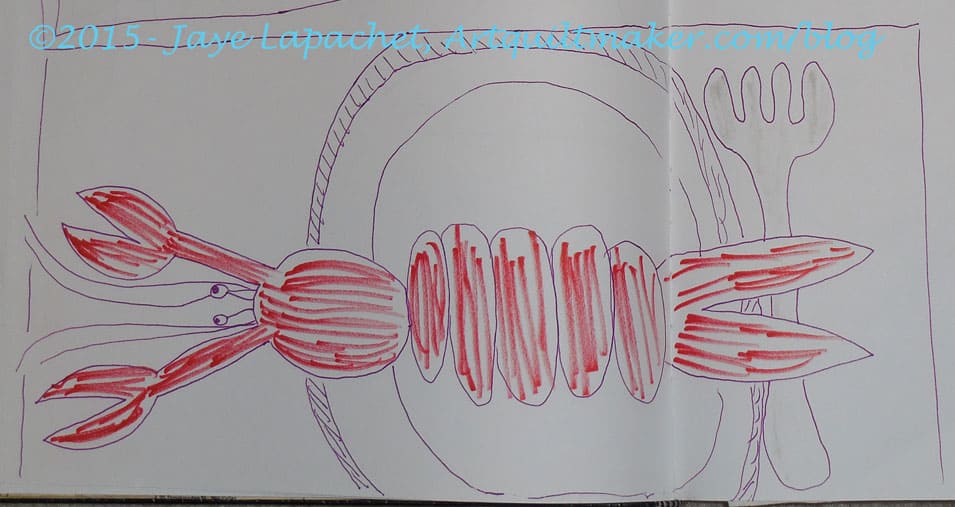
There was, at some point, a placemat challenge issued at CQFA. I don’t normally do challenges, but an idea popped into my head. It stayed in my head until the May 2014 meeting where Jen did a workshop on “from drawing to art quilt” That workshop was also about line. I took a minute to get my idea down on paper.
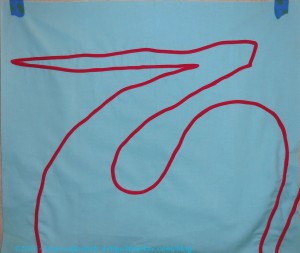
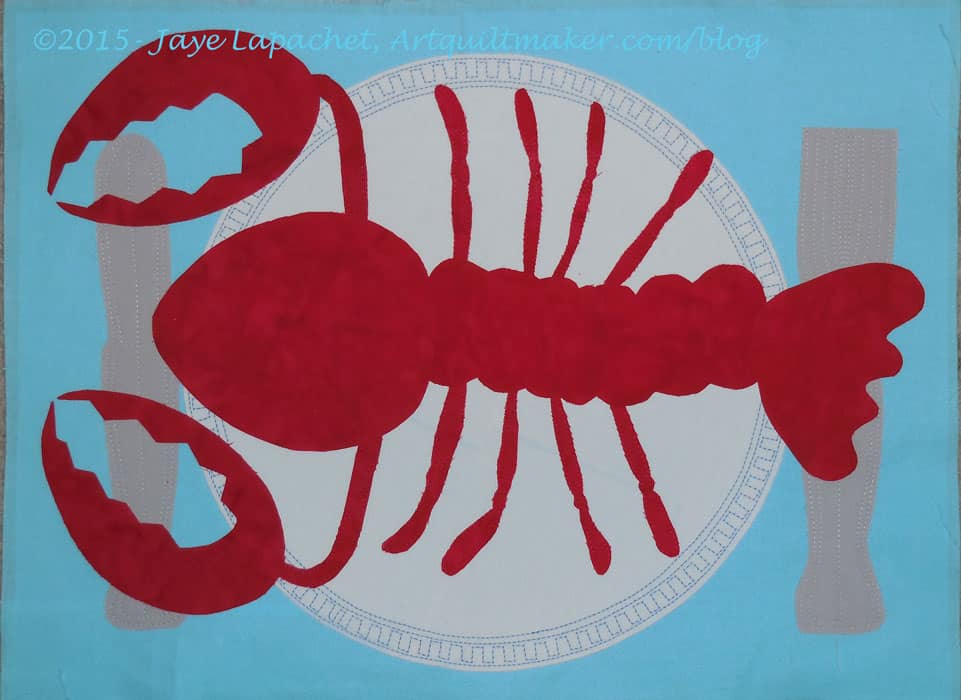
Sketchbook book lobster placemat
This past week, since we were having a CQFA art show, I started in on the piece. It is mostly applique’ — well, it is all fusible applique’ at the moment, but I am not finished and I may add some piecing around the edges.
Lobster Placemat in progress
I showed it off at CQFA yesterday during the art walk and people seemed to like it. There was some discussion about next steps. Caroline suggested googly eyes for the eyes, but I am not sure that is the direction I want to go with this piece.
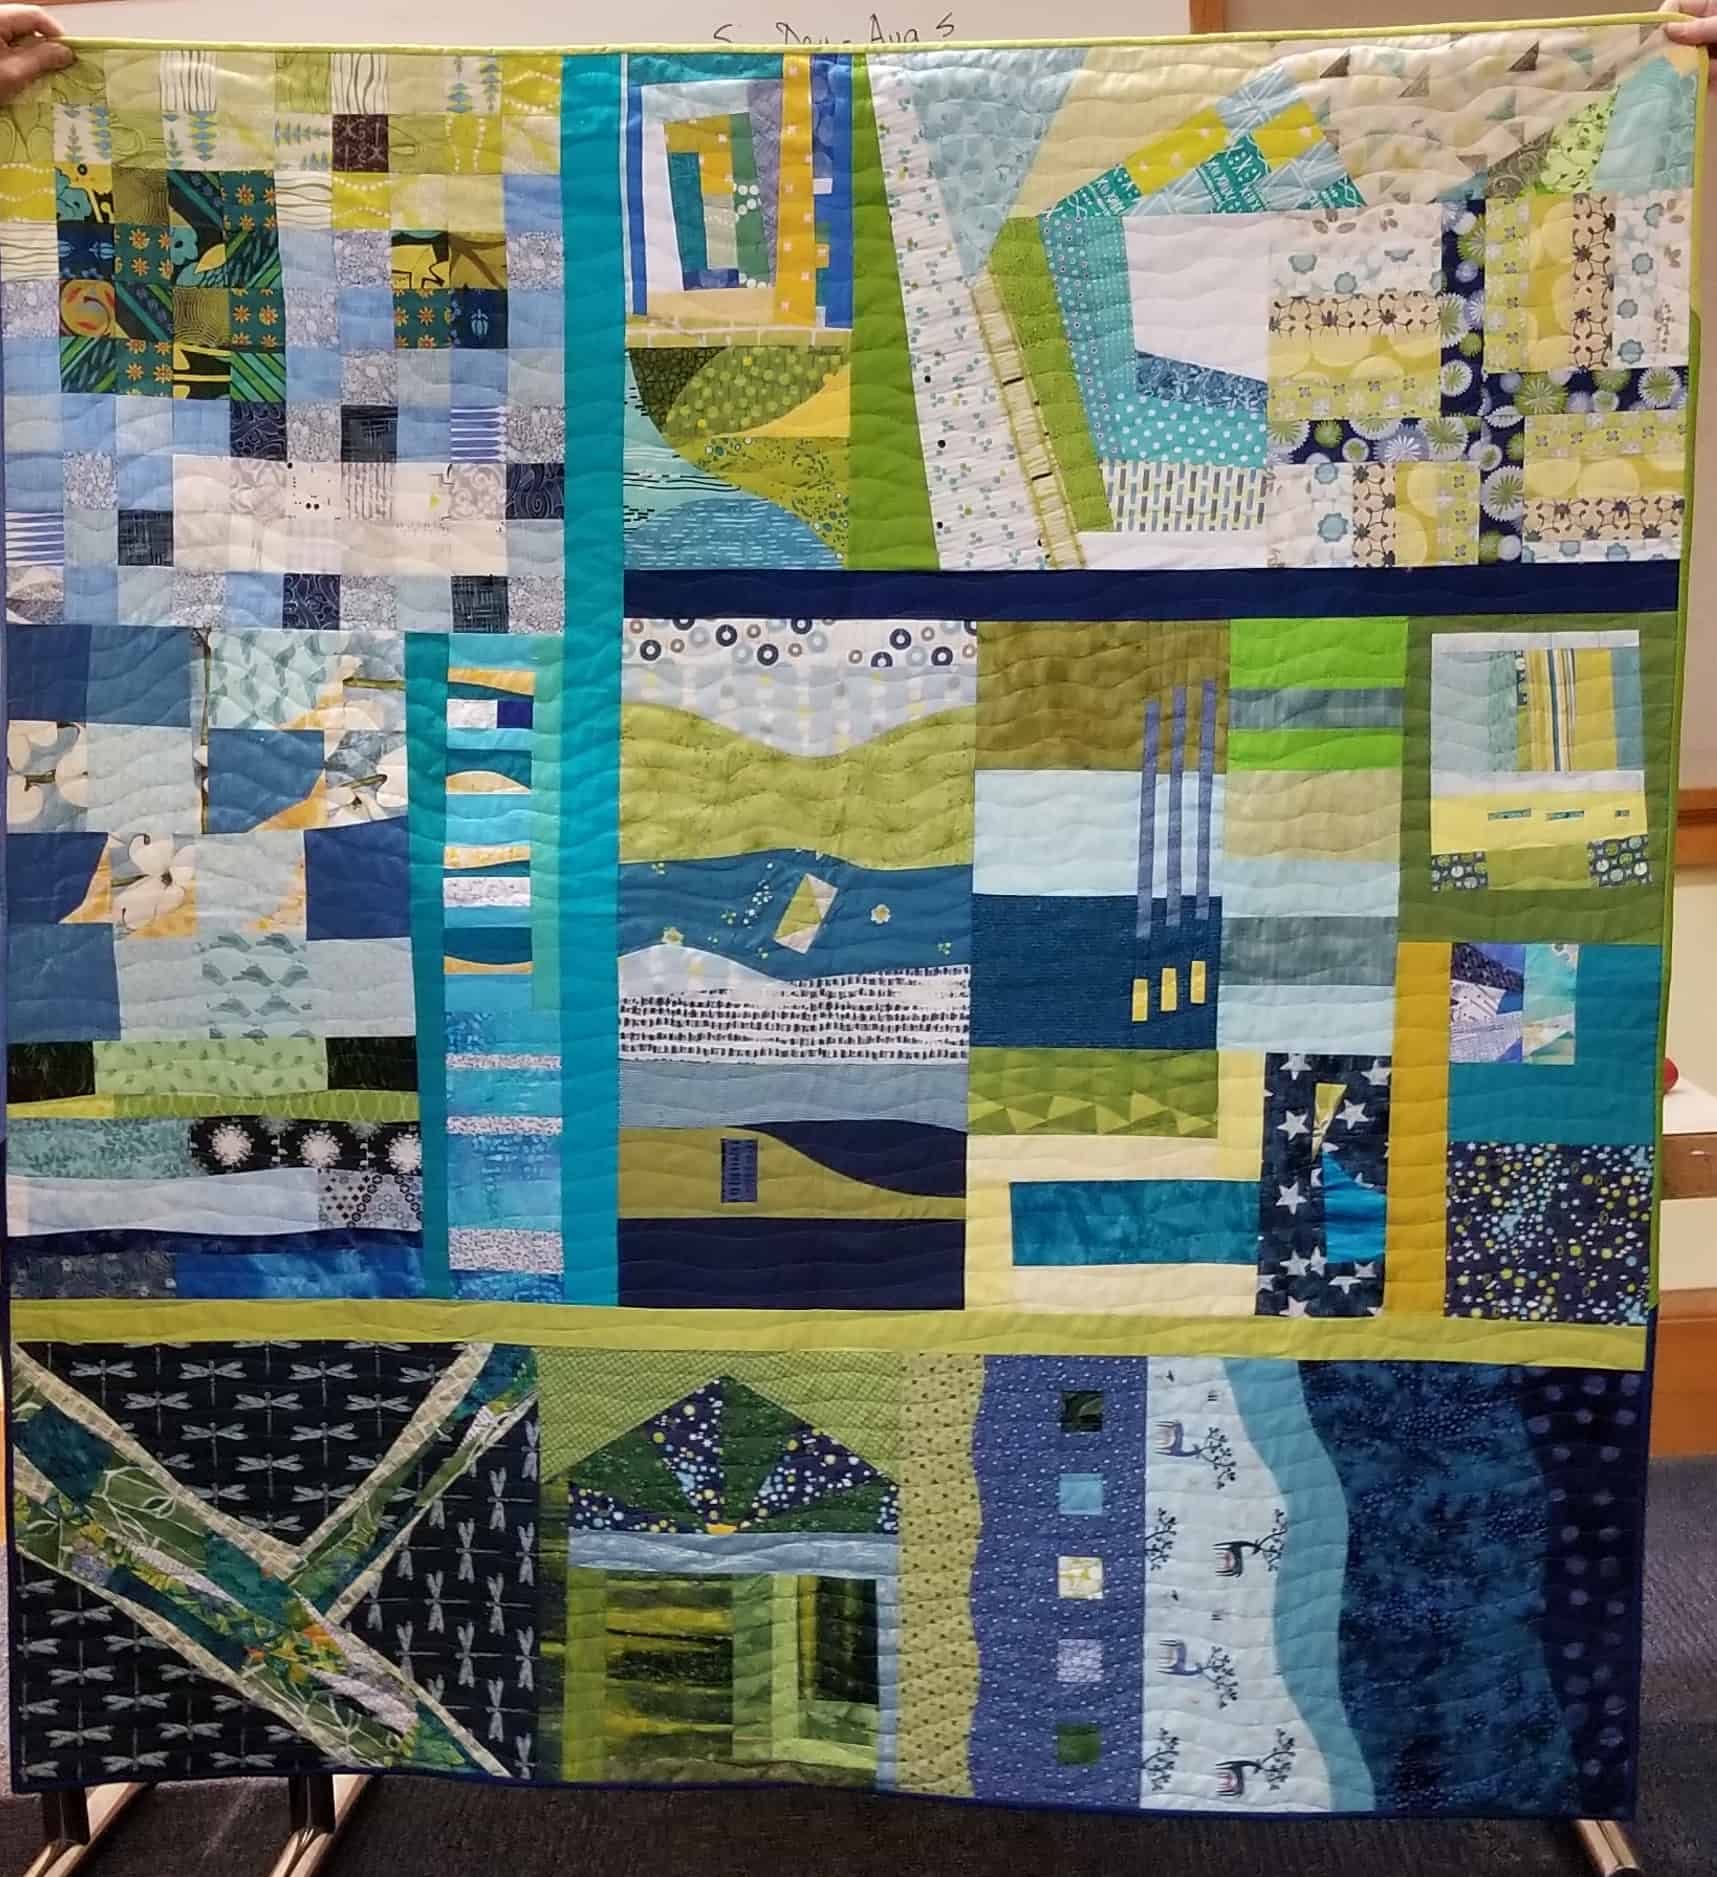
There will be a workshop on Saturday at the CQFA meeting based around this photo, Spring Comes to Humboldt. The name of the workshop is the “Same Design, Make it Mine” challenge.
The guidelines of this workshop are:
1. Look at the photo and recreate the sense of it in your medium of choice.
2. Use your own style
3. Use your own favorite techniques
4. No whining
CQFA Members: bring materials and supplies to the meeting as we will work on our own projects during the meeting.
While this workshop is primarily set up for CQFA and will be held at the meeting, everyone who reads is welcome to play. You can post your efforts to the AQ Flickr Group, or the CQFA Flickr Group, if you are a member. <Nota bene: you can easily be a member for a small payment of dues!> CQFA members should bring their finished or in process works to an upcoming meeting.
Yesterday was the BAMQG Holiday Party and Meeting. The meeting part was relatively short, then we had the gift exchange and Show & Tell.
I mentioned that I had made a gift for my Secret Santa and showed it a week early, which led to the realization that I was able to make the meeting. The recipient, Laura was really pleased with the tote bag and needle case I made. I really should have put pins and needles in it as I think she was a little confused about what should go where. I showed her and I think it ended up okay.
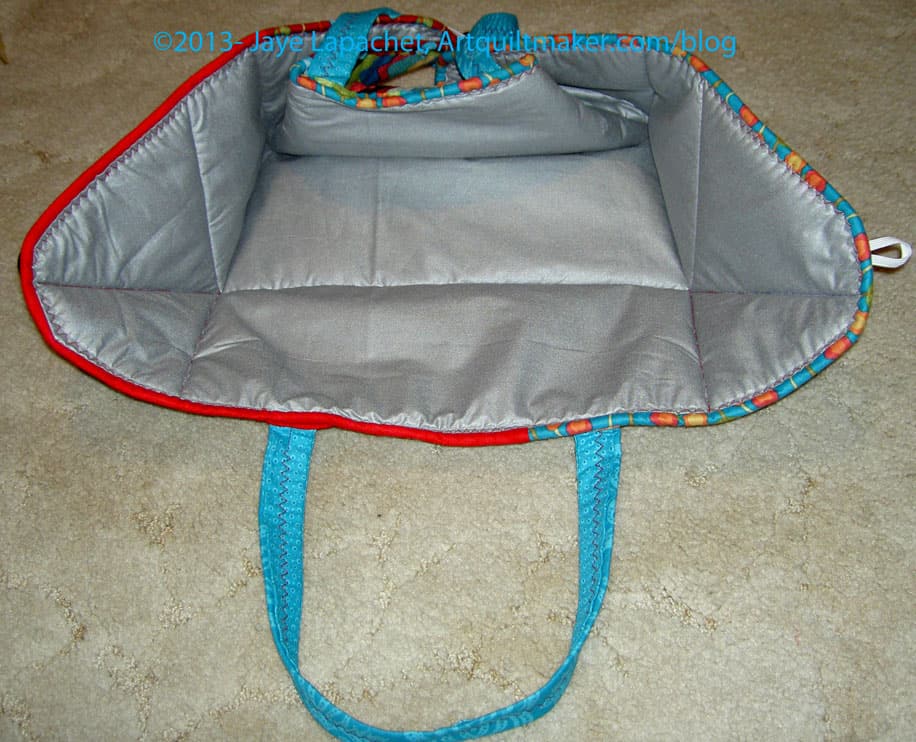
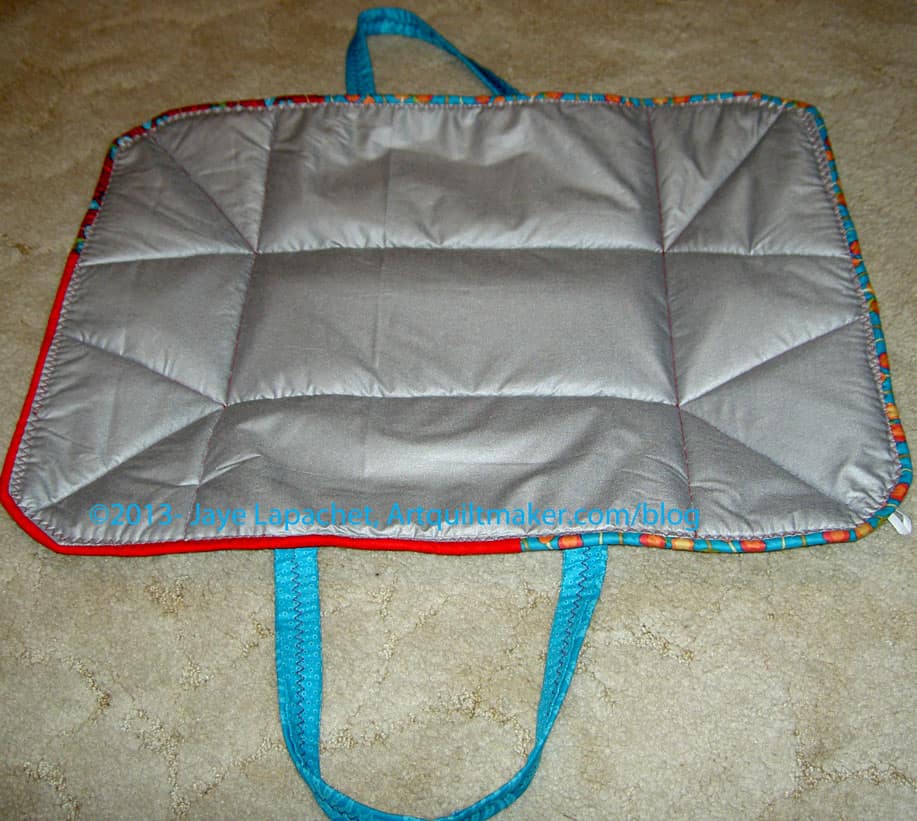
Jen was my Secret Santa and she made me this Iron Caddy. Didn’t she do a great job?
Iron Caddy – half open
Jen said used a free pattern she found somewhere on Ning. She said she made two of them alongside each other so she could test the pattern. I thought that was really sweet; it made me feel like she really cared about the gift to me
The pattern she used didn’t sound like the same one Julie told me about that so frustrated her.
Jen did say that there was one measurement off — the 7″ measurement in the middle should be 6-1/2″. I haven’t tried it so, pay attention if you make this pattern.
I still have not yet made the Iron Caddy pattern I bought at Quiltin’ Cousins, so perhaps I am off the hook?