I thought it had been an eternity since I wrote about this project, but it turns out it has only been about 10 days. June has flown by at mach 10 so I can’t really keep track. Since that last post, I have made at least one more block.
I am liking the blocks better, especially since I am able to see them all on the design wall together. They look ok separately, but the secondary design really explodes into wonderfulness when I put them all together.
I have about 7 blocks now and the urgency of laying them on the bed to see how many more blocks I need to make is becoming more urgent. Why I can’t grab the blocks and walk downstairs with them is a mystery.
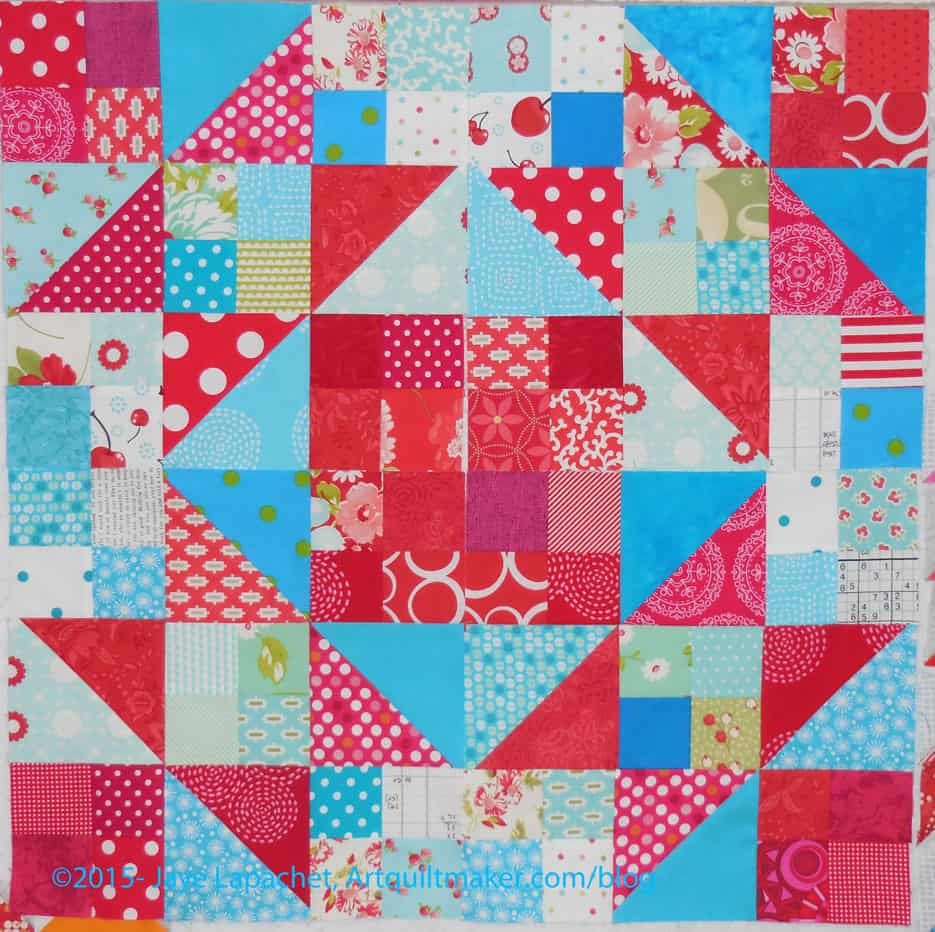
6 Blocks Together
The group of 6 blocks together looks really nice. (6 makes for a more even picture than 7.) I am glad I was strict with myself on the colors, because I think it is looking good. There is a rogue red patch, which I don’t understand, but I probably will just leave it.
As usual, despite the wide variety of fabrics, I still feel like I don’t have enough to make the piece look scrappy enough. I probably need to get over myself.
I haven’t posted about this Stepping Stones project since February, mostly because I haven’t really worked on it until recently. And ‘worked’ is a generous description of my efforts. I have been pushing red and turquoise through the machine as leaders and enders in between Field Day and the Food quilt.
Voila!
Stepping Stones June 2015
More blocks.
Progress. And so it goes.
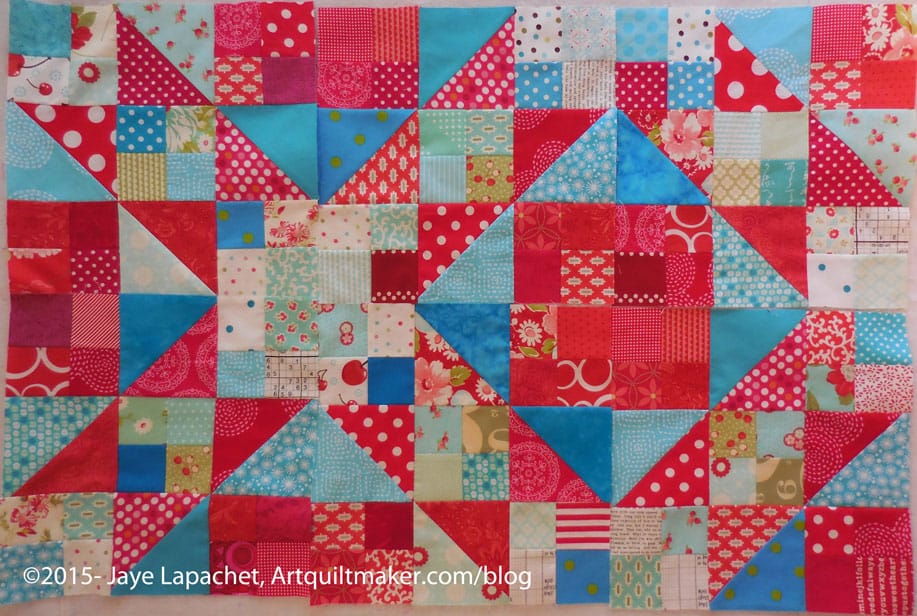
I plan to be a little more precise as I make the blocks so I don’t end up with a weird shaped quilt. Sometime I’ll drag the already completed blocks downstairs and lay them out on the bed so see where I am. I haven’t done that yet, though. 8 blocks does not a quilt make, but they are large blocks and we have a small bed, so I don’t imagine I will have very many more center blocks to make.
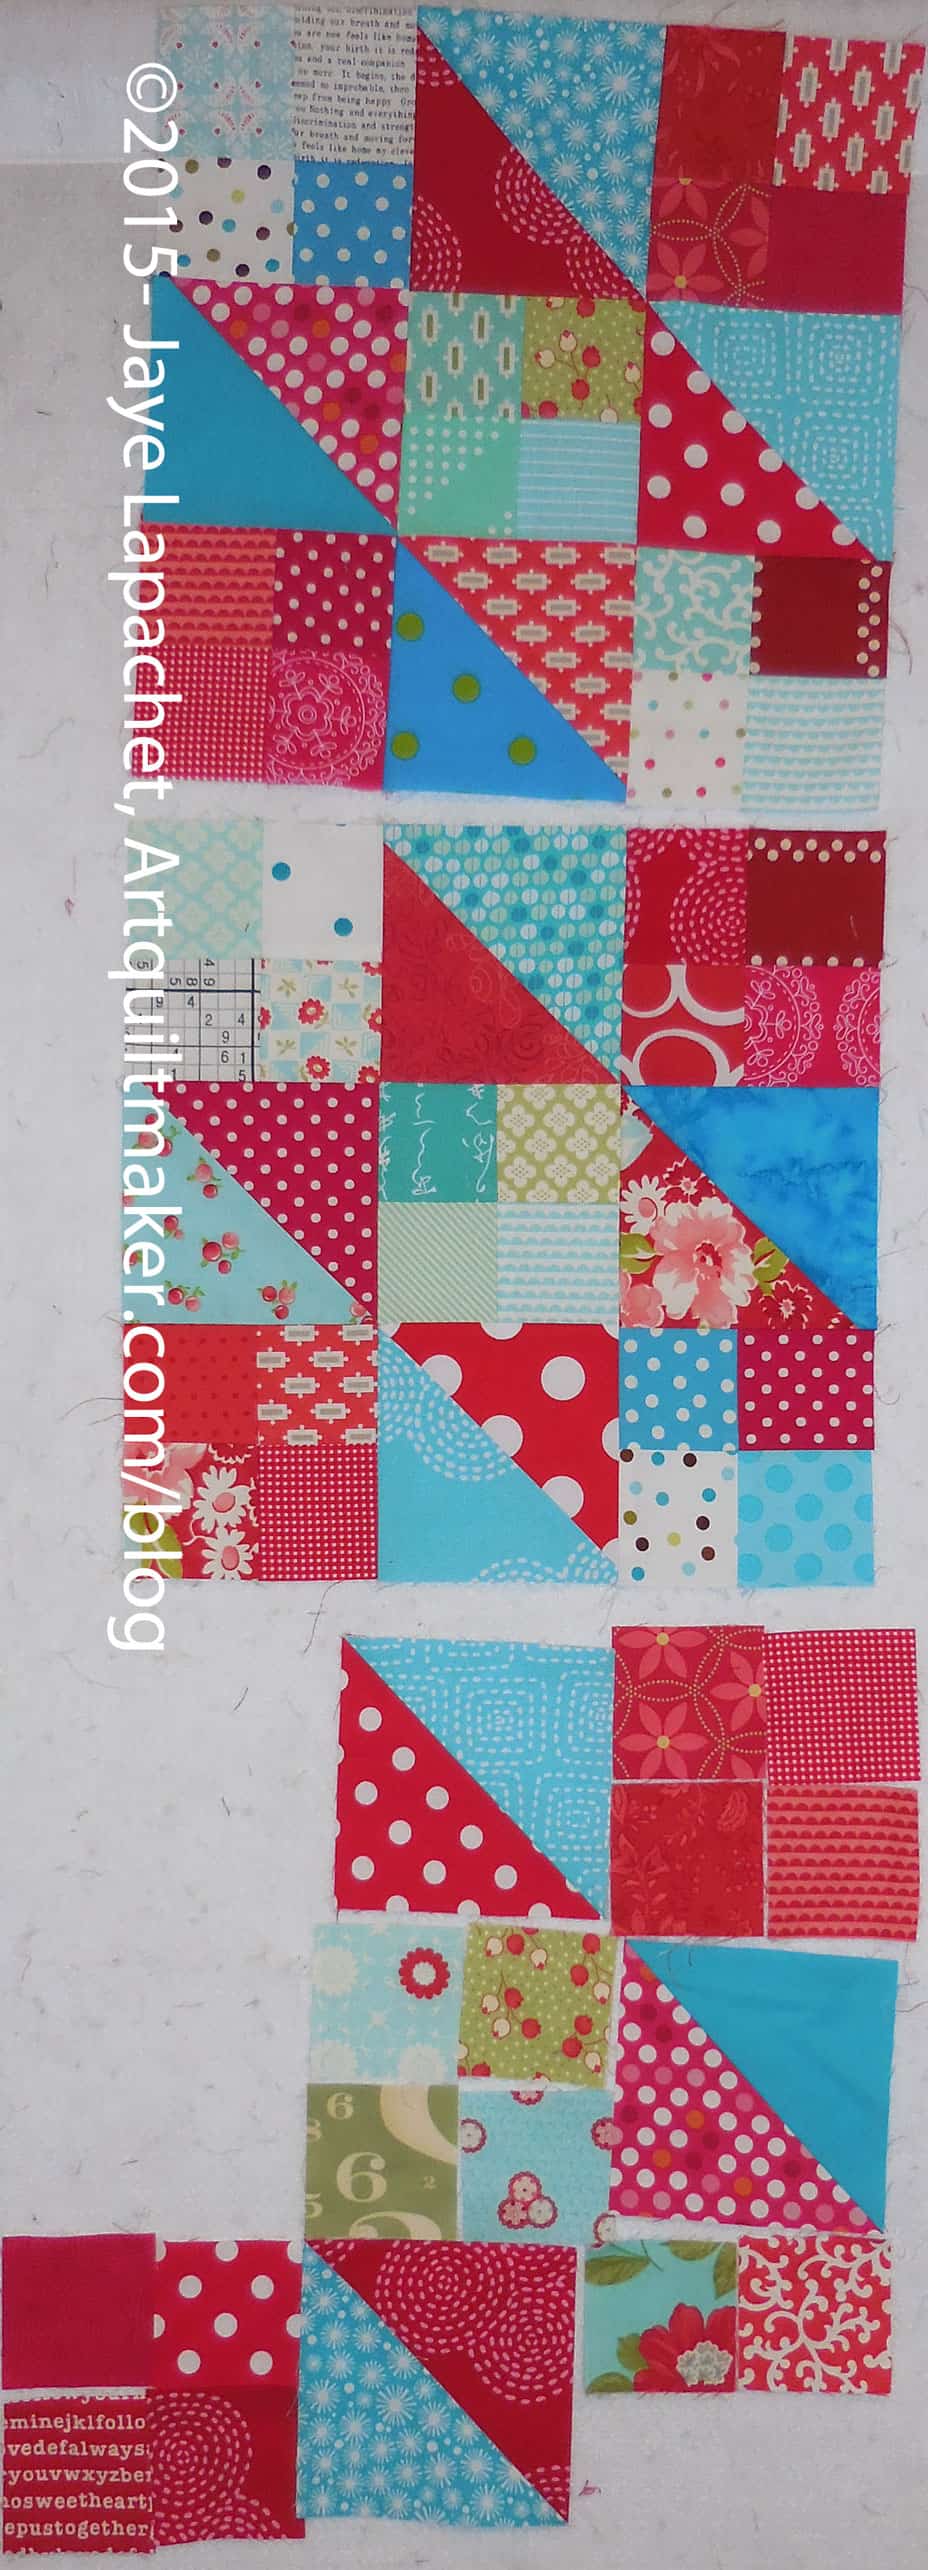
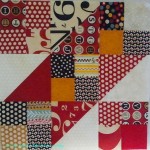
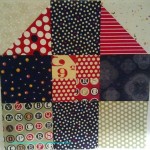
I made these two top blocks as leaders and enders when I was working on the borders of the Food Quilt #2. The bottom one is, as you can clearly see, still in progress. I do take my time picking out the fabrics to include.
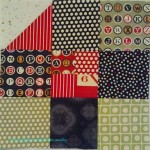
Even though I had cut about 1,000 pieces of fabric for this project, I was about to abandon this project. I wasn’t happy with my first efforts in the new colors. I determined I would make 4 blocks and then decide on whether or not to proceed. I am glad that was my strategy because now I like the piece.
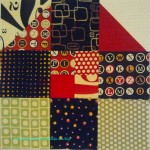
Stepping Stones #2
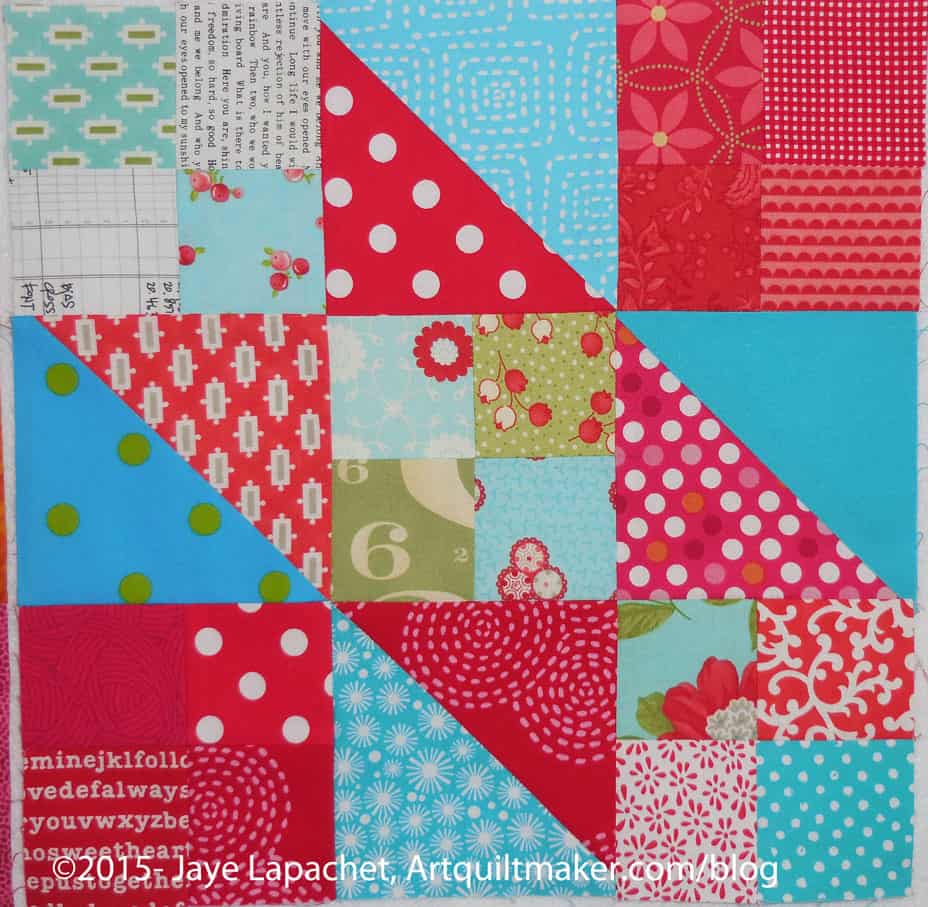
Part of why I like it is that I see a Sawtooth Star emerging. If you cover up the center and right side with your hand and just look at the right side you will see the legs of a Sawtooth Star emerging – the part that is normally formed by Flying Geese. That secondary pattern adds a design element I did not anticipate and do not see very well when I look back at the first Stepping Stones quilt.
There is better contrast, I think, in this version, though the red 4 Patches coming together in the center are a very strong design element. Looking at the previous version, I know I will have to pay attention to the border so that the Sawtooth Stars, if I want to keep them, will not be cut off. I think that means a different border.
As an aside, I fell down the Pinterest rabbit hole and saw this same pattern done in Denise Schmidt fabrics on the 3and3quarters.net blog. I was really interested in her fabric choices. I think her version looks so great! It makes me wonder anew why the Lintott girls chose the colors they did. I really dislike the examples in their book.
I have been a little on the cranky side lately – not cranky exactly, but a bit out of sorts. I am not sure why, so I blame work.
I have really wanted to sew and haven’t been able to settle on anything that demanded I get myself to the workroom and work on the project. As a result, I thought it would be a good idea to work on a project that would really be exciting to me. I like my other projects, but don’t want them to be #1 right at the moment. I know this means starting something new and not finishing things. TFQ reminded me that sewing/quiltmakingshould be fun and not something I should do. I am taking my advice and her advice.
I dug around and pulled out two Lintott books and the two Kim Bracket books I have. I perused them to see what interested me, but was still enamoured with the Stepping Stones pattern in Layer Cakes, Jelly Rolls and Charm Quilts, pg. 72-79. I have been wanting to do this in the Bonnie and Camille fabrics (remember the test?), but wasn’t really happy with the background choices. The B&C greys are a bit depressing. I think they have some taupe or brown undertones I eschew. Bottomline: they didn’t really give me the look I wanted. I bought a solid during a binge of end of the year fabric therapy with the intention of using it as a base for the background. I still want it to be scrappy, but I should be able to use it to compare other possibilities.
One PITA is that there is a lot of cutting that has to go on before very much sewing can happen. The other PITA, which I am sure I mentioned as I worked on the first Stepping Stones quilt, is that the pattern doesn’t say that I should use light medium or dark to get the overall pattern. It actually uses the colors they used, which isn’t very helpful if the maker is using different colors. To make matters worse, the photo in the book is pretty bad and I am shocked that a great publisher like David and Charles would allow such a photo to be used in one of their books.
As I worked through those problems, I realized that I really wanted to push fabric through the machine. But I didn’t want to just sew mosaic piecing; I wanted to sew with a purpose. I wanted to sew something that would make me happy. Two goals a bit at odds with each other.
I started in anyway thinking I could always stop all the thinking I had to do to get the Stepping Stones to a stage where I could just piece. I pulled out my bin of Bonnie and Camille fabrics and started pressing and cutting and placing and looking.
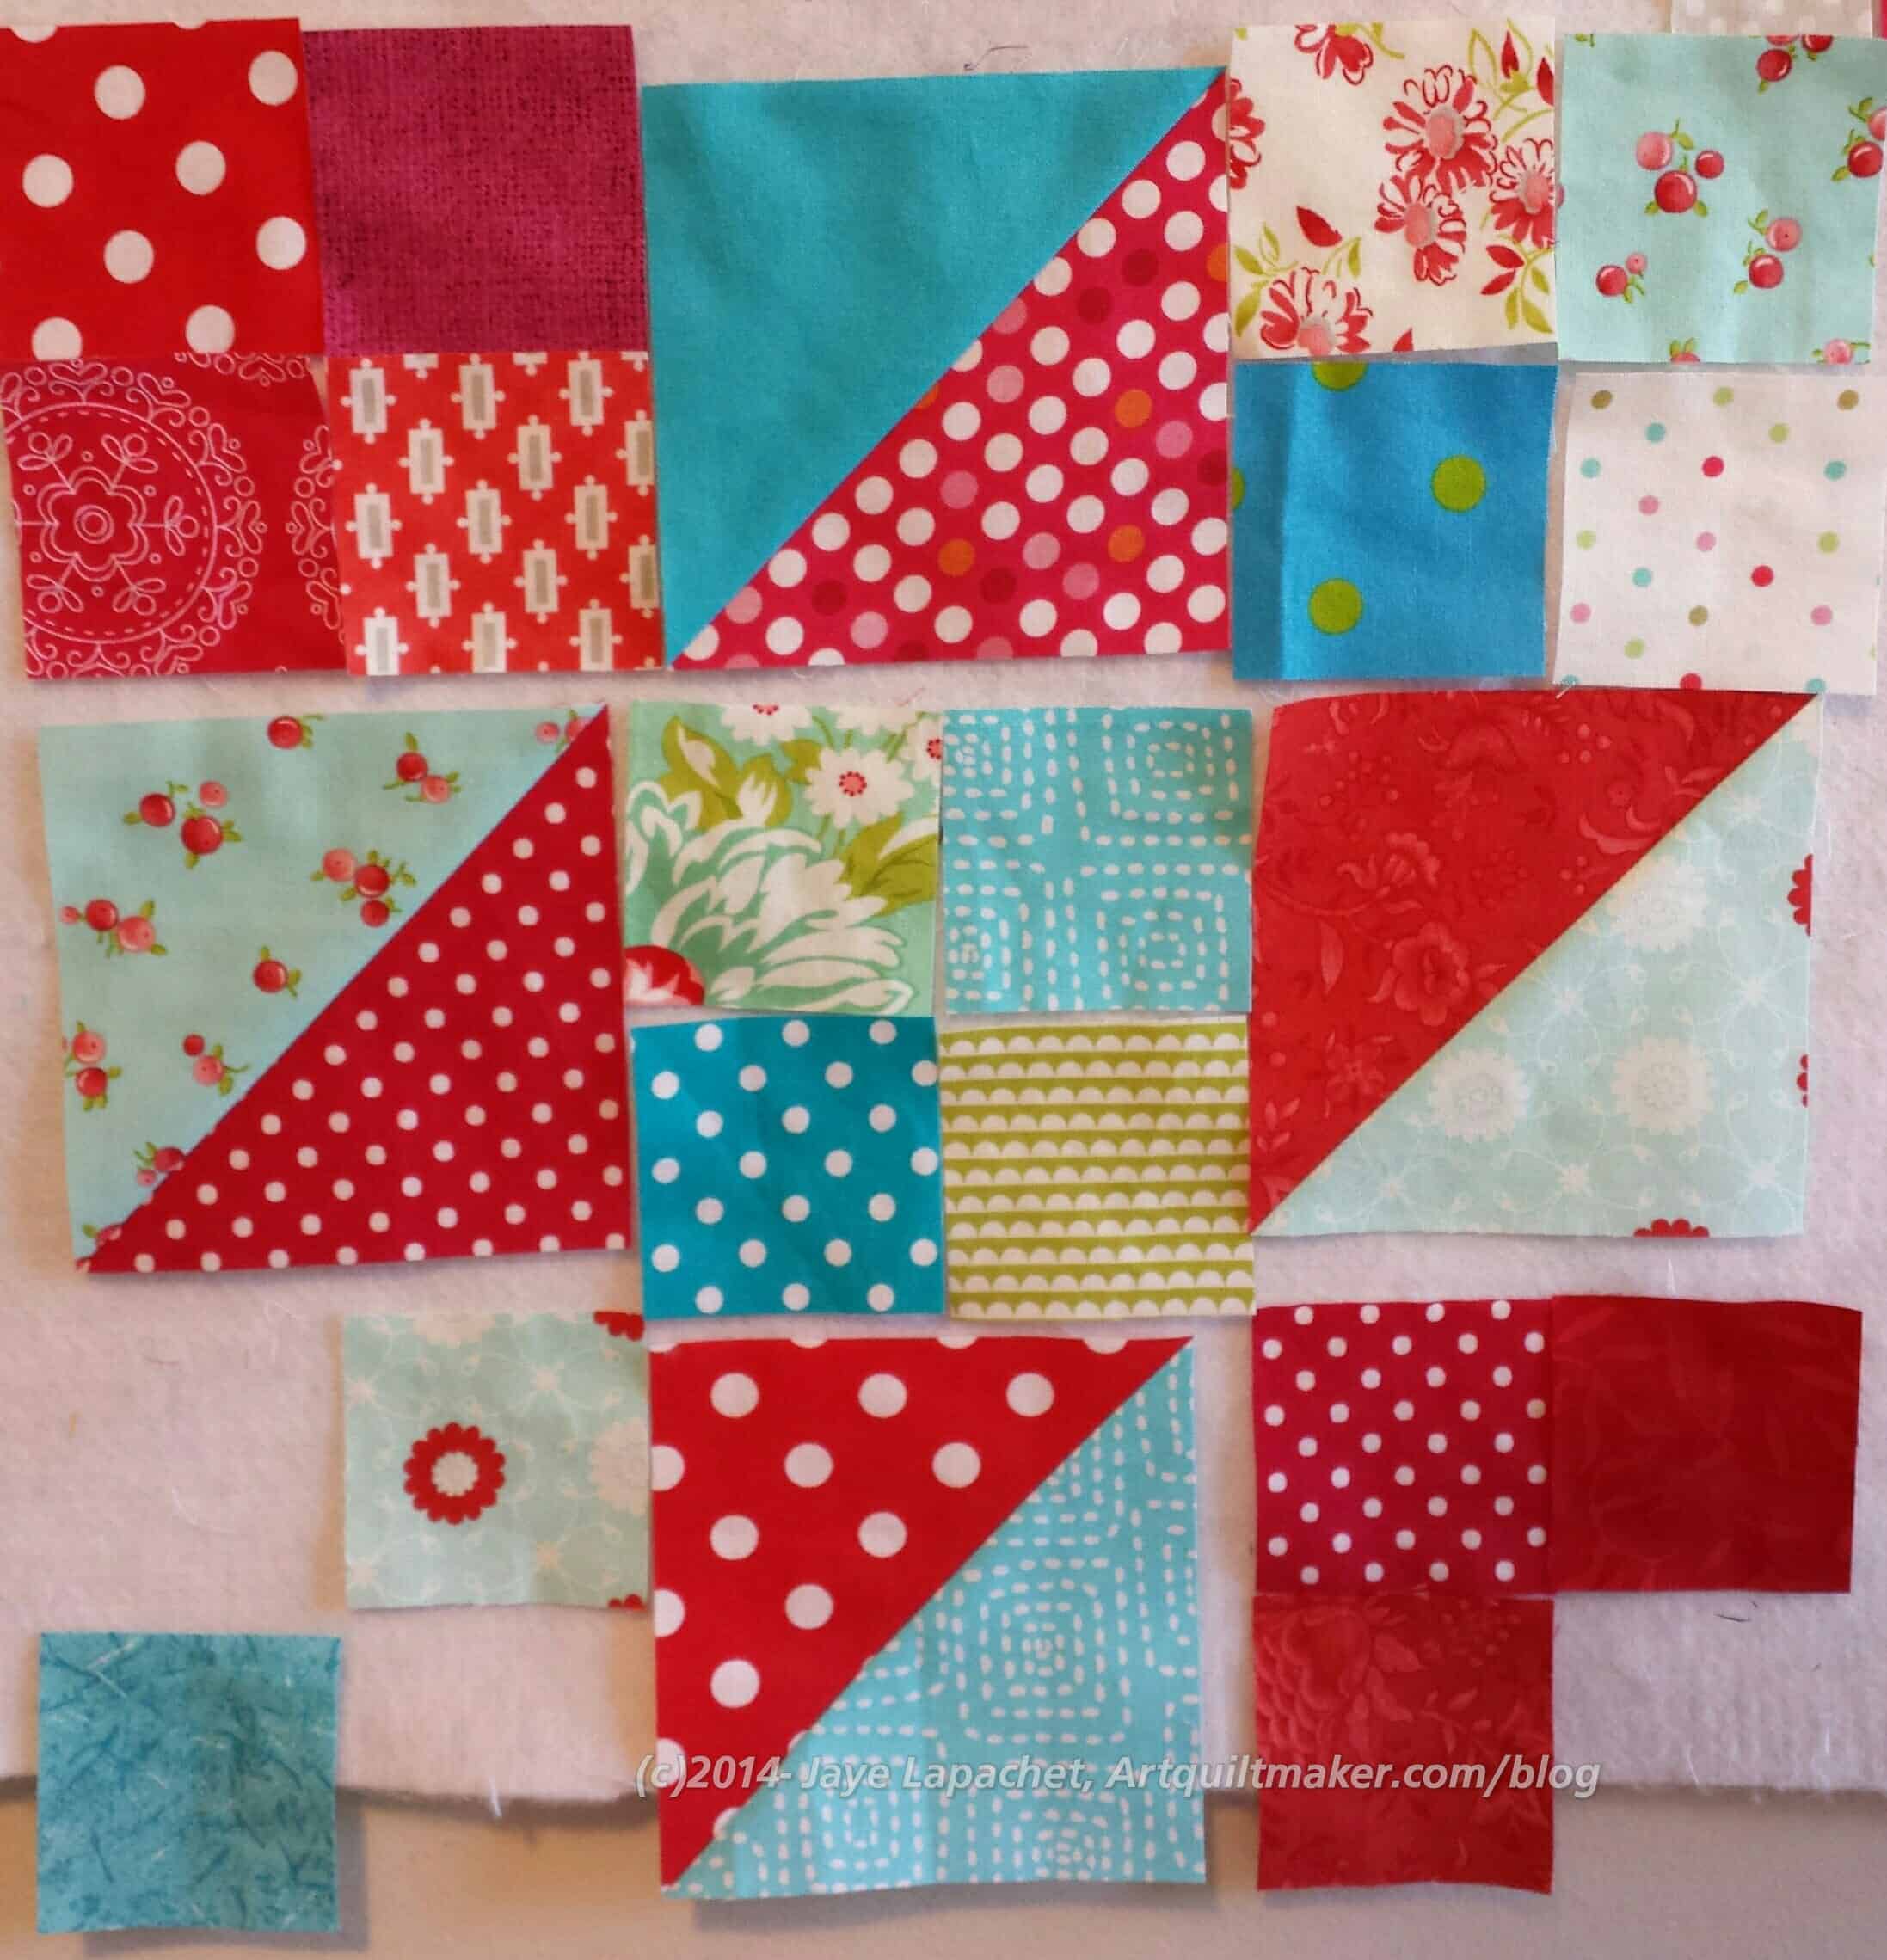
Turquoise/Red Stepping Stones block in progress
An odd thing happened. I gradually moved from all Bonnie and Camille fabrics to some Bonnie and Camille fabrics and other more turquoise, scarlet and pinky red fabrics. I like the Bonnie and Camille fabrics, but the overall effect of them, for me, was not cheerful enough. They have a vintage look, which I like, but somehow the feel was too calico and not quirky enough. I think of vintage quilts (as opposed to vintage fabrics) as a bit quirky and ones I like do not have the feel of small calico prints.
I really like dark pinky reds and bright turquoises. The Bonnie and Camille fabrics have softer turquoises, tending towards light blue and a lot of orangey reds.
It is interesting how pieces evolve. I am also happy that I was able to give myself permission to use more than just the Bonnie and Camille fabrics. I know that sounds odd, but stuck in my mind was a quilt with Bonnie and Camille fabrics. Moving beyond the idea of a quilt from a whole line (or series of lines) of just Bonnie and Camille fabrics required a major brain shift. I am glad, because I am able to use some non-B&C fabrics that I really like while keeping some of the Bonnie and Camille fabrics that fit in with my new vision.
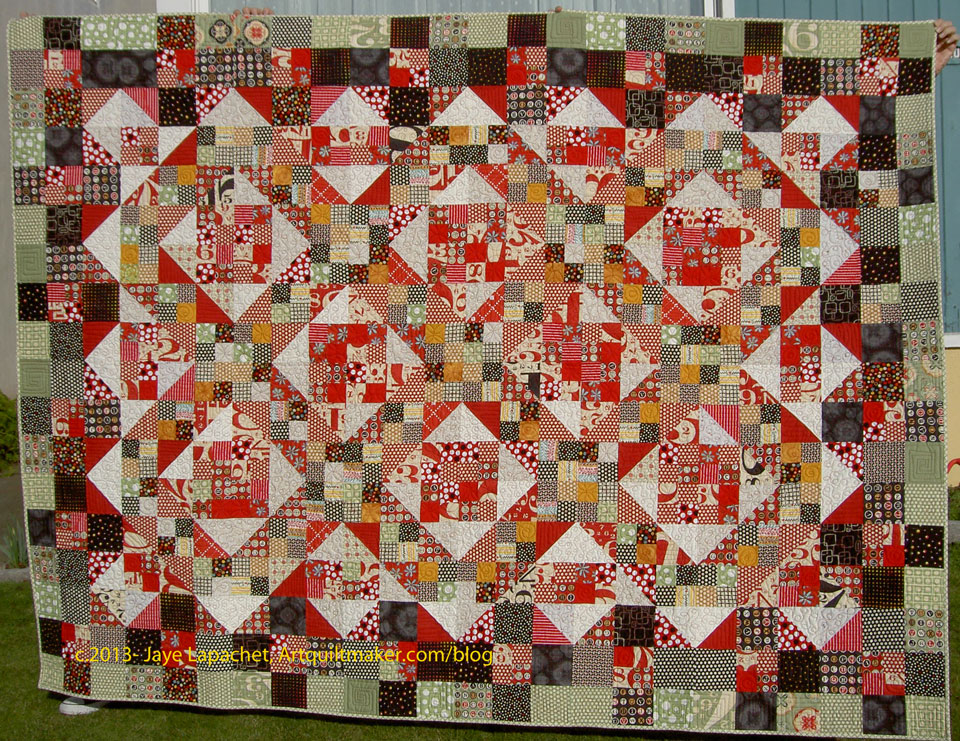
I finished the Stepping Stones on Thursday night. I was able to take a photo in front of the house when I had a spare young man to help hold the quilt.
I like the way this quilt came out and after I show it off at the guild, I will send it off to one of the nephews.
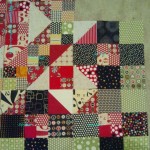
In general, I am pleased with it. I think it does look better close up. Of course, the quilting is fantastic. Looking at from this distance makes me see how the colors could be done differently.
Sandy, of Quilting…for the Rest of Us, in episode 116 and 117 spoke about the differences between the way Bonnie Hunter and Kimberly Einmo explained how to choose fabrics for their mystery quilt projects. It made me thinking about the pattern for this quilt and I think the same principles apply. The authors of the book assume you are going to use the same fabrics they used, though I think they do mention that you can use any fabrics in passing. They don’t say where you need contrast and where you need some parts emphasized. From looking at this picture, I see how I should have extended the points of the diamonds into the border (the border was my own design) and how some of the reds have too much white in them. I think the book would have more shelf life if more attention was given to the fabrics. Kind of a shame, really.
I do want to make the pattern again so I can try to do better. You know I have been working on sample blocks using various Bonnie and Camille lines. The biggest thing I realized is that I need contrast – a lot of contrast – between the background and the foreground.
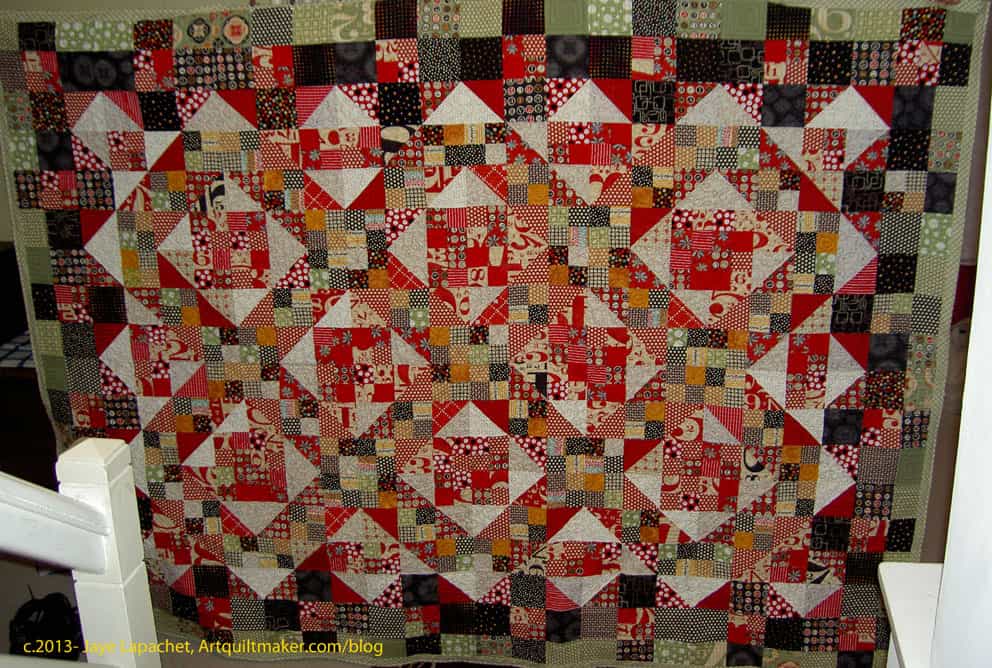
I didn’t just take a bunch of quilts to be quilted on Monday a week ago I also got the Stepping Stones quilt back from my quilter. I am sort of diligently working on the binding.
This quilt was so big. The boys insisted that I had to take the photo from the top of the stairs. I don’t know, but I didn’t want to fight with them about a photo. I’ll have to figure out another way to take the photo full on with no banister in the way.
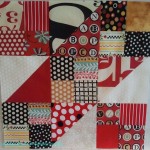
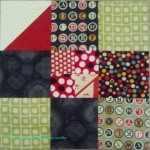
I finally made the second block for the Stepping Stones test (note: when I say it is a test that means it cannot, yet, be a project). I introduced this project test in a previous post.
I finally finished the second block and it helps me see the pattern starting to emerge. It is very clear to me that the flower print with the grey background is not going to work. It muddies the line between background and the big red blob of squares that will end up center the diamond formed by the half square triangles. I like that print, but I’d like the lines to be a bit clearer than the previous Stepping Stones quilt.
I have to be clear with myself that the pattern truly emerges when the whole quilt can be seen. a few blocks just doesn’t do the thing justice.
I am really not starting this quilt, but it is firmly in the hunting and gathering stage. I have wanted to do another Stepping Stones quilts since I made the first one now that I know the color placement.
I thought this would be a good quilt design on which to use the various Bonnie & Camille lines I have (Bliss, Ruby, some Vintage Modern).
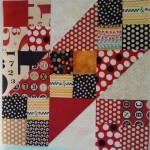
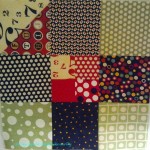
The idea has been on my mind and this week, I just got a bug in my ear to try out the colors. Not sure I like the great. It is kind of dark. I like the tone of the grey in the middle patch on the right, but I am not sure about the other greys. I have another block underway and will see when I put the two blocks together.
The Stepping Stones top is done. It is quite large and my quilt hanger was not able to hold it to its full width. I am pleased with how it came out, though I think I will add a quilting border to preserve the pattern.
I used the leftovers to make the back, which is even larger.
Stepping Stones Back
I don’t know when it will be quilted as I have not heard from my quilter and have not found anyone suitable to step in.
Stepping Stones Corner
In the corner photo you can see the modifications I made to the pattern.I am pleased with how it came out and how the green in the center works with the green border blocks.
Monday was the Boxing Day Sew-in, which was organized by Sandy and contributed to by various other podcasters and quiltmakers. I have to say that I jollied myself along to get involved and am glad I did, because I had a great time watching the tweets scroll past AND making major progress on the Stepping Stones.
Somehow the Stepping Stones project was well on it’s way to becoming a chronic UFO. I don’t know why. Somehow it just became a chore. I think that starting it around Thanksgiving and then not having my usual sewing time to devote to it contributed to the feeling.
Spending time on it on Monday and getting cheers from others participating in BDSI was the shove I needed. The support felt great and the project is well on its way to completion.
Starting Point
This is where I started. Looking at it now I find that I had made good progress. My whole problem was my attitude. Perhaps I am a fickle creature and if I cannot work on a project intensely, I become angry at it and want to move on?
During the day, we were all tweeting our progress and I was using my cell phone to take pictures. I hope the pictures are acceptable quality.
Center Done
By 10:30 or 11am, I had finished the center part of the quilt. I was able to start in on the border. As you may have seen in the previous post, I decided to modify the border so it looked more finished. As such, I needed 4 corner blocks that were slightly different from the side blocks and then 20 side blocks.
Corner labeled
Again, I was able to finish the corner (4) blocks and 2 of the side blocks. This allowed me to take a look at the way the corner would look and if my design had the desired effect. The quilt top always looks different once sewn together, but I think it will suit me.
Yesterday, I sewed several big chunks together. this is another monster quilt, so it is taking me some time to get it sewn together. I would like to have the top and back done by the time I go back to work on the 2nd. I had really big sewing plans and the holidays got in the way.
Now back to listening to my audio book and getting this baby finished!
The only quiltmaking I have gotten done in the past few days is in my head and on EQ. I decided I would rather have a self border on Stepping Stones. I thought the border they had looked nice, but a bit unfinished. This is the current border I am planning on making.
TFQ pointed out that the green in the border looks good in the border, because I have more green in the center blocks in the EQ drawing. I have to make sure that I have enough green in the actual quilt.
I am at the difficult point in this quilt where I am over it, so I need to make some progress so i don’t have to add it to the 26 Projects list. I hope to make some progress, even a miniscule amount today or tomorrow so I feel like I am actually sewing. There is a possibility since all of my houseguests are gone until Christmas Eve and it is some kind of rule that I can’t sew on Christmas, so it is ok that they will be here. They may not even sleep in my guest/workroom since they hate walking up the 3 flights of stairs. Perhaps I’ll pretend I am doing last minute wrapping and go sew. 😉
I have really not turned on my sewing machine in two weeks. A little here and there, but nothing major since Thanksgiving. I am scraping the bottom of the barrel for blog posts as a result. I am planning to ignore the world (possibly in my pajamas) all day today and work on this project.
Stepping Stones
As I mentioned before, I got this pattern from a Pam and Nicki Lintott book. One thing that is very confusing is that they have written the pattern for one line of fabric. I am not using that line, so I had to translate and that proved difficult for me. I don’t like the directions very much. I don’t think they are bad, but they don’t really work for the way I work.
So, earlier this week, I sat down with EQ7 and made a rendition of the quilt. This helped me wrap my head around the project a little more. This exercise coupled with the math that TFQ did for me when she was here made me less frustrated and excited about this project again. I organized a bit last night while the boys were out, so I am ready to sew like crazy.
Some time ago, I checked a Pam and Nicki Lintott book out of the library. One of the patterns intrigued me.
Moda Circa 1934
The other day, I stopped at the Granary in Sunnyvale and saw the Circa 1934 fabrics from Moda. I bought a few of them and a layer cake. Once I got the fabric home, I decided to try the Stepping Stones pattern using the fabric during the Thanksgiving weekend. I can’t even remember the last time I bought fabric, washed it and immediately started using it. I want to get to the point where I do that more often. Sometimes the excitement of the fabric is fresh in my mind when I buy and I would like to capitalize on that excitement in my work.
Fabric selection for quilt
I didn’t buy large pieces of the whole line, so I knew I needed some additional fabrics. Also, I want to take Joanna Figueroa’s advice and work towards using only 80% of a line so that my quilts look different from other quilts that use a whole line.
4 Blocks
I looked at the layer cake to get a few ideas about colors to use. I picked some fabrics out of my fabric closet and set to work. There was a bit of pulling colors out of the pile, but I really wanted to sew and tried not to be too picky.
I am not very experienced at following patterns and I had trouble with this one. I am not used to making a whole bunch of one element at a time, then making a whole bunch of other elements and finally sewing them together. I have to admit that once your elements are made the sewing goes quickly, but it was a lot of time on my feet.
Also, I didn’t like the pattern, because it didn’t clearly tell me how many of each triangle square and four patch I needed, nor did it tell me what size they should be (finished or unfinished). I tried to guess and hope I got it right.
Finally, the pattern is not written in such a way where it is easy to switch out colors. I would have preferred if they used terms like “light,” “dark” or “medium.” Even if they used “large floral” or “fabric with small repeat”, it would have been a bit easier to NOT use the colors and fabric line the authors used.
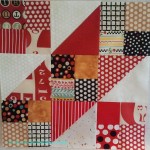
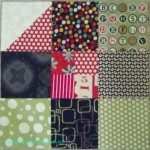
1 block
The blocks appear large and are coming out fine. I am liking how it looks, though I see now where I could have used more contrast.