Swoon #3

Swoon block #3
Swoon block #3

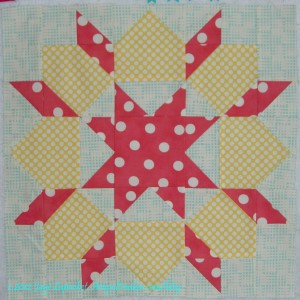
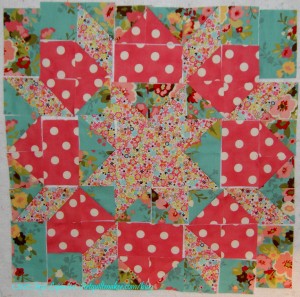
As I mentioned in my previous post on Swoon block, I am trying different ways of making these blocks. For this block, Swoon #3, I tried to make the yellow pieces one piece of fabric rather than cutting them into squares and half square triangles. I want to preserve the print as much as possible and not have those sections look choppy. I thought segments of the first Swoon block looked choppy.

I am very pleased with how this block turned out. The road was rocky, however, and I fiddled with it a lot. This block was on my design wall for a long time before I actually sewed it together.

First, I made the HSTs on the very outside of the block (pink dot and background) using my Triangle Technique.

Next, I cut 4.5″ squares for all the yellow pieces in the block (8 total).

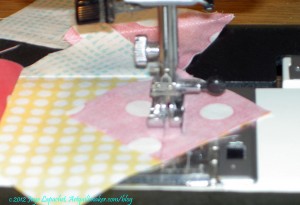
Third, I cut 2.5″ squares out of the background fabric and the pink dot fabric. I sewed them on to the yellow, larger squares by drawing a line diagonally across the center of the smaller squares and sewing on that line. The goal was to fold the square back into a triangle.
Sewing the corners
Sewing the corners

After sewing the first one, I realized that sewing on the line was not the way to go. Folding back the square into a triangle did not cover the yellow 4.5″ square. I tried lining up the line on the small square with the inside edge of my 1/4″ foot, then I sewed just inside the line. That was just enough to make this technique work for me. I have tried to illustrate this part of the post with the photo of the piece (left) in the machine. Can you see how the foot is lined up with that drawn line?

There is a failure part of this blog post as well. In order to make sure the blocks would be large enough to cover the corners of the larger square, I cut the smaller (corner) squares larger than 2.5″ the first time around. I found, when I sewed them on that the idea was good, but didn’t work. The reason it didn’t work was because the squares were simply too big and went below the place they should have been. This meant that the quarter inch seam allowance was too large to produce good matching seams.

Once I had the correct size of squares down (thanks, TFQ!) and realized I needed to sew just inside the seam, the block flew together as much as an approximately 63 piece block can.

I am pleased with the look.

_____________________

First two Swoon blocks link
Swooning Along

Swoon Block #1
Swoon Block #1

I couldn’t resist Camille Roskelley‘s Swoon block. I tried, I really did. There is a Swoon-a-long going on Flickr, organized by Imagingermonkey. I kept hearing about it and finally gave in.

The original blocks are 24″. I didn’t want to make blocks that large. I resized the pattern down to 16″. Thank you, EQ7. The size is actually good for me. The patches are reasonably sized. I can make 2 blocks from the half yard fabrics I have selected.

This block is similar to Rolling Star and Star of Bethlehem, according to EQ7.

I didn’t have a lot of time to work on the block, but it was on my design wall so I kept thinking about it. I decided to make more than one block and just see what evolved.

I think these blocks have 90 pieces if made the way I cut it the first time. It was easier, because I used the Triangle Technique for all of the triangle squares (half square triangles). The sewing is probably the same with that technique, but I don’t have to handle as many pieces.

Swoon Block #2
Swoon Block #2

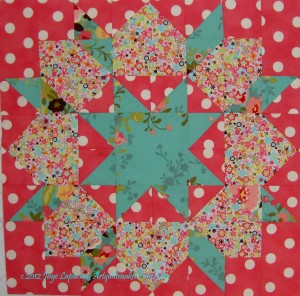
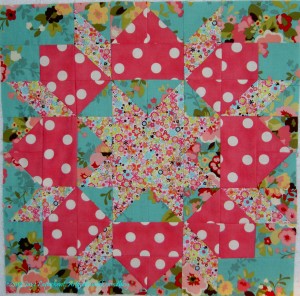
Friday, I had some time. Good thing, because I was about to lose my mind. I just sewed on and off while I listened to an audiobook in between errands and other obligations. I finished the first block and, then, finished a second! One thing I realized was how hard it is to match up the pieces of actual fabric with my block picture.

I printed out a life size version of the block so I could use it to measure the half square triangles. I wanted to use my triangle technique and various speed cutting rulers.  EQ does not calculate for specialized cutting techniques. I thought the life sized version would help. It does, actually.

Swoon Block #1 - finished

My two finished blocks look similar, because I cut some of the half square triangles wrong. See above on the life sized version.

They weren’t failures, but I couldn’t use them in the first block, thus the second. I am going to try some of the other fabrics next time. You probably knew that. 😉 I do plan to use other fabrics. I think I may have enough to mix these 3 in with other fabrics, so there is some continuity.

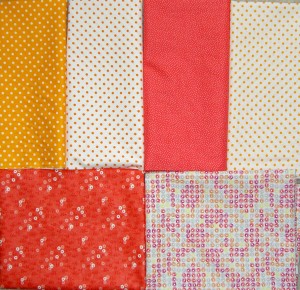
Swoon Fabrics
Swoon Fabrics

I have a group of fabrics that will be sherbety and fun. I bought them during the summer. This will be a good project for them.

I also think I will try different ways of putting the blocks together. In Block #1, I made all half square triangles (using my Triangle Technique). On the next one, I will make Flying Geese instead of half square triangles. That will give me the opportunity to try out Deb Tucker’s Flying Geese ruler, which has been sitting on my desk for months!

I decided I would try cutting a big square for the top center portion (see the pink polka dots on Block #1). On Block #2, I used the technique where you sew a square diagonally across the corner to another square on Block 2. This cut down on a few pieces. With 90-93 pieces, the fewer seams the better. It will be a good exercise to try and figure out the best way to make these blocks.

Fun Swoon blocks:

  • Imagingermonkey Block
  • Little Bluebell post and block

Search for swoon quilt block and you will see a wide variety of wonderful renditions of the Swoon block.