Contemplation of Zippers

I have been thinking about zipper installation since my sewing date with Cyndi. There, I installed two zippers.

Enigma #3 inner zipper pocket top

The first one was the small pocket zipper, which went into place with no problem. That small pocket is a great opportunity to use some smaller zippers.

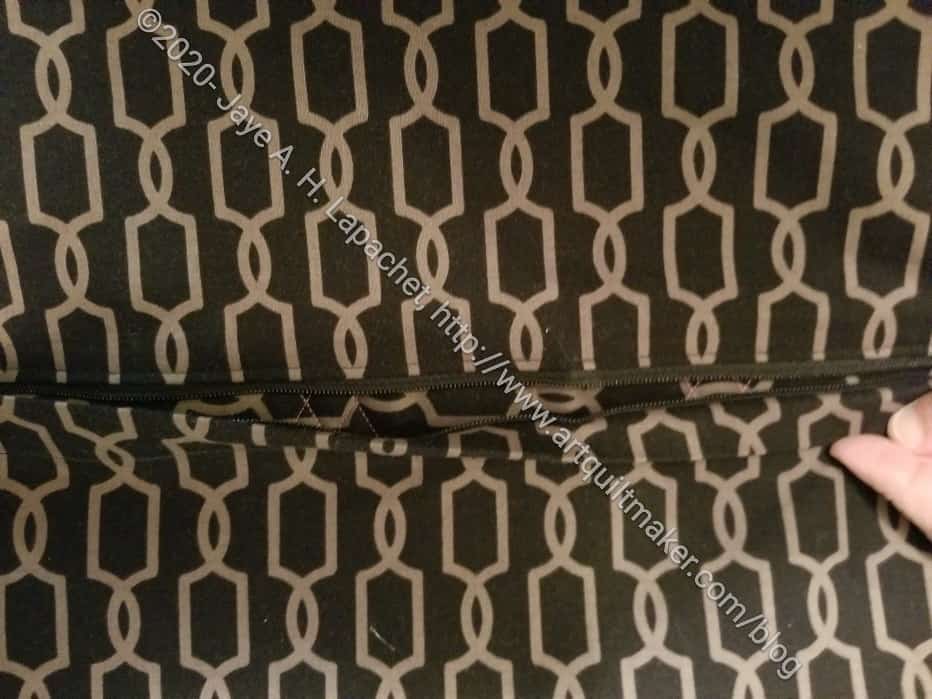
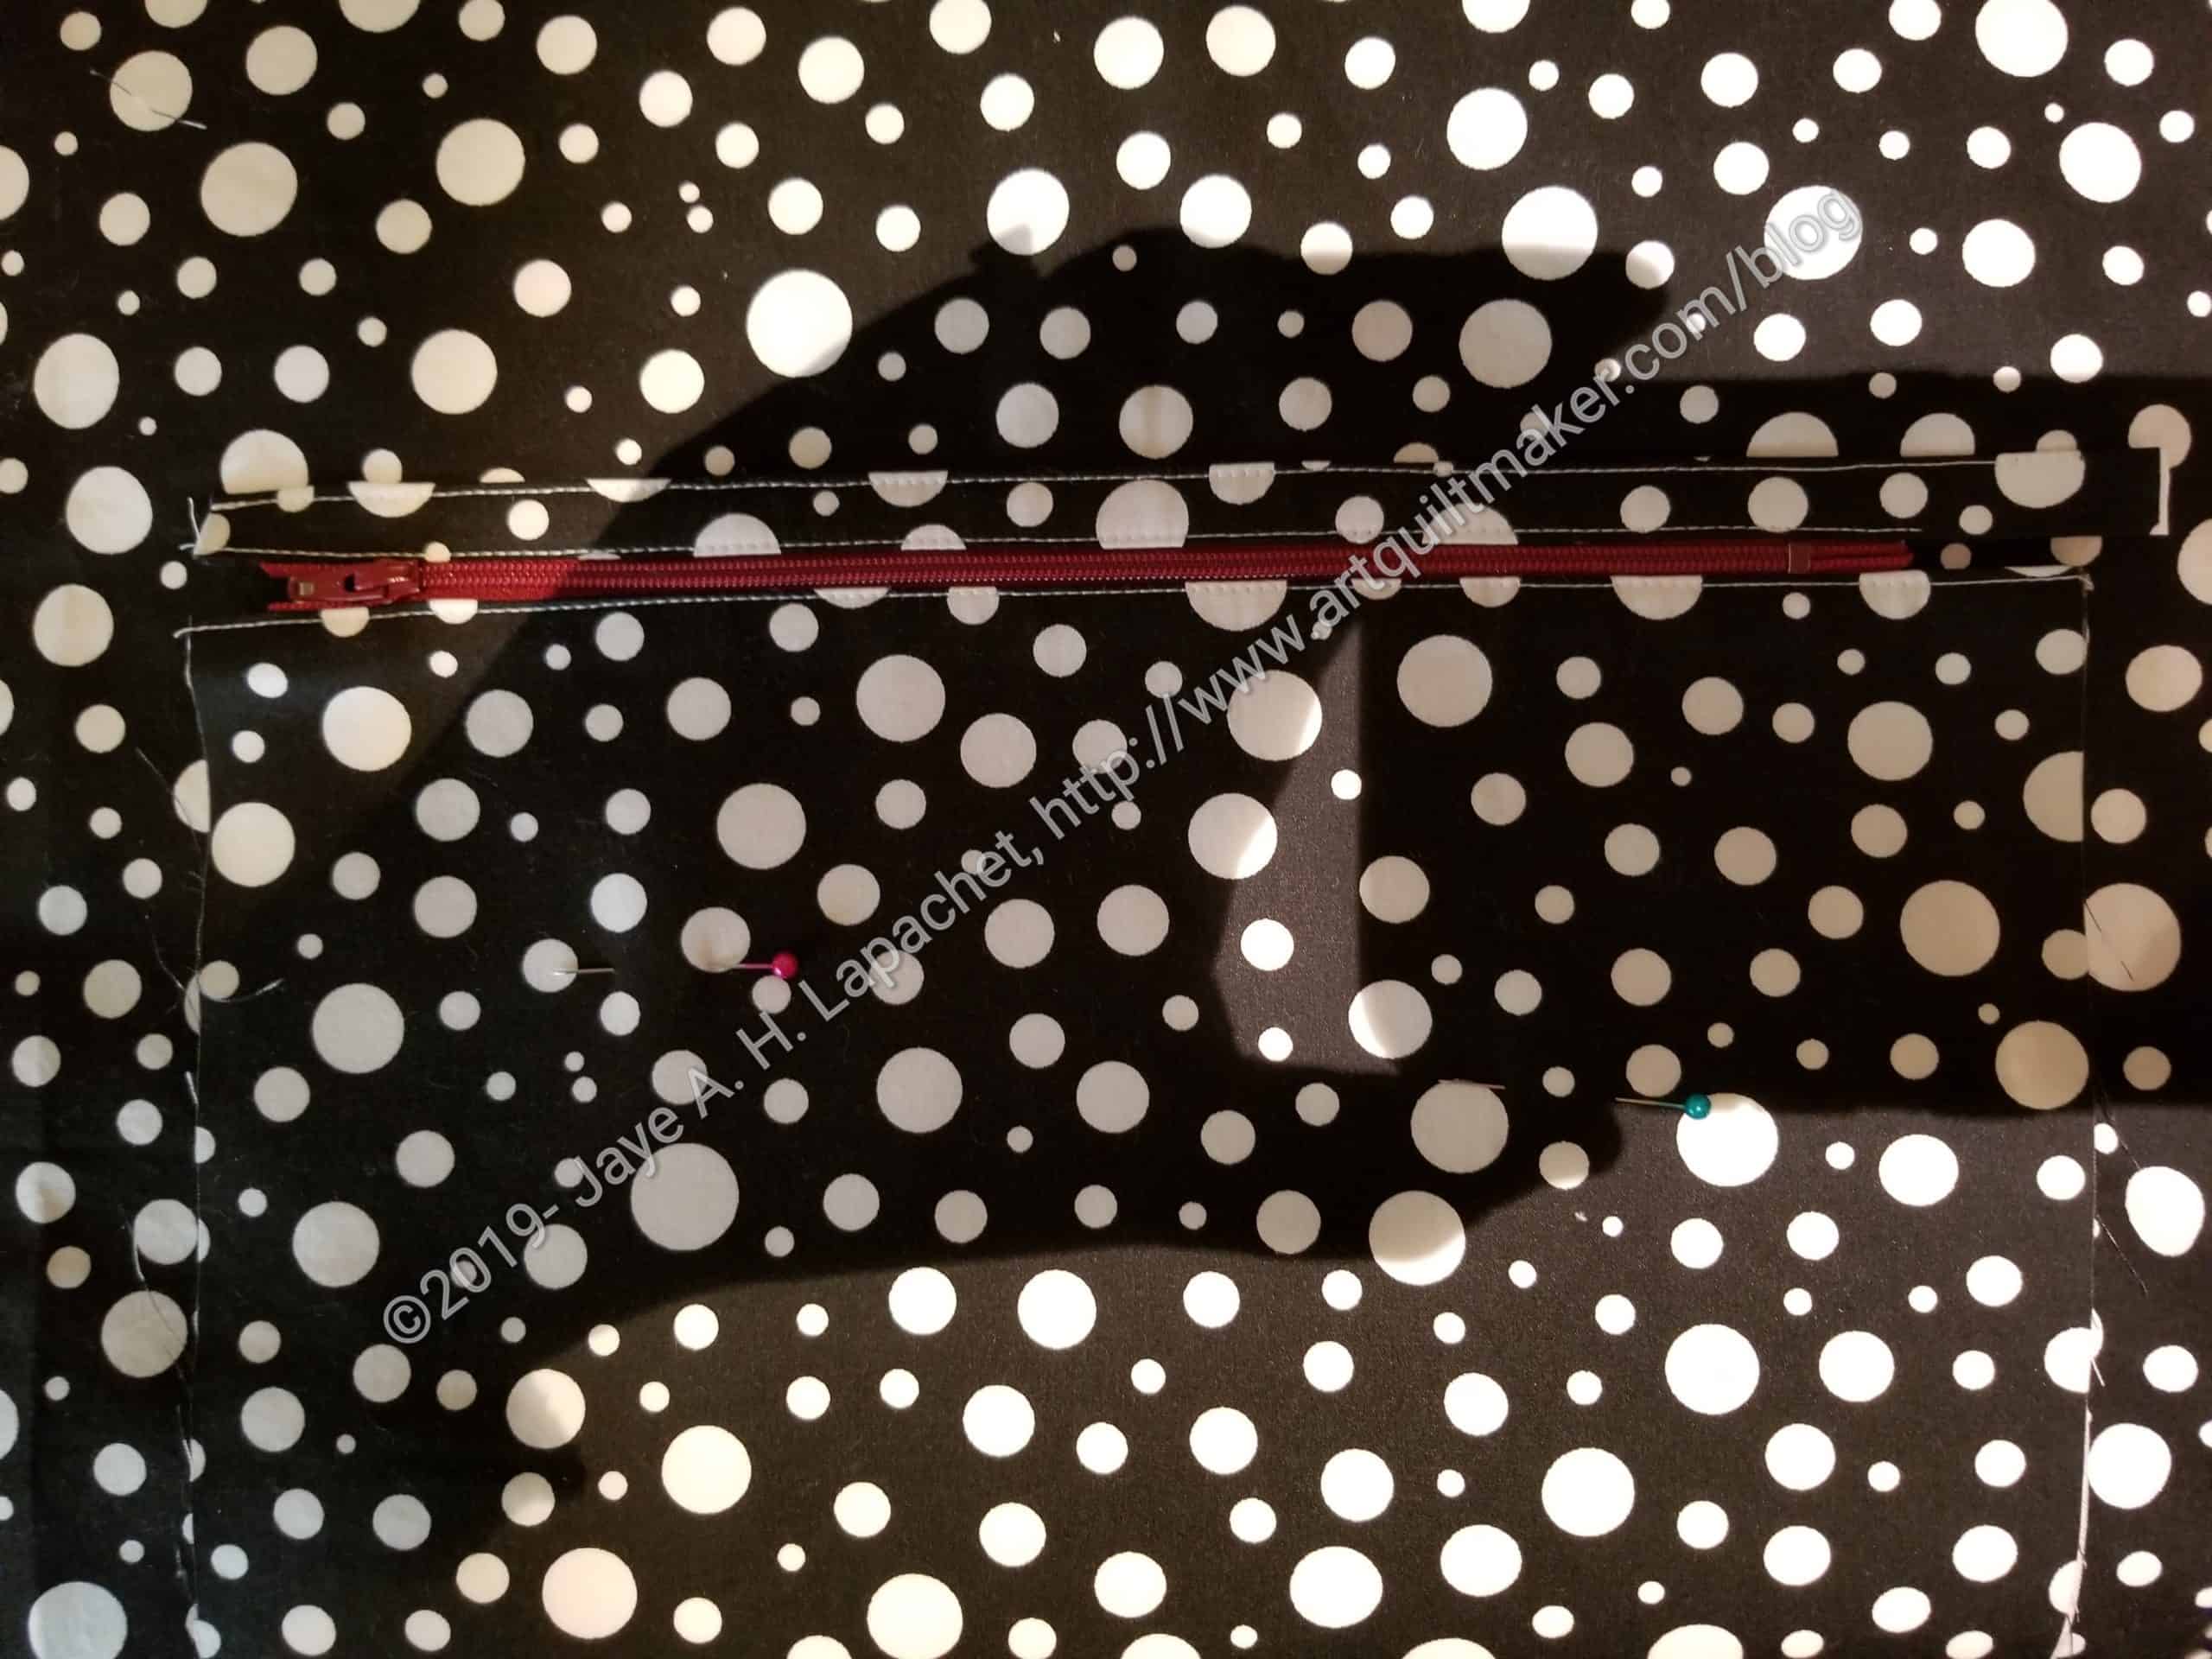
The second was the zipper for the overall bag, which didn’t go together at all well. This was completely my fault, because I was being lazy. I didn’t install the zipper foot and, thus, the edge of the regular foot interfered with the smooth installation of the zipper.

Installed zipper looks beautiful

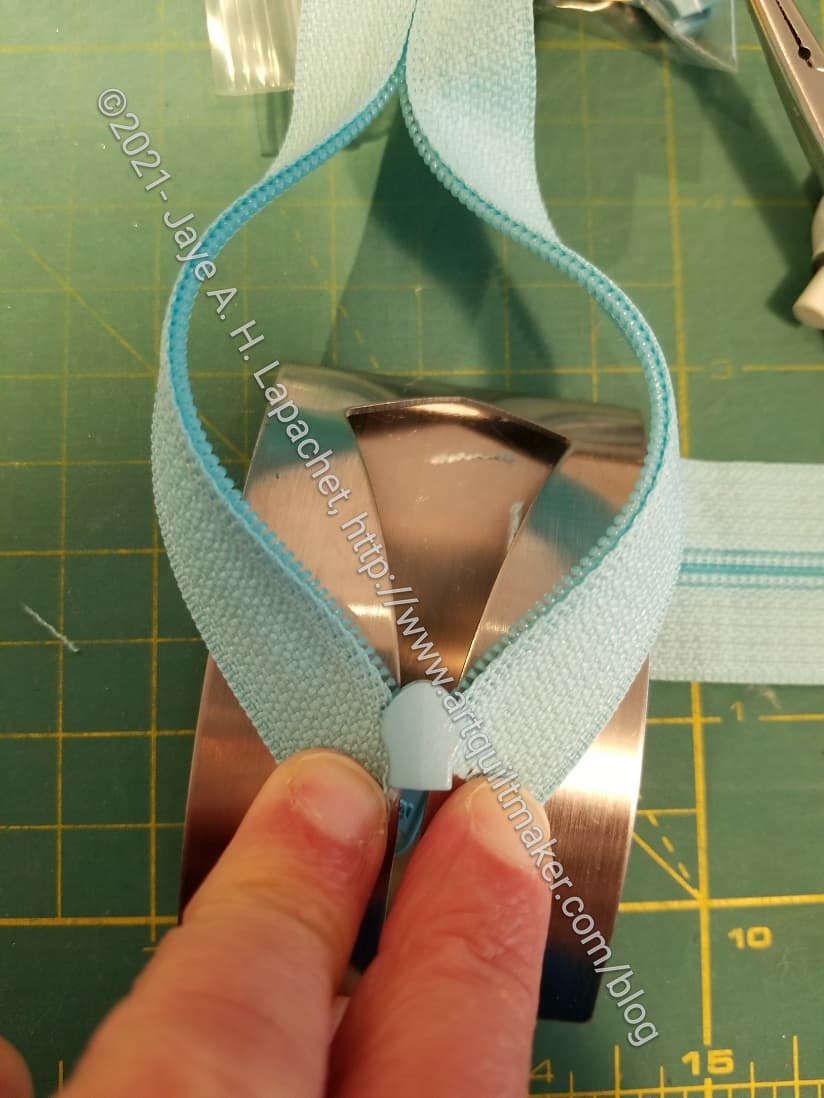
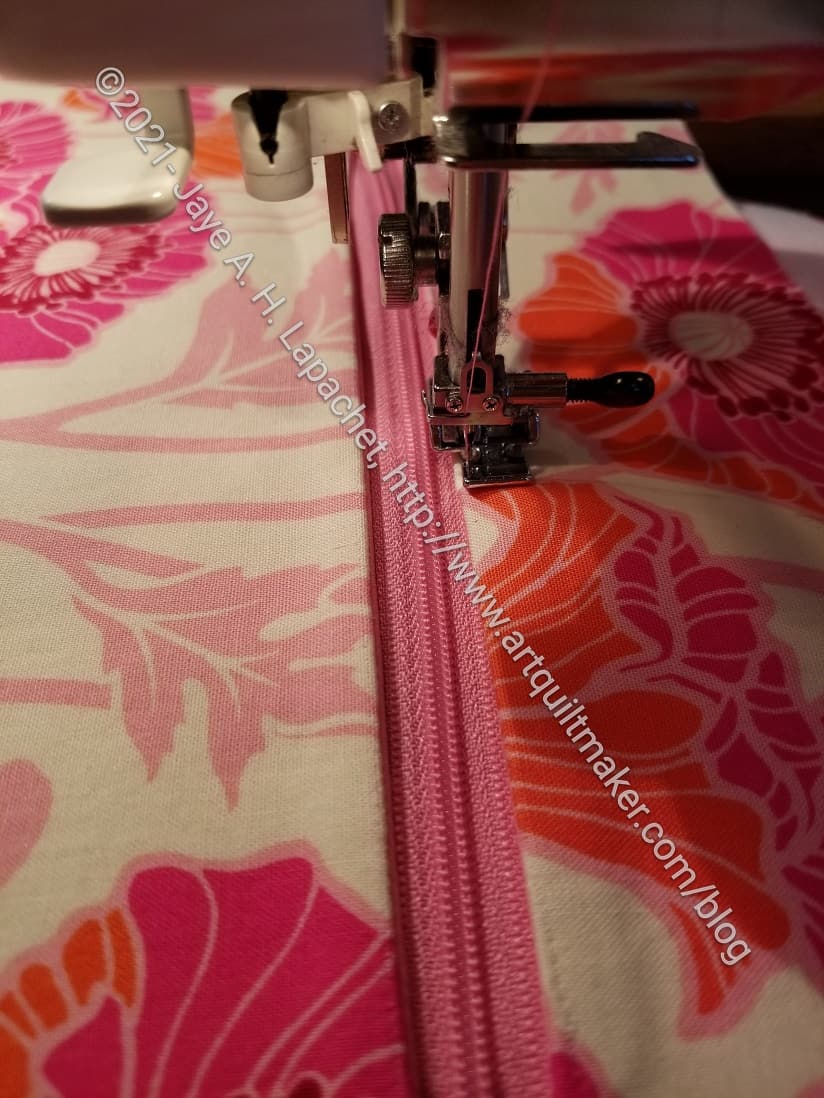
I suffered for my laziness and hope to have learned my lesson. I unstitched the whole zipper, installed the zipper foot and re-sewed the zipper. There were no wobbles using the zipper foot. My only complaint was that I found the end of the thread to be a pain because there is no foot  under which to anchor it. I hope I will now have the habit of installing the zipper foot in the future. 

Trim away foam in zipper opening

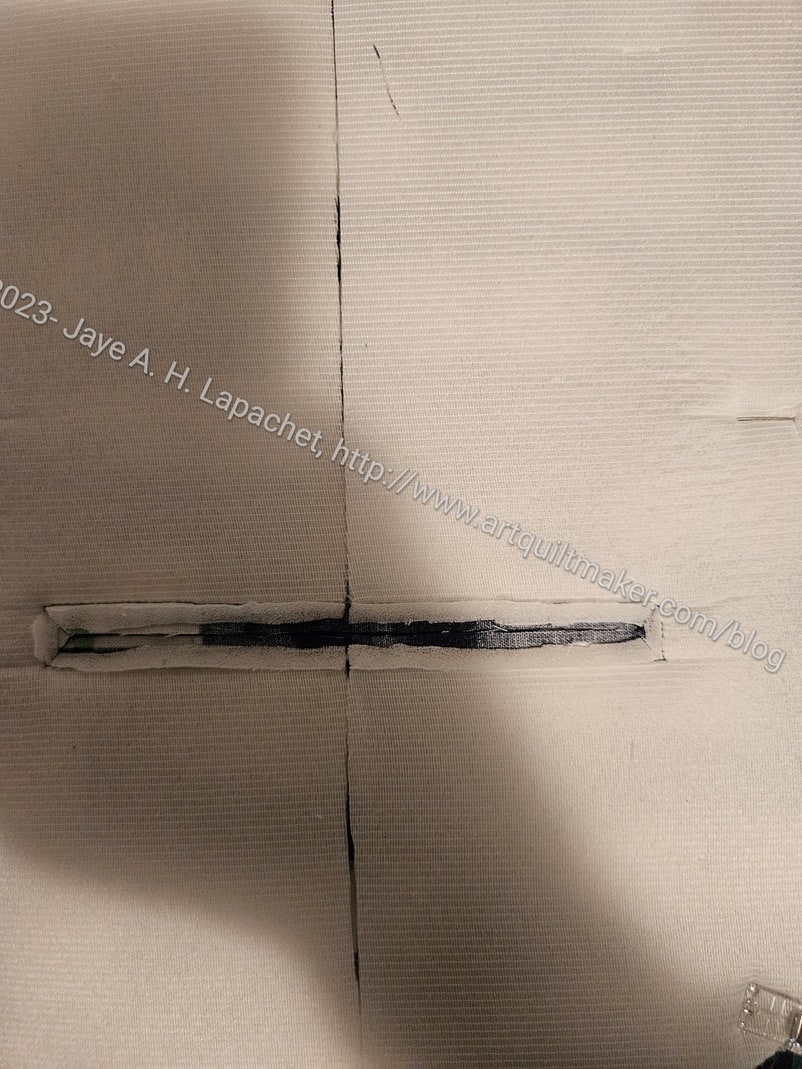
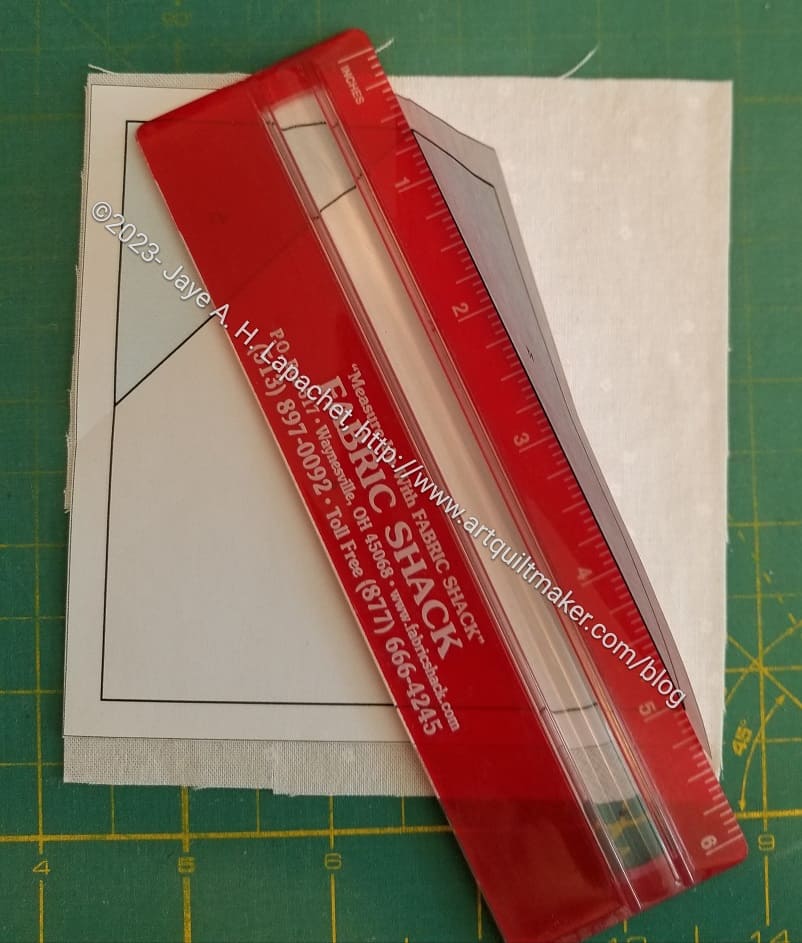
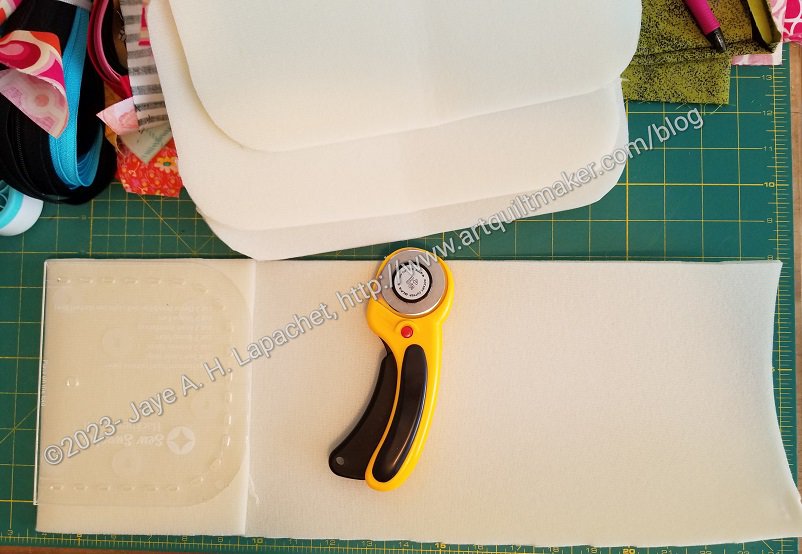
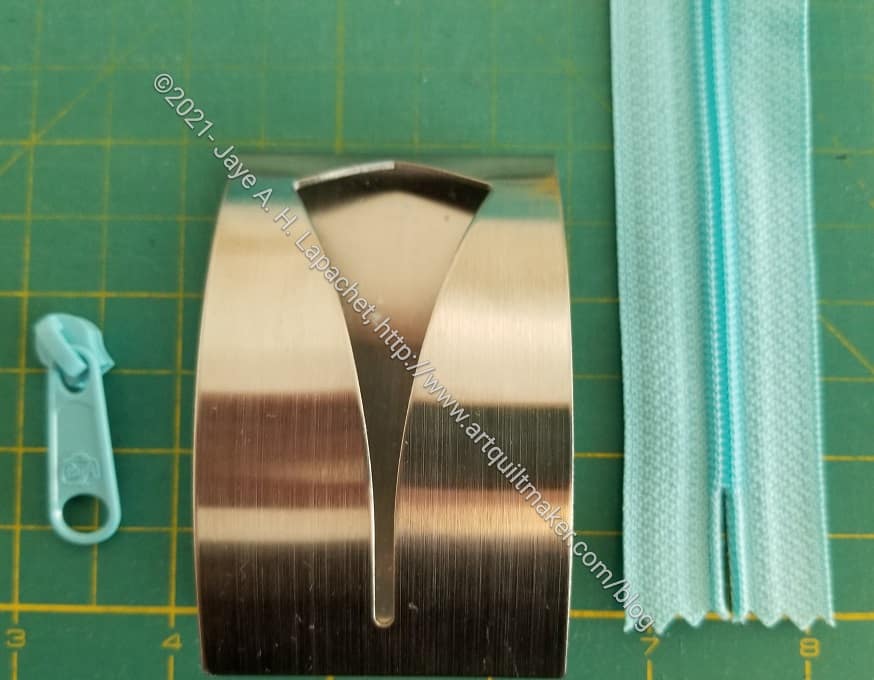
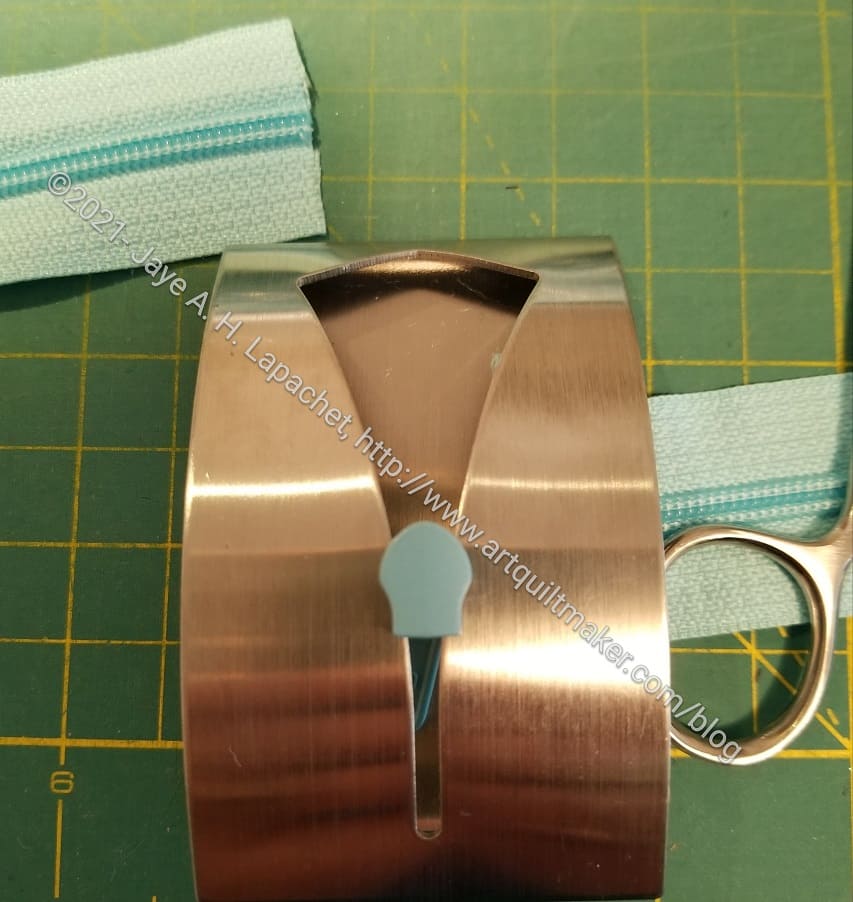
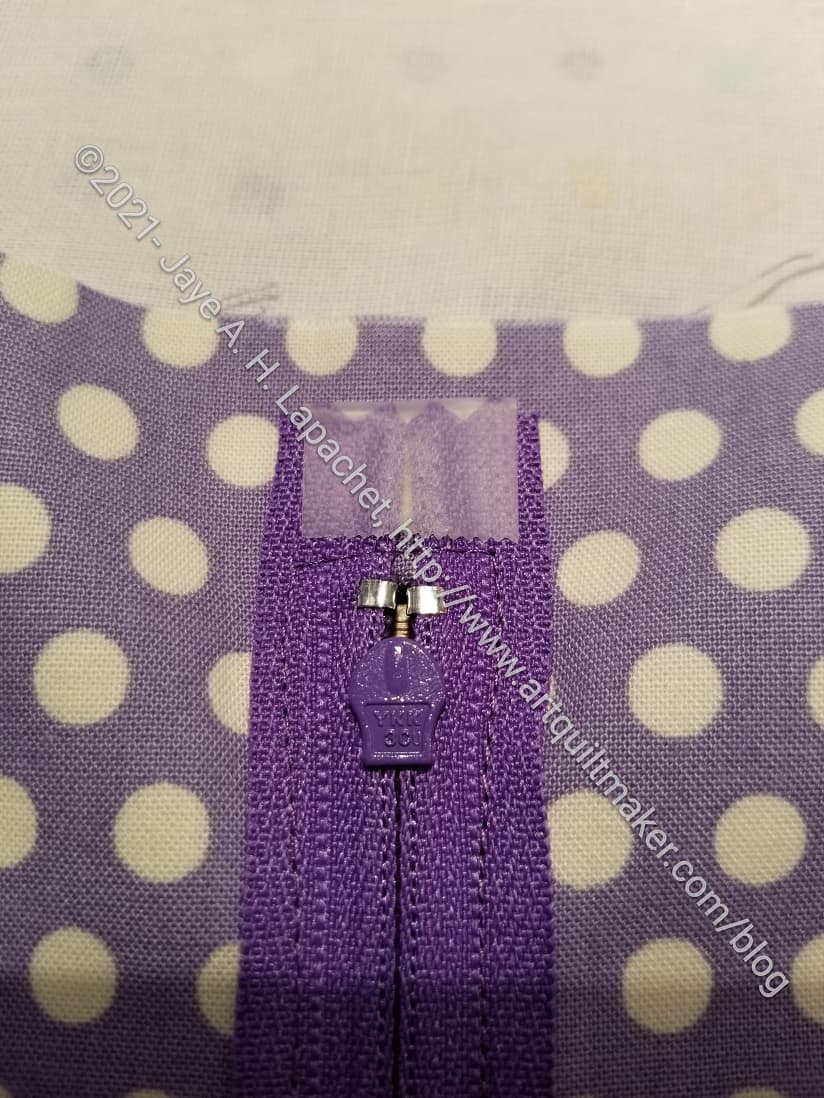
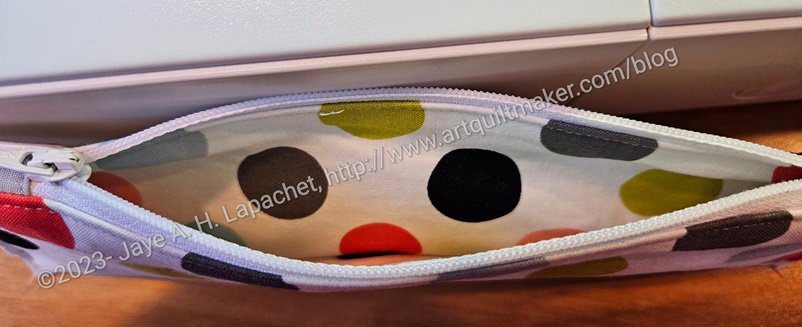
On another bag, I installed an internal zipper pocket. I have always found that pressing the area around the zipper opening into shape before installing the zipper to be less than satisfactory. In this latest pattern, the designer suggested trimming away the foam to make the preparation for topstitching easier. I did that and did find it a bit easier. I could have probably trimmed more, but was trying to be careful since I have never done that before. If you haven’t ever made an inside zipper pocket, take a look at this tutorial. Also, Sara from Sew Sweetness* has a video for using her acrylic template. I have one of those templates and use it every time I make one of these pockets.


*no affiliation; just a happy customer

No Paper Sewing FPP

Julie told me about foundation paper piecing where you don’t sew through the paper. I meant to have her show me at the last Sew Day, but somehow we didn’t get around to it.

As my stack of postcards grew, I knew I needed to do something, so I watched a video called My FPP (Foundation Paper Piecing) No Sew Paper Method and was able to get started.

WOW!

What a game changer! I might actually start to use FPP more.

I am not doing a tutorial right now, but might in the future. It would be a good technique to teach in my Sampler class.

Fold pattern over thin ruler

One of the keys is folding the paper back. The video I watched show using the Add-a-Quarter** ruler to fold the paper back. I have that ruler, but it didn’t work the way I expected. I have a very thin Bernina ruler I got somewhere and that worked very well for me.

I also have a thin plastic grid ruler**, which I haven’t tried that might work well also.

There are a few different videos on this technique. Julie said she uses this technique in a little different way, but that what it shows is basically the same.

One good thing about this technique is that I don’t have to print paper patterns all the time, use them once and then print another. Great reuse!!


**Obviously, you should shop at local quilt shops and small businesses. However, if you are too busy or can’t find what you need there, I use Amazon affiliate links and may be paid for your purchase of an item when you click on an item’s link in my post. There is no additional cost to you for clicking or purchasing items I recommend. I appreciate your clicks and purchases as it helps support this blog.

Cutting Soft & Stable

I was a little shocked and surprised when Julie brought me the giant roll of Soft & Stable. After letting it float around the room for awhile, I finally settled it into an out of the way, basically permanent location.

Now that it is suitably housed, I have been using it. Using it was also a problem, because I don’t have a table – cutting table – large enough to hold the roll. If the roll is not supported, then it is hard to cut the foam accurately.

Cutting foam off a roll

I am making some more Hackneys. One of the supplies is foam and since I am making several I decided to cut strips off the roll and then subcut them into the right sizes and shapes for various pieces.

This was a good plan, but the only way I could execute it was to put the roll on the floor. I used my long Creative Grids ruler** and a Pilot Scuf** that I like to measure the right sizes. Once the measuring was done then I used scissors to cut the strips out.

I could have used the dining room table, but that would mean hauling everything downstairs, cleaning off the dining room table, cutting and putting everything back. The only thing I would really gain was not squatting. I stayed upstairs. Also, I had to pull the roll out several times to cut more foam.

I thought cutting strips would be better, because then the edge would stay straight and be easier to use.

Subcutting foam
Subcutting foam

Subcutting was, pretty much, a breeze. I had a 60″ wide strip to deal with, but it was so much easier than the giant roll. The foam, as you know, is really lightweight, so I let it dangle over the edge of my cutting table and cut the sizes I needed. It worked great.


**Obviously, you should shop at local quilt shops and other small or indie businesses. However, if you are too busy or can’t find what you need at the smaller suppliers, I use Amazon affiliate links. I may be paid for your purchase of an item when you click on an item’s link in my post. There is no additional cost to you for clicking or purchasing items I recommend. I appreciate your clicks and purchases, as it helps support this blog.

Revisiting OdiCoat

Percheron Pouch: bottom has OdiCoat

A few weeks ago, I coated some fabric using OdiCoat. The OdiCoat dried pretty well in 24 hours and then again in 24 hours after the second coat. I was able to use it to put a bag together, but the bottom, where I had used the OdiCoat was still sticky. Not wet-sticky, but sticky in such a way that it would stick to the table. It felt like sewing thicker vinyl. I had a hard time sewing it and needed to use my vinyl techniques to complete assembly.

The bag sat for awhile, which was great, because the OdiCoat cured (I guess, or dried further) and is no longer sticky! Yay!

I am pleased with the protection the medium provides. This is the perfect pattern for it as it has a contained piece for the bottom. I’ll definitely try this substance again.

OdiCoat Test

I am making a Percheron Pouch and was finally organized enough to coat the bottom with OdiCoat**.

Preparing to apply Odicoat

Using Odicoat means rough cutting a pattern piece, then applying two layers to fabric. The first layer has to dry before the second layer can be applied.

As you know, I try to avoid messy projects, but I do like protecting the bottoms of my bags if I can. The iron-on vinyl isn’t ideal. It is wearing through and pulling away from the bottom of one of the bags on which I used it.

I had time to use the OdiCoat, so I did it. I applied on the kitchen counter, using wax paper to keep the counter clean. I allowed it to dry for 24 hours, which the directions say. I found that it was mostly dry much earlier, but I could tell the difference after 24 hours.

Two layers later I found that the piece, which was rough cut, had a plastic feeling layer on top.

Now I’ll have to see how it sews!


**Obviously, you should shop at local quilt shops. However, if you are too busy or can’t find what you need at quilt shops, I use affiliate links and may be paid for your purchase of an item when you click on an item’s link in my post. There is no additional cost to you for clicking or purchasing items I recommend. I appreciate your clicks and purchases as it helps support this blog.

La Pass Center Medallions

Kelly Pena, a quiltmaker/sewist also working on La Pass and in the private La Pass FB group, creating a basic and an easy to understand tutorial for making center medallions.  She has kindly allowed me to use her photos for this English Paper Piecing technique. This question has come up a few times in our La Pass group. I consulted with Kelly and said that I would write a blog post using her photos so there would be a permanent link to the information. I have added a little bit of additional explanation to Kelly’s already excellent tutorial.

Tula Pink's Parisville Cameo
Tula Pink’s Parisville Cameo

Our La Pass rosettes require certain sized fabric pieces that correspond to the paper we are using to create various rosettes. We fussy cut the fabrics and make cool designs. Sometimes people want to use a larger motif, such as Tula Pink’s Marie Antoinette from Parisville Deja Vu. This motif would be difficult to put together using the various shapes and pieces. Not impossible, but very difficult.

In order to use up, in this case, the entire cameo and not make ourselves completely crazy, we need more ‘paper space’.

Combine papers
Combine papers

1. Find all of the paper pieces you need (want to use) to make the center medallion. Tape the paper pieces together for the final shape. This can vary depending on the shapes making up the rosette and you can adjust the shape by adding or deleting papers until you are satisfied. You can create quite a large shape.

As far as I know, there is no size limit as the paper will be removed at some point anyway. My gut tells me that you may have some issues with the bias if the pieces are too large. As a result, and, as usual, be careful with the bias.

You can configure the papers into any shape that will work for the fabric you have. I tried this technique on one of the Month 4 rosettes and found it moderately successful. In looking at Kelly’s example above, I should have added the long, thin diamonds to my center in my attempt. I think it would have made the process easier. The concave edges around the center diamonds are difficult and the long, thin diamonds make the edge easier to deal with.

Lay combined papers on fabric

2. Lay the combined and taped papers on the fabric. Adjust the placement until you have the fabric motif you want centered on your papers.

Remember to take seam allowance into account.

You can use a light board or light box** here for more accuracy.


Cut around paper leaving seam allowance

3. Cut around the template allowing for seam allowance.

N.B.: In the image (left), Kelly is cutting freehand. If you are not confident, you can also use a small rotary cutting ruler**. If you use a ruler, you will need to keep moving it around the piece. In this case, a rotating cutting mat** might be helpful.

Cameo/Center Medallion basted

4. Baste as usual. Kelly and I are both using glue for La Pass. I am using thread basting for my Half Hexie Star project. Either method will work with this center medallion technique.

You may find it helpful for circular shapes to cut notches into the seam allowance when basting.

5. Stitch up your new larger piece. The paper shapes used will allow you to sew as if you were stitching all the shapes separately.
 
Thanks, again, to Kelly for allowing me to use her words and photos.


**Obviously, you should shop at local quilt shops, knitting shops or art stores. However, I use Amazon affiliate links. I may be paid for your purchase of an item when you click on that item’s link in my post. There is no additional cost to you for clicking or purchasing items I recommend. I only link to items I like. I appreciate your clicks and purchases as it helps support the costs related to maintaining this blog.

Tutorial: Adding Zipper Heads

I have said before that adding zipper heads to zipper tape is pretty easy. I don’t do it that often, so I always have to look it up. The main tutorial I use is Sara Lawson’s tutorial. Sara provides a ton of detail and I would advise watching it at least once. I am writing a quick tutorial so you can see another version.

Supplies:

Supplies required
Supplies required
Place zipper head face down

1. Place your zipper head face down in your towel holder

2. Flip your zipper tape wrong side up. N. B. This means that both zipper tape and zipper head are facing in the same direction, wrong side up

3. Pull your zipper tape apart 3-4 inches and configure in a V formation

Make a V with the zipper tape

4. Carefully place each end of the zipper tape into each side of the zipper head

5. Push the tape in evenly until you can pull from the bottom

Completed zipper head installation

Voila! You did it!

In the future you can find this tutorial on the tutorials page.


Resources:

    • Natalie from Sew Hungry Hippie has a video tutorial using a jig she sells


*N.B. : If you use a fork, you might want to get one at a thrift store and just use it for zippers rather than using one you eat with.


**I use affiliate links and may be paid for your purchase of an item when you click on an item link in my post. There is no additional cost to you for clicking or purchasing items I recommend. I appreciate your clicks and purchases as it helps support this blog.

Installing Zippers Tips

One of the things that came up when I was making pouches over the weekend was the zippers. They are always a pain, so I made some changes tot he way I work.

Washaway Tape
Washaway Tape

Because of the video on making an internal zipper pocket, I was reminded of the washaway tape**. I have had this tape for awhile and use it sporadically, but need to be prompted, because I tend to forget about it.

I followed Sara’s directions exactly on the second one, which means that I lined up the tape with the edge of the zipper then pressed the fabric close to the zipper before I sewed. The second one came out much better than the first.

Small zipper foot
Small zipper foot

I dug out a zipper foot that I haven’t had luck with and really worked with it. For the first time I had success using the zipper foot. This was the small zipper foot that clicks on to my machine without the use of any screwdrivers. I was surprised that it actually worked this time. Perhaps I was doing something wrong before.


Taping zipper tapes
Taping zipper tapes

Next, the tape at the end of the zipper tape where the zipper opens, e.g. opposite the stop, is loose. Most patterns say to sew the tapes together, which is a hassle and mostly doesn’t work for me. Since the ends would be hidden inside the pocket, I decided that I would try  tape instead of sewing the end of the zipper together. I used regular  Scotch tape and it worked great. I didn’t have to rip out any stitches or deal with a scrunched up fabric and thread nest. It was also fast.


**I use affiliate links and may be paid for your purchase of an item when you click on an item link in my post. There is no additional cost to you for clicking or purchasing items I recommend. I appreciate your clicks and purchases as it helps support this blog.

Sewing Pleather

Ripping tissue paper off of pleather

I have complained recently about the pleather I have used for the bottoms of the Ultimate Carry All Bags sticking to my machine bed. I thought of using tissue paper like I talk about in my Vinyl Tips & Tricks post, but didn’t do it until my Mom mentioned it as well.

Finally, when I was sewing the binding on to the exterior and lining, I used some tissue paper. It worked like a charm. I’ll put it in my bag of tricks.

Back of the Pillow Zipper

Zipper inserted in middle of the cushion back

As mentioned previously, I found some directions for putting a zipper into the back of a pillow cover. I tried the process and was really pleased with the outcome. It works really well!Not only were Sotak Handmade’s directions clear, but there was room for the maker to make the process his/her own.

I used a smaller zipper than my pillow back and added zipper tabs to make the zipper fit the back. This worked really well and I have nice stops on the back.

I also like this technique, because the zipper is covered, which is something about which I have been wondering.

I am so pleased with these directions and how they worked on my pillow cover. I plan to use them again for future pillows. They work so much better than the overlapping option. Also, this technique is much easier than the Spoonflower zipper in the seam option. There are reasons for having a multiple options and I can see using the Spoonflower method when I have a great piece of fabric on the back.


CAYG

I have been wondering how it would be if I cut bags out as I moved through the pattern instead of cutting out all the pieces in advance. Sometimes I just want to start and having to cut feels like a drag. I know it is good to have everything ready so you don’t have to stop to cut, but cutting is such a drag. I have a good system for cutting as I go with quilts, but haven’t quite figured out such a system with bags and accessories. What I really need is a nighttime Workroom Assistant who comes in stealthily at night and cuts for me while I sleep. Of course, that wouldn’t orient me to the pattern.

I recently sewed a Sewing Stand from the Sew Sweetness Minikins  Season 2 and decided that I would cut as I went.

First, I learned that I get oriented to the pieces when I cut them out. I read the first instruction and had no idea what pieces to use. I went to the video to see what Sara (the designer) was doing and finally got it. I think that getting oriented to the pattern by cutting out the pieces is a good thing.

I think cutting the fabric and labeling it ‘lining’ and ‘main’ is a must, but cutting and working with the interfacing could be done as I go.

Second, I found that having the pieces for the first few steps gets me going. It might be possible to be successful with CAYG if I cut a few pieces out, but cut the rest as I moved through the pattern.

Third, aside from the first few steps, I think I can cut interfacing and stiffener as I go along.

I think the problem I am experiencing comes from cutting everything out and then letting the project languish. This is happening with the UCAB. I lose my orientation to the pieces if I don’t start working on them right away.

As a result, I think that if you are not going to work on the project right away, that you should only cut out a few pieces, then cut the rest when you get back to it. If you are going to work on the project instantly, then cut all the pieces out and get busy sewing.

Zipper Challenge

I don’t think I really had a good tag for this post, which means I will probably never be able to find it again. 😉 It is all about zippers.

I am faithfully following the pattern for the Poolside Tote. This is the third Poolside Tote I have sewed.  I am not sure why, but I always have trouble with different parts.

This time I struggled with the facing. I also wondered about the zipper. On mom’s version and on my knitting bag, I just used slip pockets. On this version, I cut zipper pockets, which I didn’t remember. I guess it forced me to make pockets with zippers.

Zipper pocket
Zipper pocket

The directions for the pockets were pretty good. I didn’t have much trouble except for lining up the stitching. One side is hidden, so I leapt that hurdle. The only question I had was about the size of the zipper. The pattern called for a 10 inch zipper and that just seems weird to me. It seems too small. There are holes at the ends and no directions for zipper tabs. Obviously, I can make my own zipper tabs, but I just wonder why the designer asks for such a small zipper. I wonder if a 12 inch zipper would be better?

Are there rules for the size of zippers one includes in patterns??

This is not the end of the world. The zipper works fine and nobody will put something so small in the pocket that it will fall out if the bag falls over. This is just a puzzle about which I am curious. I might try the bag again with a 12 inch zipper.

Another Kind of Chain Piecing

Chain/Strip Piecing
Chain/Strip Piecing

I was working on the Frolic! piecing and I realized that I was doing chain/strip piecing in a different way.

In strip piecing, you put two strips right sides together and you sew up one side. In this case, I had one long strip and a bunch of smaller strips and squares. I lined up the various bits and pieces on the long strip and just sewed. Later, I cut the pieces apart to the appropriate length.

It works and is great, because you can get some scrapiness without as much cutting.

Leaders & Enders Clarification

A few weeks ago, I wrote about a leaders and enders demo I did at my guild. I am not sure if I changed any world views, but it was a good way to clarify the process in my mind.

As I was working on Frolic! this week, I realized that chain piecing and leaders & enders are related, but not the same and thought I should clarify.

Leaders & Enders Clarification

Chain piecing is where the quiltmaker sews piece after piece without cutting the thread. Leaders and enders are used instead of a thread bunny.

I got used to using leaders & enders when I made my FOTY quilts. It is not really possible with those projects to chain piece. I have to keep the units in an exact order on the design wall. If I chain piece they get mixed up. Thus, I put two FOTY units through the machine and end with an ender. I go press and replace the FOTY combined units back on the design wall and grab two more units. I put this FOTY set of units through the machine, which means that my ender is now a leader. I put another ender through the machine and cut off the FOTY unit and the leader.

In the above photo, you can see me chain piecing. There are a number of Frolic! units after my leader (the white pieces). I won’t cut off the last unit until after I have sewed on an ender. I adjust how I piece depending on the look I want.

As I have said before, you can use anything as leaders/enders. I have used gift bags, bag parts, other quilts. Most frequently, I use pieces for my donation quilts.

The key is to use leaders and enders to improve your productivity.

I have copied the resources below from a previous post. As I have said before, Bonnie Hunter is the leaders & enders queen.


Resources:

Books:

Guild Leaders & Enders Demo

I did a demo at the guild meeting with sewing machine and everything. I created a handout, which might be useful to some of you. I didn’t do a video, but there are some on the web already.

Bonnie Hunter is the leaders and enders queen. She has a number of books on the subject and also writes about the subject frequently on her blog. She also writes a column for Quiltmaker magazine on scraps. Her blog and shop can be found at http://www.quiltville.com

The basic concept is: instead of just stitching over a scrap at the end of a seam, you insert piecing from another project. So each time you start or end a seam and you are ready to snip the thread and press, you sew some component of another project. (Color Girl Quilts blog)

Keys for me:

  • Designate, at least in your mind, a primary and secondary project. I like to have them completely different. Different shapes or different colors or something so I don’t get confused.
  • Work small. Once the project gets too large, it is difficult to keep it in the subordinate position.
  • Keep patches/units ready to go near your sewing machine.
  • I find it easier to work on two completely different projects. Anything with a ¼” seam allowance will work.
  • Having shorter bits of thread between pieces keeps the thread trash to a minimum on the finished quilt. While this might be picky and odd, I sincerely dislike a lot of thread ends handing around a finished quilt.

The point of leaders and enders has little to do with using thread bunnies regularly, but to get more done. Using the leaders and enders method, I get a lot more community quilts finished.

Resources:

Books: