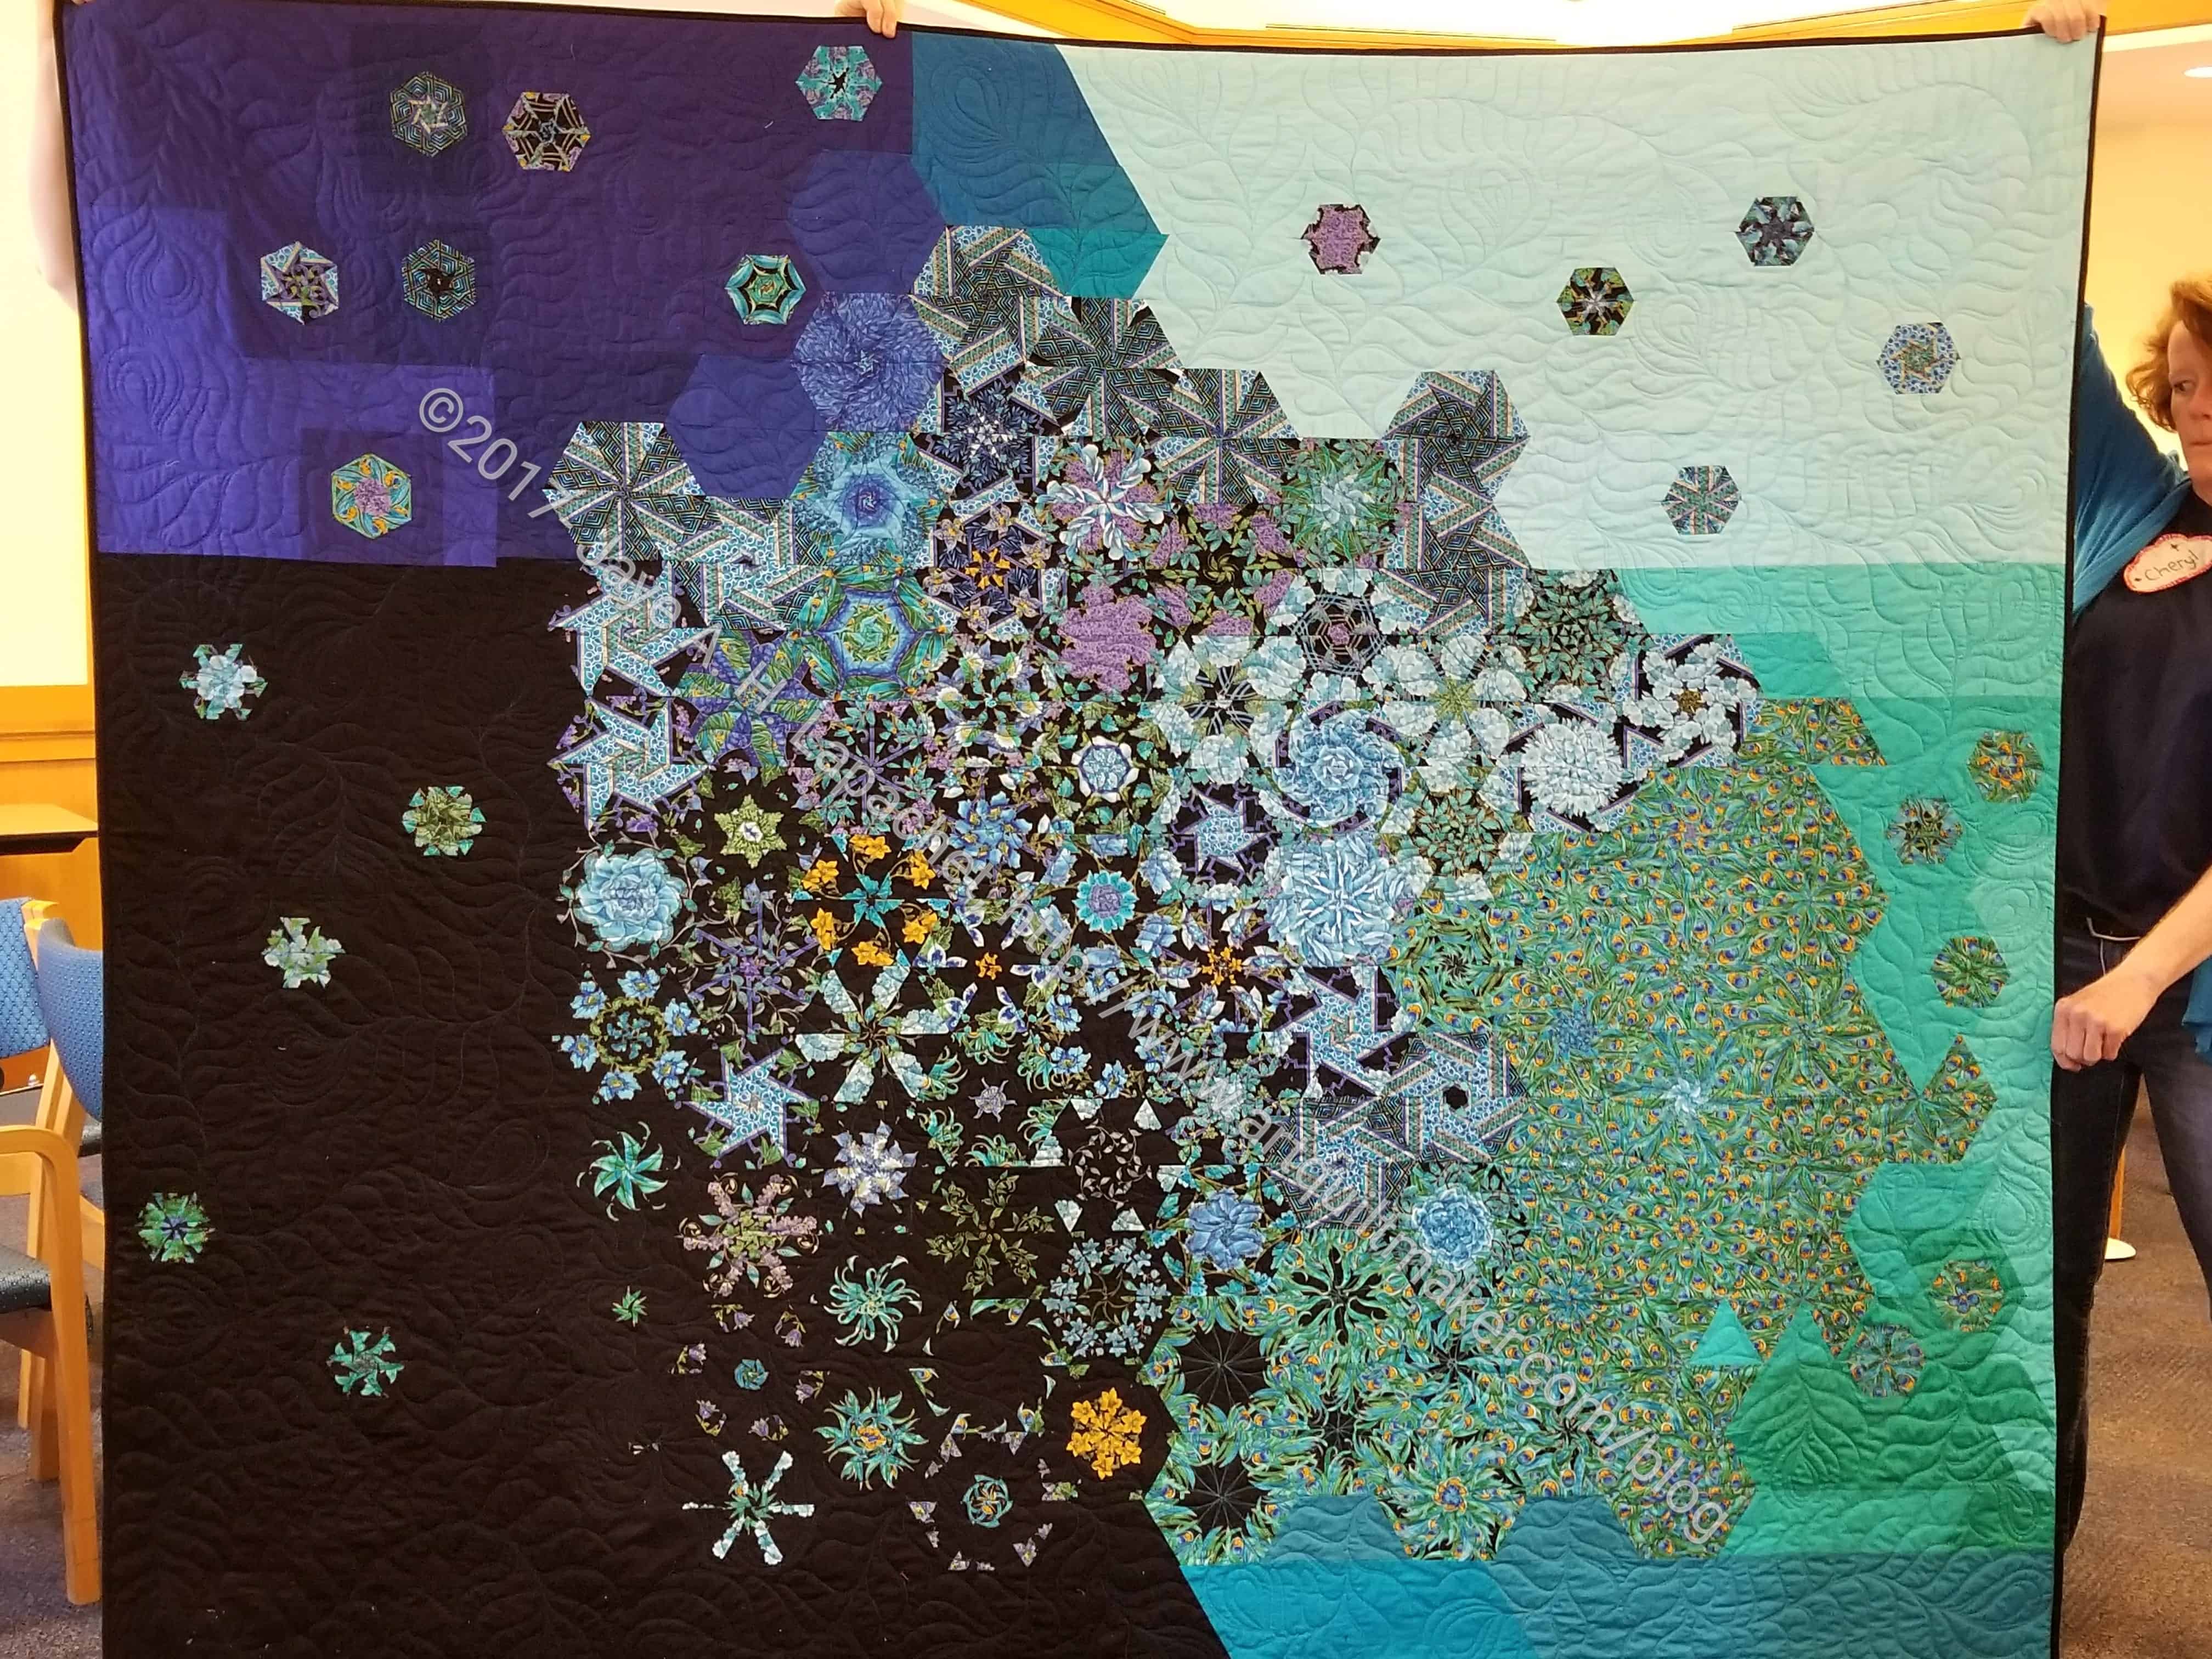
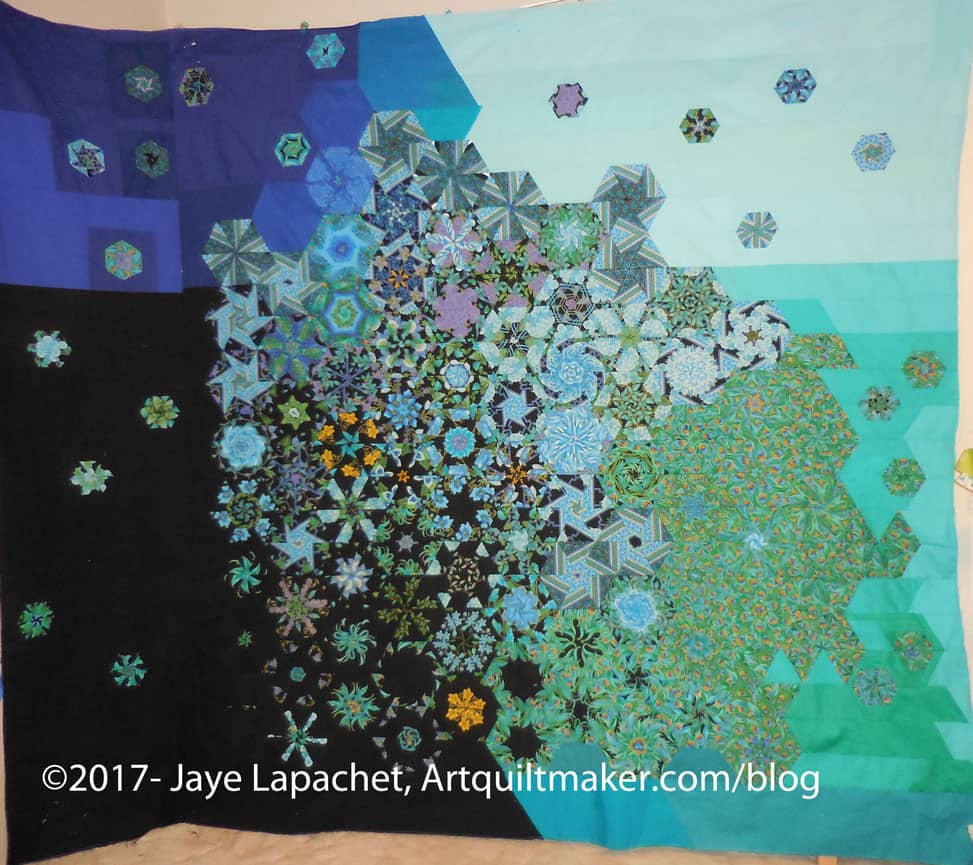
The Peacock is finally finished. Technically, it was a challenge.
I was able to add a lot of fabric to the fabric used column of my spreadsheet.
Still, I am not a fan of this quilt. I am not sure why, but I just don’t like it. I don’t hate it and am really glad it is finished. It just didn’t turn out like the vision in my head.
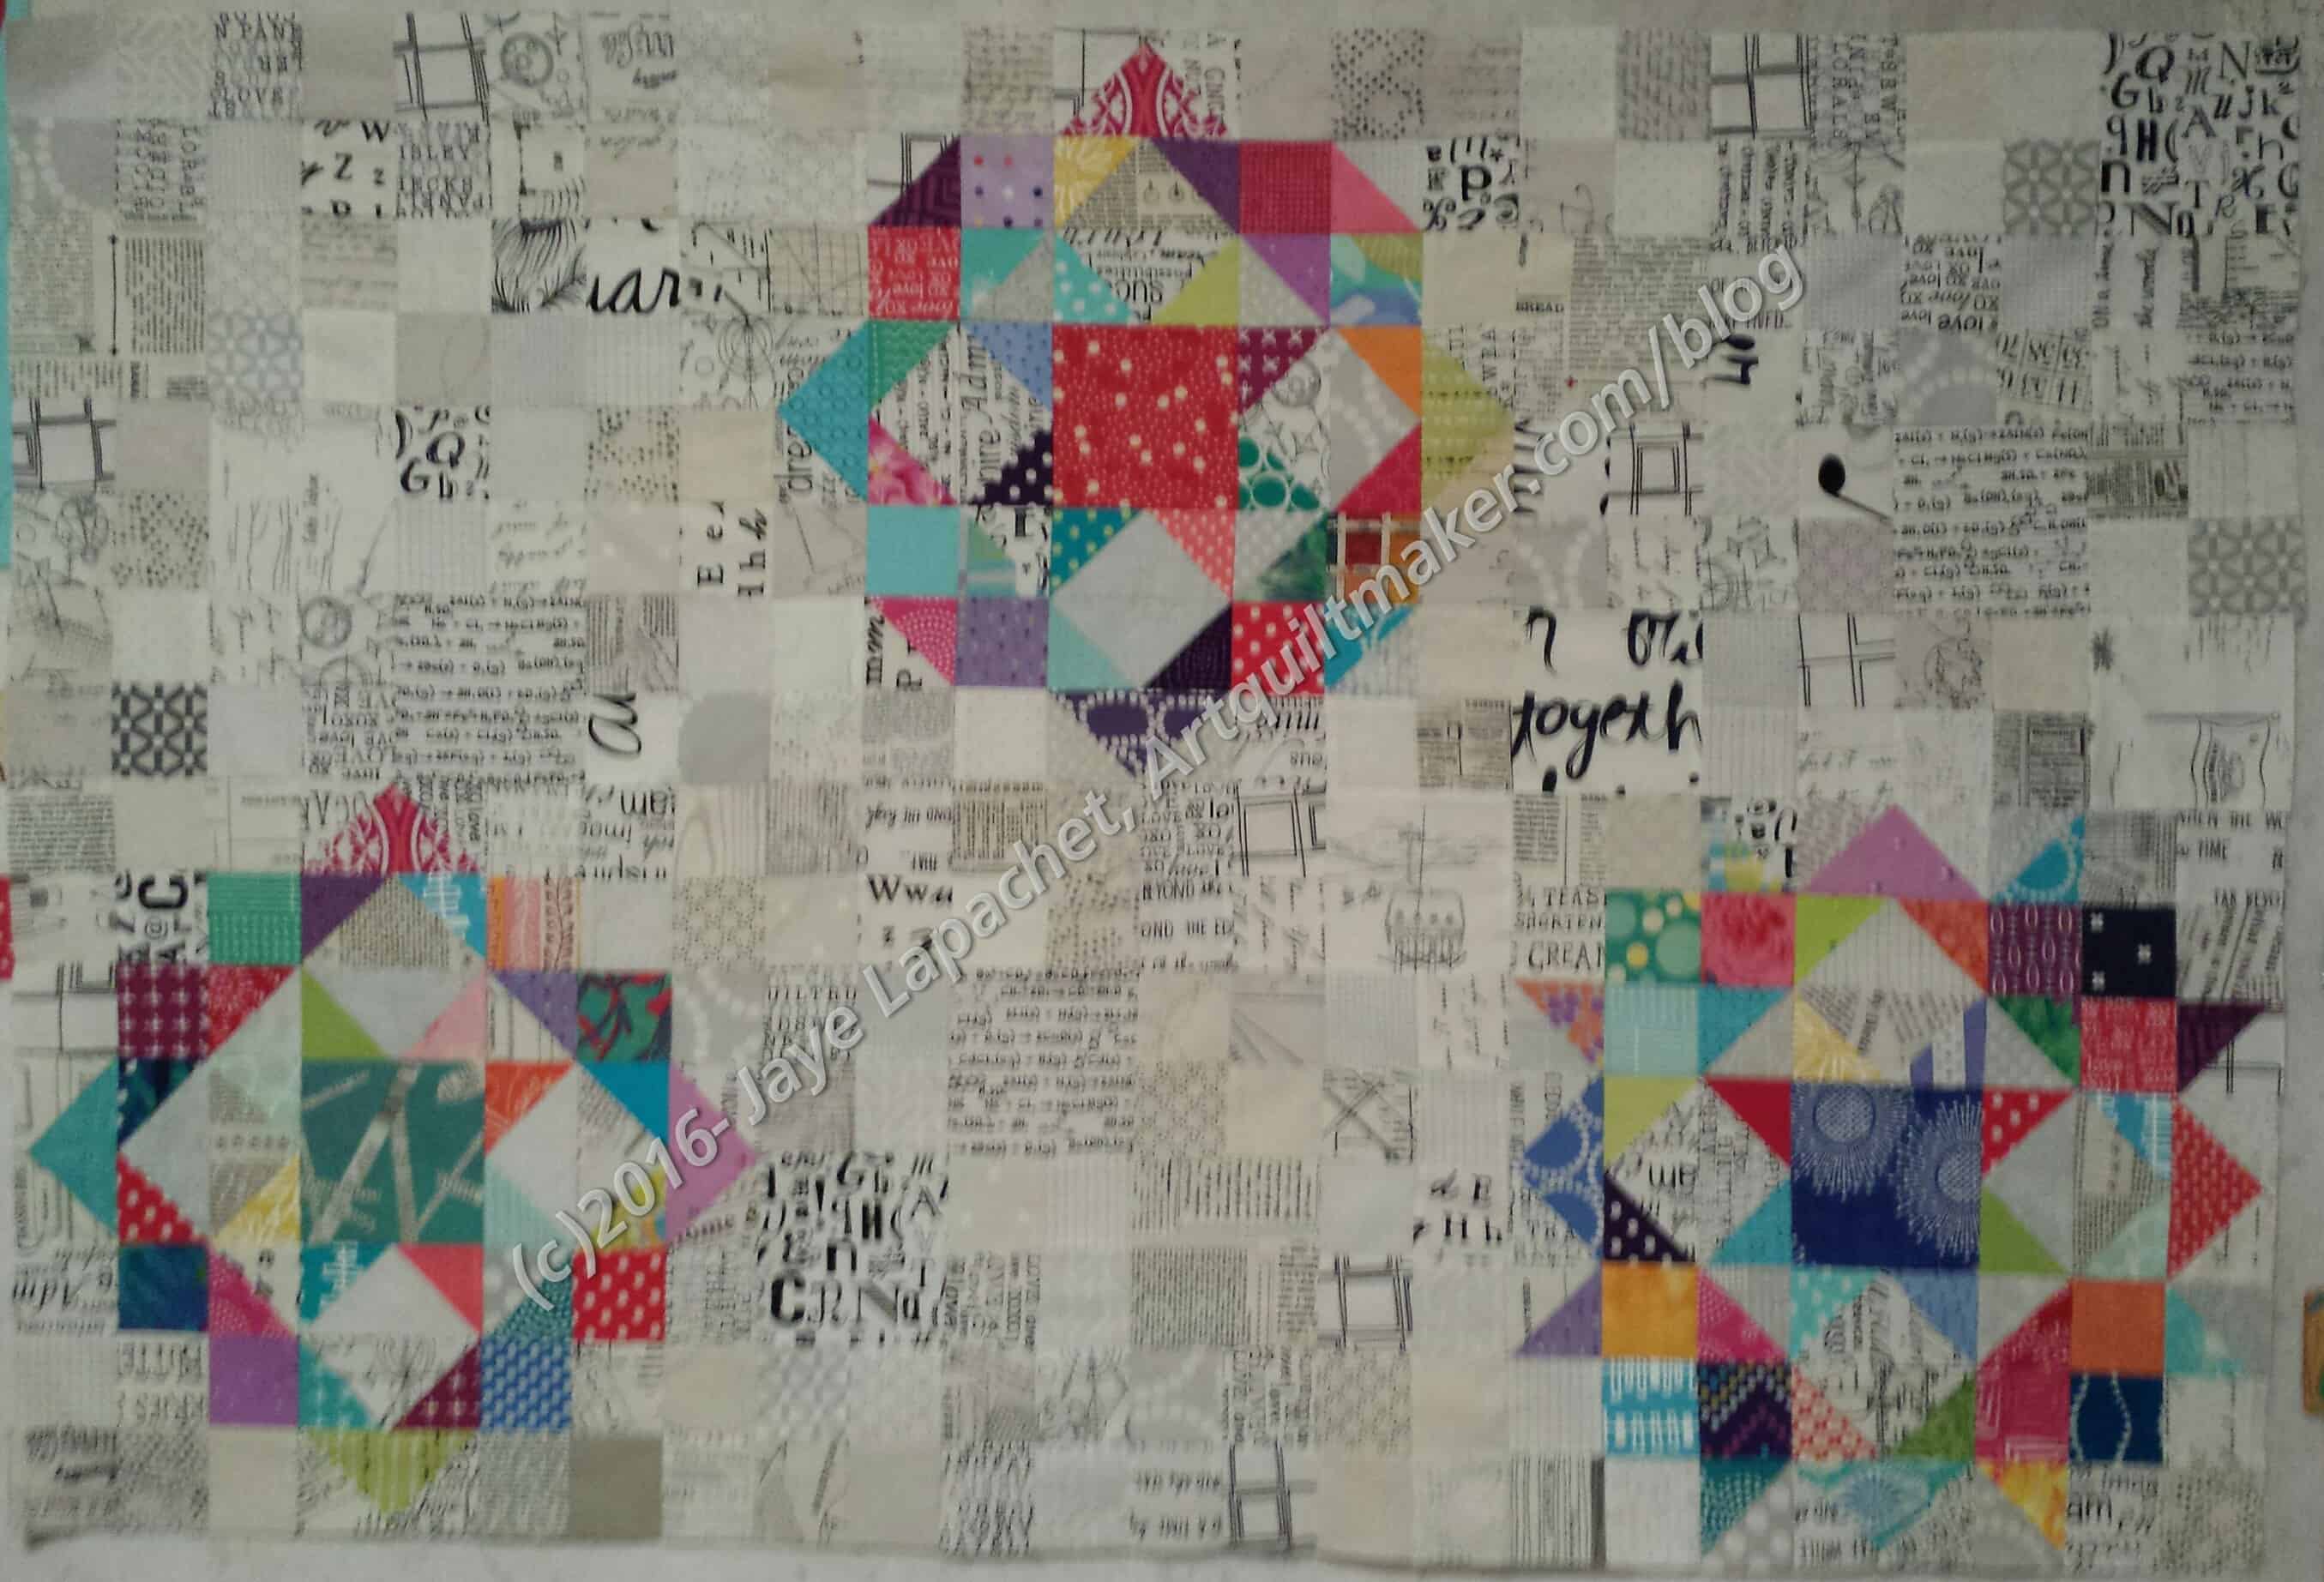
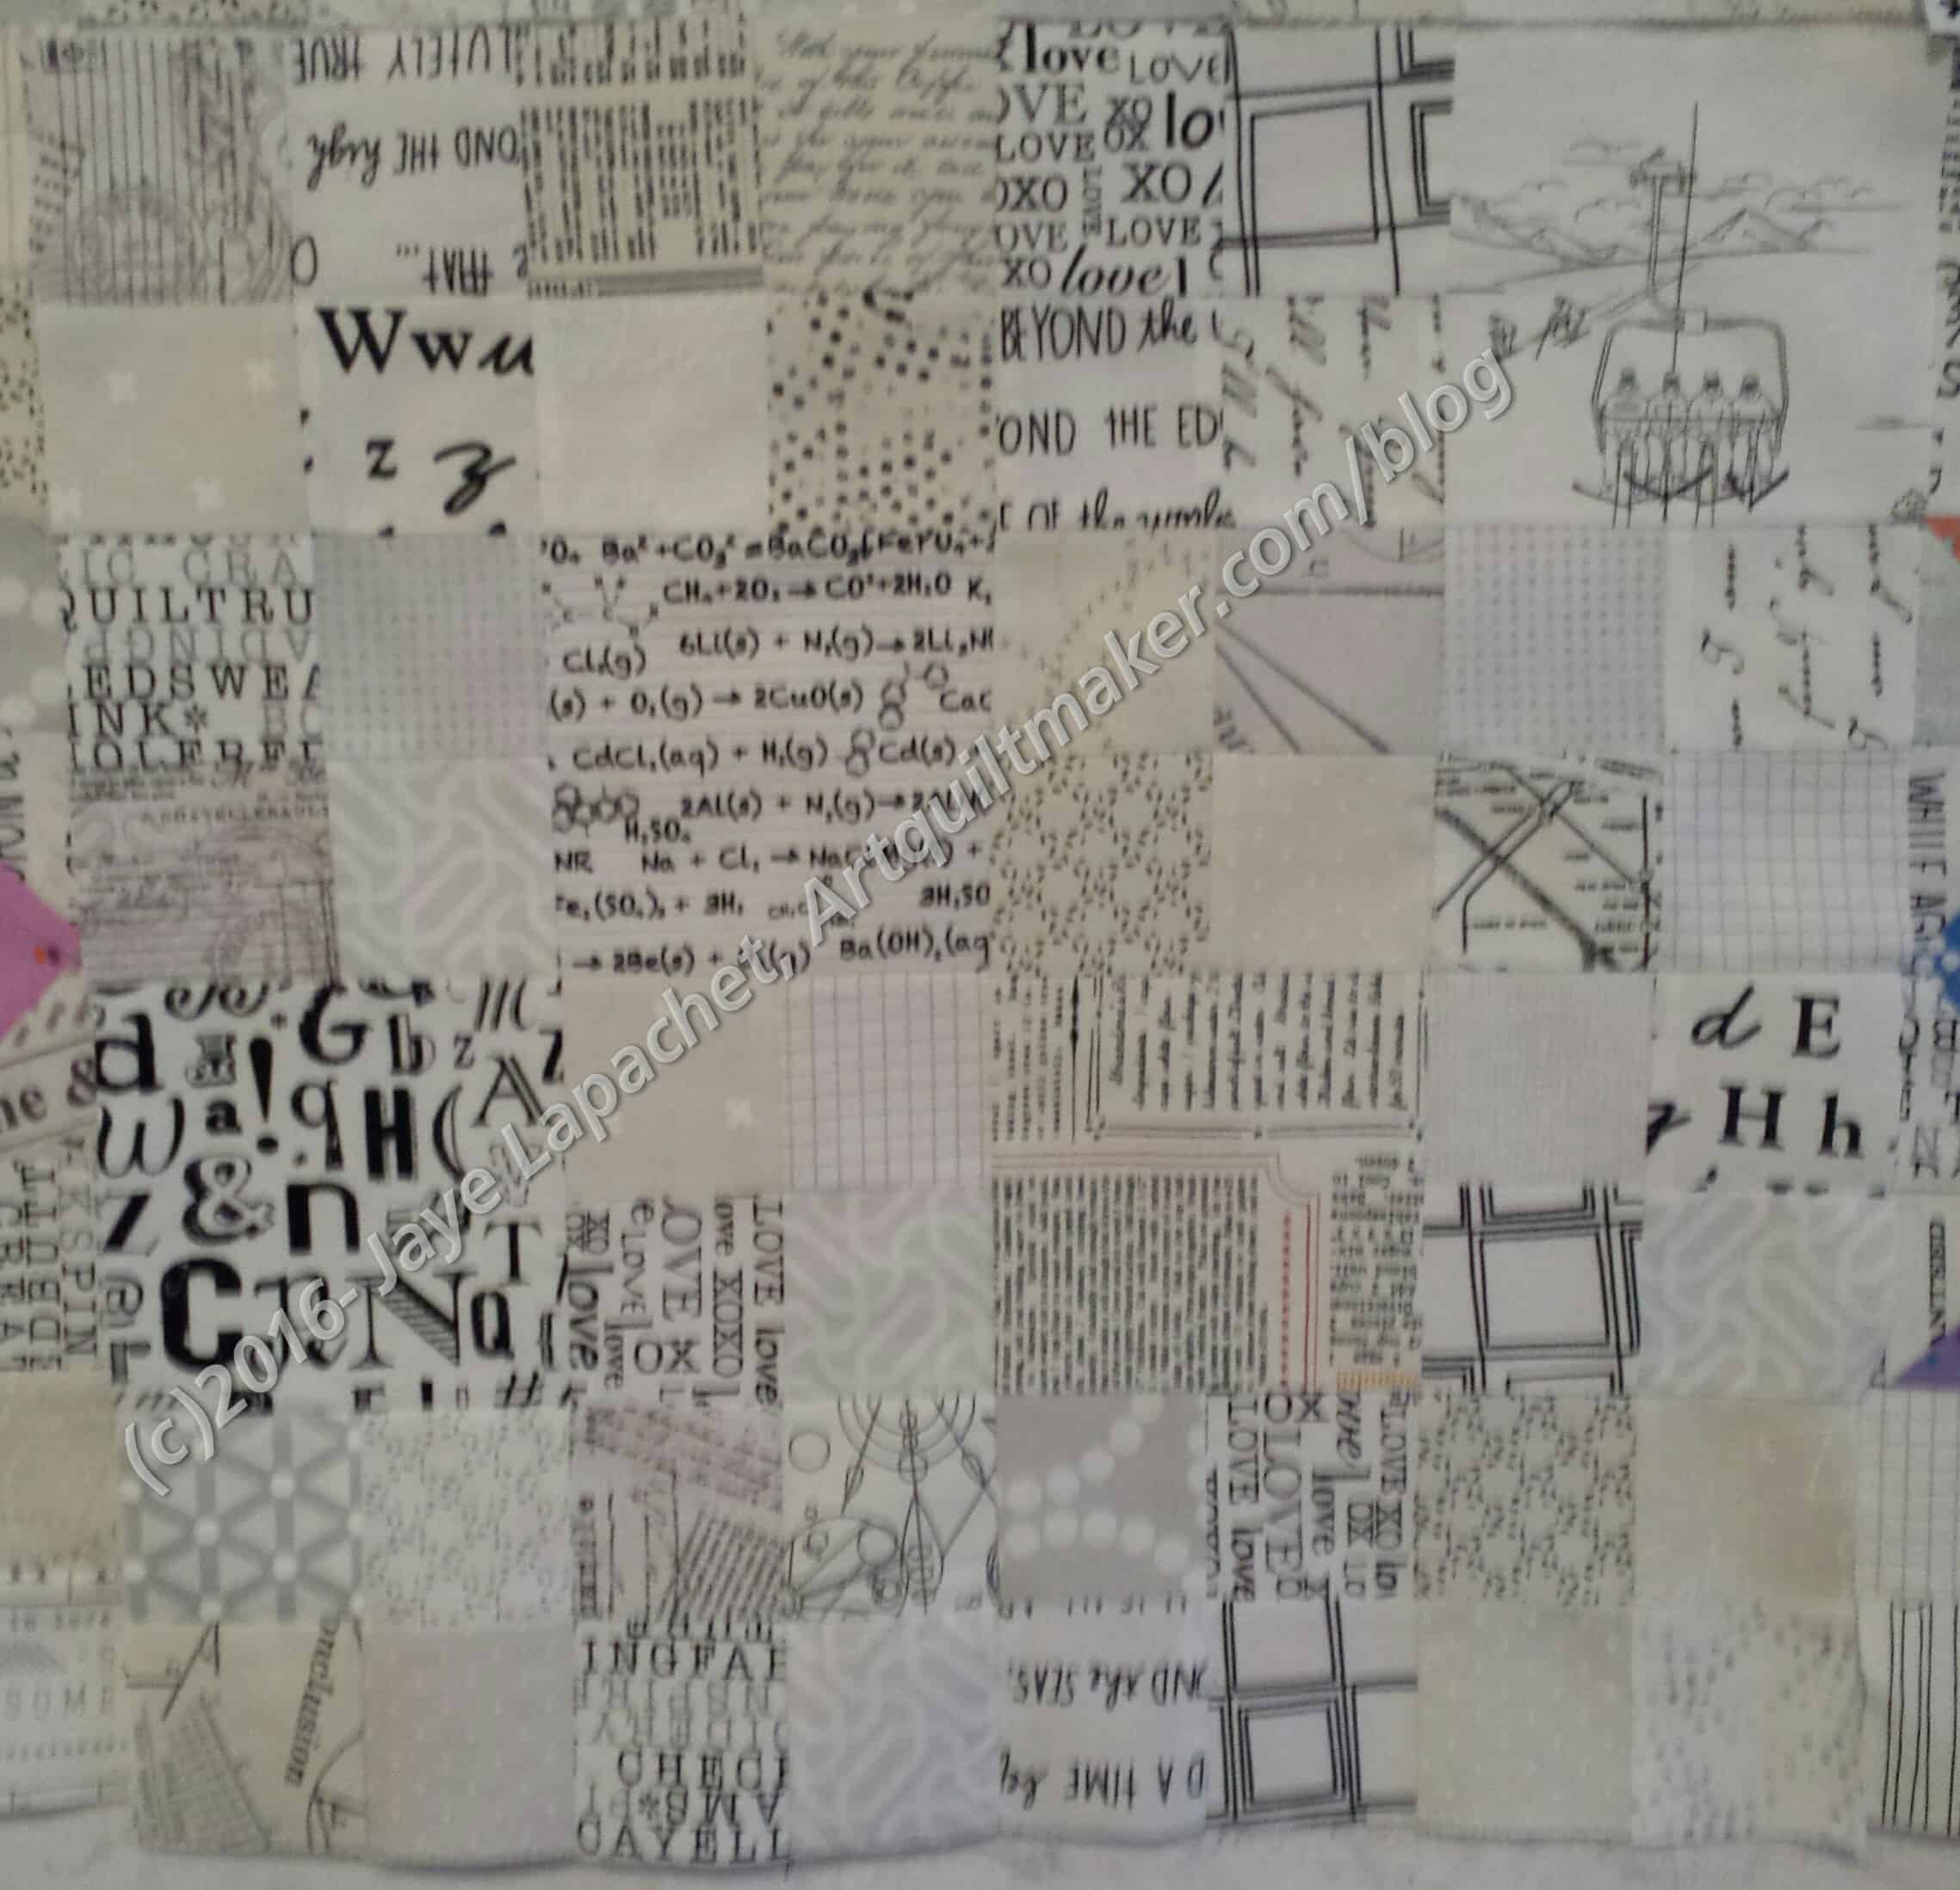
Hard on the heels of the Peacock was a deadline for the Carpenter’s Wheel. Since I had started thinking of the background for each block in terms of low volume prints, there was a lot of text fabric included.When the text Challenge was announced at my modern guild, I immediately thought of this piece. It wasn’t exactly made specifically for this challenge, but it fit the theme and the blocks were just hanging around, so Text challenge quilt it was.
That meant that I had to get some of it done before the big reveal, which was Saturday. I couldn’t be there due to #politicalwifery. Still, I had options for showing it.
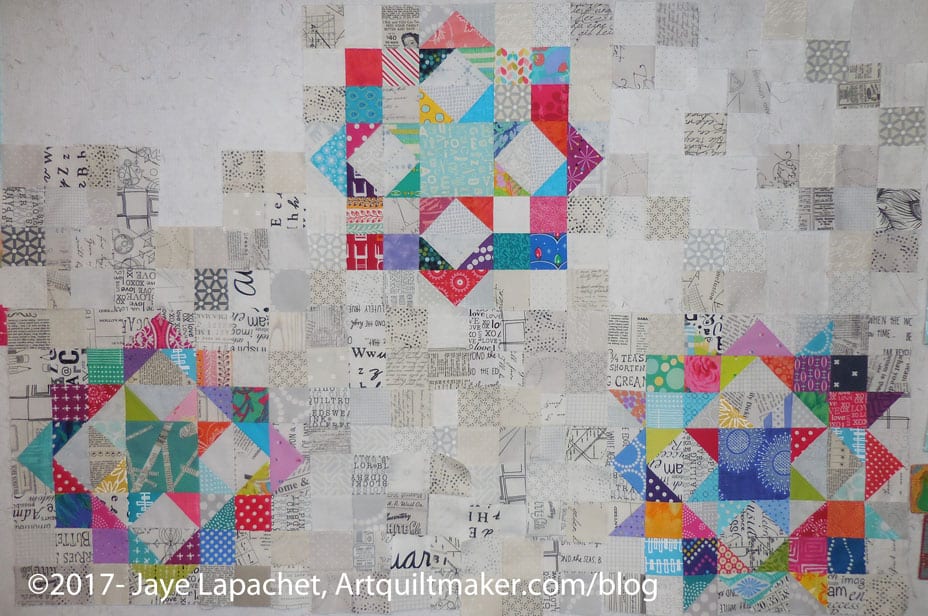
I used some mini charms, which I bought in Oregon, to get the ball rolling, but picked up other text fabrics along the way as well. A few weeks ago, I spent some quality time with the Accuquilt and the 2.5 inch die cutting, what I hoped were, enough squares to make 3 background blocks.
Carpenter’s Wheel – Feb 2017
I refused to compromise my vision, which started with the layouts I worked on in the spring of last year. I wanted some good texture int he background, so multiple squares, rather than big squares of fabric it was to be. I began using the 2.5 inch squares as leaders and enders as I finished the back for The Peacock. I made a stack of 4 patches, which later turned into 3 background squares.
Carpenter’s Wheel background block
I wanted to see how 4 inch squares would look mixed in. I chose the fabrics carefully and fussy cut in some cases. I thought they fit in and didn’t scream, so I used a couple in each block. This make the piecing go a little faster and add a little relief to the background.
I had to sew into the evening on Thursday in order to give it to my SIL on Friday to take to the meeting. I succeeded and still got to spend time with DH. I have gotten some very nice comments on Instagram and hope, even if unfinished, it is well received at guild.
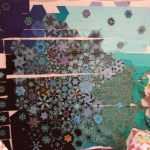
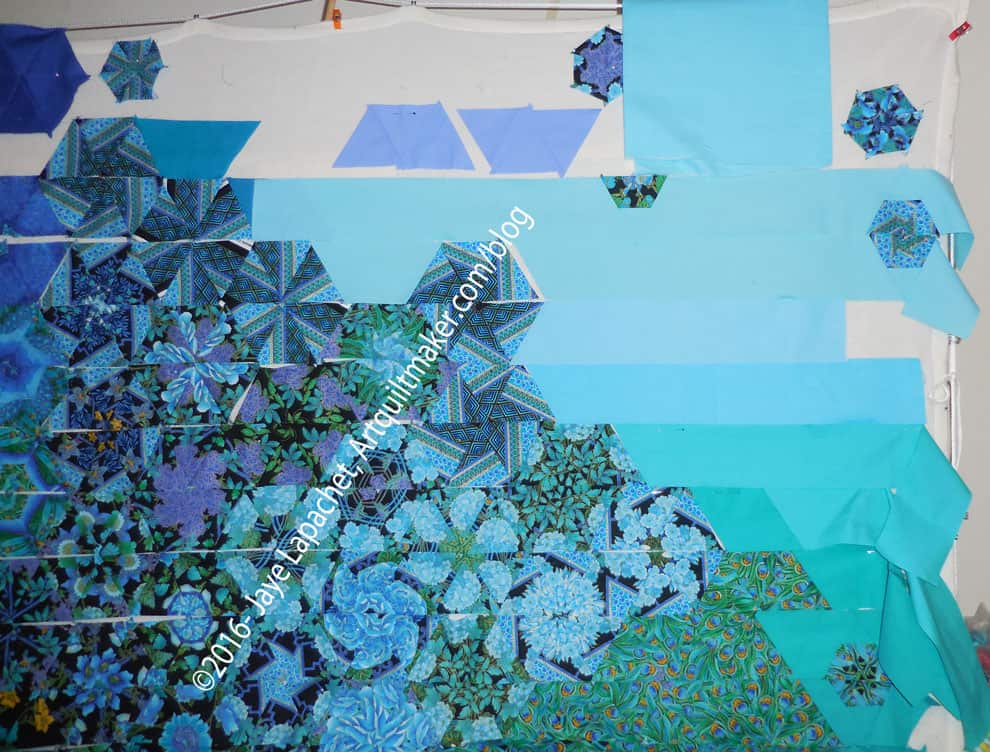
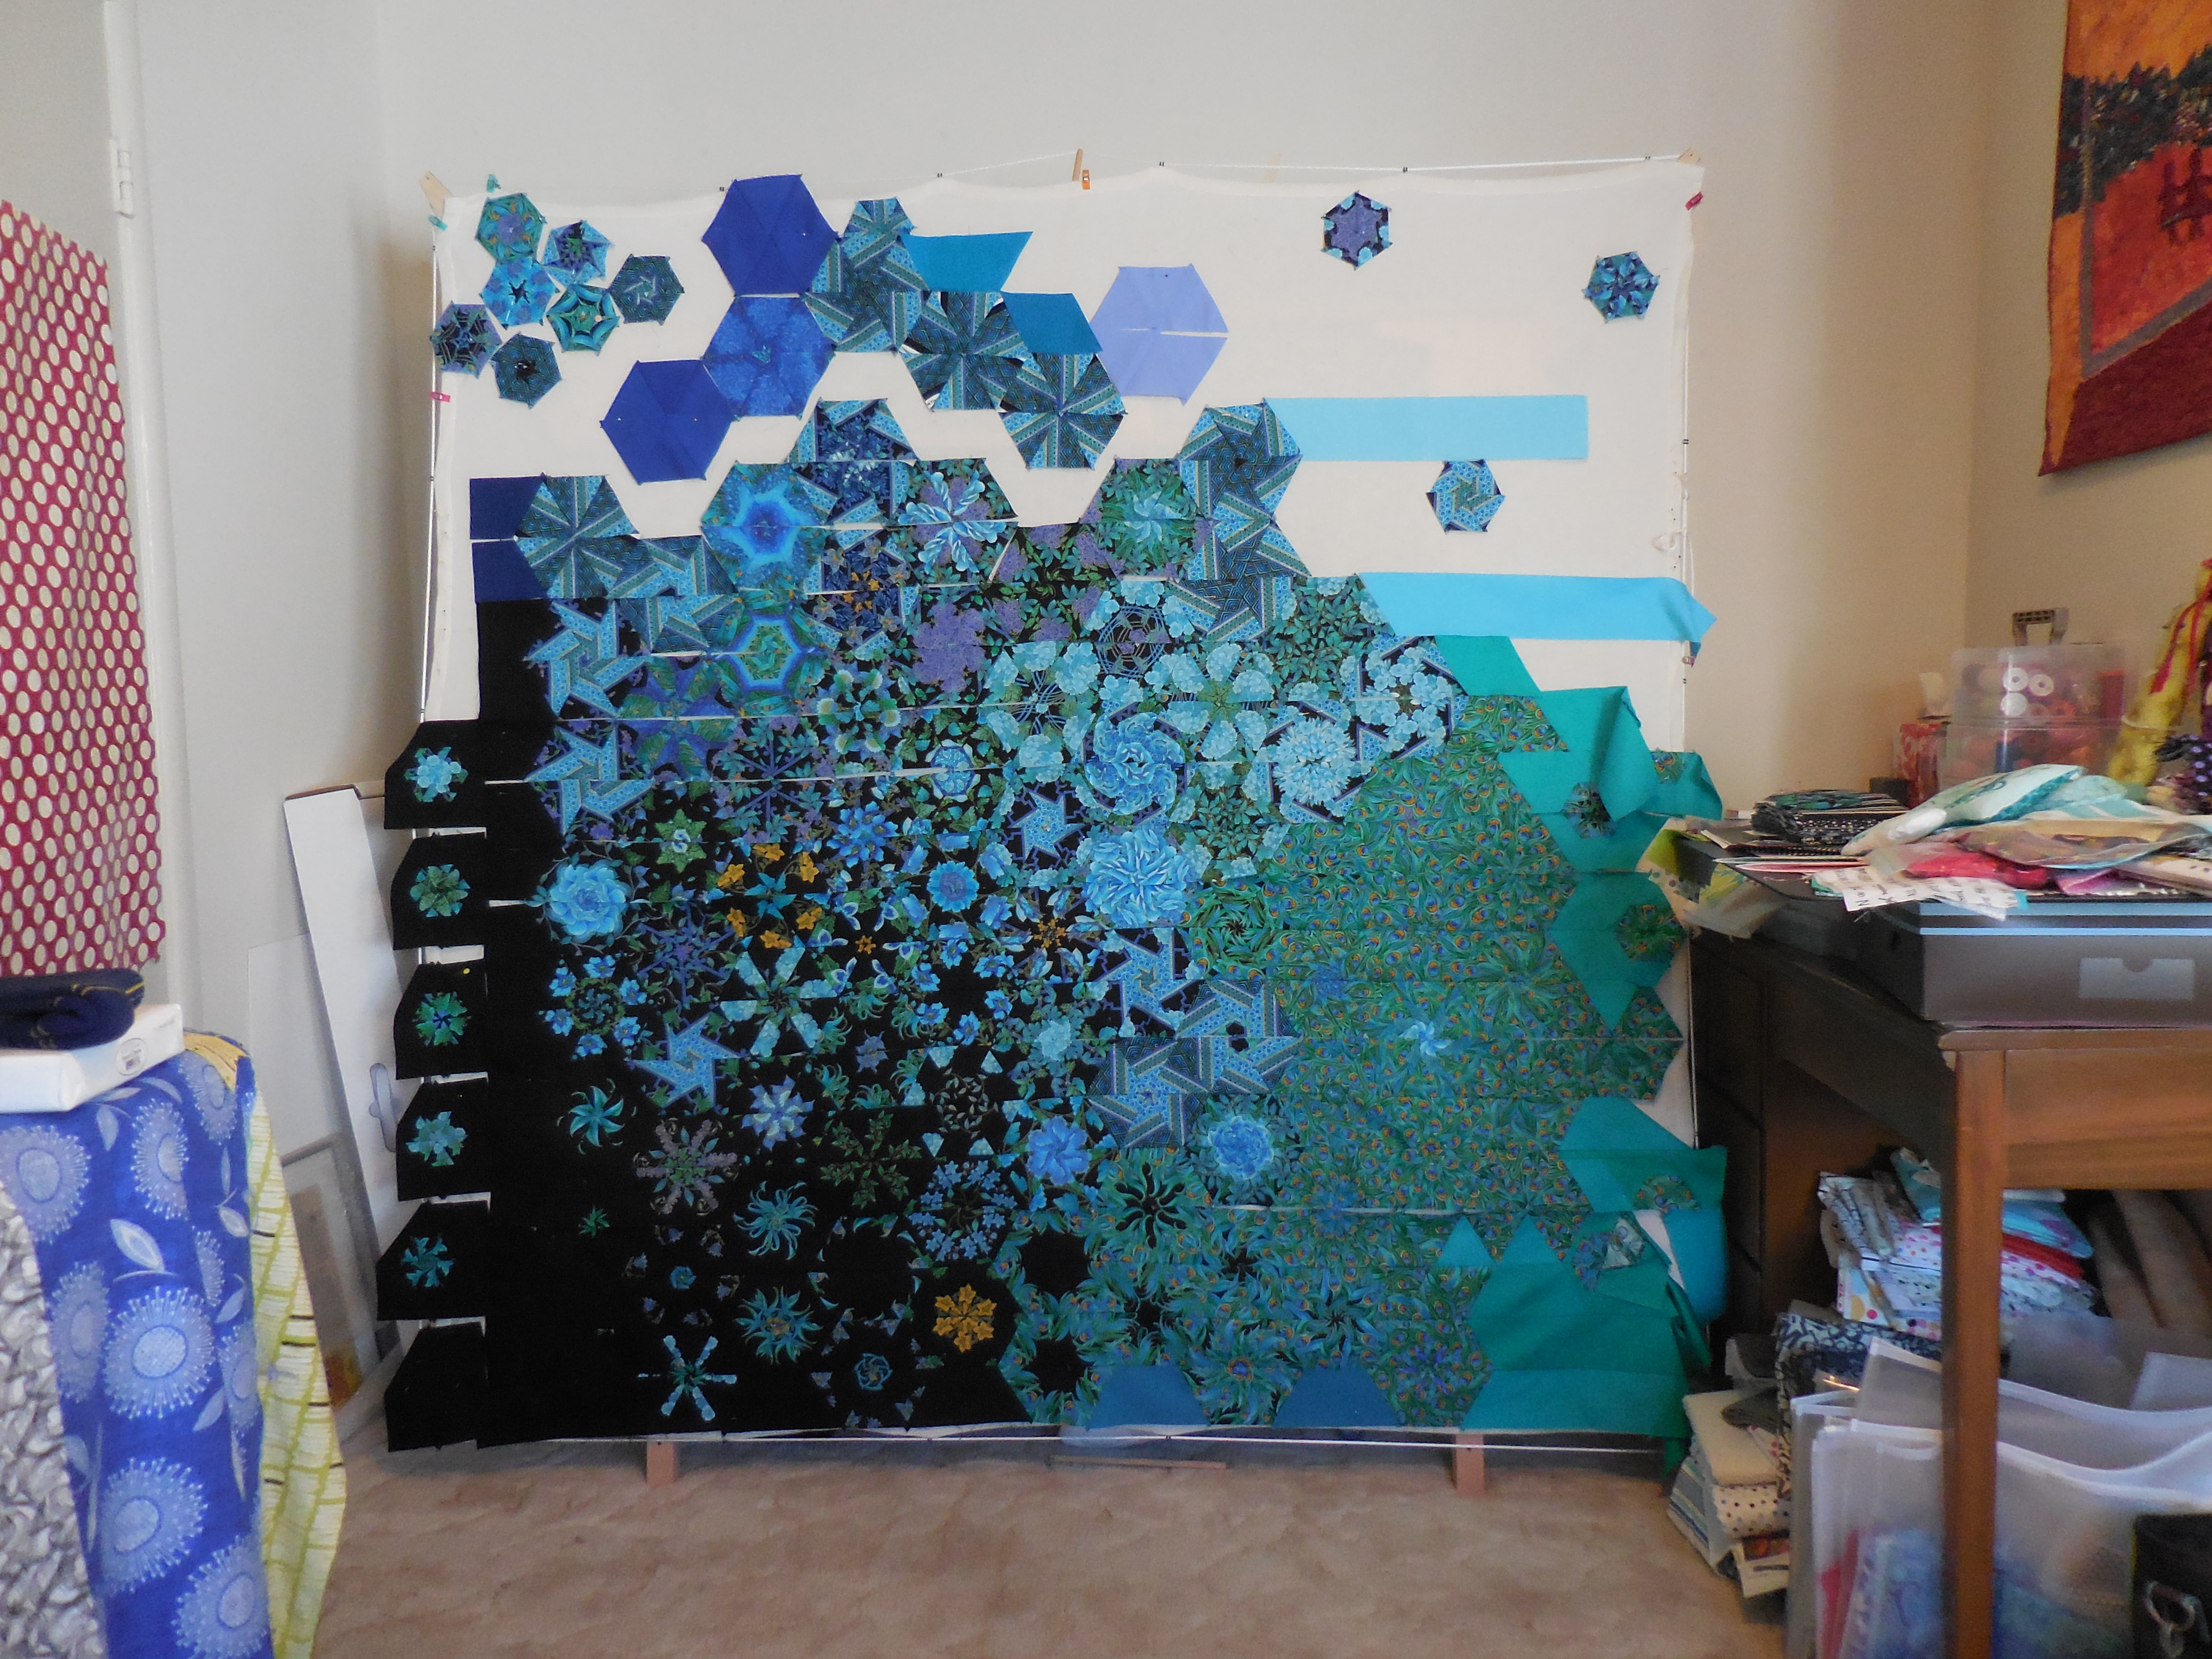
I finally finished the Peacock top. The photo looks a little odd, because my design wall isn’t large enough for the whole top so it is bent around the corner and taped to the fabric closet door. Still, done is done albeit large.
I also finished the back this past weekend. I knew it would take awhile so I started after I returned from the CQFA meeting and the BAM Sew Day. I spent about 4 hours and got about half of it done. The rest of it took me all day on Sunday. I thought about this and decided that the smaller the pieces I have to work with the more time the back takes. I had used most of the large-ish pieces on Saturday, so I was left with rather small pieces. I thought I would be annoyed, but I sewed, actually, quite happily on the back.
I needed to get it done before the CQFA Retreat, because someone wanted to buy my design wall. That didn’t work out so my Pind design wall is available for sale, if you are interested. It works great and is in great shape; it just isn’t large enough for me. Let me know if you are interested.
Yesterday, after returning from a somewhat intense #politicalwifery weekend, I spent some time with The Peacock.
The short version is that I finished the left part of the top. There a couple of long seams I need to sew to other long seams, but I am saving them until the end.
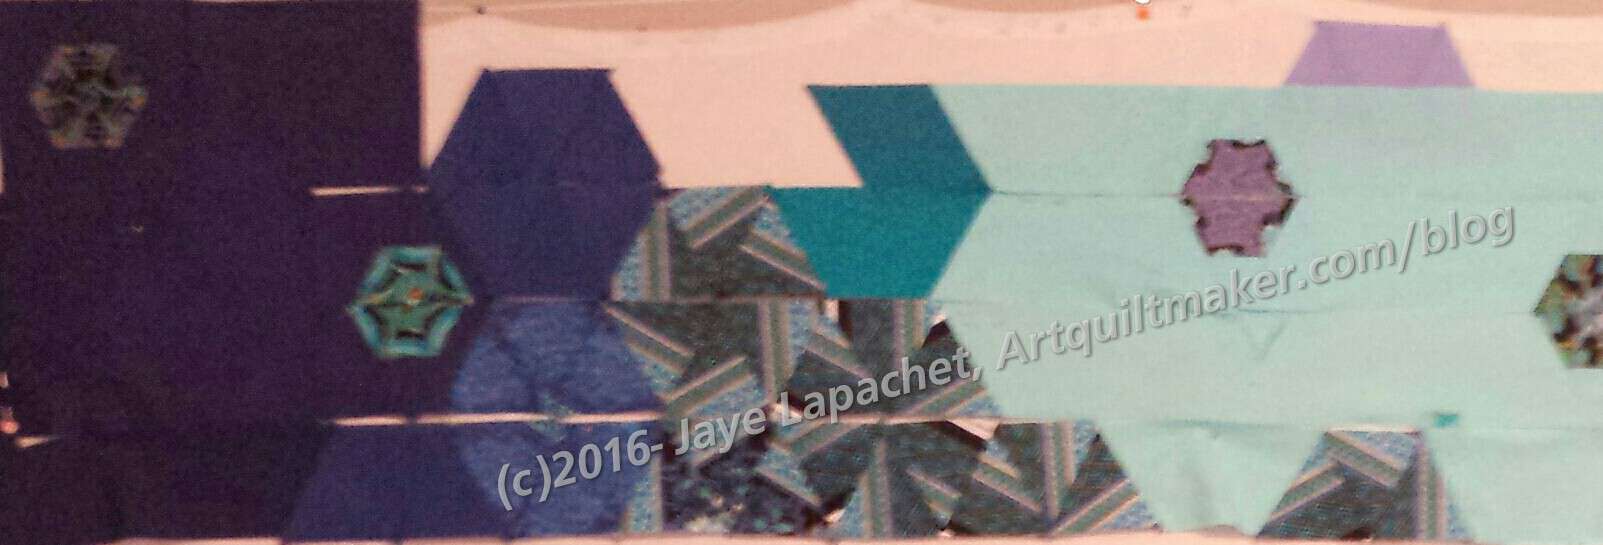
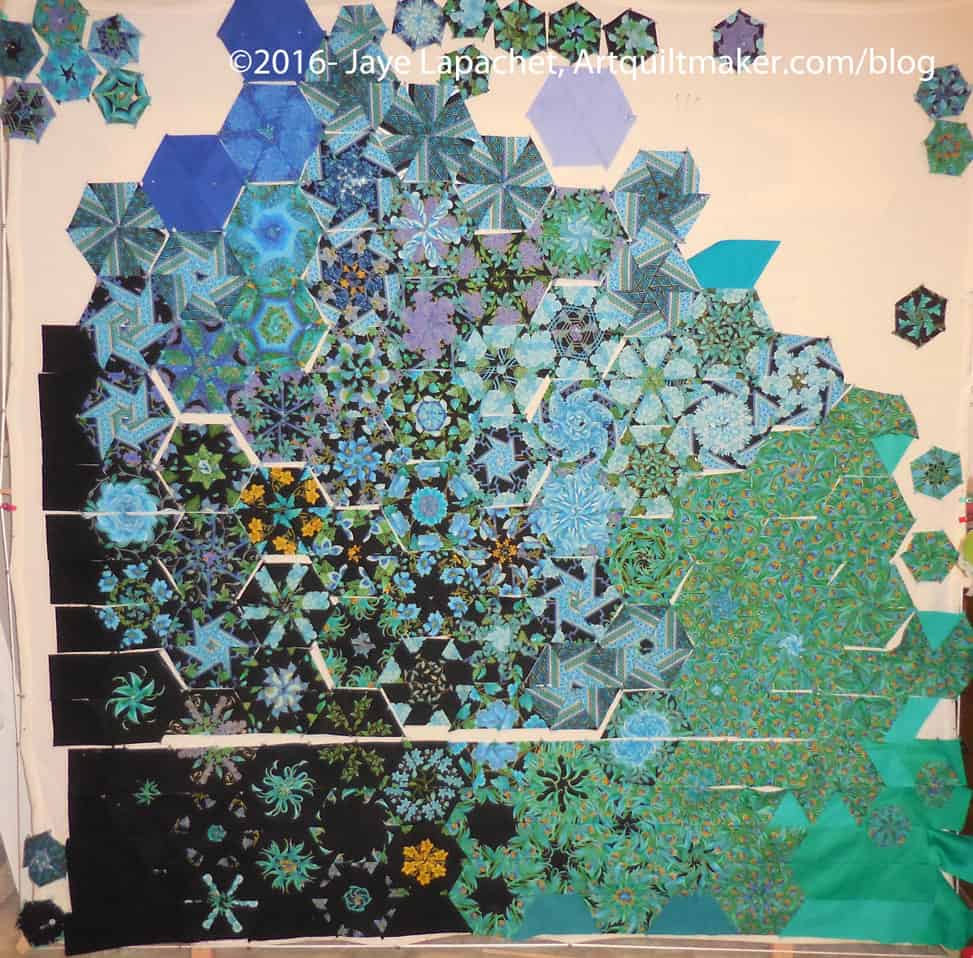
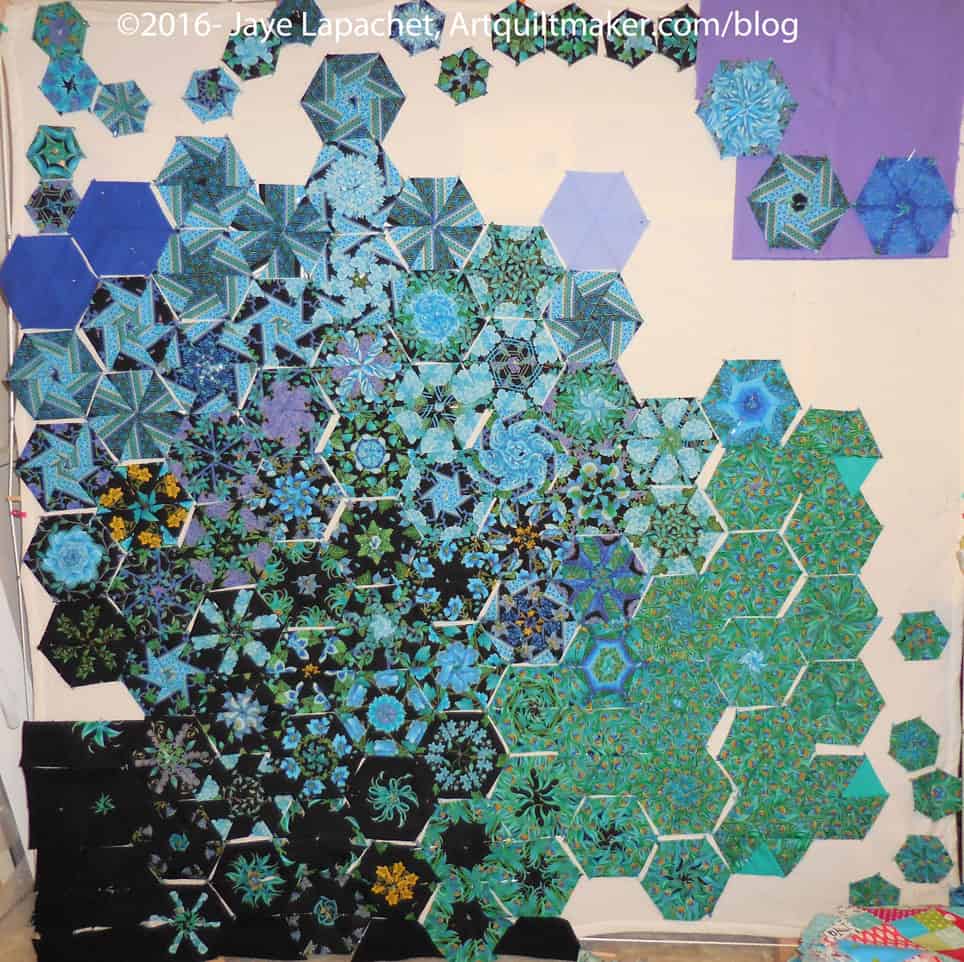
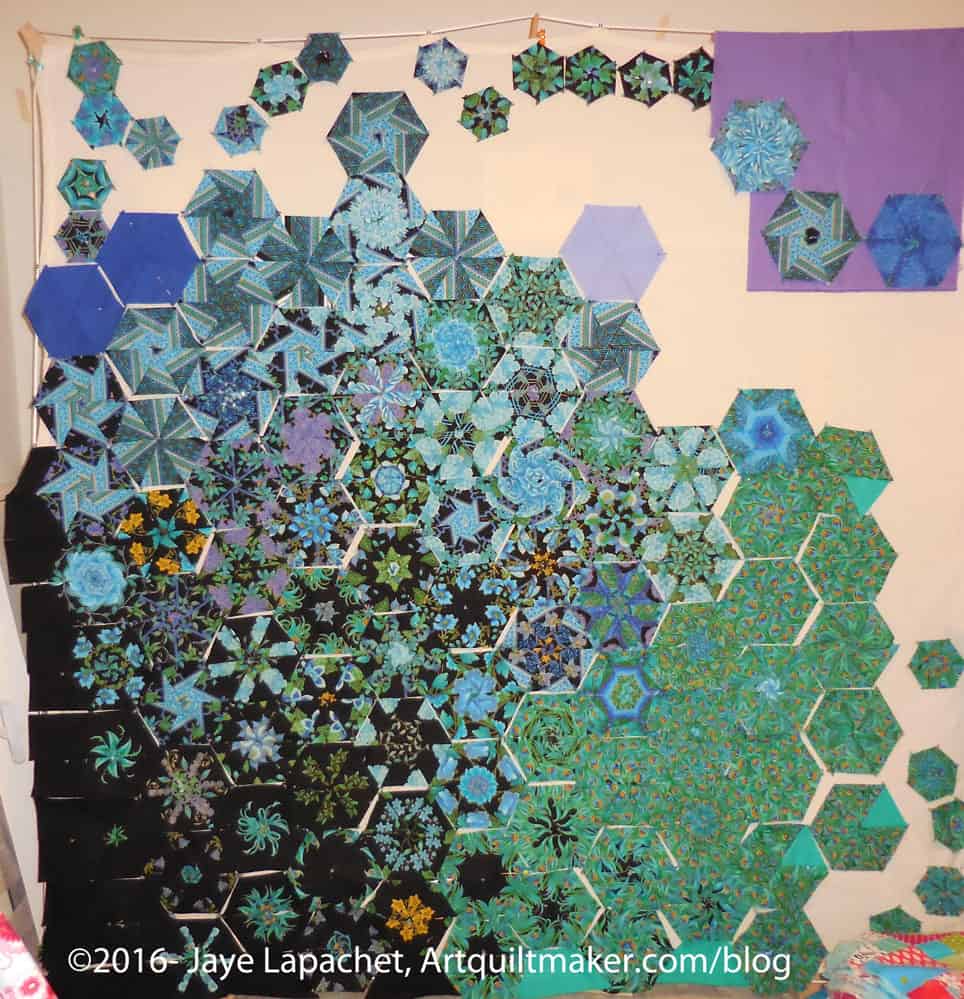
Now I can work on the right side in peace. The first small hexies I added need a lot of attention. I was able to put the 3 rows together after that. I am waiting to see how long the rows with small hexies will be before I trim or add to other rows. At the moment
I sewed a few seams last night and think I made some progress that sent me over the edge into less decision making and more rote sewing. I think.
The Peacock – full piece, January 2017
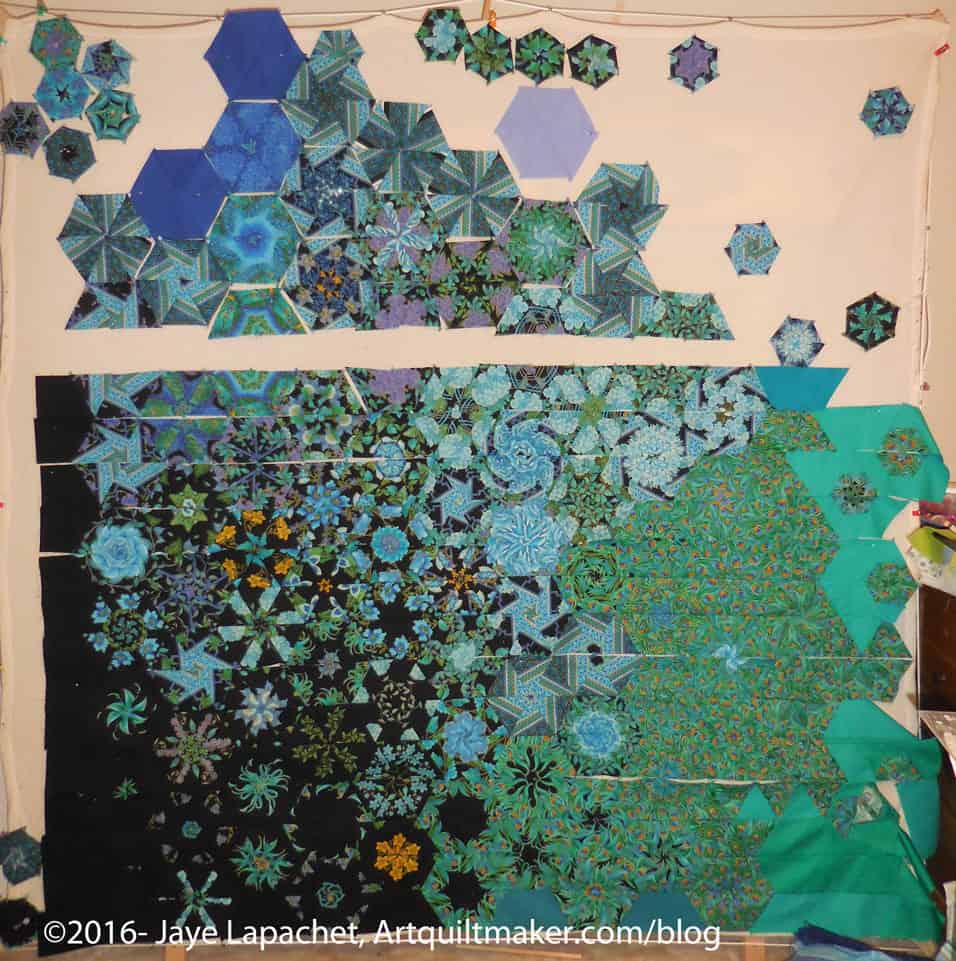
The Peacock – 1/18/2017
I need to get past the small hexies to get to the point where I can finish the top background. On the left is the piece from Monday -earlier this week and the right is the most recent incarnation. I have added one strip, but this required lining up the small hexies with their bottom halves on the row below. It doesn’t seem like a lot, but it is easy to get them out of alignment.
The Peacock – top left
Next, I have to finish that row, which means deciding if I will keep the blue half hexie (far left) or replace it with a regular strip. Some of that depends on how much of which dark fabrics I have left. Working with solids in this project reminded me why I don’t like to buy just FQs.
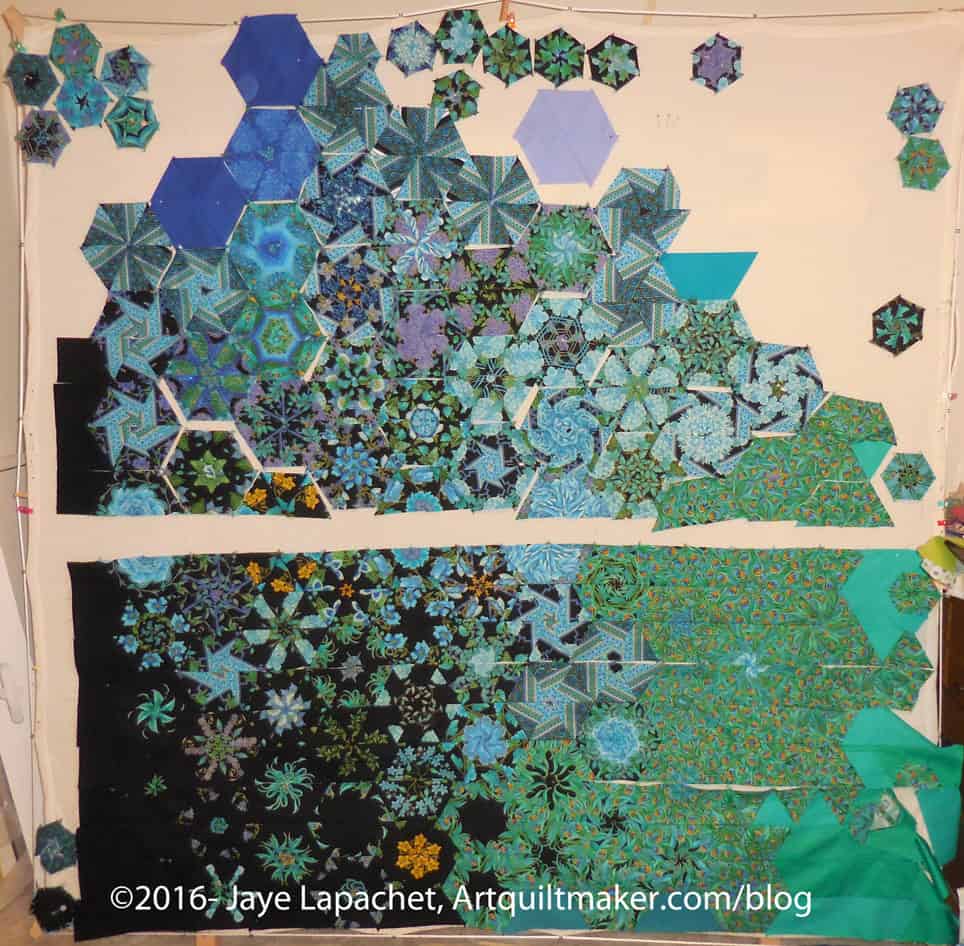
I spent several hours over the weekend working on the Peacock. I was determined to make progress and I did! I am pleased with the progress that I made. Several hard decisions were made and lots of sewing was completed.
The Peacock – top right
I spent a lot of time on Saturday making the smaller hexagons large enough to fit into the rows of the piece. During this joy I kept asking myself whose bright idea it was to add the smaller hexagons to the piece. They take more time and are a bit fiddly. Most of those I worked on will be on the darker side of the top of the piece. I will scatter them around and up to the top. A few will go on the lighter side.
The Peacock – full piece, January 2017
Including this, I am marching up to the top of the piece. I am a row away from having full strips to piece into the top and I can’t wait.
I took some time to piece the rows together on the bottom. These are just long and awful seams. I can’t do any chunking on this piece, which is a pain. I want to finish the left side including the small hexagons with black backgrounds in a border type treatment and then move the entire piece over towards the left so I can work on the right.
I’d love to tell you tomorrow I have the top finished, but I think that would be too optimistic. I plan to work more on it today and, hopefully, make some good progress.
It has been hard to get going again on the Peacock. I don’t know why. I think it required contemplation and I really have just had snatches of time here and there over the past few weeks. Some projects require concentration and no progress is made without the time and mindspace for concentration.
The problem is that this piece is taking up space on my design wall and until I finish, I can’t make any other progress. Yes, I could take this piece off the design wall, but that would be a huge mess and I am pretty sure I would never get back to it. Not worth the trouble.
Peacock – 1/1/2017
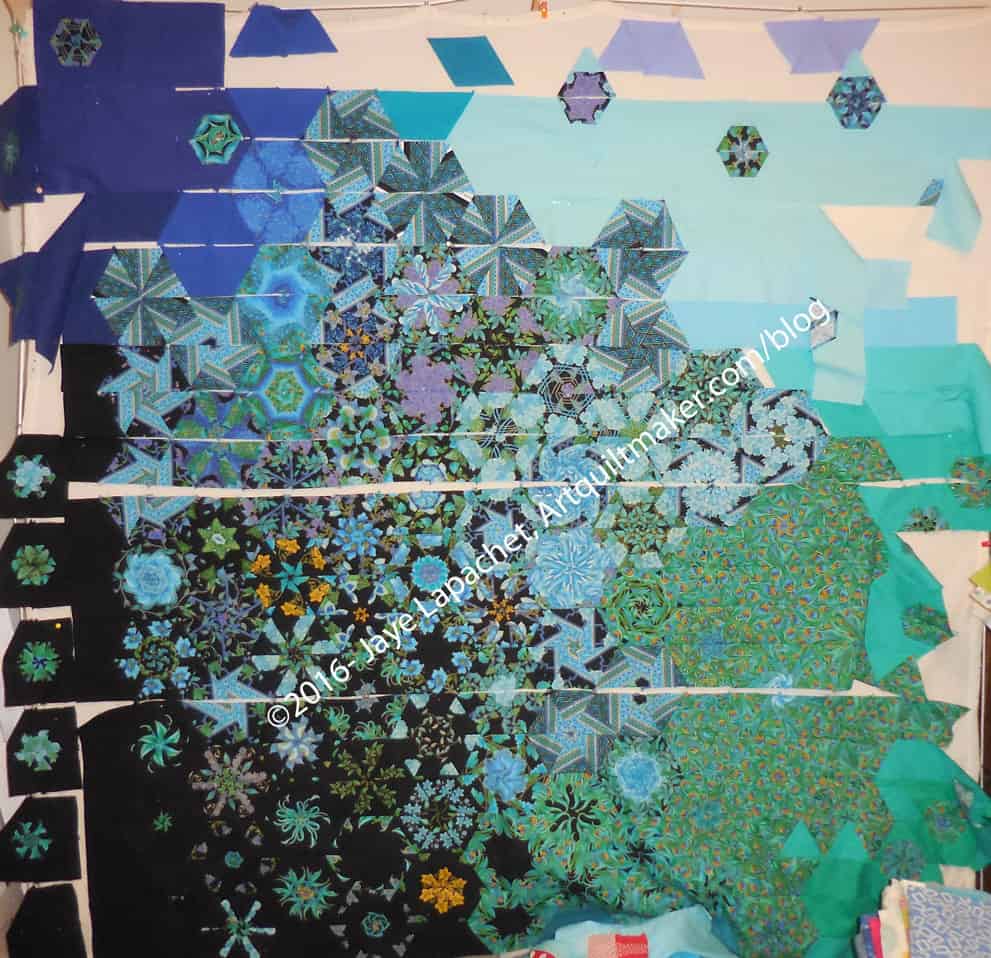
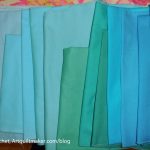
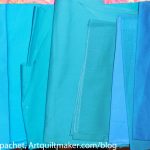
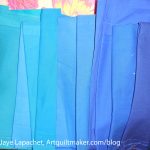
As you may remember, I gathered some solids and they have been laying around waiting for my attention. Sunday, after #politicalwifery was the day. I cut and placed some strips of solids as background onto the design wall and I am pretty pleased with the results so far. I have some very light blues, but I don’t know that I will get to them as at some point in the not to distant sewing, the very darks I am using on the left will meet the lights on the right and I have to figure out that transition. There will be an angle involved for sure. Perhaps the lavender as well?
In my last post, I talked about how my design method can run into problems. Still, it is the way I work and I don’t want to plan out a whole quilt in each detail before I work on it as there would be no reason to make it. Therefore, I have to cope with design challenges as they come up. I really am struggling with what to place on the top of the quilt.
Peacock Solids (Left)
Peacock Solids (Middle)
Peacock Solids (Right)
The other day, since I was determined to make progress on The Peacock, I pulled out all of the solids that were in the running for use and put them in order by color. The photos above don’t look very good. It is hard to see the subtle differences in hue. Still, it makes it easier to choose, which blue to put next as I move up to the top of the quilt.
Push has really come to shove on this project. I have to decide how to arrange the solids in the upper right hand corner. I have some strips cut and some ideas percolating, but this is where my design and construction style can run into problems.
I think the blues I have on the right will have to move up and I will have to use one that is darker to blend the dark-medium green more to the blues higher up.
There is a very strong diagonal line made from the greens on the middle right. I may need to figure out a way to smudge it as it is quite prominent.
As you can see, on the left, I also made the dark small hexies. They are not placed in their final location, but they will be towards the bottom left when all is said and done. As I have said 500 times, I need a larger design wall. Although, I fear if I have a larger design wall, my quilts will become larger.
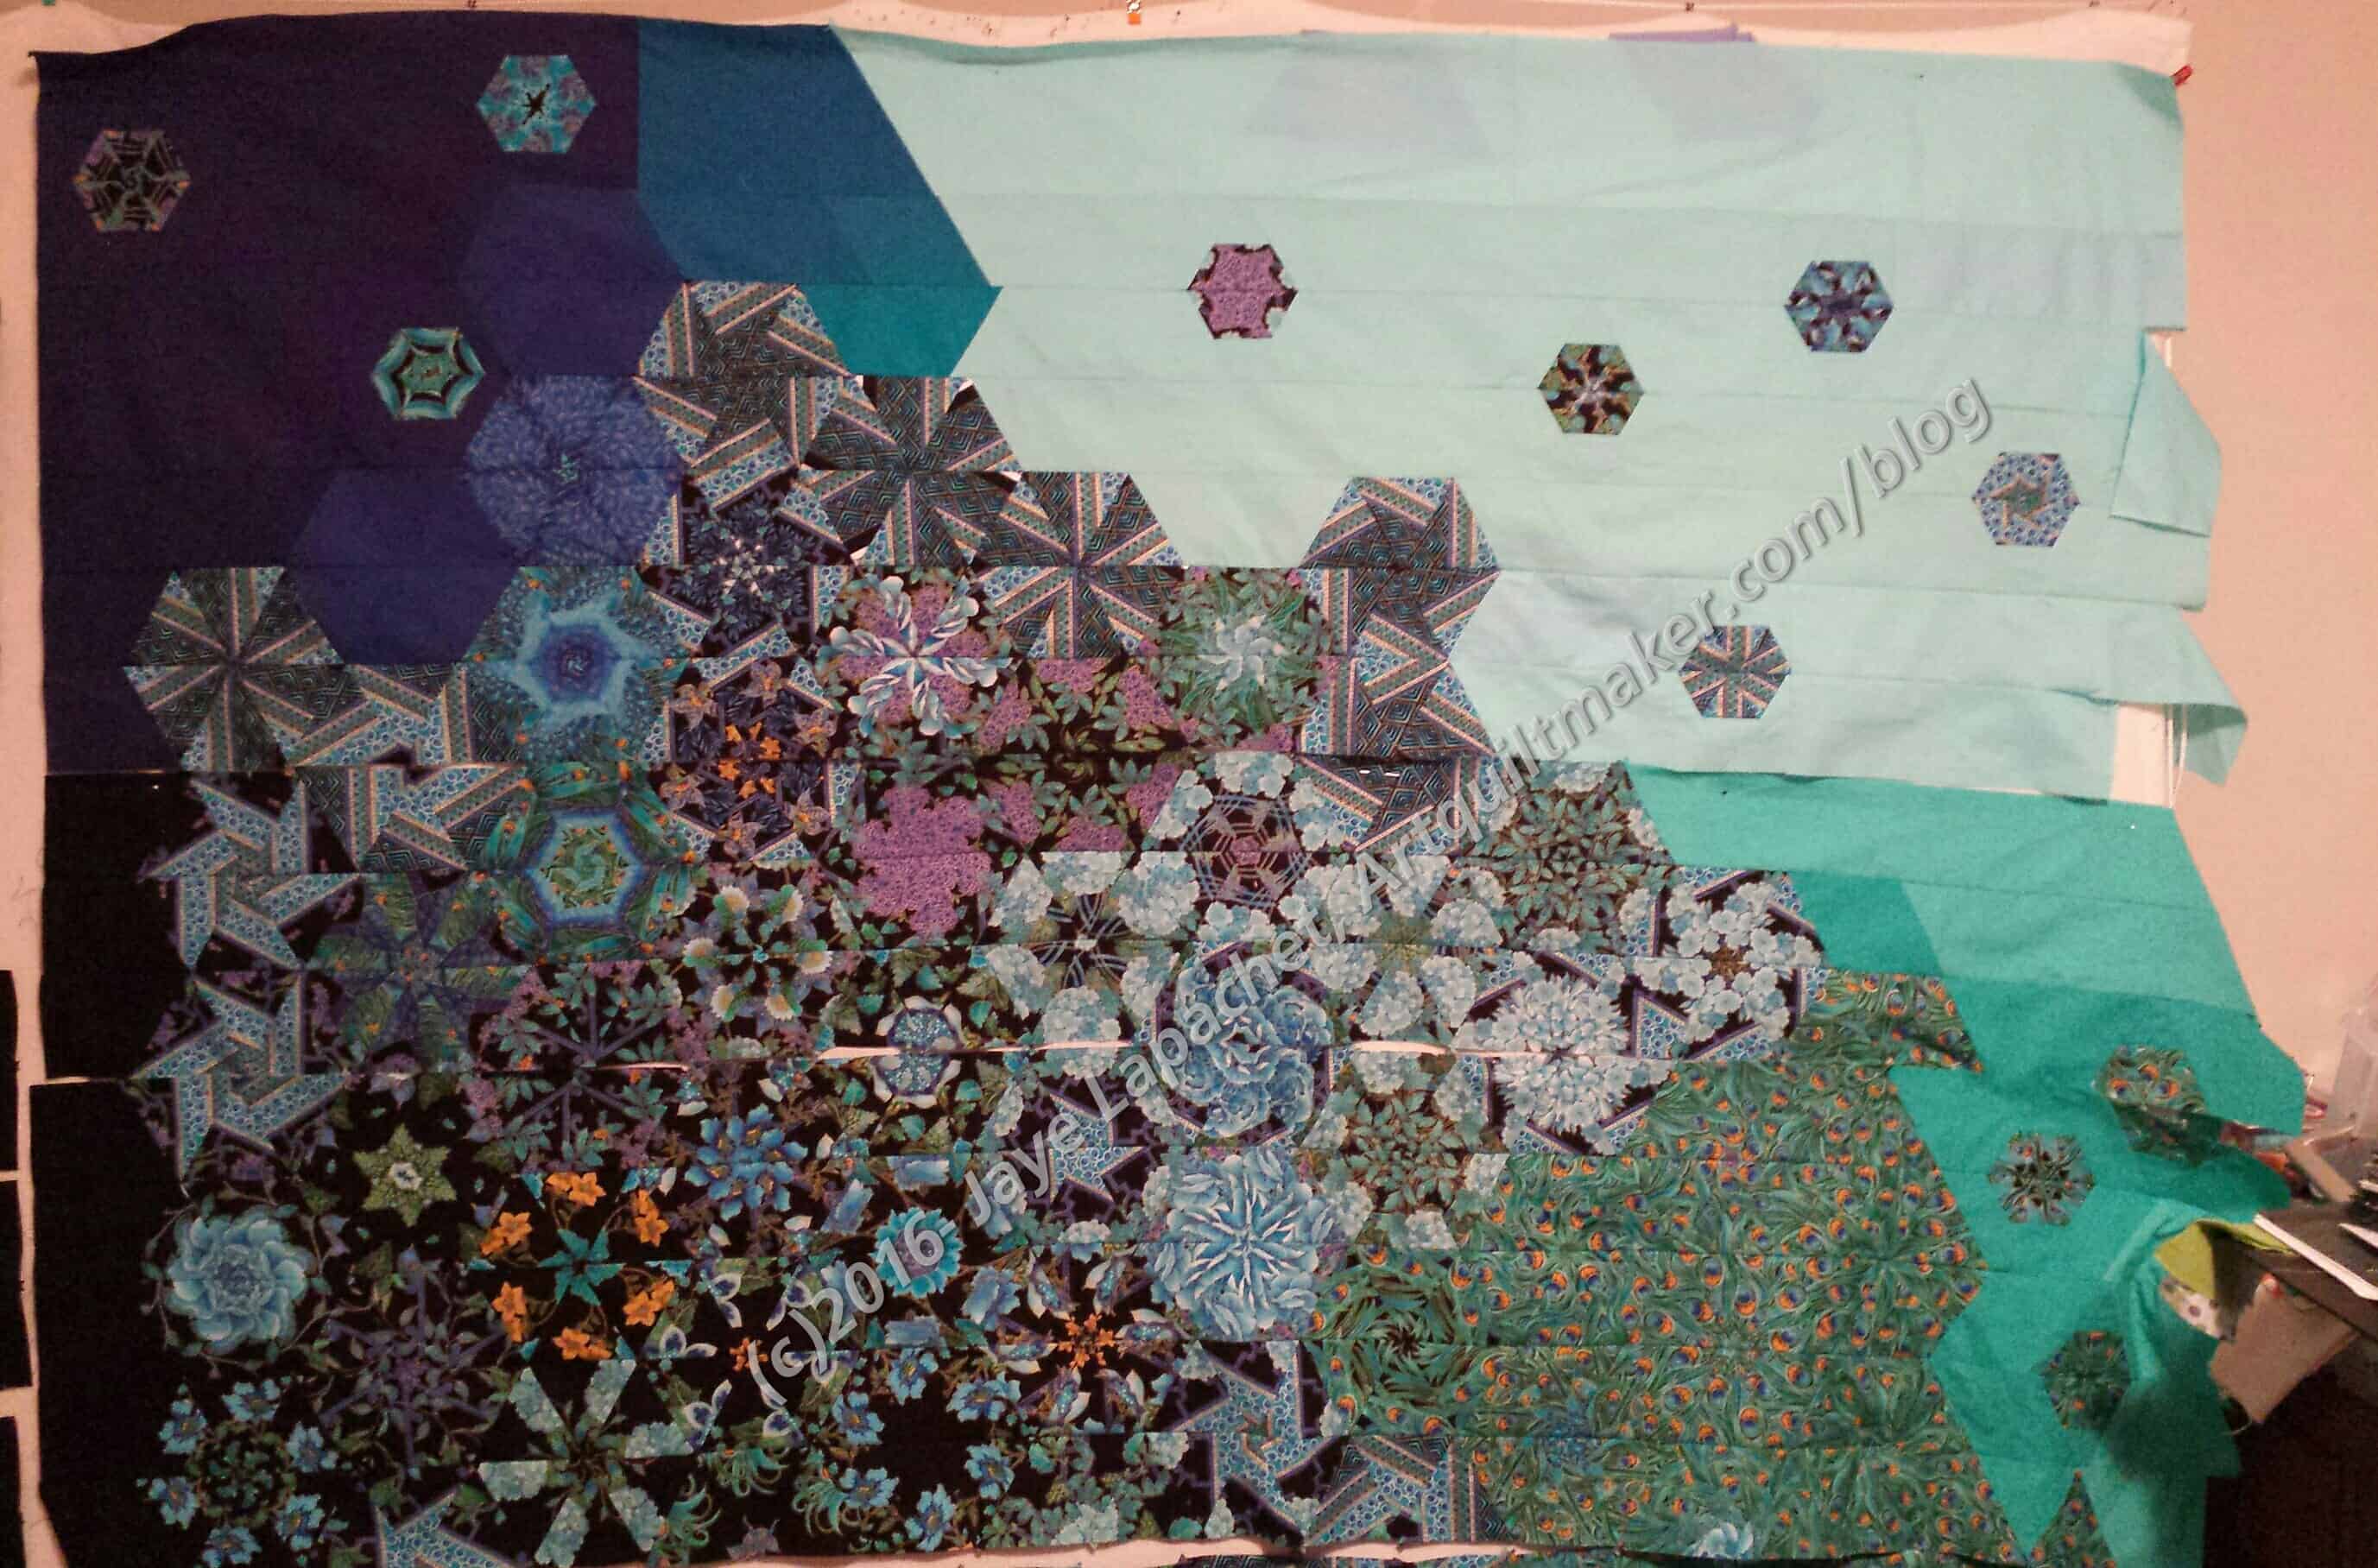
I know I just wrote about my progress on The Peacock a few days ago, but I have made more progress and I am pretty excited. The progress feels kind of like a baby. The first few months of a baby’s life sees a lot of change in their looks. In this piece, each row seems to provide more personality.
The Peacock – Nov 2016
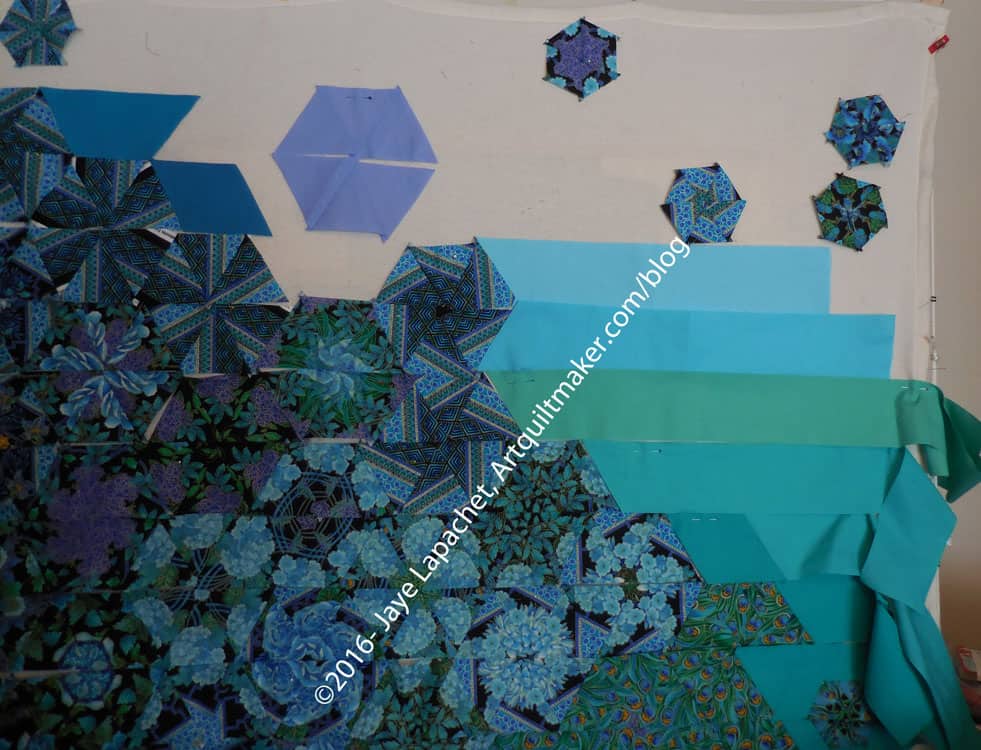
I spent most of the day Sunday out, but since it is Standard Time and the day started early, I arrived home on the early side. The timing allowed me to spend a few hours sewing. I wasn’t expecting any sewing time and was very pleased. As I am getting towards the top, the piece really looks more and more like something.
I am not sure I am a huge fan of the green (feather) diagonal line, on the right towards the middle, that was formed when I pieced those rows. I am not, however, unpicking. I do like the trails the green solid has made and I am eager to get those sections on the design wall so I can finish working on the final width and layout.
I know I was pretty ambivalent after making the blocks for this piece. I am really interested in how the quilt top is turning out. It is taking a lot of time and work. However, the challenge is really working my brain.
Time does funny things to my head when I am sewing. I know I sewed A LOT over the weekend. Still, I felt like it wasn’t enough. Will there ever be enough time to sew? I don’t know.
The Peacock, end of October 2016
During all that time, I worked, mostly, on the Peacock. I now have 10 rows sewn together in some fashion or another. I have them mostly sewn together in groups of four rows. They will all be sewn together eventually, but I am just doing this much for now.
I also started to sew some bits of the upper rows together, but nothing major is done up there. I have to get serious about the solids and see what I can make for the background in the upper right hand corner.
As I mentioned the other day, I was able to piece in some of the small blocks.
It isn’t a very linear or straightforward process and there is a lot of fiddling that goes on.
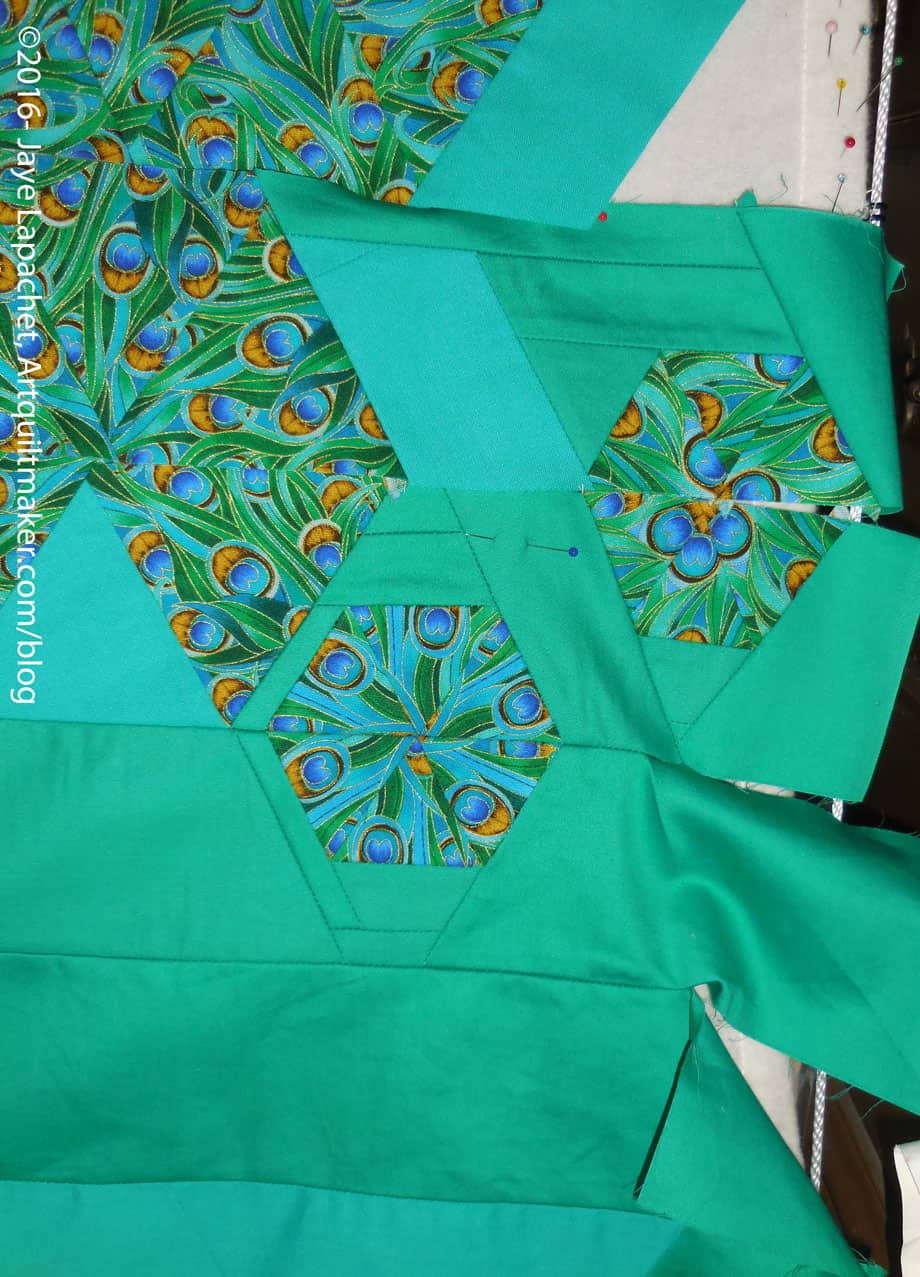
One issue I am having is with measurements. I know each row is 3.5″ wide, so I have cut solids + seam allowance to make up that size with the small blocks. I still run short and have to add other pieces of fabric. I do like the texture the added seams give the piece. However, it is still annoying. I can’t figure out what I am doing wrong.
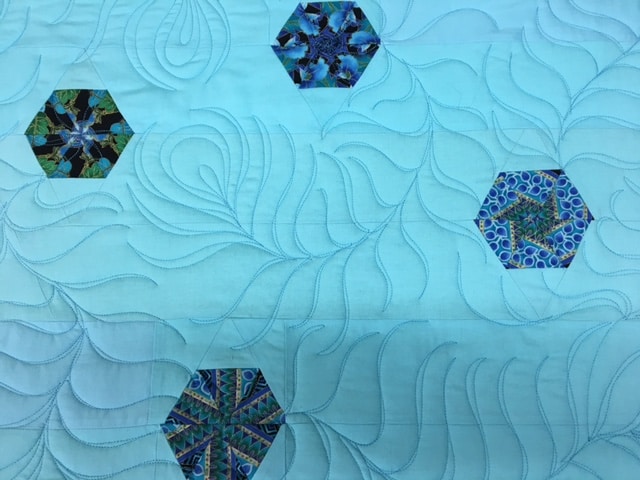
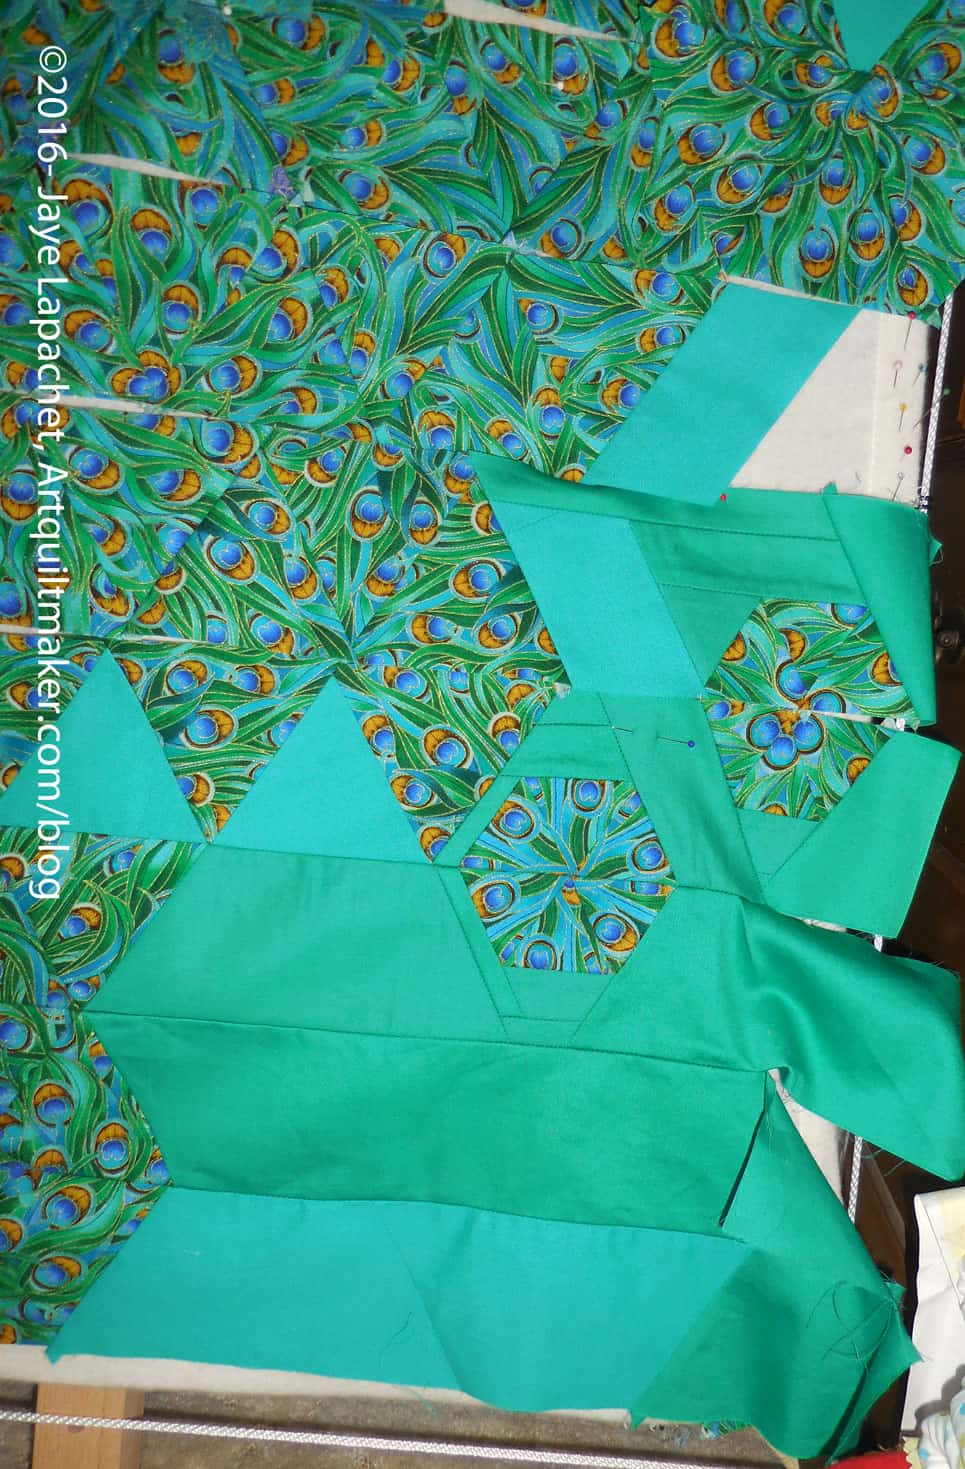
The Peacock “border” detail
I didn’t put a small block on the end of the bottom (first) row and am kind of regretting that. I have a lot of small blocks I want to use and may need to go back and add one. However, the top right hand corner background area is pretty blank and may need some mall blocks there to lighten it up.
You can see the not all of the row ends are sewn on the right side. I am leaving the design open to add more small blocks. I didn’t do that on the left and may need to add some additional yardage to the ends. We’ll see. It may be that I concentrate the small blocks on the top and right.
I am adding different colored solids that kind of match the colors of the print fabrics on the edges and to fill in the background. I bought some solids from the line of fabric, but I have others that go with the fabrics as well. the shiny green solid you see above is one of the first fabrics I bought when I made my first quilt. I have been keeping it all this time and I think it is the right color for this piece.
I bought a lot of black with the intention of using black for the entire background. While I need to drape a piece of black up on the right-top, I decided that it will probably make the quilt too depressing. I am also thinking of using a variety of solids.
The dark blues at the top are ok, but the lavender might be too light.
I spent some time on Saturday night and most of the day Sunday trying to make progress on The Peacock. I now have four rows sewn together in a chunk. A fifth is the start of a new chunk.
The piecing is very labor intensive, though not as labor intensive as Y seams. The good part is that I have to put a leader/ender piece between each Peacock seam under the machine. This will equal a lot of additional blocks or, perhaps, a quilt top.
I started to put the small blocks into the ends of some of the rows. That piecing is fiddly and I haven’t gotten all the measurements figured out. Still, I am pleased that I have been able to incorporate those small blocks into the border as I piece. I have more to piece in and have to figure out how to do that.
During the past little while, I have been flinging curses at the Peacock as it sits on my design wall, taking up space and glaring smugly at me.
No more.
Peacock on Sunday
I made two cuts on Sunday and was off. With those two rotary cut strips, everything changed. Finishing the piecing actually became possible…. no probable. I only had time for a little work on it, but the piece progresses. I am snatching bits of time where I can and making some progress. It is amazing how something can change so quickly. I do think that, more importantly, my attitude about the project changed.
First, I had along rest with absolutely no sewing. The closest I came was visiting a craft shop that carried quilt fabrics and magazines.
Next, solving the problem of squaring up the piece began to rumble around in the back of my mind until I had a solution I wanted to try. Two cuts and I realized that what I wanted to do would work and it was actually a reasonable idea.
The idea was to cut 3.5″ strips (same width as half one of the blocks), cut a 60 degree angle on one side and sew it to the edge blocks. These short strips work. The black, with which I have started, blends nicely in with the very darkest blocks.
Peacock: More background added
Third, I started to move the blocks around after taking some photos. Some of the blocks looked out of place in the photos. Moving them make the piece come together better.
In the photo, right, I have moved some of the solids around to try and blend the background a little better. I haven’t tried super hard yet and I know I won’t be able to blend as well as I do with the Fabric of the Year quilts, but I want to give the impression of a bit of blending going on. That I immediately started to blend the blocks into an Impressionist look tells me I have much more color blending in my future.
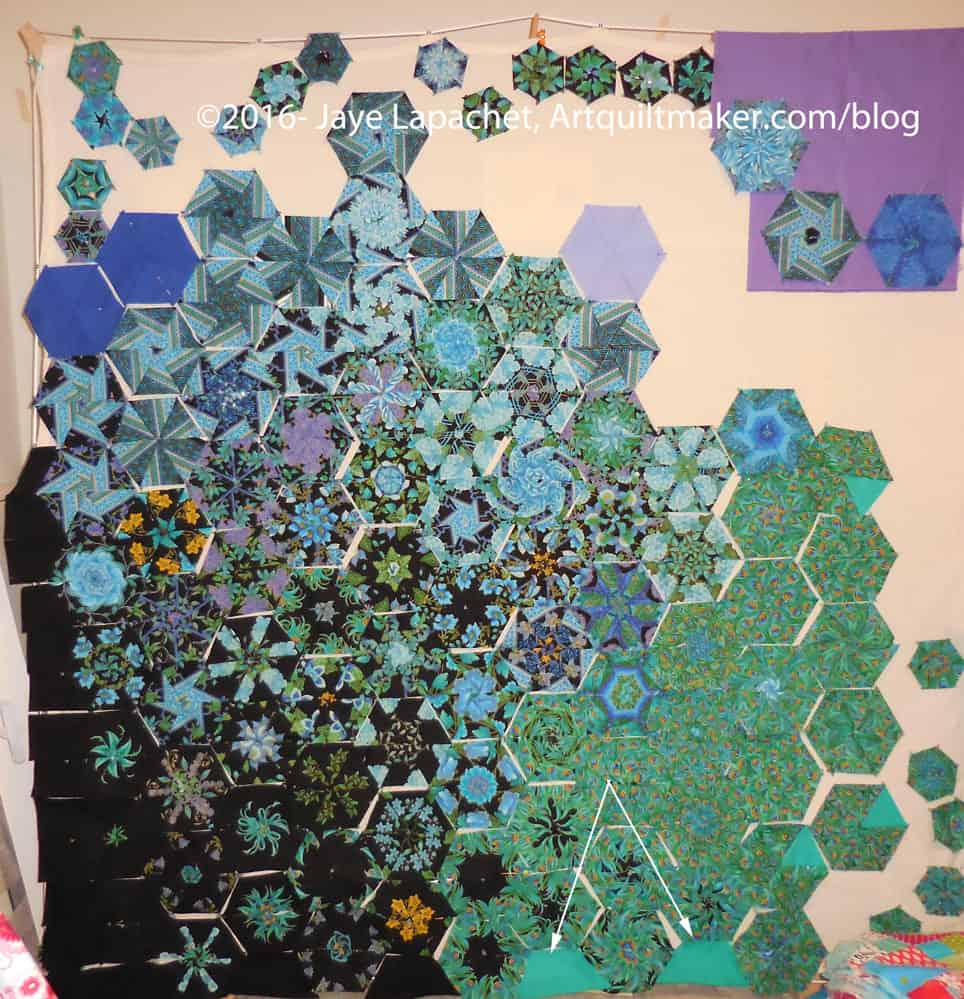
Peacock: Exchanging Black for Green
Most importantly, I have changed out the black on the bottom and used green (see arrows at the bottom). The black was too jarring near some blocks that had no black. The green isn’t a perfect match to those feather blocks, but it is the green I used in the other feather blocks.
I am also trying out some of the blues at the top, but I am thinking they may be too dark and I might try some light blue. I have a stack of solids I can try. I just haven’t tried very hard to find the right one yet.
I plan to have a sort of irregular line of blocks, as the quilt looks now, though the background will make the quilt square. There are still some unknowns. I don’t know what the quilt will look like exactly. I am not sure how I will make the small blocks float around the edges as you see them now. I will let it mull in the back of my mind and see what comes up.