Shortly after finishing EPP Ball #2, I finished Ball #3. As I said in the recent La Pass post, I was in desperate need of handwork. Yes, I have knitting, but I seem to have lost the directions and can’t find the name of the project, so I am stuck for now.
Thus, I quickly sewed up the gap for this EPP Ball.
As I said in the previous post for Ball #2, I will give this one to Dameon or Alita. I haven’t decided yet.
I was able to sew up the gap in the second EPP ball and it is ready to go to its new home. The birthday isn’t until October, so I have a little time.
I really enjoy making these. If I had some space, I might make one for myself. As it is, I will give this one to Dameon or Alita. I haven’t decided yet.
This project went way too fast. Not that I want to spend my life on one project, but I do like projects that I can grab and go.
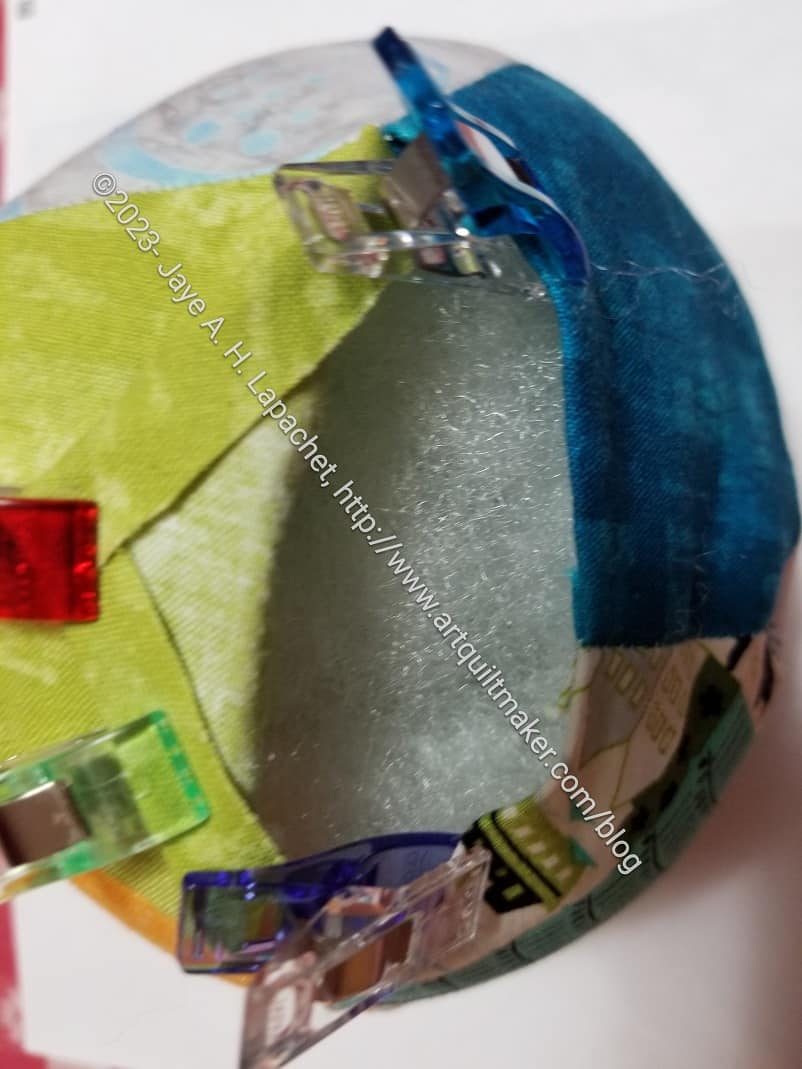
As you can see, I have only the gap to stitch closed. I have the clips on the edges, because I wasn’t sure how else to keep them under control. I really have to look up how to work with the edges of the an EPP quilt or project. This research will be good for the Half Hexie Star project, which is waiting for a back.
I just used regular Fiberfill** to fill it. I was pleased to see that the Fiberfill**, brand name Poly-fil, was made from recycled materials. I didn’t stuff in any Beanie Baby pellets** in case one of the kids decides to chuck the ball at their parents. Beanie Baby pellets** are actually called Poly pellets or ‘weighted stuffing pellets’.
**N. B. : Obviously, you should shop at local quilt shops and small businesses. However, if you are too busy or can’t find what you need there, I use Amazon affiliate links and may be paid for your purchase of an item when you click on an item’s link in my post. There is no additional cost to you for clicking or purchasing items I recommend. I appreciate your clicks and purchases as it helps support this blog.
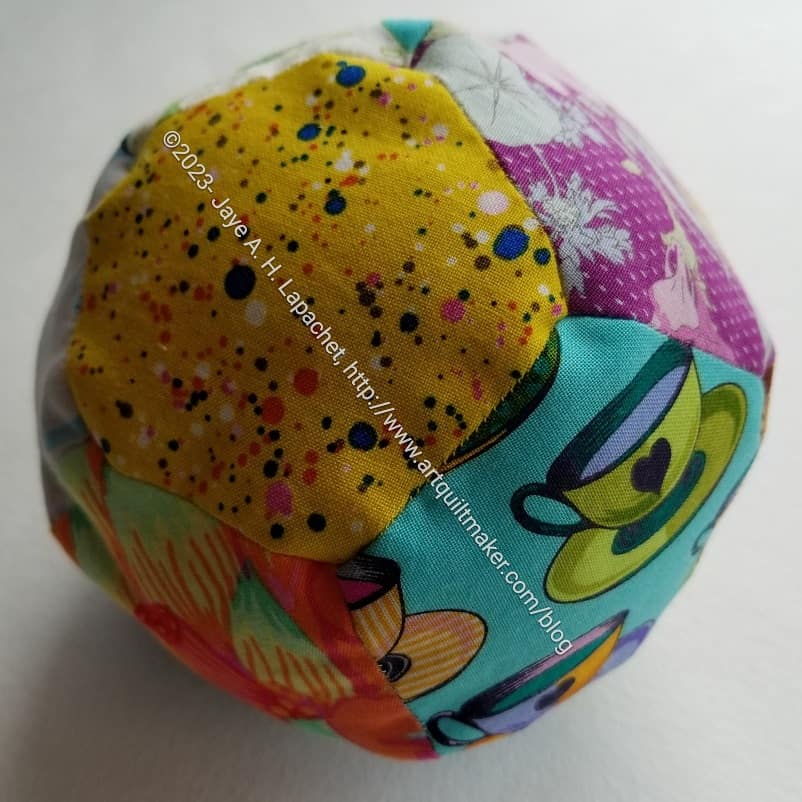
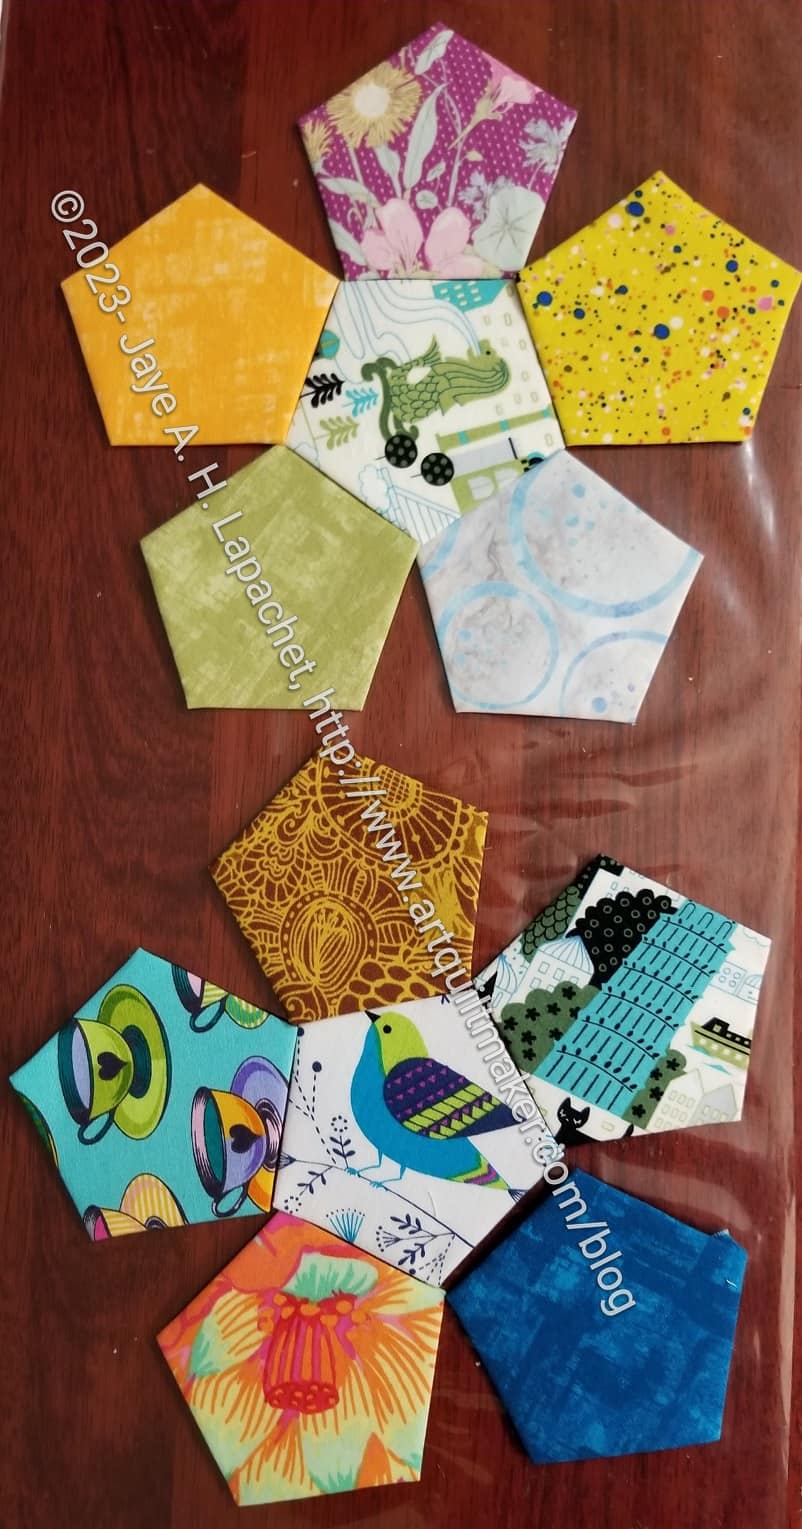
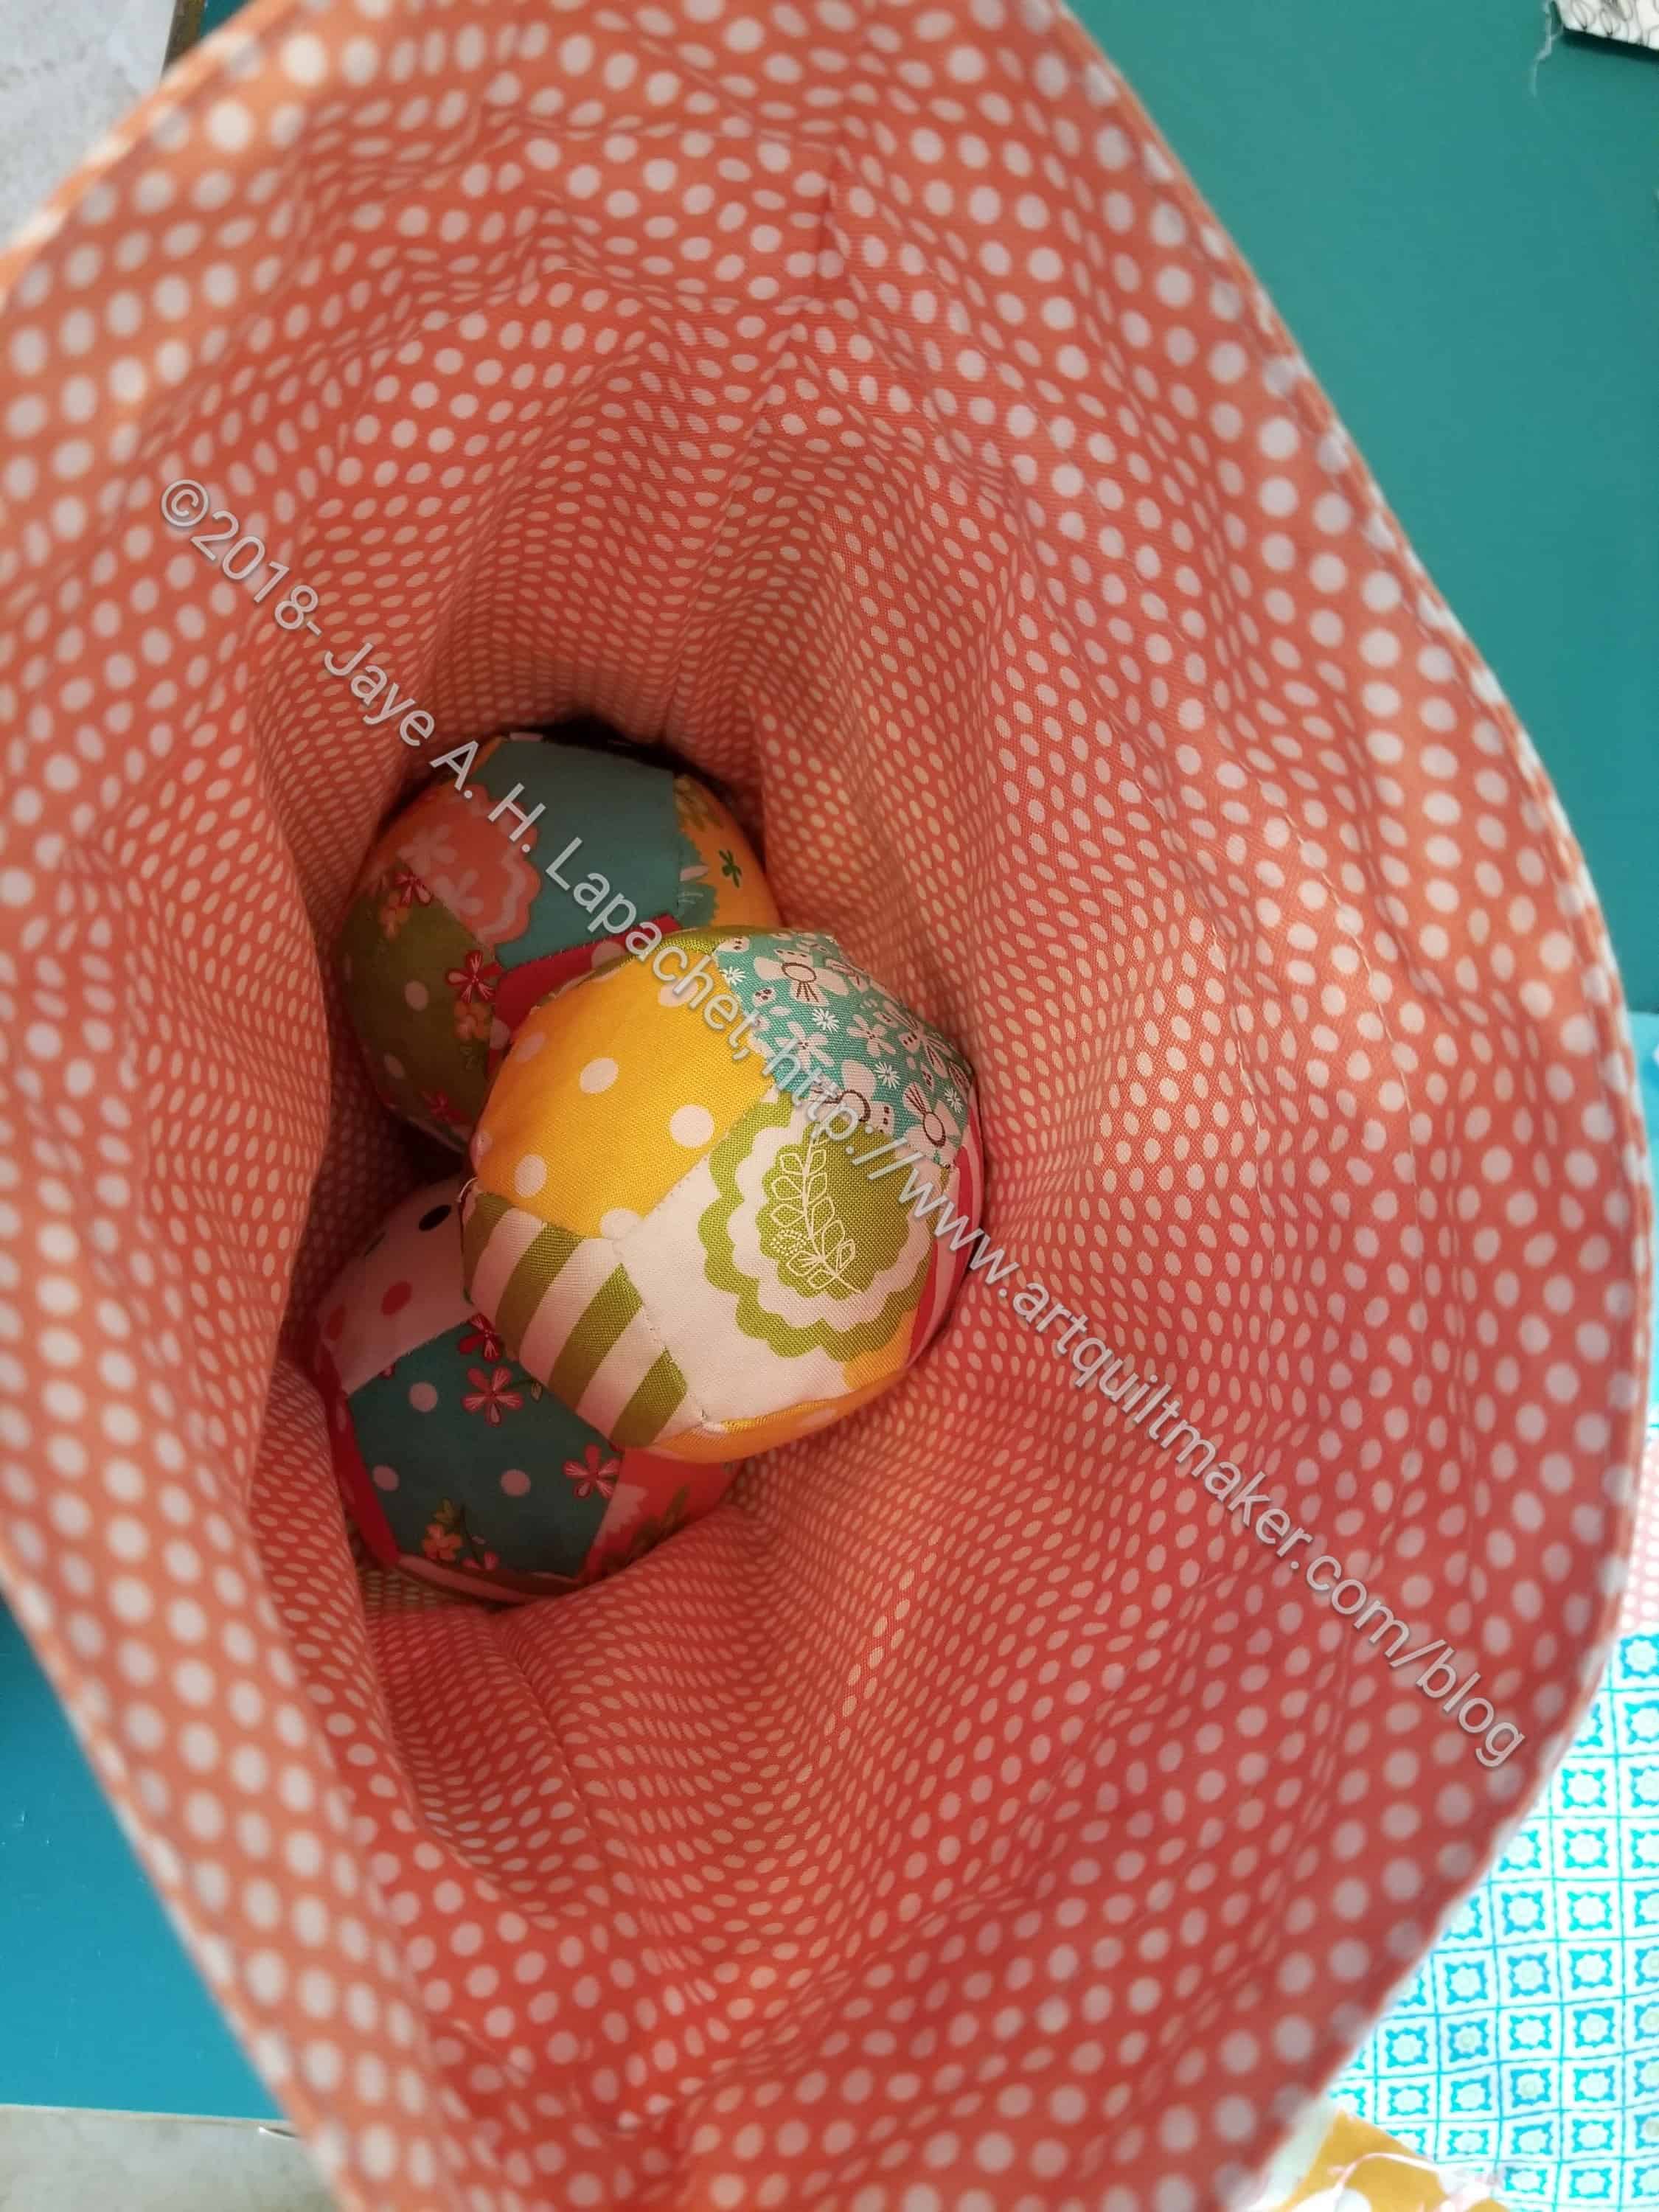
I dragged out the Pentagon Ball I have been taking on car rides so I could share it with you.
This one uses a lot of fabrics that could be considered novelty fabrics, though I would necessarily include most of them in that category. You can see that many are Tula fabrics. I also included a few others. I wanted the recipient to be able to identify items on the ball as well as roll it and toss it.
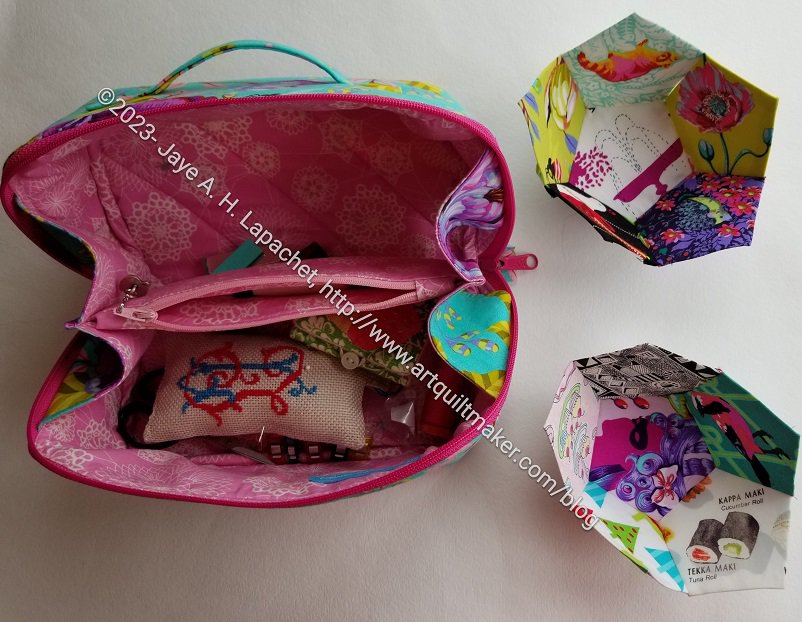
EPP To Go Bag (Enigma) with EPP Ball
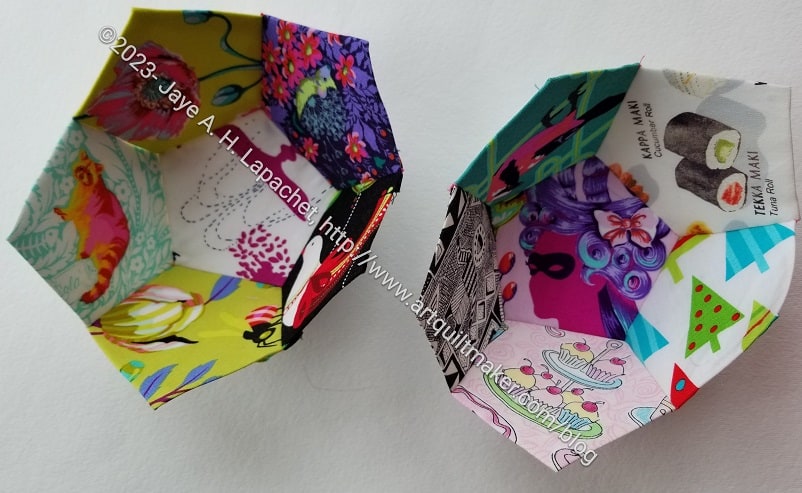
Even sewed into cups (as shown), this project fits well into the Enigma bag. The fact that the pocket doesn’t go all the way to the bottom works in the 3D project’s favor. I can slip the ‘cups’ in on their sides and still zip the Enigma Bag. It won’t be the same once I start sewing the two halves together.
This project went too fast. I arrived at this point before I was ready as I don’t have any other handwork projects at the moment, which means nothing to do while I watch TV. I guess I have to get busy figuring out the border on La Pass.
In 2020 I made one of these balls and decided that I would make two more for a new-ish grandniece and a new-ish grand-nephew.
#2 is in my Enigma Bag and I take it with me when we drive places. That one is almost done and I’ll try to get a good photo to share with you.
This one uses fabrics that I didn’t use for the Half Hexie Star. I cut a lot of strips for the half hexie pieces and then didn’t use them all. They were available and I couldn’t think of a reason not to use them.
The Half Hexie Star top is done, as mentioned, but I need to figure out how to work with the edges. They still have the papers in, but Colleen can’t quilt it with the papers in, so I need to figure out what to do. I also need to make the back and the binding. Maybe I’ll do that today?
I’ll have to get some more fiberfill** at some point.
**N. B. : Obviously, you should shop at local quilt shops and small businesses. However, if you are too busy or can’t find what you need there, I use Amazon affiliate links and may be paid for your purchase of an item when you click on an item’s link in my post. There is no additional cost to you for clicking or purchasing items I recommend. I appreciate your clicks and purchases as it helps support this blog.
I finished my large-ish EPP ball and really like the way it came out.
I fussy cut some favorite fabrics and then spent several hours during Craft Night and some guild meetings basting the fabrics and, then, sewing the ball together.
I used the last bits of my bag of fiberfill to stuff it. Normally I would add some Beanie Baby pellets to the stuff to give the ball some weight. However, I plan to give this ball to a 1 year old and I don’t want her breaking a lamp or giving one of her parents a black eye when she throws it.
EPP-Pentagon Ball
EPP-Pentagon Ball
I think these balls would be fun for people of any age, though the fun could get out of hand at a family event.
**I use affiliate links and may be paid for your purchase of an item when you click on an item link in my post. There is no additional cost to you for clicking or purchasing items I recommend. I appreciate your clicks and purchases as it helps support this blog.
The other day, I went to visit my friend and sew. DH was out until the evening and it was a good day to go and hang with a friend. One thing we do together is eat cornbread. My family doesn’t like it and Gerre loves it. Every chance we get she and I enjoy it together. We also took a nice walk around her neighborhood, which is filled with lovely Victorians.
We didn’t skimp on the sewing, however.
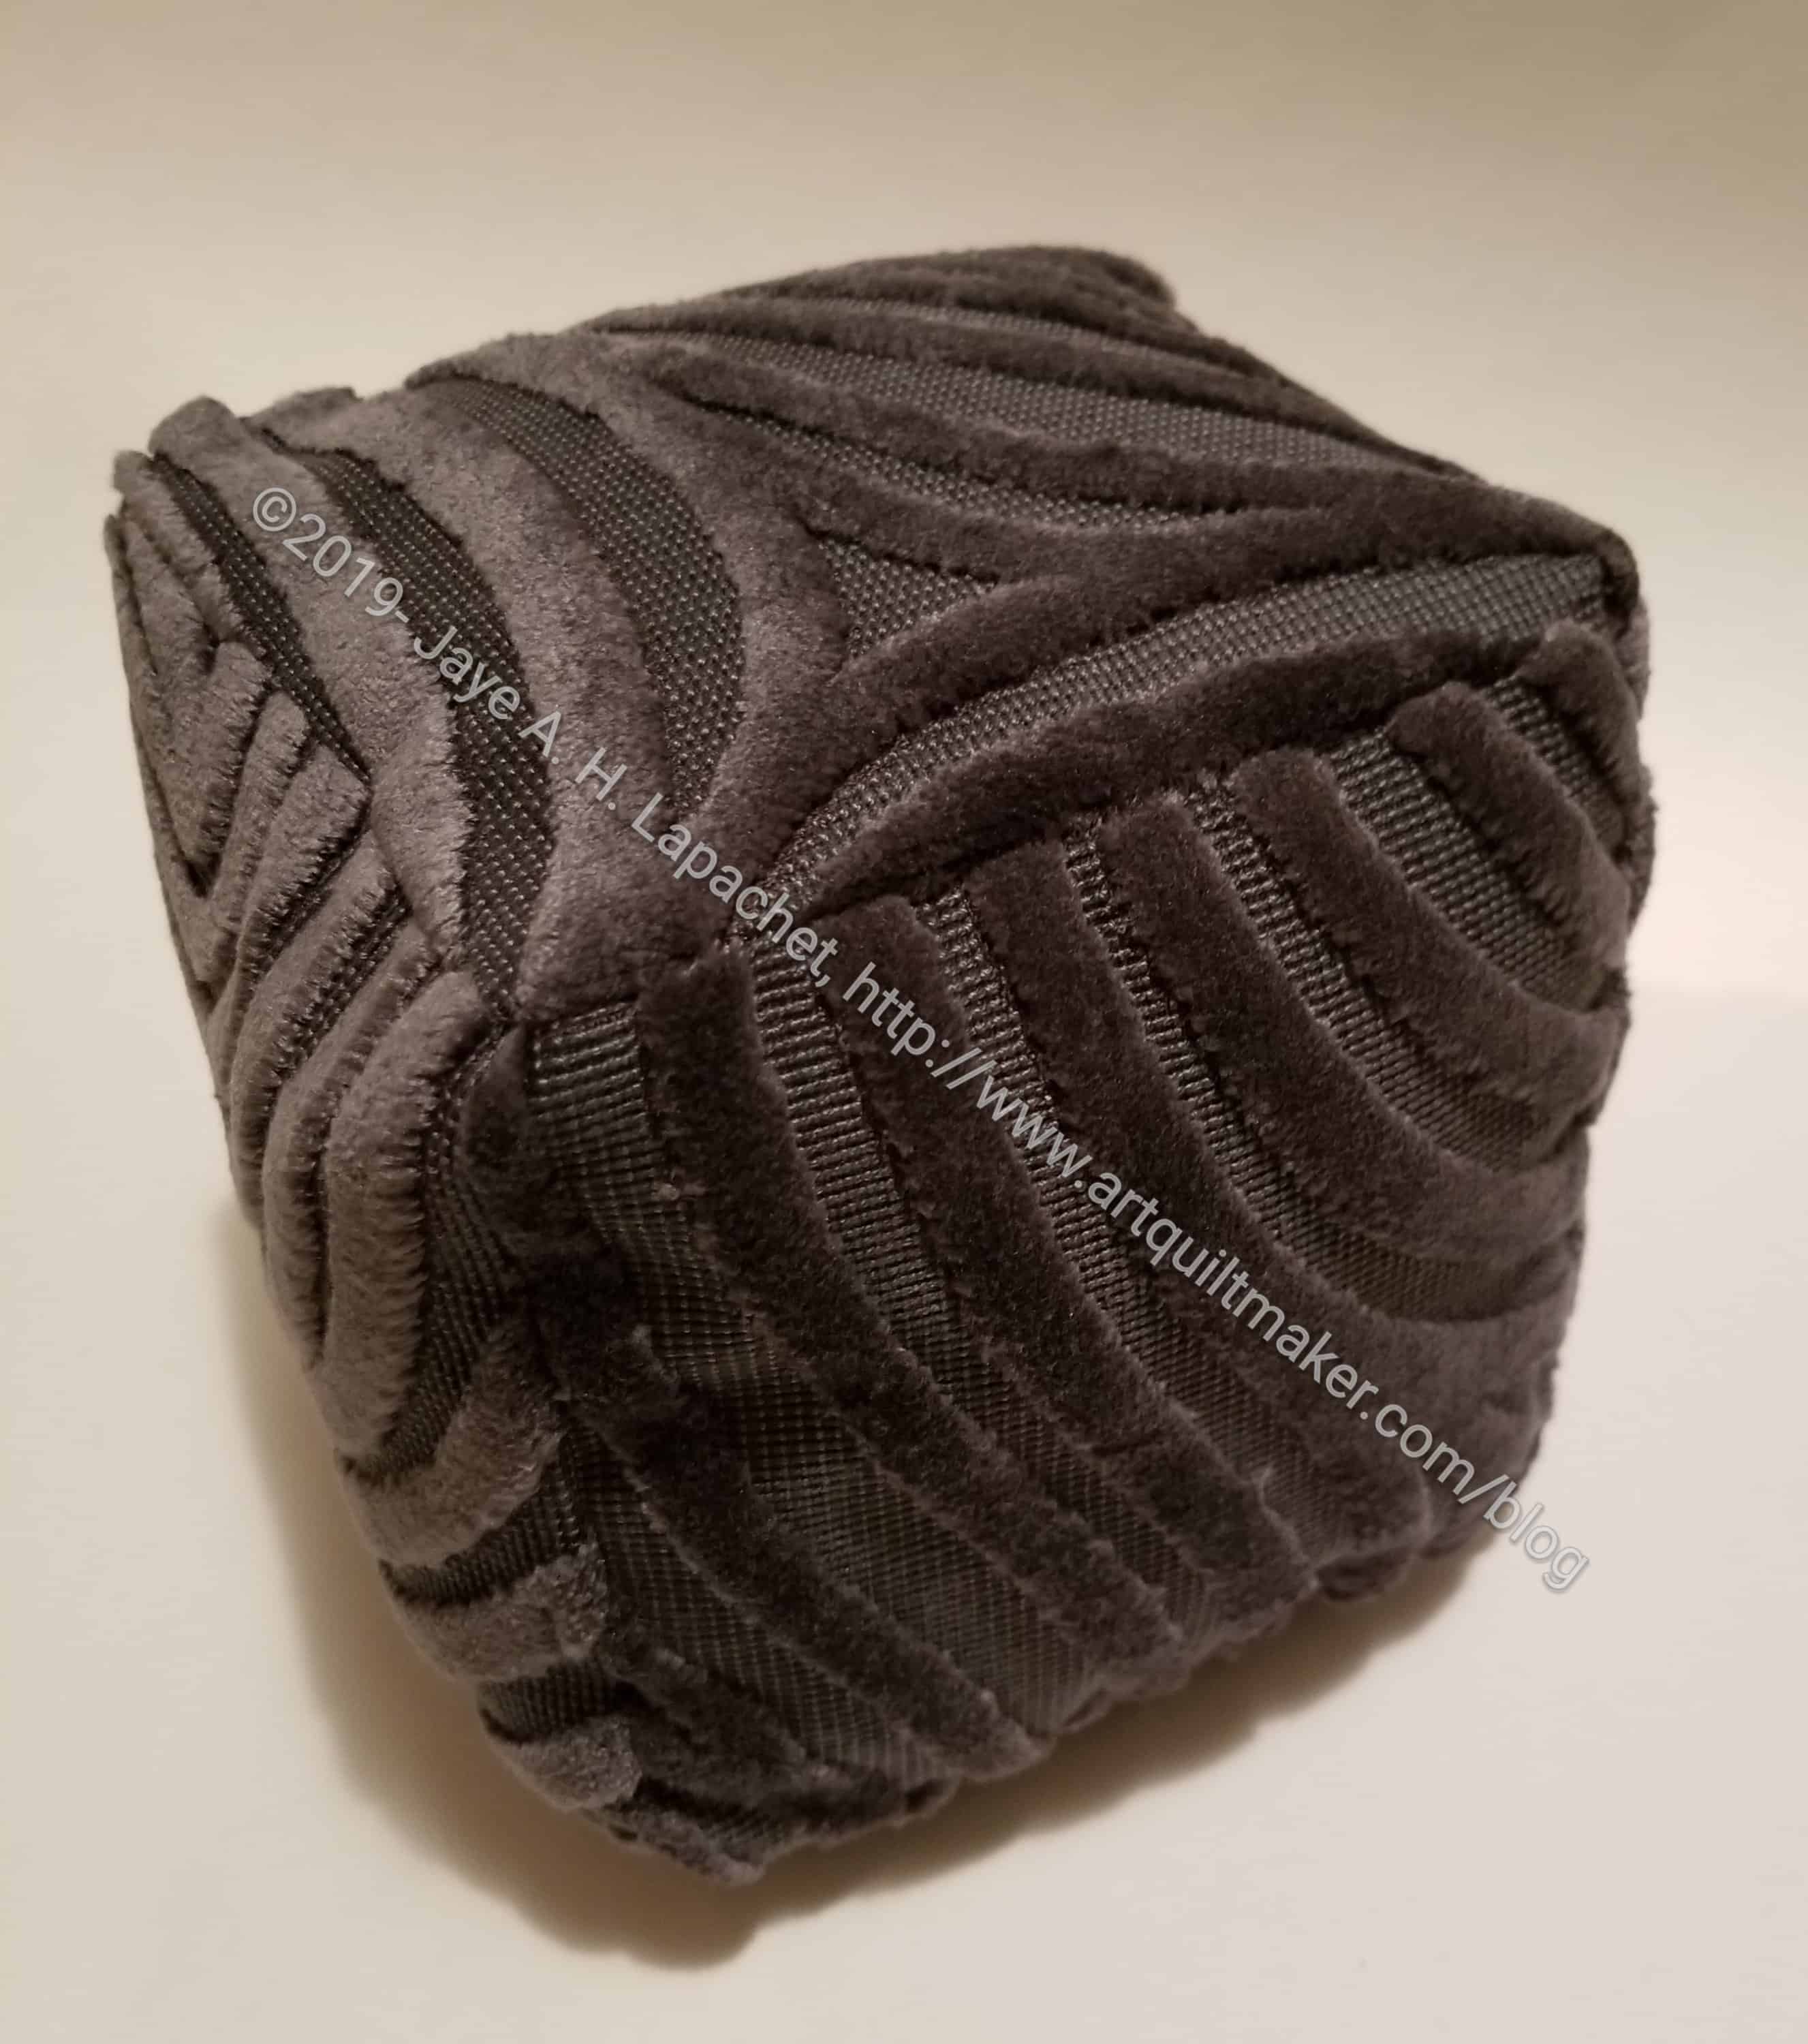
Textured Cube
I followed up on Jan’s idea from the retreat of a textured cube. Jan works at a local museum as an Exhibits Coordinator, so she is always doing interesting things with fabric for the museum. This time she had found some 6 inch squares at FabMo. For the kinesthetic aspects of an upcoming exhibit she decided to make fabric cubes. I thought the YM would like something like this for stress relief. I took Jan up on her kind offer of squares and and made this cube on Gerre’s second machine. Since the squares were already cut, it was pretty quick to put together
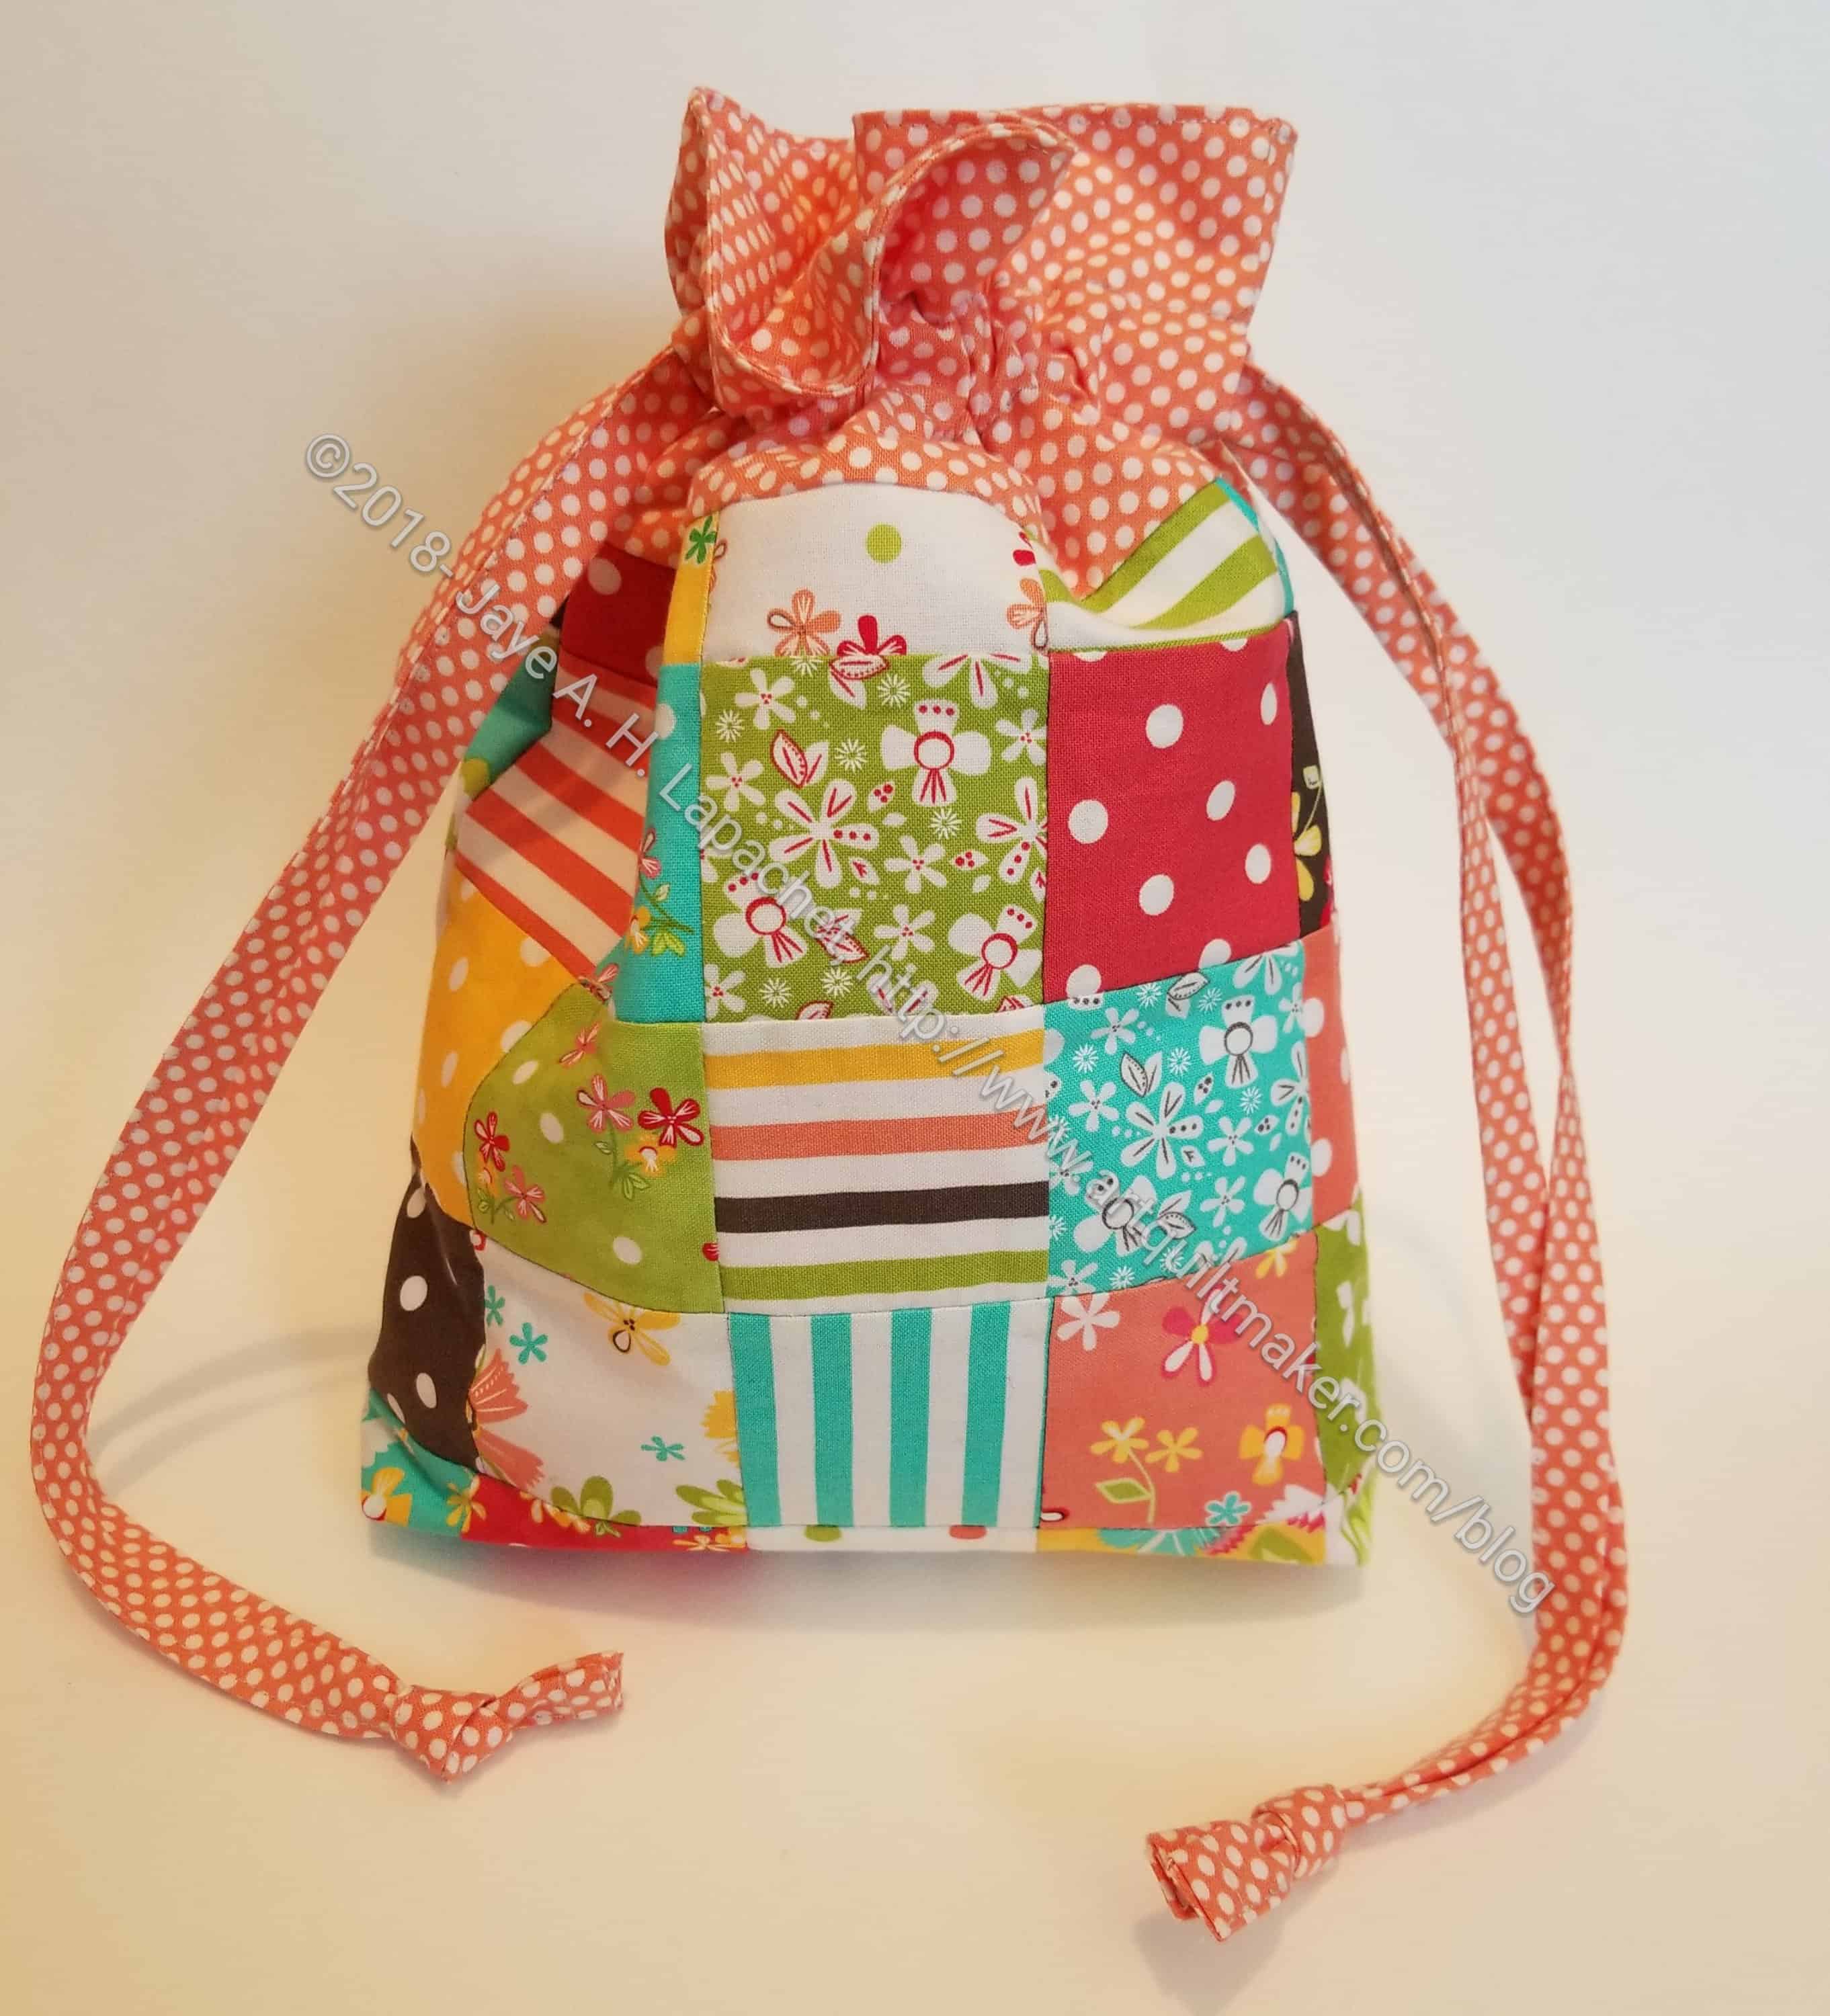
I also started working on some fabric bags. Before I went to Portland I had about 30 small gifts to wrap. I didn’t have small bags so I was forced to use paper, which, for me, is a special kind of hell. I decided that I would make a bunch of small bags. In this case, some gifts arrived too late for Christmas and I decided to use the In Color Order drawstring bag pattern.
I spent most of the time we had together making the drawstrings. You’d think I would have gotten them right, but I think they are too long for the size of the bag. We’ll have to see. The bags will look nice, but this endeavor is turning out to be more complicated than I want so I will go back to my regular gift bag tutorial once I finish these.
All in all, it was a great day. I didn’t get as much done as I would have liked, but we had some nice conversation and the most important thing to me is that Gerre is getting back to sewing.
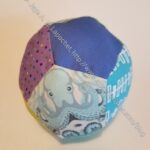
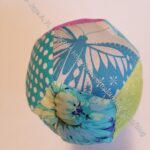
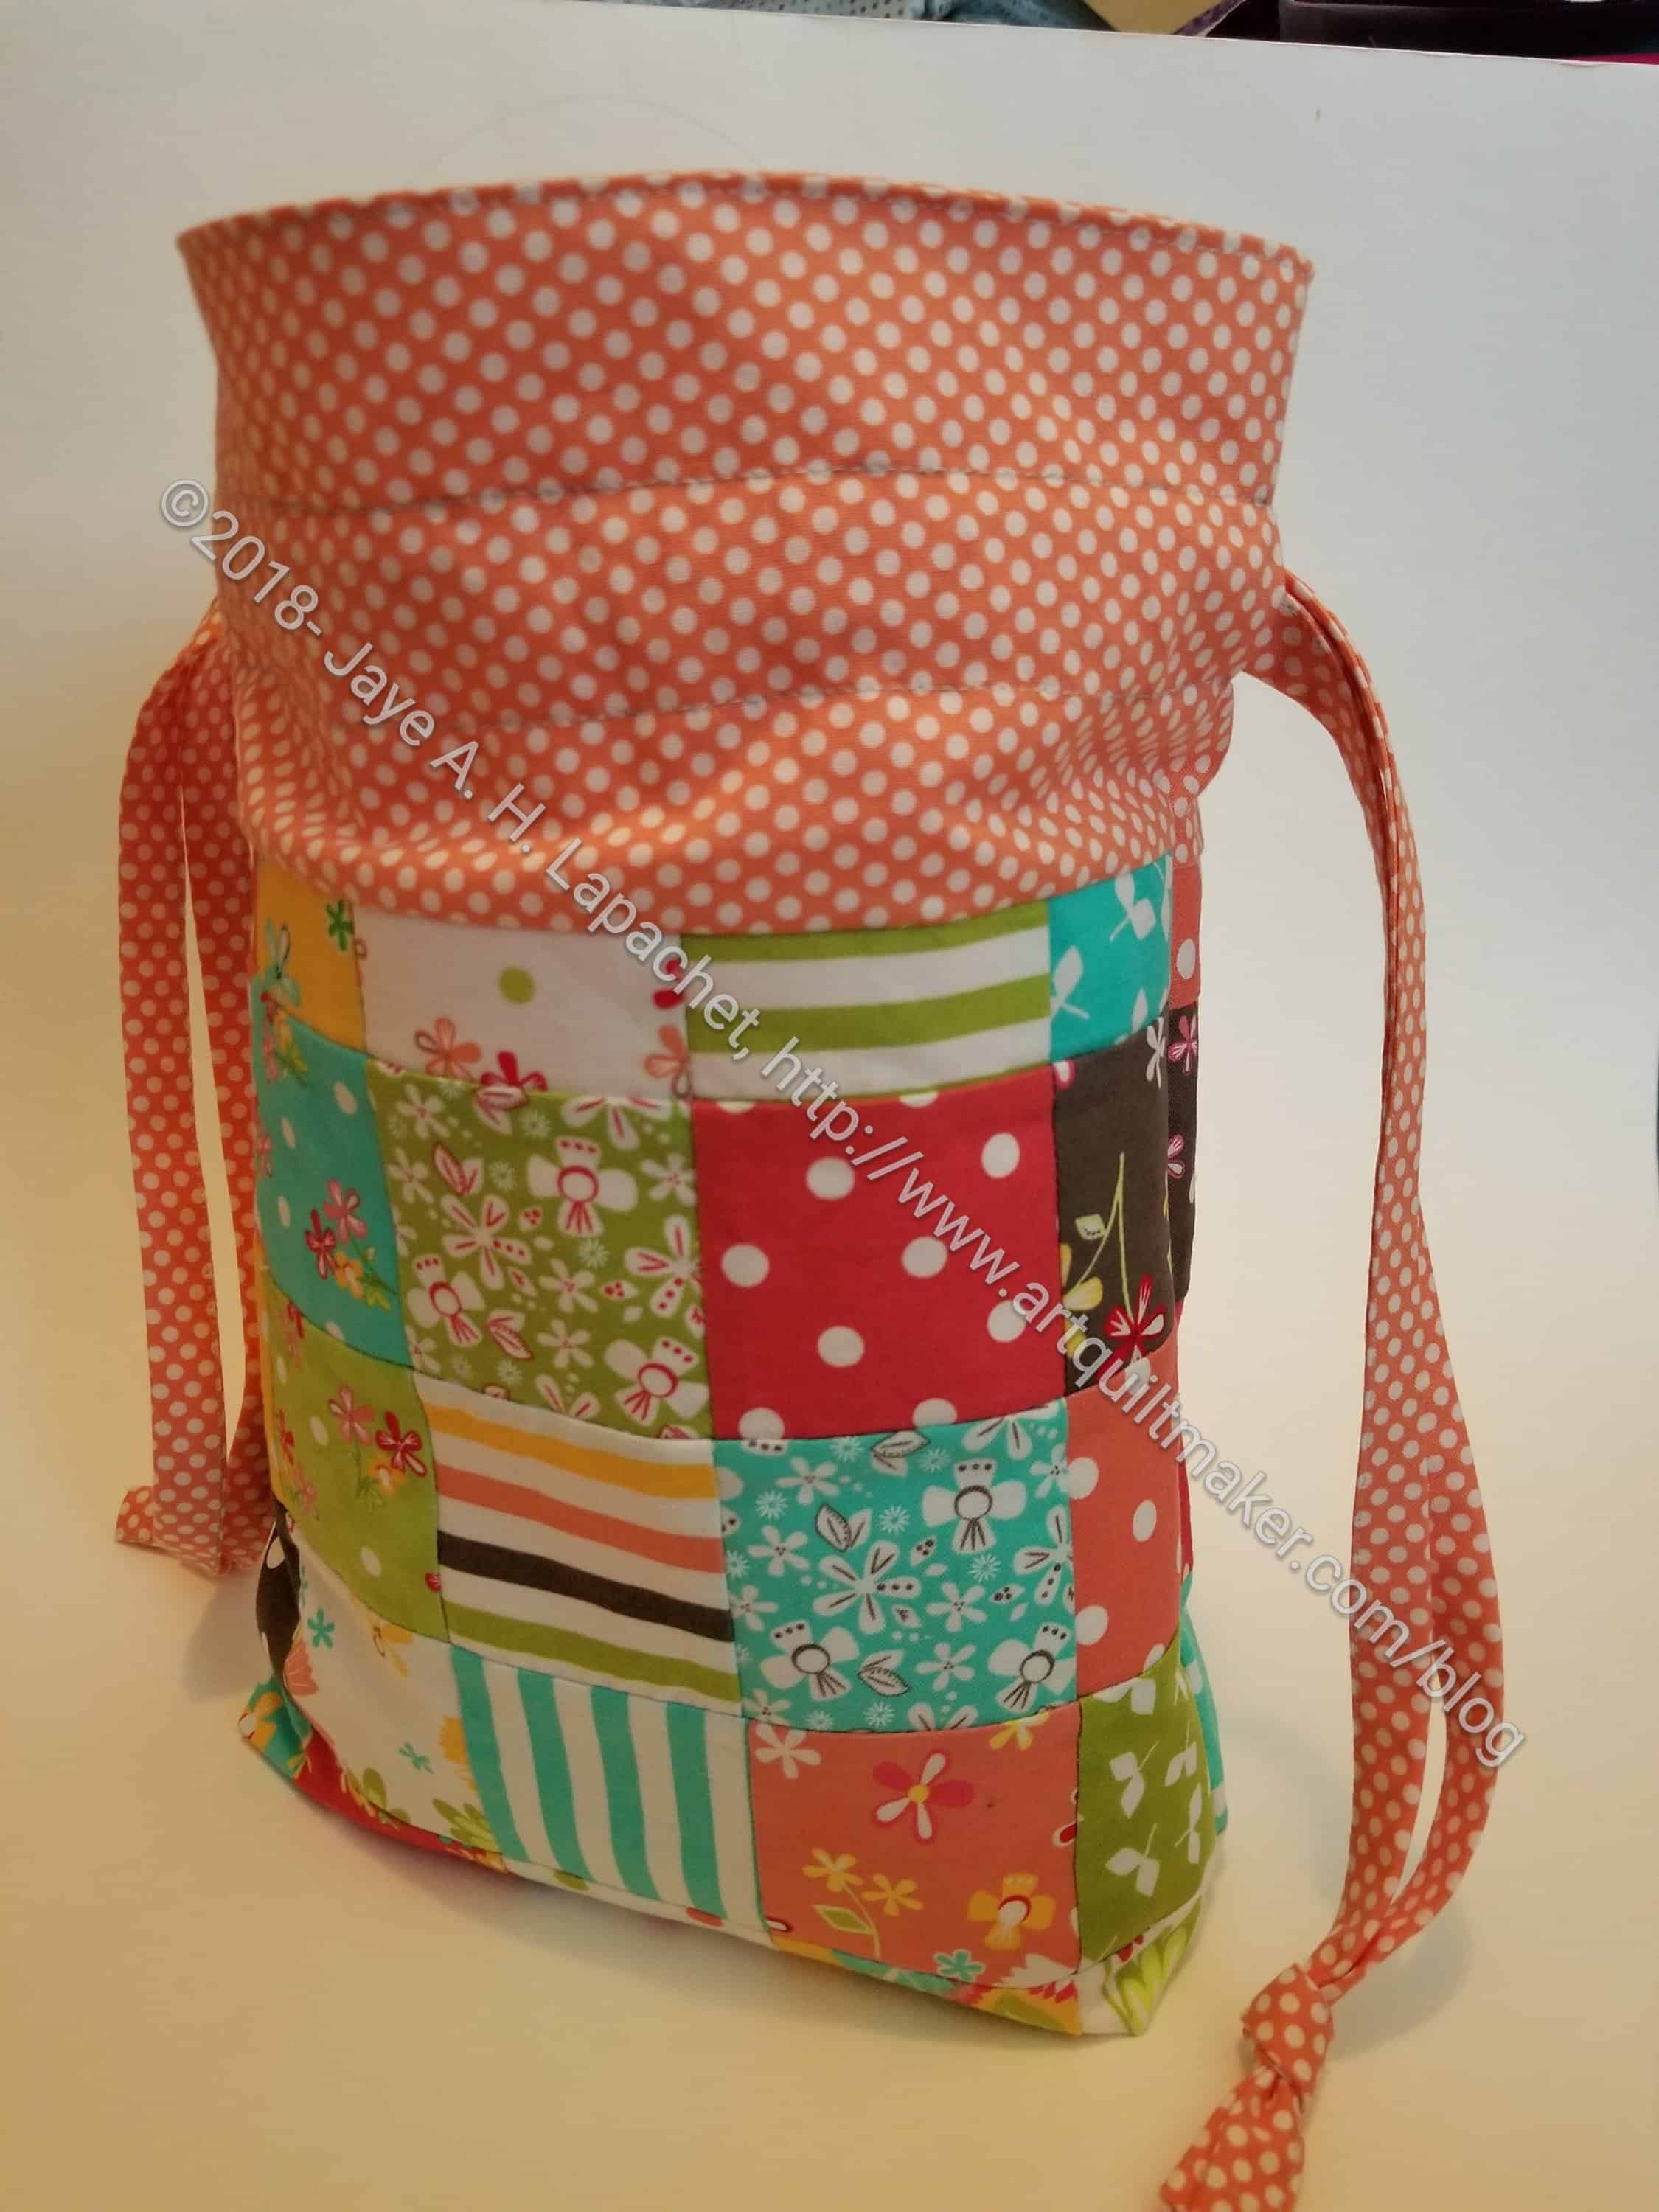
Three juggling ballsJuggling Balls in the drawstring bag
You have seen a few posts about these juggling balls in the past few weeks. Well, I finally finished them. I didn’t get them done in time to give them to my niece for Christmas, but oh well. I am still pretty pleased with the way they came out and I am thinking about making another set.
As previously mentioned, I got the idea for the balls from All Points Patchwork, a comprehensive guide on English paper piecing. I wrote a review about it recently.
Juggling Balls drawstring bag
I didn’t want to just hand over 3 balls, so I looked for a bag to make in which they could be stored. Quickly, I remembered the drawstring bag by Jeni Baker of In Color Order. I found the tutorial, but after working through it a little I found some missing information. After some investigation I was forwarded to another version of the tutorial. In fairness, Baker sells a pattern for this drawstring bag with several size variations. I believe I bought it at one point, but wasn’t able to put my hands on the pattern quickly. The size (approx 10.5″ x 8.5″) in the tutorial was fine for my purposes. Perhaps a little big, but fine.
Juggling Balls drawstring bag-3/4 view
I had a bunch of the mini-charm packs of Prairie by Moda, which is what I used to make the juggling balls. I used more of them to make the bag with a Barbara Jones peach dot print for the accent and the lining. I am not sure I would make patchwork again for the bag, though if I had some orphan blocks I might use them. It would be quicker and more elegant to use two or three fabrics. Still, what I made is kind of cheerful.
ColorPlay and the Creative Spark will return soon!
Finished set of Hansel & Gretel
Yay! This set is finished! A little more than a year after I got it, it is finished, signed, sealed and sent off.
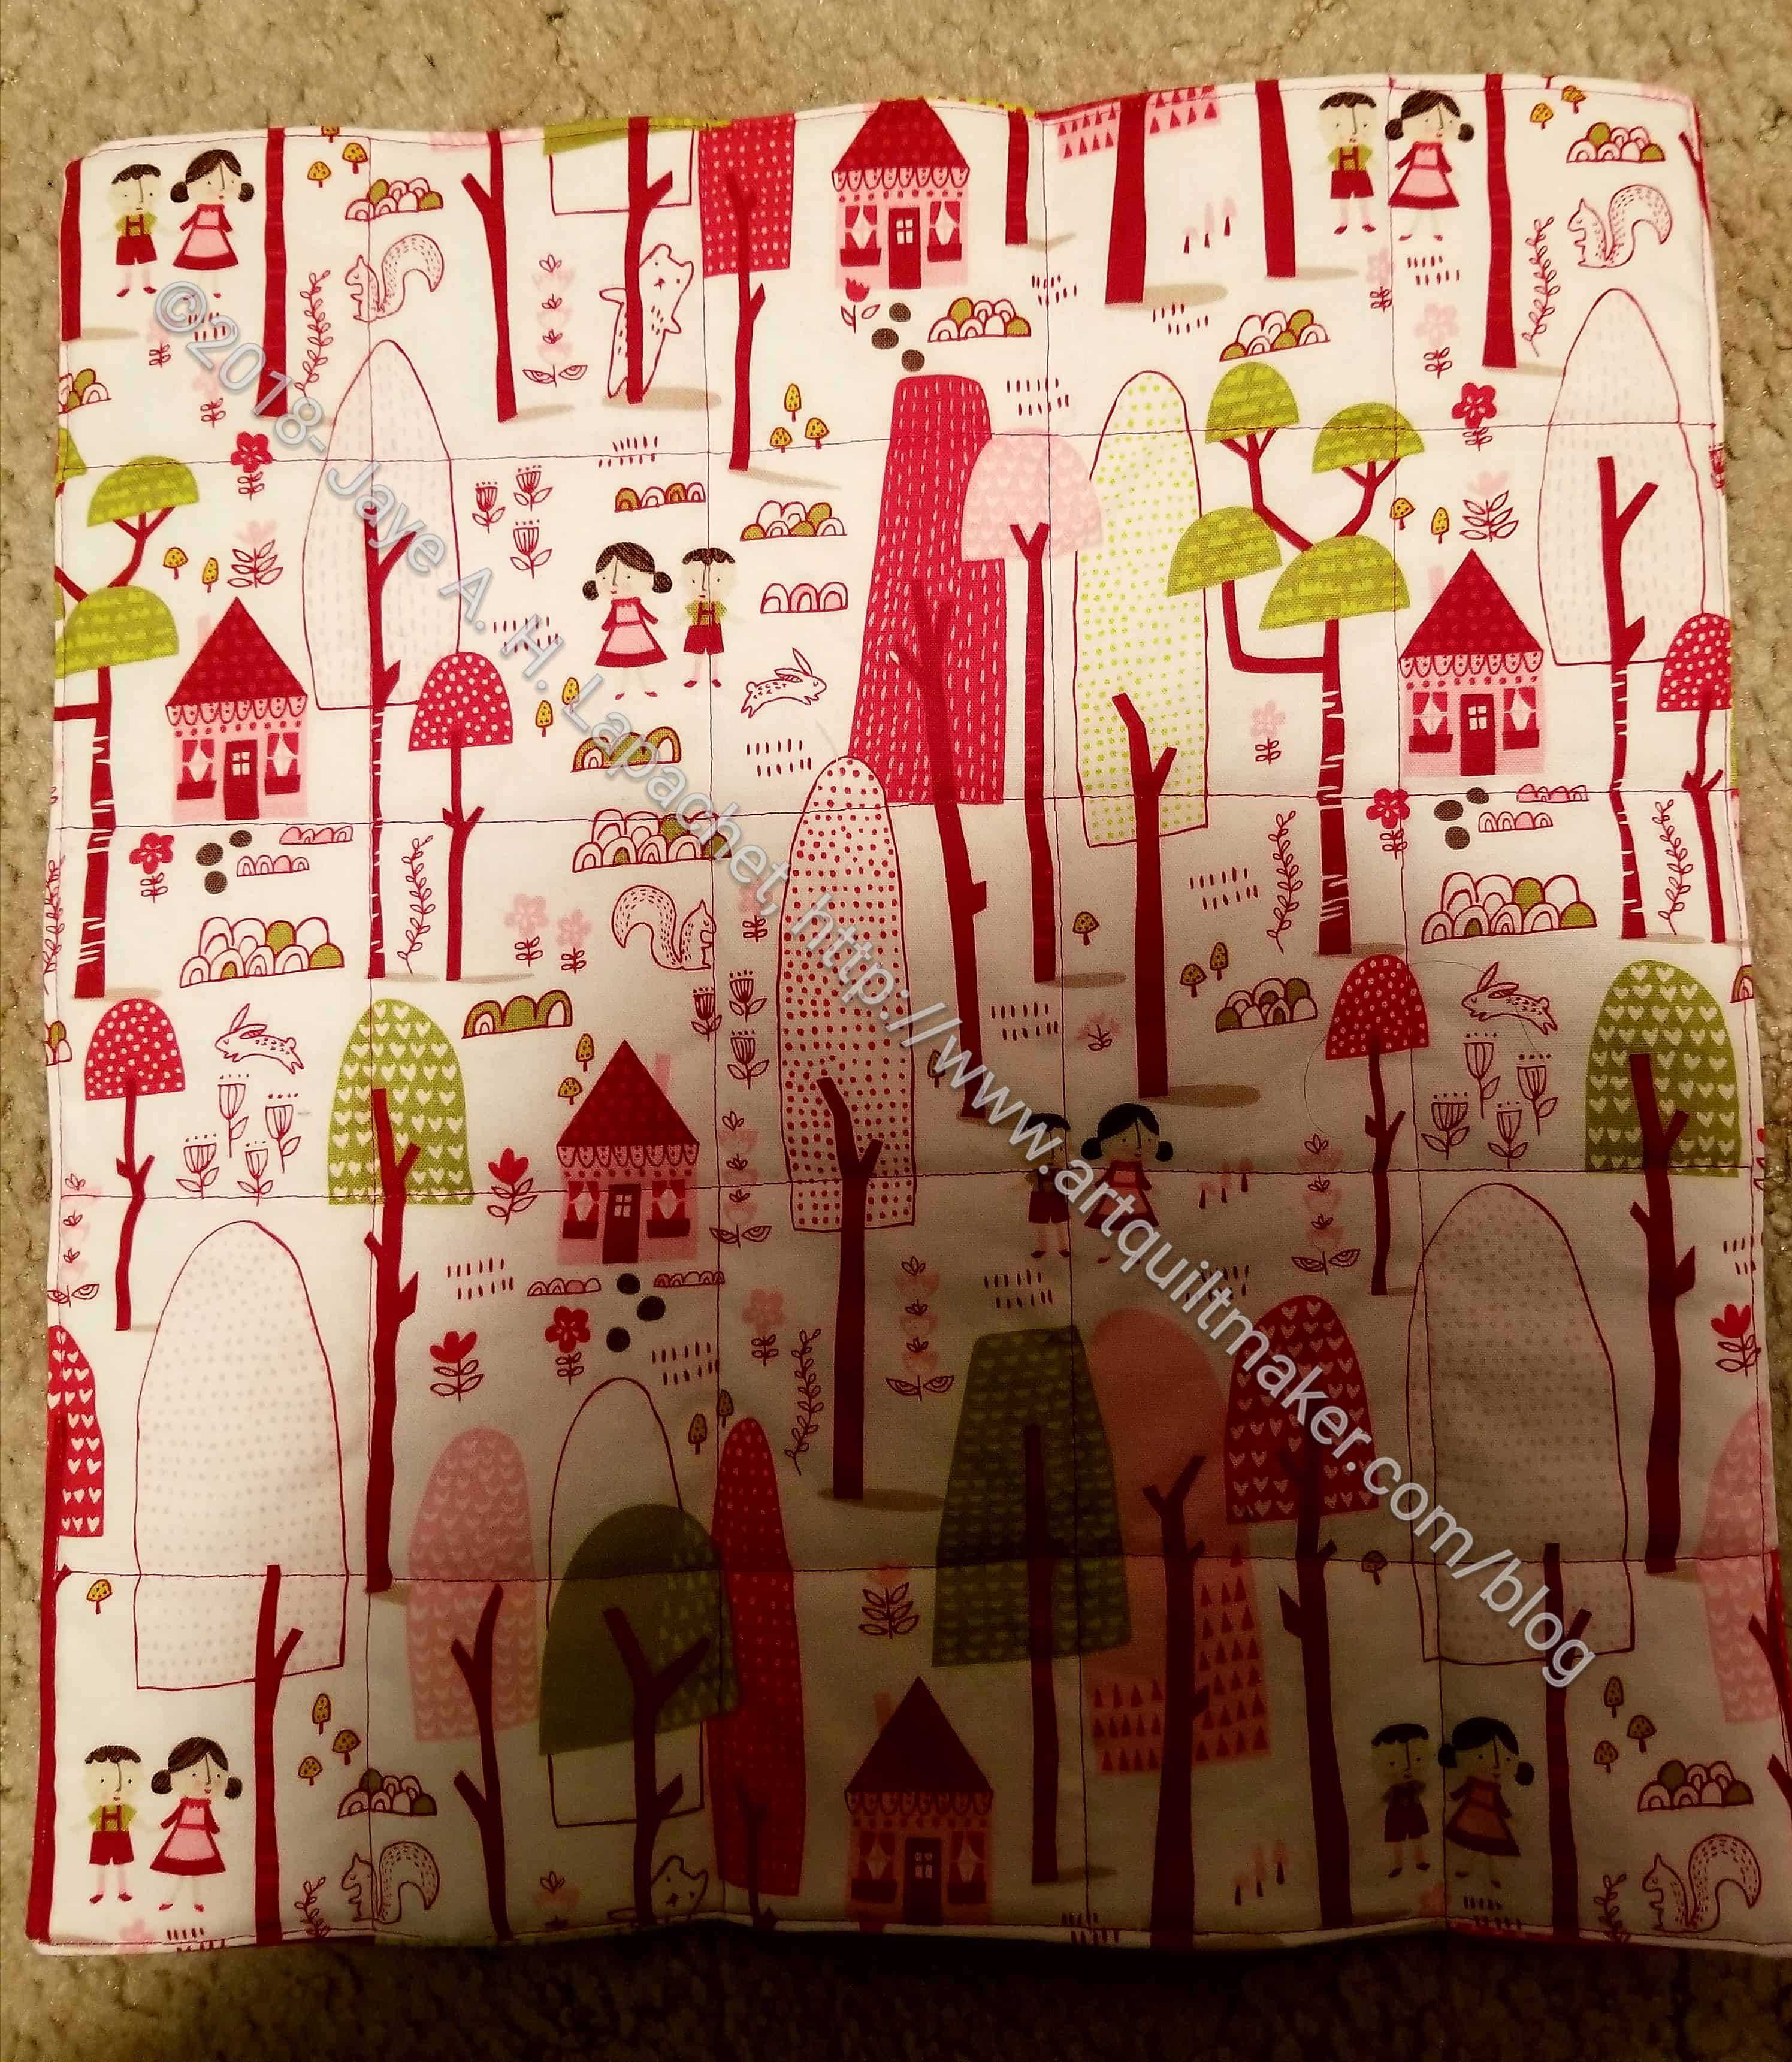
The quilt in this set was probably the easiest part. I did a pillowcase binding and then sunk the threads. It is a pretty basic quilt, but the small amount of quilting I did on it looks nice, I think.
Finished quilt of Hansel & Gretel
I don’t think I will make this brand of panel dolls again. The good thing is that everything is all on one panel. The bad is that the seam allowances are really small and the seams tend to blow out after play. My little niece plays with these dolls, a purpose for which they are intended, and I don’t want her to be disappointed. I have another pattern – not a panel – with lots of zippers and buttons so she can learn to dress herself (we had a doll when I was a kid with the same concept called Dressy Bessy). I hope to get started on that doll soon-ish.
As I said the other day, I got the kids partially stuffed. They are going to be able to sit and bend their arms. I actually understood the directions and how to get that done. Both of the previous dolls, Coral the Mermaid and Little Red Riding Hood. had stiff legs.
To me, this means I am progressing in my skills. It also means more work. I couldn’t just stuff and finish the dolls. I had to stuff, then sew, then stuff some more before finishing. It worked fine, though it took more time.
The skirt for Gretel is the last piece of this set. It is mostly made, but I needed Gretel to be done, so I could finish the skirt to fit Gretel’s waist. I plan to finish this last bit and send the set off to my niece soon.
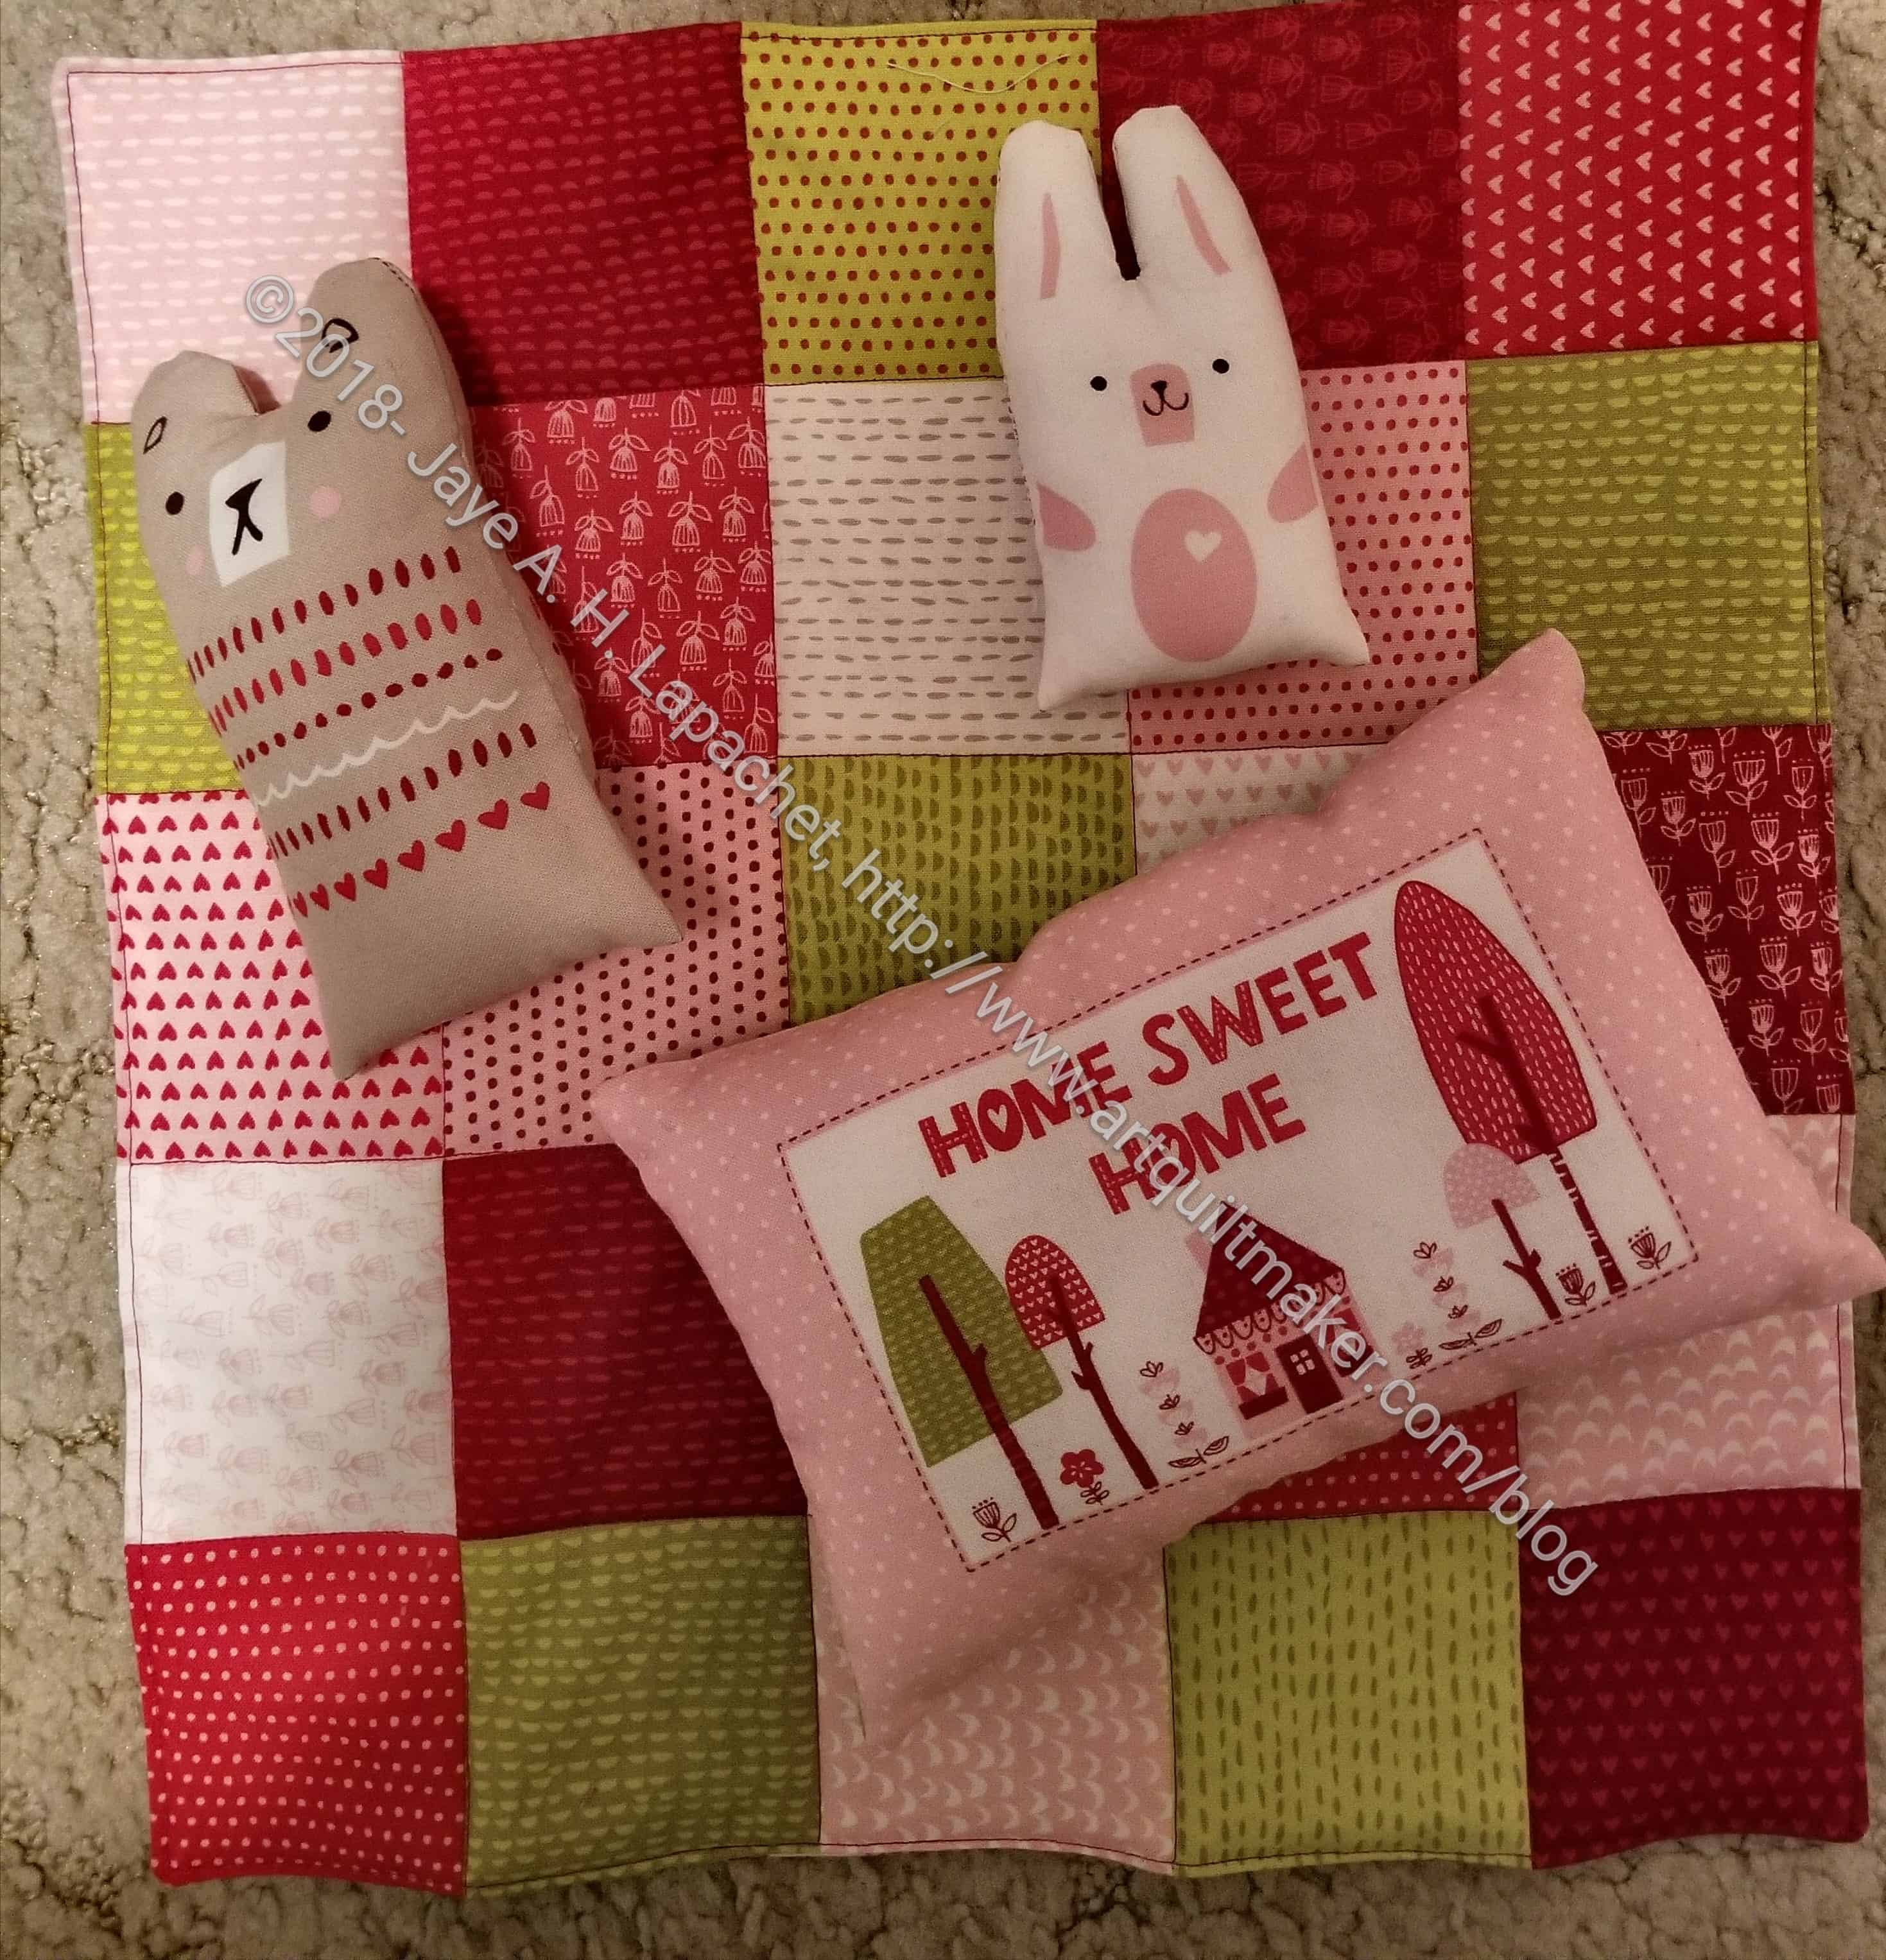
I am making progress on Hansel and Gretel. The pillow, bunny and bear are done, as is the quilt.
The kids are stuffed partially, but since I am making them sit down this time, I have to do some intermediate sewing before I can stuff them some more. I also had to buy more stuffing.
Hansel & Gretel Quilt Back
Yes, I did quilt the quilt myself. I used the pillowcase method of binding. I didn’t have much trouble with bubbles, which was a relief.
These are part of my effort to clear things off the to do list.
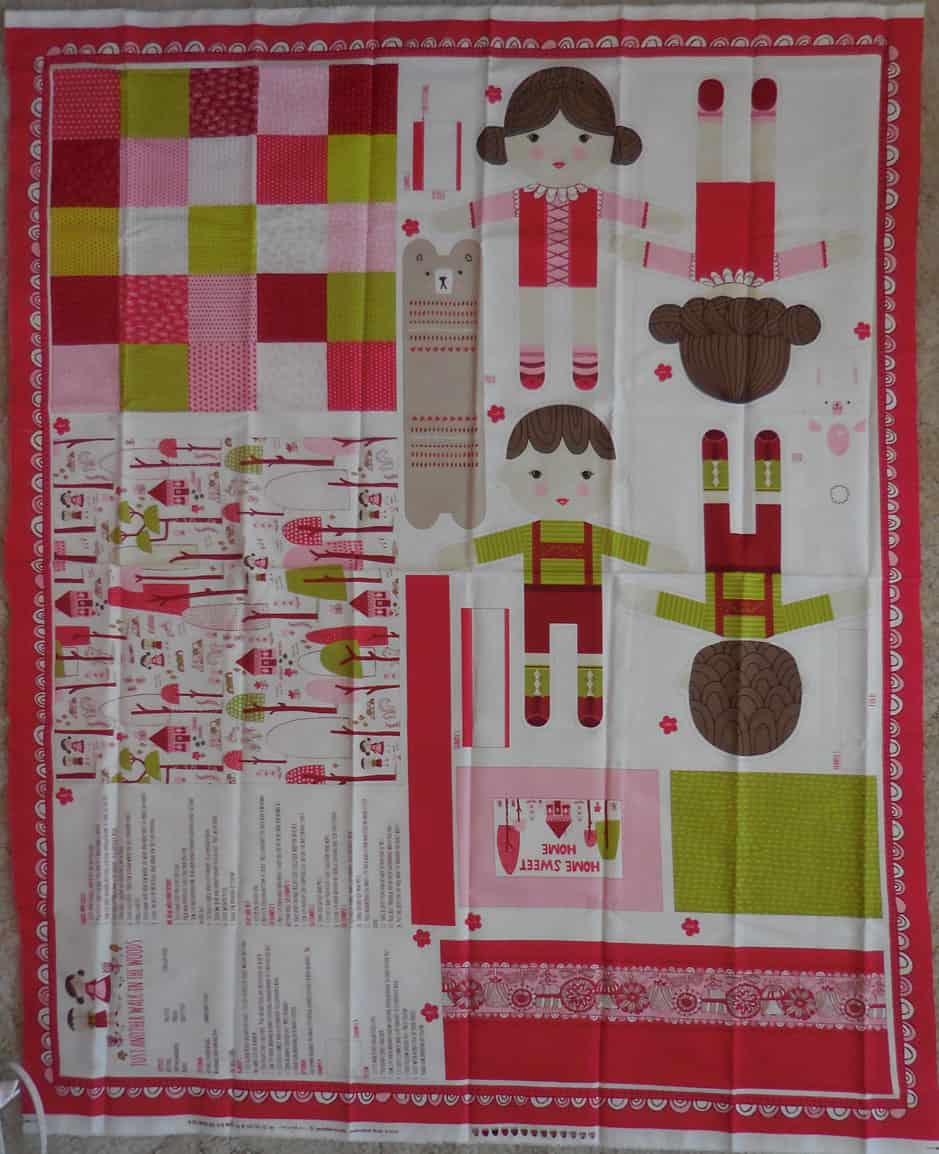
I received the Hansel and Gretel panel for my birthday, which resolves whether or not I will make it for my niece. I looked at the panel and found that there is a pet, two dolls and a quilt. There is also a skirt and a pillow. Brother and sister will be very cozy together.
I am still not very confident making the skirts. Coral didn’t need one, but Gretel does, so I will get some more practice. I also need some more stuffing. I might try bits of batting. I have a lot of thin strips, which might be appropriate. I am not in the mood to store a giant bag of stuffing. If I knew Moda would come out with new dolls every year, I might change my mind, but for now I will make do. If the batting doesn’t work, I’ll get some stuffing.
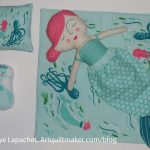
Coral is ready to be sent off to my little niece for Christmas. I showed her at guild on Saturday. I even have the perfect box.
This all came about because I finally decided that Coral the Mermaid is finished. What the means is that I am not going to make her skirt. The skirt directions are too complicated. She can share Red’s skirt.
I visited the Granary last week and found a new panel in this series: Hansel and Gretel. I didn’t buy it, but I was sorely tempted. It would be fun to keep sending the girly these dolls periodically. I’ll have to think about it.
I do wish Moda would come out with panels of clothes for the various dolls. It would be fun to give them a new wardrobe periodically, though such a project might be more than I am willing to tackle.
Now that Red is finished, I can focus on Coral the Mermaid. I have been working on her in bits and pieces, but focusing on finishing Red. One finished is better than none finished.
Coral is sewn, but not yet turned and stuffed. I decided I would reinforce the sections of stitching where I have to clip as I had some almost seam failures after stuffing Red.
Coral’s quilt just needs to be quilted to be completed. I suppose I could tie it with some embroidery floss. I haven’t that and it might be a good excuse to learn how to do it.
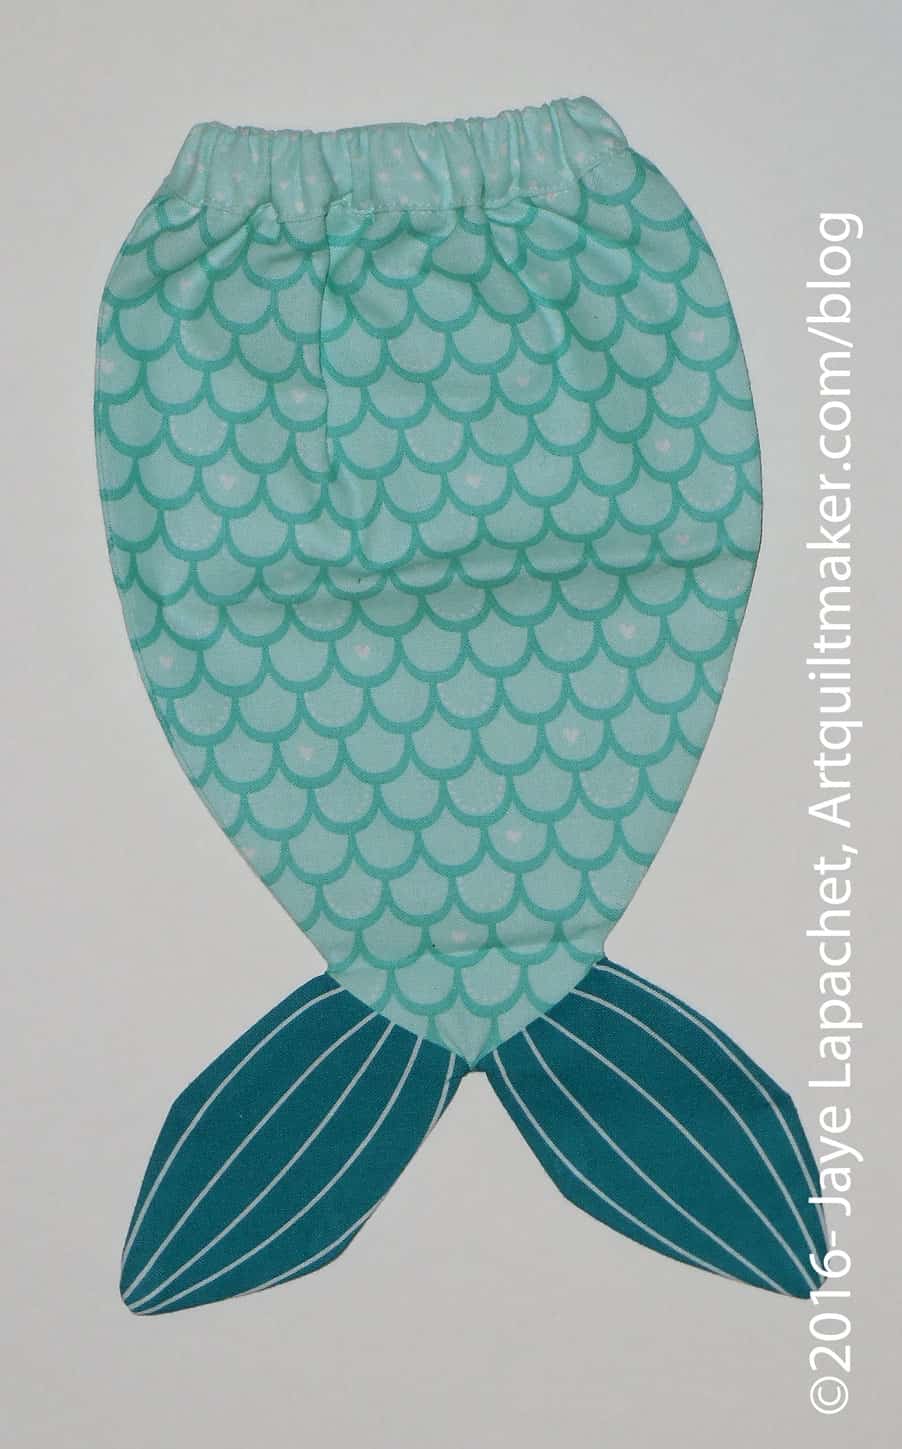
Coral’s Fin
Mom put elastic into the fin for me. I thought that would be better than having ties. Less frustrating for little fingers.
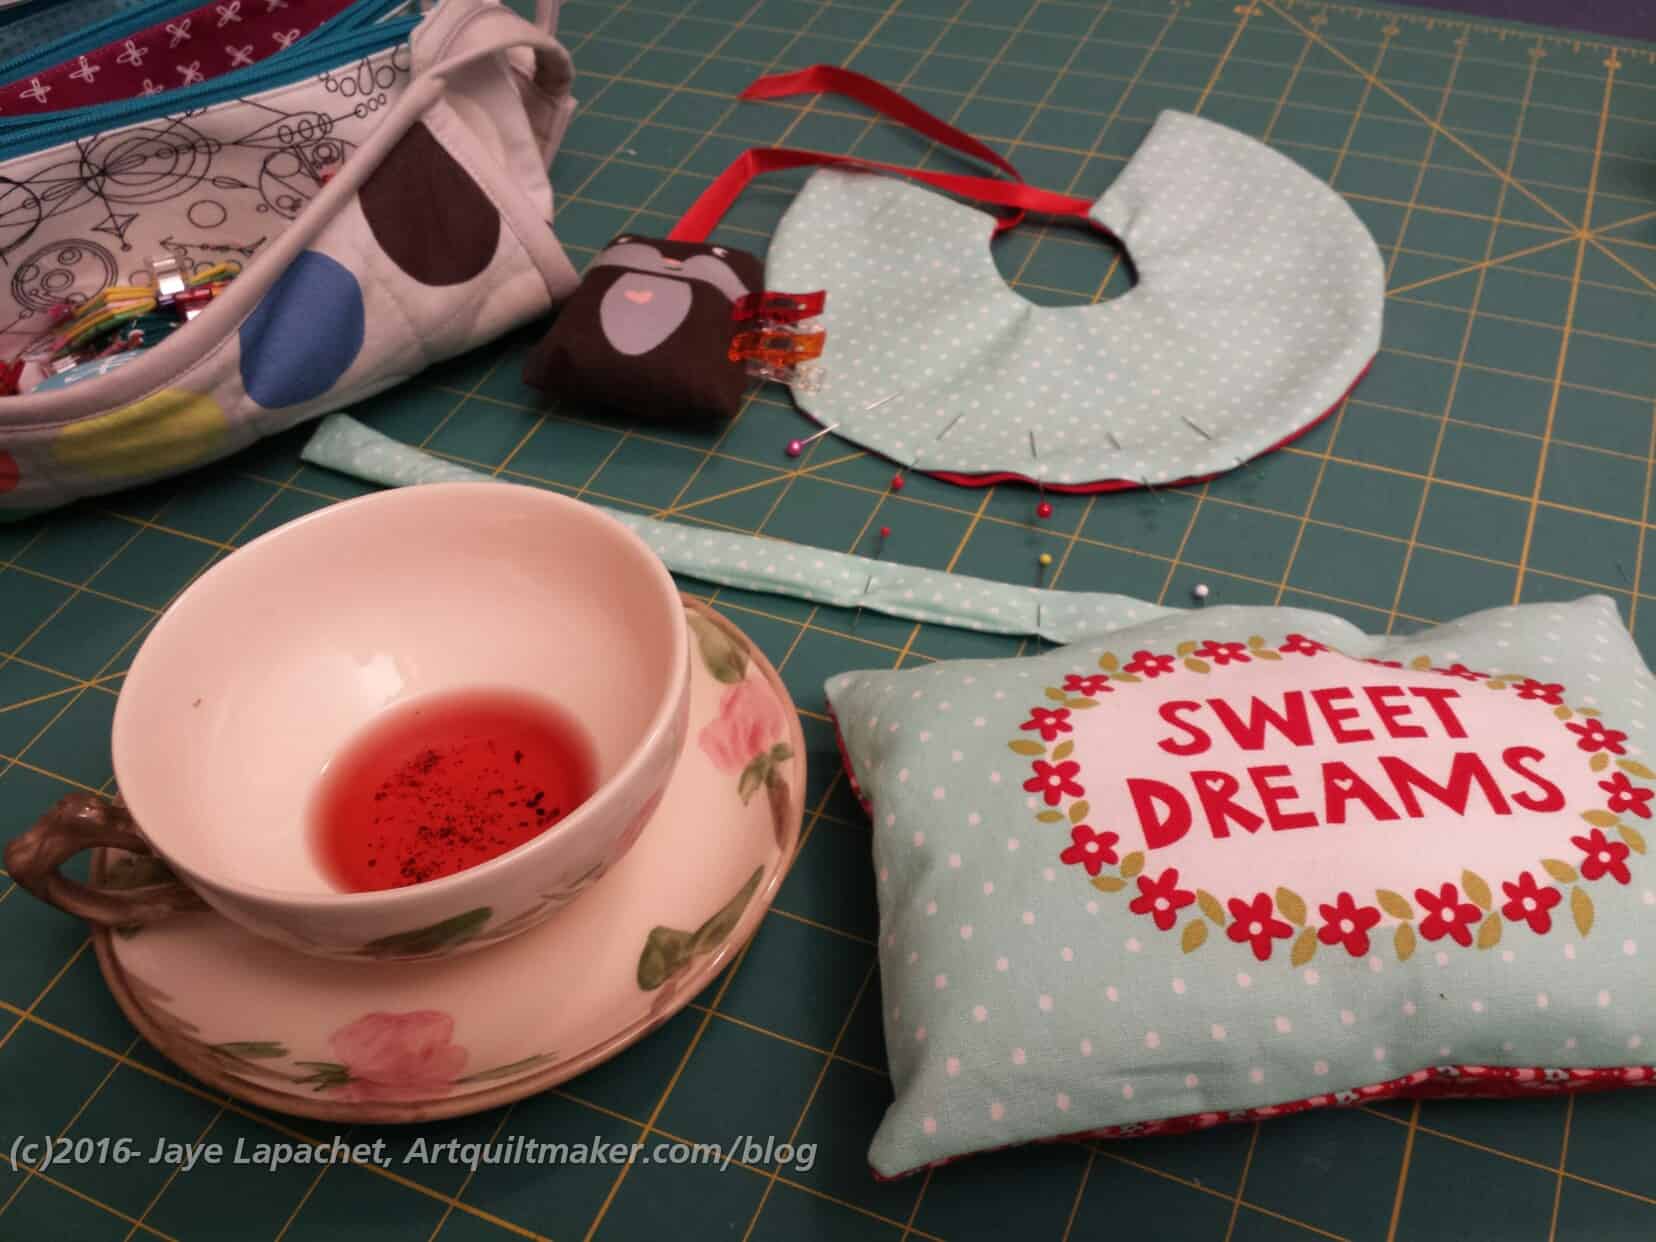
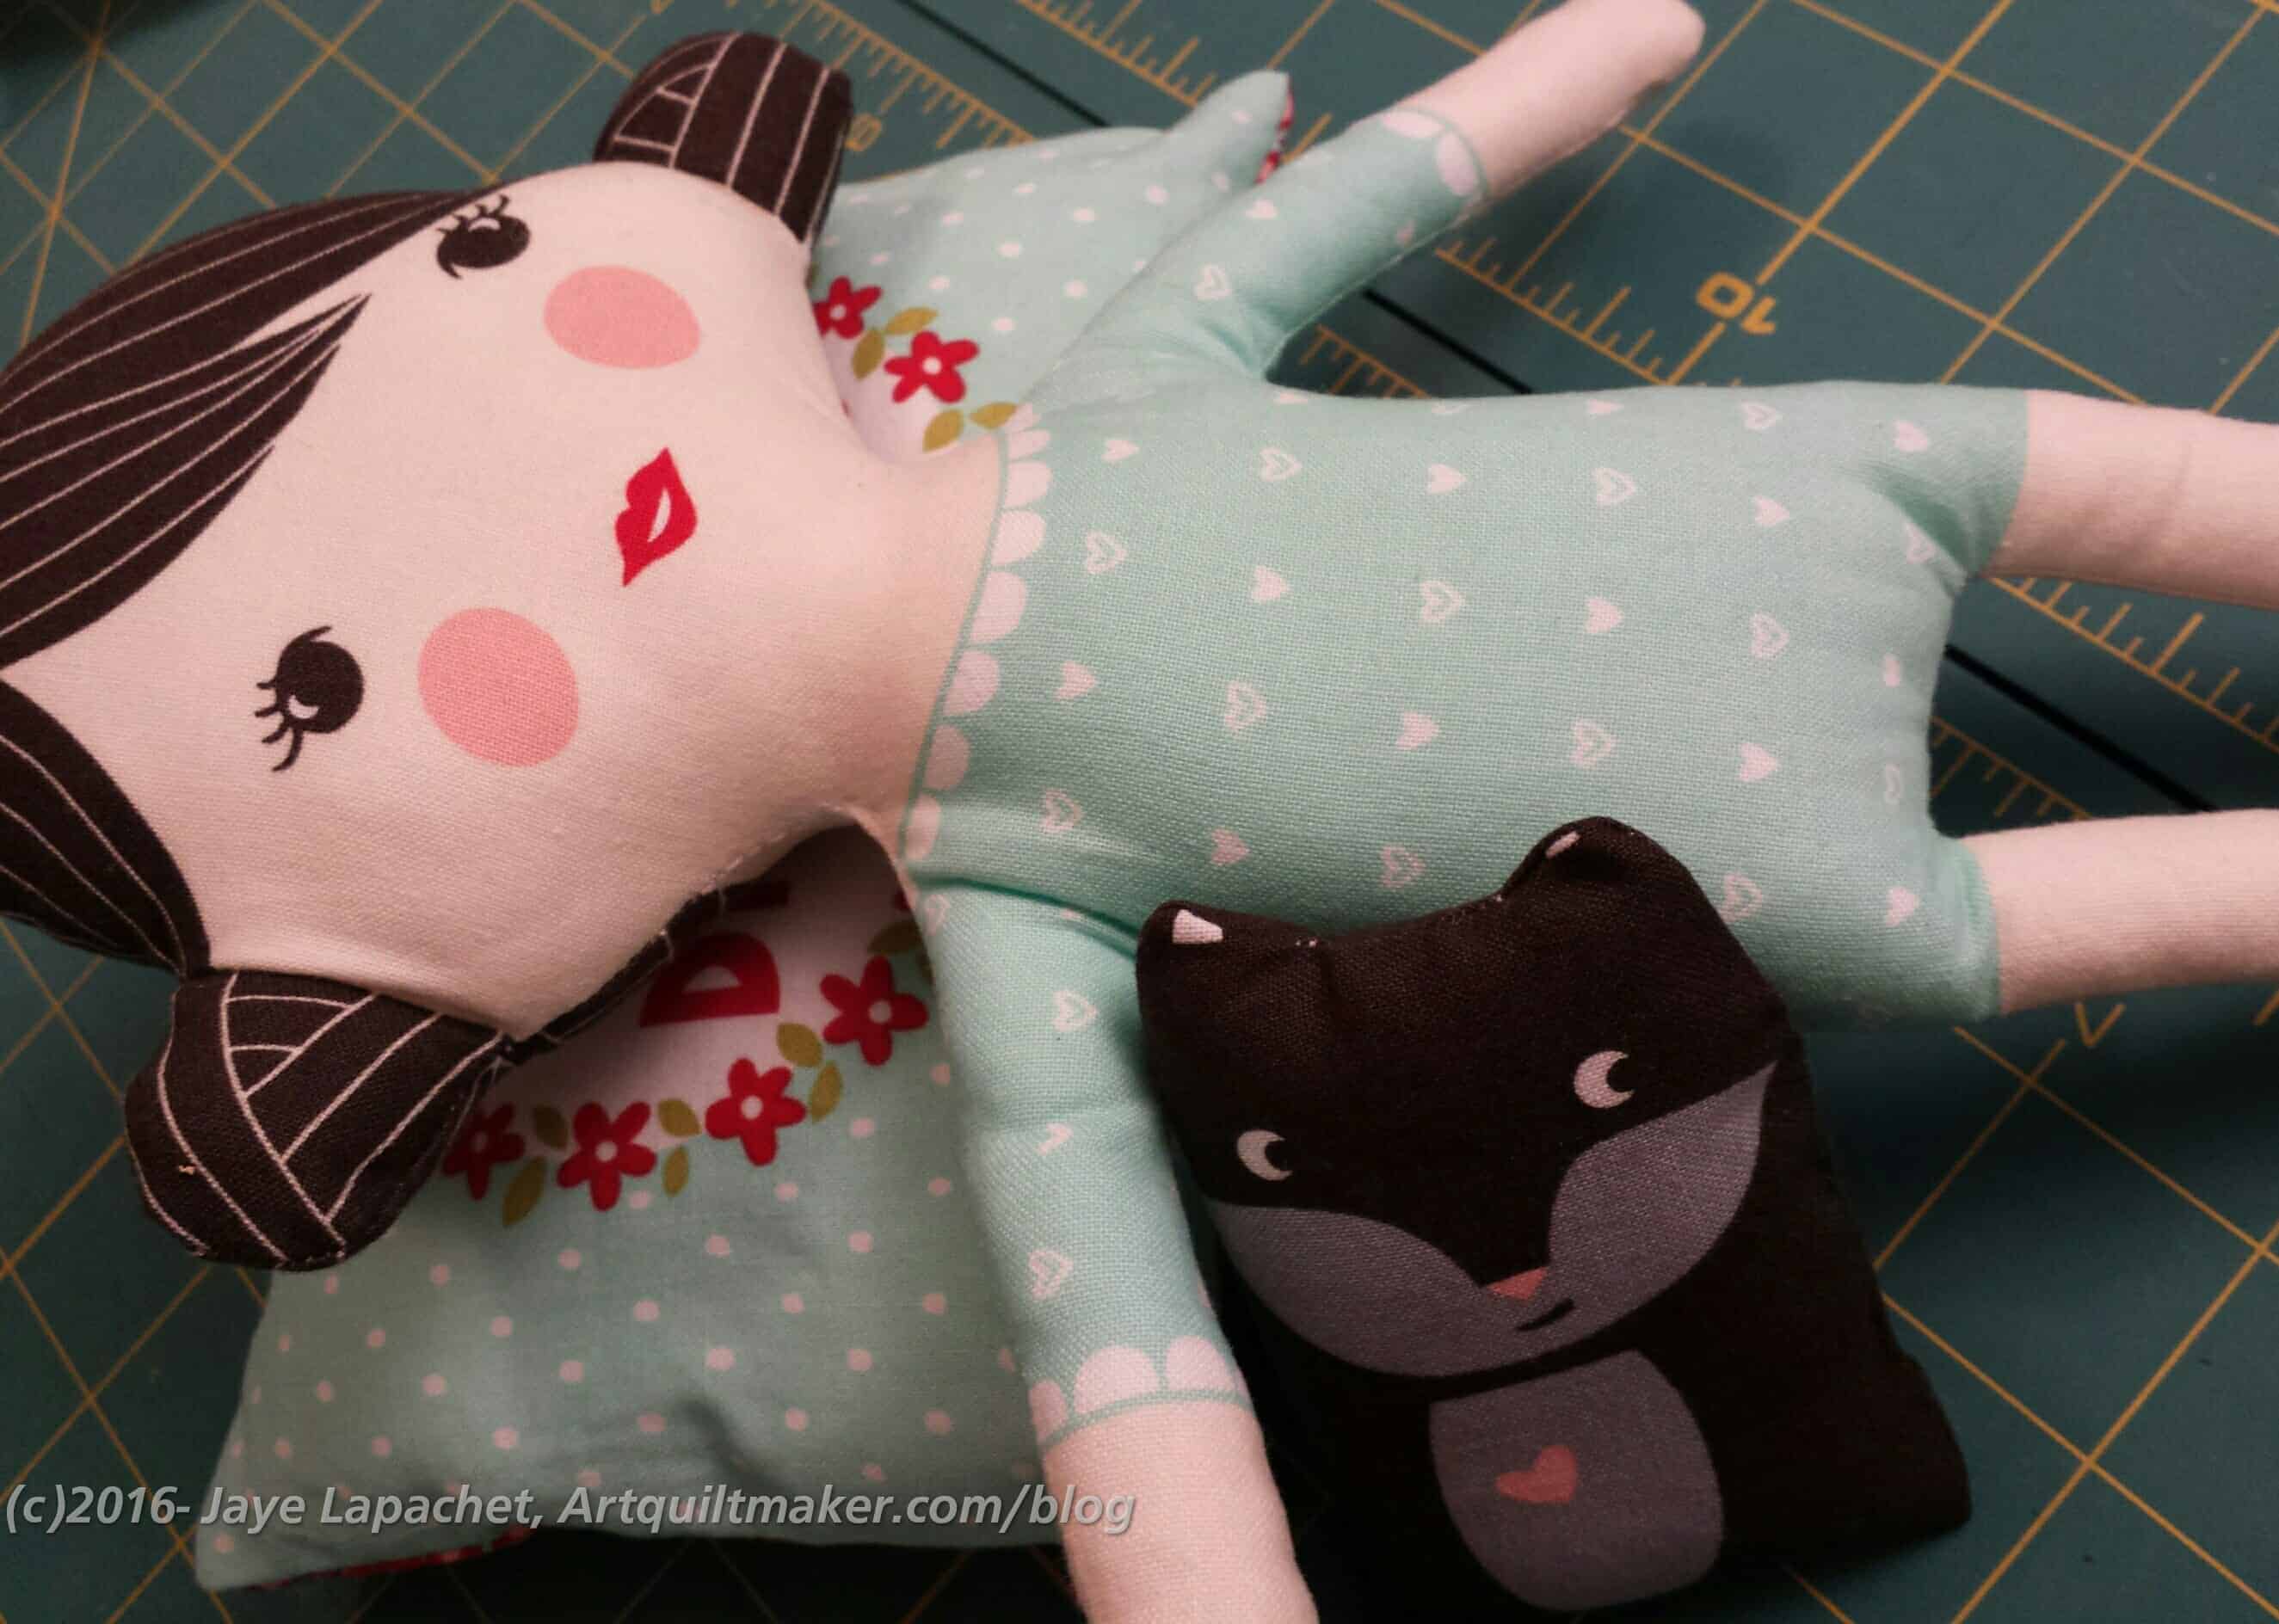
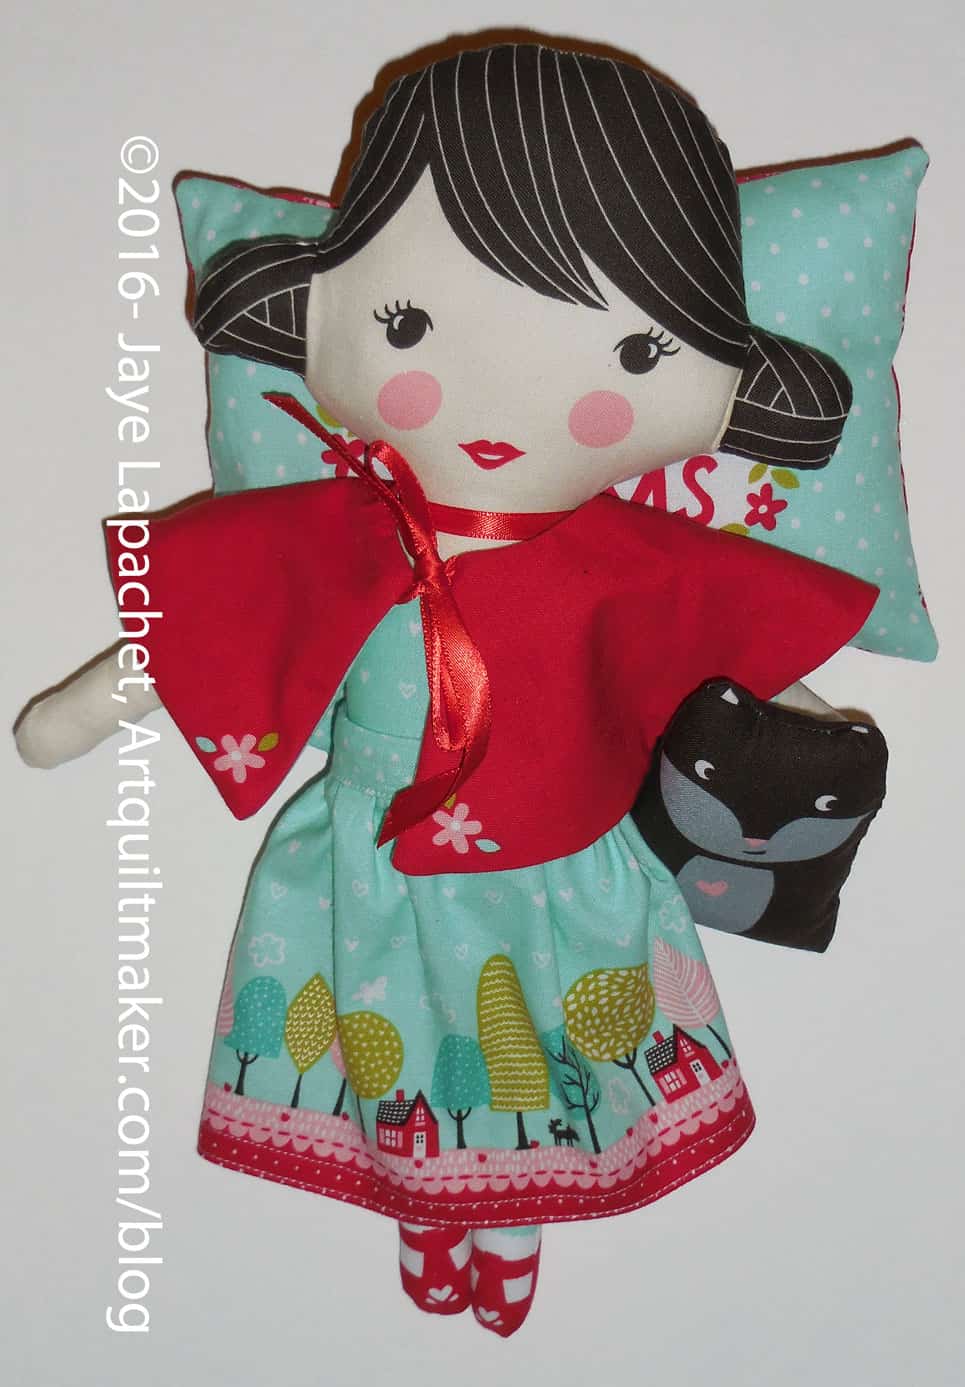
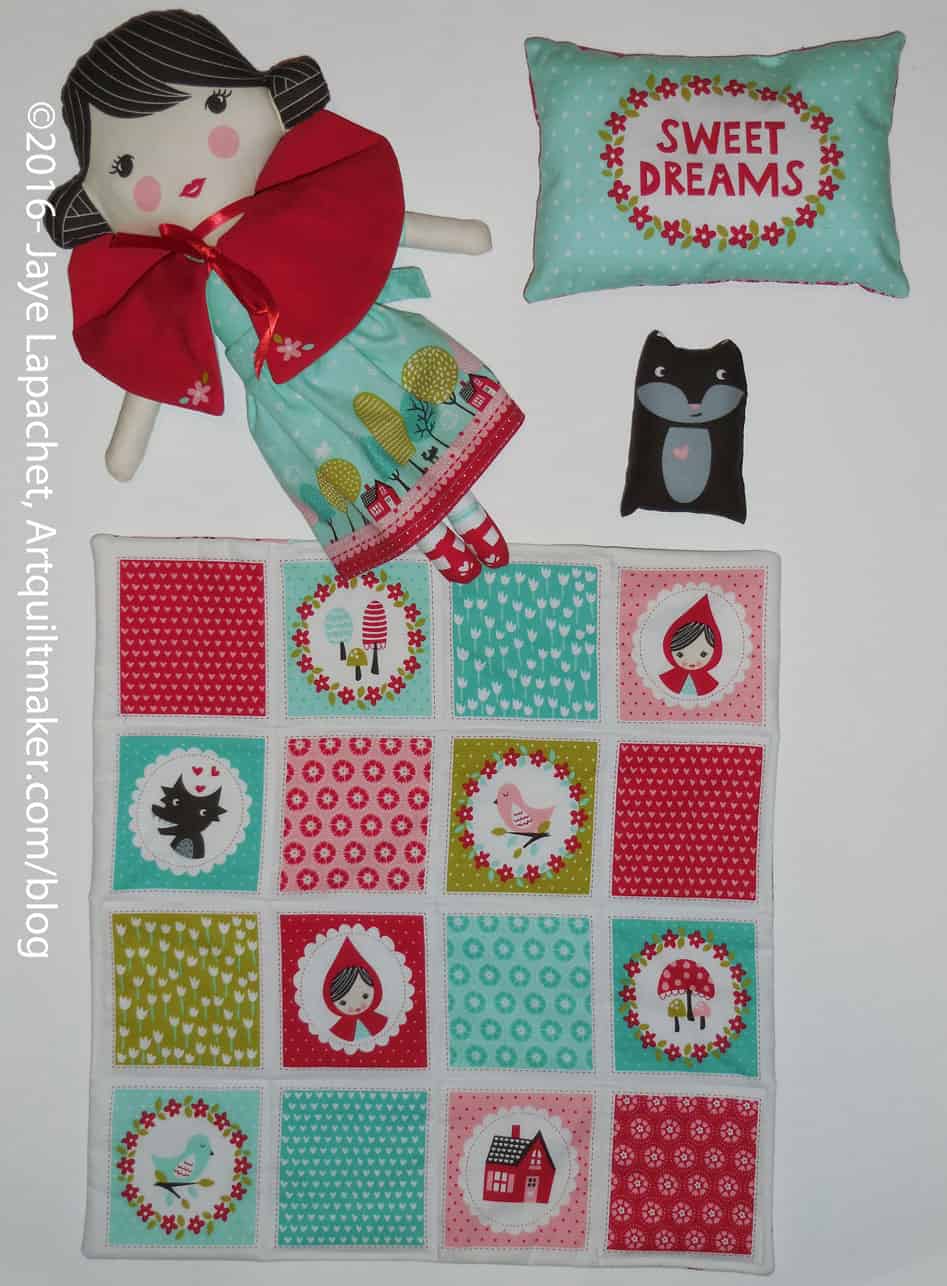
Little Red Riding Hood is finished! She went from a panel to a finished doll in not very long.
Craft Night Work
Red and Wolf
I did need some help. Mom helped with the gathering of the skirt, SIL #3 gave me some stuffing and SIL #2 offered various types of advice and some ribbon for her necklace. Group effort.
Red detailRed pieces
I am pretty pleased with how the whole group came out and I can’t wait to send it off and see what happens.