After sewing the background together, I thought there might be a small chance I was done and could move on. No dice. I would like to say that my Muse gently stroked my hand encouragingly. No such luck. The VIMH #2 was impatient and insistent. “keep going,” she said (loudly). She has no patience because she knows I know what I am supposed to do. When I don’t do it she has no patience for my prevaricating.
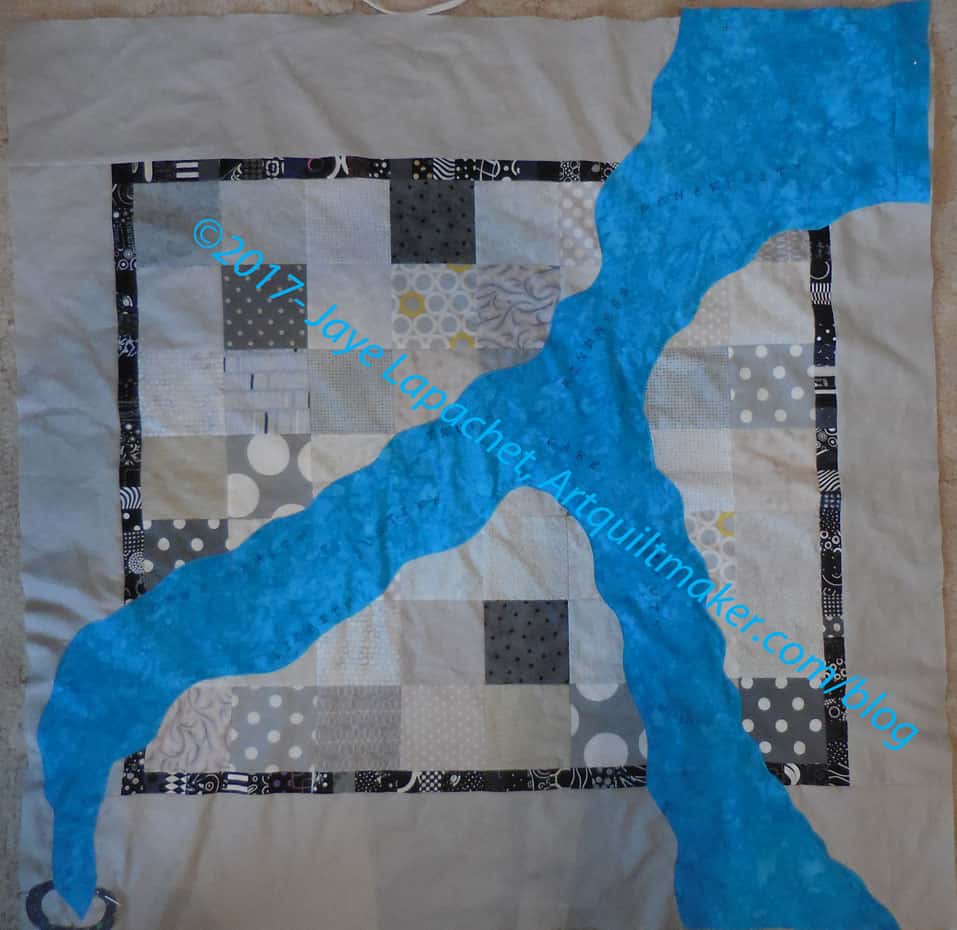
I thought the piece needed an inner border to keep the center motifs contained. I thought a dark border would work. Not being done with those 1.5″ squares yet, I cut about a gazillion more out of black and white fabrics. The fabrics were mostly dark, but the white provides a little space.
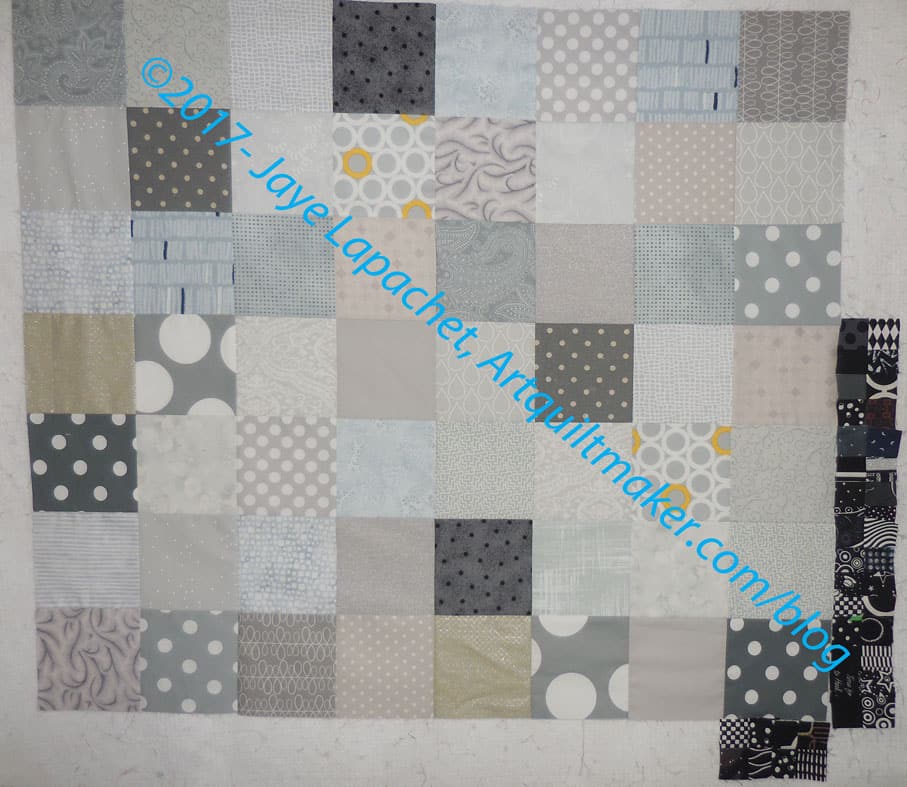
I cut enough for two rows, then put them up on the wall.
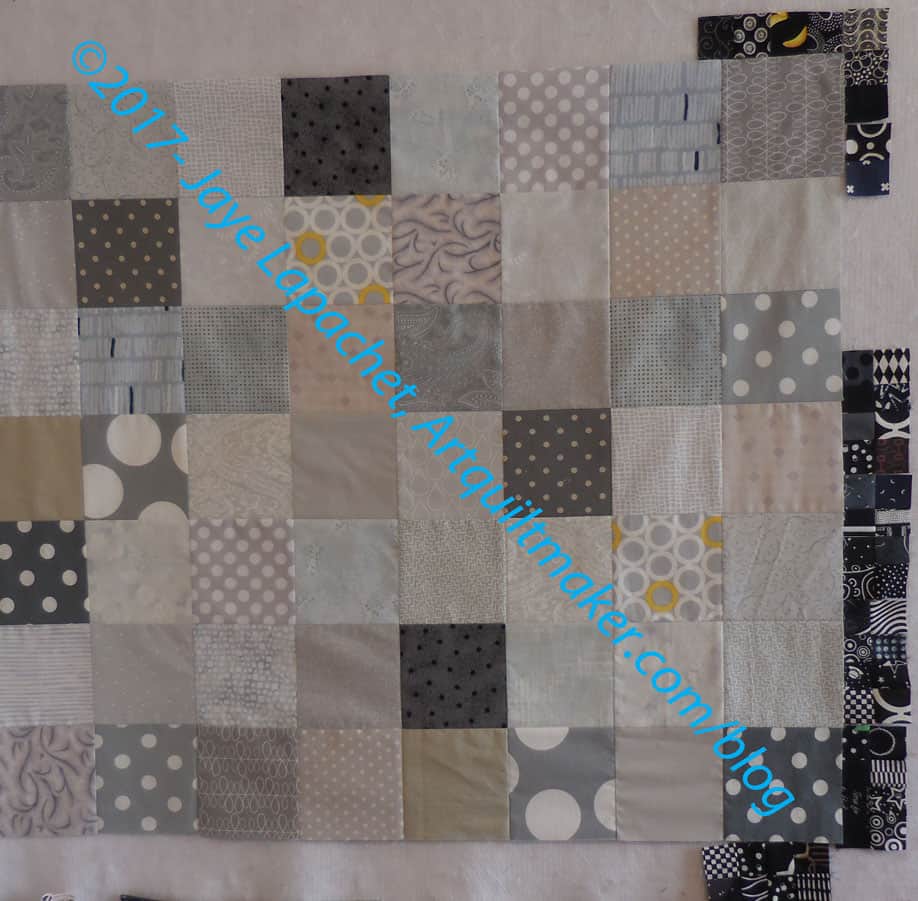
The effect seemed kind of heavy to me, so I put one row up and compared the two. One row seemed best to me, so I sewed those together and put them on to the quilt.
Except.
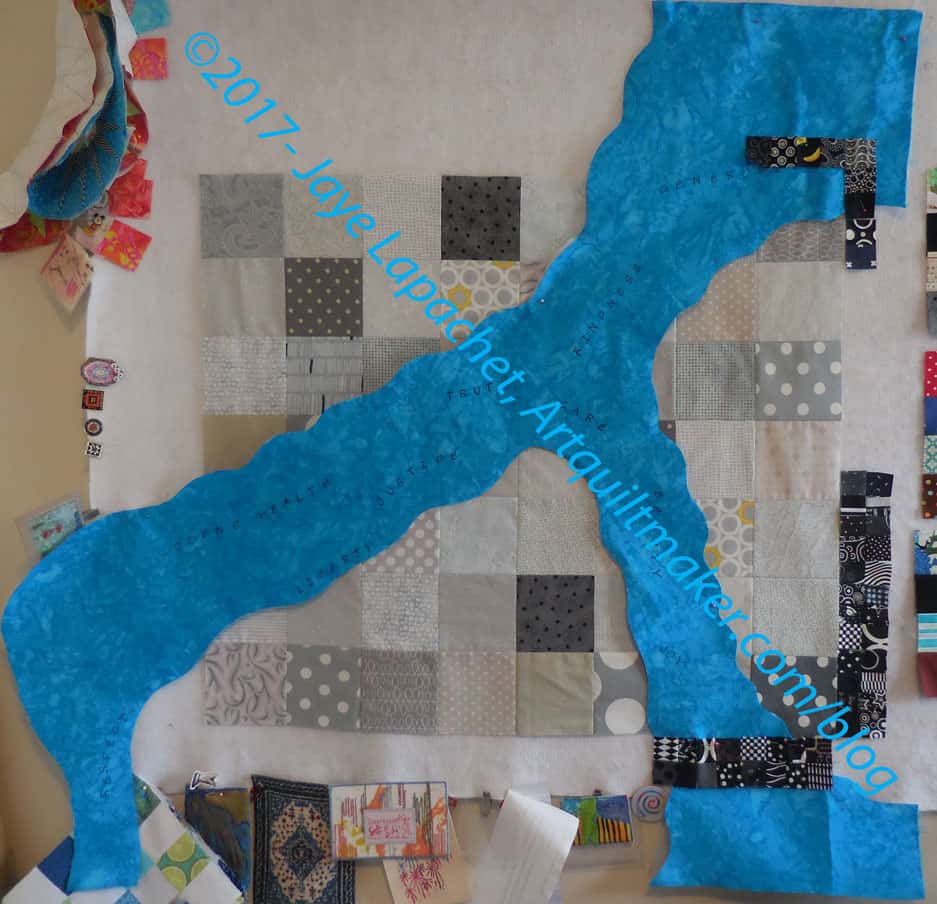
I really wanted the ‘River‘ to go underneath the border. I fiddled with that concept a lot, then finally gave up.
Part of the problem was that I was going to have to applique some of the squares and I really didn’t want to do that. I also didn’t think it added anything to the quilt overall. It was hard to tell, though, and it made me sad not to be able to work out the technical details.
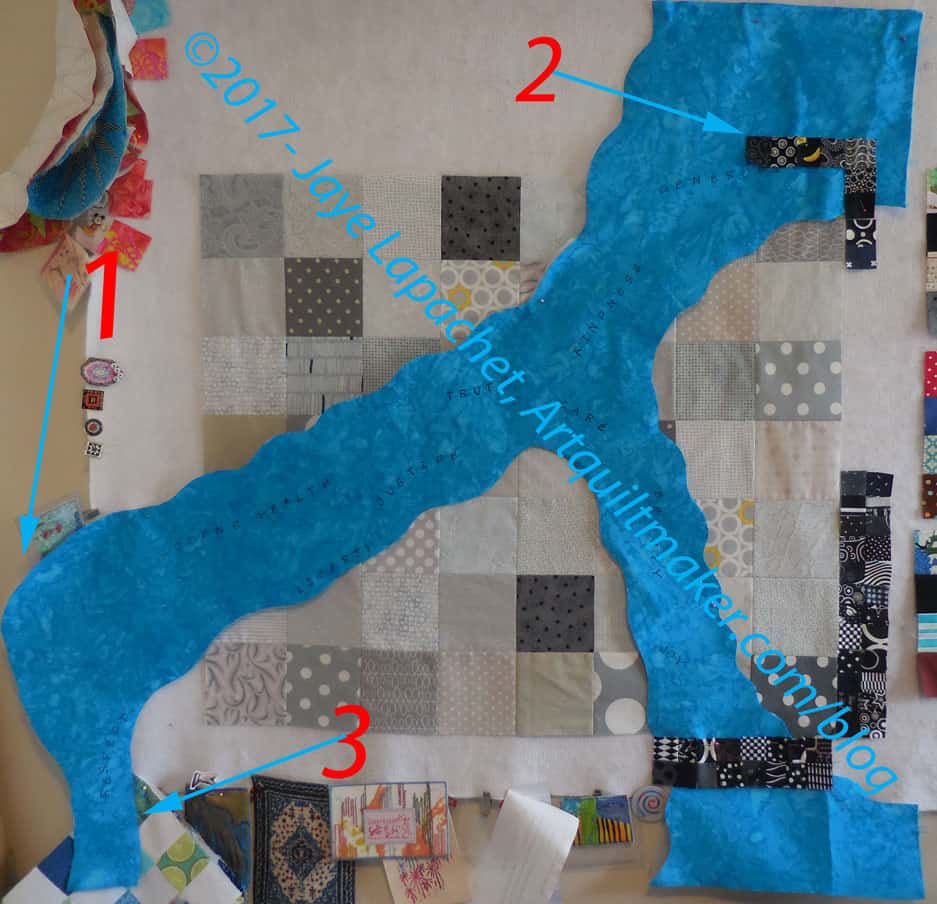
I got busy trimming the River as I didn’t want a 20 inch third border.
- I needed to make the water filtering into the drain end up in the corner but not on the edge, otherwise I wouldn’t be able to applique the drain.
- I was still trying to figure out how to get the inner border over the River shape. This point in the process decided me, because I was already thinking about quilting and how I would manage that with this border on top.
- Trimming the bottom of the water going down the drain was also a problem because of the angle of the viewer. I looked at water sluicing into a drain, which didn’t help me, because I was looking at it from on top. Even if I stood on my head **in** the sink, I wouldn’t have been able to get the same angle. Finally, I decided that my viewers weren’t stupid and would figure out what I was trying to say. I am not 100% happy with the outcome, but sometimes one has to make compromises.
After trimming, sewing, ripping and sewing again, I finished the second layer.
The weather has been very gray lately, so the quilt, being predominantly grey at this point, looks depressing. It isn’t really. The grey made into the second border is a bright clear grey. Even thought I don’t get the interwoven feel I was trying for, I am pleased with how this came out.
Posts about Down the Drain
- I Have a Secret – 8/6/2017
- Art Quilt Start: Background – 8/8/2017
- Art Quilt: River of Sorrow – 8/10/2017