One of the things that makes me feel really good is when someone tells me that a project I made inspired them.
Lynnette’s Star Sampler
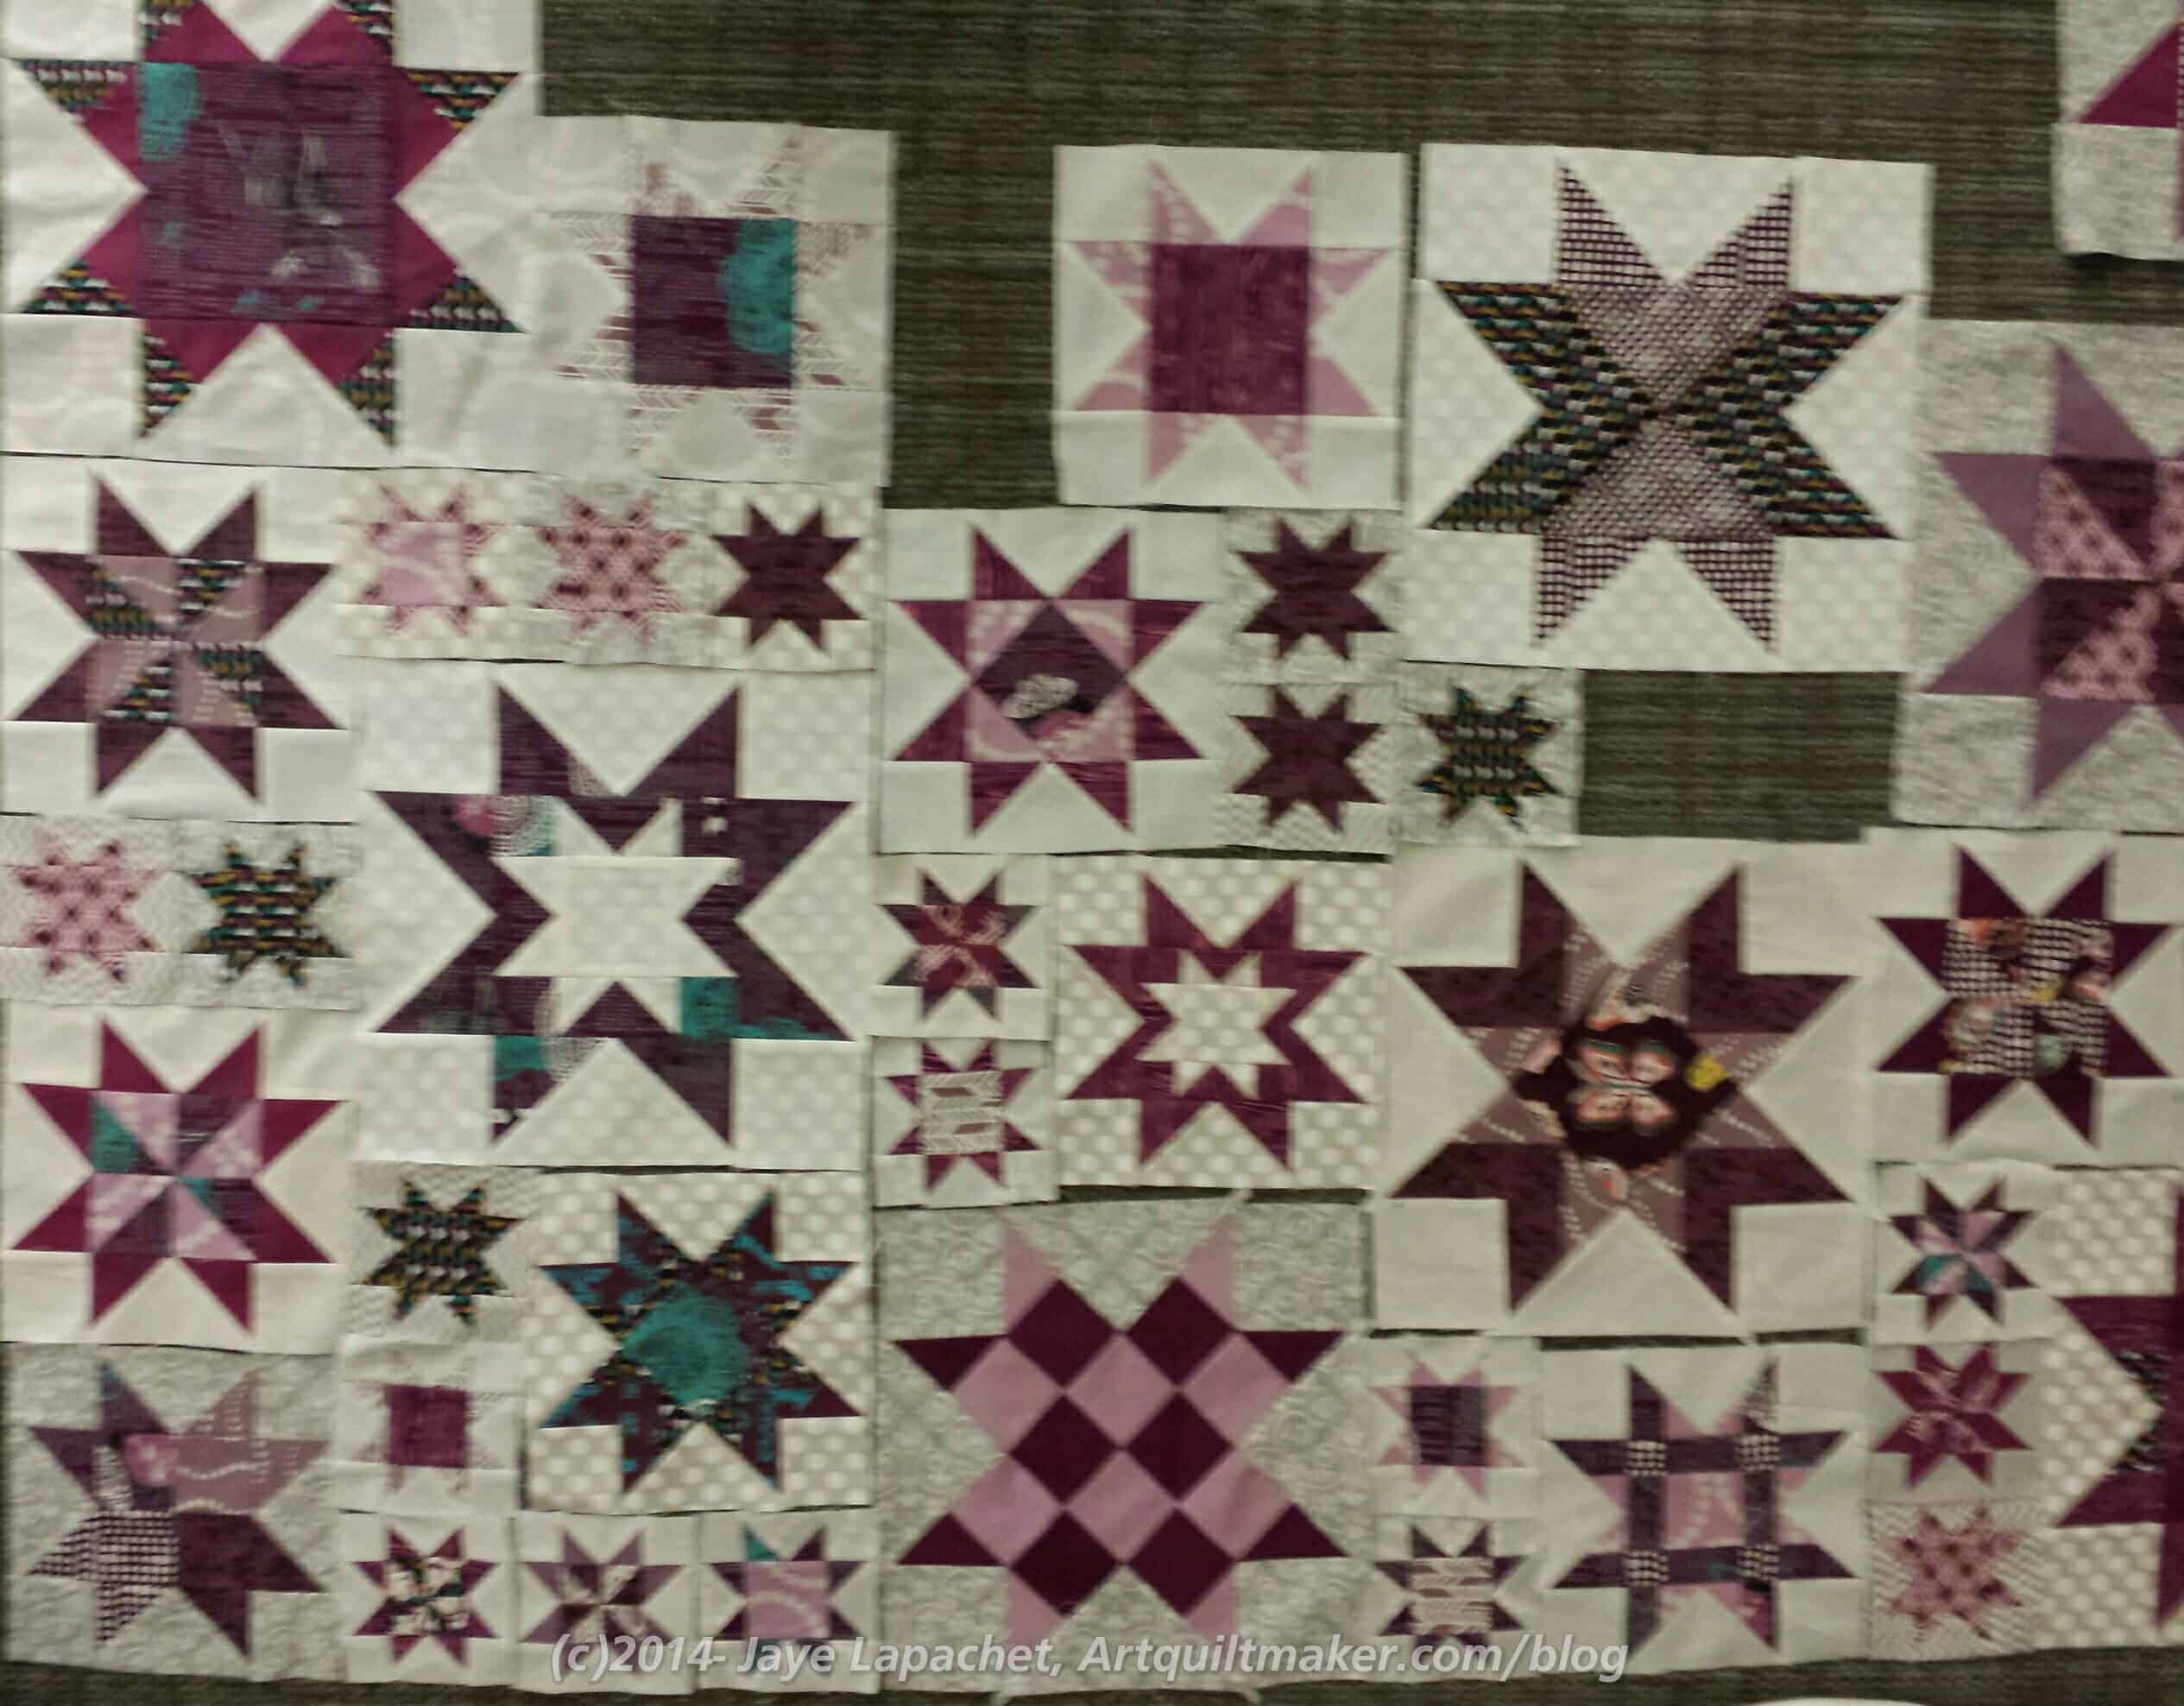
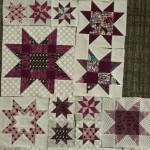
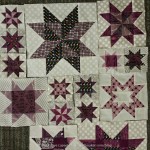
At a recent Sew Day, Lynnette was laying out star blocks that looked suspiciously like my Star Sampler, but in really awesome colors. She told me that my Star Sampler had inspired her.
Ooooh! I inspired someone. That feeling is awesome.
I know the colors are hard to see, but it is in shades of white, plum and grey. It will be a gift. That told me that Lynnette is a better person than I am. I am just thrilled to see another version IRL of the Star Sampler.
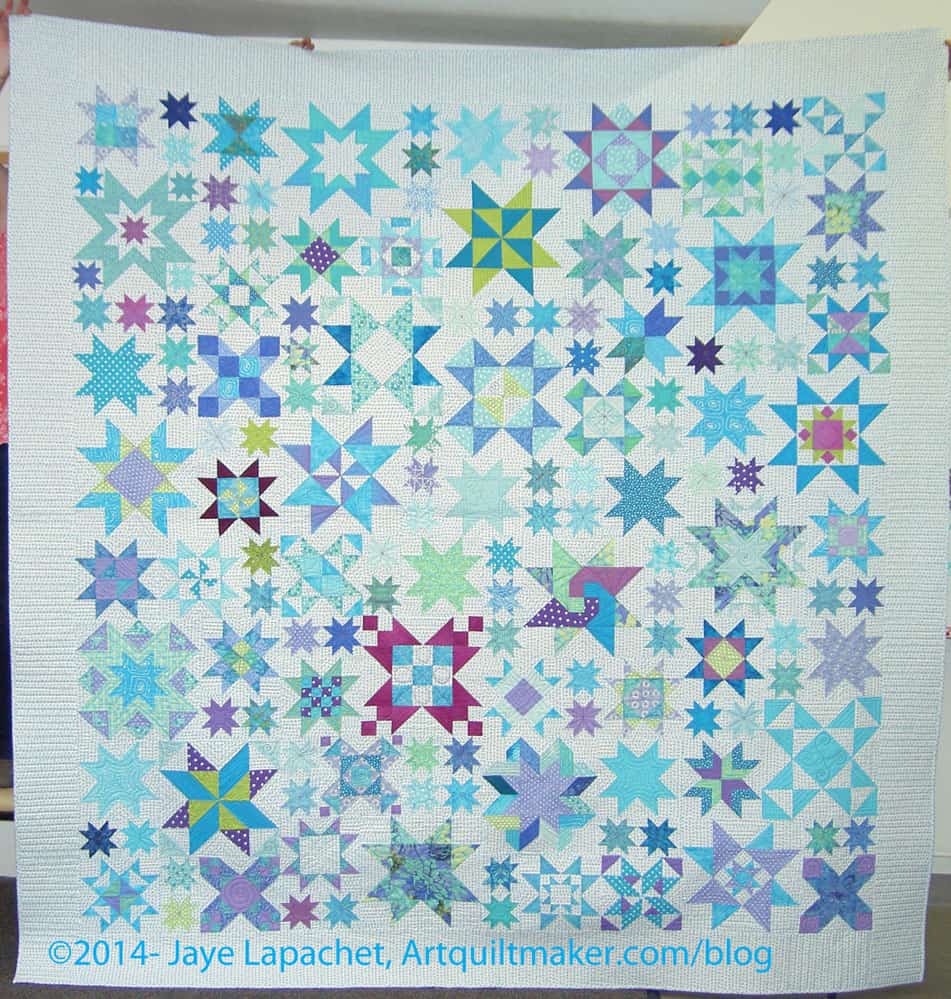
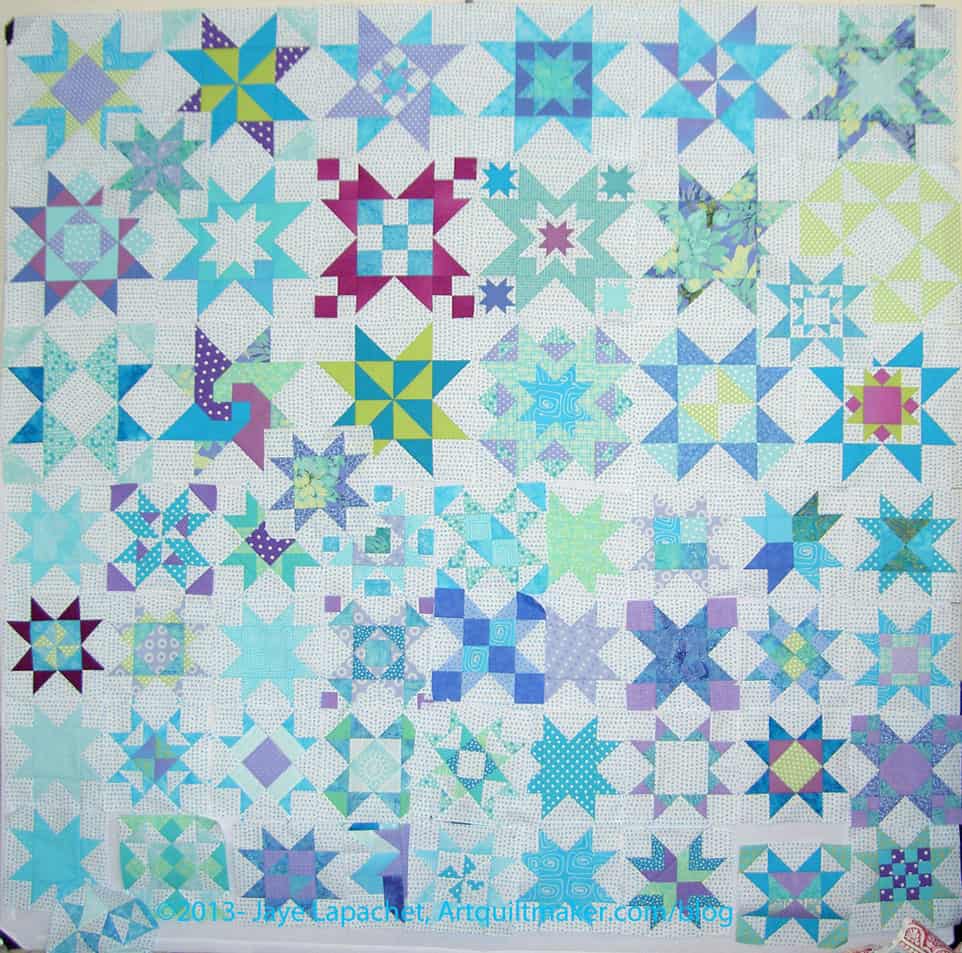
I actually finished this piece last week (or, maybe, the week before), but it is so huge and the weather has been so wet that I wasn’t able to take a photo until Maureen and Nancy held it up for me at the CQFA Meeting last weekend. Thanks, Pals!
It was also the first time I had seen it all completely finished. I wrestled it in my lap to bind it, but didn’t even get DH to hold it up, because we were really busy last week and I was afraid it would have defeated him as well.
I am so pleased with how this quilt turned out. Not only is the finished pieced lovely, but it brings back good memories, despite some complaining, about working on a project with TFQ. She still has to finish hers, but perhaps seeing mind finished will spur her along.
I really like the different sized blocks. They really create a lot of movement in the quilt.
Earlier in the year, while working on the Star Sampler project, I wrote: “Still I didn’t want to work on any Sawtooth Stars at the moment, even the new patterns. I just left these on the design wall and pretended I wasn’t behind again. This is an interesting exercise in working on one project almost exclusively. It is difficult for me to dedicate so much time to one project, I am finding. This makes me think more about my process.”
I didn’t go back after the above musing and put pen to paper (or keyboard to blogsite as the case may be) about my thoughts on process. I do think that the Star Sampler has given me some insight into working on a semi-complex, long term project. Whether or not I have said it, I have been thinking about trying to mostly stick to one project at a time. And, whether or not I have realized it or planned it, the Star Sampler project was a test of that thought.
We were about two months into the Sawtooth Star project when I wrote the above. I found my eyes wandering. The Star Sampler turned out to be a special project, because it required so many blocks, and, in turn, so much dedication. The blocks weren’t all difficult and there were some similarities, such as dozens and dozens of Flying Geese, but there was figuring out and puzzling out to be done throughout the project. The small 4″ stars were especially challenging, but mostly because of the size and the quantities required. The quilt, and the exercise might not have been a good test, but it was a test.
I have spent time thinking about this and I found that, after a few months of no longer working on the Star Sampler, the project sticks in my head. I feel like I have a relationship with Sawtooth Stars and I think about how much work and time the project took.
I think I have learned something about process from this project. Working on a large project that requires dedication has value. Speeding through projects doesn’t allow them to lodge in my brain. The Star Sampler is in my brain. I keep thinking about it. I think I need to consider other projects with the difficulty and depth of projects in the future.
Do I want to work on all projects that take 4 months to piece? Probably not, but I also don’t want to churn through projects every weekend. I want to remember the projects that I have made. I feel really bad about Fresh Fruit. Fresh Fruit, as you know was a leaders and enders project. Because the pieces were so large, I had the major pieces for the quilt top done before I really realized it. It didn’t require much dedicated time on my part. I kind of slid it between whatever else I was working on. It is definitely not lodged in my brain.
I don’t think it is sheer time that makes a quilt top lodge in my brain. I think there has to be a little drama, like the green border for the T-Shirt quilt. Not a lot of drama, but a little. Perhaps drama isn’t the right word? Perhaps the right word is process. I have to work through the process in order to get the quilt to stick in my mind. If there is no process, no puzzling out piecing tricks, no quandries, then the quilt just doesn’t stick in my mind. It is kind of sad to make a quilt and then not even remember making it.
I finally got a chance to see the blocks that TFQ made as part of our Star Sampler project. I hadn’t seen her blocks before, though I did see a few of them on Flickr. There weren’t enough hours in the day for me to photograph them all, so you just get an idea of what she did. I cajoled, but hadn’t sunk to bribing by the time I left, her to sew them together. She was afraid that if she didn’tget the project done by the time she left for vacation, she would lose momentum. She said that is what she is experiencing. Sigh.
I know I am drawing out the ending of this a bit, but the truth is that I haven’t gotten the back done and I need to get the back done before I can show you the entire project.
I’ll get there. I am just not there yet.
No section came out perfectly. I am not talking about precise sewing, though that is true as well, but also in color placement. I tried hard to disperse the fabrics sort of evenly and among the different sections in hopes that this strategy would act as a way of moving your eye around the piece.
Section 7
This, Section 7, was a bear of a section. I really had to sew carefully and fix little bits and bobs here and there. The fact of the matter is that the Ribbon Star isn’t on the same grid as the Sawtooth Star and that came back to haunt me a little bit when when putting this section together.
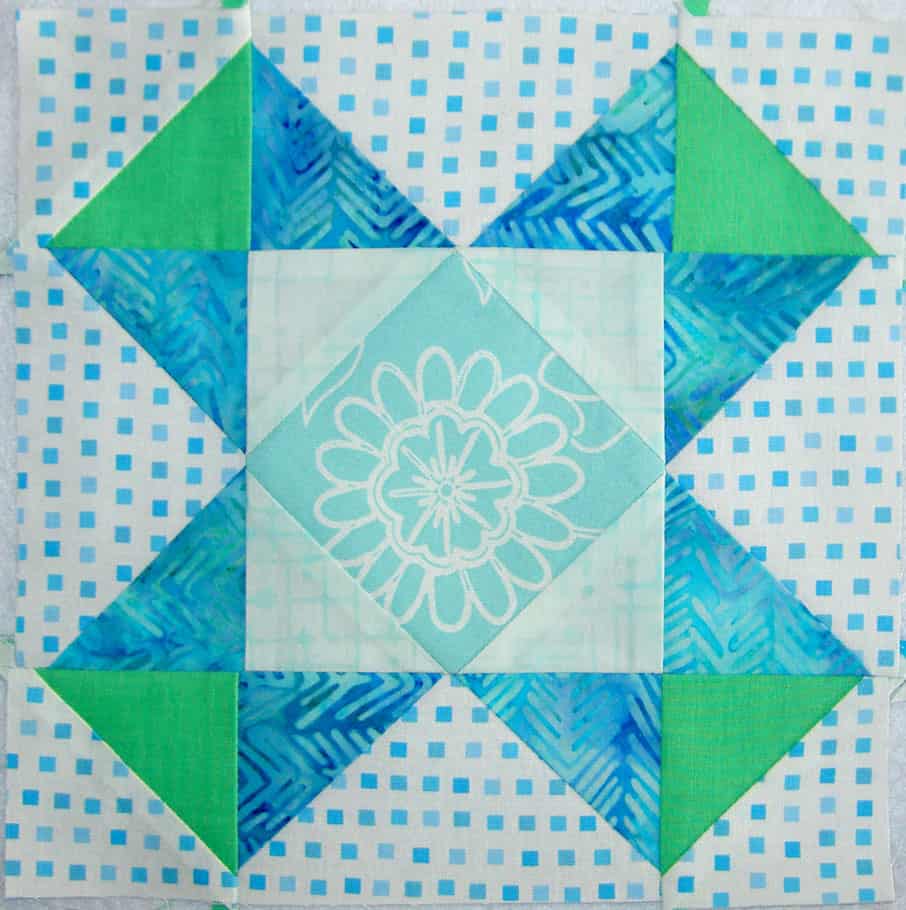
Remember that I went on a bit about the Mosaic Number 19 and how it wasn’t quite up to par? Still, it was the first block I made for this project and I had some fondness for it.
Well, I remade it.
Mosaic No.19
So much for fondness. It just didn’t fit and I decided that while I was remaking blocks that weren’t working for other reasons, I might as well remake this one.
One thing I wanted to do was make sure that the background was the background. In the green version, there are large triangles of green in the middle center where background should be. Essentially the Sawtooth Star shape is reversed in terms of fabric. I thought the green where the background should be would ruin the flow of the background of the quilt. Yes, this new configuration meant that the corners would be non-background fabric, but other blocks have that quality as well, so it will be ok.
I have to say that I do like the frame around the center block int he green version. It really focuses attention on that center tilted/on point square. I suppose I could have found something to fussy cut and kept that look in the new version, but I didn’t think of it.
That blue that I used is a really nice blue. I think it shows up really well in the photo.
See more about this quilt using the Star Sampler tag. I wrote a whole post about the genesis of this project, which you might want to look at.
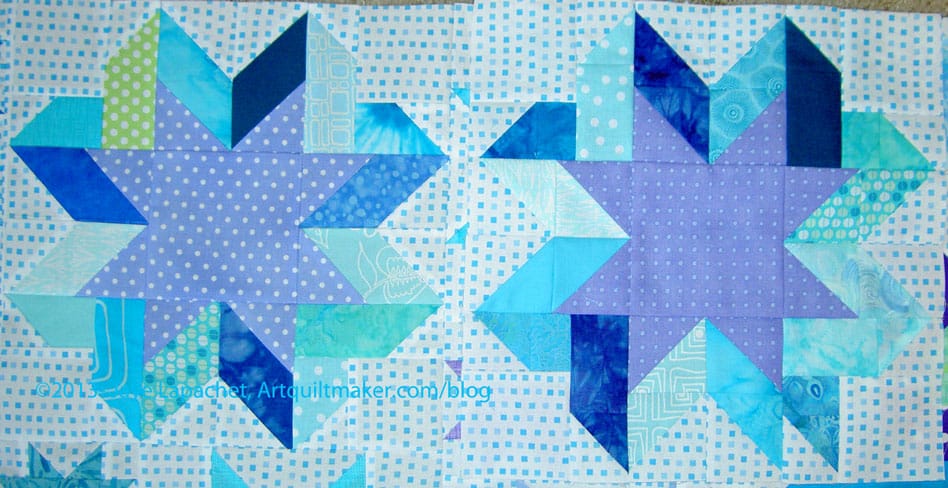
You might remember the drama of the first Ribbon Star. You also might remember that I made the star over using half square triangles rather than parallelograms.
I have to admit that I never really liked the new version, which you can see on the right of the above picture. I used it, because I had no choice, but I didn’t really like that particular lavender fabric.
Finally, I decided that I would remake the first block. The first block had a lot of problems, not the least of which was that the parts were a variety of different sizes. I unsewed all the squares, rearranged some of the colors and resewed them so that the block, basically, fit together. Many of the seam allowances are so far short of 1/4″ that I really worry about their integrity.
Still I am really happy that I get to use the original version of the block.
A Hot Mess as Pam or Tanesha would say. We don’t use that phrase here, but it seems appropriate.
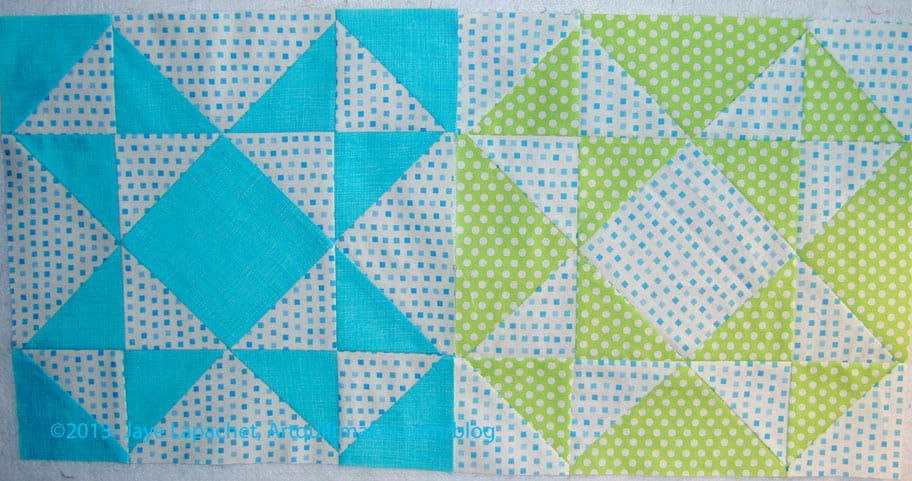
Section 3
It is certainly true that projects look worse before they look better. This Star Sampler and my workroom are both in the Worse stage right now.
All the parts, which I have sewn together, look great, but the parts are all over the place. Discards are in a pile. Fabric is in another pile. I don’t know how I work under these circumstances. Really.
Making all of those blocks in advance, though, makes it really easy to put together. I have all the parts, so I just need to grab them and sew. Nota bene: If you make this project, I would recommend making all the blocks first. I know I don’t always do that, but in this case, it works.
As I thought, I love the layout. I love it that it is difficult to see how the blocks were set together. I love it that there are 3 different sized blocks used in the quilt. I guess I just like my secrets. 😉
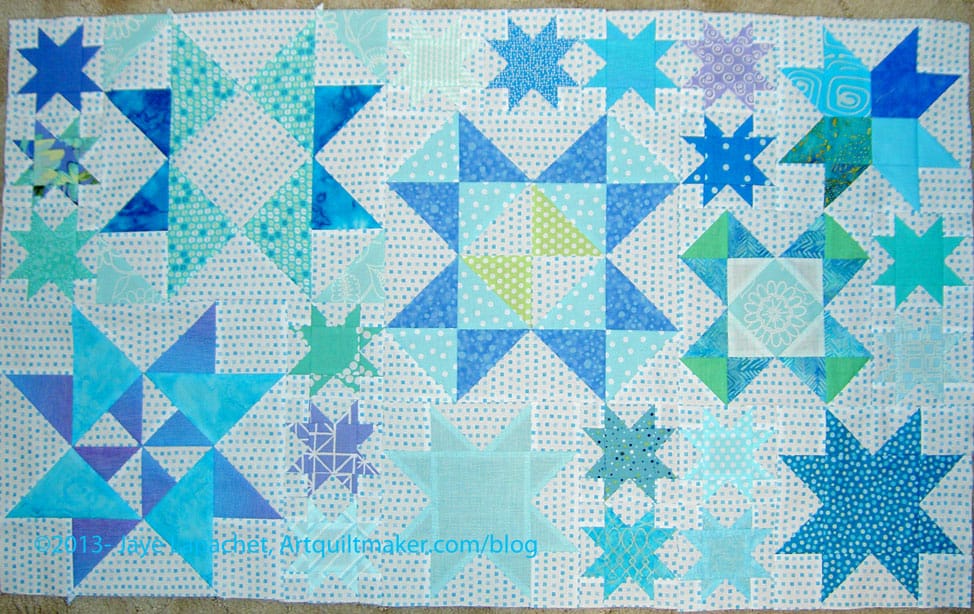
Section 1
It is fun deciding which blocks will go with which other blocks. We are getting some of our summer weather so the photos have the foggy look to them. I had all the lights on and used the flash, but still…the foggy look.
I think the blocks with the strong (non-background) corners look ok. The one in Section 1 (lower right) doesn’t stand out like a sore thumb, which is a relief.
I thought the Basic Stars might look like big un-pieced blobs in the middle of the sections, but I think I chose fabrics wisely and placement wisely. I think the Basic Stars may provide a slight resting spot for the viewer’s eyes amidst all the pieced blocks.
Section 2
The 12″ blocks are working well, too. 12″ blocks are so….big. I thought they would dominate the quilt, but the 8″ and 4″ stars soften them up a bit. I do like that Rising Star in the upper left hand corner. That might be my favorite block.
Do click on the photos to see them larger. They look better larger.
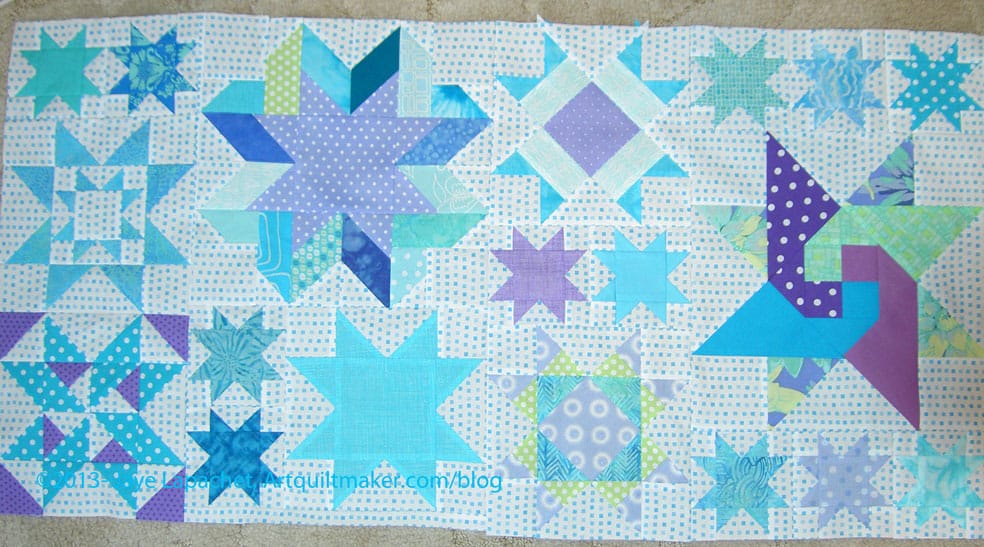
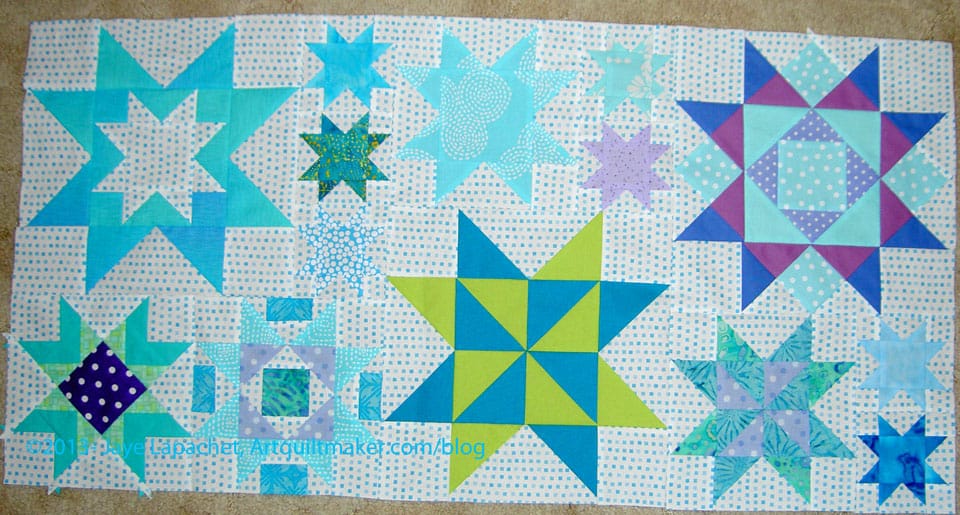
Star Sampler – 1/2 of the top
Believe it or not I had to tidy the whole house including my workroom, which meant tidying that mess I talked about earlier in the post. All of the pieces and parts had to get off the floor.
I put everything up on the design wall. It promptly fell off. All that piecing is heavy and even my super sticky design wall fabric was no match for this baby. I had to resort to pins.
The above photo is half of the piece. HALF! Half does not completely fit width-wise. The blocks on the bottom are still blocks. They had to go somewhere and I did not want them sucked into the vacuum!
I am thinking it looks a bit chaotic. Please tell me I did not go through all this work to end up with chaos.
Remember: if you want to know more about this quilt, the pattern and the project, check out the Star Sampler Background post.
I finally finished the 4″ Sawtooth Stars over the weekend. This project is lingering a little too long for my tastes, but I wasn’t miserable making these little stars and the group of them makes for a very nice accomplishment.
Now I am ready to put the blocks together. I plan to follow the plan from the Oh My Stars QAL, because I think it is an interesting way to put the blocks together.
I really do. The possibilities are so endless and I love possibilities.
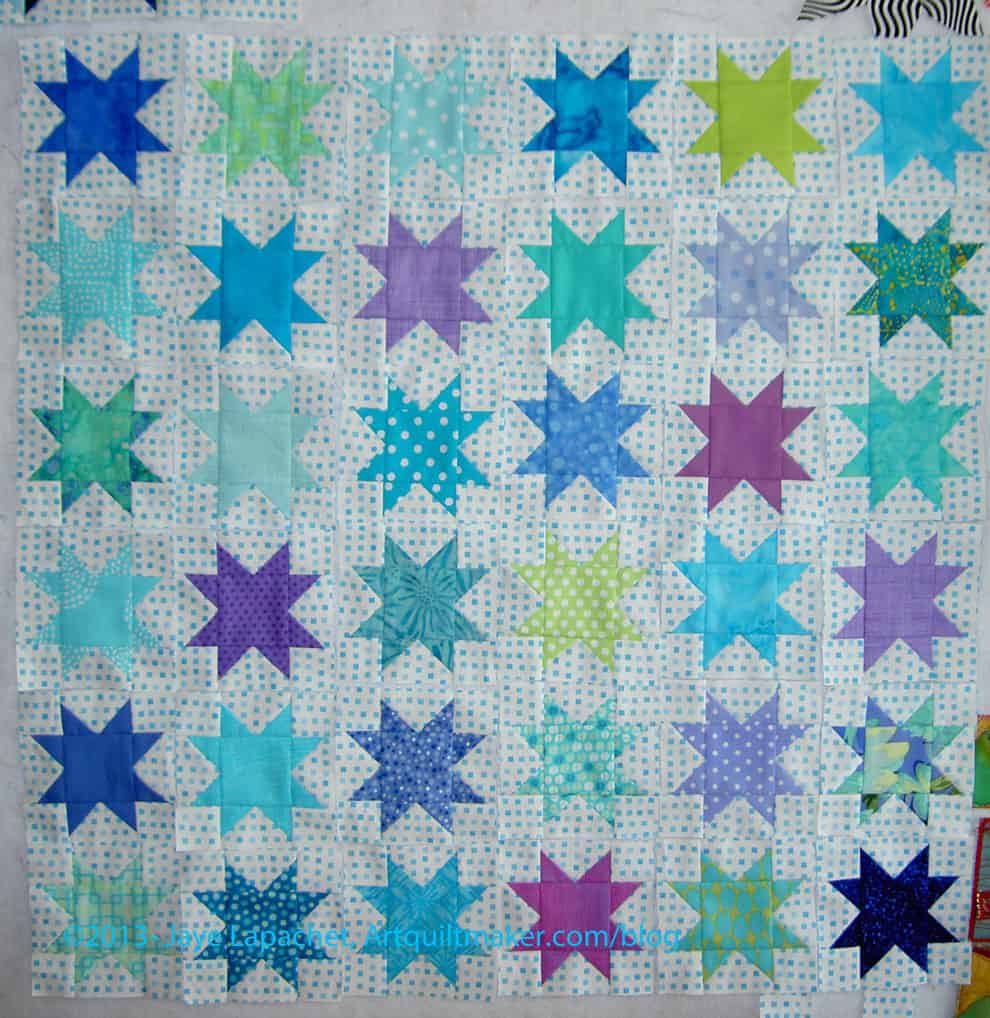
All Pieced 8″ & 12″ Blocks
Above are the 59 Sawtooth Star variations that I have made for my Star Sampler Project. I am pretty pleased with the way they look together. There are 2 I may redo, but TFQ is coming to visit this weekend, so I will ask her what she thinks.
Week 15 8″ Blocks
These are the Week 15 blocks.Left to Right, Top to bottom they are Mosaic #11, Sarah’s Choice (again), Basic Star (with a flourish) and Rising Star (another redux).
I am still dying to know why many of the classic blocks are called Mosaic #something. I’ll have to look on Barbara Brackman’s blog to see if she ever talks about it. I like the fabrics I chose for this block. It looks beachy and fresh.
The Sarah’s Choice is a bit blah, but not terrible and it blends in well with the other blocks (see above), so I will leave it.
I decided early on that I wouldn’t get fancy with the Basic Star, but decided on this last one to use my ‘focus’ fabric as the center and different legs for one block only. I wanted it to be clear that the Basic Stars were Basic Stars.
I am pretty pleased with the Rising Star. I really love the design of that block. I used the excess backing (cut off after the quilting process) from another quilt. It is a nice batik fabric and I wanted to use it again.
I still have about 25 4″ Sawtooth Stars to make. I pressed fabrics earlier this week and on the weekend and cut parts to make them, but didn’t do much sewing. I didn’t get to cut all the parts I needed, but I will certainly be ready to sew when the weekend finally arrives.
I am really looking forward to starting the process of putting these blocks together.
Week 14 Week of April 29 (8″ blocks) (JHL chooses)
Basic Star
Broken Star (Around the Block)
Indian Star (Around the Block)
Martha Washington Star (Around the Block)
Hooray! I finished another week’s worth of blocks. We are nearing the end of these blocks, too.
I still have about 40 of the 4″ blocks to go, but I have been cutting for them and using them for leaders and enders. I can get about 5 done in a few hours that way.
I made a pile of fabrics, from the grand pile that is my palette of blues, greens and purples, that I may use for the 4″ stars. I’d like them, if possible to each be different. I don’t know if it is possible. I have plenty of fabric, so that isn’t the issue.
The issue for next week is whether I lost a basic star or not. I think the issue is that the stars fill every inch of my large design wall and I may have lost track of one of the blocks. I have to count and see.
I have plenty of work to do on this project, but I am glad that the end is near.
As I have mentioned, I am behind on this project. We both should be done with the 8″ blocks and finishing up the 4″ stars. We are on Week 13, which was supposed to be finished during the week of April 22. TFQ chose these blocks and I just started them on Sunday.
Basic Star
Free Trade (Around the Block, page 67)
A Salute to the Colors (Around the Block Again, page 106)
Chisholm Trail (Once More Around the Block, page 50)
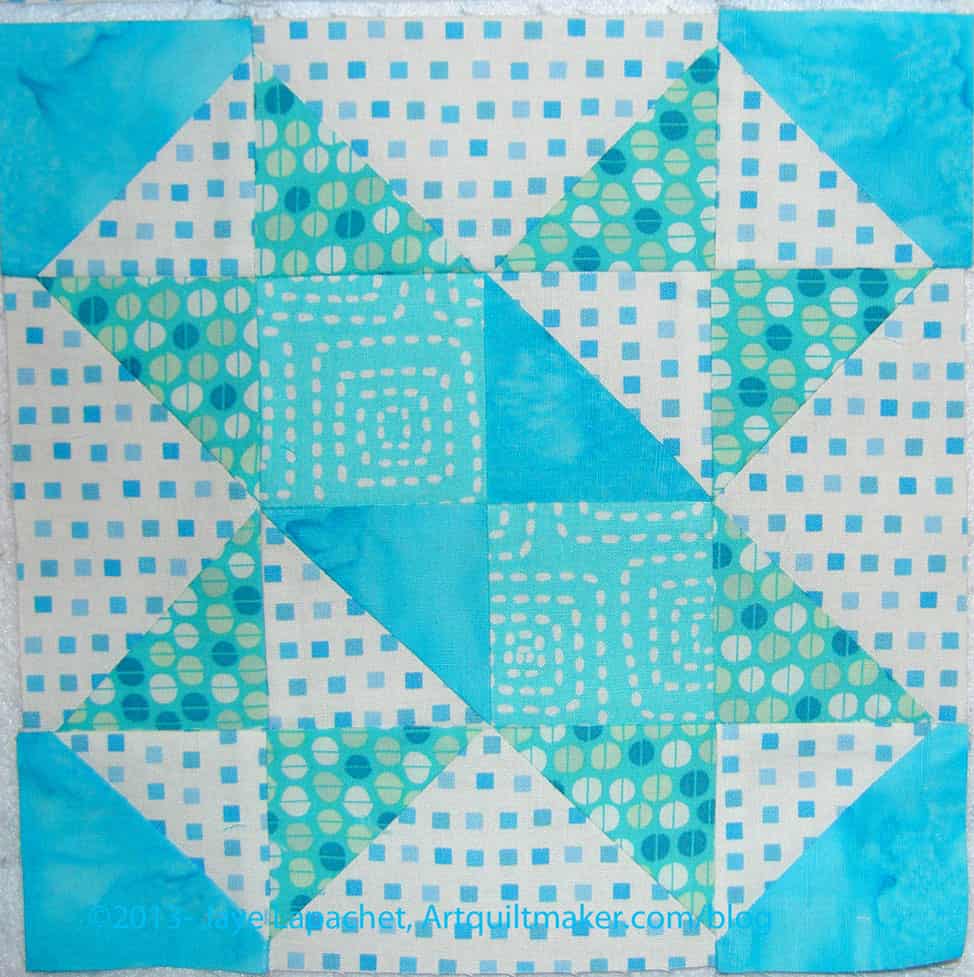
Star Sampler: Free Trade
Free Trade was the first block I sewed to try and catch up.
I like the look of the squares and half square triangles in the center.
I used squares for the center that had been rejected from other blocks. I couldn’t find any to match, so I used some that would look good together and, perhaps, create a little added movement in the block.
I was pleased with myself for thinking of this. I happened to be filing scraps in the course of tidying up the workroom when I thought of it.
Star Sampler Week 13
I finished all of the blocks last night.I don’t usually sew during the week, but my mom had to switch her days (she usually comes over on Tuesdays to see the Young Man) so I threw caution to the wind and just worked. I don’t know what DH was doing (ballgame, maybe?), but he didn’t want to catch up on a show with me until later.
So, TFQ picked these blocks and they were fine. I wasn’t really pleased with A Salute to Colors (lower left) when I saw the pattern, but I changed around a couple of colors and like it now that it is done.
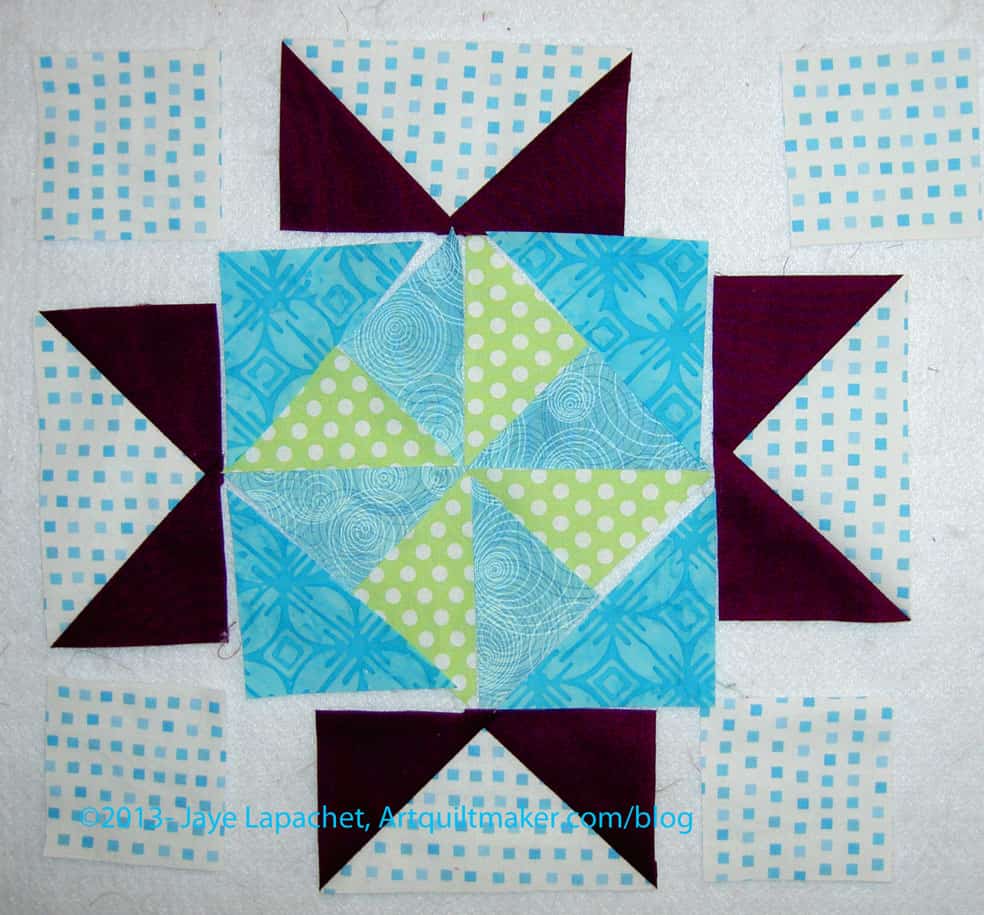
Chisholm Trail
My favorite of this group is the Chisholm Trail block. I love the way the fabrics work together.
The fabric I used for the arms of the star is perfect in that space with the other fabrics.
I am pleased.
Now I have to get busy with the blocks for Week 14. I have one cut out, one made and another 41 4″ Sawtooth Stars to cut out and sew.
I think we are on week 12 of our Star Sampler project. We are still making 8″ blocks. These are from the week of April 15. I am now behind again, because I was able to sew over the weekend. I chose these blocks:
Basic Star
Whale’s Tail (Once Again Around the Block, pg.126)
Centennial (Around the Block Again, pg.40)
2142 Mosaic #19 (R1, C5)
Whale’s Tail
Whale’s Tail: There are a number of the blocks with chevrons making up the legs. I kind of wonder about the name of this blocks.
Since we are nearing the end of the pieced larger blocks, I am trying to make sure that all the fabrics I have used in other blocks have been used at least 3 times, so that there is some balance in terms of the colors and fabrics. If you want to read more about balance, Sandy and I did an episode in the design series and we talked about it.
Centennial
Centennial: I really have to wonder why this block was named Centennial. I looked up the block on the web, because I don’t have my Jinny Beyer book handy. I found some interesting settings for this block.
2142 Mosaic #19
2142 Mosaic #19: I should look up this block in the Jinny Beyer book, because it is such a weird name. Were there 18 other versions of this block?
I have also done similar blocks. I paid attention to the fabric placement and, as you can see, fussy cut the fabric for the center.
I think all four blocks came out nicely and look good together.
I have now made 37 4″ blocks. I am almost half way finished with them. TFQ is going on vacation and my goal is to make them all during the first two weeks of May so they are ready when she comes to visit.
This is the group of stars from the week of April 8 (I believe). They were a lot more work than I anticipated or expected. Somehow, they were temperamental and needed more attention than their 8″ siblings. I was also in ‘a mood’ for some of the week, which didn’t help either.
One of the things that happens when making blocks, regardless of how many you make, is that they don’t always come out the way you think they will. In the best of circumstances, I had to rearrange the look of blocks by cannibalizing parts of other in-progress blocks. In the worst circumstances, I removed certain fabrics completely and cut new pieces in order to be satisfied with the outcome.
The above, with green and lavender, is the first version of the Missouri Star. I realized, again, that the green needed to be away from the background. I don’t know why I forget that, but I did until it was all up on the design wall. It took me looking at the pieces on the design wall to see how nicely the green and background were blending into each other.
I also realized that there was too much green. I love that green, but a little goes a long way.
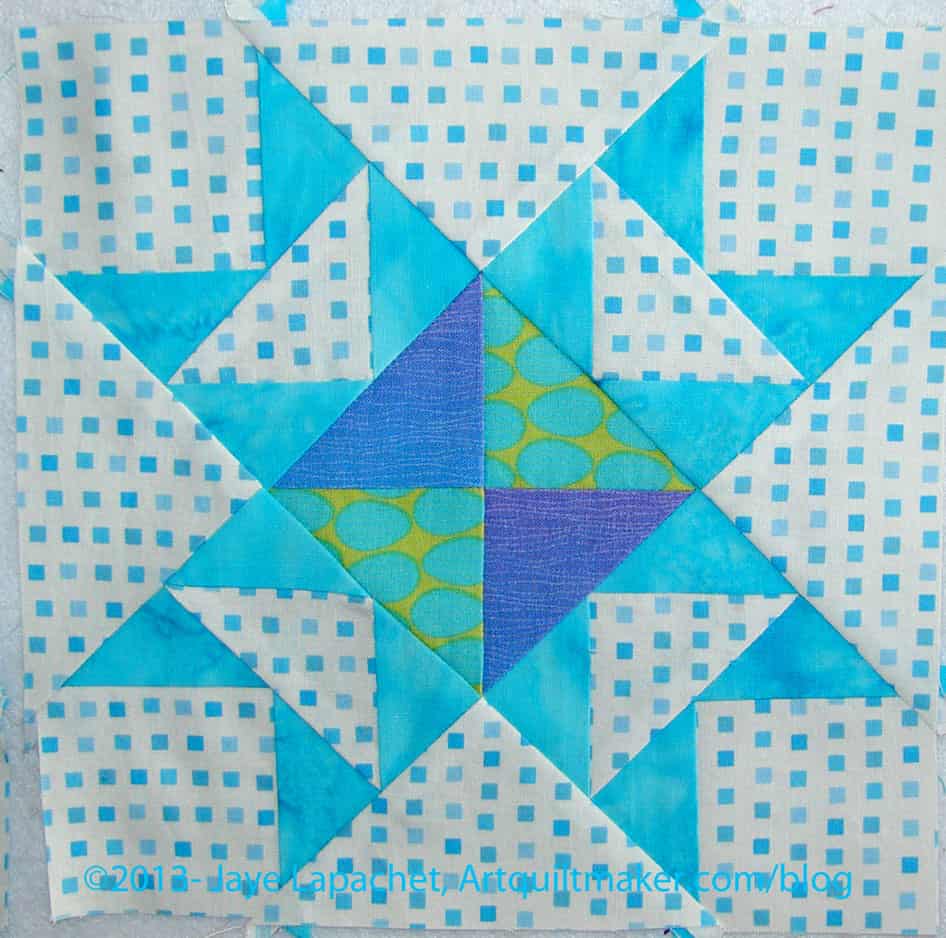
Missouri Star block
I changed out a few fabrics and rearranged some of the pieces to come up with different options. The arrangement, left, is the iteration with which I am most in love. I moved some of the darker blues from the Flying Cloud Star block into the center, but it didn’t work for me. I tried a variety of the medium batiks that I have been enjoying in other blocks. The combination that I have now is not a usual one, but I like it and I think it works.
Flying Cloud block – 1st version
The dark blues in the first version of the Flying Cloud Star (below) just don’t work for me. Somehow they stood out too much, I guess.
I was trying to add in some more of the fuchsia that I used in Mrs. Lloyd’s Favorite in the 12″ group. It is one of the Simply Color ombres and I don’t have much, if any, of the fuchsia part of the fabric left. Thus, the one I used in the Flying Cloud is a different fabric. It isn’t as dark in person as it looks in the photo. It is also a solid.
Flying cloud
After trying a few different options, decided, again, on the medium value batik. I worry about choosing mediums all the time. They do not seem like a bold choice. I do love those batiks.
Lesson?
MAKE VISUAL DECISIONS VISUALLY
THERE IS ALWAYS MORE FABRIC, SO CHANGE OUT ONE YOU DON’T LIKE.
Week of April 8 Stars
The last photo shows the finished blocks and I am pretty pleased with them.
These are the blocks for this week. Or so I thought. TFQ took the time to go through our list and found, though not her intention, that I wasn’t ahead as I had thought. She found that I actually finished blocks for the end of the last week not the beginning of this week. I have to say I felt disheartened. I wanted to work on another project, which was why I got busy with these so early in the weekend. So much for clearing the decks.
We have a deadline of getting the 8″ blocks done by the beginning of May and I want to stick to that schedule. Her efforts, fortunately, got us back on our real schedule, rather than the schedule in my head, which is good.
Still I didn’t want to work on any Sawtooth Stars at the moment, even the new patterns. I just left these on the design wall and pretended I wasn’t behind again. This is an interesting exercise in working on one project almost exclusively. It is difficult for me to dedicate so much time to one project, I am finding. This makes me think more about my process. More on that later, I think.
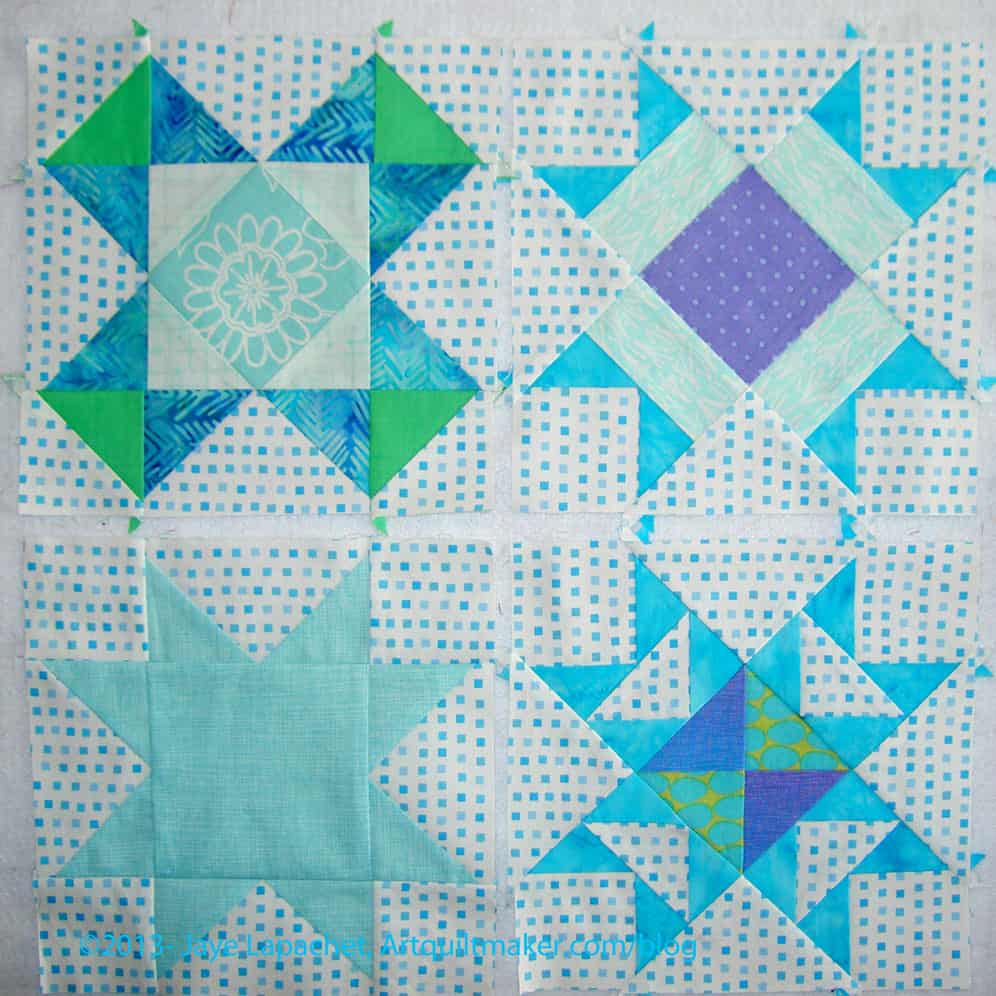
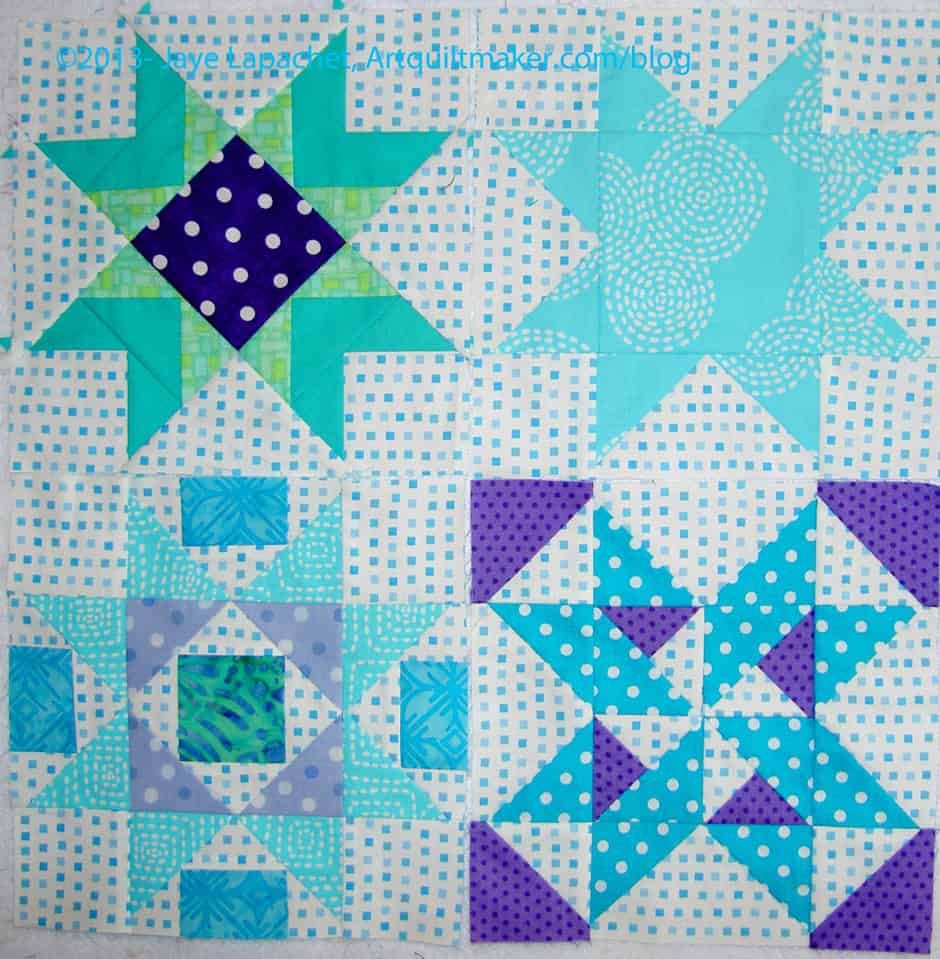
Above are: Chevron Star (actually from the week before as I made the wrong block previously) (upper left) Basic Star (upper right) Home Treasure (lower left) and Stars & Pinwheels (lower right). All of these can be found in one of the Around the Block books.
I am using some of the 12″ blocks as inspiration for the fabric combinations.
Yesterday, I decided to do some cutting and cut out the new blocks. Life goes on.