In between other projects, I started another pink journal cover.
Yes, pink. Are you surprised?
I have a lot of pink scraps. 😉
And, due to a lot of complicated reasons, I needed a quick leaders and enders project. Since I will need a new journal cover in the next month or so, it seemed logical.
I considered the size of the pieces when I made the Orange Crush journal cover. I am using that cover and I really like it. I really like the size of the pieces, the flatness, everything. I want this journal and the others I make in the future to be just as good. I am concerned that I am making the pieces too small and going back to being frustrated by the lumpiness of the final product. I have about 10″ of mosaic piecing left to make the journal cover. We’ll see.
I have two blue journal covers in process. One is finished (read on!) and the other is still in the piecing stage. When I wrote the previous post, I thought I used a picture of the other journal cover, but I actually used the picture of this Blue Tree journal cover, which is, happily, also the one I finished. For once I was organized even though I thought I wasn’t. 😉
Anyway, I was about to finish all the pages in a journal and I needed to finish a new journal cover. I buckled down last weekend and put the finishing touches on this one. I finished just in the nick of time.
This journal cover is named after the fabric in the middle, which is a slice from a back I made some months ago with trees, White Birch trees, I think, printed on it.
Surprisingly, to me, at least, I started off with the front cover being the part of the journal cover you see on the left. It is ok in terms of interesting-ness, but nothing special. What was preventing me from using the other side, which I really liked, as the front was the Wizard of Oz fabric, which ended up smack dab in the middle of the part that was the most interesting.
I kept looking at the back and since the front and back are interchangeable, I just switched the cover around and am now using a new front. I like it and don’t even see the Wizard of Oz fabric.
Shockingly, I am almost done with another journal. I ordered a new one so I will be ready and it took forever to arrive. I have been waiting to finish this journal cover so I could measure using the actual journal. It isn’t like I don’t have 30 around, but most have covers on them and I was being lazy with the knowledge that a new journal was imminent.
This mosaic quilting piece came together so easily that I almost didn’t realize I was finished with the top. That is what leaders and enders will do for you.
I thought I would finish it this past weekend, but I worked on the Russian Rubix instead and also put the black and grey donation pieces through the machine.
Like the Pink Rose Journal cover, I made an effort to piece smaller pieces. It is so much more interesting when there is more piecing. I still have to back it (have a piece of fabric already picked) and add the interfacing then I should be ready to use it. Stay tuned!
As you know I like to make journal covers for my journals. I have been using the Yellow Flower Journal journal cover on my most recent journal. Since I have been off a lot I am carrying my journal around more and spending more time with it. That means I have to look at the cover more often.
I don’t like it.
I like the fabric, but the cover itself is boring. So, I decided to make another one. I probably have at least two months of life left in this journal and I didn’t want to look at a boring cover.
Don’t worry, I don’t hate this journal cover. The Yellow Flower Journal Cover isn’t going waste. I will put it on one of the older journals that has not yet been covered.
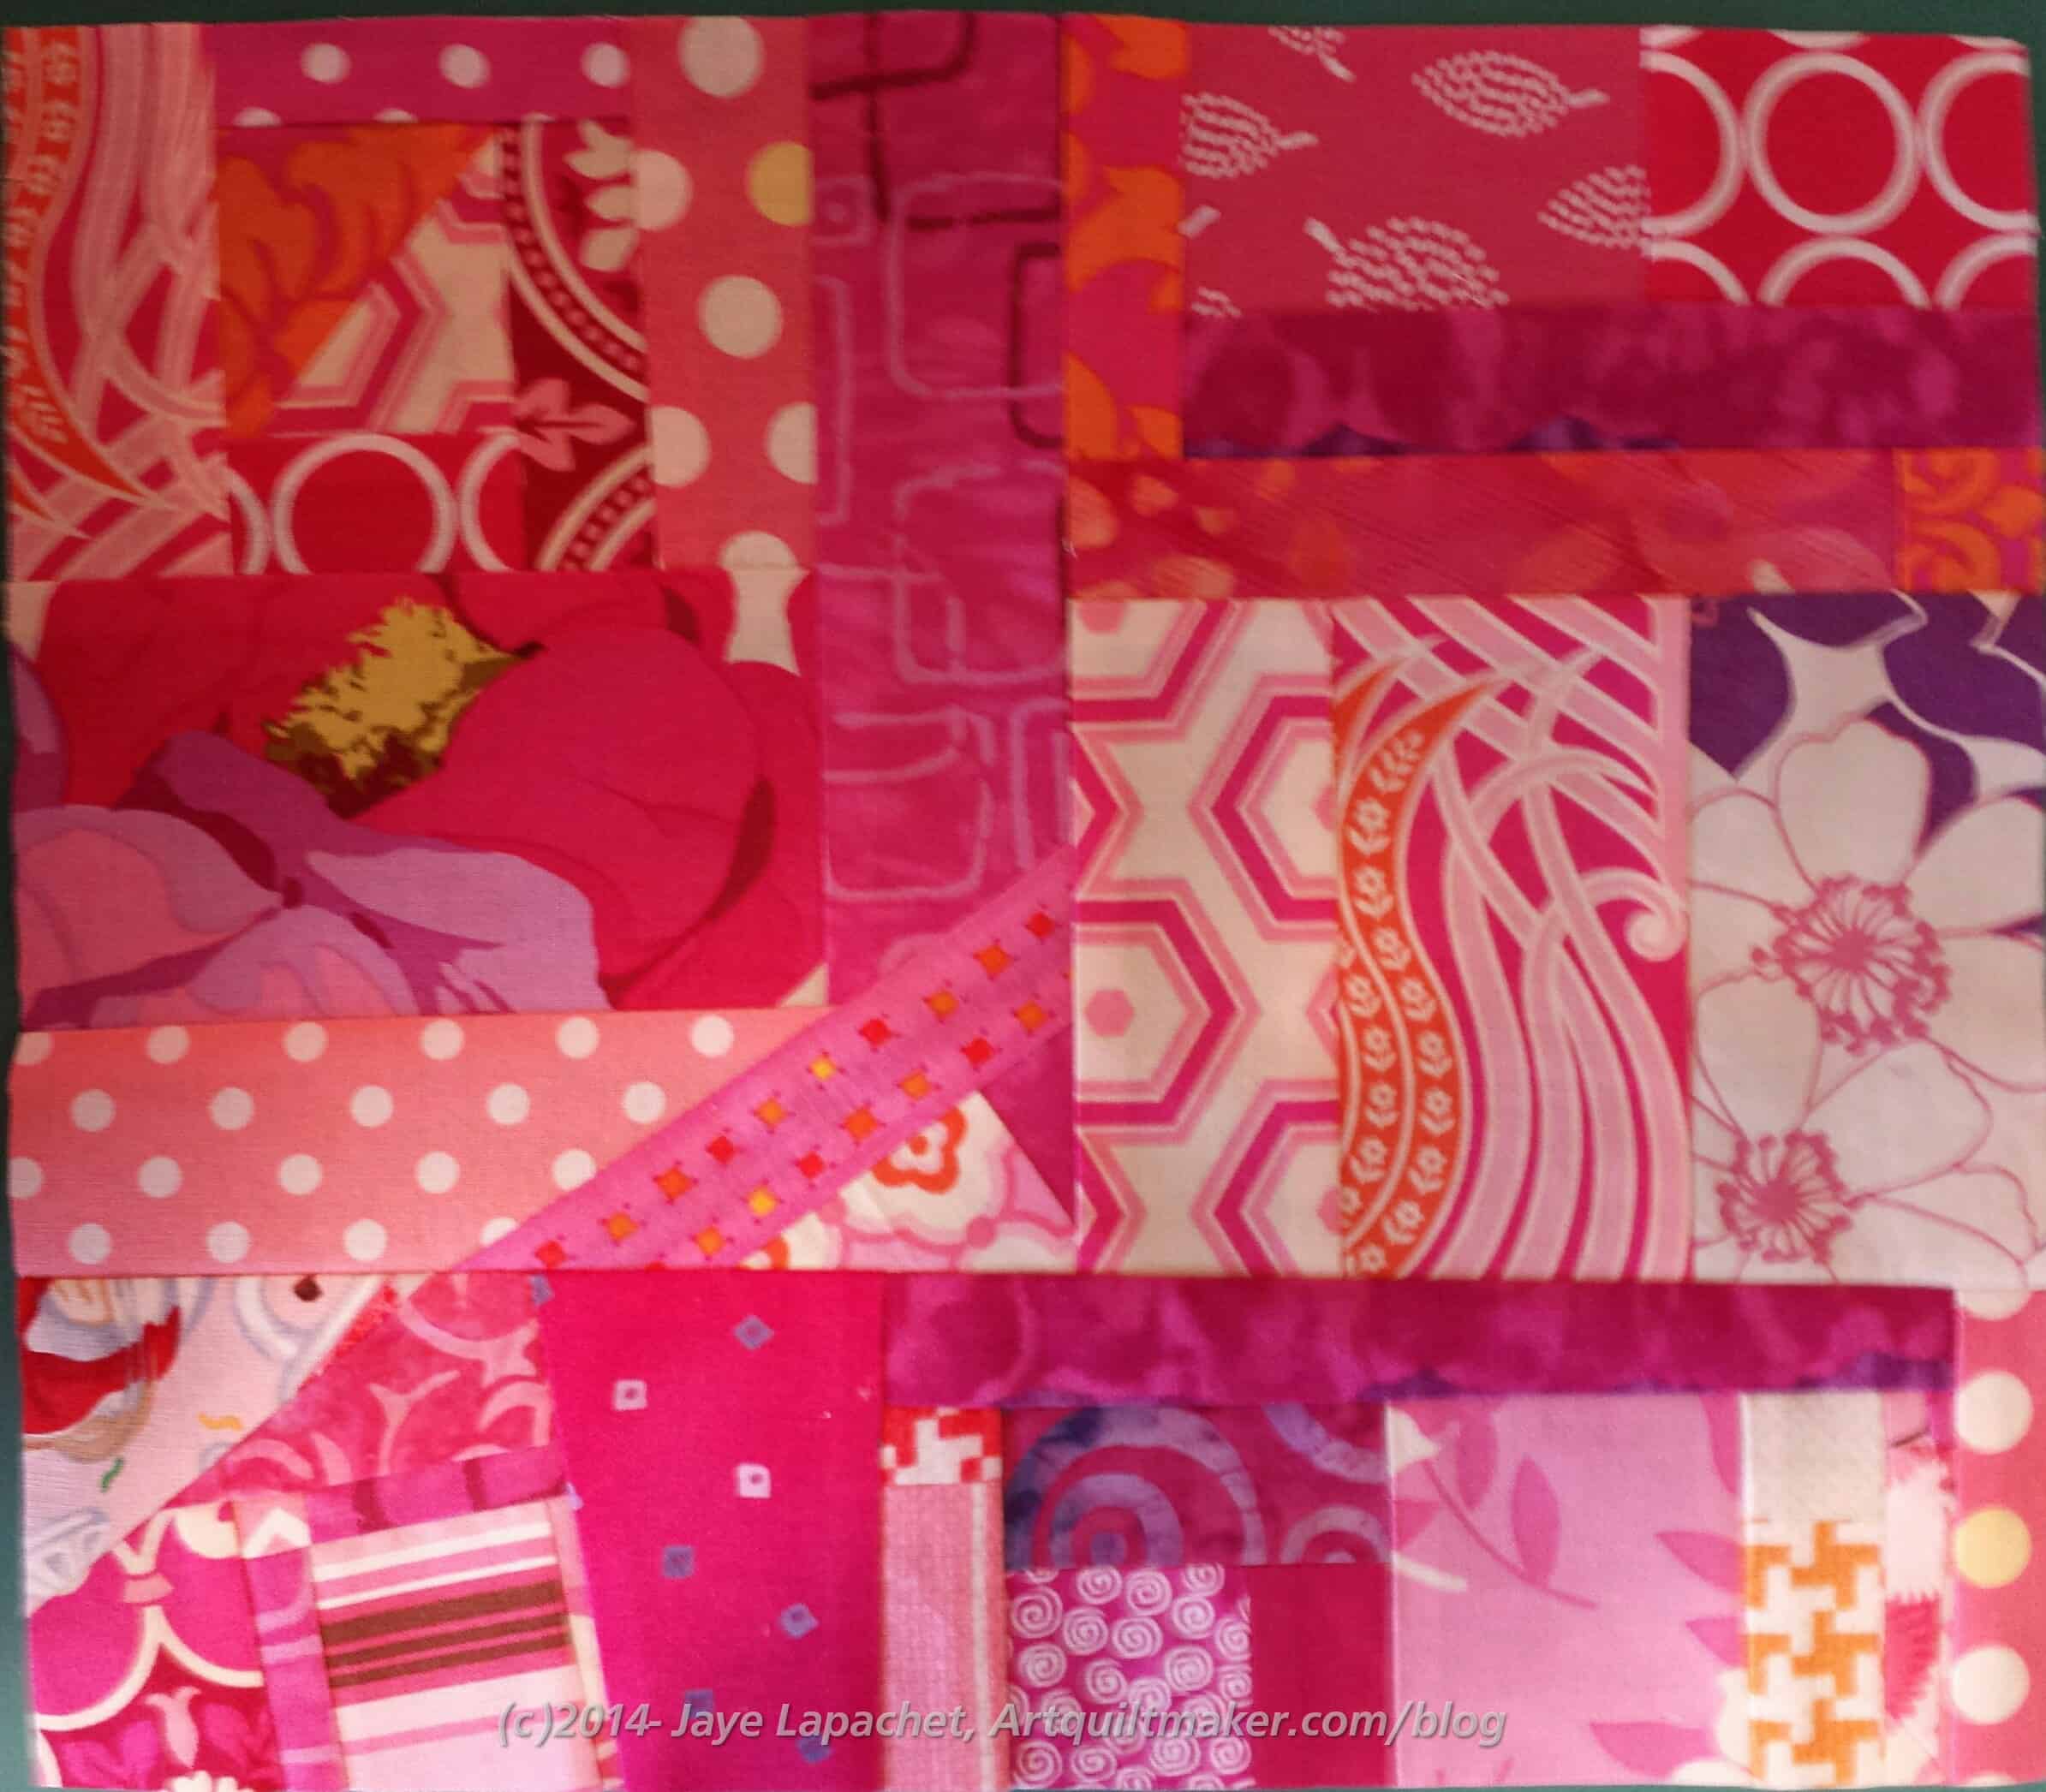
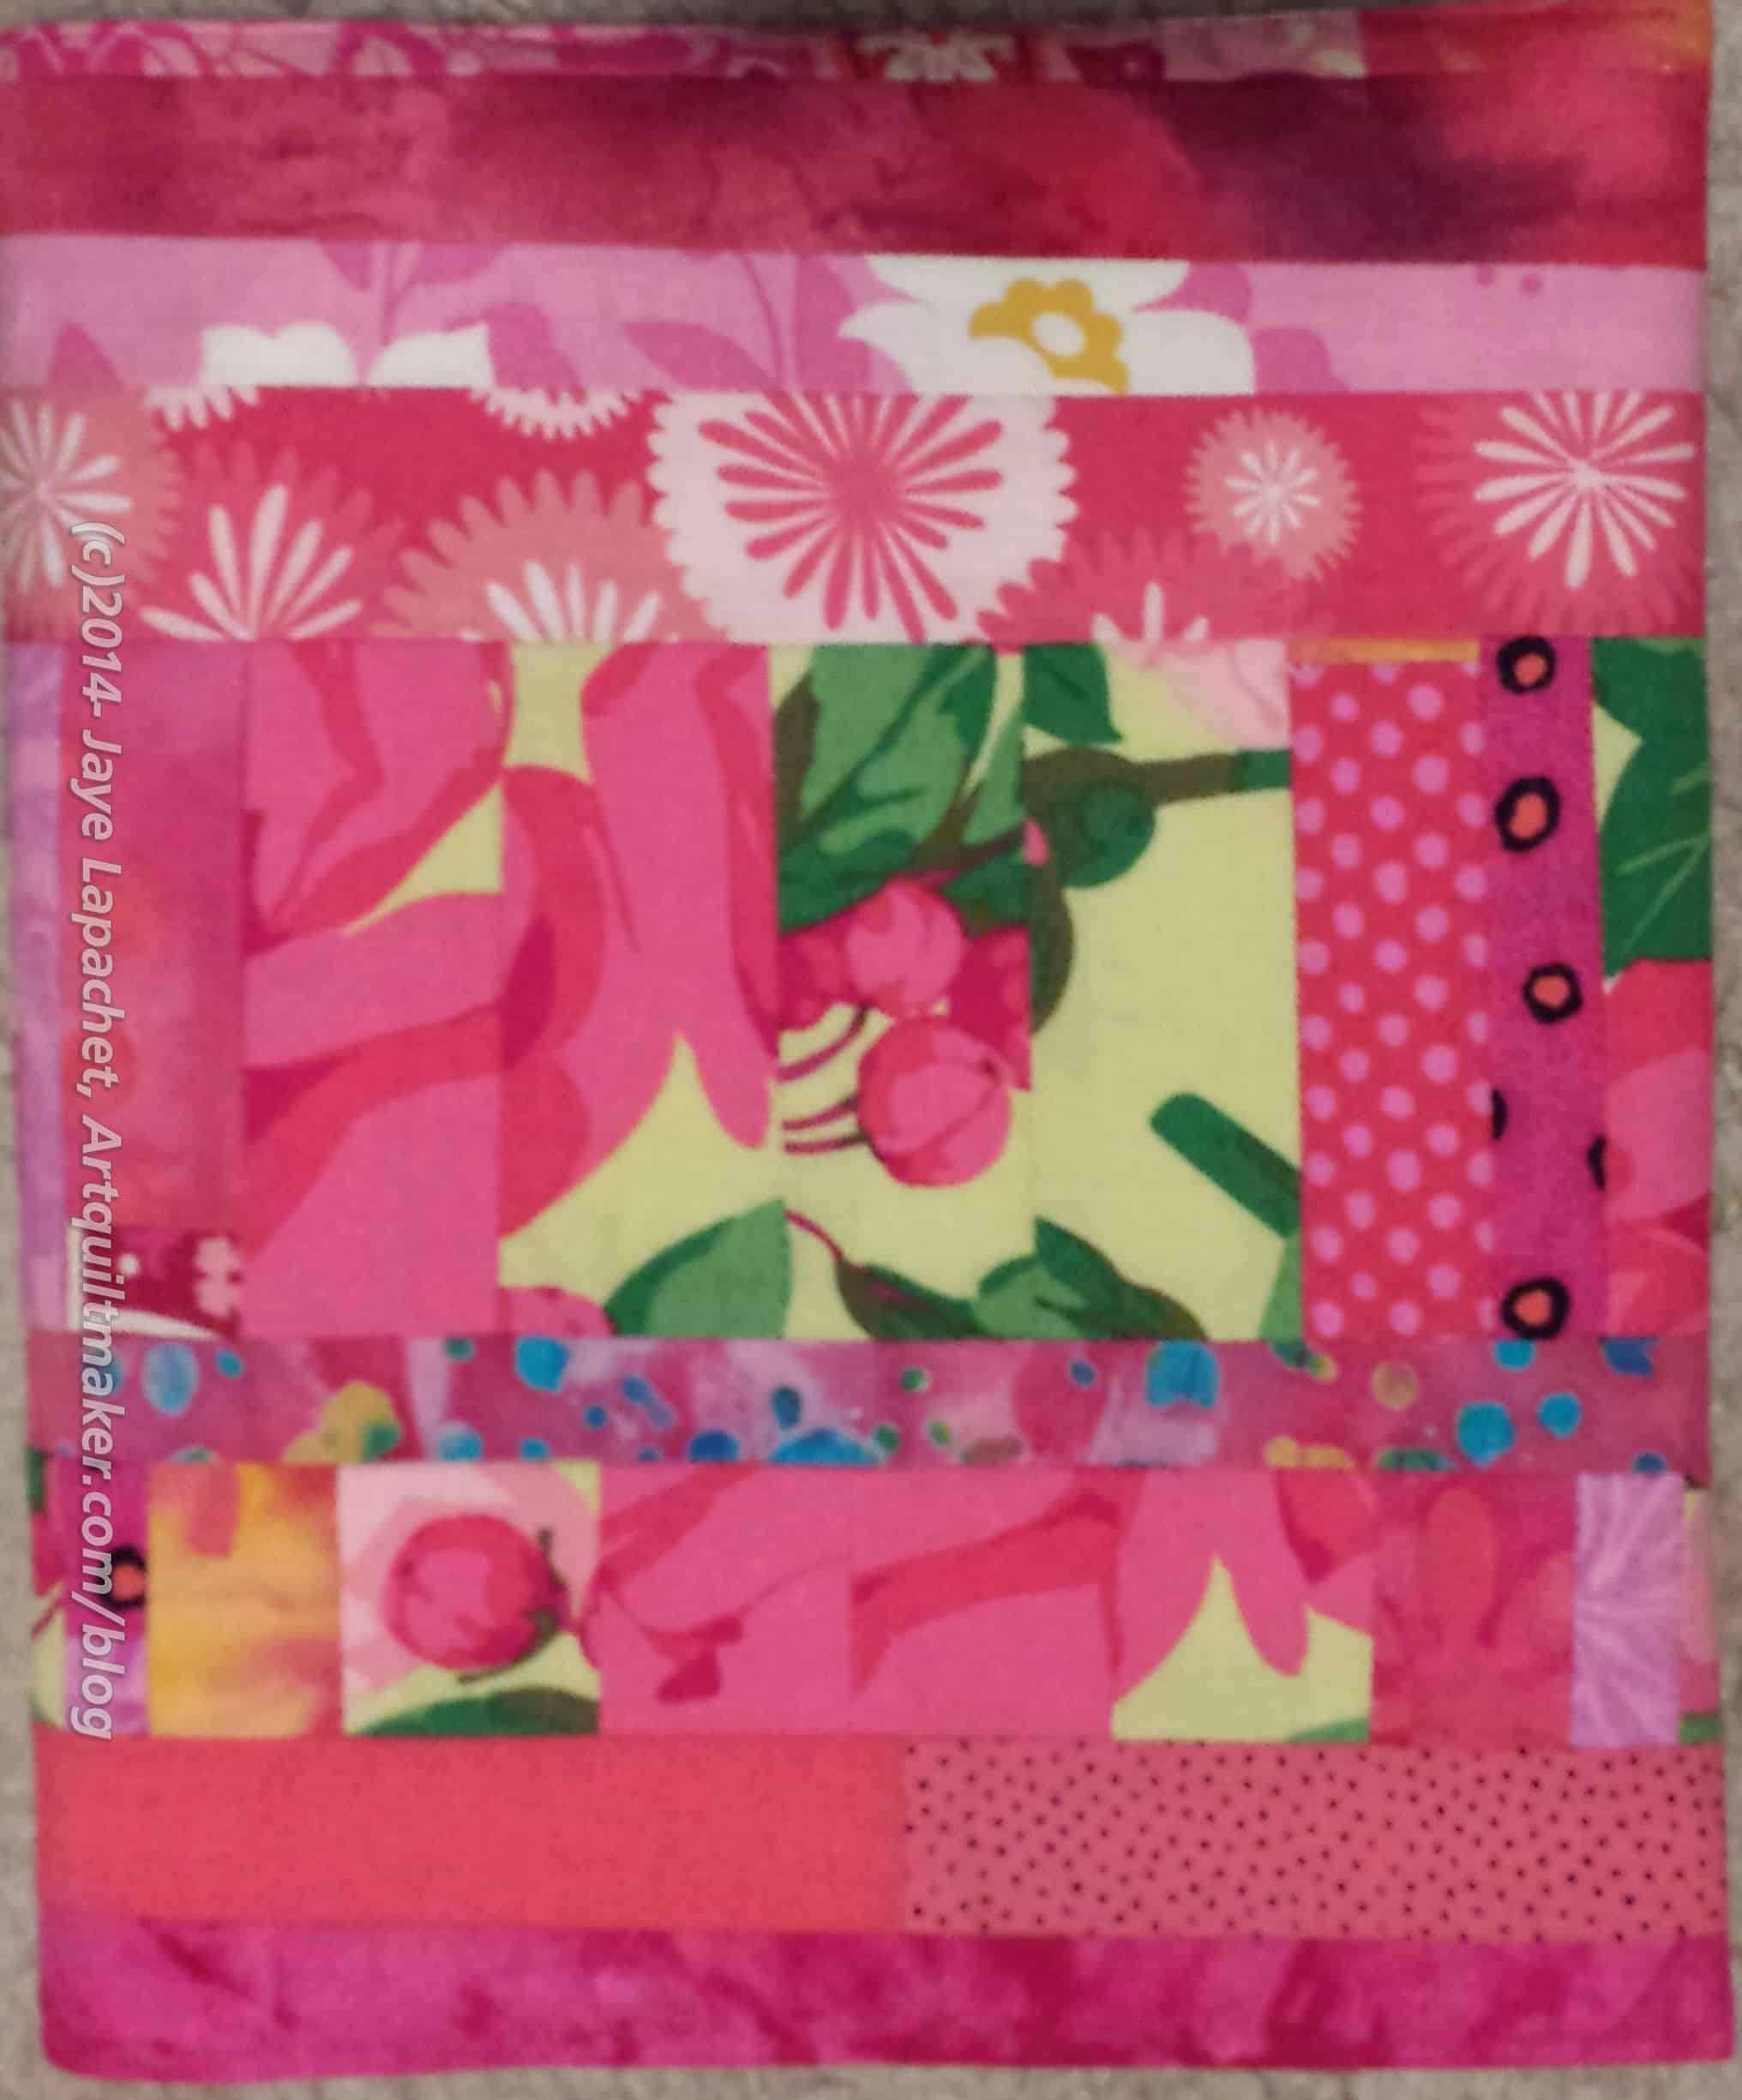
I had a piece of Mosaic Piecing to which I had been adding bits of pink and I decided that was a good start. I made sure to add pieces on all different sides and to sew various pieces together before I sewed them to the main piece that would become the journal cover.
The Good
Inside Back Cover
First, there is a lot of piecing, including some of the yellow rose fabric from the Yellow Flower Journal Cover. The piecing is not just all strips added on to the ends of the piecing which makes it a little more interesting. I was even able to add a few diagonal lines, which adds interest in terms of piecing.
Next, there are bits of pink that I really like. Some from Joel Dewberry’s Notting Hill line, various Philip Jacobs, a few batiks and some random pieces that make me happy.
Third, though I had some trouble with the interfacing and flannel, the feel of the journal cover isn’t too puffy, which I like.
Last, it is PINK! Pink makes me happy.
The Bad
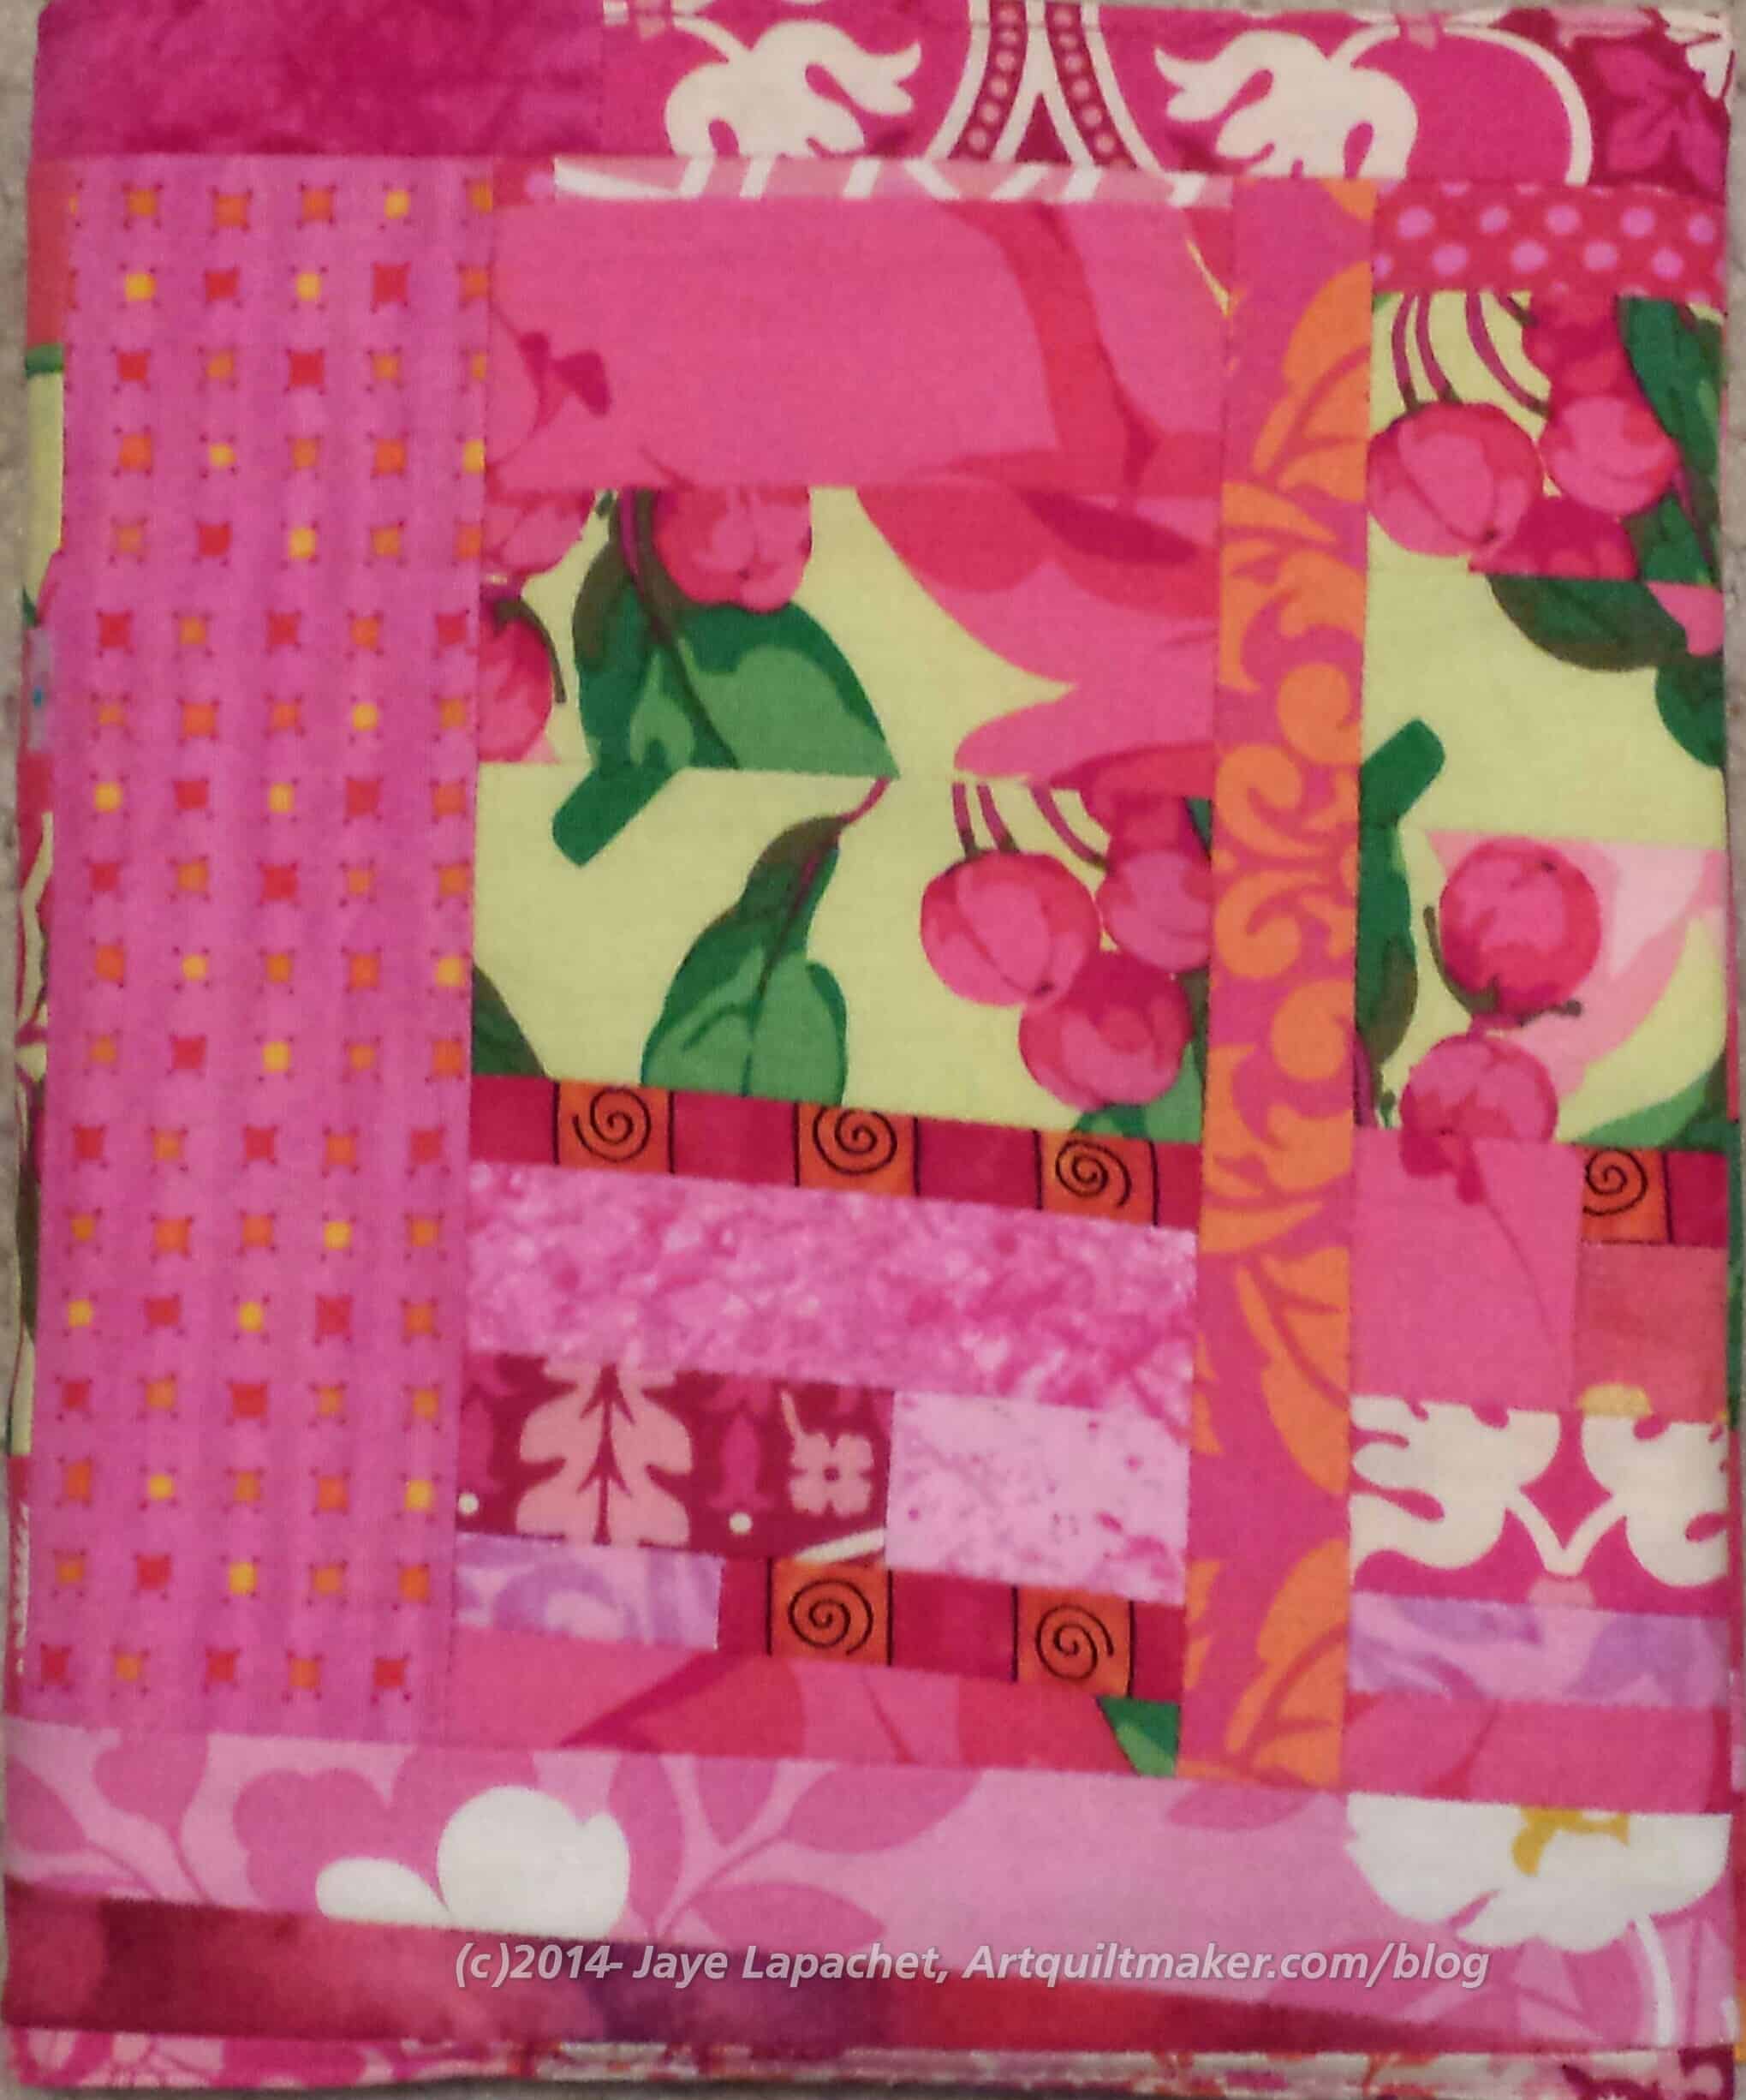
I was lazy with the flannel and just eyeballed the size instead of measuring. This caused other problems later.
I had some trouble with the stitching as a result of my laziness with the flannel. If you remember, you have to stitch very close to the edge to make the journal cover fit really snugly and not floop around. By not measuring the flannel, it was too small, so I had to sew it to the seam allowance when I put the back and front together. That means that a bit of the flannel was in the seam allowance where I had to sew when I was sewing the final step. That made it really thick and hard to sew on the corners.
The Unknown
I am not sure if this is the Good, Bad or Ugly.
Inside Front Cover
There was so much piecing that it was kind of a waste to try and put ShapeFlex on to the pieced side of the cover. That means that only the inside has interfacing on it. As I said, above, the cover feels ok, so I guess it is fine.
The other factor was that there were a lot of seam allowances, because of all the piecing. That made the whole piece a bit thicker, including in the seam allowances.
Finally…
Back Cover
Clearly, this project offers continuous learning for me. I guess I haven’t perfected the process yet and will just keep trying.
Some people call this crumb piecing. I have always called it mosaic quilting since I saw Shannon Williams on Simply Quilts about a thousand years ago. I like the term mosaic quilting. It sounds fancy and important. 😉 Crumb piecing sounds like something I have to wipe off my counter with a sponge (with apologies to Bonnie Hunter!)
I consider this to be making new fabric from scraps – some very tiny scraps in some cases. I am putting scraps together into a larger piece so that I can cut it up later using pattern pieces to make something new.
When I am working on a piece like this, I often use it as leaders and enders. I usually have several small pieces to which I add, then at some point I sew them together to make a larger piece. The piece above is getting to large to work on comfortably and I have not yet sewn it to the larger piece.
There are a lot of seams and these pieces get to be pretty heavy. I like them, though as I think they add interest and create a topic for conversation in a piece. Also, it is a technique you can use to draw people in closer to look at your quilt.
Once you have made your ‘fabric’, you can cut it up again into squares or other shapes and use them as patches for your quilt. You have to be aware of the seam allowances, because they can get quite thick. This technique is a good time to press your seams open.
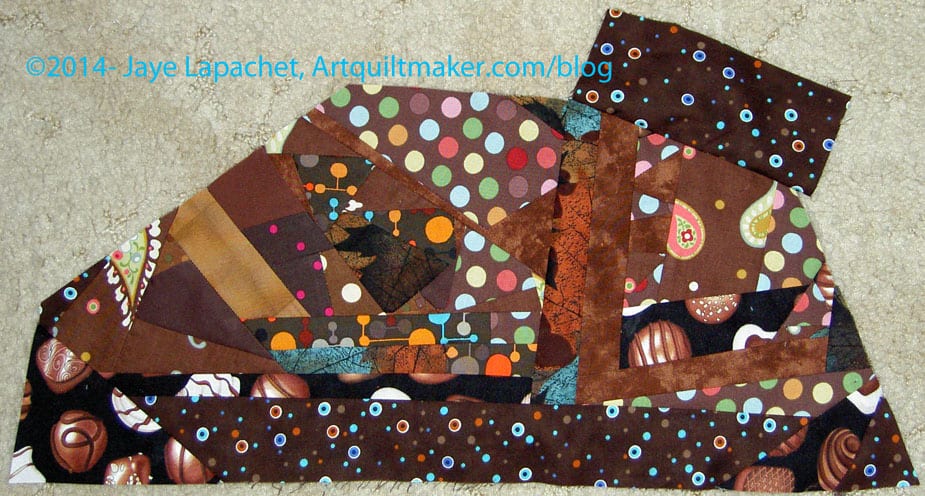
I have several pieces of this new brown ‘fabric’ that I am making to use for a project that will be a gift for a friend. I will show you the project eventually, but for now you will have to be satisfied with the sneak peek above.
A few weeks ago I posted about Exuberant Color’s journal cover directions. This was after I saw directions for a journal cover on the Quilts and More website, Allpeoplequilt.com (you may have to register and login). I began the journal cover last Friday and finally finished on Sunday. In the end, it wasn’t difficult; I just didn’t have much time and struggled a bit with the directions.
As I may have mentioned, I liked the idea of this project, because it is useful. I also liked the idea of having an accessory using some of my fabric with me on a daily basis. Finally, it gave my journal a bit more privacy. The journal cover got its first outing with me on Tuesday.
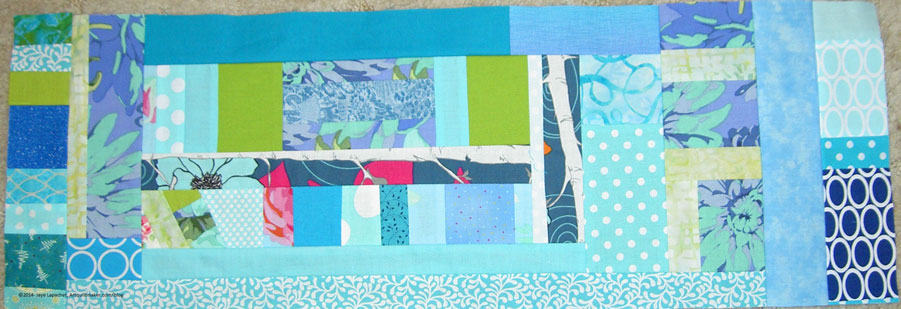
I started madly sewing turquoise scraps together when I was angry and needed to calm down. The repetitive nature of the sewing helps me. Not only do I calm down, but I also make progress, an added bonus. I am loving turquoise more and more lately and, found, as I rummaged through my scrap basket, that there were a lot of really pretty, if small, pieces.
Journal Cover Piecing, Oct 2009
Sewing scraps together is also an exercise I do when I don’t know what else to do. I sew like-colored scraps together to make new fabric. I have quite a large piece of red and have just started creating a pink piece. Other than tests and using them to make ATCs, I don’t really do much else with my scraps, so making new fabrics can create something useful.
The blue piece quickly turned into a journal cover. The technique is inspired, as you may have read before (March 2007 or July 2008), by Shannon Williams’ Mosaic Quilting technique.
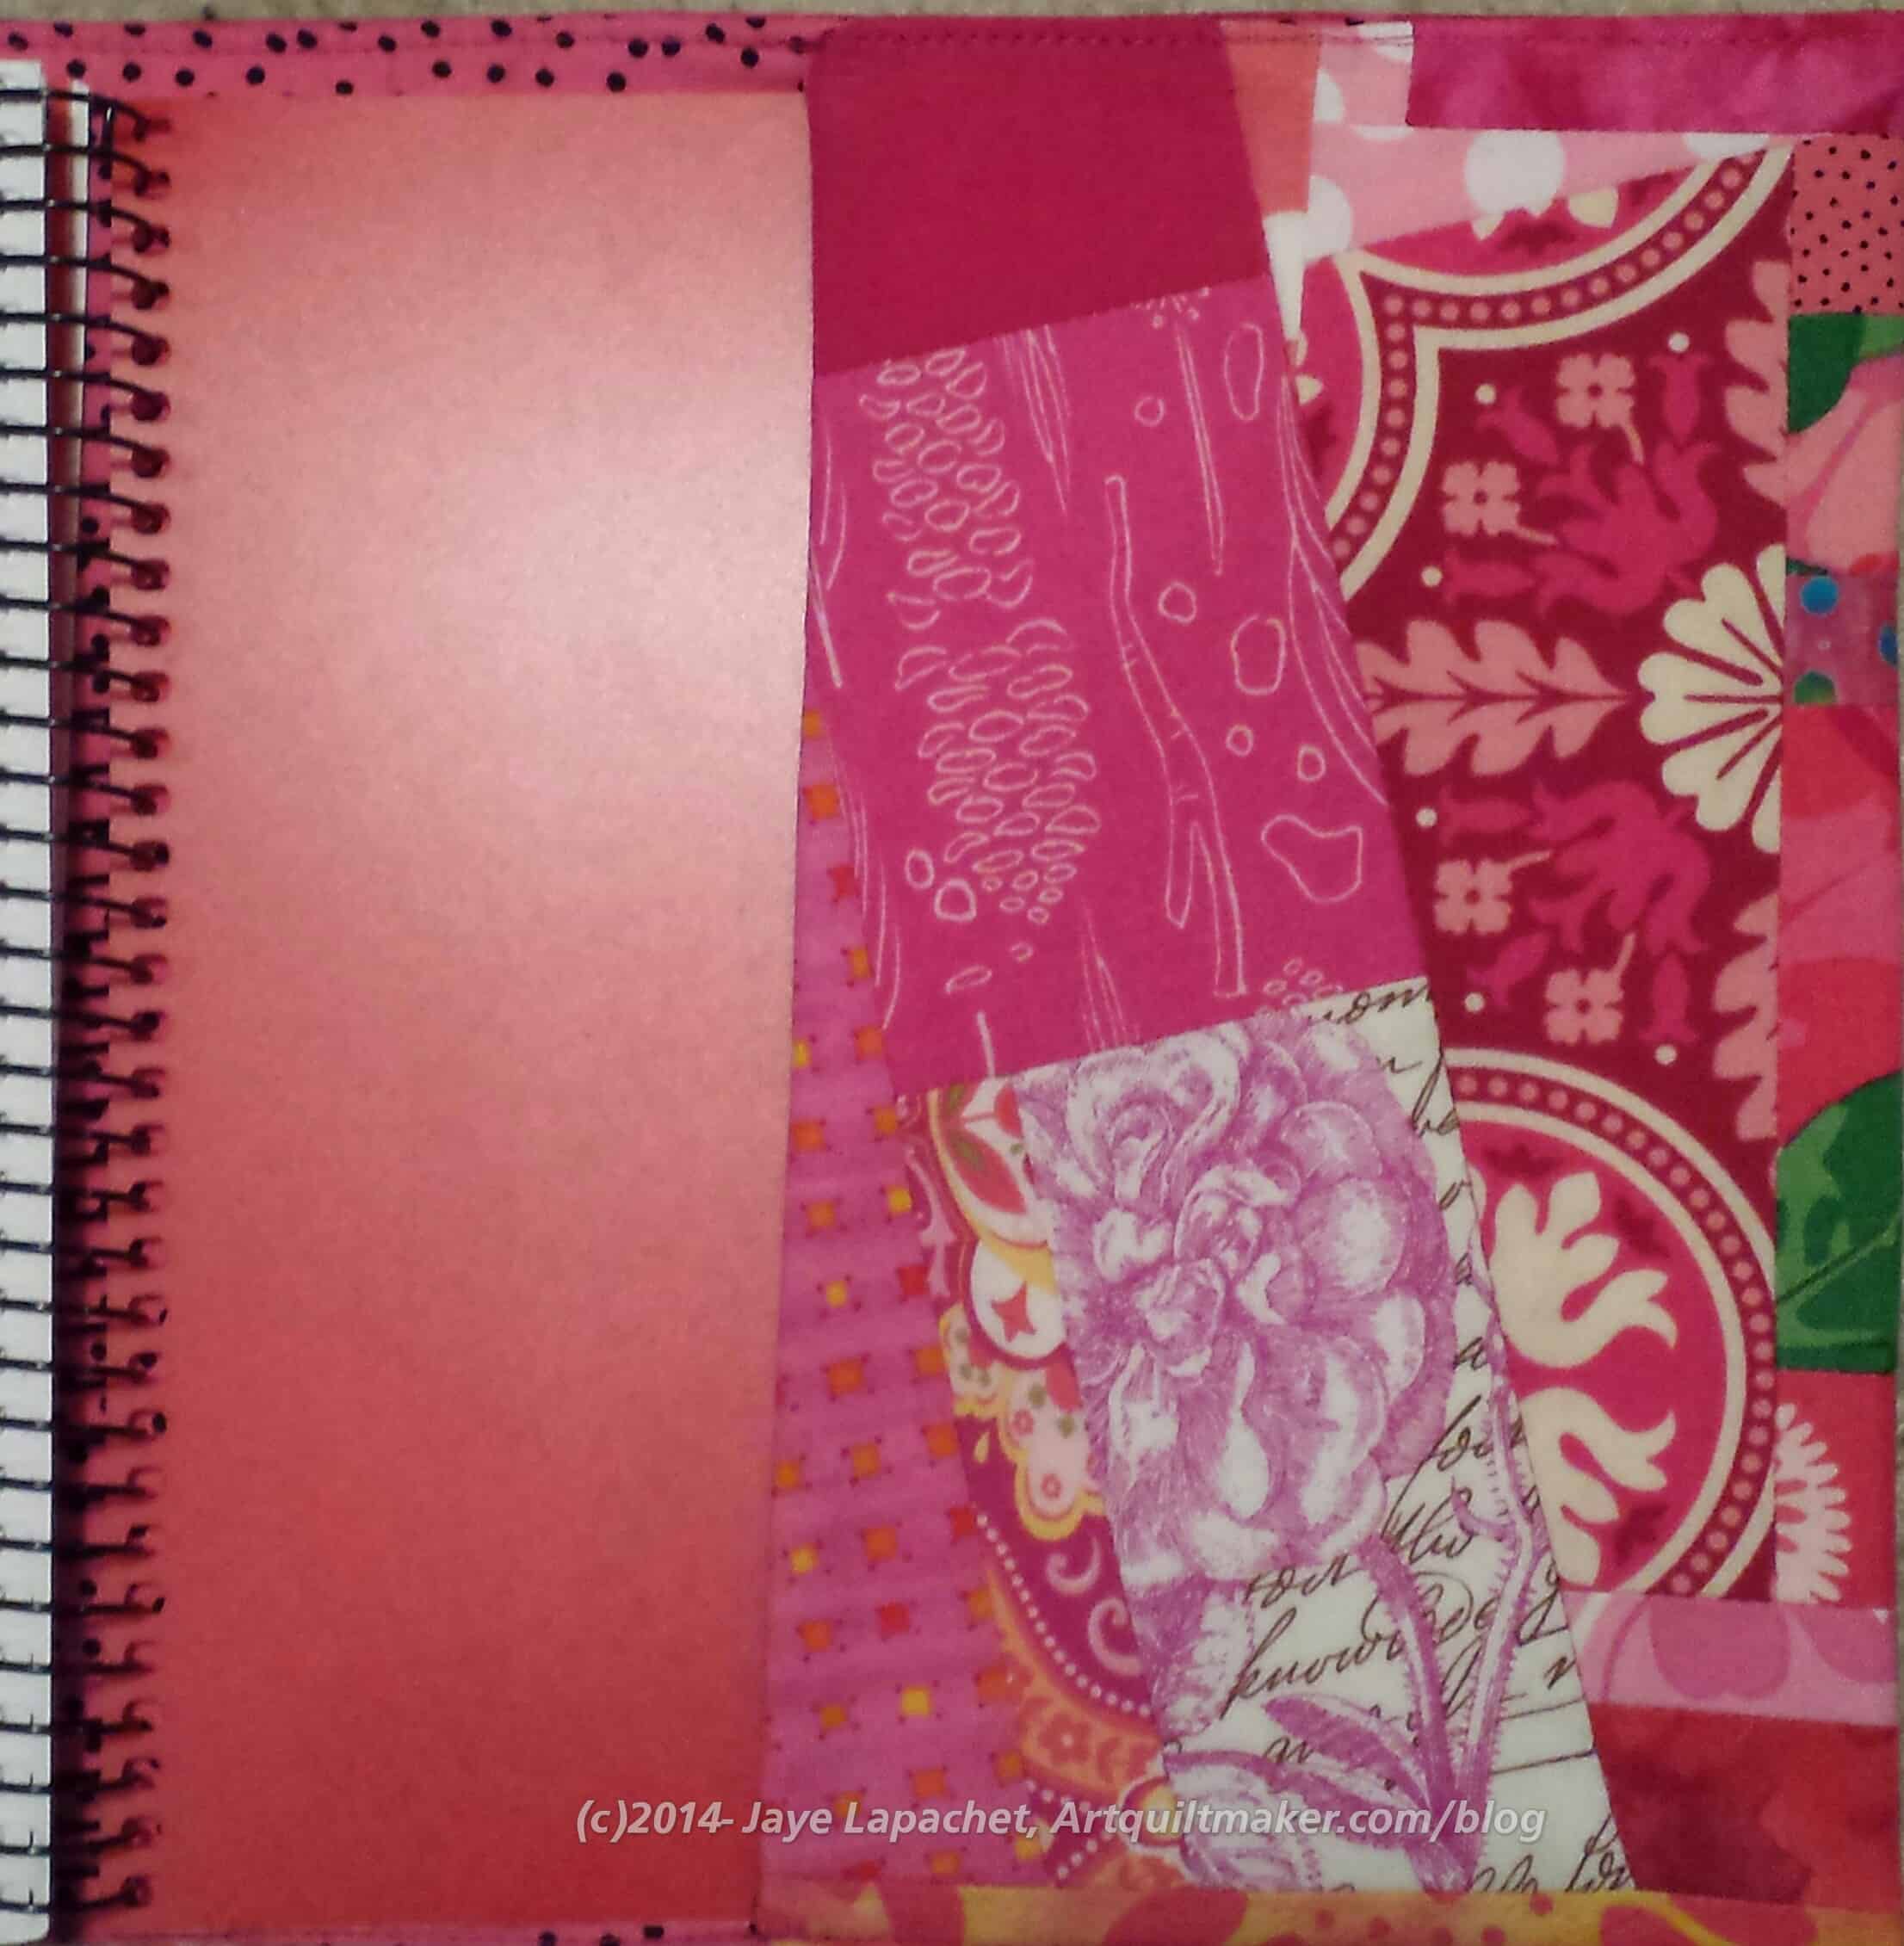
Finished cover, Lining detail
I also used the fabric I wrote about (used as another source of inspiration) as the lining. I thought I would be able to see more of it and enjoy it, but the lining is pretty covered up. I might be a little miffed, but I know it is there and I can look at it whenever I want.
As I was making the fabric for the outside, I had to know how large to make the piece. I found the Quilts & More pattern not to work very well for me. That pattern requires that you buy a specific journal – the black & white composition notebook type, I think – which is a specific size. I did read this when I started the project. What I didn’t read was that they had no instructions for those who wanted to use a journal that had been laying around the house. Wanda at Exuberant Color came to the rescue, giving me an idea of how to measure my own journal so I could use that journal instead of going out and buying a new one.
Measuring, pt.1
First, I put the measuring tape down on the back of the journal. You can’t see it because it is in between the ironing board and the journal
Then, I wrapped the measuring tape around the back so that I could see the total width the fabric should be. You do have to close the book to make sure that you have enough. I found that if I put the beginning metal bit of the measuring tape right up against the binding, then there was plenty of fabric, even with the book closed and seam allowances.
I was a little confused by the direction on Exuberant Color about the amount of fabric for a seam allowance on the top. I eventually used about an inch larger than the book and that seemed to work.
I ended up with a total of 26″x 9 1/4″ for this sized Miquelrius journal cover. You can either cut two pieces of fabric this size or piece fabric scraps together in the appropriate size. Then cut another piece (not pieced) the same size. It reduces bulk not to piece both.
Press fusible interfacing to the inside piece. It is easier to press the fusible to the fabric that has not been pieced. I use scraps of fusible. You can also using batting, which I did in this turquoise pieced journal.
Now is the time to add your label. Use your journal to estimate where your label should go.
Next, place the fabrics right sides together and stitch around the whole piece. Leave an opening large enough to turn the piece. Reinforce the stitching near the opening, so the stitches don’t come out when you are turning the fabric.
Clip the corners.
Turn the piece and press. Press the opening so that it will look neat when caught in the final sewing stitches.
Fold over the edges towards the middle using the journal as your pattern. Make sure you close the journal with the cover around it. You will need a bit more than you think to cover the journal in the closed position.
Pin flaps in place. You will only need a few pins
Sew along the cover flaps as close to the top as you possibly can and stitch catch all four layers.
Place your journal cover on your journal and enjoy!
Finished Cover, Oct. 2009
Above is the finished piece. I put a bit of a selvedge on the front cover to add interest. That bit of selvedge had been hanging on my design wall for a long time. I liked the name of the fabric: The Butterfly Queen. I may cover up Jason Yenter’s name with a flower or something, but we will see.
Journal Cover, Back Flap detail
This picture shows the journal open and how much changes from my original measurement of 25″ (see photo above) and this photo (directly above) once the journal cover was completely sewed.
I didn’t have to buy anything to make this journal cover, which was nice. It is a project you can complete with materials around the house. It is one of those projects that works when inspirations strikes late at night and everything is closed. 😉
I want to make another one and possibly a few more as gifts. One thing I want to try is fusible interfacing like one of the thicker Pellon products rather than batting. I find the batting to be too squishy, especially when I fold the journal backwards to write on both pages.
This is a quilt top that my SIL is working on. You might notice, especially from the detail (below) that it looks like the mosaic quilting technique of Shannon Williams displayed on Simply Quilts YEARS ago. the patches that my pieces and Shannon’s pieces use are much smaller, but SIL used the leftovers from another quilt and I think this piece is wonderful. The mosaic patches really add a lot of interest to the piecing.
Some time ago, I saw an episode of Simply Quilts on Mosaic Quilting. The artist was a southern woman named Shannon Williams and her idea was really interesting. The blurb for the episode is:
“What can you do with all your scrap pieces of fabrics? Mosaic quilt designer Shannon Williams joins host Alex Anderson in studio to give us the answer. She uses scrap pieces to demonstrate a mosaic quilt project called Blooming Sunflower. Alex reads a letter from viewer Kelly Biddle about her mom, Peggy Biddle, and the 50th anniversary quilt she created for her parents. Then, Alex talks to Peggy on the phone in studio about her work. QLT-705”
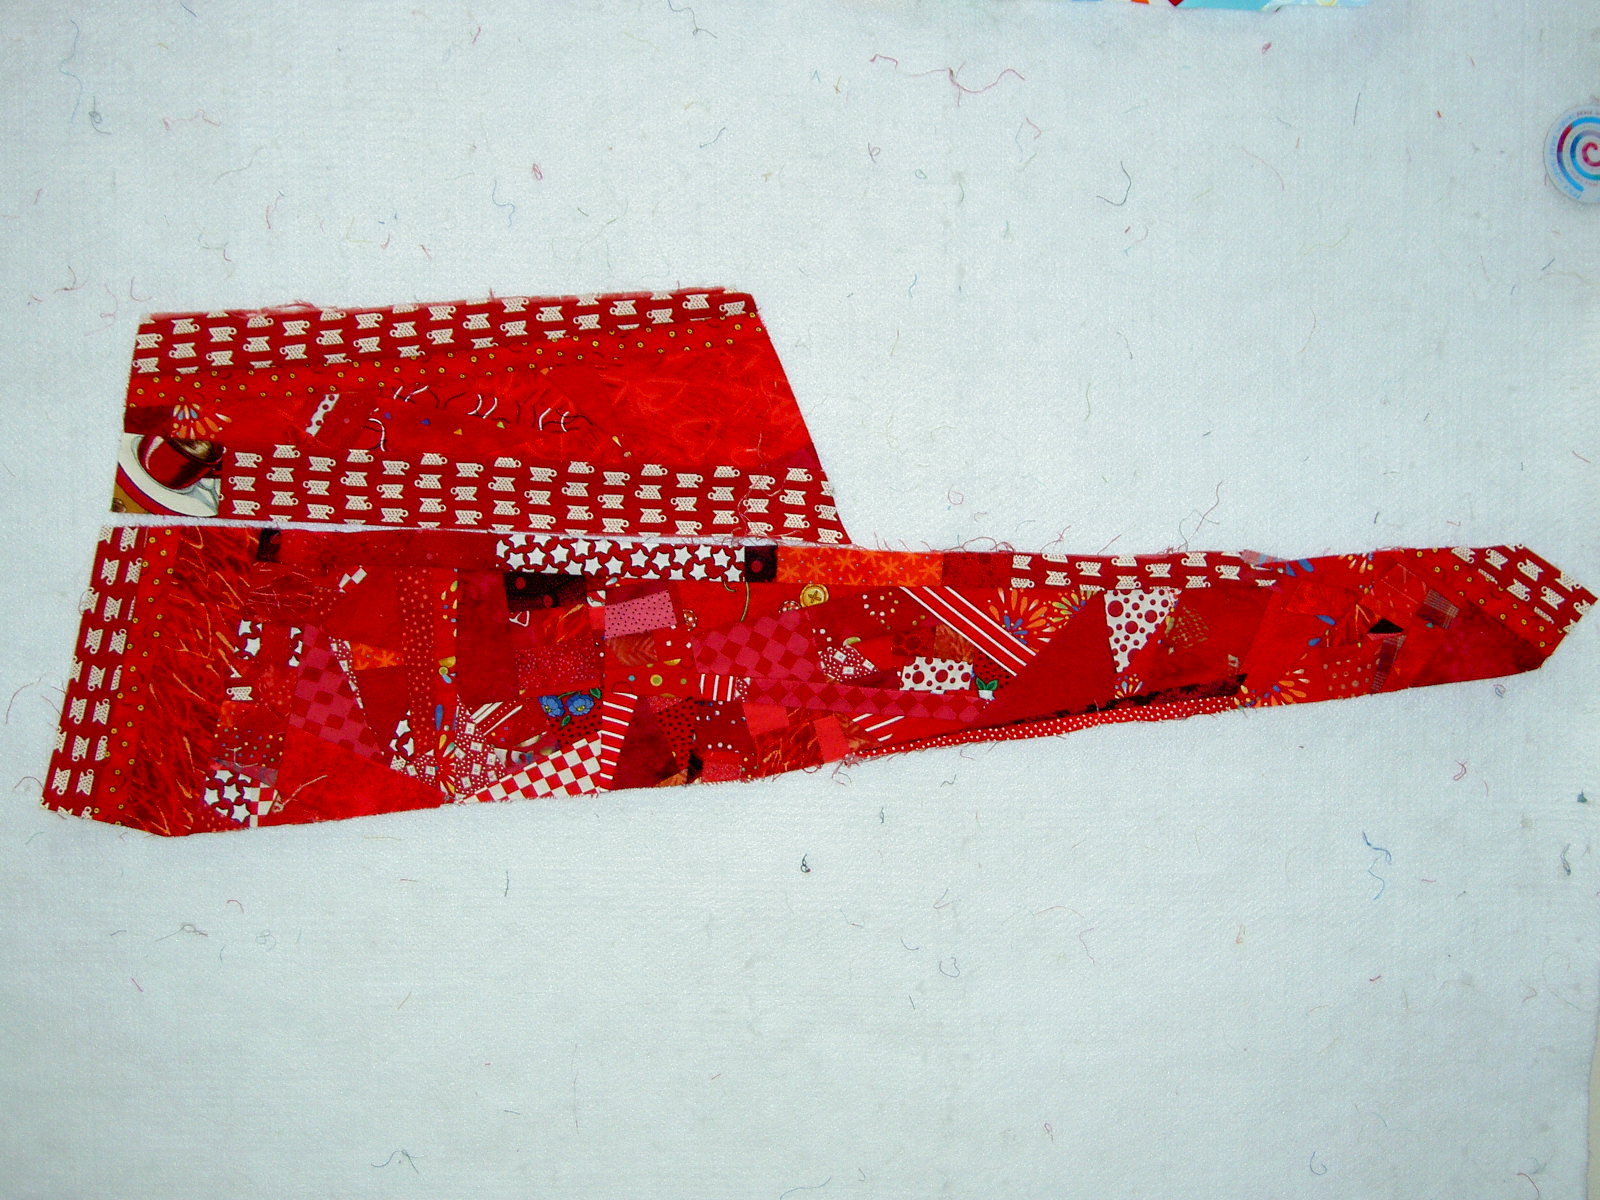
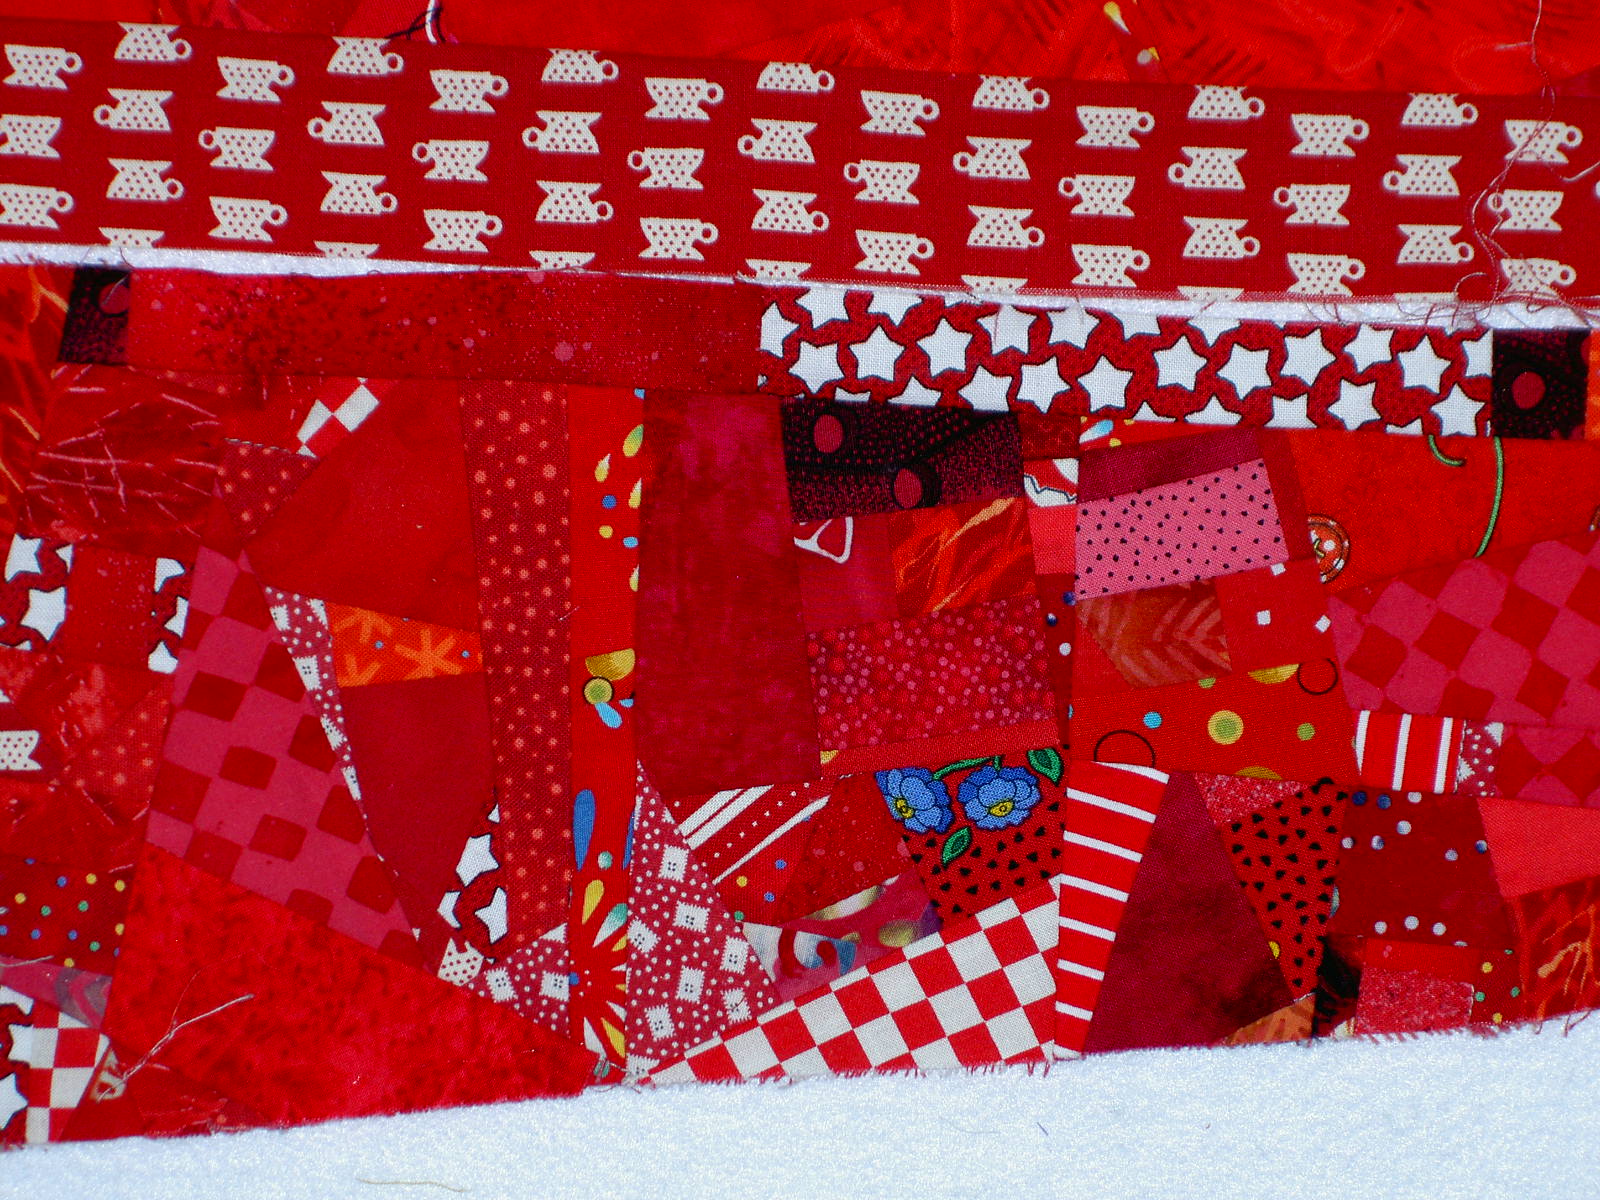
At the time (2003), after a class with Gwen Marston, I was working on Women’s Work and had a lot of red scraps around, so I started working on a piece using Ms. Williams’ technique.
It is not a project in and of itself. The idea is that it is ongoing and someday will provide enough new fabric so I can cut other shapes out of it. So far, this is what I have:
The long piece is the one I started with and the shape, after awhile, became quite unwieldy, e.g. not square or rectangular and quite useless. I was unwilling to slap some big strips on to make it a more normal shape, because I wanted it to retain that mosaic quality, so I started the second piece (shorter one) in order to sew it to the first piece and make more normal shape. I have considered hacking off a part and sewing it back on to another side/part of the original, but haven’t gotten there yet.
I haven’t worked on it for a long time as the piece has been covered by strips that I still feel compelled to collect for the Spiderweb. I saw the mosaic pieces peeking out from under said strips the other day and was reminded that I have some reds I could add to make the piece larger. Since I haven’t done any sewing this week, I thought it would be something to share with you all.
This is actually the first photo that I took today, but I thought it didn’t show enough of the detail nor did it show the entire piece. Perhaps I should ditch it, but I do like the way you can see how the two pieces will look together. You can also get an idea of how I simplified the piecing for the second piece.
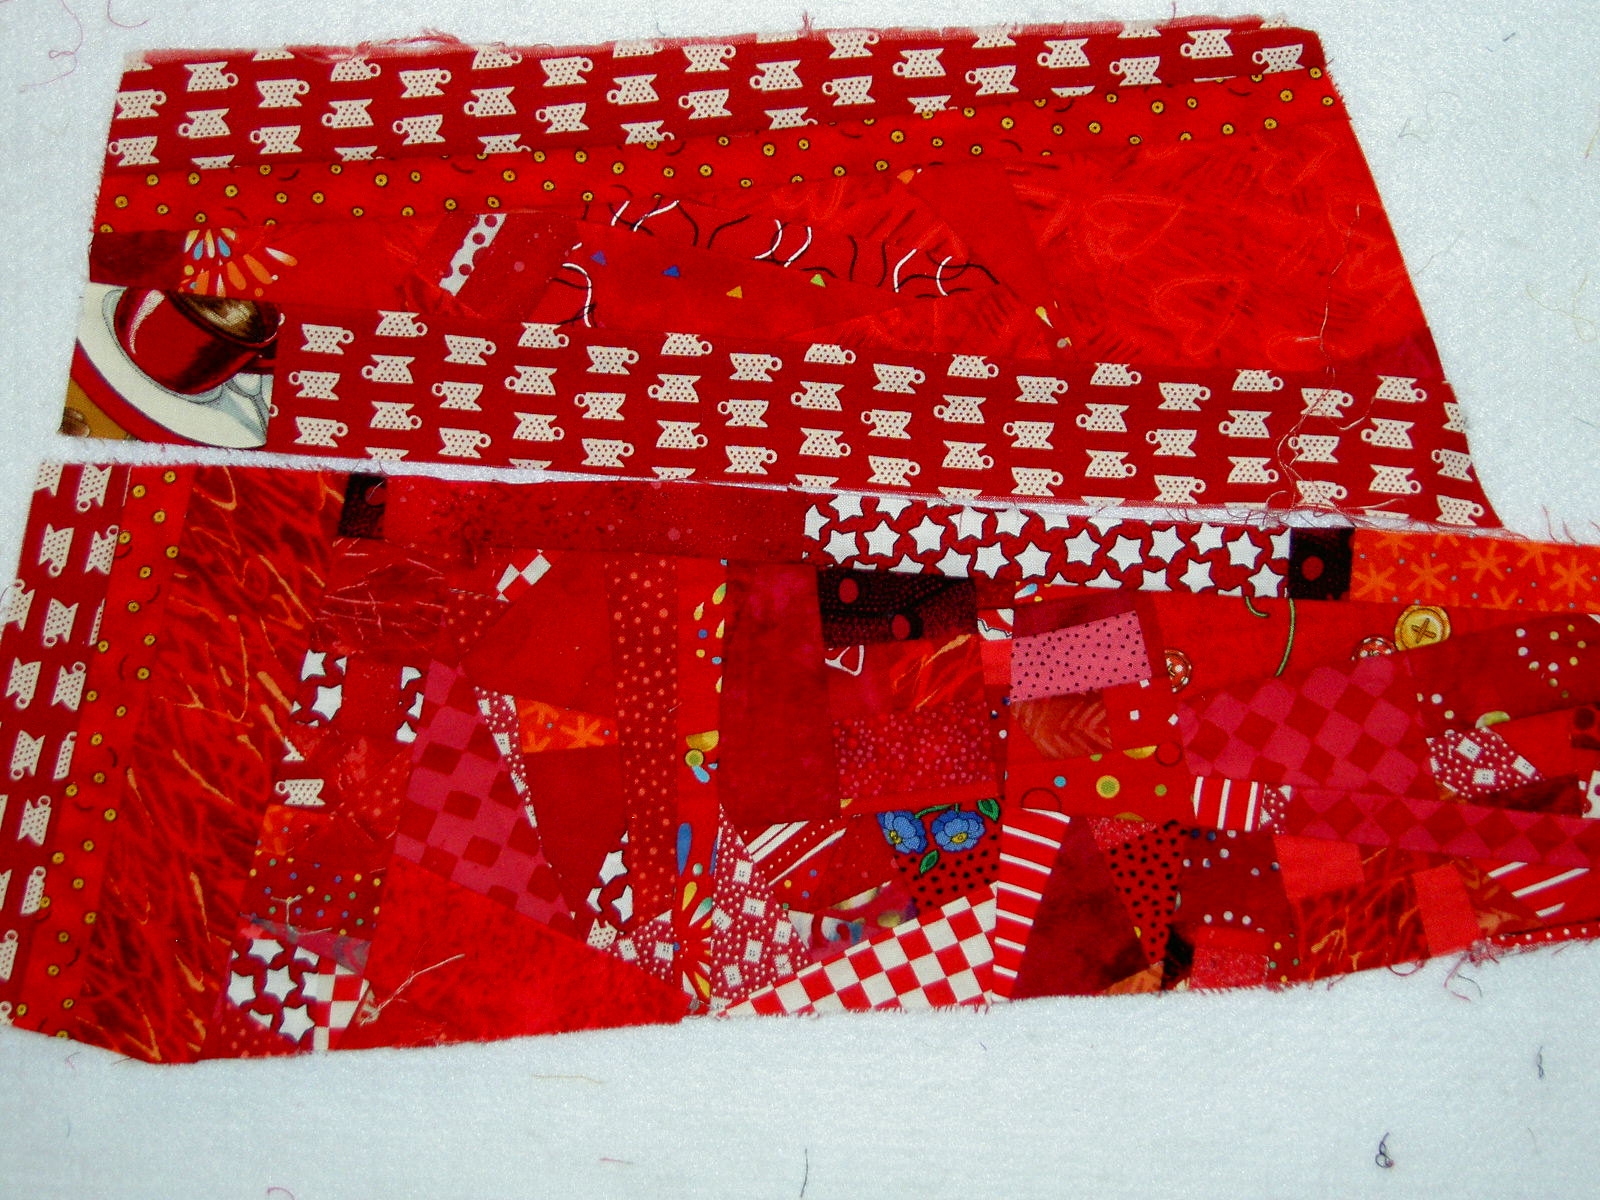
And here is a detail shot that shows the intricate piecing. At the beginning of this piece, I would fit any size scrap in, which made the piece beautifully complex, but also a nightmare of piecing. I need to add some of the intricate piecing to the second piece, but I haven’t gotten there yet.
The other thing about this technique and my particular piece, is color. Since I had the red and use a lot of red, generally, I thought I would make a red piece, because I was sure to use the ‘new fabric’ later. However, there are often other colors in fabric. You can see the white and some blue flowers and the brown in the coffee cup scrap. I think the other colors add interest, but I know that my eyes gravitate to the white. I don’t have a panacea for this, but it is something that I am playing with.