Progress on the Russian Rubix

Early October Progress

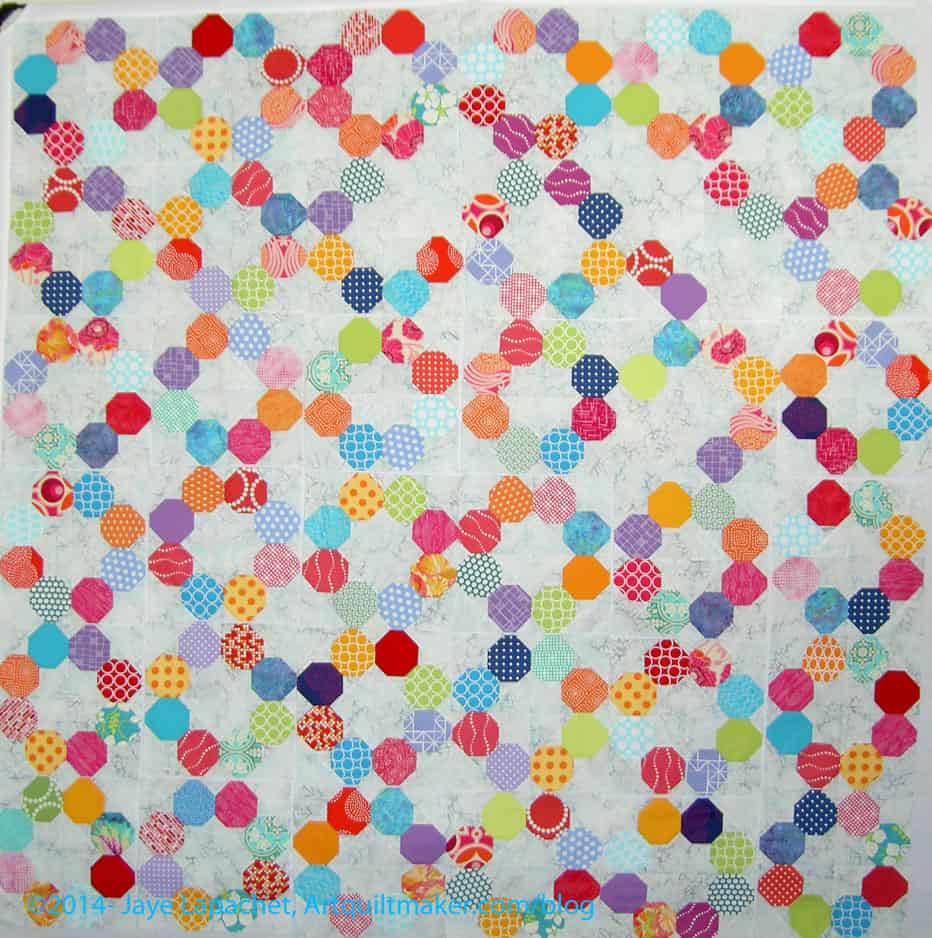
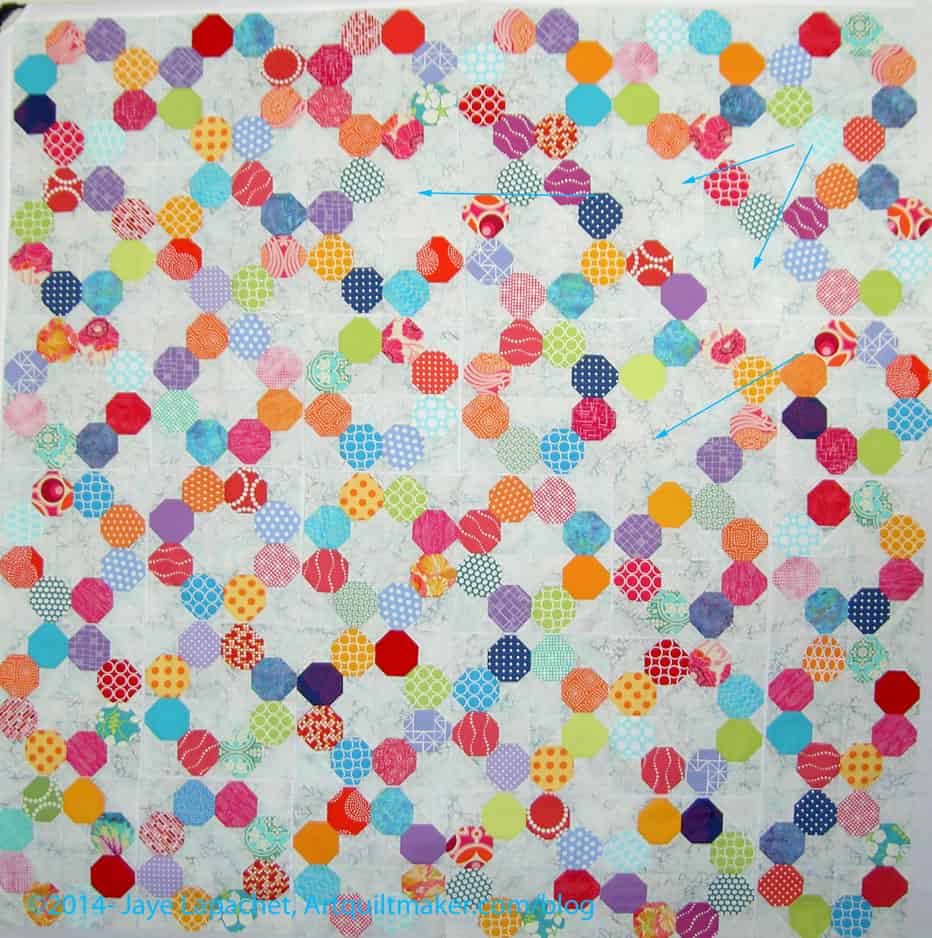
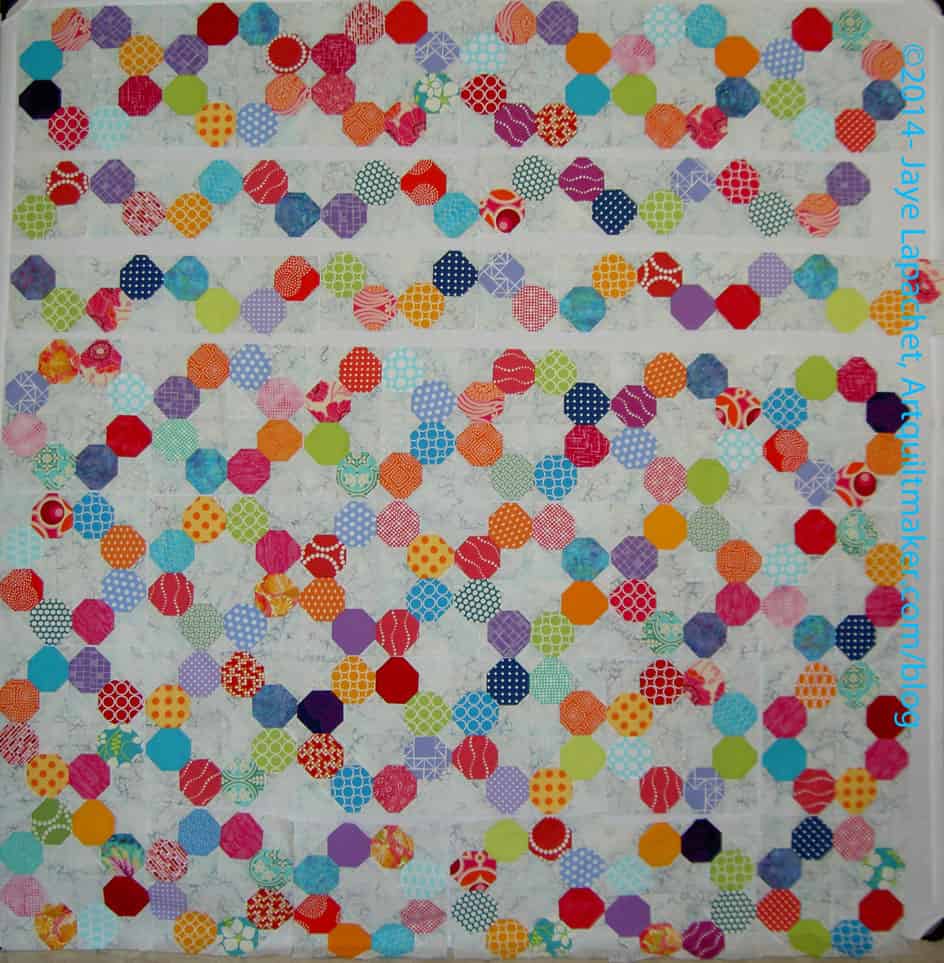
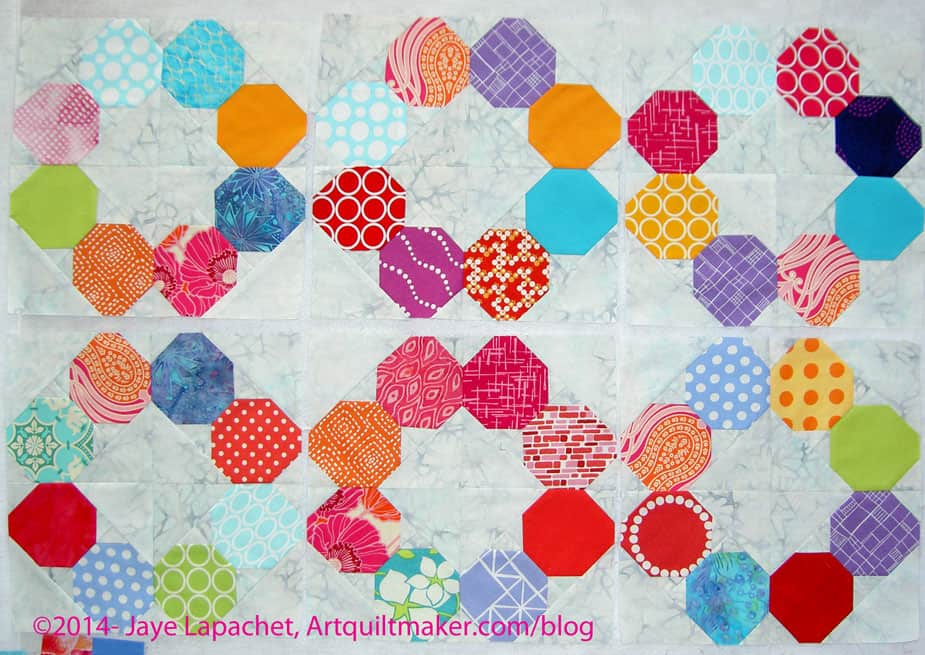
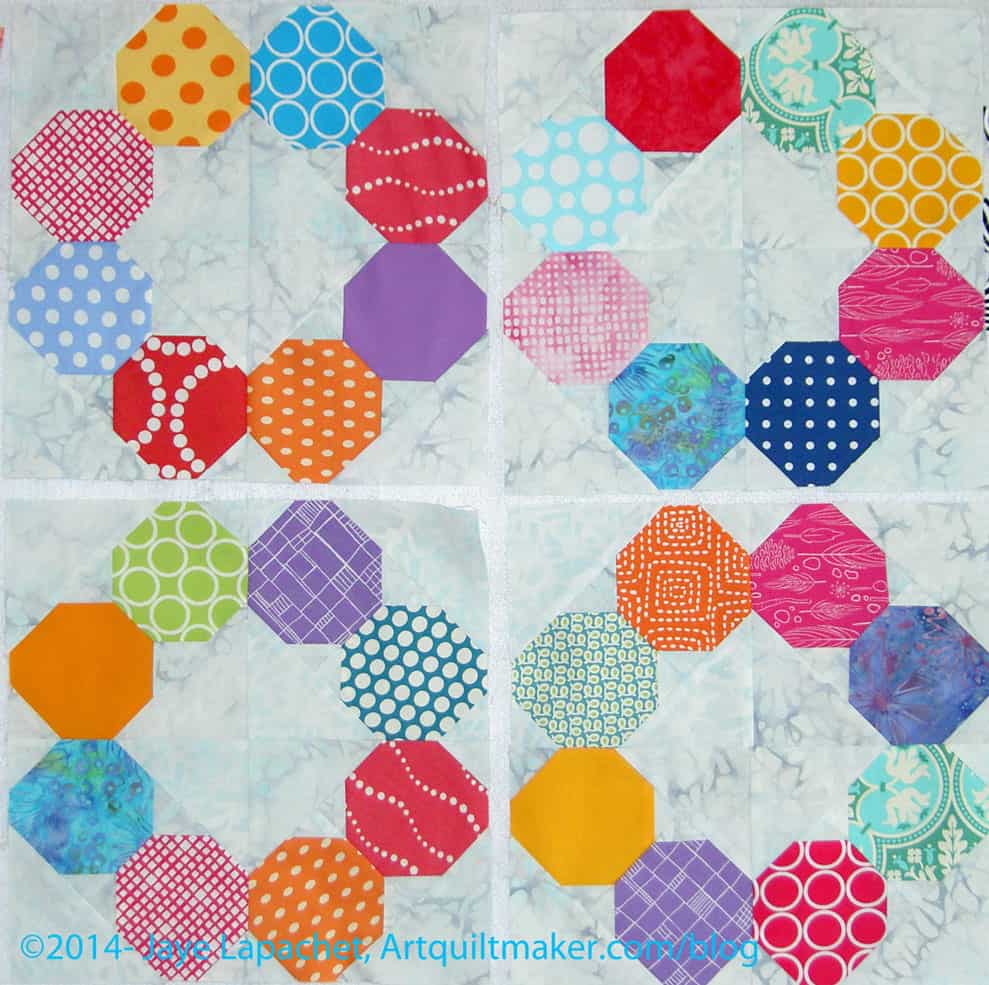
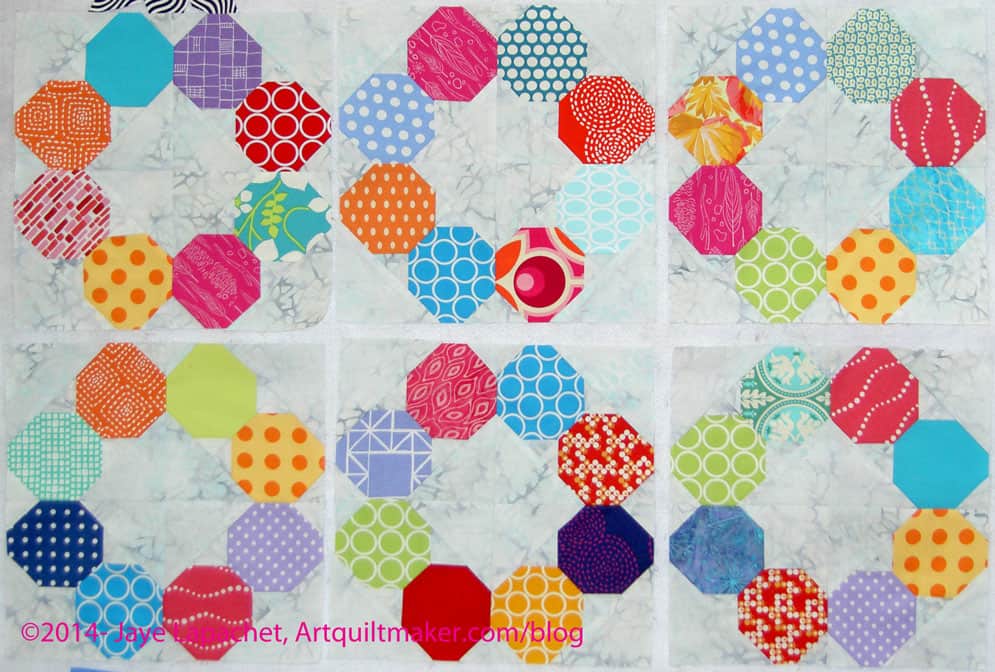
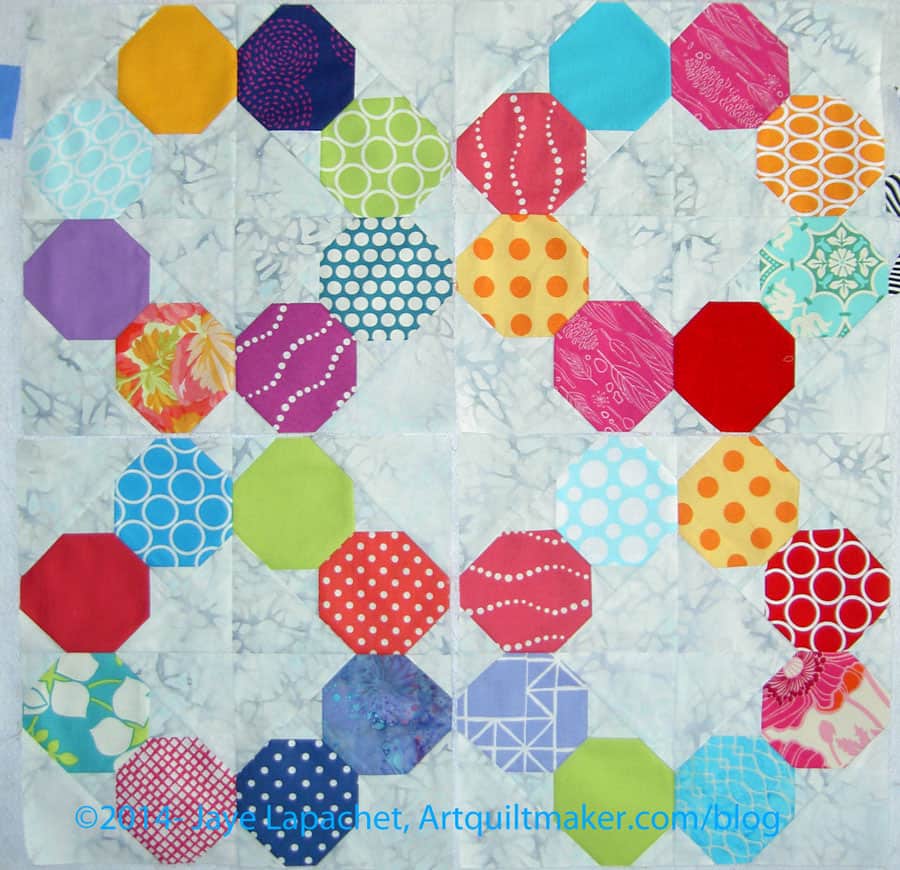
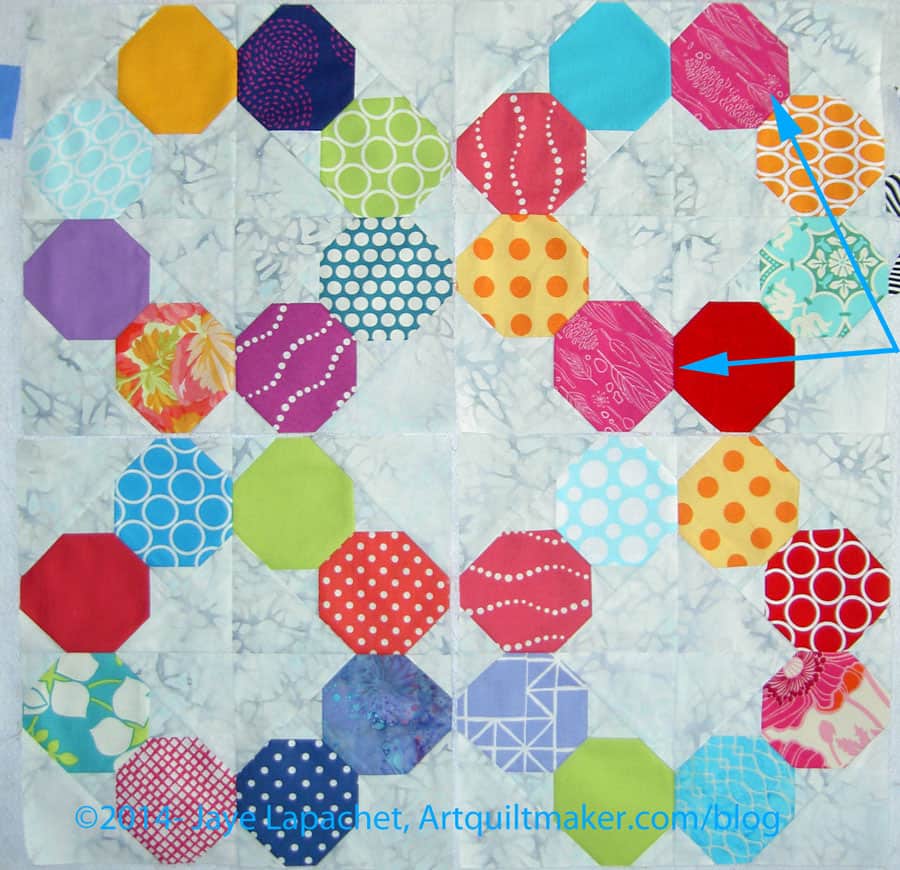
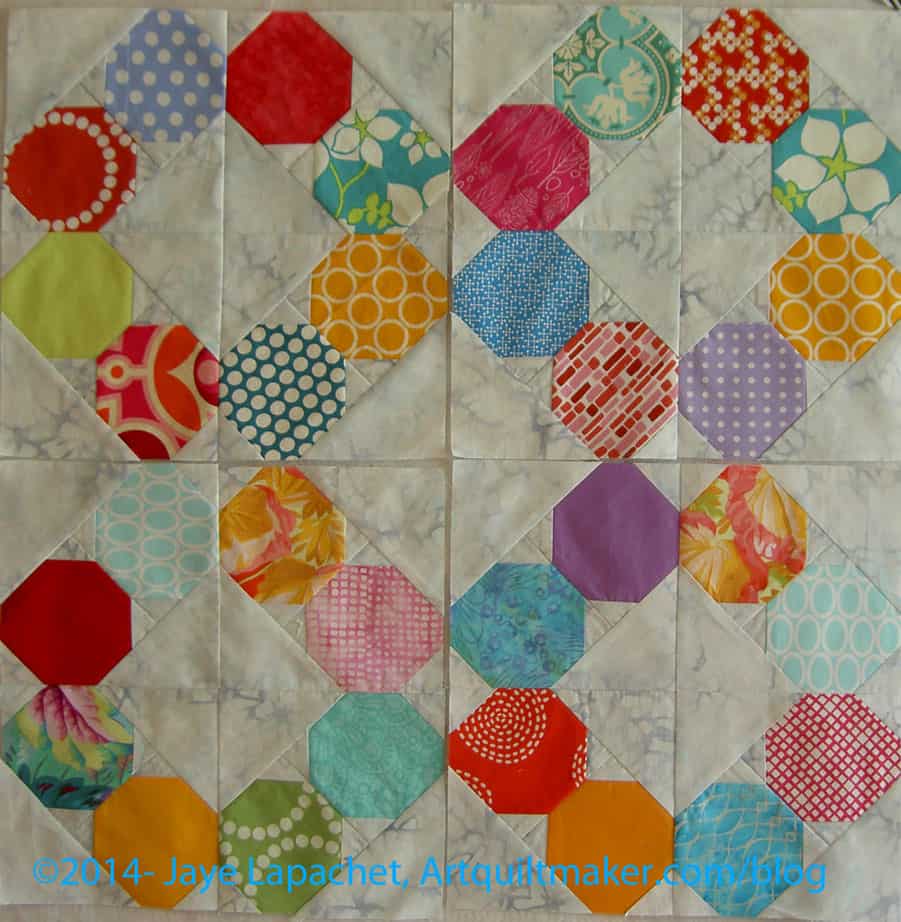
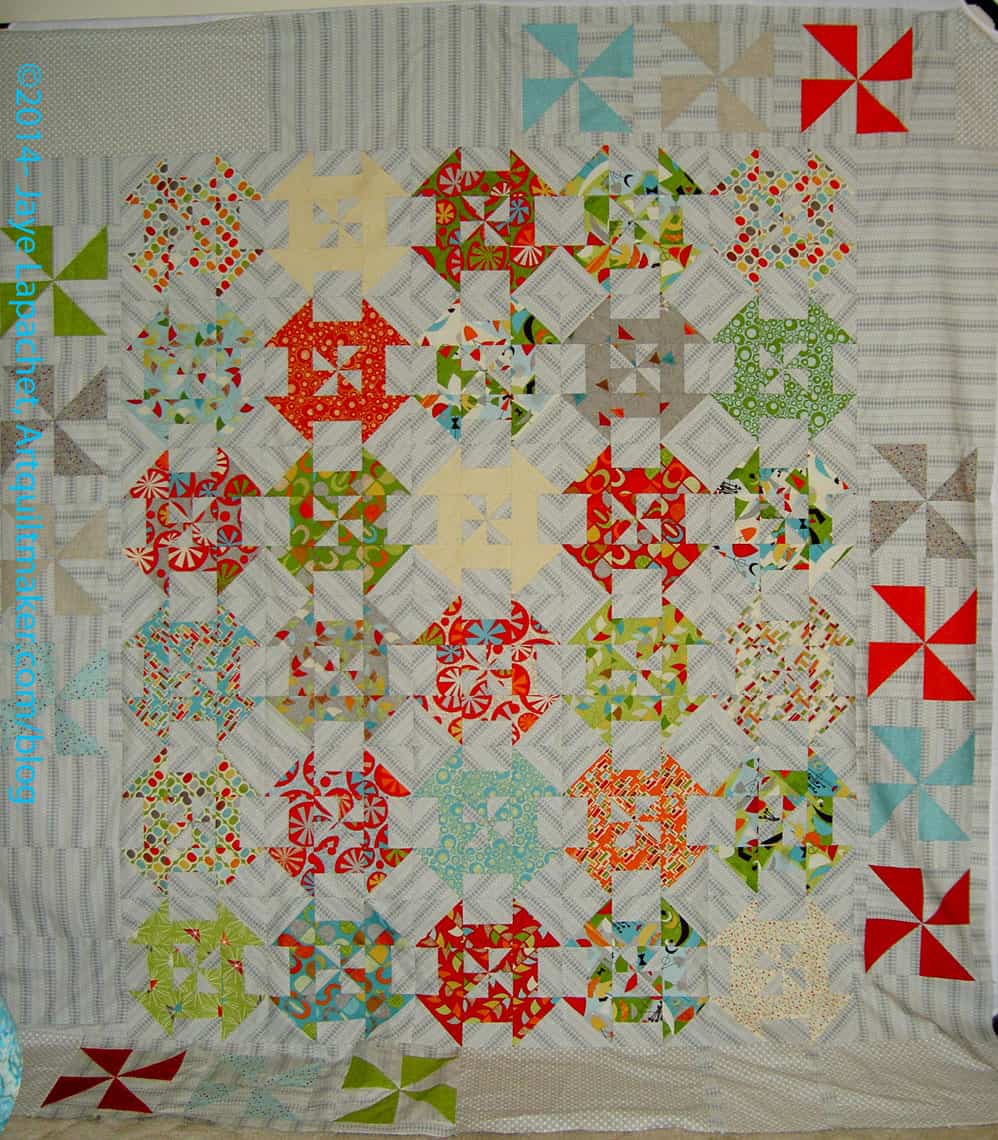
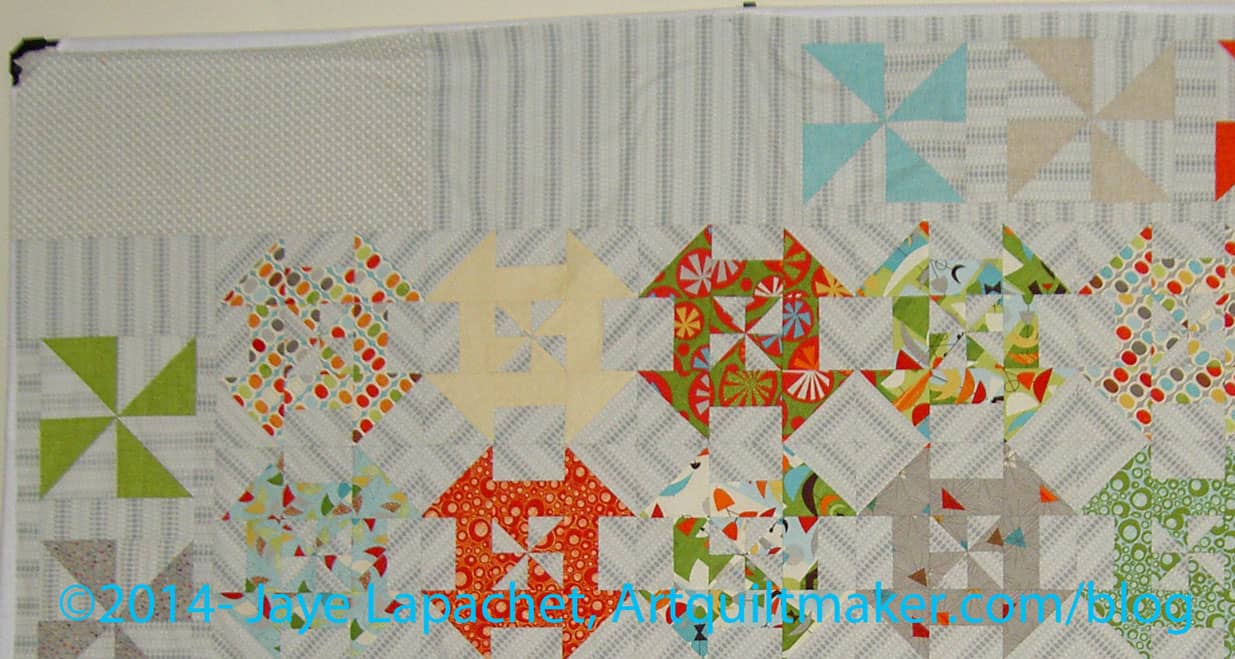
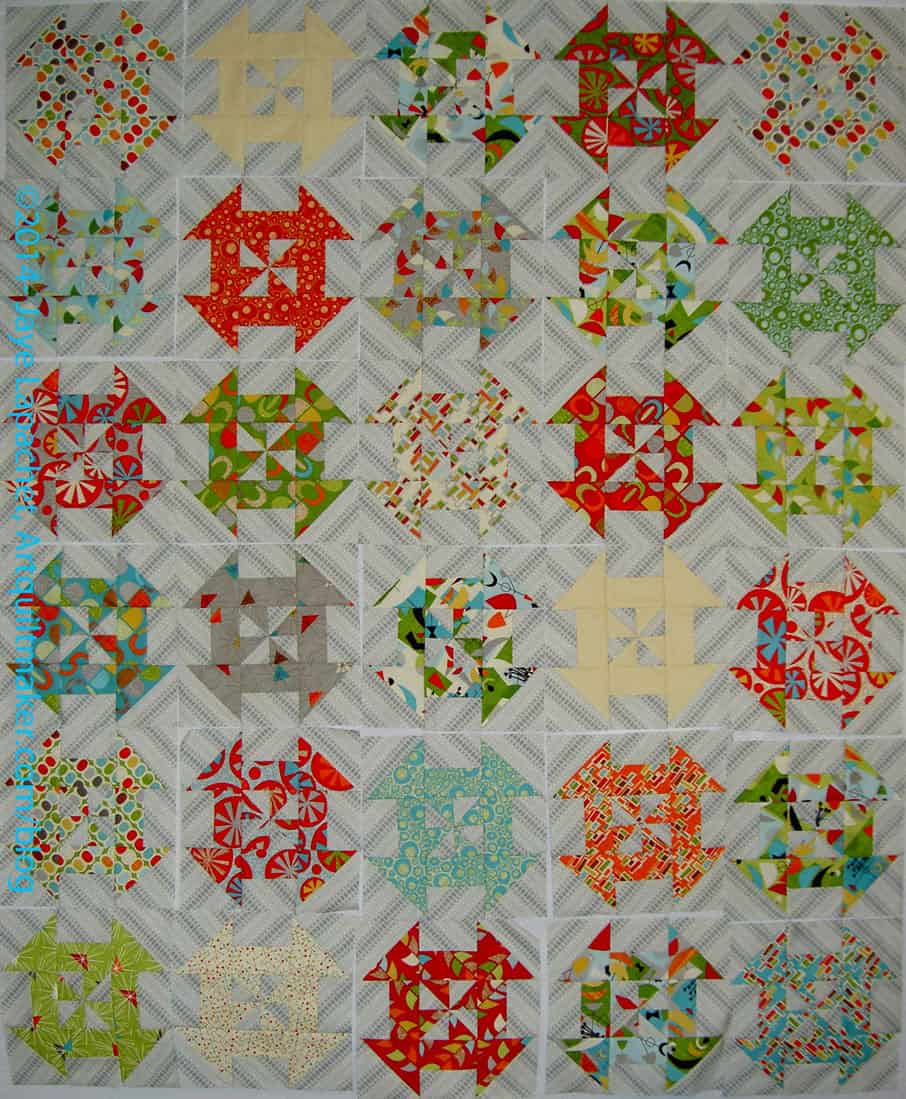
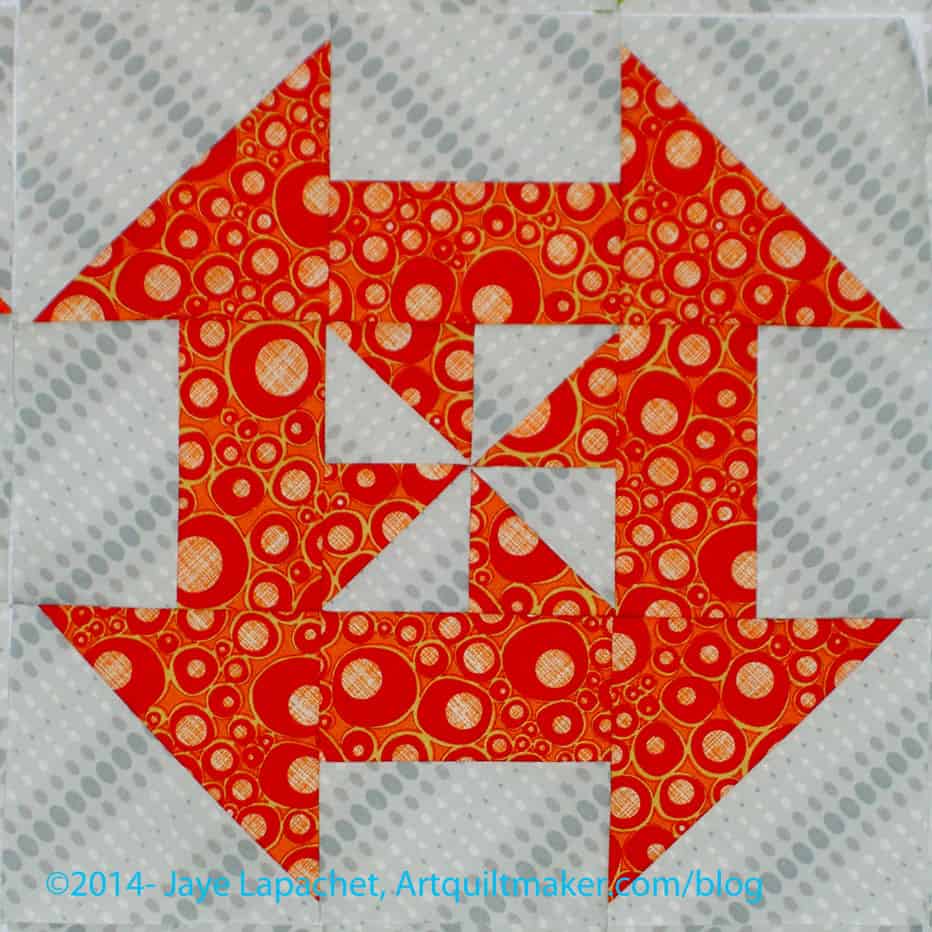
I did some sewing on the Russian Rubix, but not enough to call the top finished yet. I don’t have dates for finishing the top planned. It will get done when it get done.

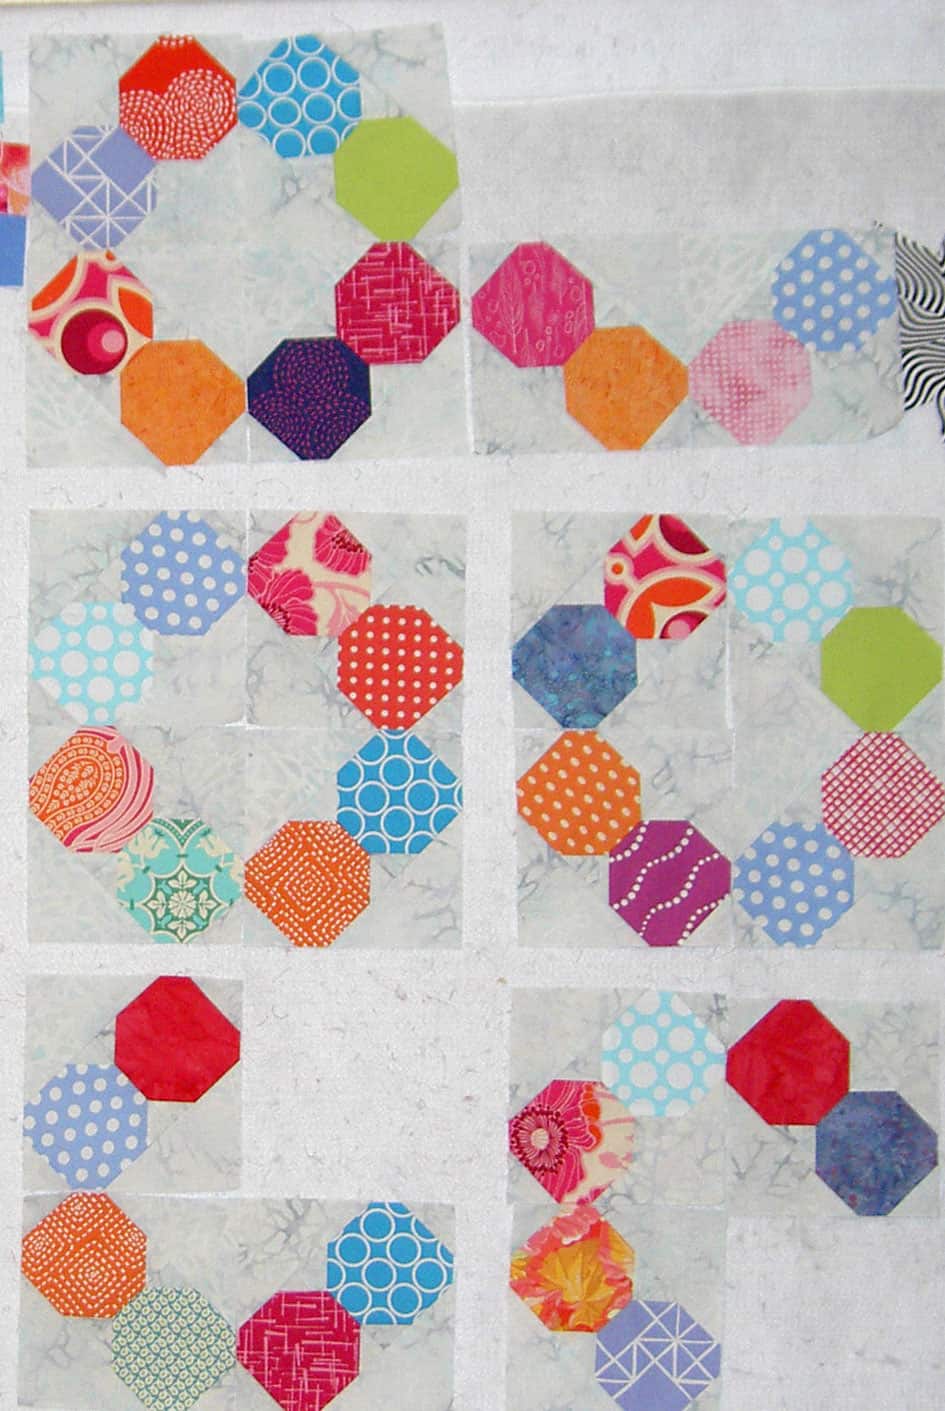
I moved around some of the blocks with the blanks, because there were too many blank blocks next to each other. I am making progress. I have 16 blocks together and am sewing two to three together as I have a moment.

Previous Posts:

Dropping Out of the Russian Rubix

Russian Rubix top in process

Lots of stuff is about process with me lately. That includes the Russian Rubix. I worked on it, finally, over the weekend and came up with, what I think, is a good idea: Dropping out.

By dropping out, I mean that I replaced some of the quarter squares with blank pieces of the background fabric and allowed the pieces to float. There wasn’t much else I could do with this very distinctive pattern and it seemed like the best solution after not really liking the idea I floated last time.

Dropping out chart
Dropping out chart

I made a chart of where the blank areas were when I took the last photos. I have moved things around a bit again, though.


Previous Posts:

Field Day. Hm.

Field Day September 2014

After I took FOTY 2013 off the wall and before I put the Russian Rubix up on the wall, I put the very few Field Day blocks up to see what I had.

Well, it isn’t looking exactly as I expected or anticipated, though there are also not very many pieces yet.

The pattern calls for 5″x2.5″ strips sewn to 2.5″ squares. The top center (2d column) piece is that shape and the correct size. I thought I would make the piece more interesting and vary the sizes of the non-Sangria background and the Field Day fabric. The top left hand piece in the first column is what I came up with.

Hhmm. Clearly I had trouble with the math, even though I measured everything, took the seam allowance into consideration, etc. I am going to use those pieces, but I am not going to make any more of them. I am going to stick with the boring 5″x2.5″ strips sewn to 2.5″ squares.

I also think I will put the Goldenrod in between the columns. I think that would add interest.

This is definitely a dark piece and I wasn’t anticipating that. I’ll have to get it done soon, so that it isn’t on the design wall in the winter when it is dark and cold.

Russian Rubix Potential Layout

You might think that I did a lot of amazing work between Monday and now, but really I made the blocks I showed Monday over the Labor Day weekend and the most recent work, which I will tell you about in this post, was done this past Sunday. It just so happens that I have a lot to say on the blog and haven’t been able to keep up. I could double up topics on posts, but it makes everything so messy in terms of tagging and categorizing and finding posts later. Some of my earlier posts include multiple topics and I don’t like linking to them as I don’t know if you, dear reader, will feel like wading through a long post to find a specific topic I meant you to find. It’s all about you, you know. 😉

Russian Rubix Test Layout

So, I got an idea in my mind and as soon as I did the Hell Binding for the FOTY 2013, I put the Russian Rubix blocks up on the design wall to see what my idea would look like.

The idea is to break up one row of blocks and make them look a bit off from the other blocks so the quilt is not as boring. I would put some of the grey in between the full ring rows in order to highlight the difference.

I put the separated blocks off center from the full blocks. I don’t think there is much differentiation and the parts still look like blocks and the blocks still look like rings.

Seeing it all up on the wall like this makes me think that I should just put the whole thing together and be done with it. I have already done a lot of work on this project and I don’t want to ruin it. I am also ready to be done with it.

Russian Rubix Pieces & Parts

Alas, I have a ton of pieces and parts that which have not yet been made into blocks. What would I do? Make a second one? Cut squares out of all those octagons? Donate to charity?


Previous Posts:

Nota bene: I was kind of shocked that there was a dearth of posts at hte beginning of August. I feel like I have been working on this project all the time. I realized that I had been making parts with leaders and enders and not really making discernible progress until I put a bunch of blocks together.

Additional Russian Rubix

Russian Rubix - Sept 2014
Russian Rubix – Sept 2014

Another project I advanced was the Russian Rubix project. I made the six blocks you see on the left, but I also made parts for other blocks.

In the course of making the parts, I got an idea to make the quilt more than just a bunch of blocks. As soon as I get the FOTY 2013 top off the wall, I will try it out and take a photo.

Possible Border?
Possible Border?

The above is just a Photoshopped version of what I am talking about, but I think that adding in a couple of rows like the above, perhaps spaced with a  thin piece of background in the middle of the blocks will make the quilt a lot more interesting. We’ll have to see.

Making Progress Again on the Russian Rubix

August 2014 Blocks
August 2014 Blocks

These blocks had been sewing into quarters and placed on my design wall, where they stayed like that for weeks. I think I had some sort of grand illusions of adding in different colors or something. Last weekend, I just sewed them together, photographed them and put them in the pile with the other blocks.

There will be other opportunities for messing with color on this project and I was sick of looking at these blocks. I also wanted to make progress on shuffling around the stuff on my design wall.

Weekend RR Blocks
Weekend RR Blocks

I sewed a lot of triangles to octagons, but many of them are not finished. For the ones that were finished, I started to put them together into quarter blocks and hang them on the design wall. I thought I might be able to sew a few more blocks, but the quarters were just about all I could manage.

As you could see from my Design Wall post last week, I worked a lot with cool colors, which meant that the quarters had a lot of cool colors. I tried to keep the cool colors in each block to a minimum, but still have some arranging to do.

I am still wondering about the ratios of colors in blocks. I have a lot more warm colors to work with. Intuitively that seems to mean that I should put more warm fabrics in each block. Practically, I don’t know.


Black & Grey Donation Blocks

Black/Grey Donation Blocks

I think I am back in the saddle with the Black & Grey donation blocks. I haven’t really worked on the piece since February 8 of this year. I feel bad about that, but I can only do what I can do. I figure that doing something slowly is better than doing nothing.

I have about 15 blocks now and am still thinking of making a teenaged boy donation quilt. It feels dauntingly large, though and I don’t know if I can make all of those blocks. Again, I have run out of a lot of choices of different fabrics, which I know won’t matter in 6 months, but now feels constraining.

I’ll just keep plugging away as best I can and see how it comes out. Kelly offered to help and I am hoping she has made some blocks to add to mine to spice up what I have made.

FOTY 2013 Even Better Progress

FOTY 2013: Mid-Late June 2014

I am not ready to piece yet, but I am so much farther along than I was when I last checked in.

I know a number of you liked the falling water/color gradation effect, but process wins and it wasn’t working for me.

This is so much better. I couldn’t have done it without the work I did on the first version. I did extensive sorting of the colors, as you may have noticed if you enlarged the photos and looked carefully. I expect that most of you didn’t have time and will just take my word for it.

The extensive sorting that I did really helped me leap frog over the preliminary shuffling that I have done in the past. I’ll have to keep that in mind for the future.

I still have a lot of work to do, but I am feeling better about the piece.

Previous Posts that Might be of Interest:

Russian Rubix – 6 More Blocks

Russian Rubix -Early June 2014

As I mentioned, I was avoiding the Petrillo bag on Saturday and ended up working on this project.

One of the annoying things about this project is that it takes 36 seams to make a block. This means that I sew and sew and sew before I make any progress.

On the good side I sew and sew and sew and then, all of a sudden, I have 6 blocks done. It is nice to see the blocks once they are done.

I have been trying to work through each color and then attach it to a different color to avoid duplication when making the 2-octagon subunits. It doesn’t always work and will look better once I have all the blocks done. The problem is that, in a picture like the one above, it looks like I have used the same fabrics in all the blocks.

To a certain extent I have and it bugs me, but then I remember that I am not going to, necessarily, put the blocks above next to each other in the quilt.

I also get bored with the same fabrics, so I try and move through the stack of colors so I have more from which to choose. As a result, I have some quarter block units to put together still and octagons waiting to be paired with other octagons.

The progress continues, though I only have 10 blocks at the moment. I will keep sewing and make more.

Previous Posts:

A Few More Russian Rubix Blocks

Russian Rubix Blocks - Mid May 2014
Russian Rubix Blocks – Mid May 2014

I have been piecing parts of the Russian Rubix blocks together, but not putting as many blocks together as one might expect.

I am trying to sew grey to all of the octagons, so I have a lot of choices when I go to make the blocks. It is a good plan, but doesn’t always work, because I get bored and want to make blocks.

So, I make a few blocks then admonish myself for having no self control and go back to making the pieces and parts for awhile.

Russian Rubix Booboo

I am pleased with the group of fabrics I put together. It is fun to see the different fabrics next to each other and in different combinations. I made one small booboo on one of these blocks: I put the same fabric in one block twice.

In the grand scheme, I don’t think it will matter since there will be several octagons next to each other and the different quarters of the blocks will create new rings when they are put together. Still, I want you to know that mistakes happen and life goes on. I did consider ripping it out and putting in a different quarter block (2 octagons). I may still, but for now I am going to leave it. I really don’t think people will notice much.

Also, SIL said that the light blues dropped out because of their value on the grey. She was right, but there is something in leaving them in that creates a bit of movement. I plan to space them away from each other, if I can, when I lay out all the blocks.

I had three of the four shown finished for a long time, but I couldn’t seem to get the fourth one finished. Finally, I did and wanted to take a photo so I could remove these blocks from the design wall and fill up the space with new blocks.

Previous Posts:

Russian Rubix Again

4 Russian Rubix blocks

Susan is back in action and that means I need to get back to the Russian Rubix. I haven’t been completely ignoring this project, but I haven’t been as focused as I need to be. I haven’t completely been ignoring the project, though.

I am working on the Super Secret Project #4 and I am at the point where I really need to keep things in order so I am piecing parts of the Russian Rubix in between the SSP#4 parts.

I was thinking about combinations of colors as well. In each block there are 8 octagons. I was wondering, as I mentioned, if I should put more cool than warm colors (and visa versa) or if I should put all cools in one or equal out the warms and cools. In the end, I don’t think it matters very much, because there will be many blocks and many opportunities for combinations of colors, temperatures and fabrics.

It is going very quickly. I thought of sewing octagons in some sort of orderly fashion, but then I didn’t. I don’t want to sew all of the patches at once, because I want to see blocks  as well as parts.

Russian Rubix posts:

Disappearing Pinwheel Top Complete

No joke. I worked diligently on Saturday and finished the top of the Disappearing Pinwheel. When I last wrote about this project, I didn’t really feel like I could ever finish it. I may not have conveyed my feelings in the post, but I was feeling pretty low about it. I don’t know why.

Then Friday, I had a lot of paperwork and boring stuff to do (e.g. sign Young Man up for ACT test-bleah!) and didn’t work on any quilt anything. So, Saturday was the day. I had to get up at 5am to get the Young Man to a Drumline competition (do you sense a theme here?), so by 9 I was ready to sew. I spent most of the day sewing the top and got it done.

Disappearing Pinwheel Top

I am pleased, though a little disappointed that I ran out of the background fabric. I could have gotten more (thanks to Kelly O! for the offer), but I decided to use what I have and get the top done, so I can move on. I didn’t want to wait for an order, or for a friend to send the fabric.

It turns out that I actually like the way the second background drops out and the first background looks more highlighted.

I plan to have Colleen quilt the second background in a slightly darker grey so that the lightness is toned down a bit. When I talked to her about it, she said OK.

The smaller detail shot shows a close up of the second fabric. It was also one of those I bought with an eye towards using it for the Russian Rubix. Too beige for that project, but it worked ok for this one.

Disappearing Pinwheel detail

Vital Statistics:

  • Size: 84”h x73”w
  • By Jaye A. H. Lapachet, 2014
  • For the collection of Pierce Lapachet
  • Pieced by Jaye A. H. Lapachet
  • Longarm quilted by Colleen Granger

I also finished the back. It was a pain, as backs are wont to be, but I wanted to get it to Colleen yesterday, so I powered through. I thought I would get a lot more done on Sunday, but I didn’t. I just got the back done and then I had to clean up my workroom. It made me cranky to work on it, so I am glad it is finished. I continued pulling from my grey bin and a lot of greys you see have been in my fabric closet for over 10 years. I am happy they are finally getting an airing.

Disappearing Pinwheel Back

I still have to make the binding. What color do you think would work with this top?

The Disappearing Pinwheel Continues

DPW Block
DPW Block

I had hoped to show you a finished quilt by now, but that is not yet to be. Perhaps over the weekend I will finish. Despite being off of work, I have been quite busy this week and whenever I haven’t been busy, I have been laying on the couch or face planted in bed. Neither of those activities are conducive to finishing the DPW! ERGH!

Still, I have to remind myself that there are no prizes for finishing and the process is important. Blah. Blah. Blah.

Finally, all the blocks I am going to make are finished. I am pleased with the blocks. They look fun, are a bit off and not my usual style. The background adds to that idea. I am wondering if this is stretching my fabric choices. If so, then this quilt pattern was a good one to use to stretch, because I wasn’t in love with it.

DPW Block
DPW Block

Don’t get me wrong. It is a fun project, but I didn’t have a good reason for doing it, so using fabrics I wouldn’t normally use was a good thing. It also used up the Mod Century layer cake which was an impulse buy and not slated for another project. I also used that grey background, which was sort of an unfortunate purchase (online), but worked out for this project.

I really enjoy seeing what other people are making with the same pattern and this project was no exception. There is a lot of variety in the DPW projects the Twilters are making and it is interesting to watch.

I am really glad I had little bits of this fabric to work with. I don’t think it ever caught my attention in a quilt store, but I like the different prints and think the shapes and colors are interesting.

I think the border will be very interesting. You’ll have to wait a bit to see that as the piece is in such disarray at the moment as to prevent me from taking a photo that would be anything but embarrassing. Soon, trust me.

The bad news is that I probably won’t have enough background fabric to finish the borders. I am going to look around and see if I have more. If I do, I certainly want to dig it out and use it, but if not, I will find something else. No, it won’t be the same, but I want to use what I have on hand.

All DPW blocks-March 2014

Previous Posts

  • March 20: More Disappearing Pinwheels
  • March 2: Make a Disappearing Pinwheel
  • Feb 23: Disappearing Pinwheel Blocks
  • Jan 28: Disappearing Pinwheel

More Disappearing Pinwheels

Disappearing Pinwheel
Latest Disappearing Pinwheels

I have had  a few busy weeks plus Scrapitude to prepare for quilting so I haven’t had a chance to work on the Disappearing Pinwheels. I thought I remembered taking some photos of the latest group that I hadn’t posted.

I made a lot of progress on my last session of making these blocks and will need to get busy on it again soon.

The orange and red block to the left really caught my eye when I was looking at the whole group. I noticed how well the pinwheel in the center of the block stood out. Some of the blocks are very subtle, but that one  has god contrast.

In the group photo, I noticed how the background stripes have a subtle stripe, but it does add a lot of movement. Friend Julie and my mom both said the same thing when they saw the blocks.

I may take Scrapitude over to be quilted next week and I have some idea that I will take this quilt over as well. That is a lot of work between now and then, but we will see. It would be nice to get this out of my hair.

Scrapitude Confetti

Scrapitude Februry 2014

After finally settling down over the weekend, I decided to start piecing Scrapitude into a top. The top is not yet completely pieced, but I did get a rhythm going and I did make progress. I might be able to finish it this weekend, which would go a long way towards alleviating some of the chaos.

The piece looks really cheerful, which is nice. Sandi said it reminded her of confetti. It does, so I might use that as a name.

As I was piecing the seam allowances were shrinking, I noticed how the lines of squares ran through the whole piece. I think it would have been good to make those all one color and not use that color anywhere else in the quilt — or only in selected locations that didn’t touch the squares.

Previous Scrapitude Posts