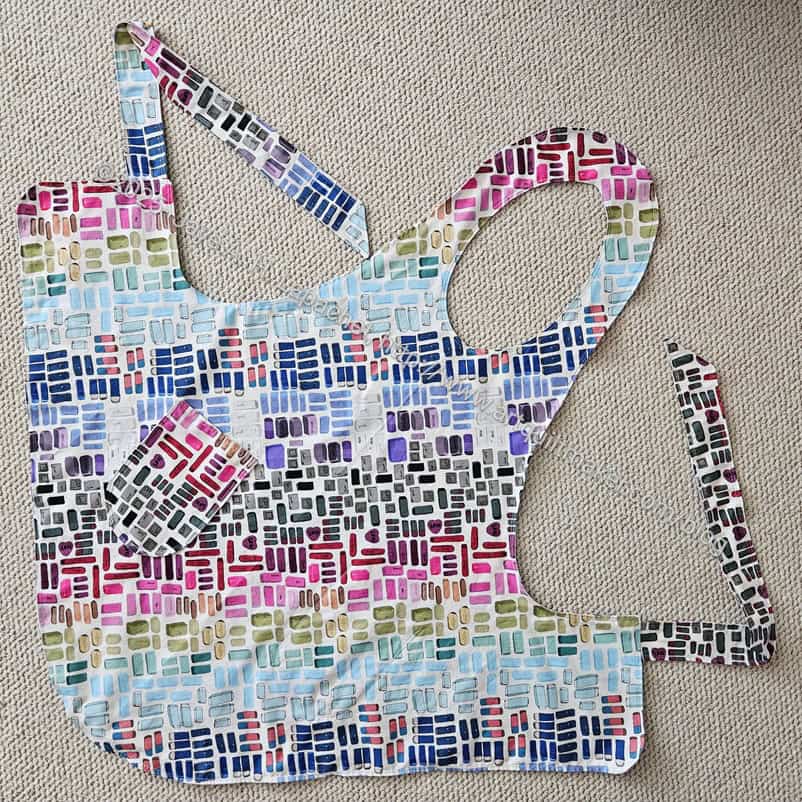
The Arthouse apron is finally finished! I know you are surprised, because I didn’t tell you that I had started it. Sorry about that. I have been thinking about it for awhile and push finally came to shove. I needed to get it done.
I bought the fabric for this apron, at least one side of it, not that long ago. I bought the eraser fabric recently on a whim. I thought it would be a better, more appropriately themed choice for the Arthouse.
Arthouse Apron – painting side
This is a fairly quick project. I cut it out at the October 4 Sew Day and I was able to finish it over the weekend, so I could bring it with me to Portland.
Aside from forgetting to put the pockets on until I had the outside sewn, the project was not a problem.
A long time ago, the Angel Family Mom mentioned an apron she used to wear at school (she’s a teacher), but lost. What she described sounded a lot like the Cafe Apron I made for my sister some time ago.
After looking up that project, I realized I bought the same pattern again. 🙁 I thought it was a different pattern and should have looked it up. Oh well. At least it wasn’t an expensive pattern.
Amanda Jane school apron
I bought the fabric and the pattern at Moonlight Quilters. I think I was inspired by the fabric, which doesn’t scream school teacher, but is school oriented. The motifs are subtle.
The apron didn’t take me very long to make. I estimate it took about 4 hours total. This time I used all the same fabric instead of different fabrics for the pockets, etc.
I got a call from the Angel Mama and she LOVES the apron. She said that she was wearing it around the house and it was just like the apron she lost. I was thrilled that she liked it. I threatened to make her one for home, but she said she had some Starbuck’s versions she used for around the house.
I am pleased that I was able to finish this in time for the new school year.
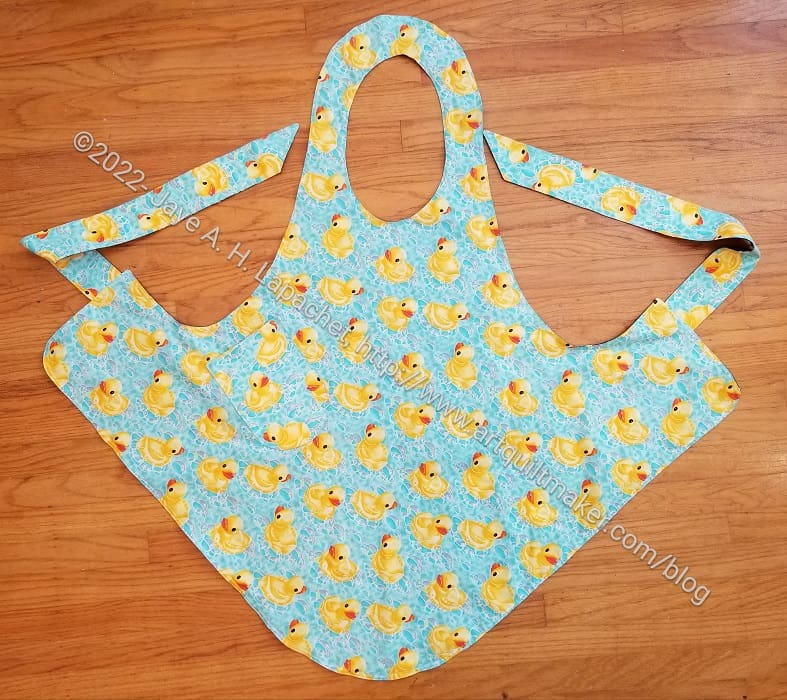
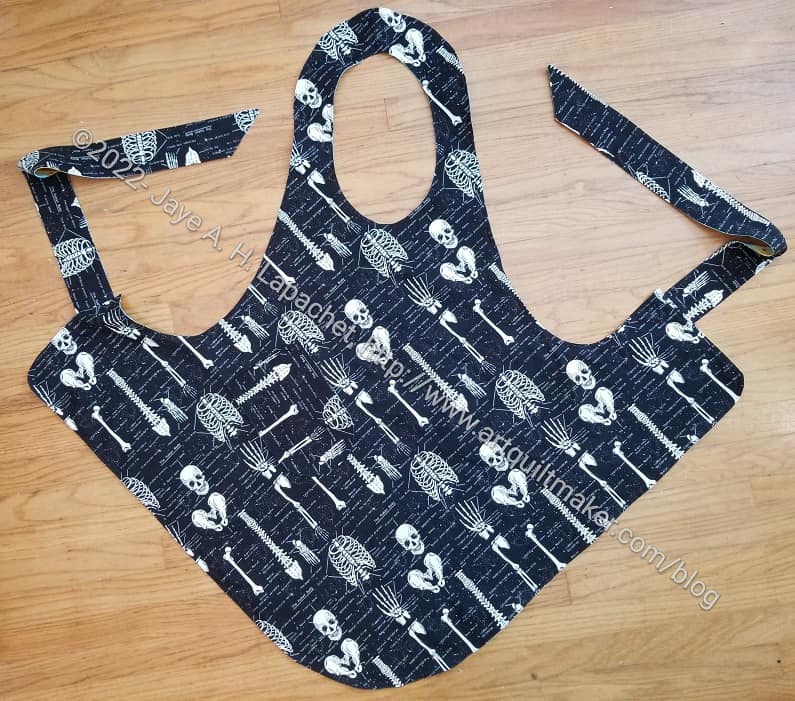
I finished another Flapper apron over the weekend. I call this the Duck Bones apron because one side has rubber duckies and the other bones. This will be for the YM’s partner. She is on a pathology course and really liked it when I included the bones fabric in a bag I made for her for Christmas.
Duck Bones Apron
The bone fabric is a favorite of various recipients. I have an alert on a shop site so whenever it comes in I buy 3 yards and decide what to make. I have enough left to make more pillowcases, which is probably a good idea for my SIL. Who uses only two pillowcases?
I have made several of these over the past few years and still like the way they turn out. The last one I made was for my mom, I think.
I made two of these at a time. The second one is still in progress. No, it isn’t Christmas or a birthday, but I had them on my mind, so I decided to make them.
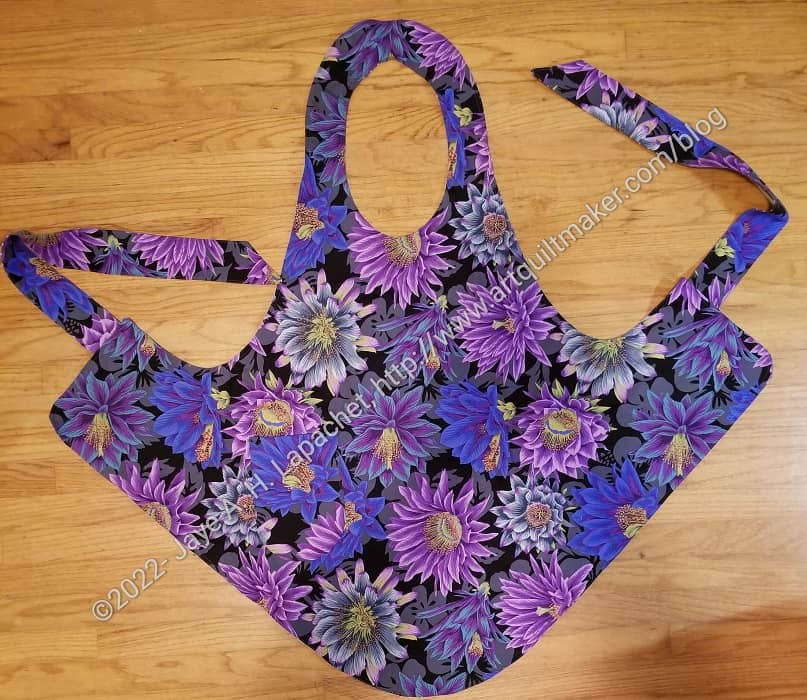
I have been adjusting the neck hole a little, but left it the original size this time. I don’t remember why I adjusted it originally. I think the fabric looks really nice in apron form.
Yes, I used some of my precious Philip Jacobs fabric, but why not? It isn’t like there is a shortage at my house.
This is the pattern you can use with a yard of fabric. The pattern is called Flapper Apron from the Decades of Style pattern company. I bought it in 2018 when I was out shopping with Amanda. The clever part of this pattern is that you cut the pattern out on the bias. The biggest attraction is that you only *need* one yard of fabric to make it. I usually make the apron reversible, which takes 2 yards. As mentioned before, I like to give myself a little breathing room with 1.25 yards on each side. Still, the pattern is designed for one yard of fabric.
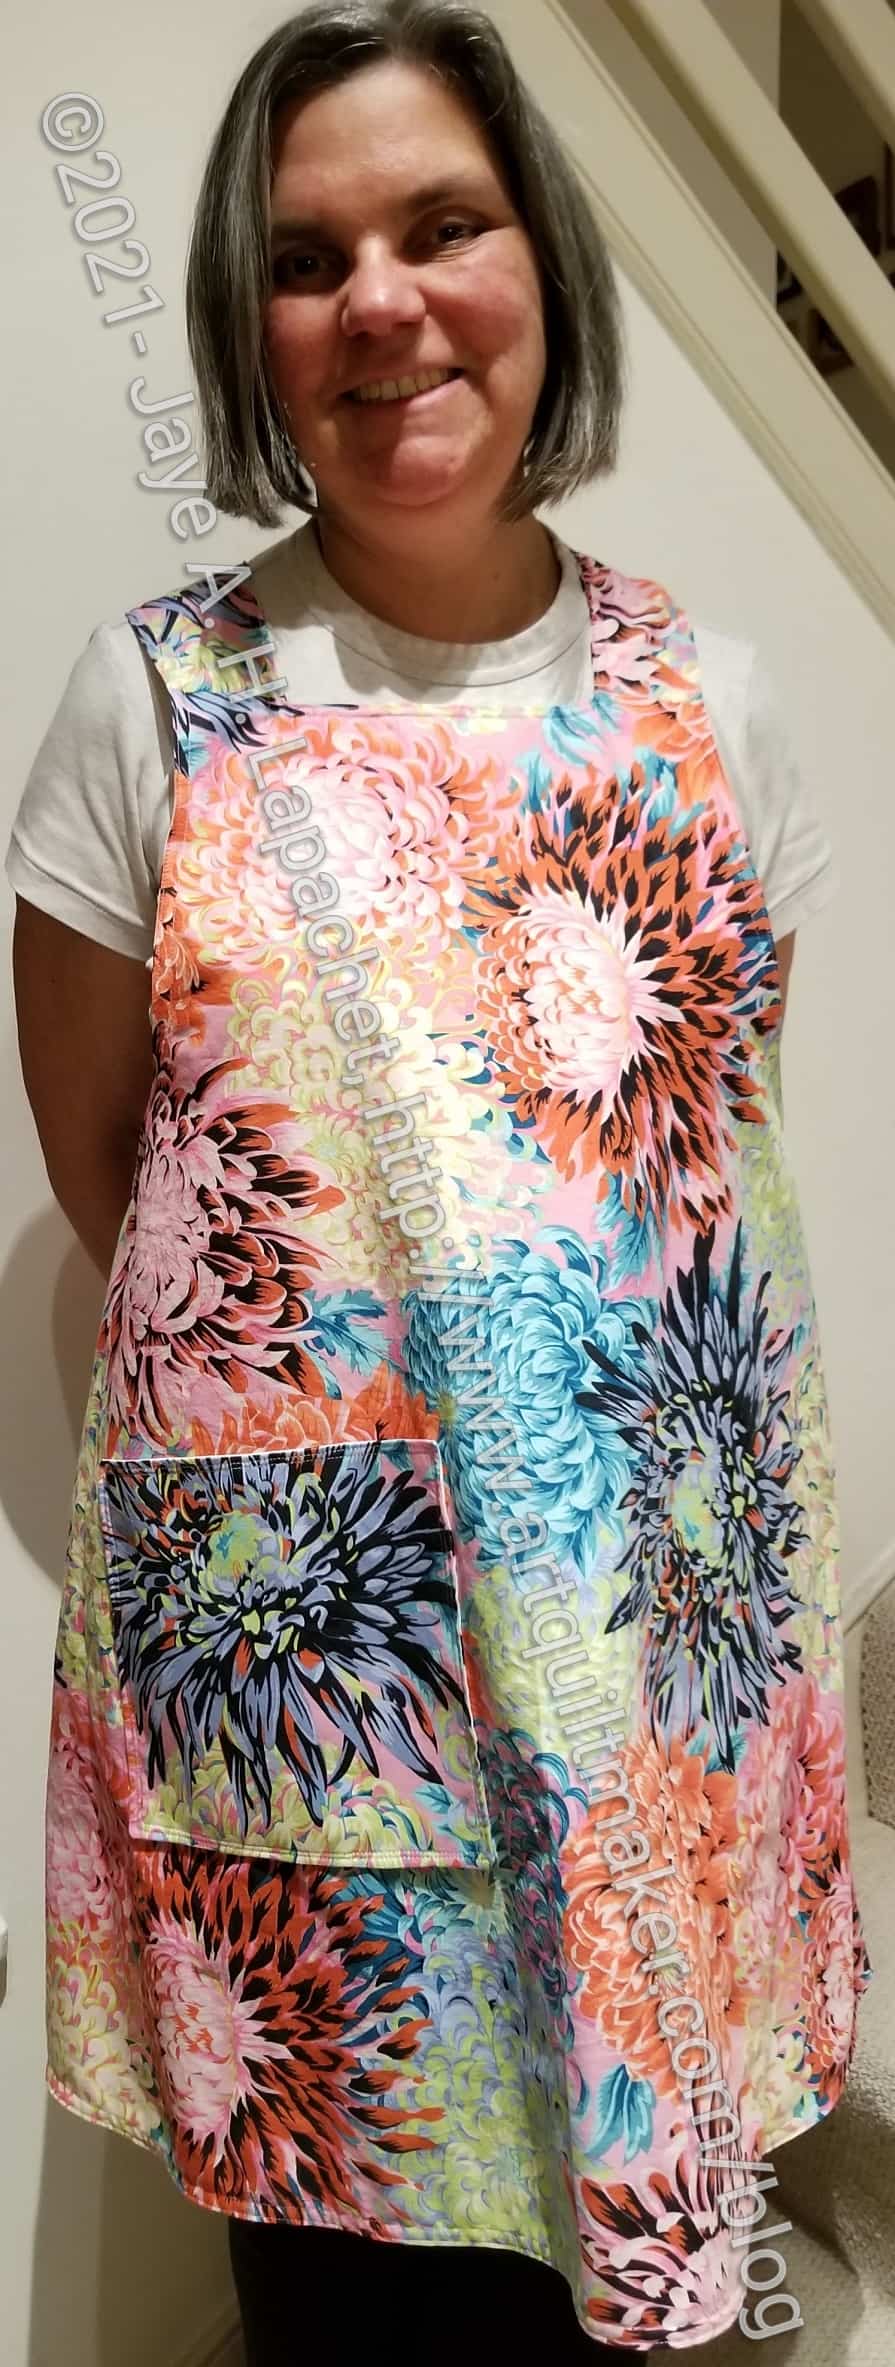
I started this apron in March when Maria set a challenge of everyone in the guild making an apron. She got everyone interested in Japanese apron.
I chose the Tessuti pattern, which is free. The pattern is designed so that the apron is single sided and uses linen or heavier fabrics.
I like my aprons to be reversible. I don’t really ever reverse the aprons, but I don’t like folding over and ironing hems. Also, I can use more fabric if I make them reversible. I have a lot of quilting cotton, so that is what I used.
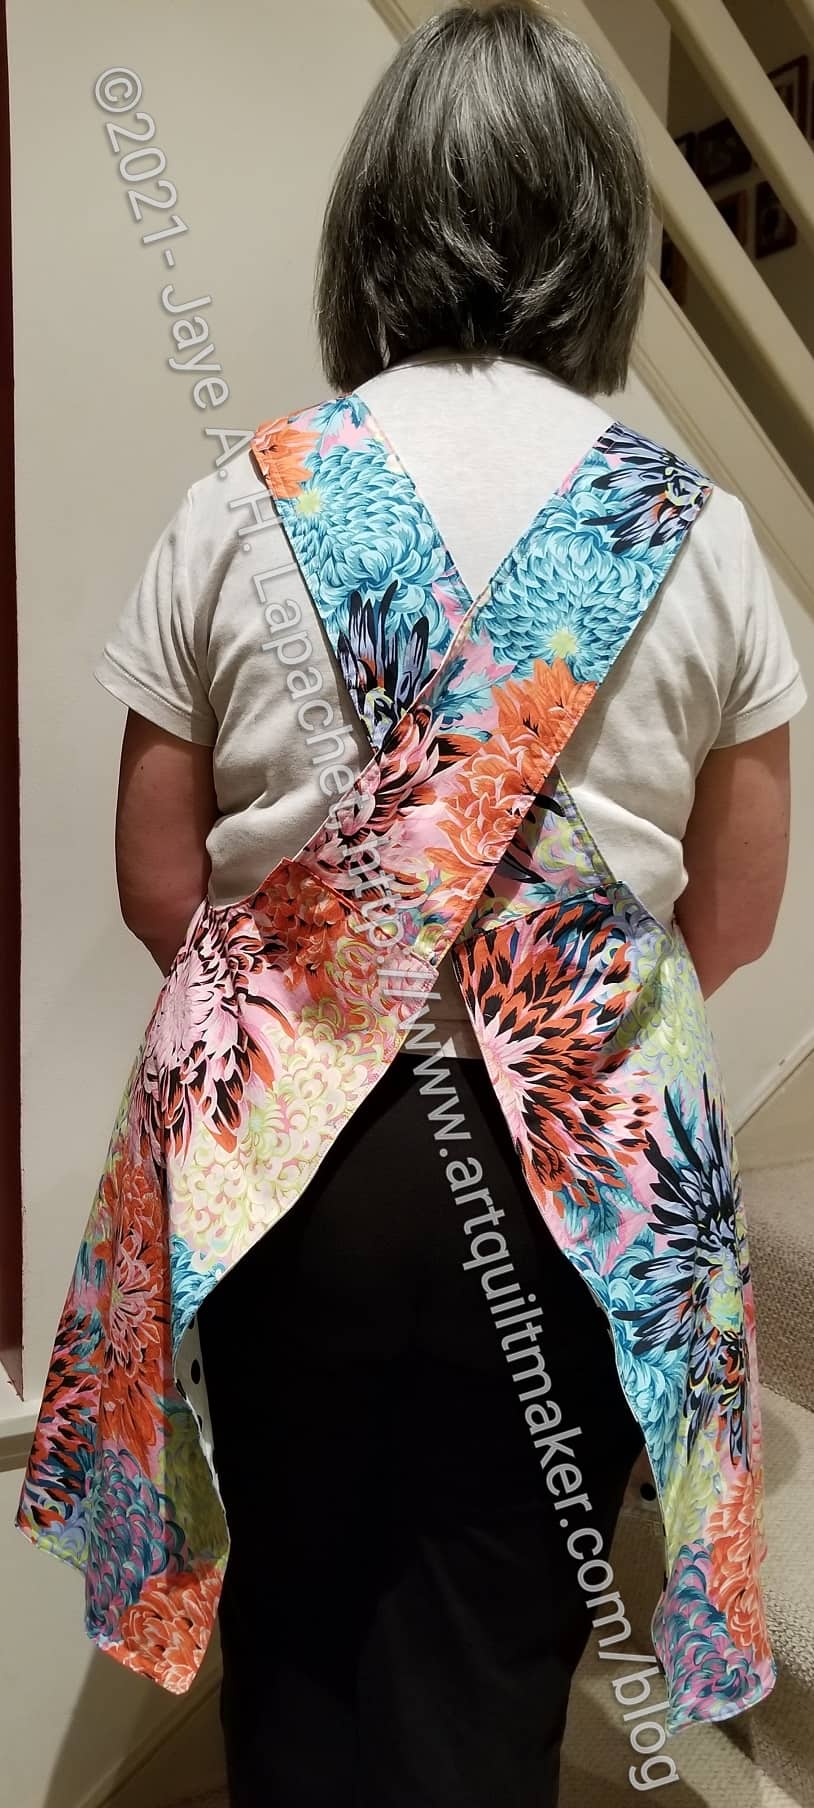
Finished: Tessuti Apron – back
My problem was that I couldn’t imagine how I would put the apron together and the pattern didn’t help, because I was doing something completely different. One of the good things about being in a guild is that there are a lot of people with a lot of different experiences. We are fortunate to have Mary C for a lot of reasons. She has an encyclopedic knowledge of garment sewing. I brought my pieces and talked to her about the project. She could immediately conceive of how to put the apron together. She talked me through it, so I was able to finish it at home the next day.
I haven’t used one of these types of aprons as an apron. I wear aprons while cooking and baking all the time. Mostly I wear the Flapper apron I made a few years ago. The big difference is Japanese aprons don’t have ties. My new headphones don’t fit very well through my Flapper apron opening, so the new Japanese apron will help me slip the apron on and off as I move between my cooking chores and other tasks.
For the moment I am not using it. I want to show it at the guild meeting in its pristine condition before I start wiping flour on it.
The guild has started another Sew Happy Hour on Fridays. This one will be devoted to WIPs or group projects though, knowing the guild, people can work on whatever they want. Maria has designated the next date as a time to make Japanese aprons.
A Japanese apron is, apparently, an apron with no ties that crosses in the back. Maria sent a great article on different Japanese Apron patterns, which I mentioned in the most recent V&S post. I chose the Tessuti pattern, which is free, mostly because it was the first one I saw.
Japanese Apron Giant pattern page
The first thing I had to do was print about 1,000 pages of pattern. Then I had to glue and tape it all together. Usually, I will buy the pattern to avoid this step, but the the shipping was from Australia, making the free pattern $40 or so. I couldn’t justify the cost even with the ink, tape, glue and my time. I have to say that the designer did a good job labeling the pieces so it was easy to put together.
After I had the pattern together, I traced it onto tracing paper. This required me pulling out my sewing cabinet, so I could flip up the back. I had one of those cardboard cutting mats people used to use for cutting out garment patterns, but it wandered off somewhere and I couldn’t find it. I just the opportunity of having the back up to also trace my Westchester Dolman Top pattern. I’m glad I thought of that since tracing the pattern to the right size was what was holding me up with that project.
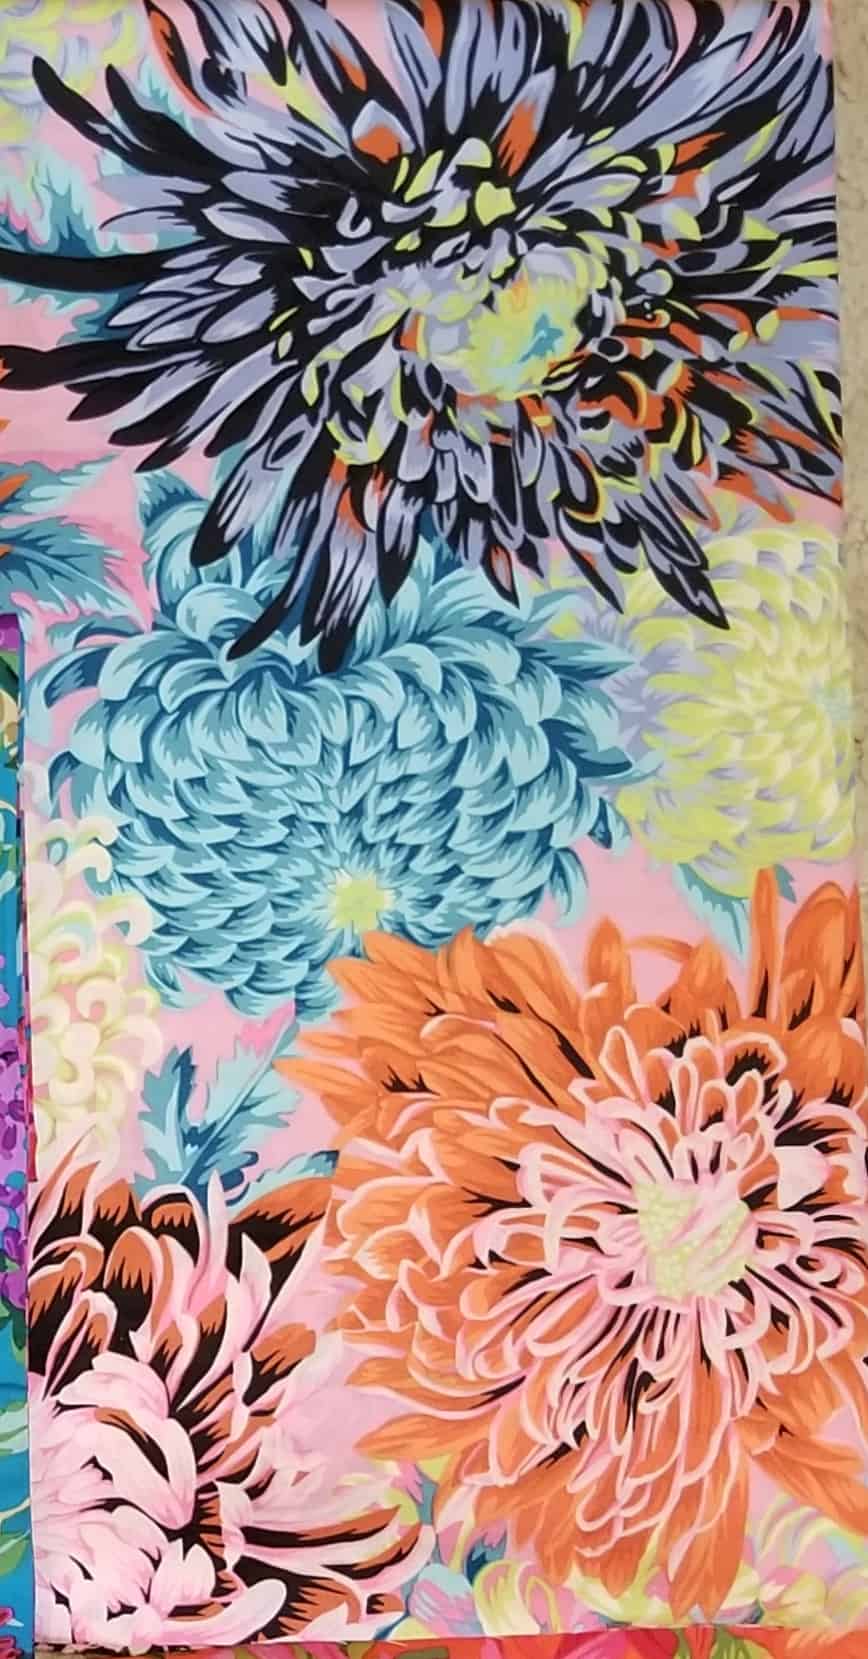
Philip Jacobs Japanese Chrysanthemum
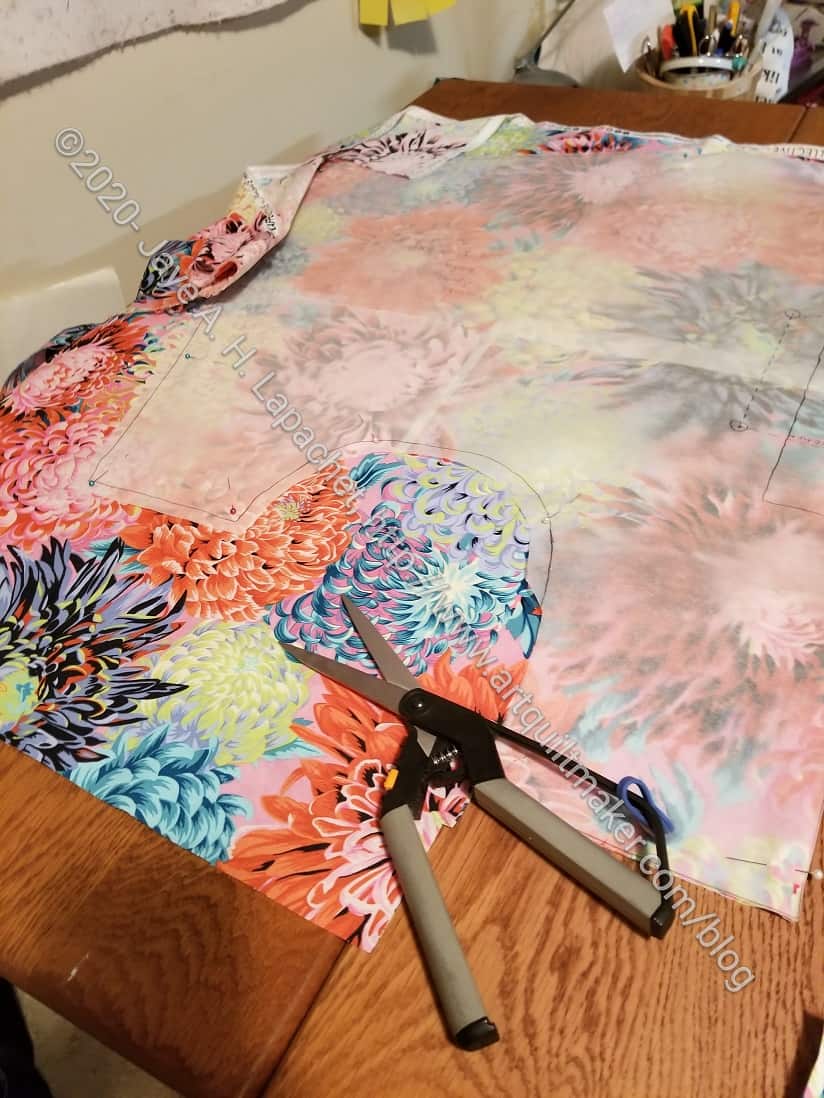
Once those tasks were done, I could start cutting out the fabric. I am using one of the new Philip Jacobs Chrysanthemum prints I bought a few weeks ago. I think this is the same print I used for my sewing machine cover. I think they color the same designs in different ways for new collections.
I chose a white with black dots for the other side. Probably not the most practical choice, but I’ll use the flower print for the front.
I plan to make this reversible. Alison and I talked about how that would work at the last Sew Happy hour so I have an idea in my head on how to do it now.
I finished the Flapper Apron for my mom. This is the project I started at Sew Day with Gerre and then worked on at the most recent BAM Sew Day.
I spent a few hours on Sunday finishing it up. Now I can show it at the BAM meeting in a few weeks and give it to my mom after she returns from Portland.
This is a pattern you can use with a yard of fabric. You cut the pattern out on the bias. The biggest attraction is that you only *need* one yard of fabric to make it. I usually make the apron reversible, which takes 2 yards. I like to give myself a little breathing room with 1.25 yards on each side. Still, the pattern is designed for one yard of fabric.
Paint Tube Flapper Apron – reverse side
The pattern directions say nothing about directional fabric. When I made my youngest SIL’s apron the fabric was directional. I decided not to pay attention to the fabric motif and just made the apron. The motif is at an angle, but SIL didn’t complain. On my mom’s version, I wanted the paint tubes to go up and down. Gerre helped me look at the different options for cutting it out. I was concerned about the bias, but since this is an apron, I decided not to care too much.
I did notice when I was finishing it that the edges are all, now, on the bias. For an apron, who cares? For other types of garments, I wouldn’t make this choice. Also, I top stitched all around the edge, so the bias shouldn’t be an issue.
Read about this pattern on the first post I wrote about it. Long term readers will know that I have made several of these aprons. You can see all the aprons I have made, including several from this pattern, using the tag.
I got myself organized after the week’s strange schedule to head to Sew Day. Surprisingly, we had 15 or so people in attendance. I was the first to show up after Mary and she was pleased because she wasn’t sure if anyone would show up. Holiday weekend and all, I suppose.
We always set up and clean the tables first. As we were doing that, others showed up and offered help.
I brought cutting and organizing only, after bringing my machine last time for the Jelly Roll Rug. I have a number of projects that needed attention and brought them along.
First, the Flapper apron I am making as a gift needed some corners. It took me longer than expected to get these corners ready to sew, but I finally accomplished the task and moved on to the bag.
I decided to make a Poolside tote as a gift. Mine was a pain to make, but I started using it for my knitting and find it very useful. I think my recipient will probably find it useful as well.
En Provence – Peaky & Spike example
I also brought the Mondo Bag to arrange, but didn’t get to it. Cyndi and I spent some time talking about Deb Tucker rulers. She recently bought the V Block ruler, which I think works on the same principle as my Split Recs ruler with a slightly different outcome. The V Block ruler makes Peaky and Spike blocks, like I used for En Provence. Perhaps I’ll try it when I get around to the next En Provence quilt.
I brought a pattern for a nightshirt that I wanted to cut out. Mary is a master at garments and she finished all of her projects. I asked her to cut out my nightshirt and she agreed. This means I got a third more done than I thought I would!
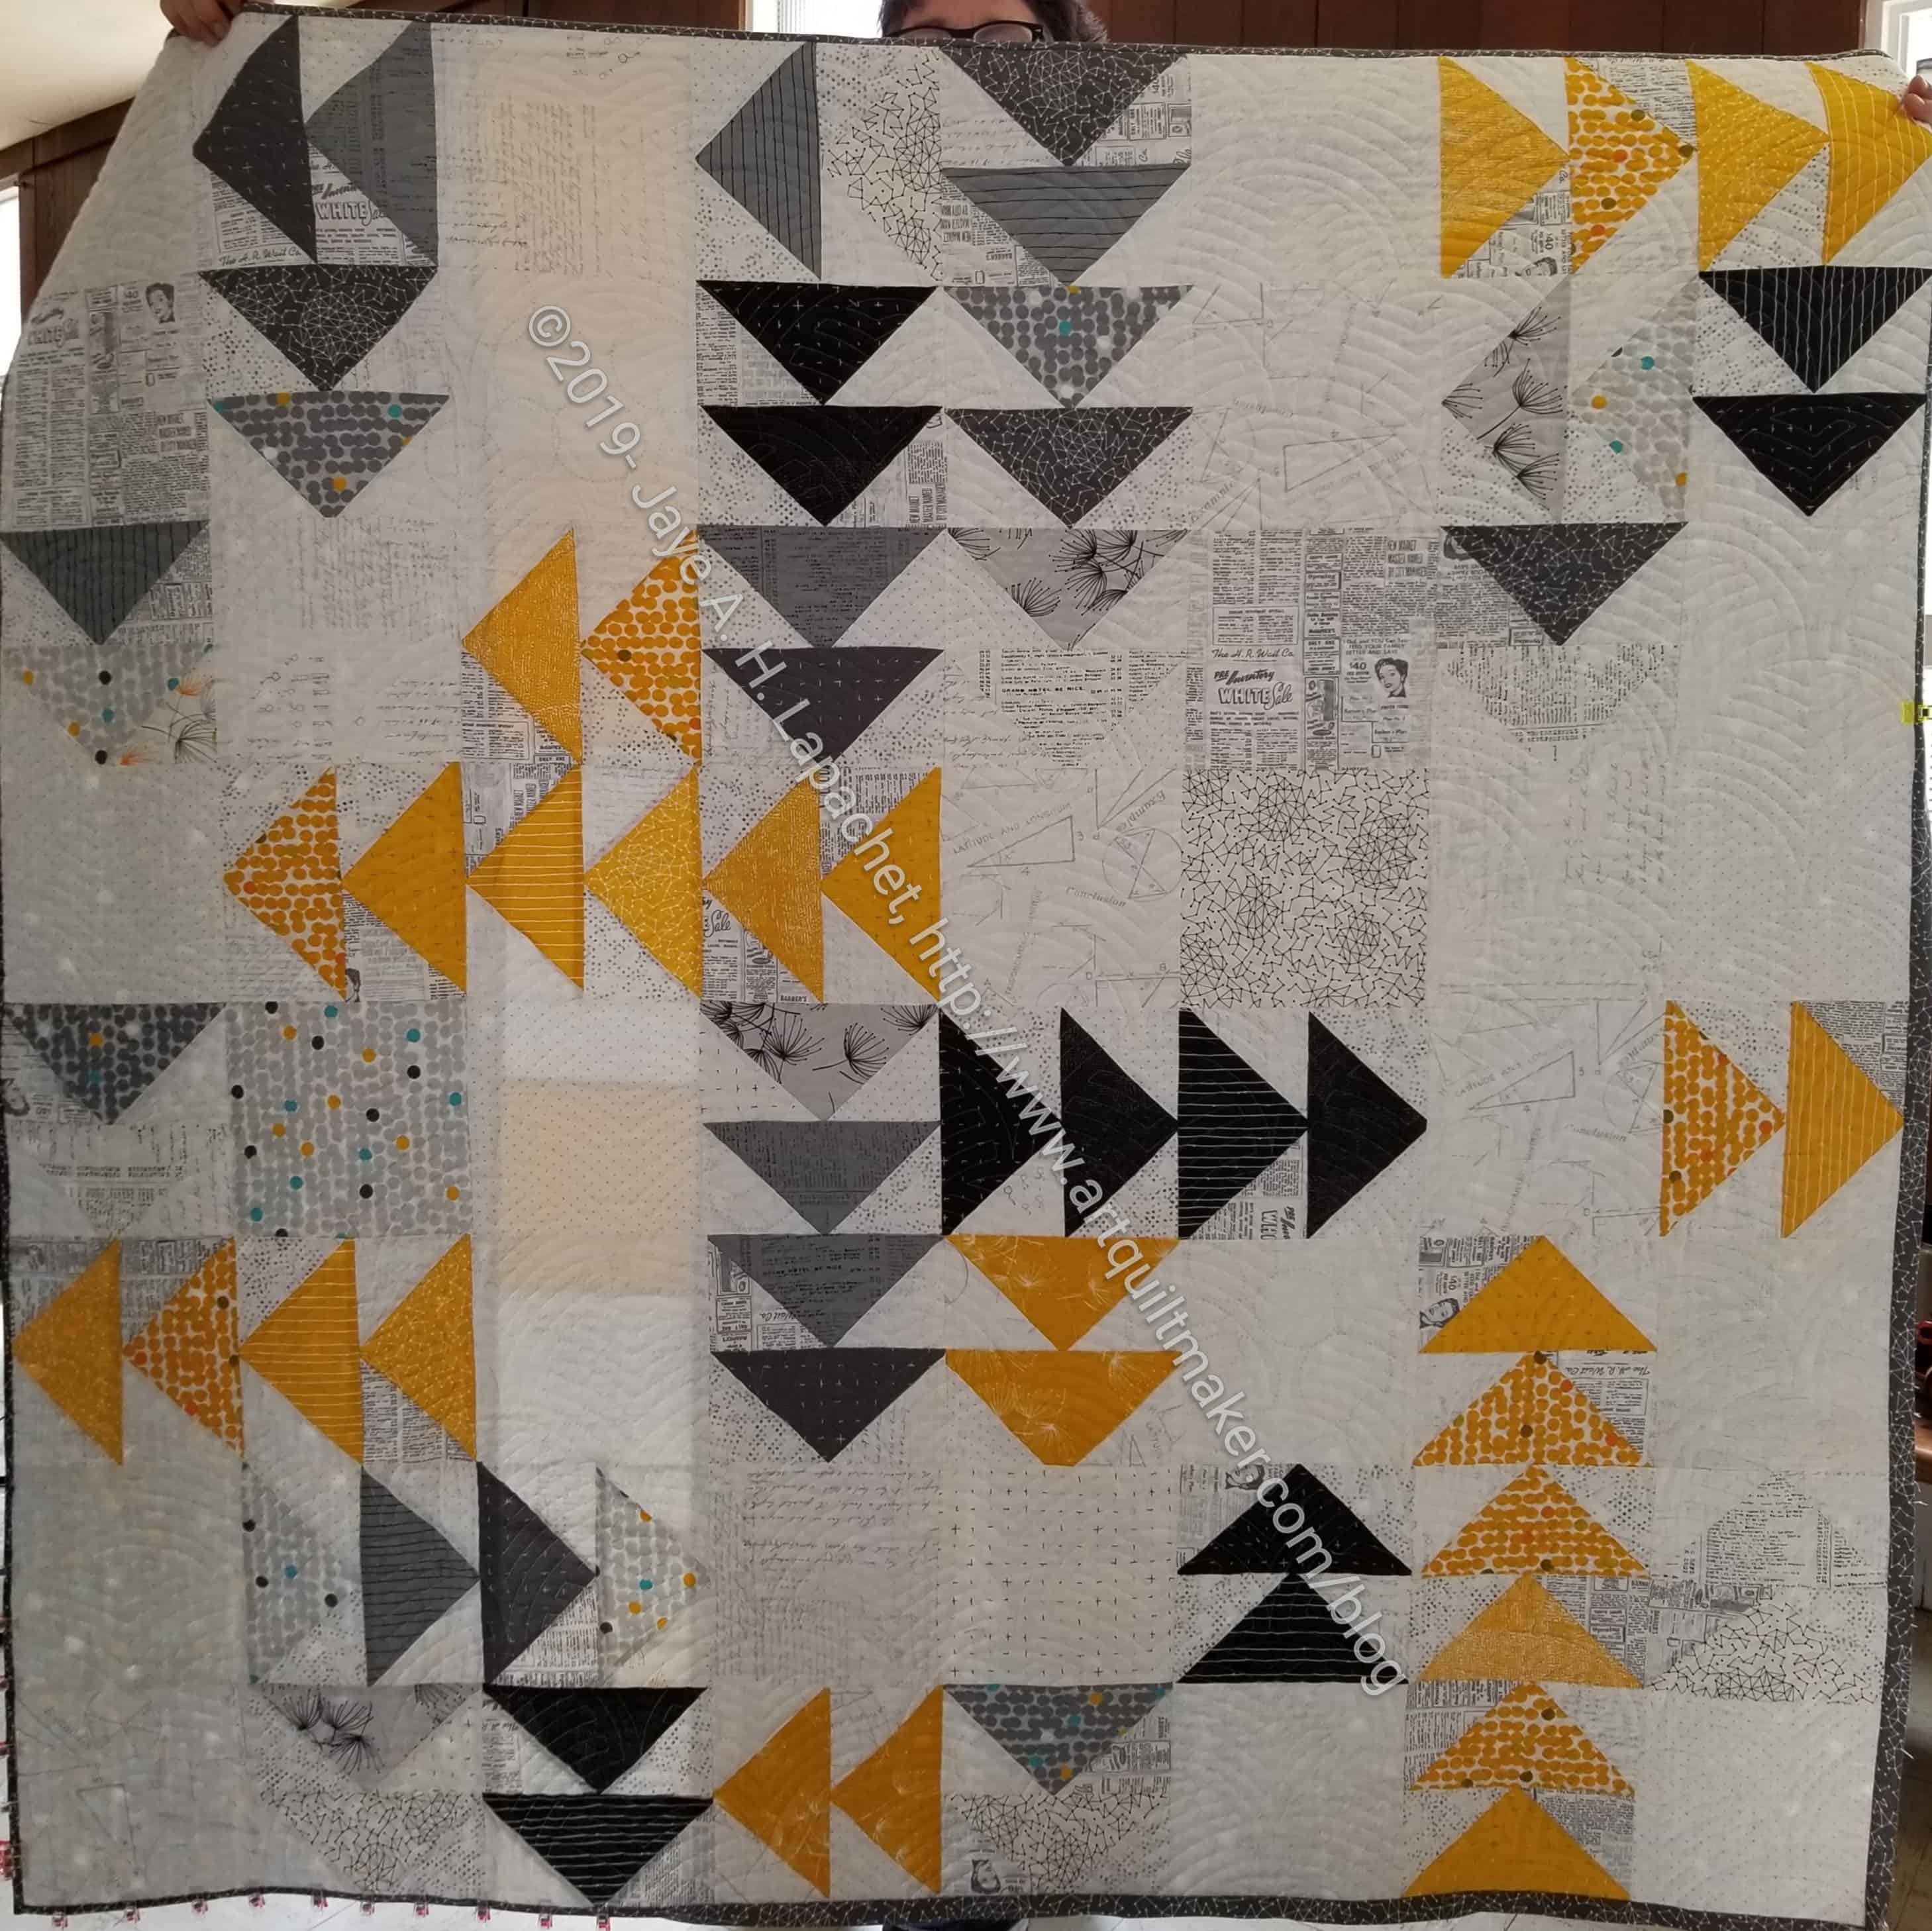
Marty’s Flying Geese quilt
People were busy at Sew Day as well. Marty was working on a binding. Her use of mustard is the best I have seen. the colors in general are great. The piece is not too depressing, but also very neutral. It’s hard to see, but the background fabrics are low volume text (and text-like) prints. She used some that I used in En Provence. I also like the way she placed the Flying Geese. This is Marty’s fourth quilt! She was able to finish the binding today and we all cheered.
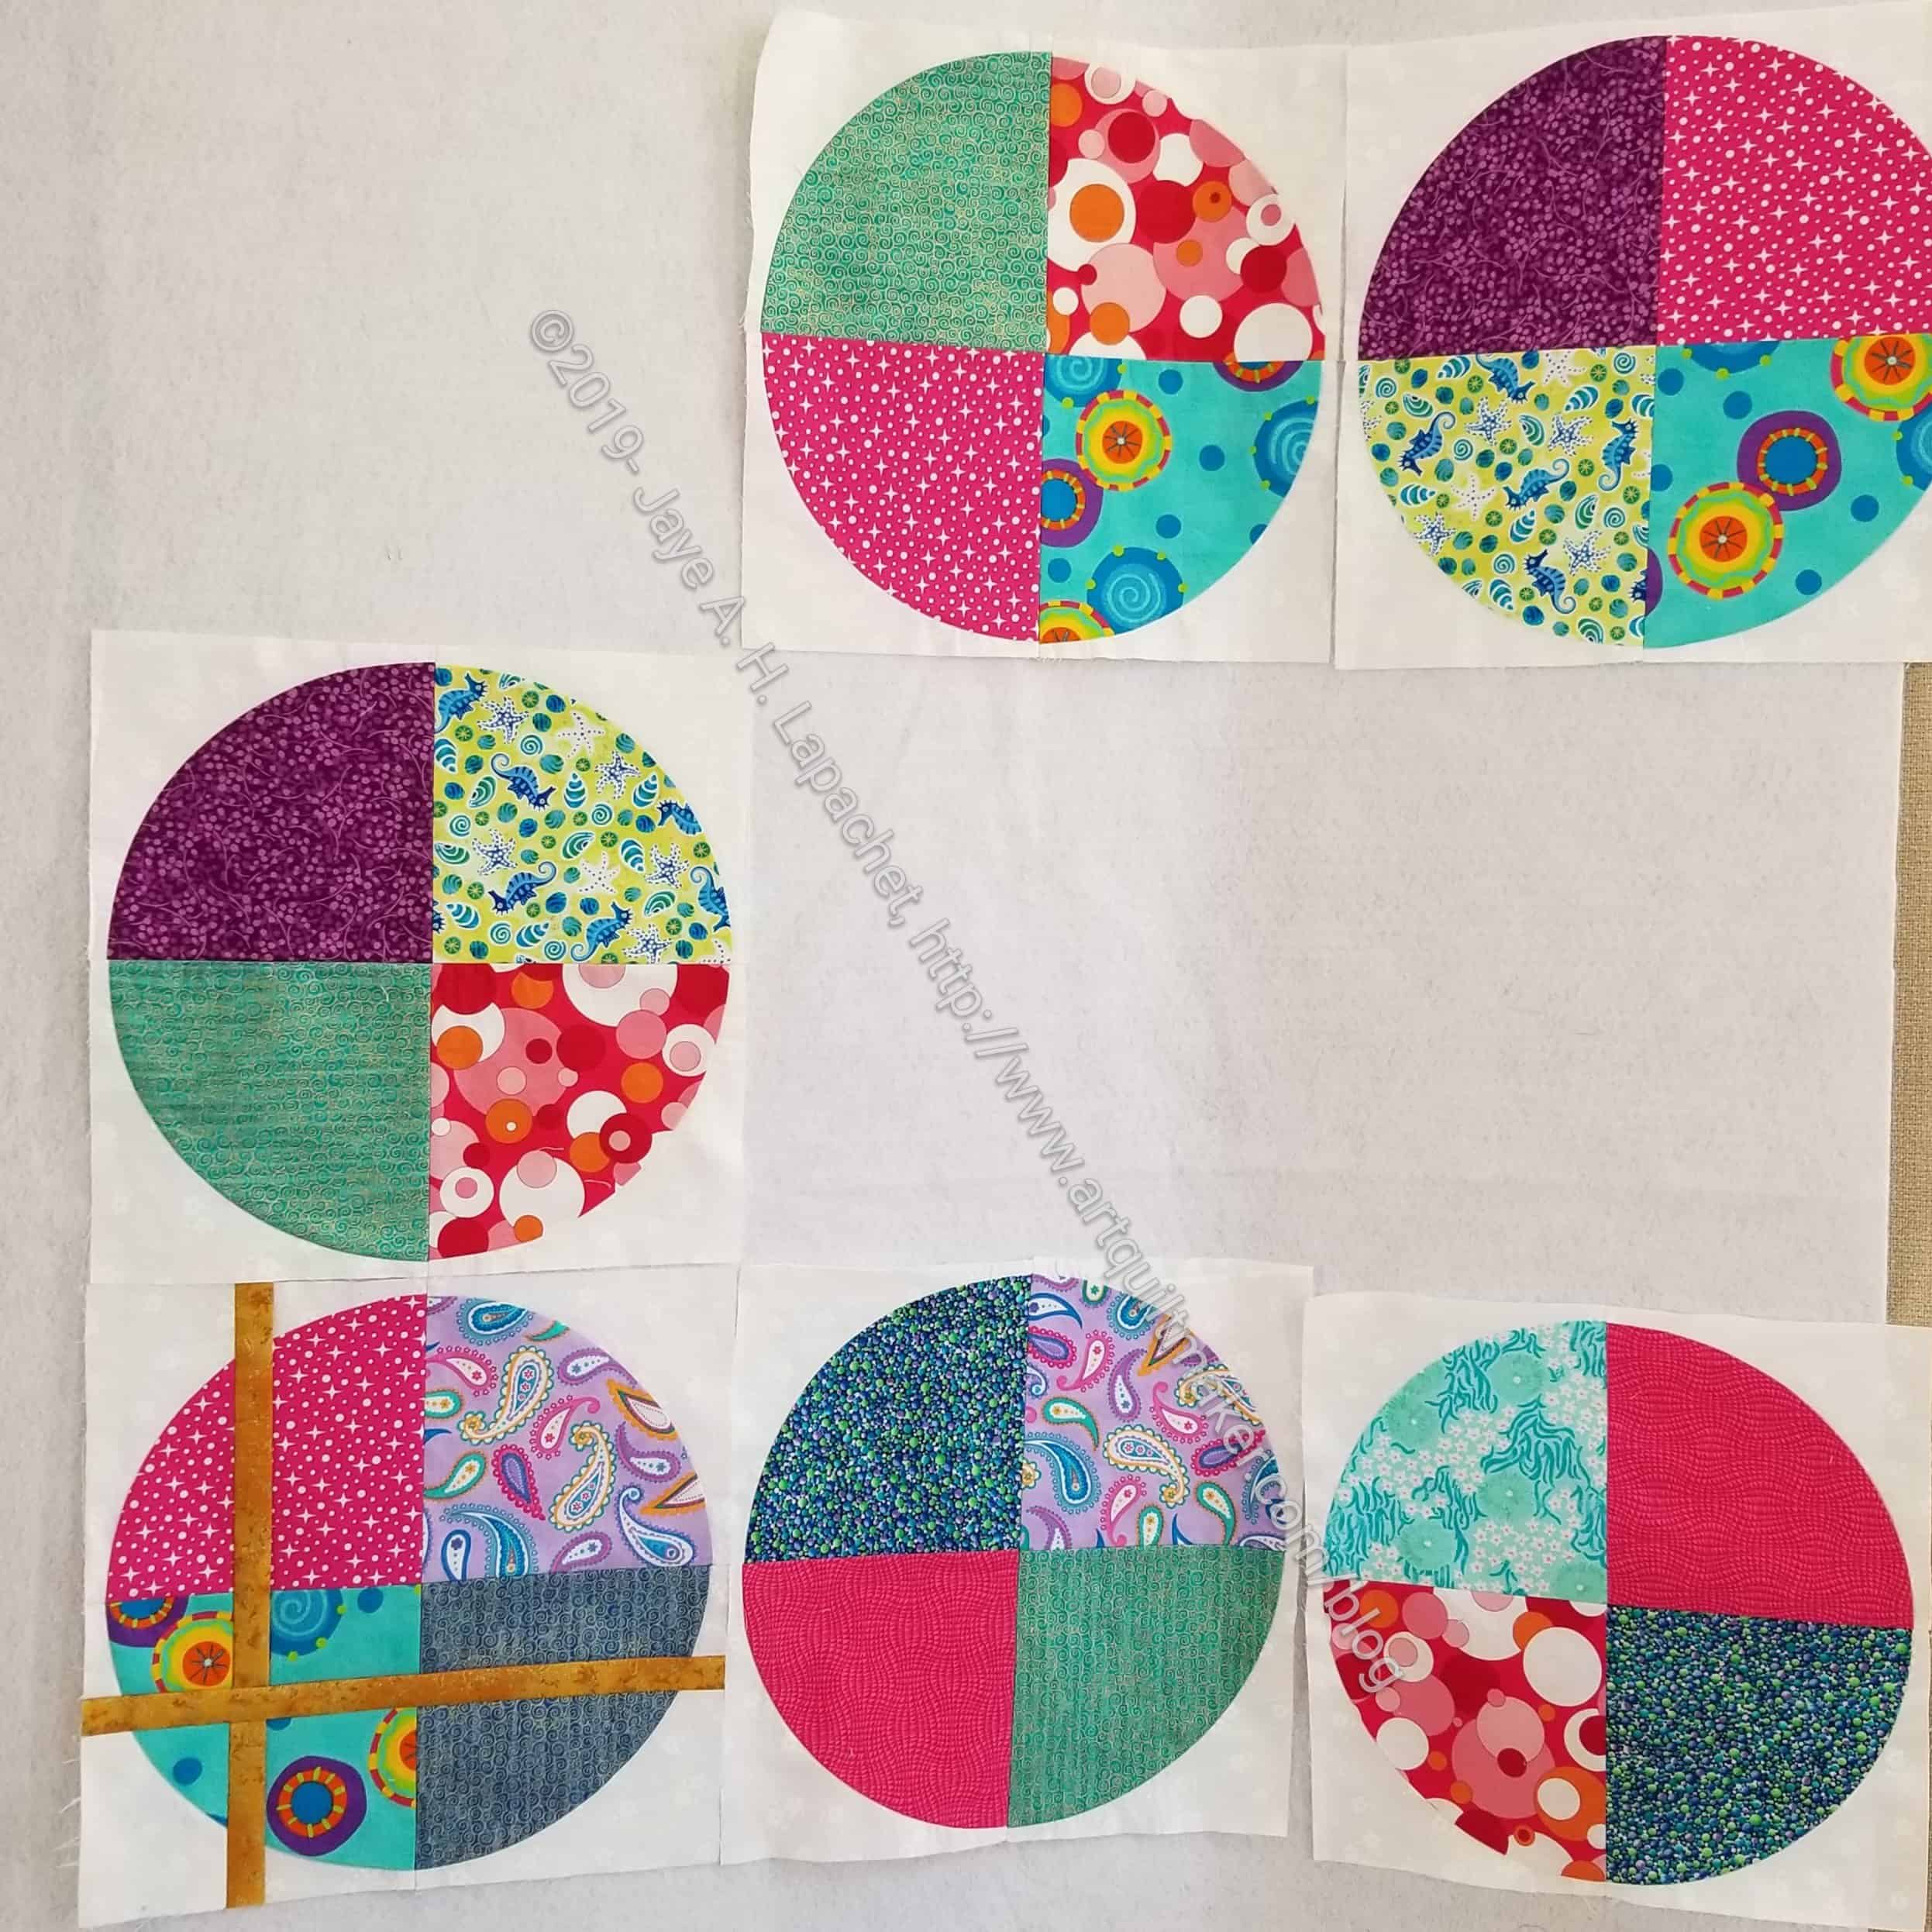
Cyndi’s JCB blocks
I was pleased to see Cyndi’s Jen Carlton Bailly blocks. She decided to make enough for a large wall hanging or small lap quilt and was working on them.
The fabrics she is using are very cheerful. I saw one overlap with my Circle tablerunner!
I didn’t get a photo after she finished it, but I did see it and it looks really great.
Once finished with the circles, she took out a different piece she is making from Camille Roskelly’s Simply Retro book. I saw the quilt she is making in the book and didn’t think much of it, but Cyndi’s version uses more dark fabrics in the background. It is much more appealing *to me* that way.
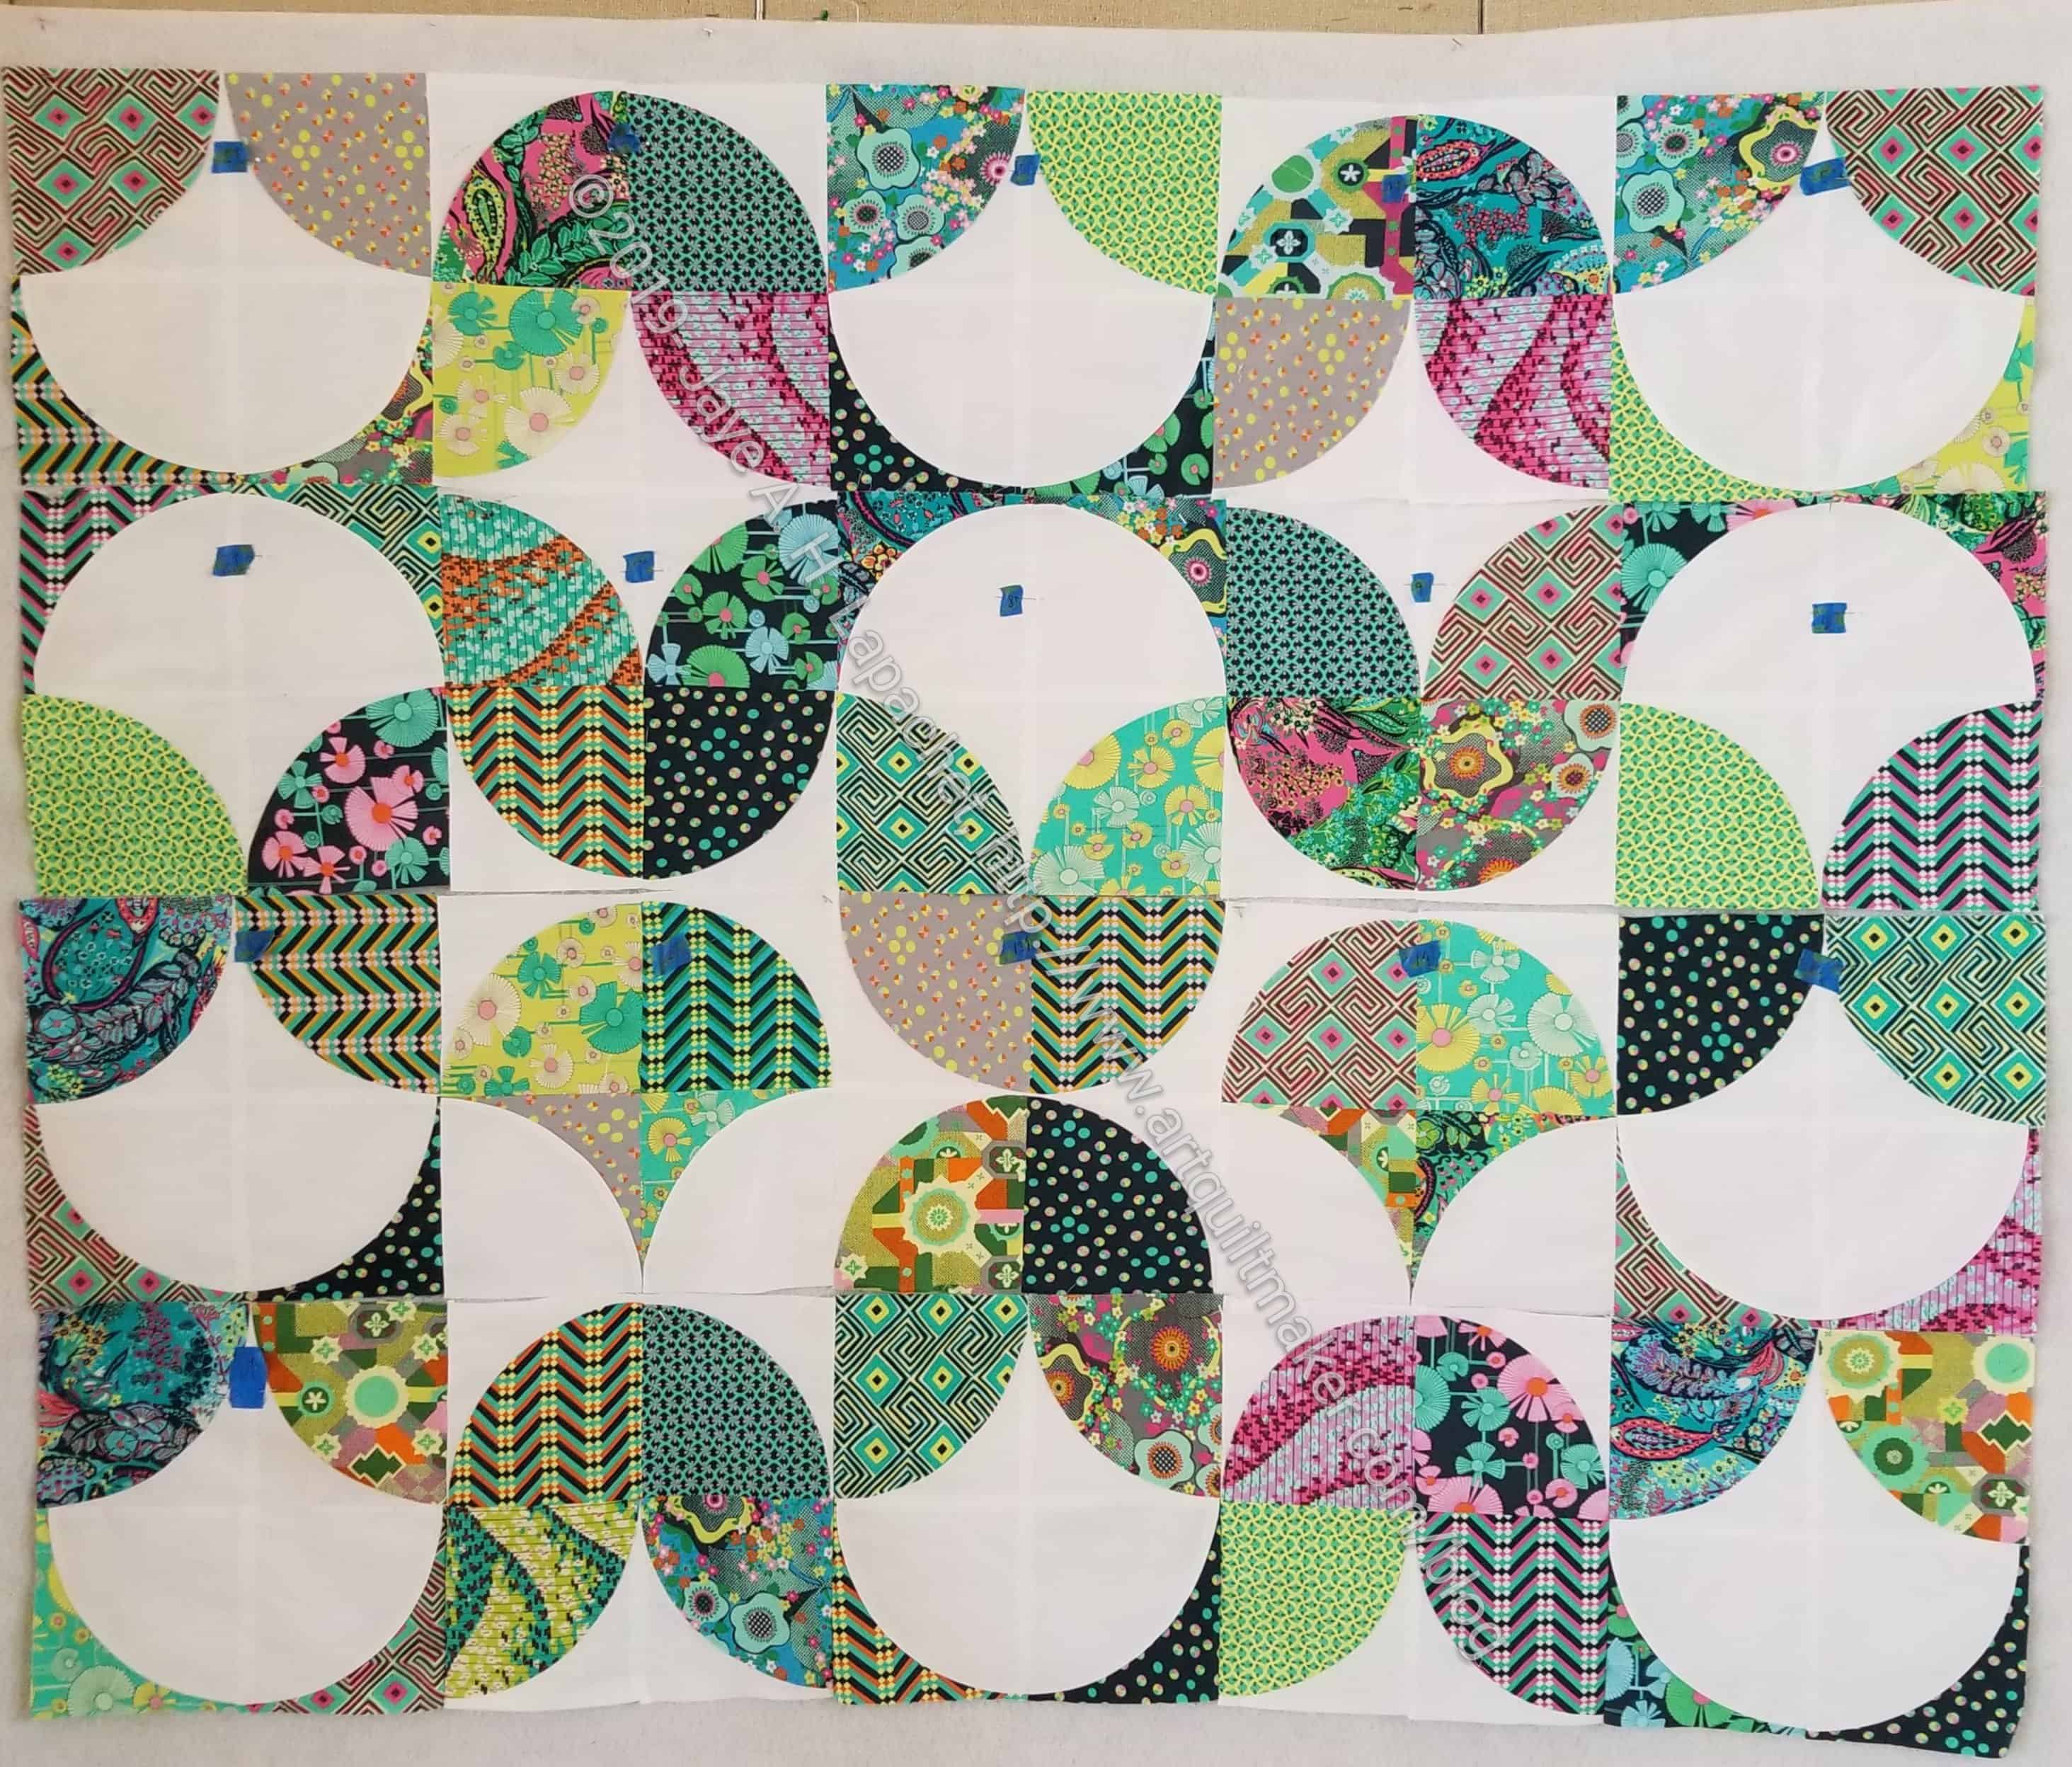
Gerre’s Jen Carlton Bailly blocks
Finally, Gerre also brought her Jen Carlton Bailly blocks. She had sewn a couple of rows together and was able to get the top done by the time Sew Day was over. She used Amy Butler fabrics and the piece is fantastic.
I have some new projects to work on and some of the small tasks ready to move me to my next steps. I am happy!
The other day I went and sewed with Gerre. A number of small projects and small elements on larger projects, have been bugging me. I brought a number of those things with me and made good progress.
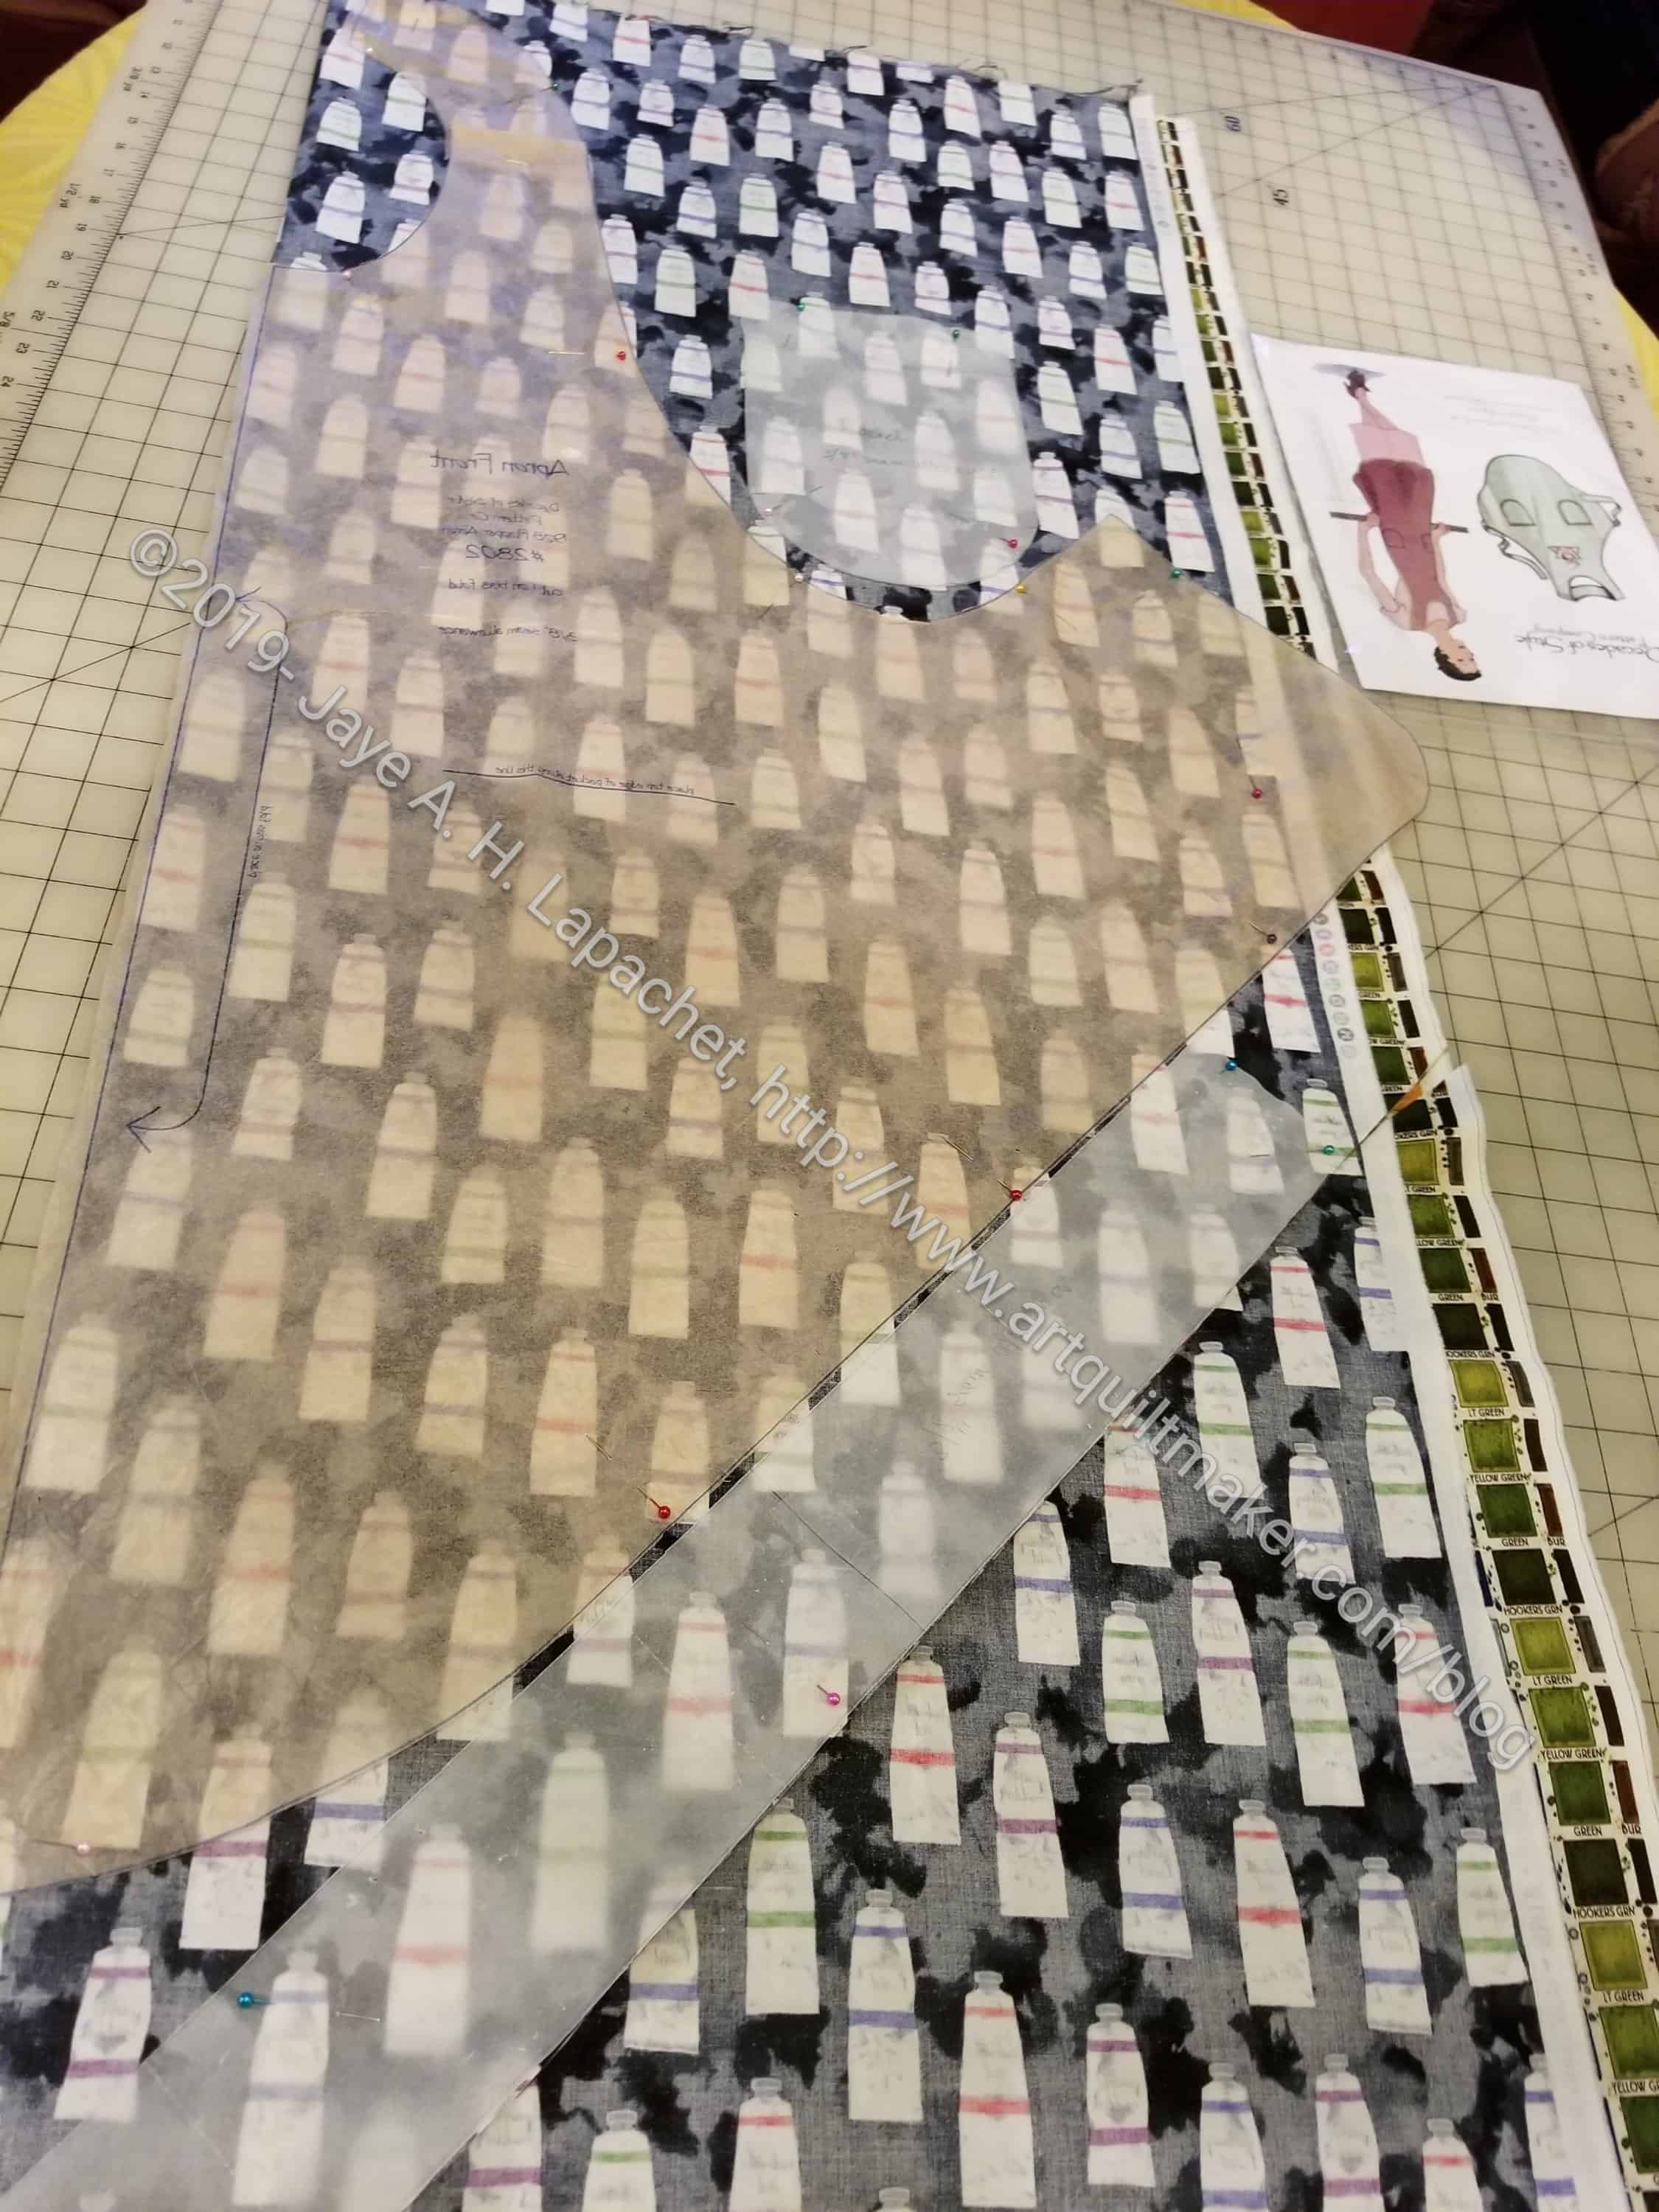
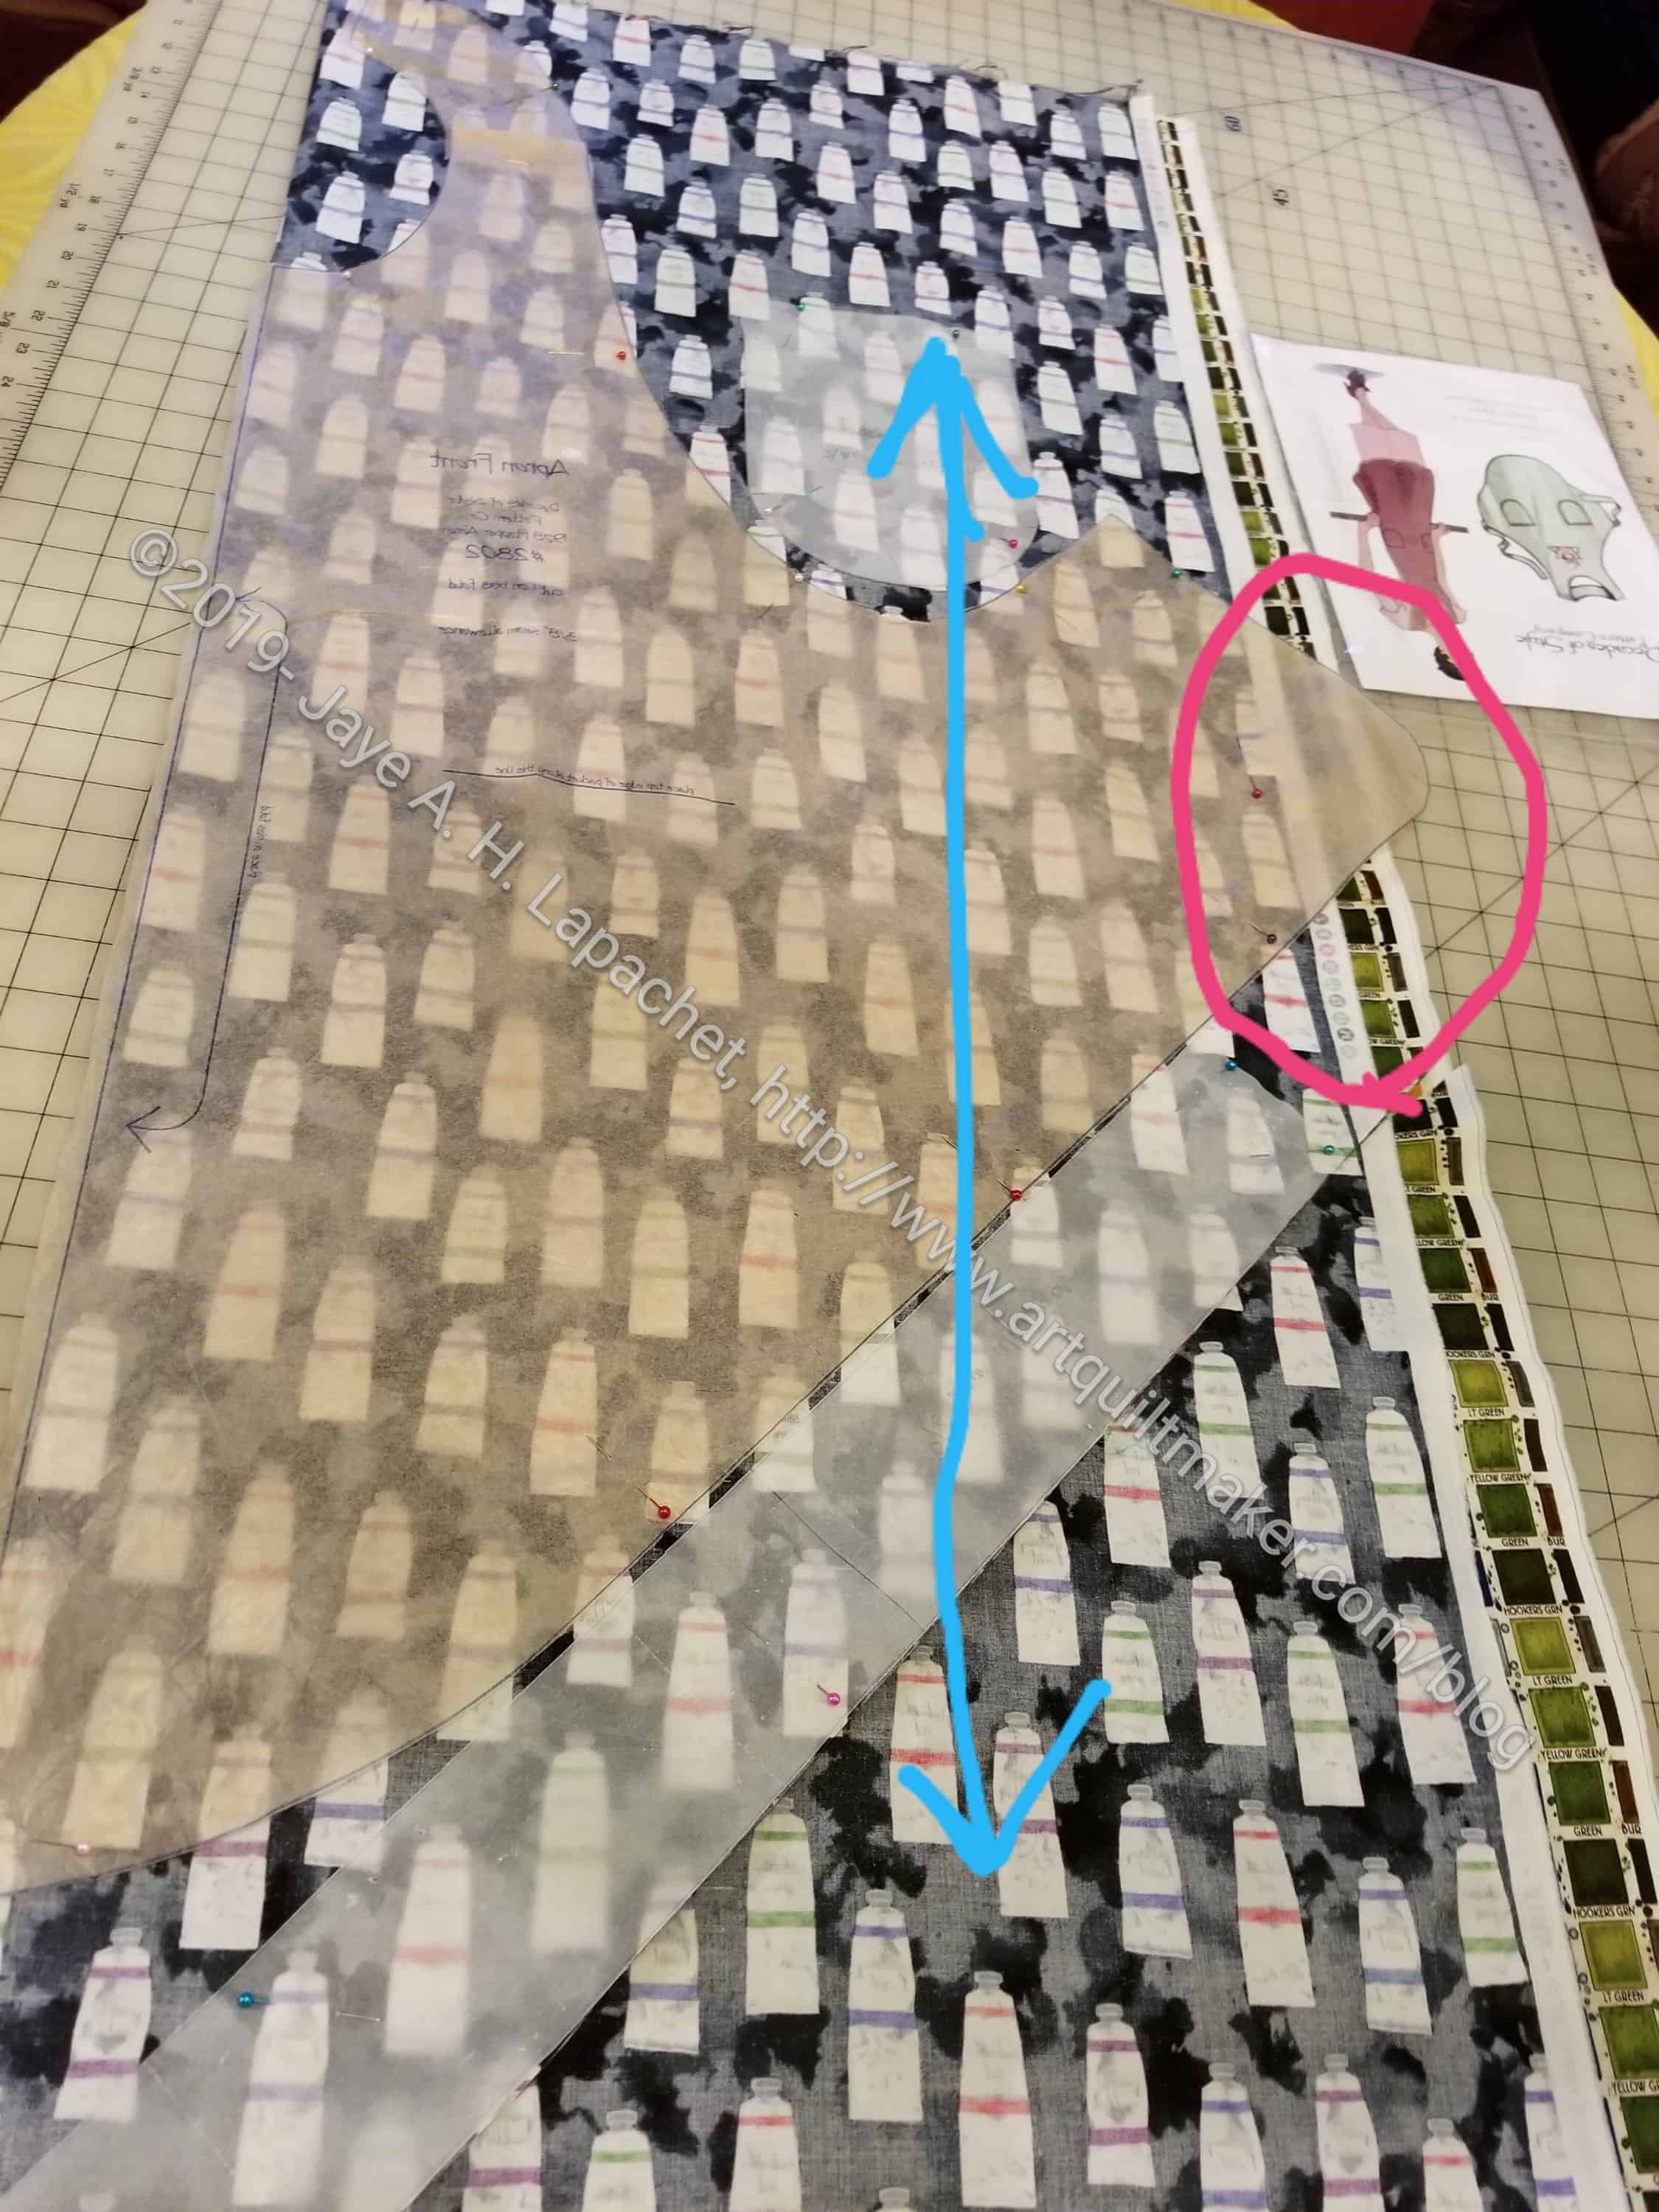
Flapper Apron for Mom-preparing to cut
One project was the Flapper Apron I promised to make for my mom. This is a real garment sewing project, so I had to lay out the tissue and prepare to cut.
One of the things I like about this pattern is that you can lay the fabric out, folded on the bias, lay the pattern pieces out and cut them all from 1 yard of fabric. If you want a reversible apron, you need two yards. Still that is a lot of bang for your fabric buck.
Gerre and I tried a lot of different things to get the paint tubes on the fabric to line up straight on the fabric. We couldn’t figure it out. We decided that since it was an apron, it would probably be ok to not cut it on the bias. If have more fabric if I need to remake it. I am doing it this way so the motifs are oriented properly.
Sadly, there was no information on the pattern focusing directional fabric. The directions are complete, but brief.
Flapper Apron for Mom-preparing to cut with challenges
Folding the fabric lengthwise parallel with the selvedge posed some challenges. One challenge is that the whole piece is on the straight of the grain. I figured that, since it is an apron, it will probably be fine. I did put the tie on the bias to enhance tying. The motifs will not be straight, but I think that will be fine.
The larger problem is that the folded fabric is not wide enough for the whole pattern. I plan to add some small pieces on, matching as best I can.
Every time I type ‘apron’ it comes out as aprong. I am not sure why, but it may mean that I need to stop making aprons.
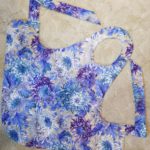
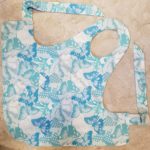
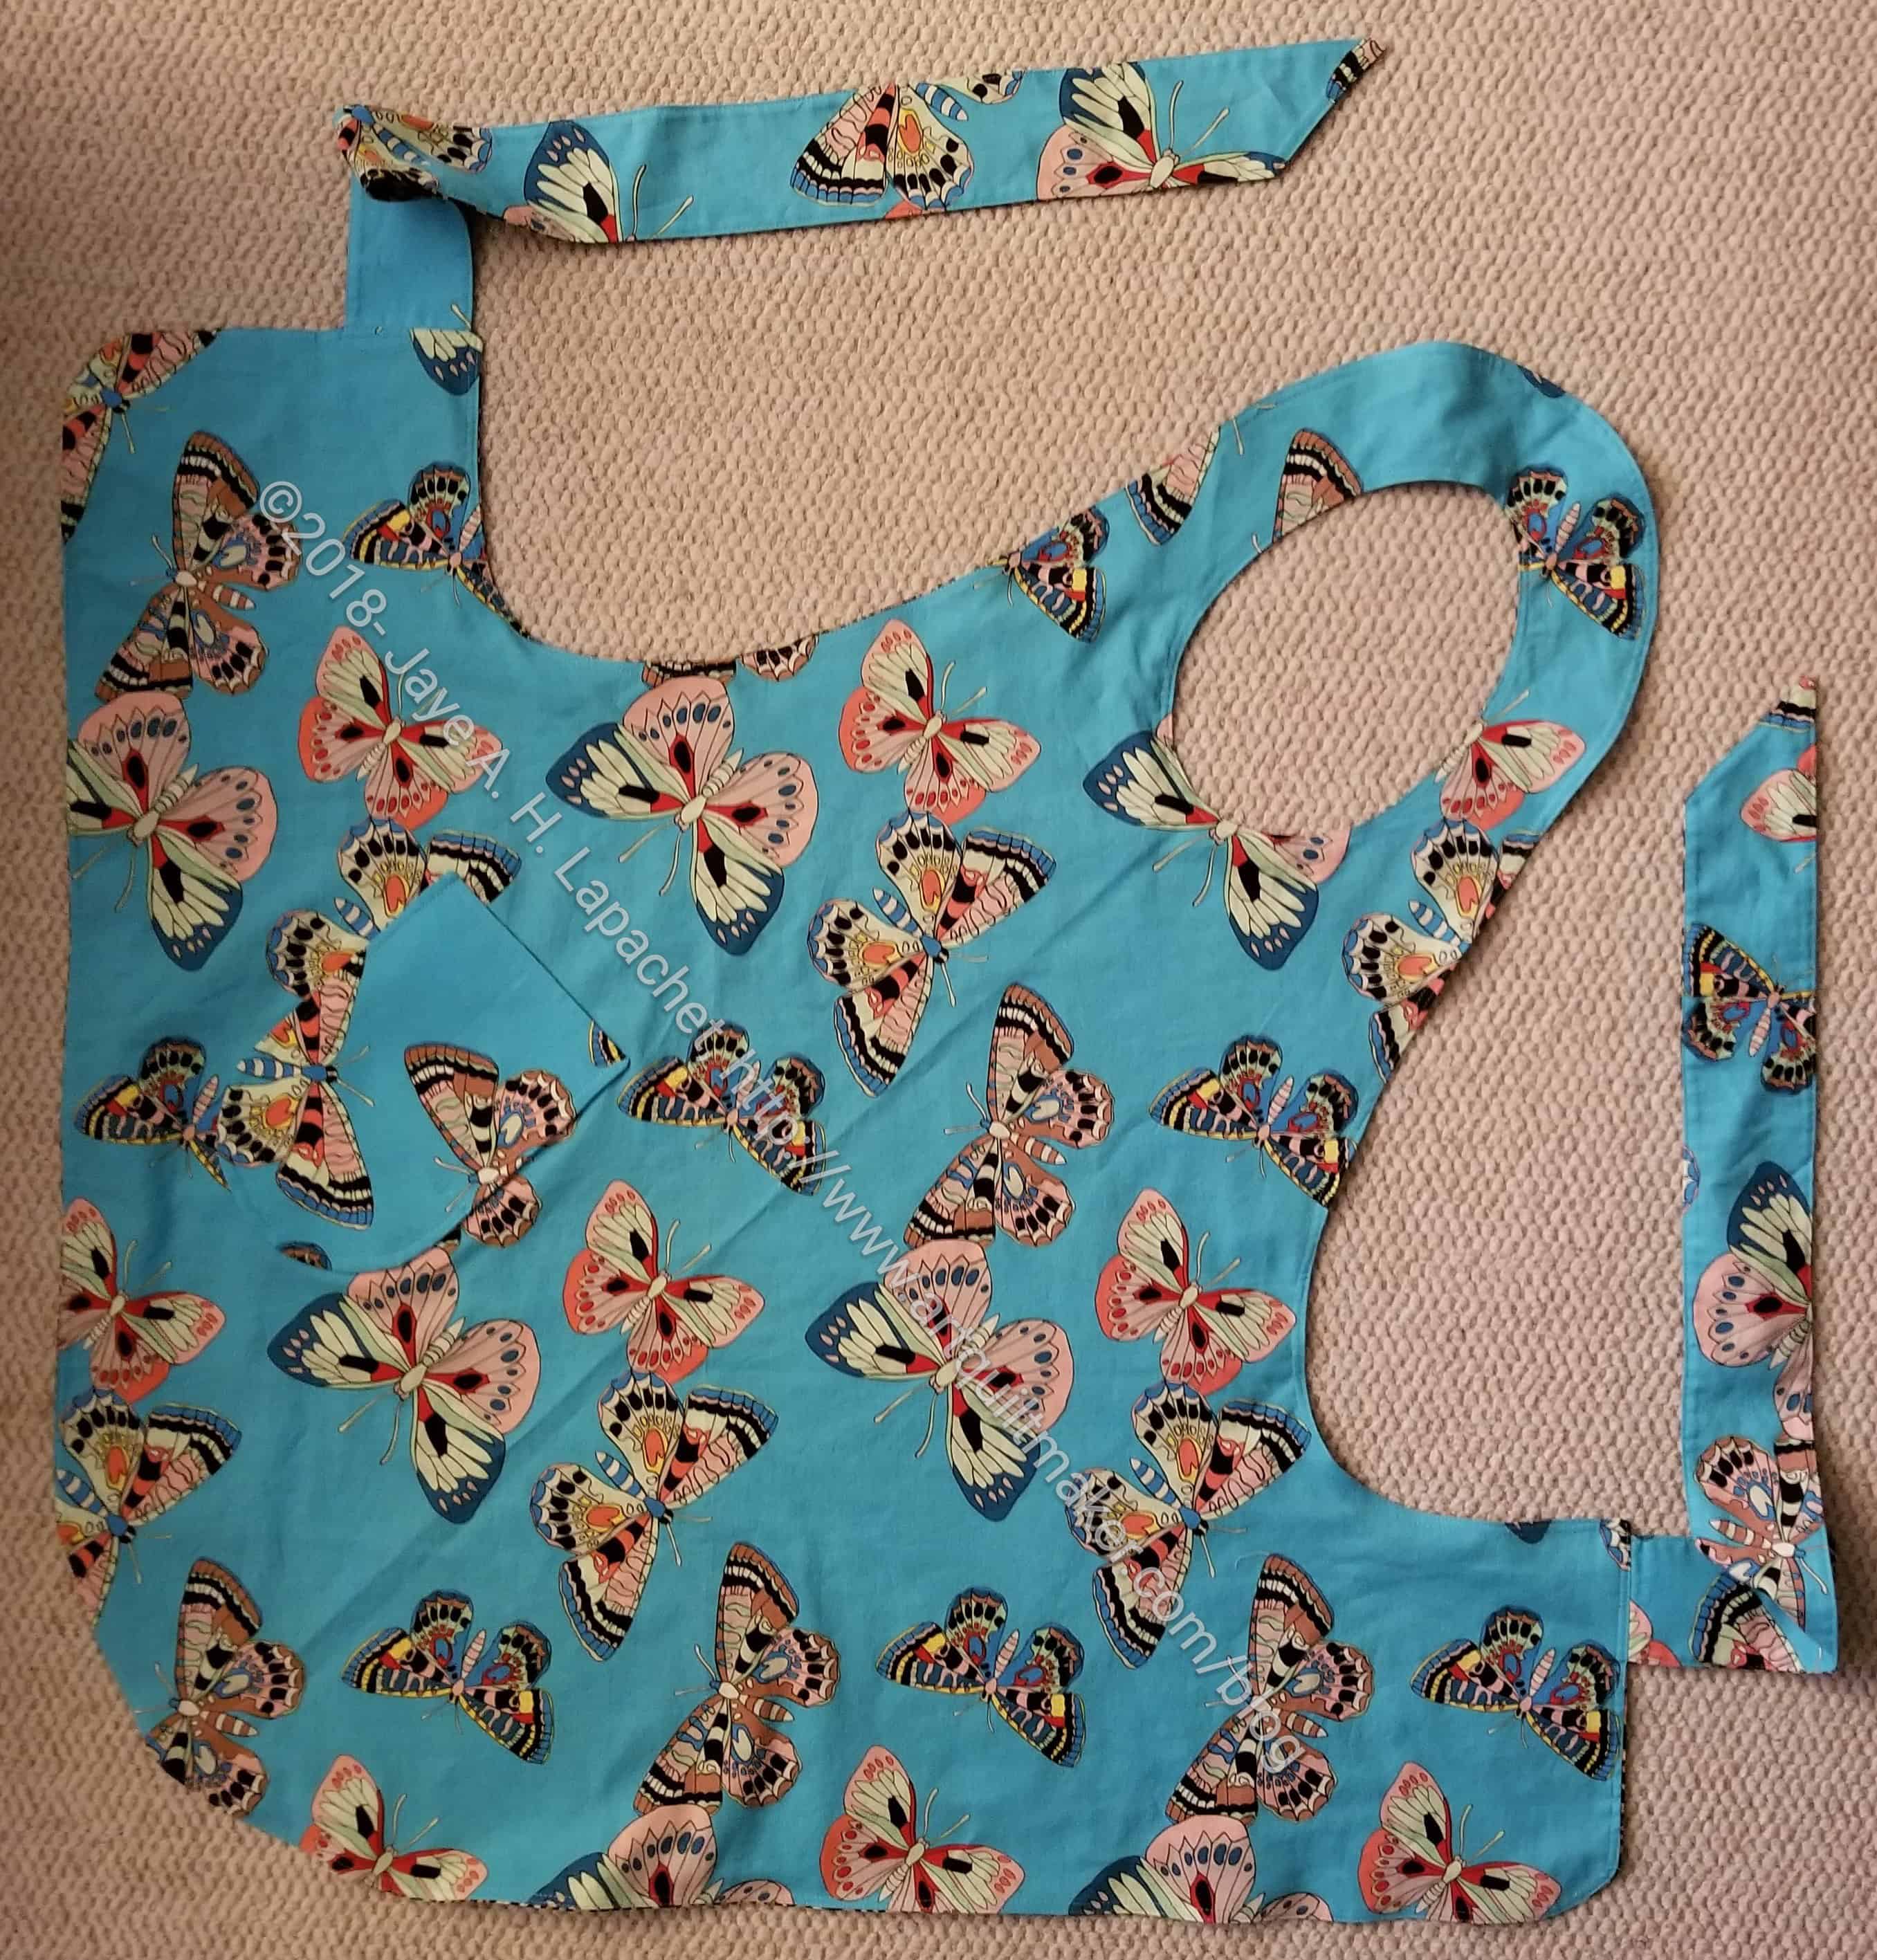
Flapper apron – Chrysanthemum side
Flapper apron – Butterfly side
I finally finished my Flapper apron. I have been using the Church Ladies apron I made awhile ago, though it is not perfect. I don’t like the interfacing in the handles, because it makes them hard to tie. I also don’t like the construction.
I made a Flapper apron for myself awhile ago. The neckline was too long and gaped, so I didn’t like it for myself. It was the one I put in the Fair last year and was well sewn. It couldn’t compete against the tailored blazer in the same category (ERGH!!!), but I still did my best. I never wore it so I sent it off to a friend who admired it. Why not? She loves it.
I adjusted the pattern a little bit on this newest version and the neckline is much better. Not as long, so it doesn’t gape.
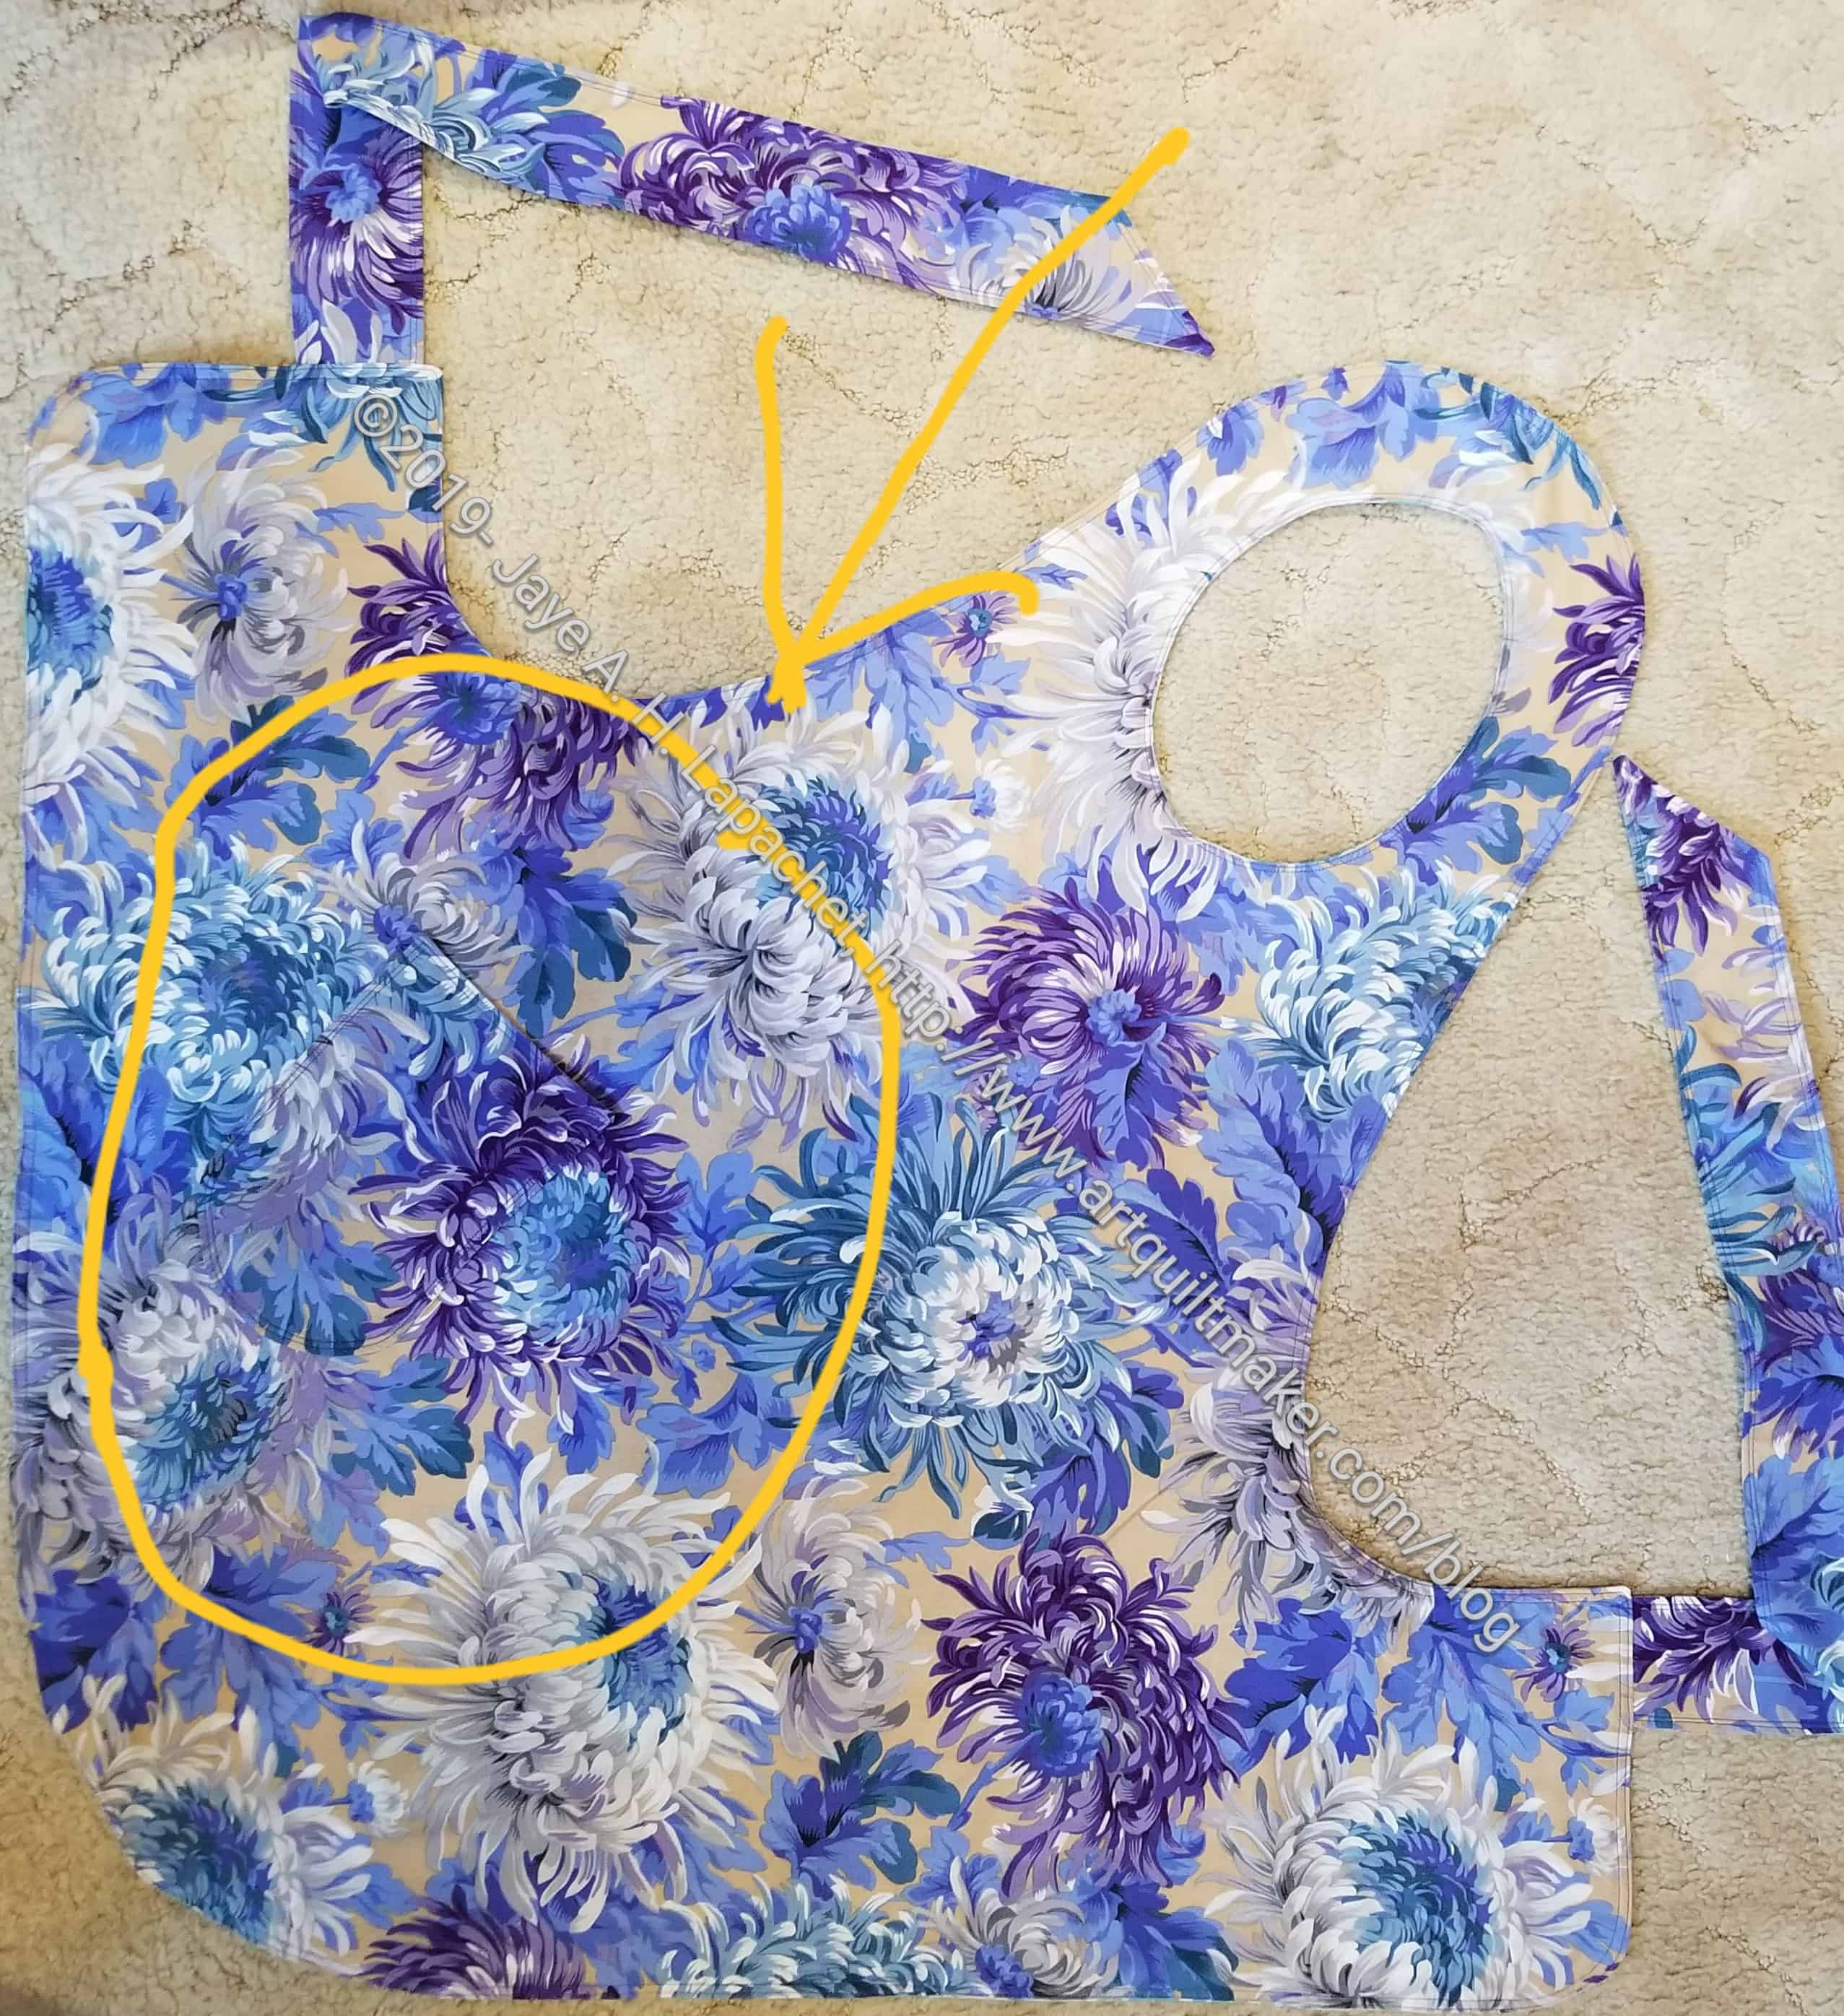
Flapper apron – pocket detail
When I put the pockets on, I was pleased to see that I had matched up one of the Chrysanthemums! I didn’t do it on purpose, but am so pleased. I know the pocket blends into the fabric, so enlarge the photo to see my triumph. 🙂
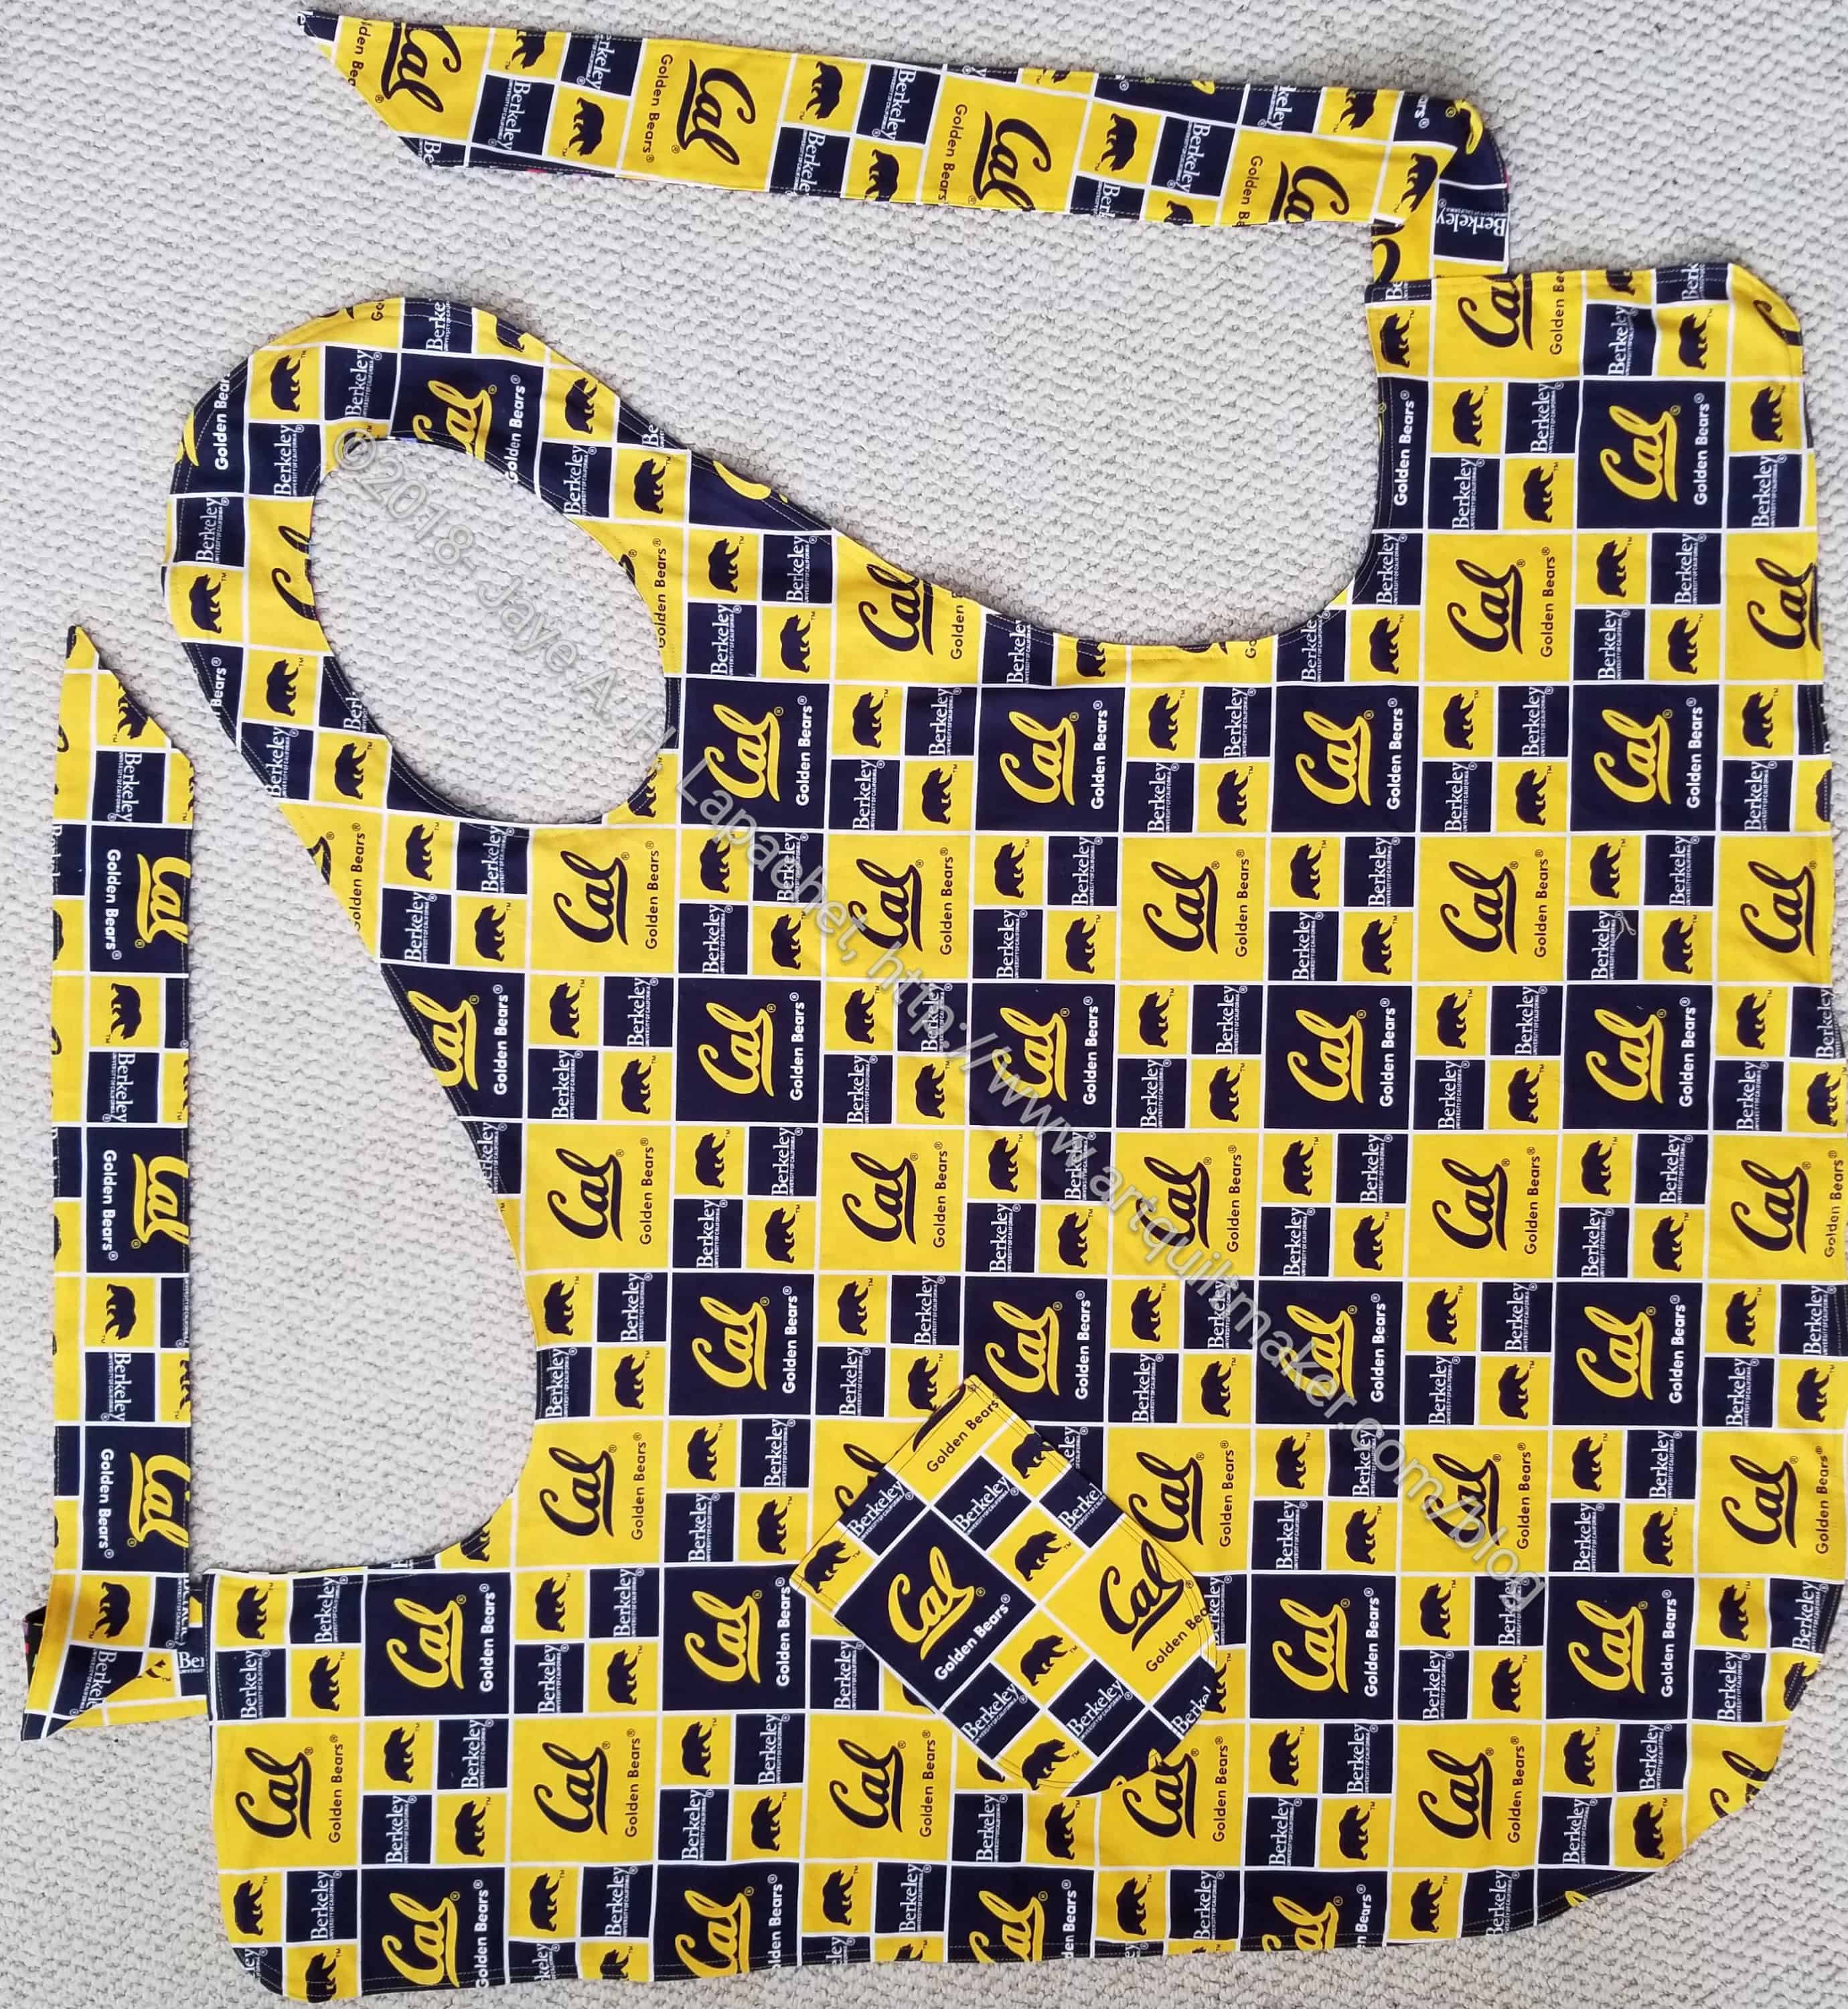
This is the last apron I made from the marathon of cutting I did at Sew Day way back in August.
It took me time to make them all, but repetition is good for projects like this.
SIL #1 is also a Cal fan and a Cal graduate who attends football games regularly. She got the last of my Cal fabric.
Dee’s Apron, front – Christmas 2018
I learned that the pattern prevents the maker from laying out directional fabric in a certain orientation, but I am ok with the logo being on the diagonal when it is worn.
The front looks good and I hope it won’t show the dirt.
I was pleased to finish the last apron well in advance of Christmas. I didn’t work on any of them in a particular order. I picked one up and went to work finishing it and they were all done in time for Christmas.
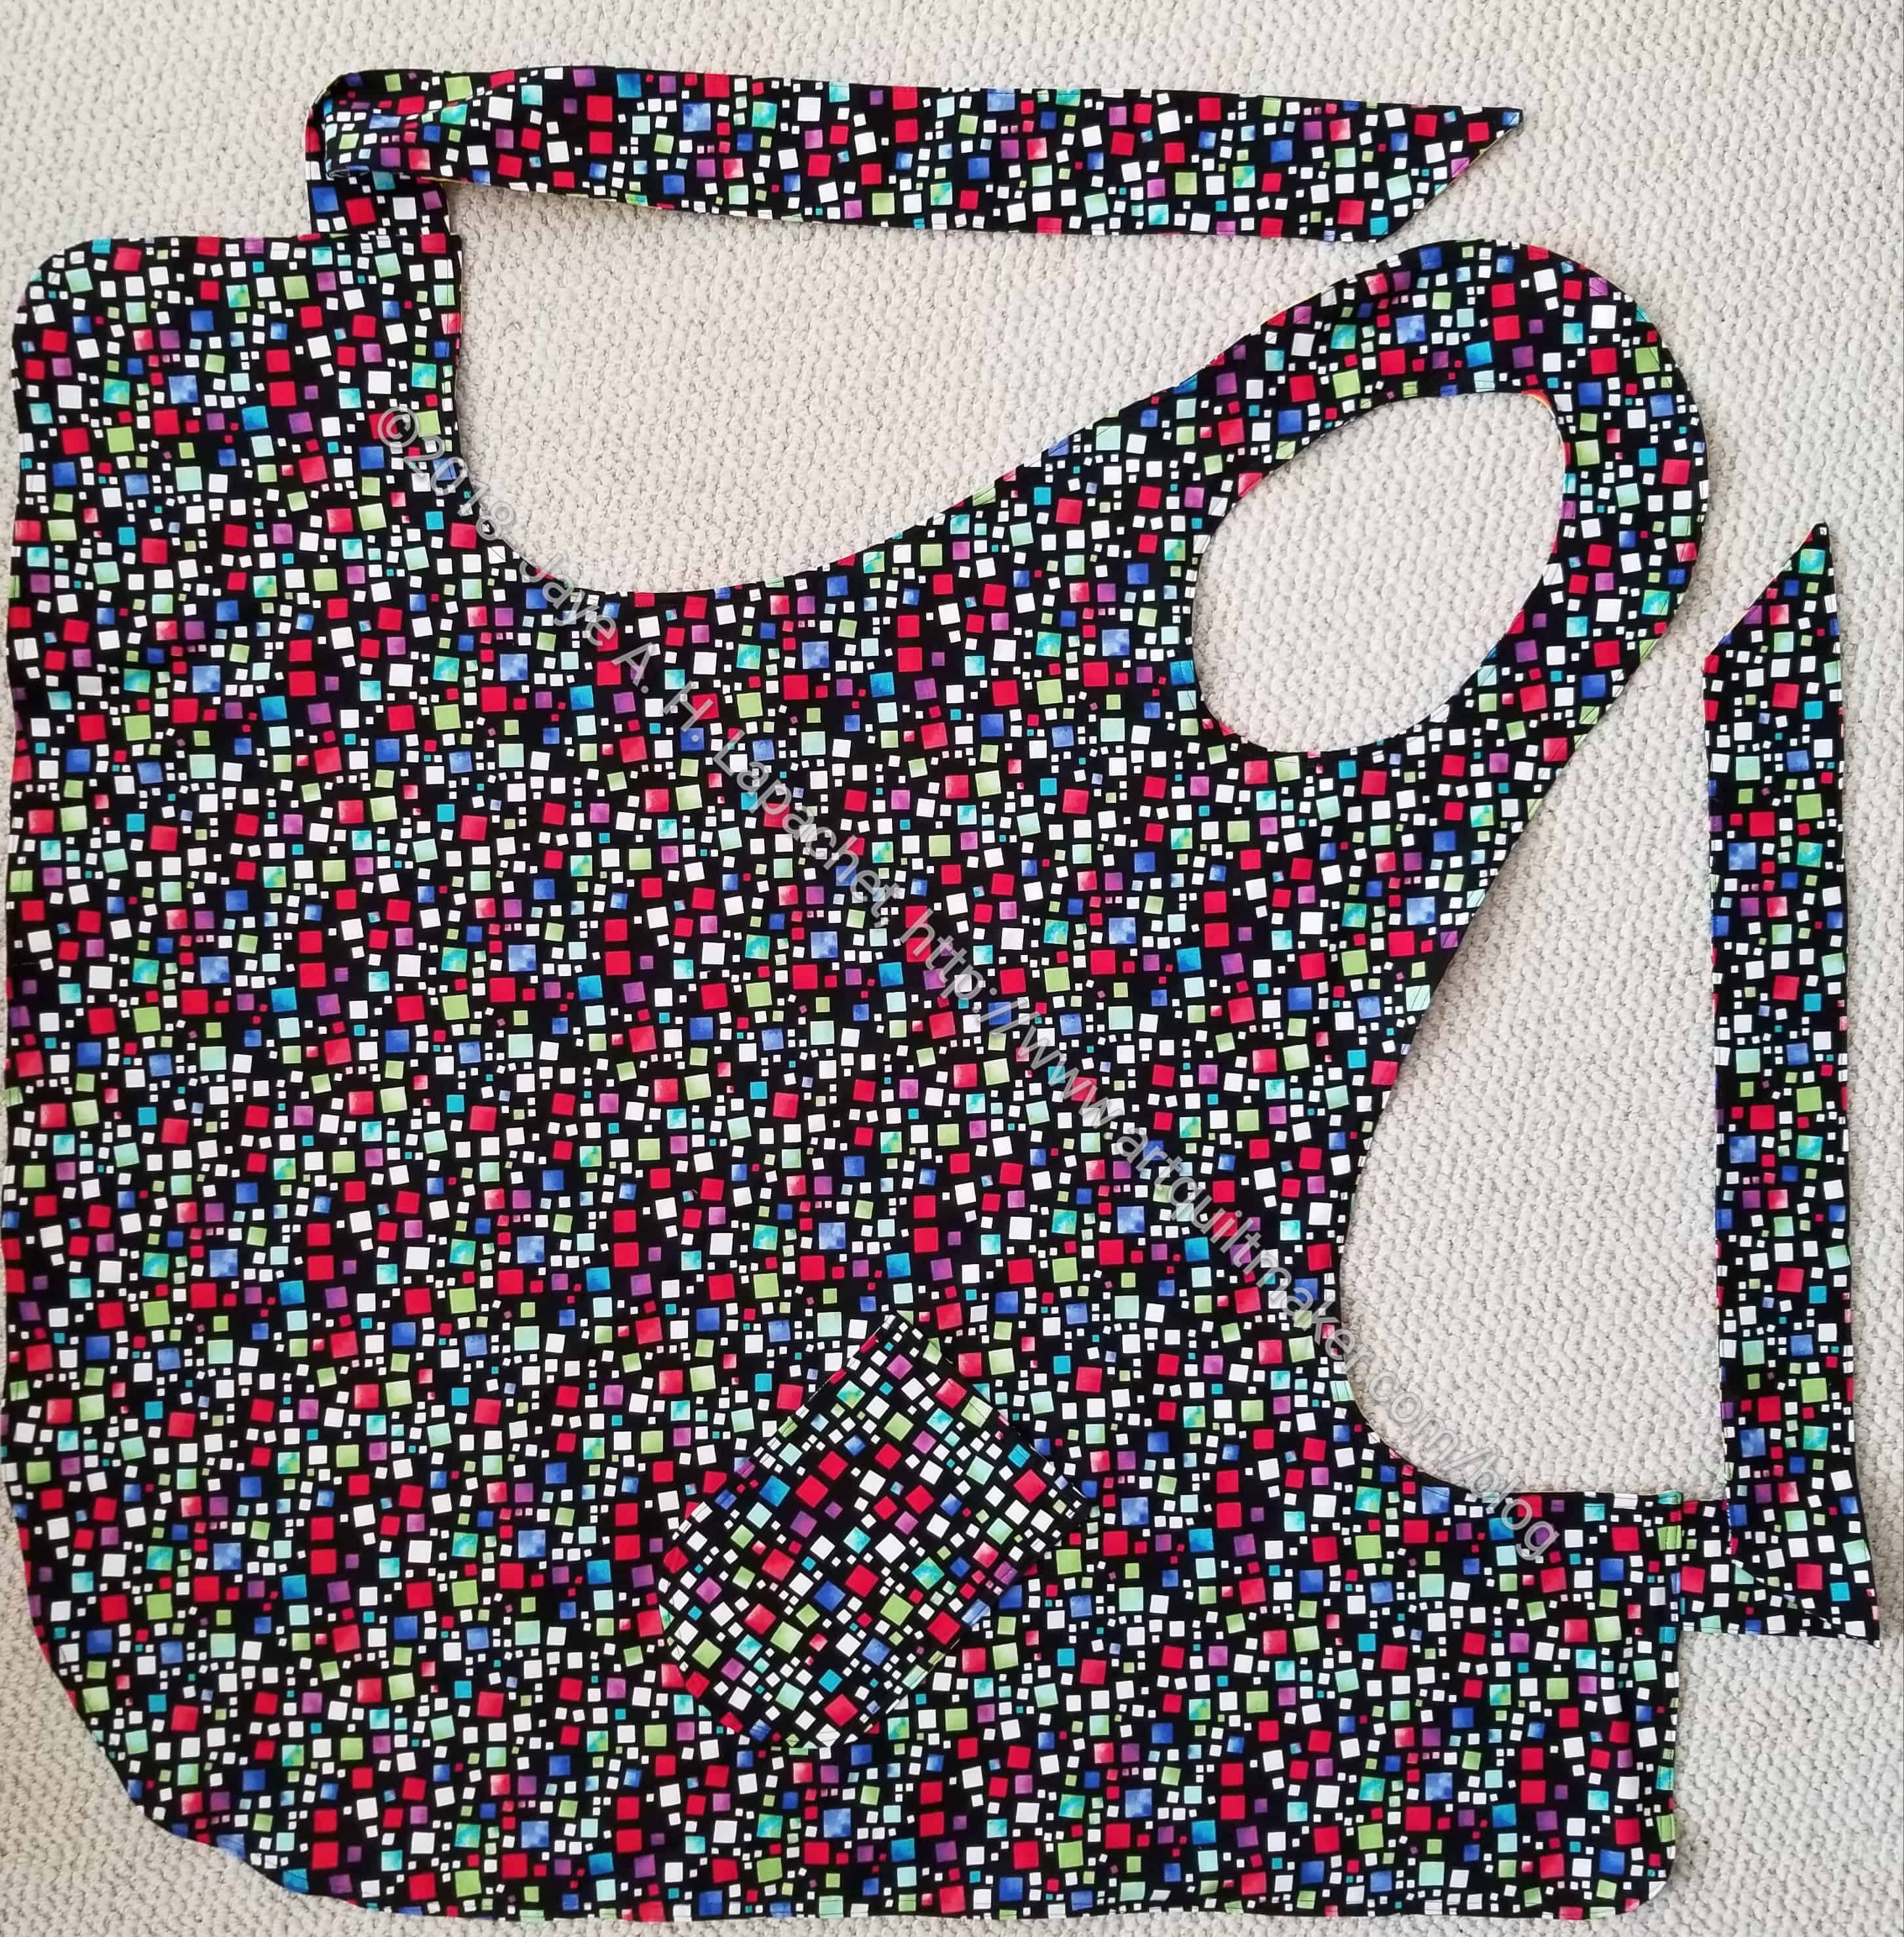
May’s Apron, reverse – Christmas 2018
The flowers on this one are really vibrant and I hope SIL #3 likes it. The reverse side is more her style.
This is the urban chic + Football crazy version of the Flapper Apron. It is for DH’s youngest sister and I know she will love the Cal side. The urban chic side was hard to choose, so I picked something that I liked and thought had a good chance of being on target. I bought the Marsha Derst fabric in Portland at Pioneer Quilts.
I am not sure which side will be the front. I wear an apron often when I am working in the kitchen and I tend to always wear the same side as the outside.
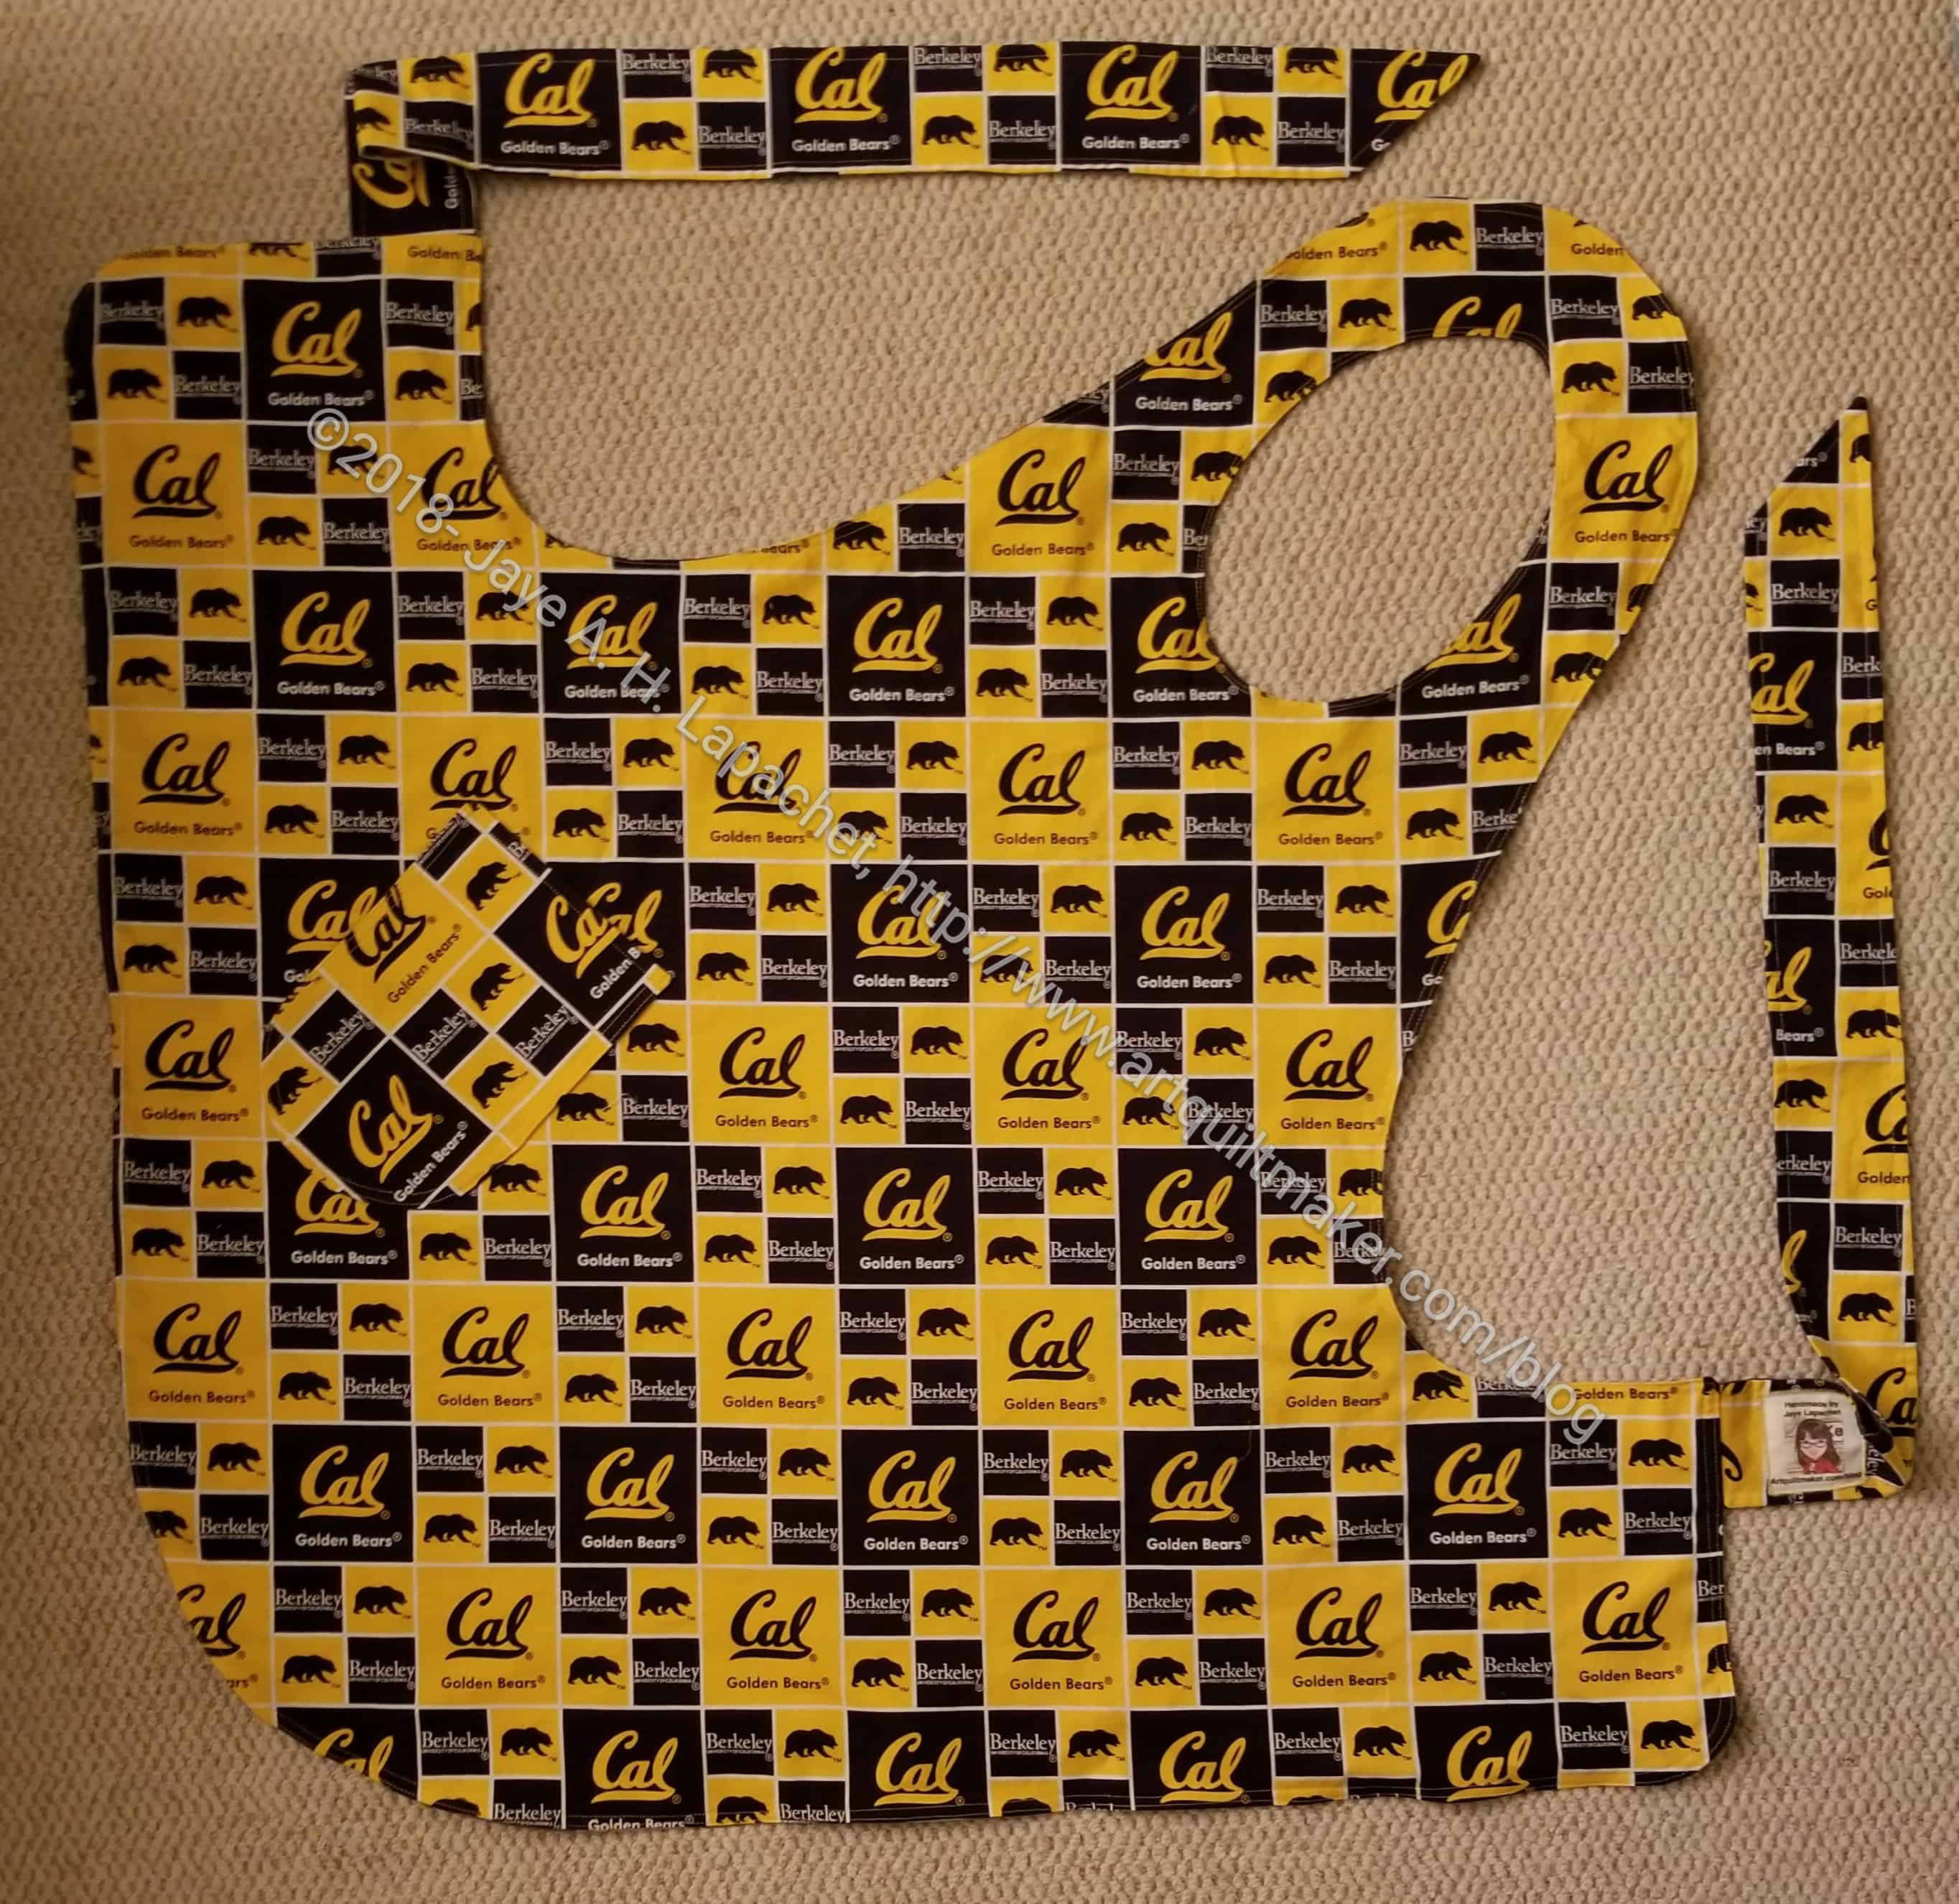
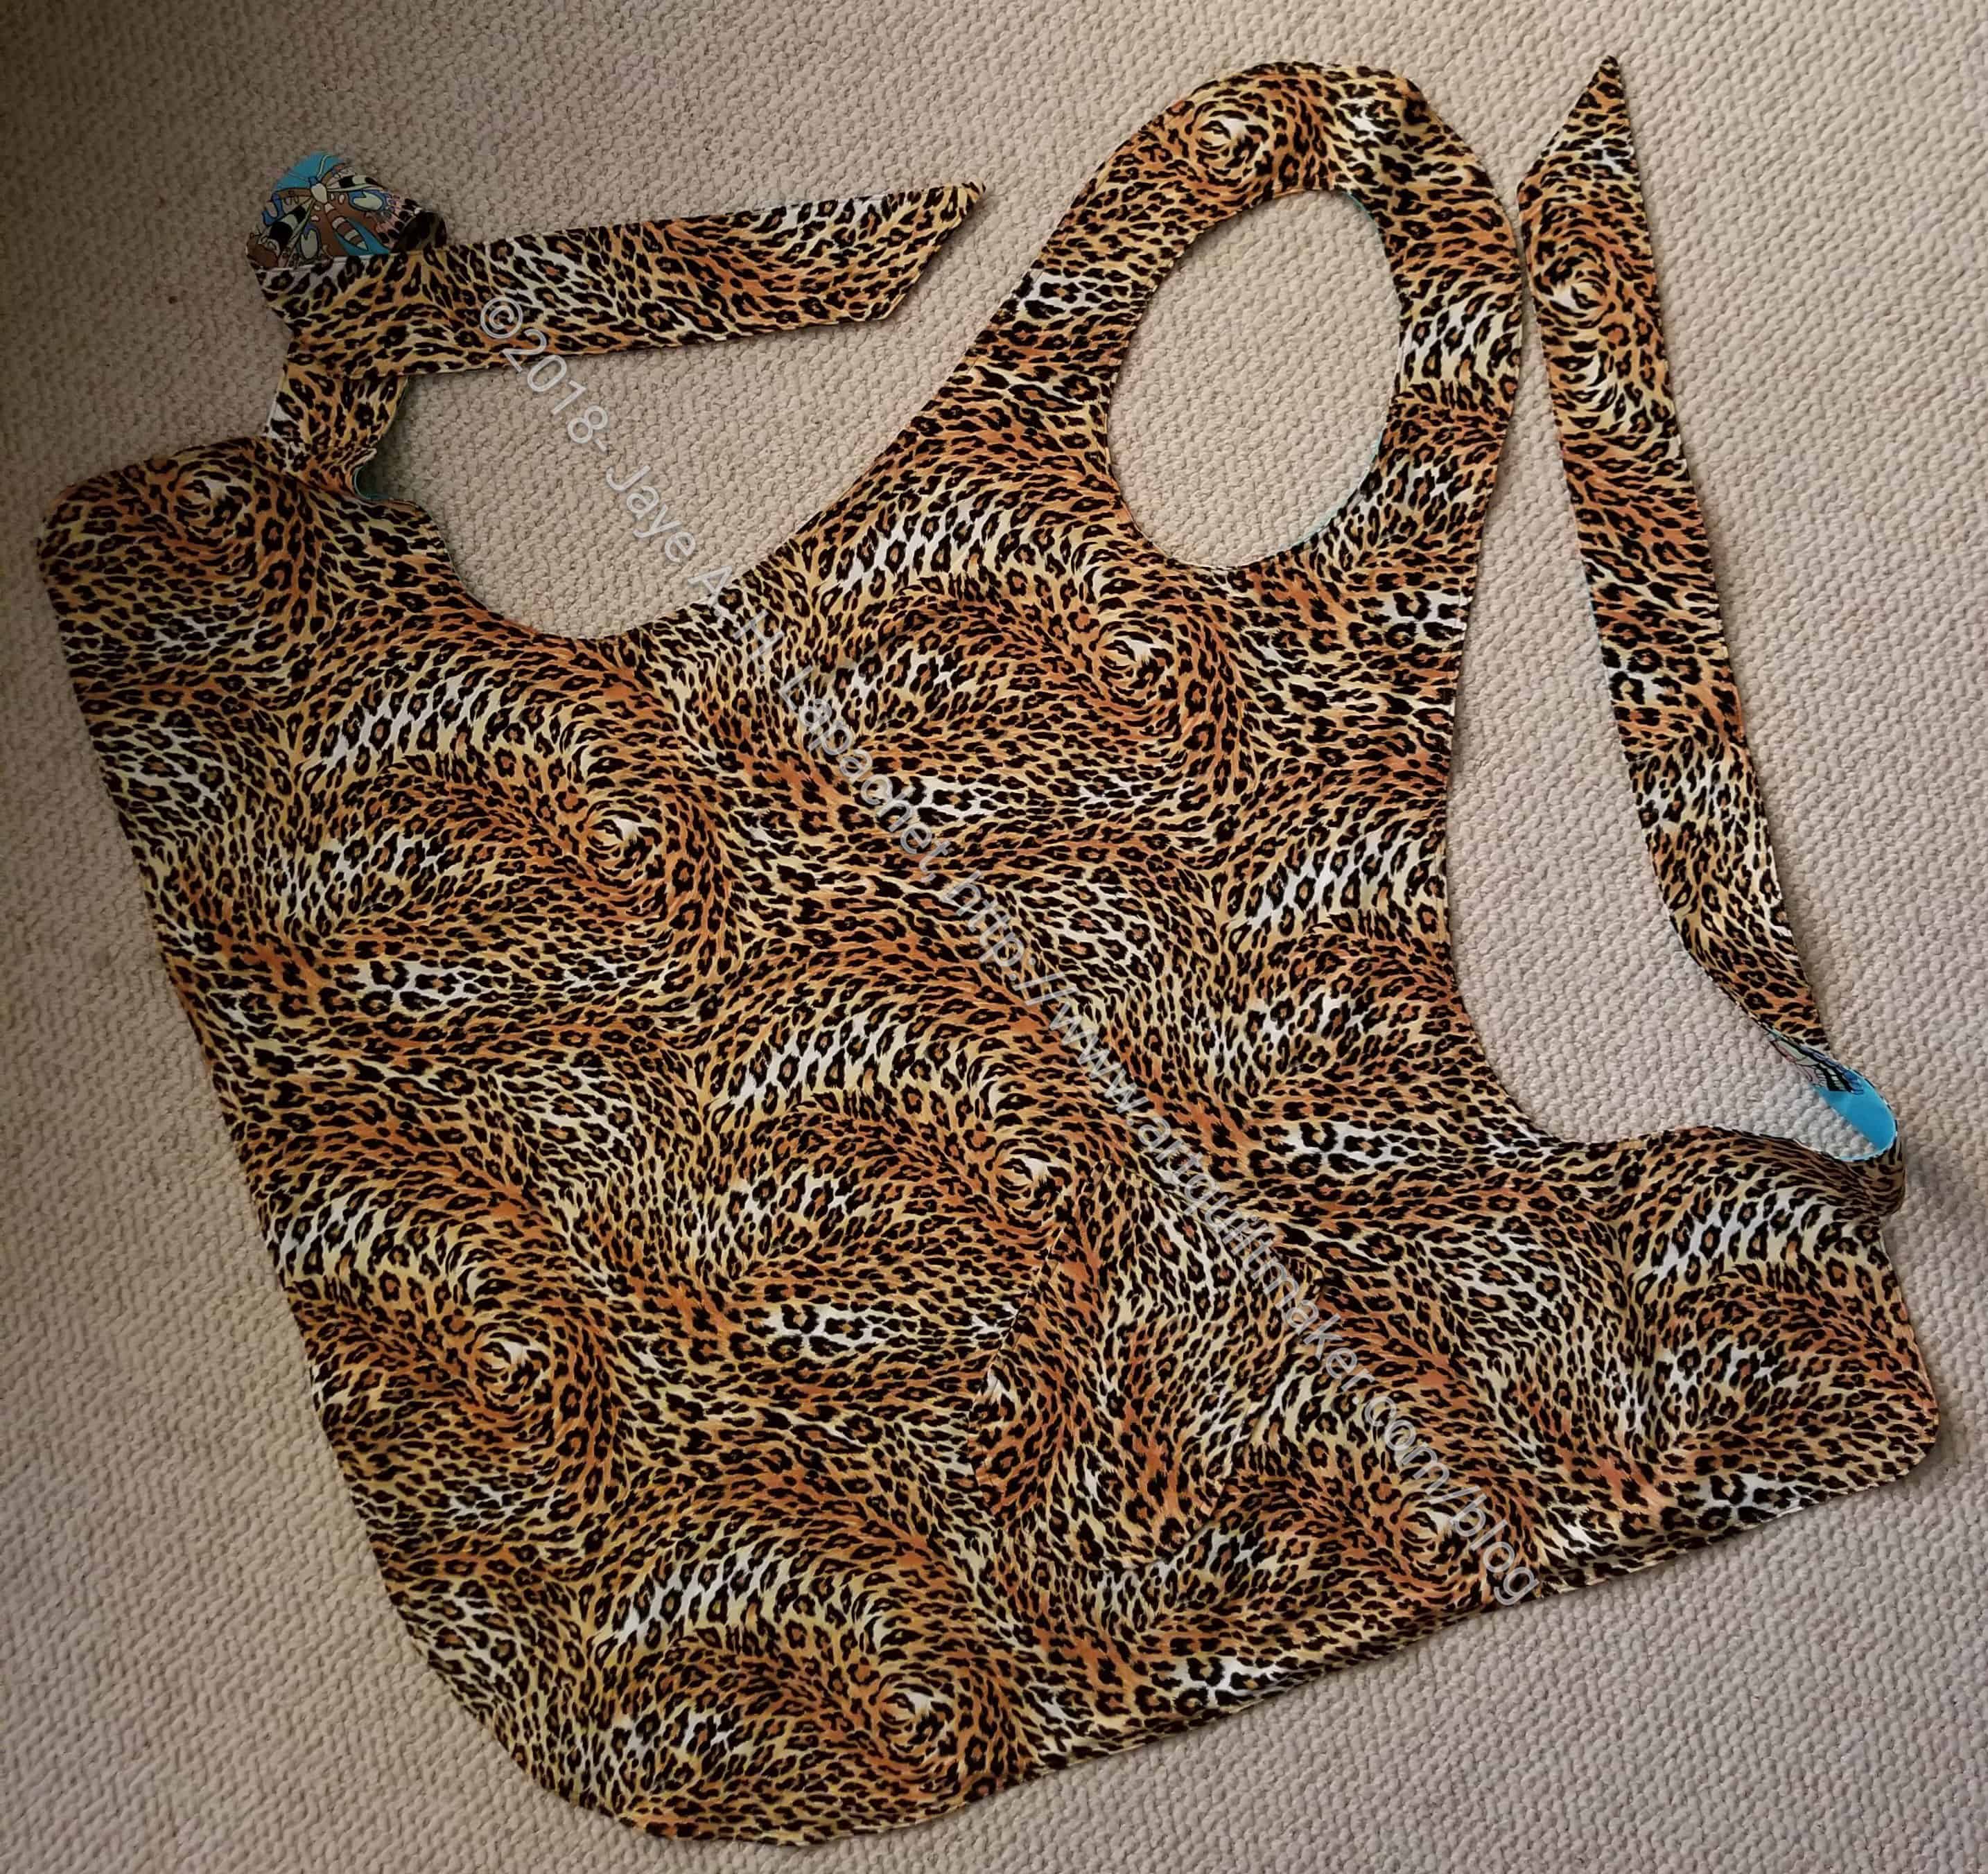
Beth’s apron – Cal side
I have to say that I was annoyed with this pattern when I first started finishing up this project, but as I finished them up, I started thinking of making two more – one for another friend and another for myself.
One thing about this pattern is challenges with directional fabric. I couldn’t make the fabric line up properly to be read horizontally while it was being worn. It can still be read, so I am not too worried, but it would have been nice. Perhaps the slightly off kilter nature of it will look edgy?
After Thanksgiving, I worked on the group of aprons I wanted to give to my SILs as gifts. Since some of my SILs read here, I couldn’t post until after Christmas. I was also working hard to get to a 100 yards used and each of these aprons is 2 yards.
I fumbled around quite a bit on the first one in this group. I had already finished one a few months ago, which I posted about a few days ago. I finally got the hang of the process, put all the small pieces together and was, eventually, able to zoom along.
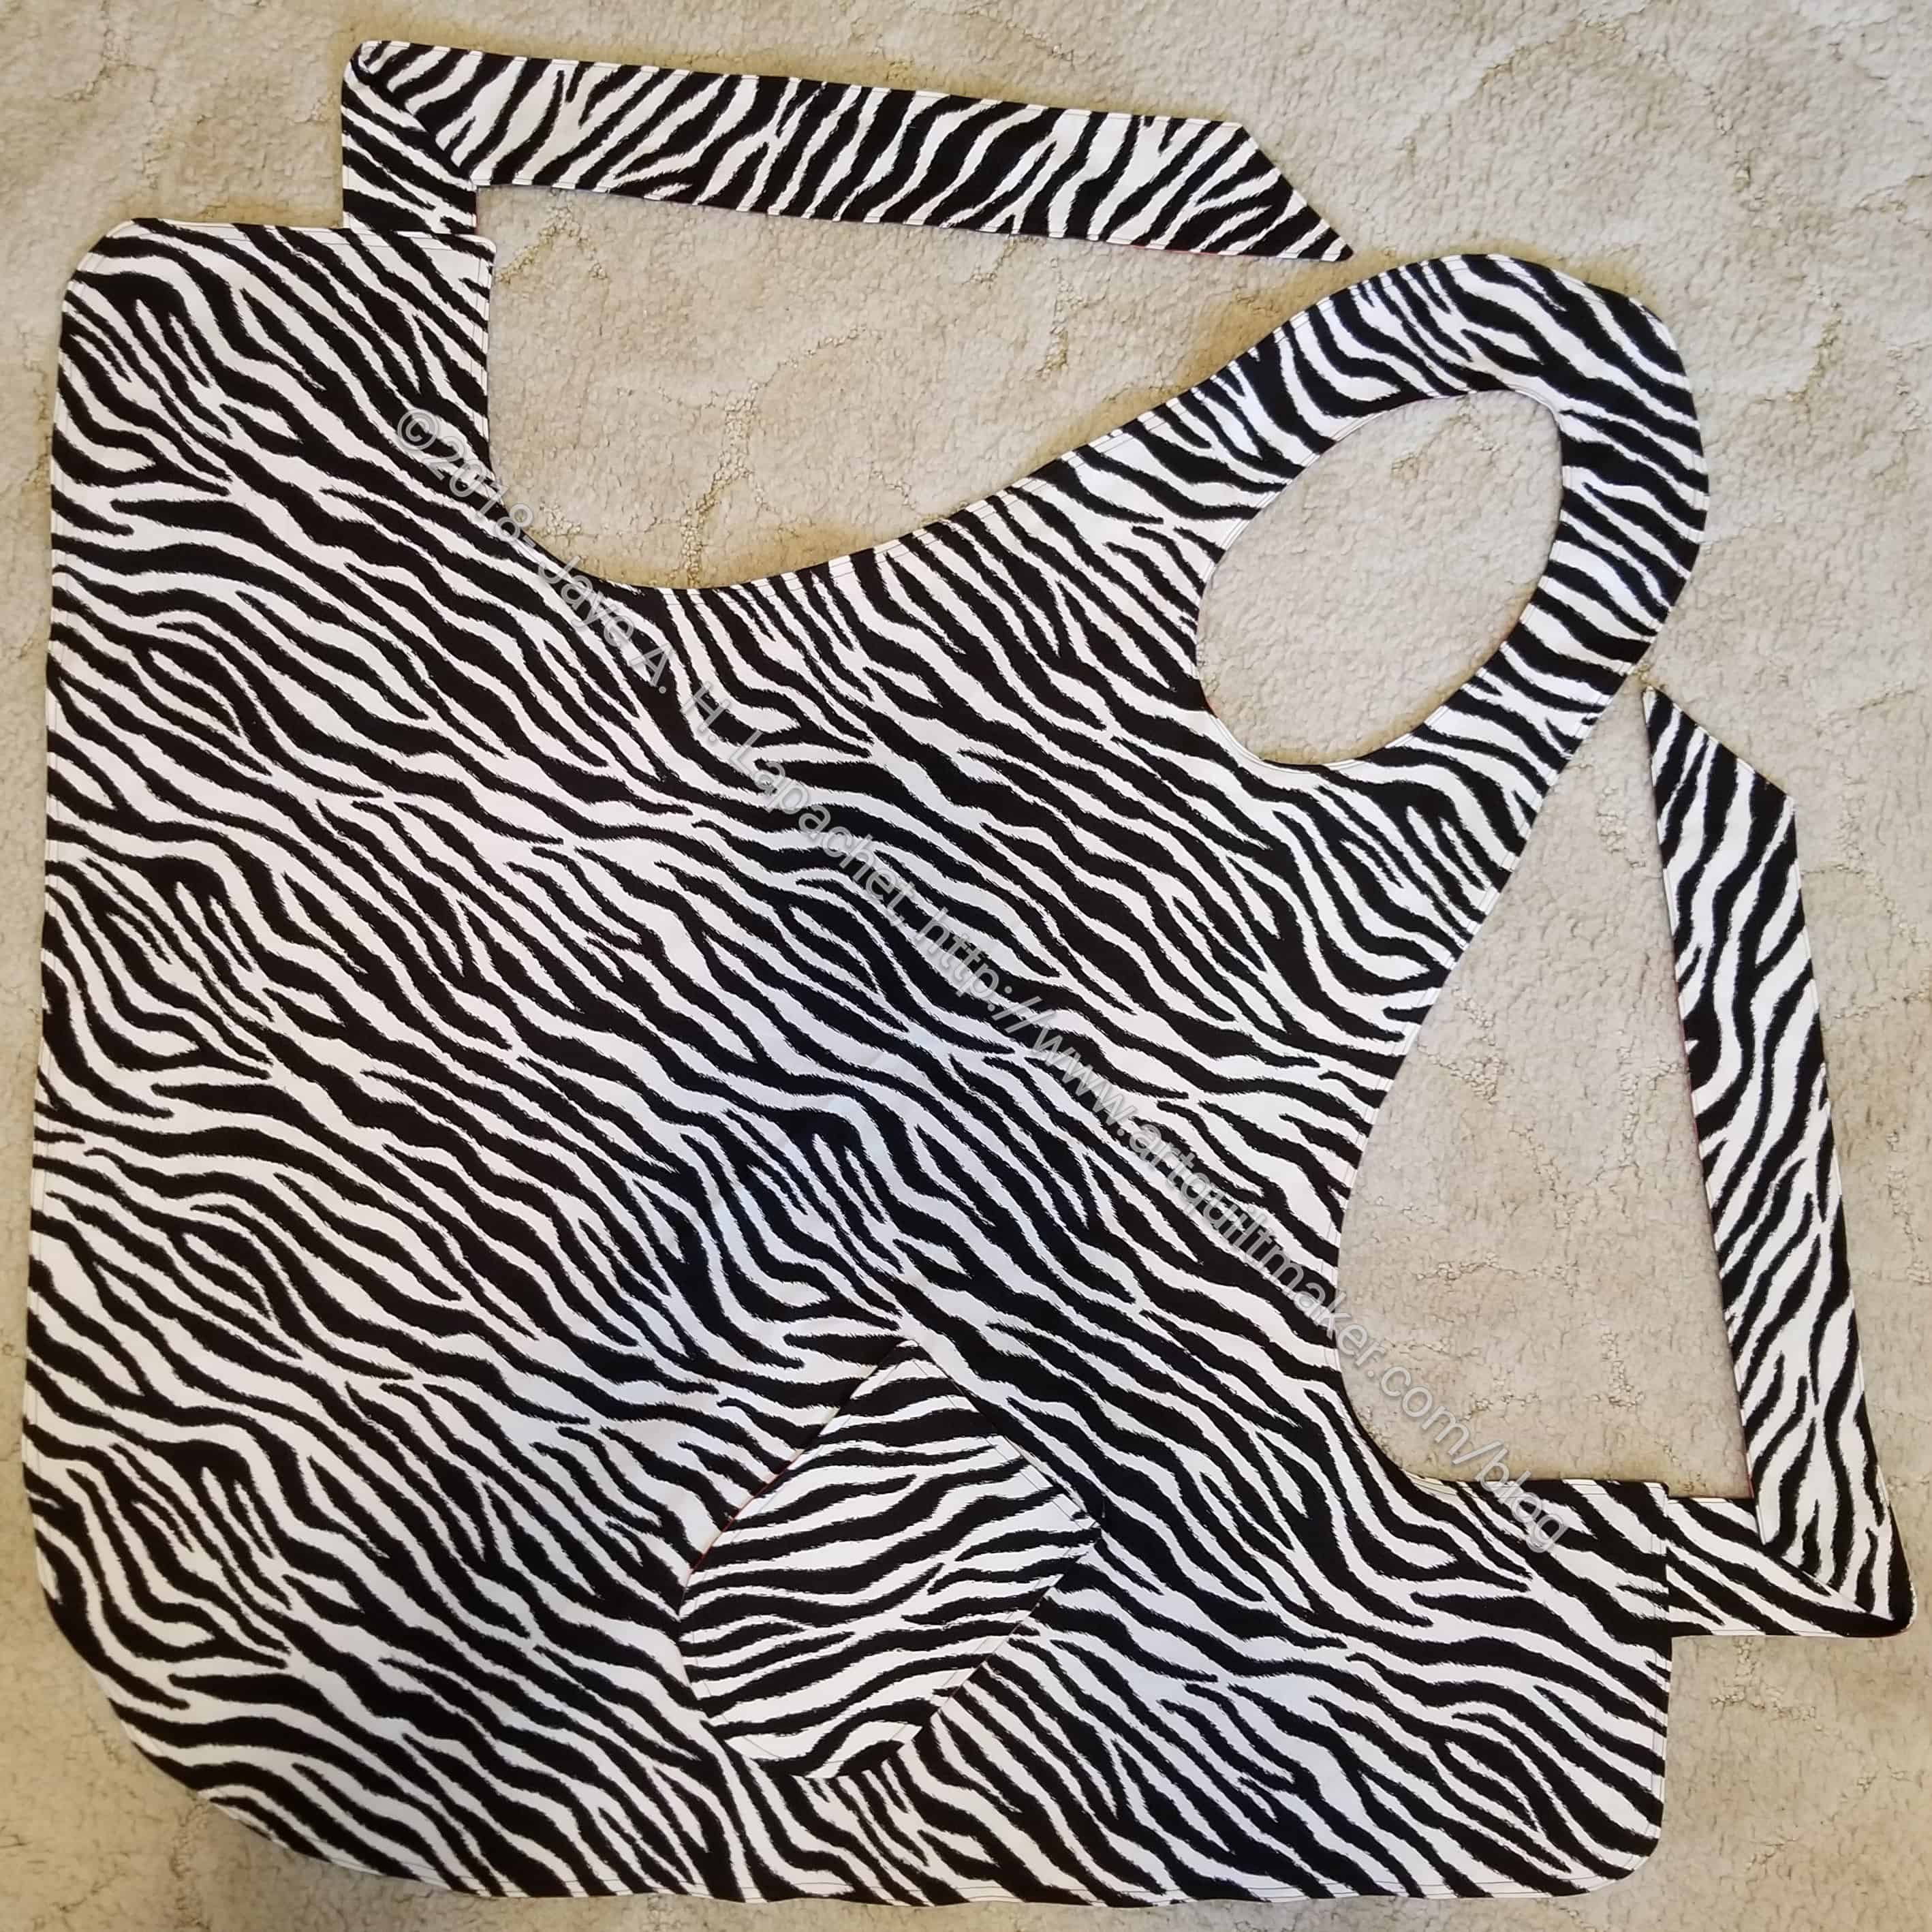
Steph’s Apron- back
The pattern says “finish the neck as desired,” which is about as useful as ‘quilt as desired’ in quilt patterns. I ended up folding the neck by hand and trying to match both sides so the other side wouldn’t peek through. I decided to double top stitch around the neck and the outside to make sure the raw edges, even inside, were sewed down.
I wasn’t sure what fabrics to choose for this apron as I don’t know very well what motifs this SIL likes. Brown and turquoise go together and who doesn’t like butterflies? This is an apron, not a dress, so I am not going to worry too much. I am pleased with how this one came out.