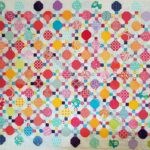
The Octagon 9 Patch, the Stepping Stones n.2 and the BAMaQG Color Round Robin are all at the quilter. I took them on my way to Sisters. It was kind of a ridiculous stop, but I had to take the time when I had it. We did the speediest dropoff ever and then got on the road to Sisters.
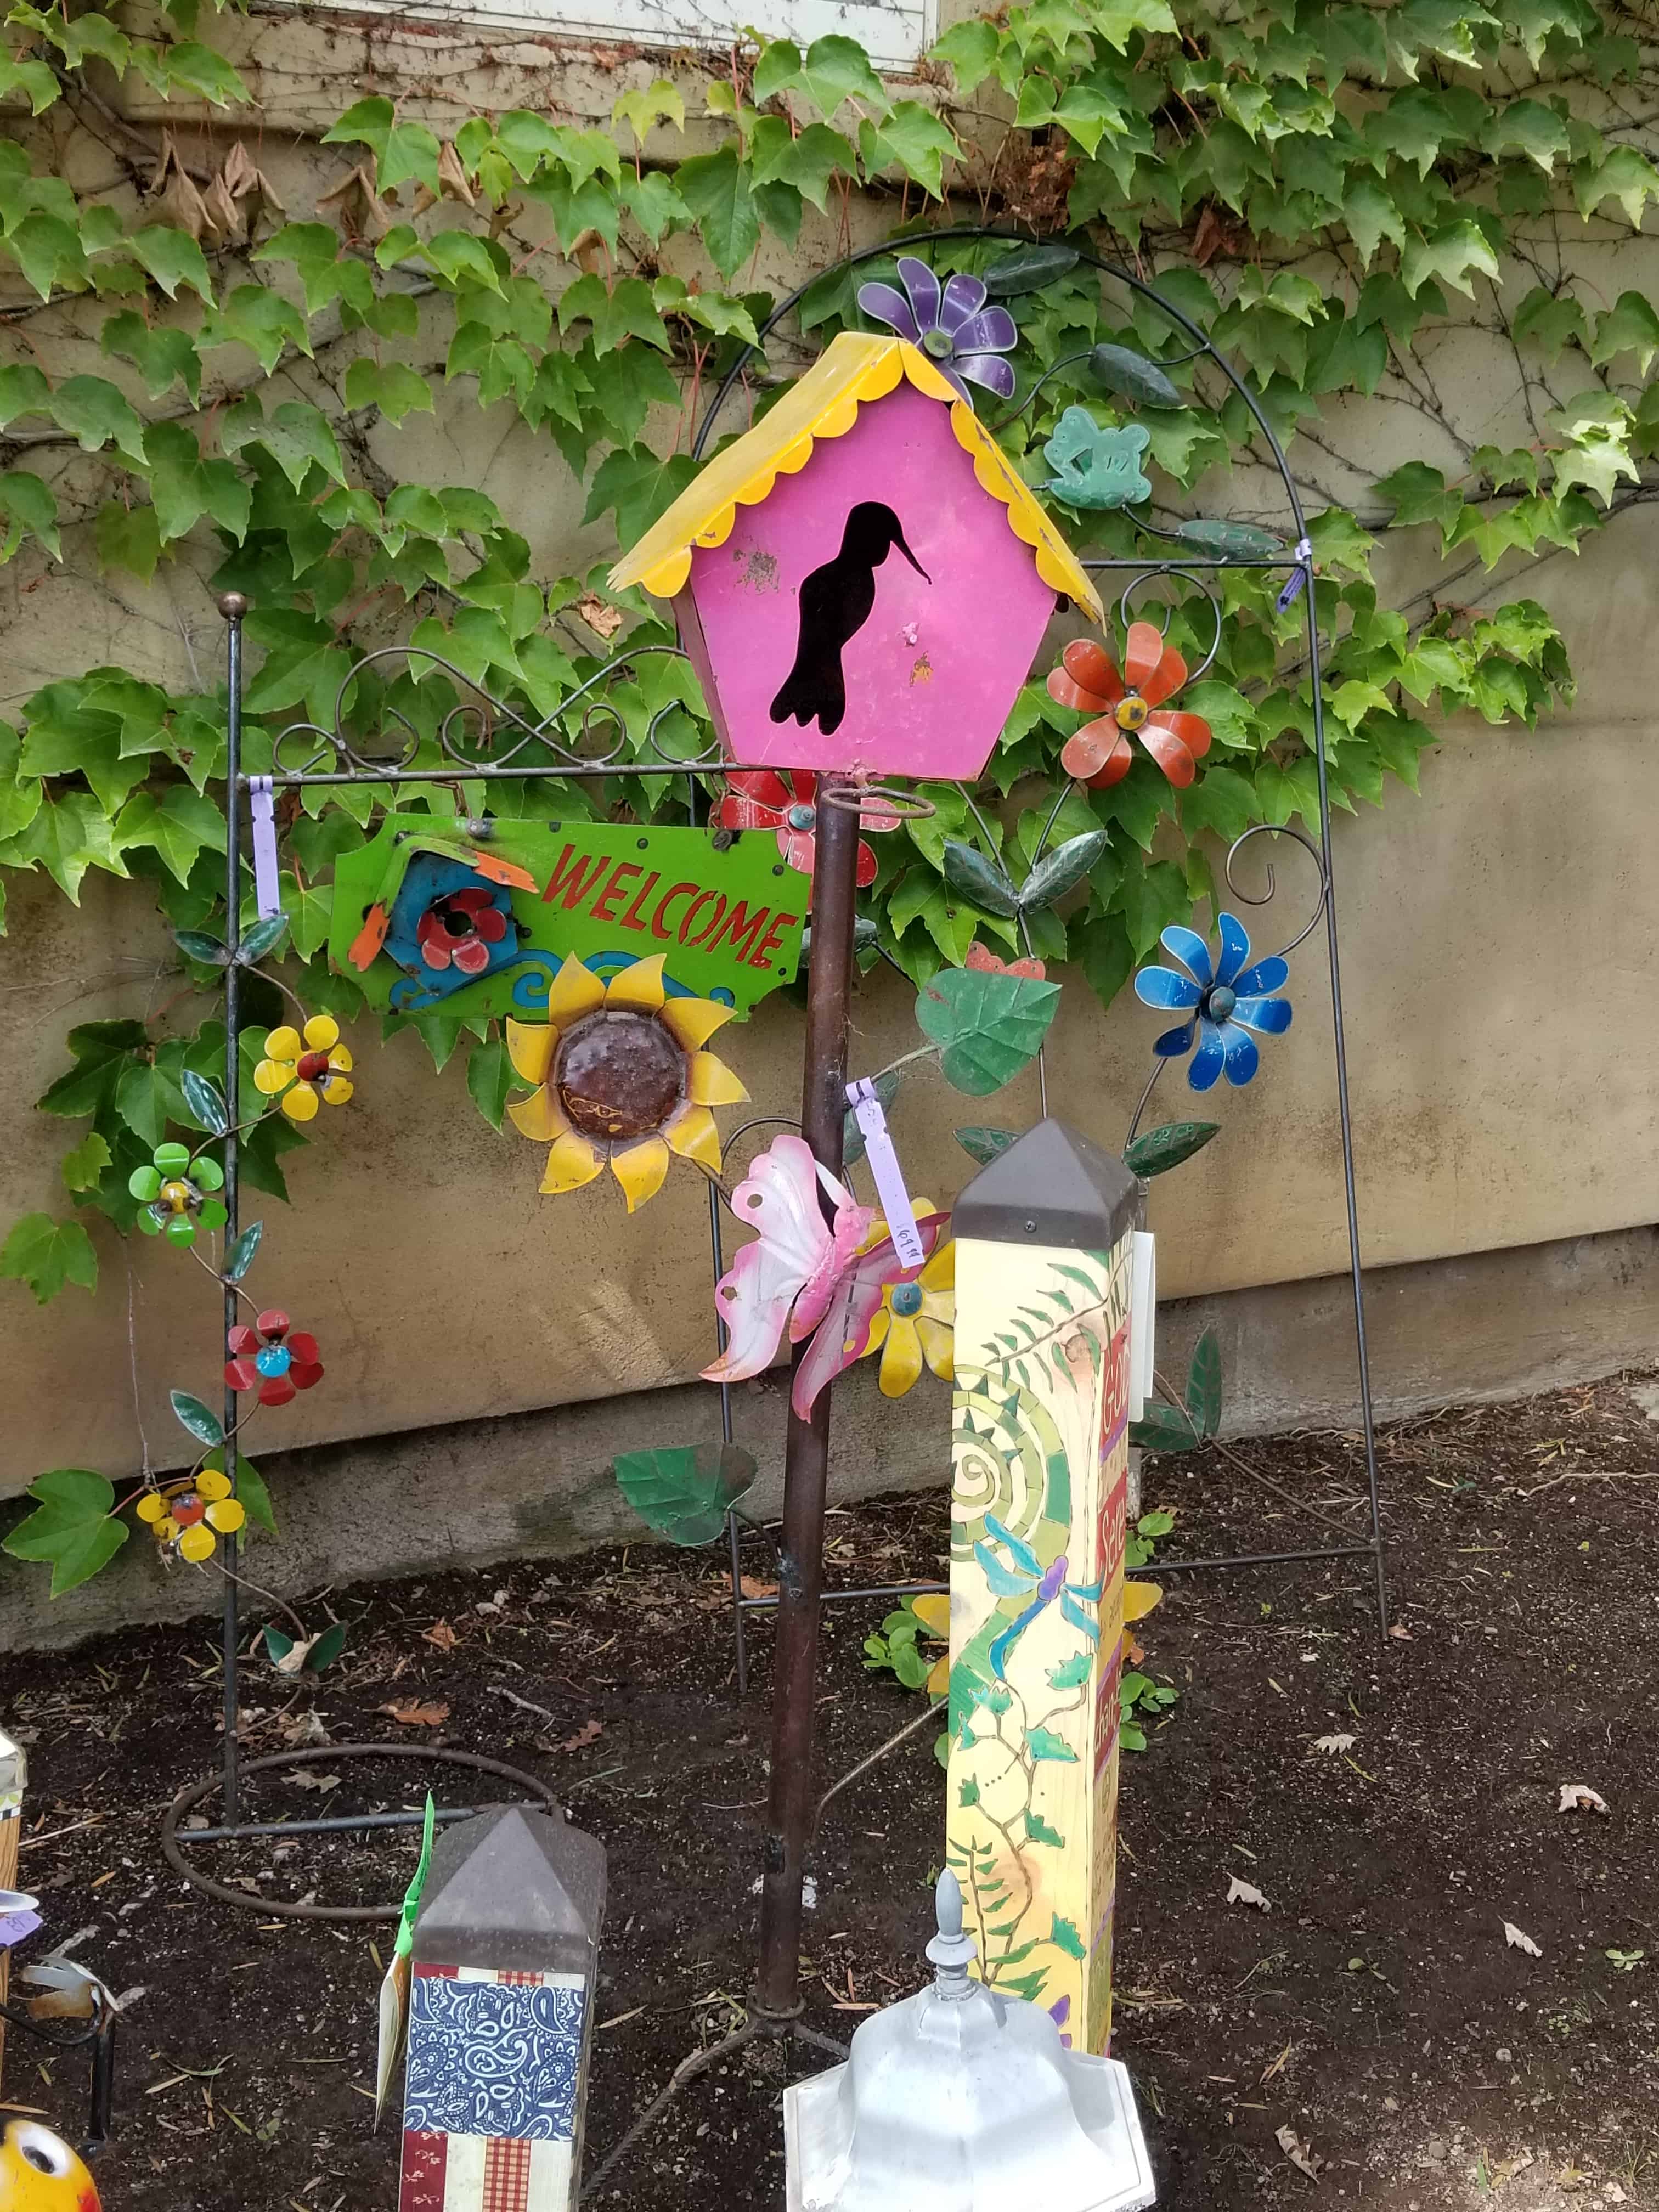
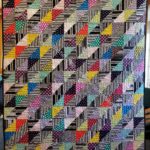
This is a photo from the Alden Lane Quilt show from last September. I picked it because it is so cheerful looking.
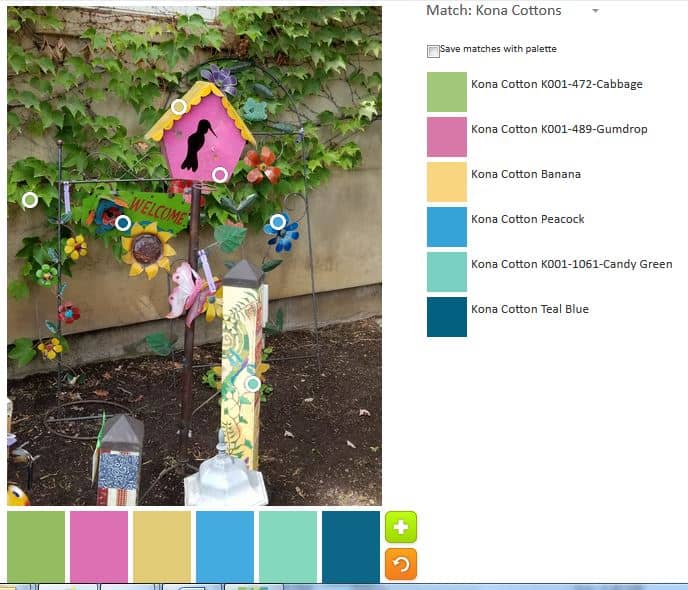
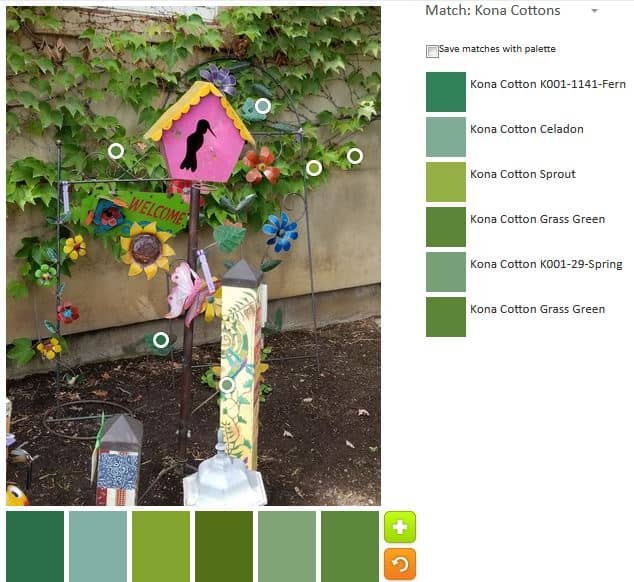
ColorPlay: Birdhouse-n.1
First, I had to pick out the candy colors. You know I love the brights.
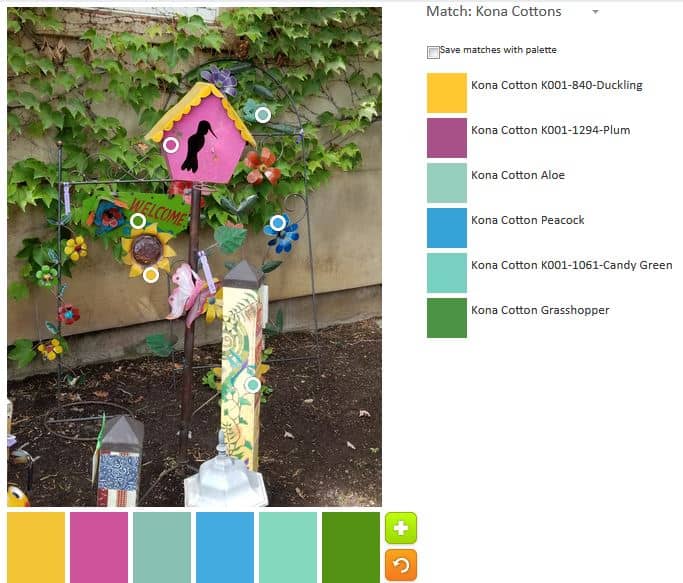
ColorPlay: Birdhouse-n.2
I did another palette of brights, because I thought I could. I think this palette is a little brighter. There are a lot of greens in this image, so it is a challenge.
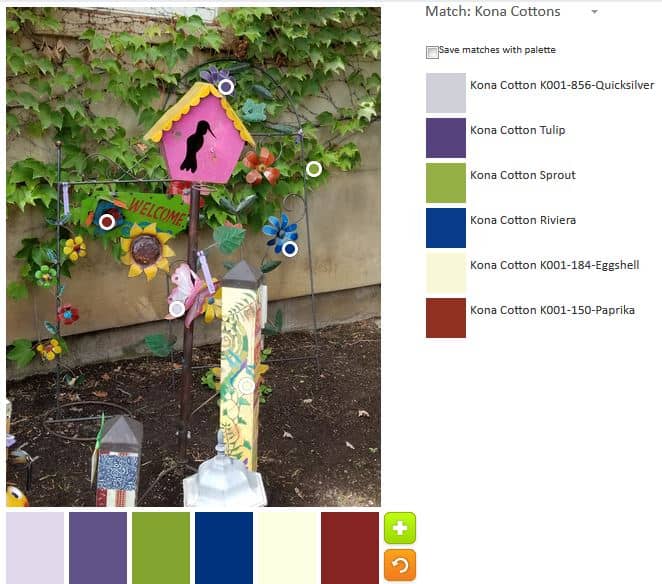
ColorPlay: Birdhouse-n.3
This is sort of an ode to a more traditional palette. Perhaps 4th of July palette?
ColorPlay: Birdhouse-n.4
And I seem to have to do a monochromatic palette. This week’s is green.
After seeing my Spiky 16 Patch quilt, Mrs. K asked that i give the math on putting blocks on point. This post is an addition or adjunct to the Sampler Class tutorials. Different quilt, but you can use this information to put your sampler blocks on point as well.
Setting blocks on point tutorial
There are two aspects to putting blocks on point: the setting triangles and the corner triangles. The setting triangles are on the inside of the quilt. The corner triangles are on, shockingly, on the corners.
In the photo, right, the corner triangles are indicated by the orange half circle. The setting triangles are shown with a purple circle.
Setting Triangles
Setting Triangles, also called side triangles, are giant quarter square triangles. You want to use this method, because the bias will end up on the outside of the block.
1. Measure the block.
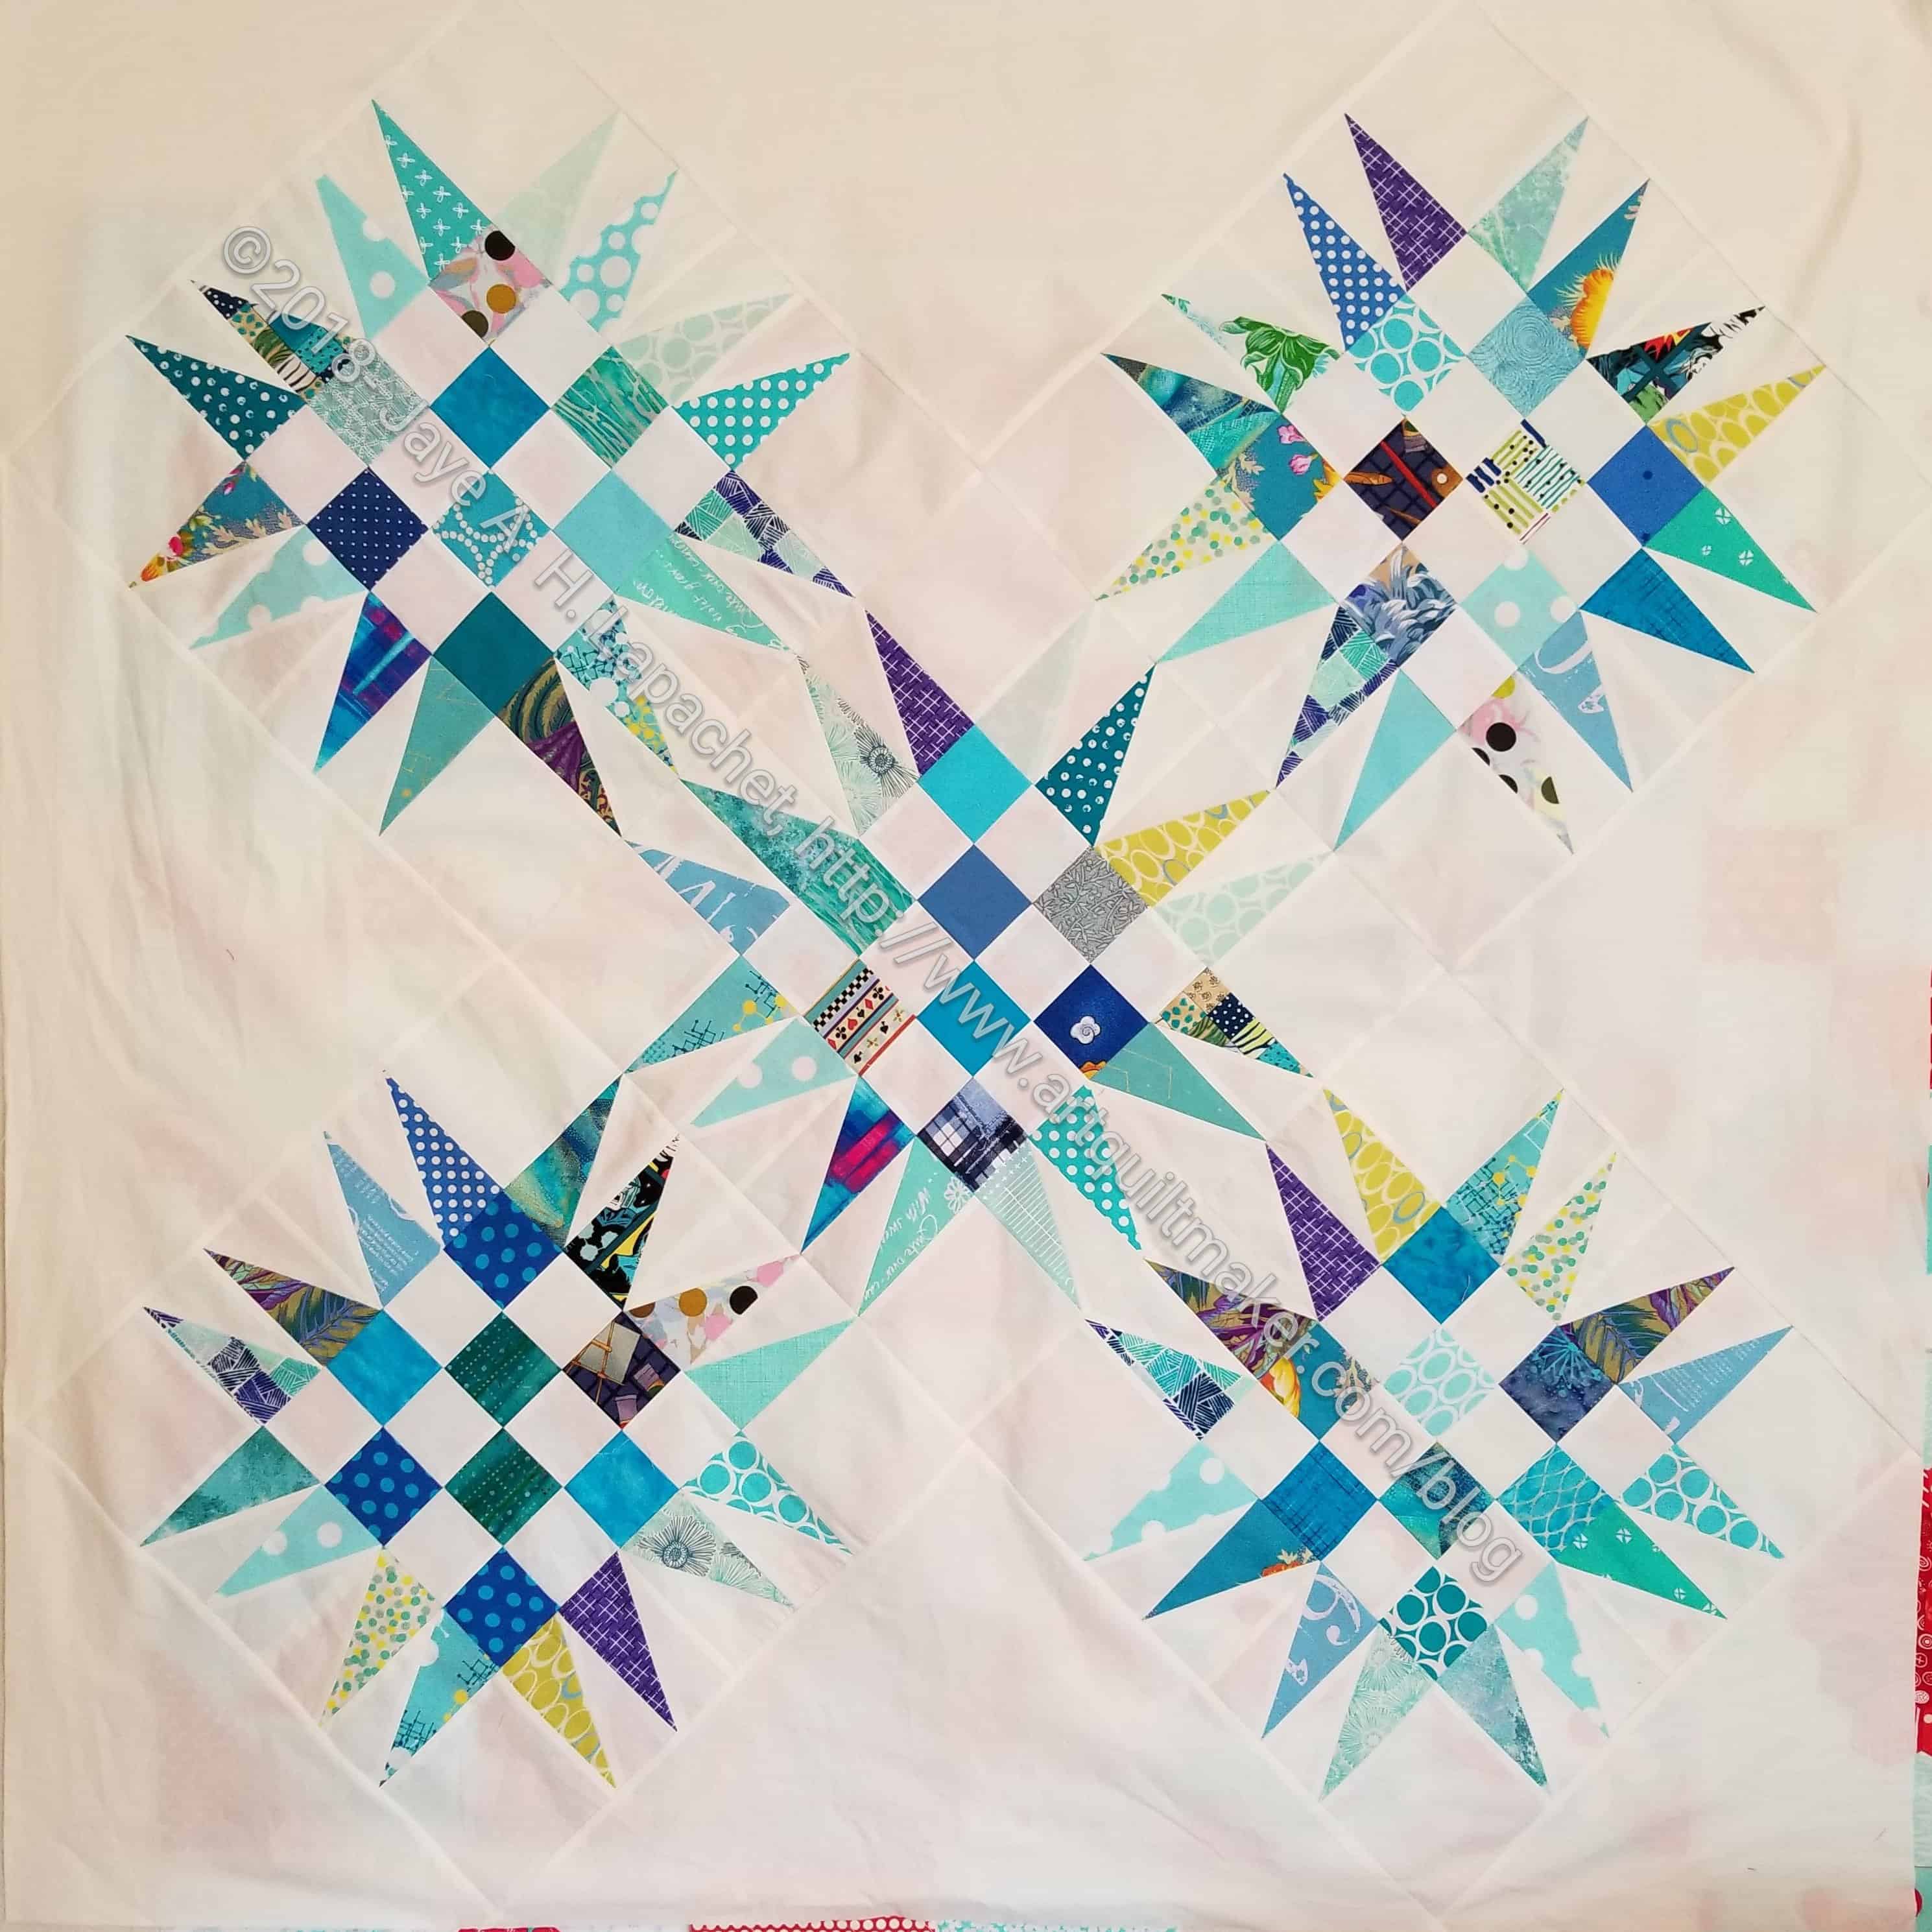
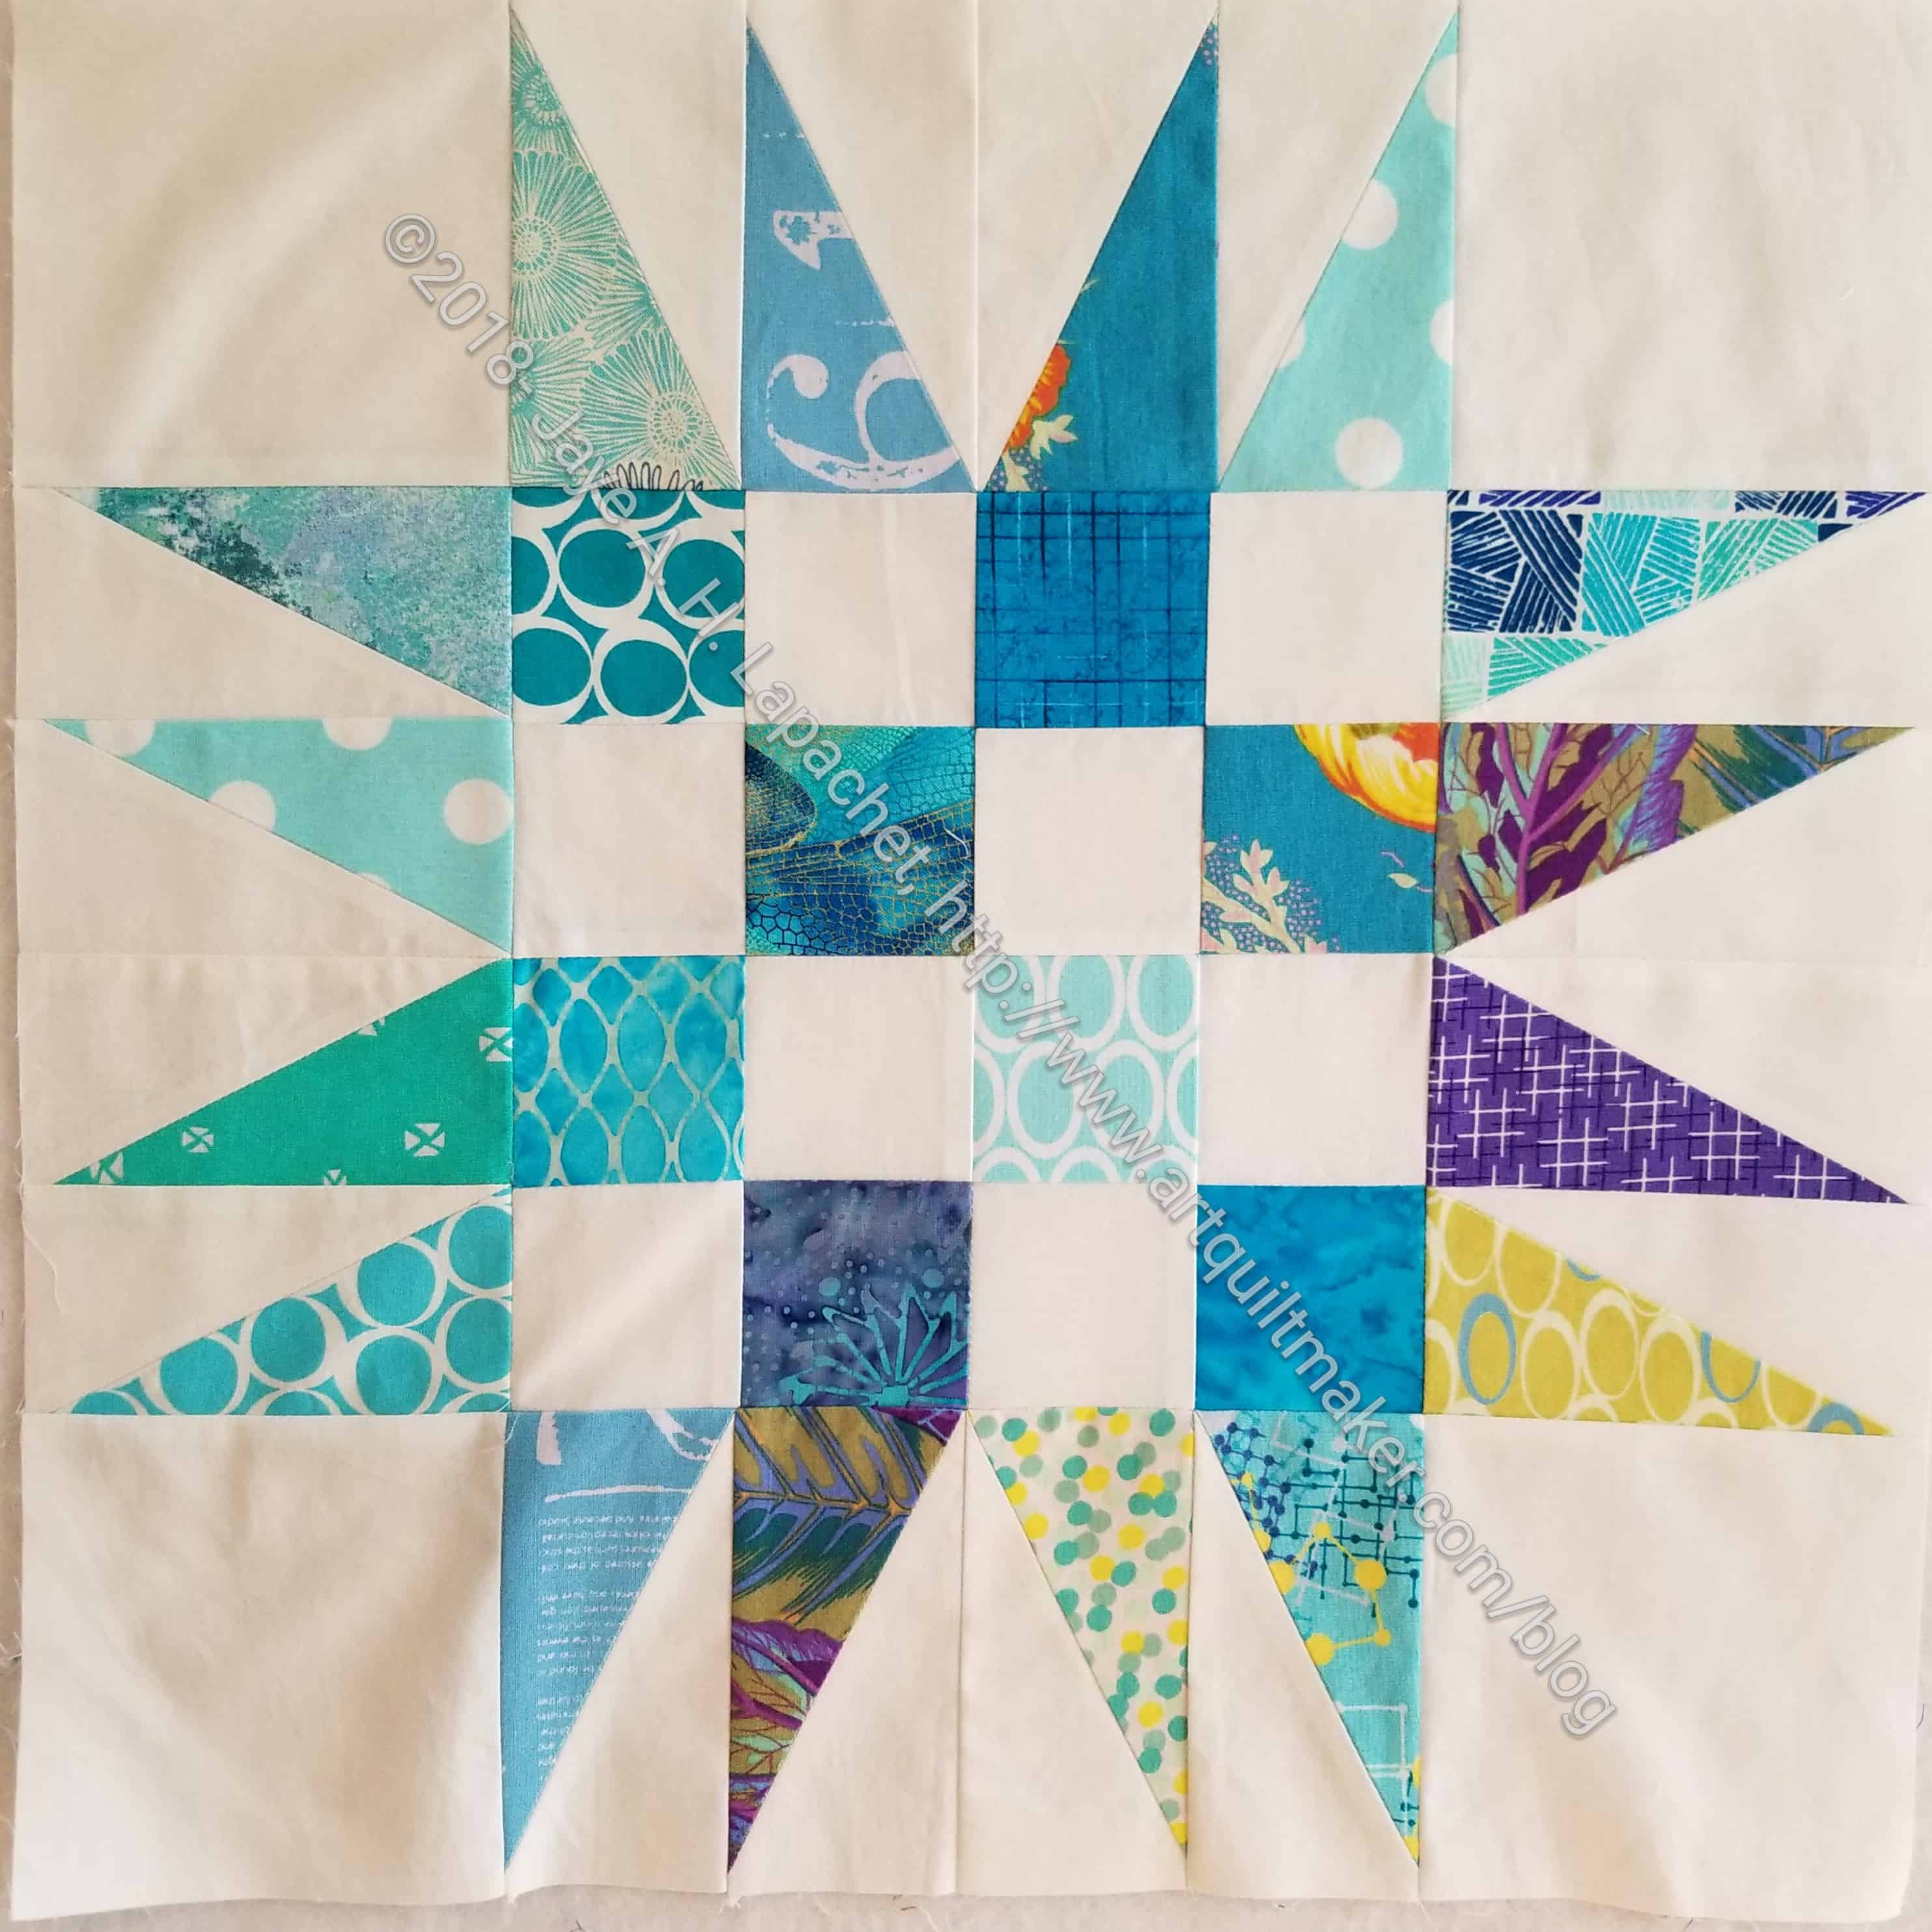
Spiky 16 Patch n.7
In the quilt above you want it to end up looking like it is shown. The Spiky 16 patches.
The Spiky 16 patch measures 16.5 inches.
2. Take the finished block size and divide by 1.414.
Note: the finished block size is different than what we measured. You need to remove .5 inches for seam allowance, which gives you a finished block size of 16 inches.
16 x 1.414 = 22.624
3. Round up
I rounded up to 22.75, but you can round up to an eighth of an inch, if you want.
4. Add 1-1/4″ to the resulting number for the correct size to cut squares for side triangles.
22.75 + 1.25 = 24
5. Cut this square in half diagonally twice in the shape of an X to produce four side triangles.
Nota bene: Cut one square for every four side triangles needed for the quilt setting.
6. Lay setting triangles next to your blocks to make the quilt square.
YAY! You did it!
Corner Triangles
1. Measure the block.
Spiky 16 Patch n.7
In the quilt above you want it to end up looking like it is shown. The Spiky 16 patches.
The Spiky 16 patch measures 16.5 inches.
2. Take the finished block size and divide by 1.414.
Note: the finished block size is different than what we measured. You need to remove .5 inches for seam allowance, which gives you a finished block size of 16 inches.
16 / 1.414 = 11.315417256
3. Round the size up
Take the number you got and round it to the nearest quarter or eighth of an inch. I rounded up to 11.5.
4. Add 7/8 inch
11.5 + 7/8 = 12 3/8
5. Cut two squares the size determined above.
6. Cut both squares in half diagonally.
Now you have four triangles.
7. Place on each corner.
YAY! You did it! You cut corner square triangles. Sew them on. You may need a quick trim and you are done with corners.
Lay all of the setting triangles and corner triangles out with the blocks on your design wall. When you are ready to sew, sew. I fold the blocks and the setting and corner triangles in half so I can line them up properly.
Trim once the whole piece is complete, if necessary.
If you don’t believe me, you can find Bonnie Hunter’s tutorial on Quiltville.
I have been thinking more about dream projects again lately. I have been working on so many UFOs that my mind is straying to fresh, new, unstarted projects.
Art Institute of Chicago Fusible Applique’ (Ticker Tape Style) Quilt
Status: Dream state
Pattern: Original, I do have a version of the pattern I used for the Whole Cloth quilt and I will use it as starting point.
Fabric: Turquoise and red, mainly, but other colors for the leaves and flowers, perhaps
Steps: need to fuse a bunch of turquoise to some piece of fabric in the ‘ticker tape’ style so i can cut it up into small pieces. I am thinking of making it similar to the Whole Cloth Quilt and using red, again, for the background.
Thoughts: I might make another one with turquoise on top of red with just two pieces of fabric.
Art Institute of Chicago Fusible Applique’ (one sheet of fabric) Quilt
Status: Dream state
Pattern: Original, I do have a version of the pattern I used for the Whole Cloth quilt and I will use it as starting point.
Fabric: Turquoise and red, mainly
Steps: need to fuse a big piece of turquoise to SoftFuse or similar, then cut out the image and fuse it to the background. I would satin stitch all around the image. I don’t know that I can make one continuous piece, but will try. The image would be similar to the Whole Cloth Quilt and using red, again, for the background.
Thoughts: I might make it with turquoise on top of red with just two pieces of fabric.
Thoughts: I can’t decide if this is still a dream or if it is already started and I just need to arrange it and start piecing. I have done a lot of cutting, so I think I have started it, thus it may not be a dream anymore. The original idea stemmed from the FOTY quilts. I just decided to do a monochromatic version – using just blues, in this case. I probably have enough patches now and just need to slot the time to work on it into my schedule.
Thoughts: I probably had enough squares to make this quilt, but then I used a bunch of them to make En Provence. Now I am working on cutting more. I hope to slot the time into my schedule int he not too distant future.
Easy Street
Status: have pattern/ dream state
Fabric: pinks
Pattern: Easy Street by Bonnie Hunter
Thoughts: I really liked Daisy‘s version of Easy Street, which she calls Cherry Bomb (she thinks of the best names for her quilts) in terms of color and feel. I don’t want to copy her, but if I do this quilt, I’d like to have the same pinky-red feel to it. One challenge about a mostly monochromatic quilt is getting enough contrast. I look forward to that challenge. Not sure this will become a reality.
En Provence #2
Status: Dream state
Pattern: En Provence by Bonnie Hunter
Thoughts: I loved the one I made before and can’t stop thinking about it. I have to make another one, but I can’t figure out what colors to use next. The ones I used before were almost perfect.
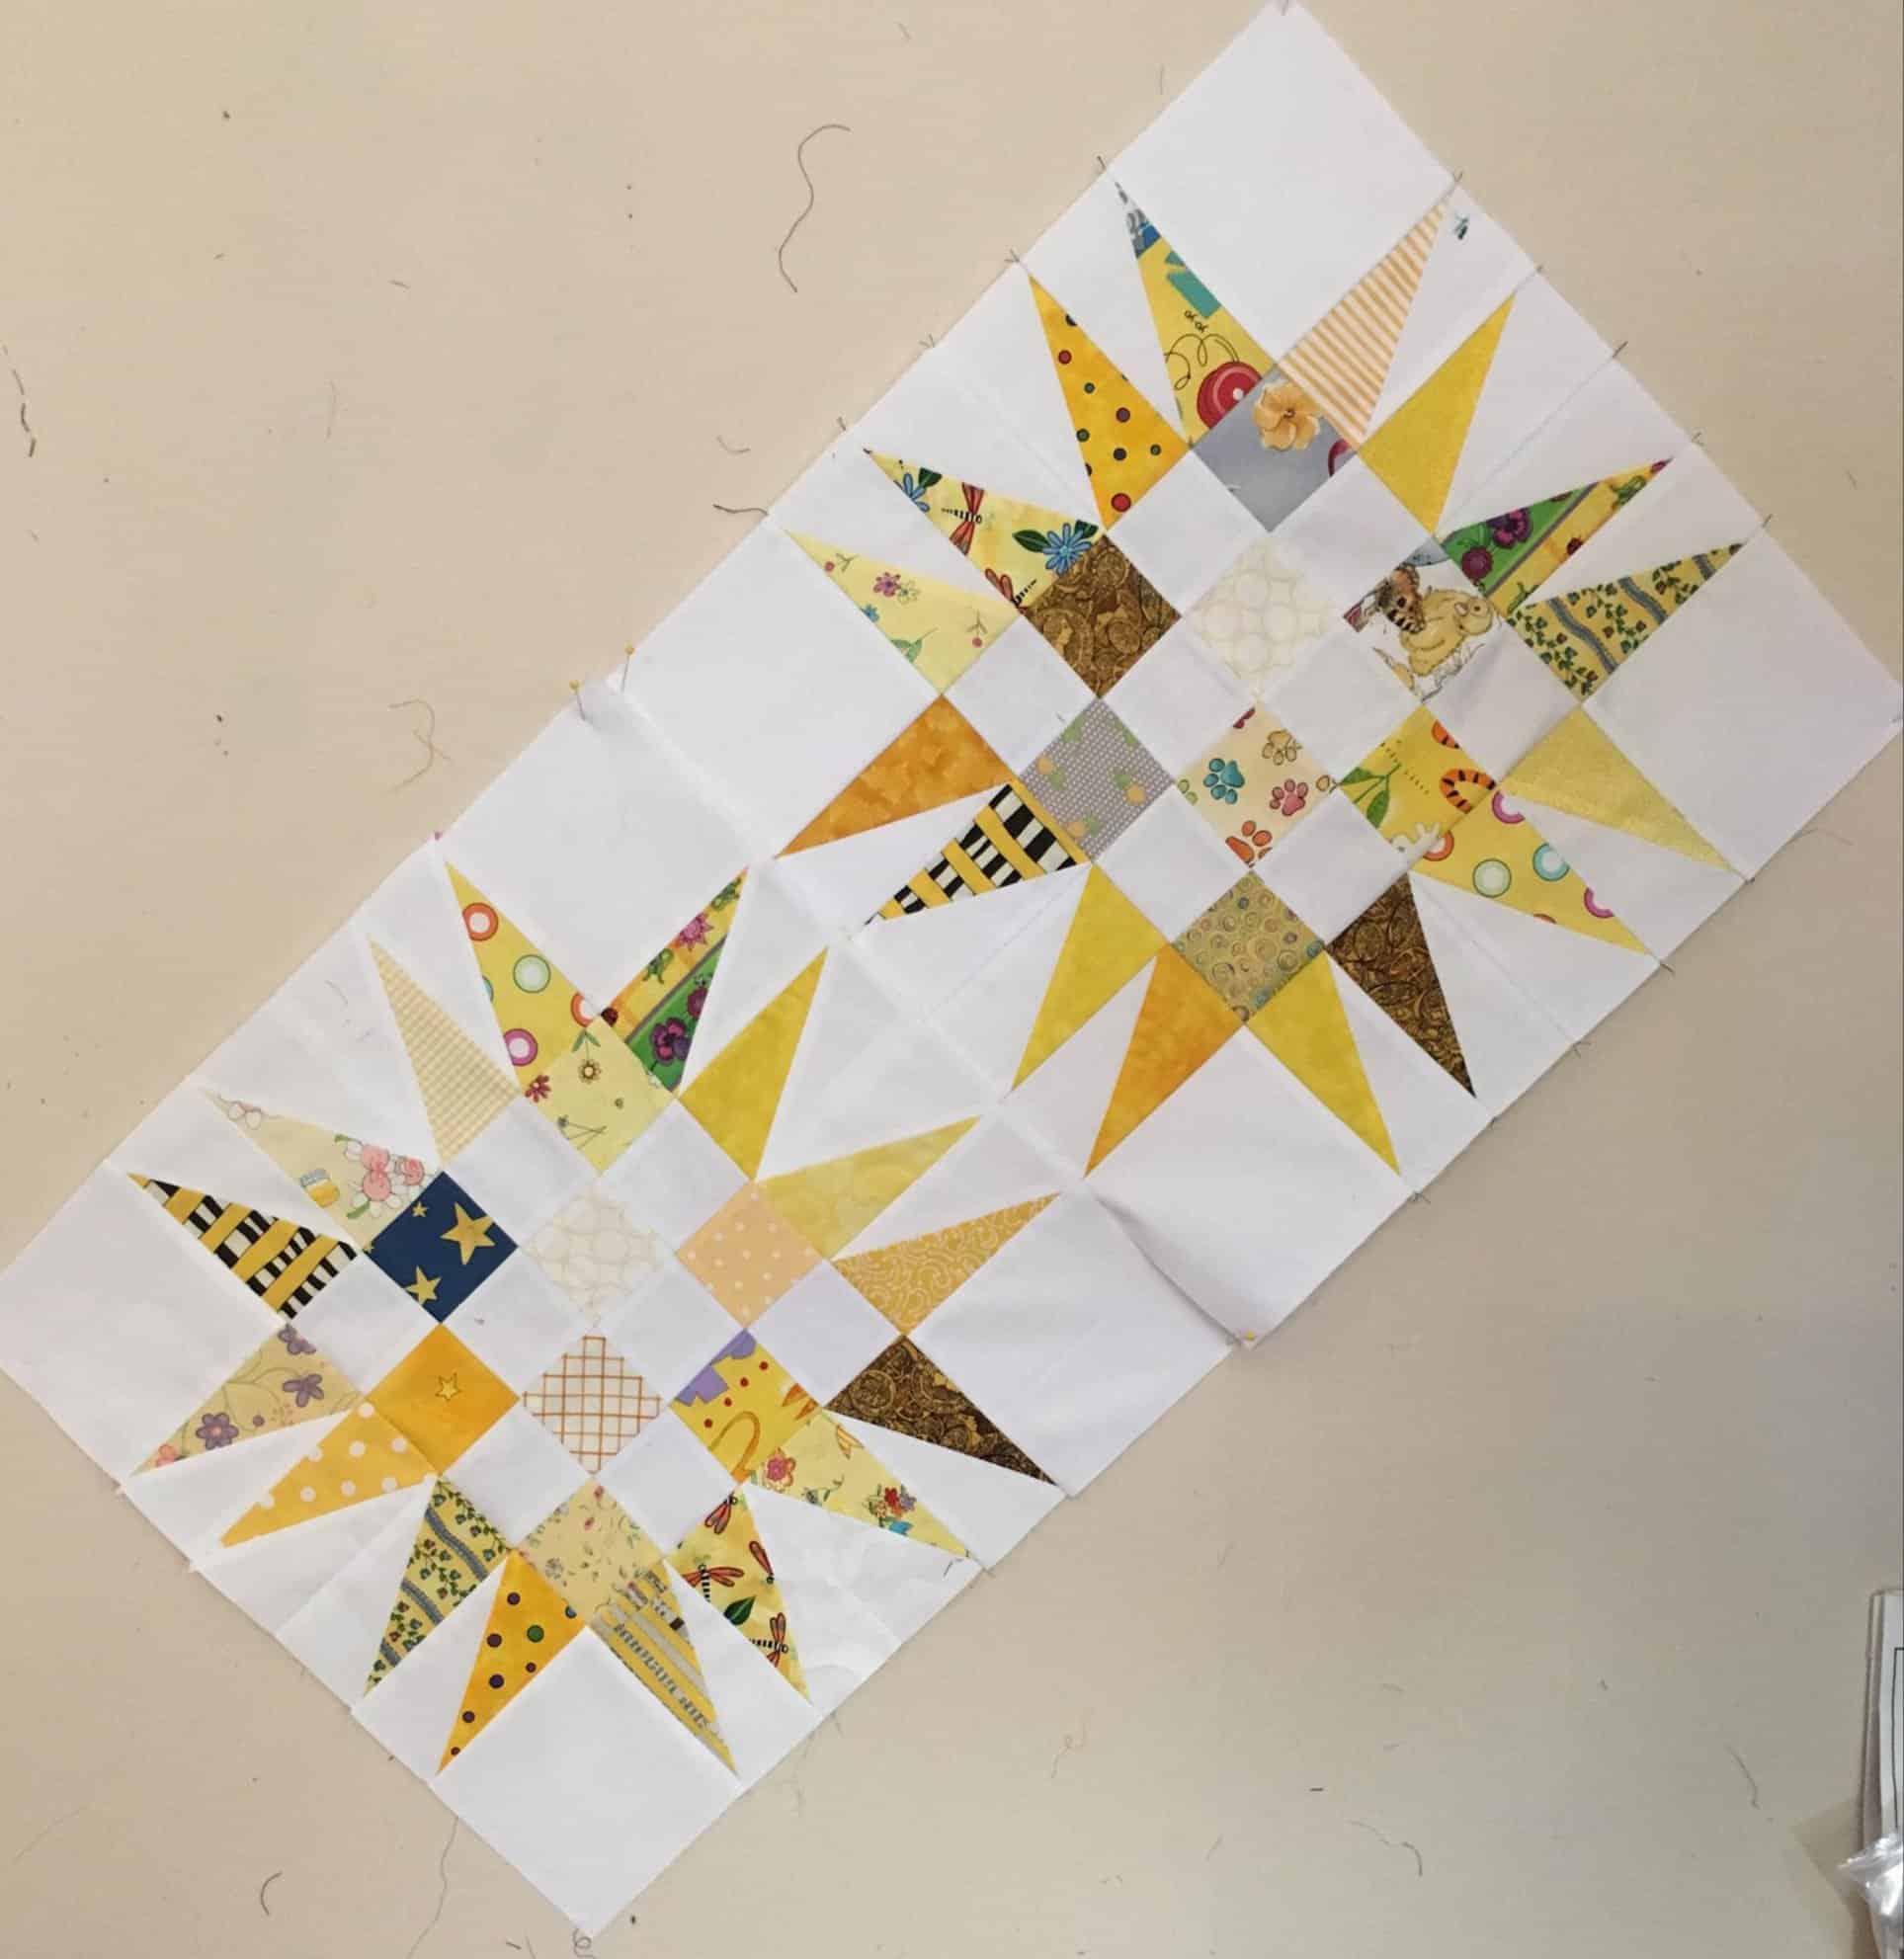
Feathered Star Block (or quilt?)
Status: Dream state.
Pattern: I haven’t decided on a particular feathered star
Fabric: I decided not to use a layer cake and will use the scrap 2.5 inch squares I have been cutting. I love the cheerfulness of Scrapitude Carnivale, as I say over and over, and am not done with that combination yet.
Thoughts: I thought about using dots on a white background, as I did with the Scrapitude Carnivale quilt as the background. It makes the Scrapitude quilt look so cheerful. I probably wouldn’t call it Good Night Irene.
Interlocking Triangles Quilt(s)
Status: dream state
Pattern: This is an idea that I designed myself. I made two quilts and have variations on the pattern to make more.
Fabric: I have a few different collections of fabric I want to use. Most are rainbow colored; I also have a lot of stripes to use
Thoughts: This is a quilt from which I get a lot of bang for my buck. The visual impact is tremendous. The easiest way to do the spiky triangles is with paper piecing. I am not that big of a fan of paper piecing (read my laments about the Spiderweb‘s paper piecing). I made Spiky Stars using templates and that was meditative and won a prize, so it is doable.
Jack’s Chain Quilt
Status: dream state
Pattern: Jack’s Chain, a continuous pattern
Fabric: bright scrappy, consistent centers
Thoughts: This is one of the first quilts I saw hanging in a quilt store and thought of making, after I learned to quilt. I have seen a number of variations lately using different hexagons in the center. Making the nine patches would be a good leaders and enders endeavor. As if I don’t have about a zillion leaders and enders opportunities.
Music Quilt
Status: dream state, but not very inspired
Pattern: Top will have a piece of music the Young Man can actually play. That will probably be applique’
Fabric/Colors: music prints and tone-on-tones with a little red
Thoughts: The Young Man has requested this quilt as his high school graduation quilt. I missed that deadline. He has sent me a piece of music, which I printed out. Now I need to make into an applique’
Pineapple (Hunting and Gathering)
Status: I have strips cut.
Fabric: dots. Have most of the strips cut. Will be much more selective about which strips I use.
Pattern: Pineapple log cabin
Thoughts: I haven’t given up on a Pineapple quilt despite my frustration with the previous attempt. I bought a different ruler: a Creative Grids Pineapple ruler in hopes that it will work better for me
Quick Curve Ruler Quilt
No exact plans yet
Pattern: I have a couple of patterns I received as gifts and I will use one.
Thoughts: I just want to make something with this ruler!
Silk Colorblock quilt
Status: I have the fabrics and the plan
Fabrics: silk dupioni and cotton in brights (of course)
Thoughts: I have made a couple of, what I call, Colorblock quilts over the years. One was the Kona Challenge in 2011, another was my 1990 Colorblocks 2 and the first one, Colorblocks, also made in about 1990. I bought the silk fabrics at the Marin Needlearts show about a zillion years ago and they have languished waiting for me to learn to back them so I can use them. I think I have that covered now and there is nothing stopping me except time and will.
Status: half cut; need more greys for the background
Fabric: Scrappy. I will use a grey for the background, because if I use more of the cut fabric patches, the pattern will be lost. The pieces are too oddly shaped and I don’t want to lose the pattern in a mass of scraps.
Pattern: Come Quilt with Me Rotary templates
Thoughts: I think I will buy the Sizzix template and cut grey windmill pieces with that instead of by hand
Out of the Dream State: Below is a list of projects that were on this list at some point that I actually made or am working on:
Half Moon Modern Quilt I made a Chubby Charmer instead of a quilt and am happy with that choice.
Medium Mondo Bag – I actually made the Midi bag. I think I might have another pattern to make another one, so I will have to try it out without the class.
I’d love to say this piece was in the finishing process, but it is so far from the finishing process that lying wouldn’t even cover what I was doing. I am, however, working on this piece. It is slow going, which is fine when I don’t have other handwork that I must do.
Half Hexie First Borders
Recently, I bought papers to fill in the border of the half hexie piece. I needed some triangles and some diamonds. I want to create a full stop at least on one side, so I picked out a dark grey (charcoal) with small white dots and basted some pieces. The fabric is not a pin dot.
It is a little bit of a shift to insert these extra shapes, but I got into it. It is kind of funny to see the edge done. I wonder if the grey is too dark considering the overall cheerful look of the piece.
I plan to put another straight border on the sides, once I get all the diamonds and triangles attached.
In Process
The ‘In Process’ is used to denote projects on which I am actively working or pretending to stitch. I try not to put away projects, because that will ensure I never work on them
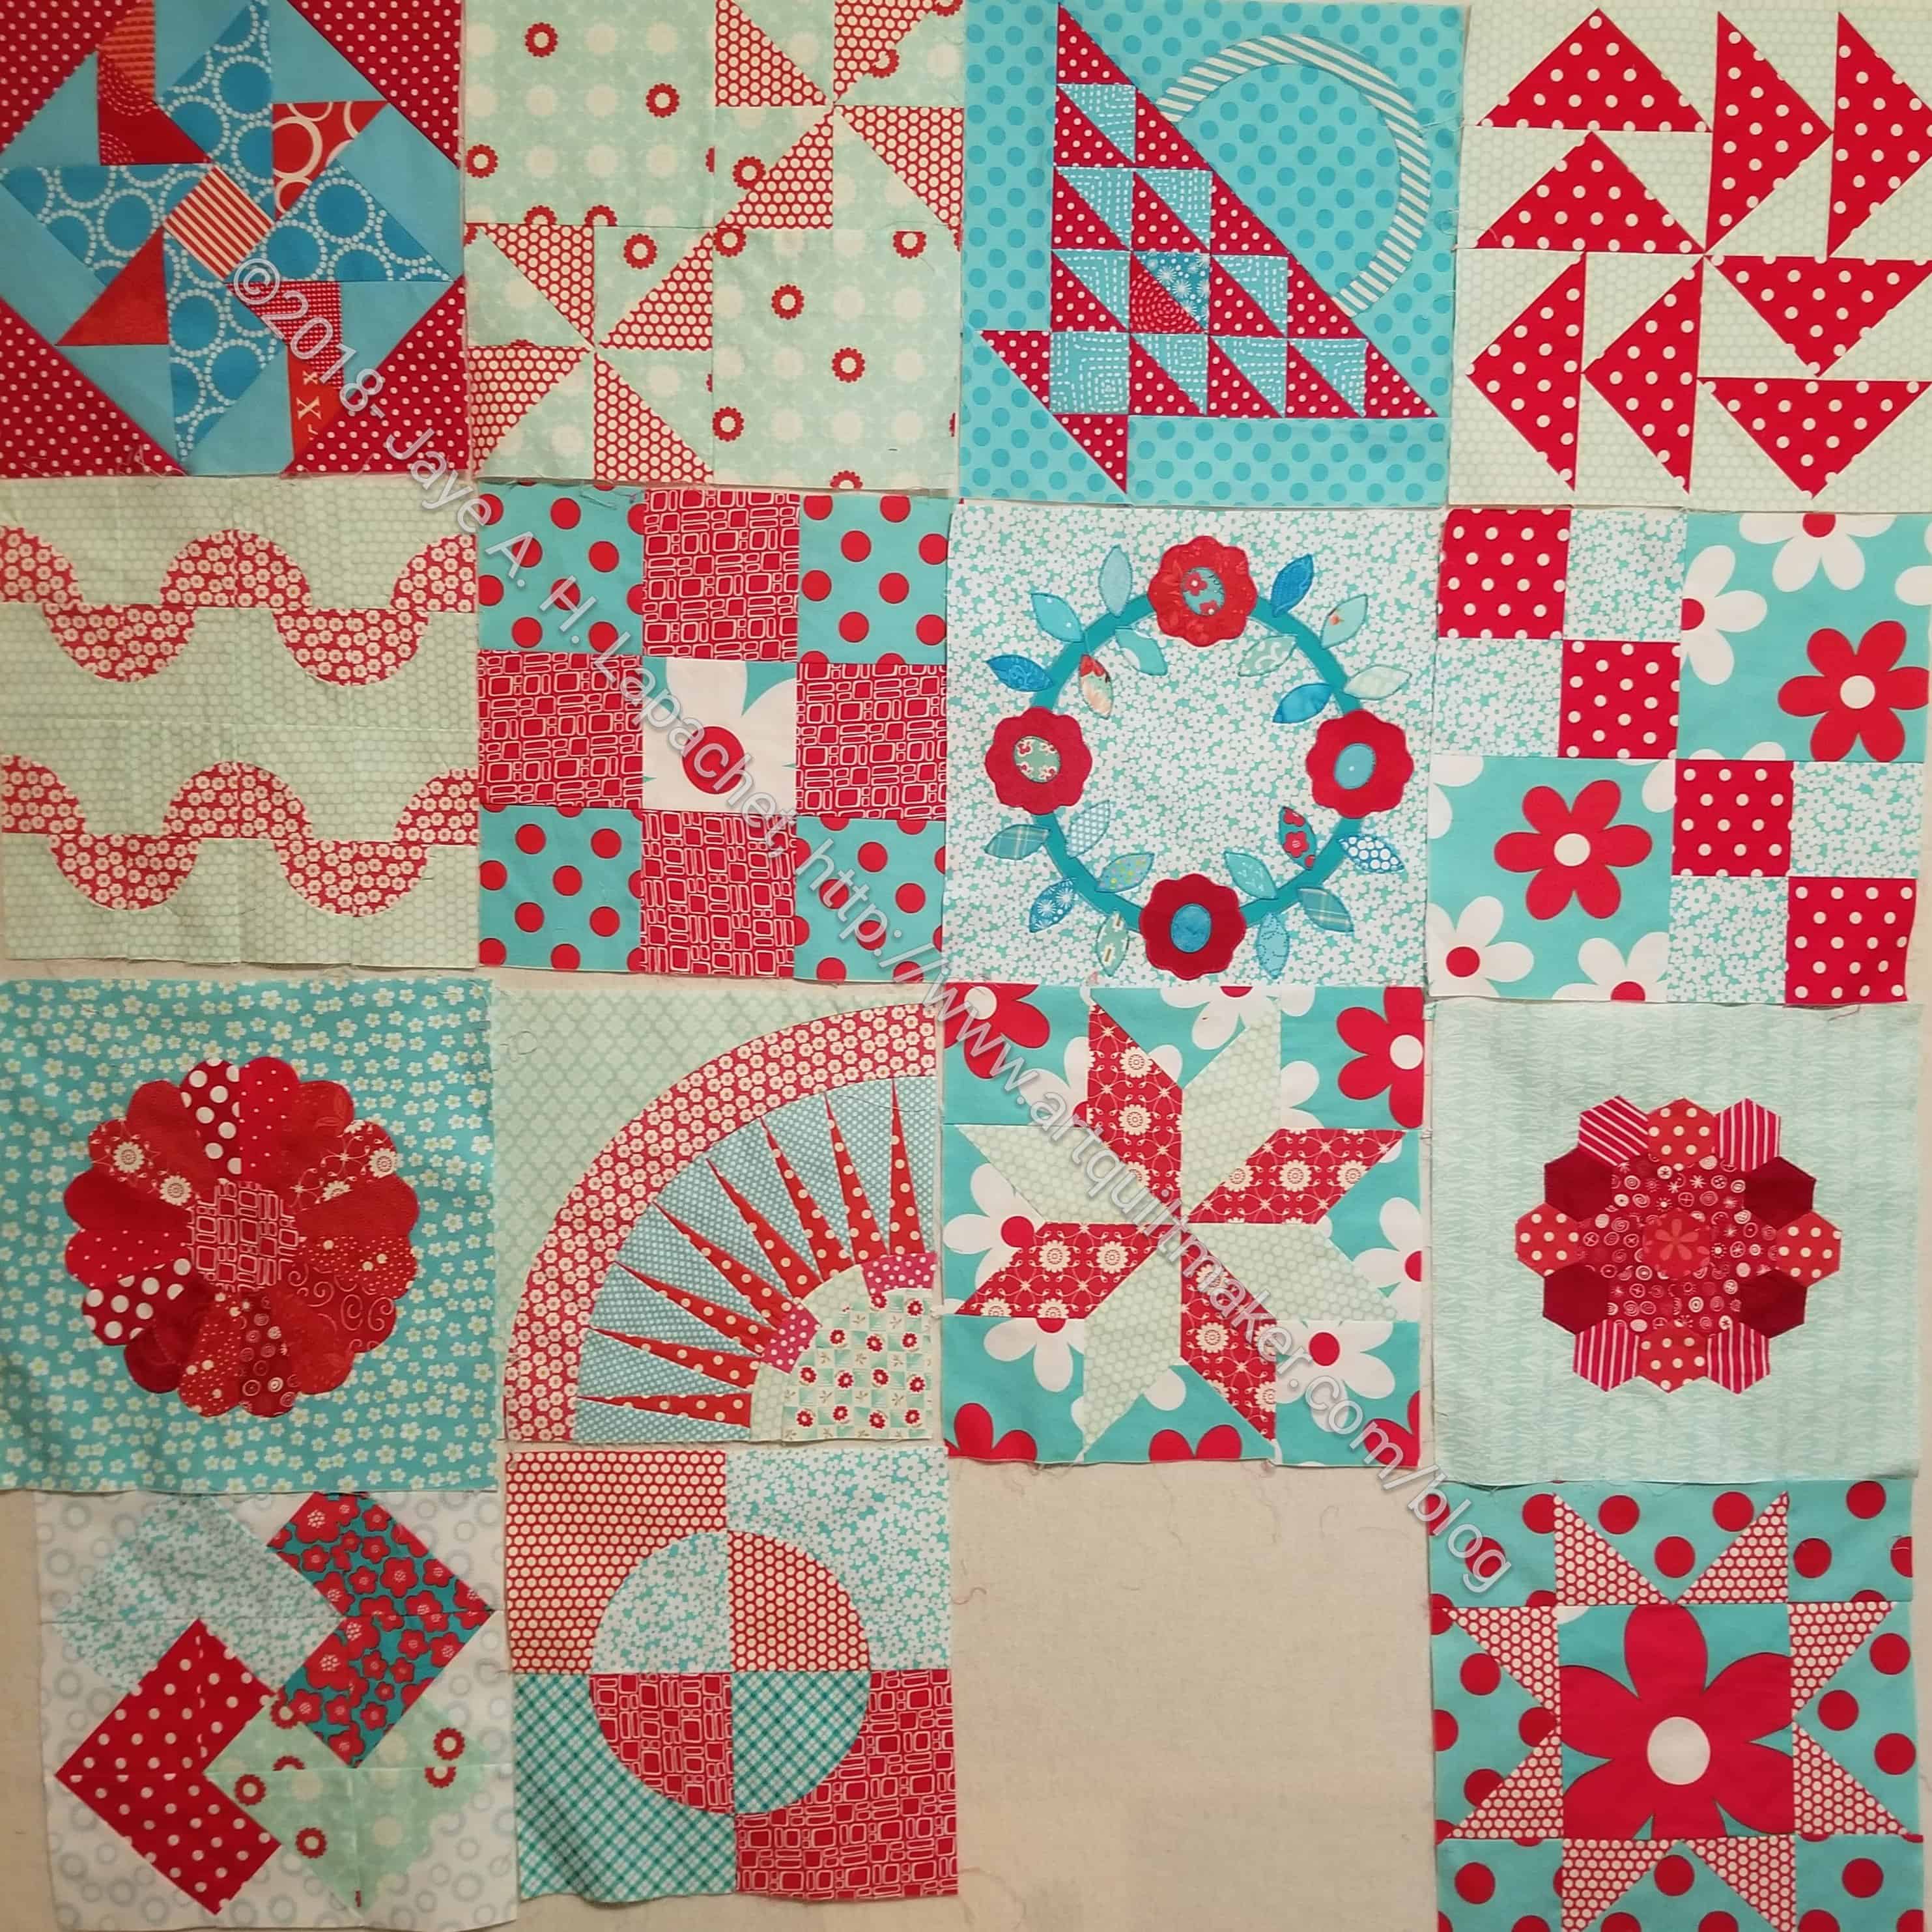
Aqua-Red Sampler –This is on the design wall and I am contemplating the last block.
Pies and Points from 2016 Victoria Findlay Wolfe class. Julie and I had a playdate towards the beginning of April. I brought this piece with me so I could cut more elements (Julie has a Sizzix). I am more excited about this piece now. I thought I had done more, but I couldn’t find more than 2.5 sewn together pieces.
English Paper Piecing Project– half hexies – I have added about five stars. I also found some grey (did I buy it for this project or on spec?) that will be perfect for the border. Remember last time when I said I couldn’t find the diamond papers? I gave up and bought more. I haven’t actuallly made a border yet, but I have all of the supplies. I bought a template to go with the diamond papers. Joann at Paper Pieces was very helpful.
Still WIPs
I still have WIPs. Who doesn’t, after all? A project in the ‘UFO’ category means I am stalled. A nicer way of saying UFO is a WIP. The list is a lot shorter and the projects are newer, for the most part.
City Sampler – blocks all made. The long term goal is to sash the blocks and put the top together. In the meantime, due to some seam allowance issues, some of the blocks are smaller than others, so I will have to adjust them in some way – either ripping and resewing, adding a piece or two to the block, or with sashing. This is my sticking point. I need to finish measuring all of the blocks before I can move on that is just a tedious task. Once I know what I am facing for each block, I can probably move forward. I am not looking forward to it, thus no new progress.
FOTY 2017 – pieces cut. Need to layout and start piecing. No new progress.
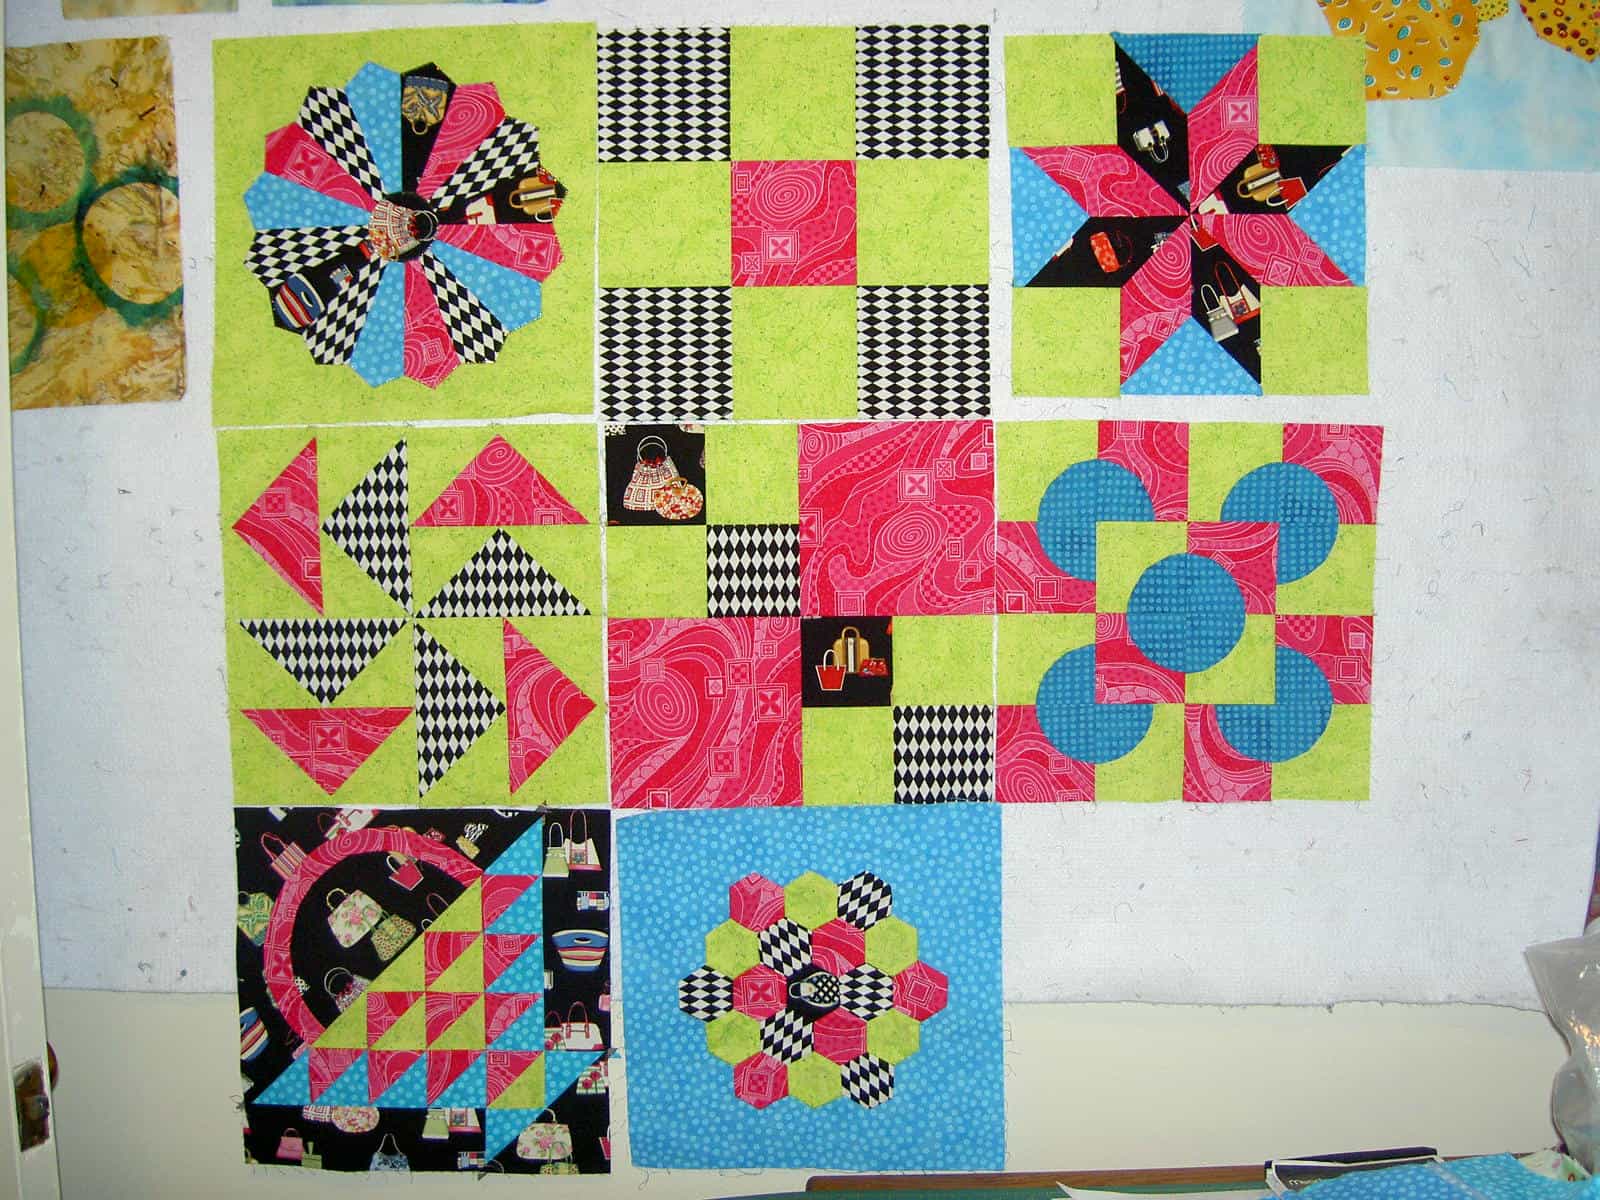
Handbag Sampler – this is a project about which I had forgotten. The blocks were teaching samples when I taught a sampler class the time before I started writing the quilt class sampler tutorials. I found one block recently, but otherwise I actually don’t know exactly where the blocks are hiding. I have an idea and will crawl up in the far reaches of my fabric closet soon and see if I can find them. I haven’t even found a picture of all the blocks.
Lobster – I still have more stitching to do and then I need to quilt it.
Pointillist Palette #4: Fourth is a series of 6 quilts; needs tiny square patches sewn together. No progress.
Under the Sea: class project; like the design and am happier with the colors. I have a new idea for it, which is to make a pillow and gift it to a friend.
Black and Red quilt – This came about because of two other projects. I made a whole bunch of bias tape as part of my failed attempt at doing the Mighty Lucky Club a few years ago. Another part of the inspiration came from my class with Tina of Little Blue Cottage fame. This was going to be for a nephew, but I think it will be for one of my SILs and BILs. I have rectangles cut and some bias tape ready. My next step is to sew the bias tape to the rectangles like pickup sticks. I don’t have any photos of this, so you’ll have to trust me.
Small Projects in Process
Most of my progress involves thinking or just cutting.
Chubby Charmer with Good Fortune charm pack – gift
4-Zip Organizer – part of Crafty Gemini Organizer Club, so on my list, but I haven’t actually started
Ultimate Project Organizer – another project from the Crafty Gemini Organizer Club, also on my list, but not yet started
Ready for Quilting
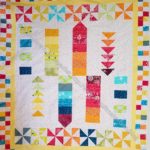
BAMaQG Color Round Robin– I didn’t think I would do anything with this project soon. I am on a mission to clear off this UFO list. One weekend, I just blew through the back and binding. This will go to Colleen soon.
Octagon 9 Patch: I finished the top on May 5, the back and binding on May 6. This piece is finally ready to be quilted.
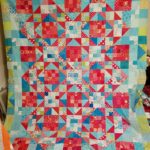
Stepping Stones #2 – This is ready to be quilted and I am happy. Finally!
In Quilting Process
BAMaQG IRR –The sandwich has been basted. I machine quilted a couple of lines to stabilize it. I am making slow progress on hand quilting it using Big Stitch. I
Theoretically, the Tarts Come to Tea is in the quilting process, though I haven’t worked on it in a while. See above.
Binding
nothing at the moment
Hunting and Gathering
30 Something: I continue to cutting 1.5 inch squares. I am pretty sure I have the 800 I need, but I am not ready to sew them together yet, so whenever I have a chance to cut more I cut more. It will give me choice when the time comes. I’ll have to think up a new name for this quilt, too. My next step is to figure out if I need to cut other sizes of squares and switch from cutting 1.5 inch squares to cutting the new size.
Blue Gradation Quilt: cutting 2.5 inch x 4.5 inch blue rectangles. It has to end sometime. I wasn’t sure I was ready to put this together, but I think I am. I might do a couple of gradation quilts in a row just to get the practice.
Blue Lemonade: cutting blue, green, purple 2 inch squares. I used a lot of these squares for En Provence, so I am slowly cutting more.
FOTY 2018: I have started cutting 2.5 inch squares for the 2018 version.
Pink Gradation Quilt: cutting 2.5 inch x 4.5 inch pink rectangles
Spin Wheel: really not started, but supplies gathered. I might have to cut some more background fabrics. I probably have enough fabrics and just need to decide to start.
Windmill quilt: Still hunting and gathering. I am supposed to be cutting a variety of greys for the background, which required the purchase of a new template. I should be able to get going again
Other
Stepping Stones #3 using the Macaron pre-cuts from Hoffman. I have all the fabric in pre-cuts and am just waiting for space (and desire) in my schedule.
I bought some fabric, so I am down on net usage. Still gross usage is just over 113 yards. My net calculation isn’t working, though I think I must be at 50 yards net now. I am pleased, but I want to confirm my guess. If I could make it to 100 yards NET used by the end of the year, I would be ecstatic. It is good to have goals!
The other day, I was thinking about the Snowball Wreath block. In the process of linking to that post and looking at the post photos, I found that a number of my older photos were still on Blogger. What I mean by that is that photos displaying here on WordPress actually live on Blogger.
Yes, Artquiltmaker started out on Blogger. When I migrated, I migrated all the posts and links and, I thought, the photos. No such luck.
So, I have embarked on a project to move the photos over. Fortunately, I only have to move 3 years worth of photos and not 13 years worth of photos. Yes, AQ is 13 years old!
No normal person would do this but the incongruity of the photos being in two places nags at the librarian in me. I have been thinking of deleting the Blogger site as it is redundant and the photos are taking up space on my Google account. I am also afraid somehow the photos will get deleted or become unavailable, making 3 years worth of posts worthless.
It has taken me awhile to find a reasonable process for the project. I have tried a few different methods of getting the photos where they need to be. I have uploaded a lot of photos from Google something, but apparently not all lived there. Some, from the first days of the blog are living on a webspace associated with my personal email! I didn’t even know I still had access to that space! Access is a misnomer. I don’t remember how to get to it or what the password is. I was also linking to some photos from Flickr, which had to be moved. Finally, I had to find photos on my hard drive and backup drive as well.
Basically, the photos were a mess.
As you can see, this is a big project, but it is also fun to look back at what I was thinking about in 2006 (the year I am working on now).
I was thinking a lot and posting a lot about Thoughts on Dots, which I am fixing now. You must have been bored stiff with those posts! I moved one patch and wrote about it. They are serious process posts.
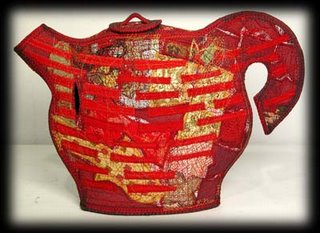
I had forgotten about Kay Khan’s work. I love the 3D teapot.
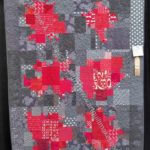
I also was interested to see the recap posts I did. In one post, I picked out the best quilts I saw at all of the shows I visited that year. That post had a lot of photos, which was a pain. I was interested to see that my fabric choices have stayed consistent as have my design sensibilities. That post also had some quilts that look like they could have been made by MQG members, though it was made LONG before the MQG came on the scene.
This project will take me awhile, but the good part is that I get to revisit my quilt past.
In going through old photos, I found photos of the Handbag Sampler I have been talking about recently.
I haven’t actually found the blocks, but, at least, I have a photo and sort of know what I have.
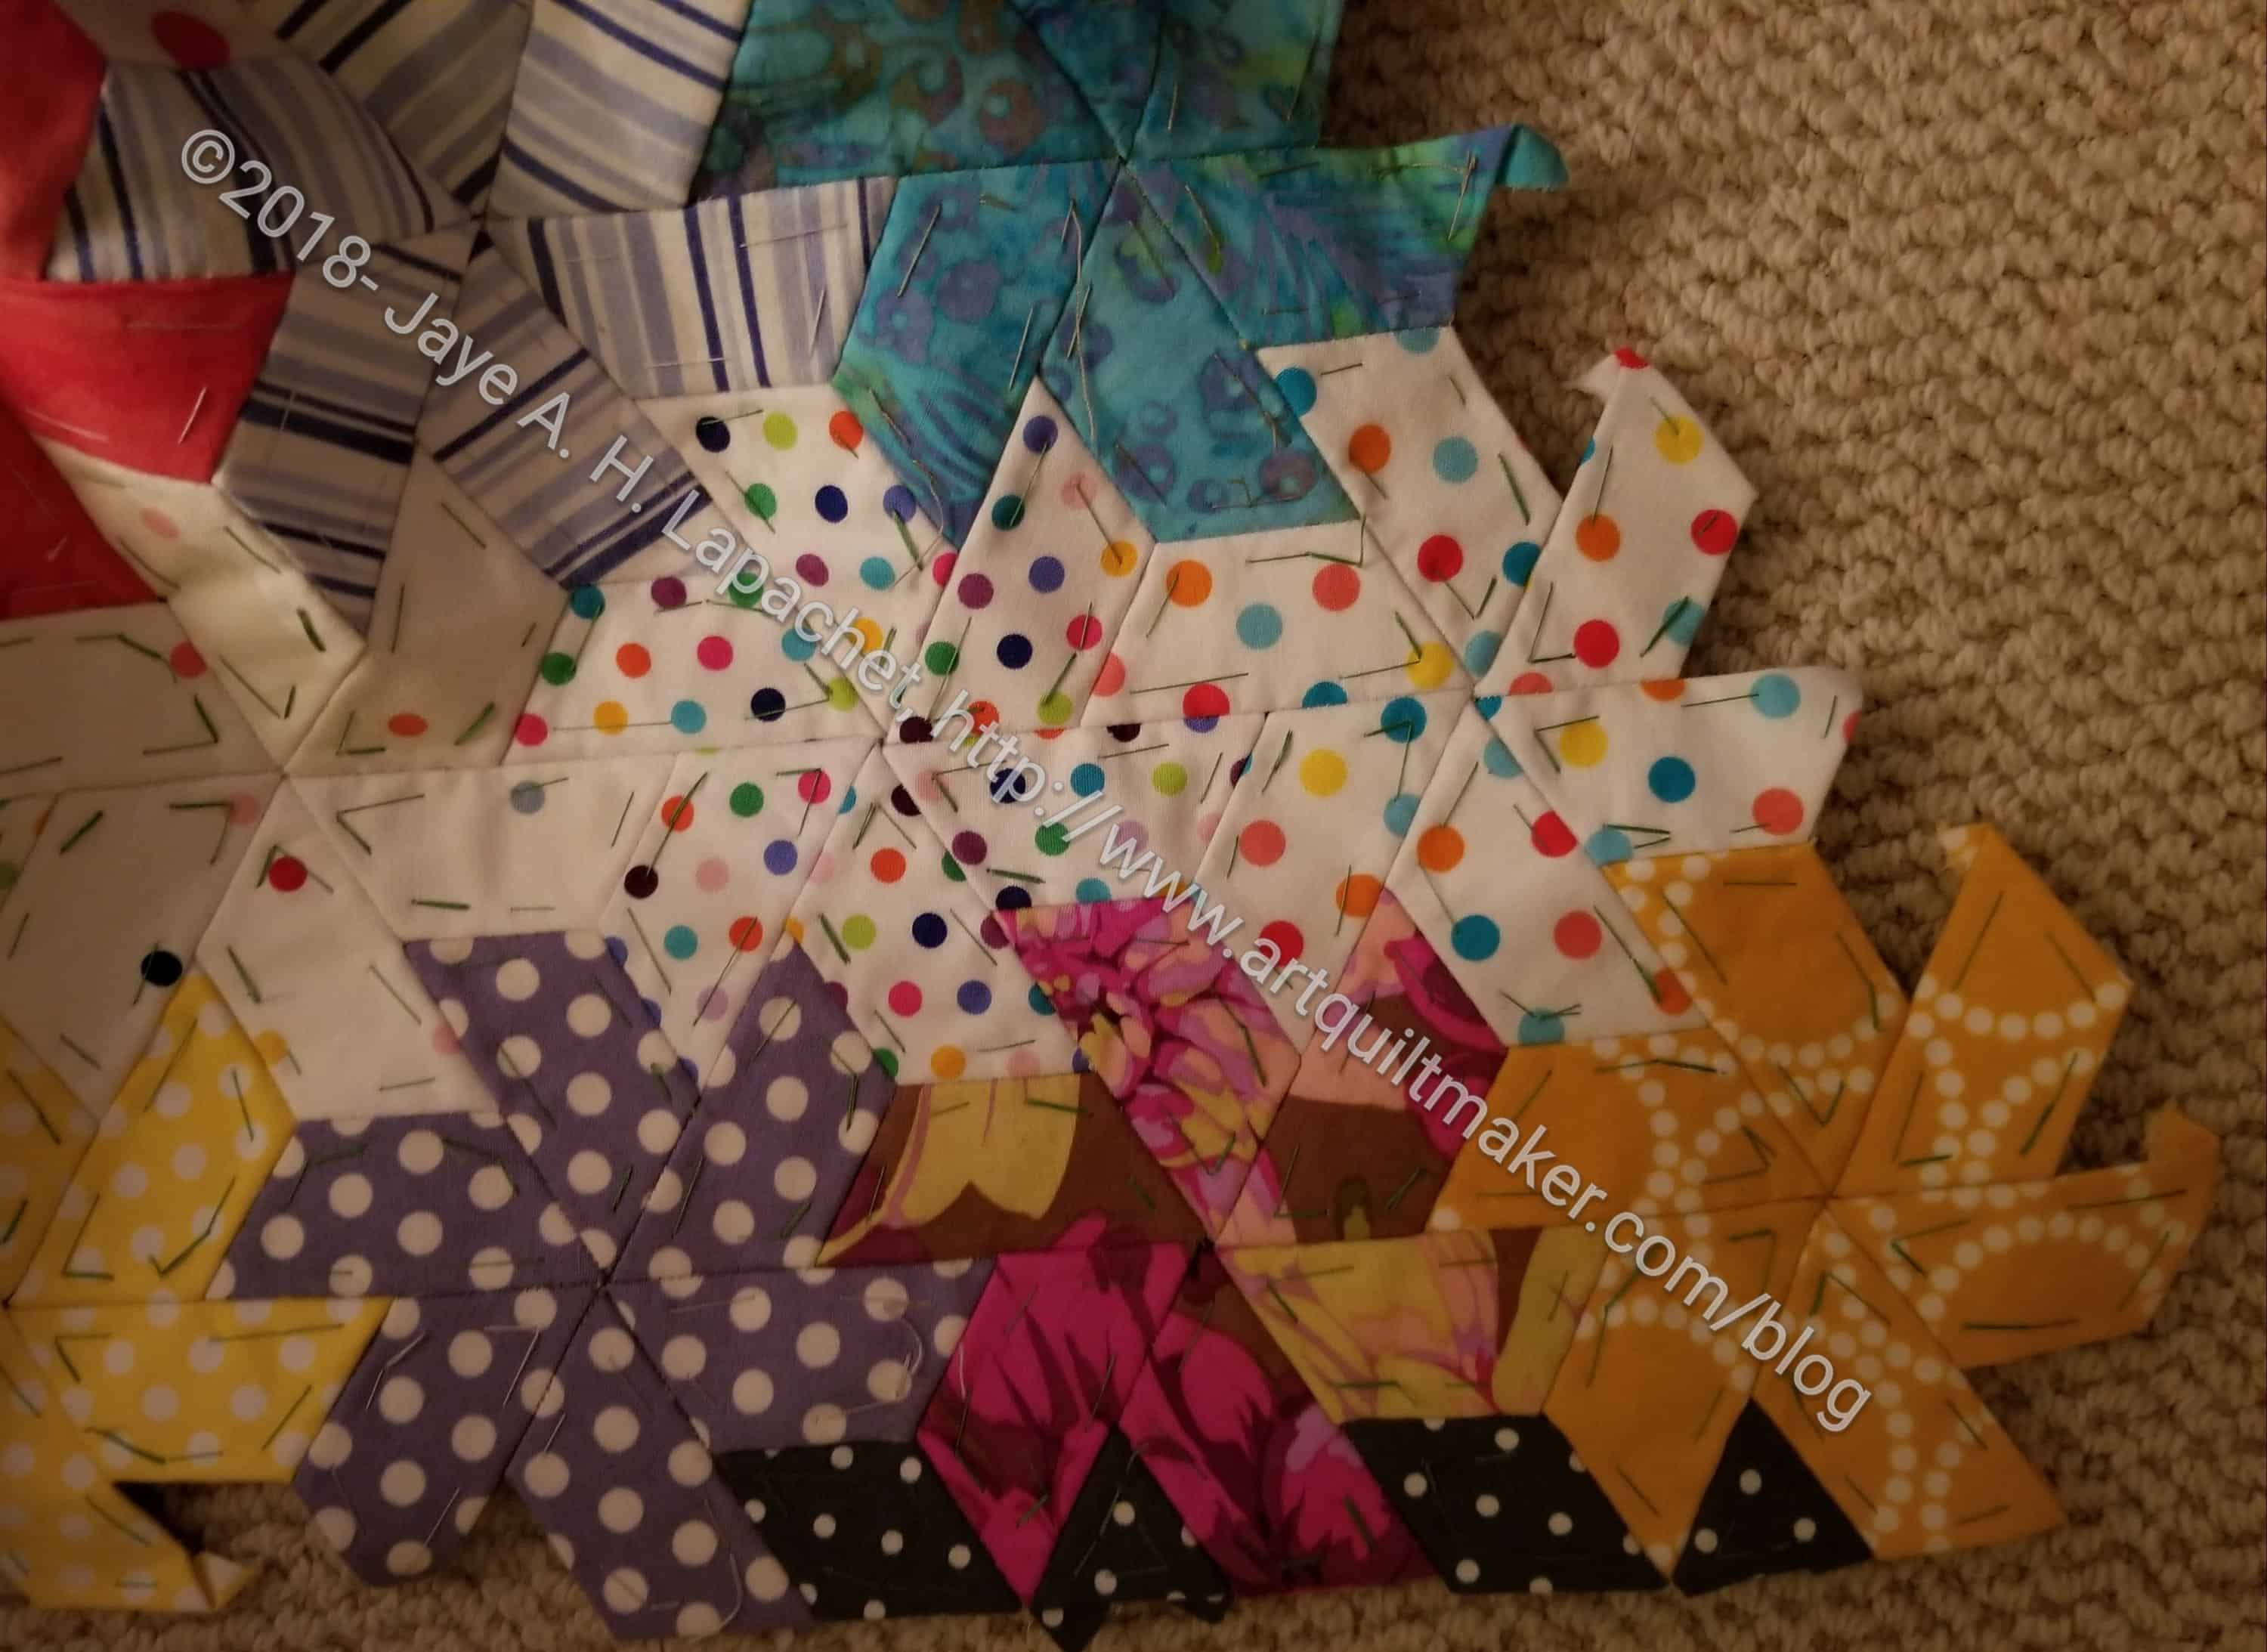
Handbag Sampler Nosegay
I found a photo of a Nosegay block that I made (or am in the process of making as well. The 9th block is good, because that means, if I find the blocks, I can just put the quilt together. I don’t have to search out fabric, which is all very distinctive. Of course,in terms of learning, it isn’t quite as comprehensive a Sampler as the Aqua-Red Sampler. There is no applique completed.
I have to find the blocks before I decide what other blocks to make.
Yes, I am behind in reporting on June. Life is busy and I am heading to a week long quilt retreat with Friend Julie, so I am preparing to have a whole bunch of posts for you to peruse.
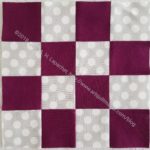
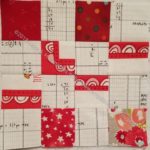
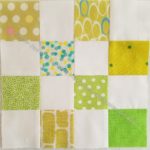
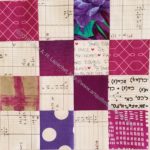
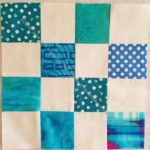
Grey Text Donation Block
Eggplant & Grey Donation Block
Red & Text donation block
Yellow-green donation block
Red-violet donation block
Medium Blue Donation Block
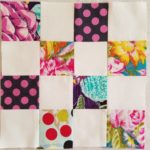
Purple Flower + Dot Donation Block
It is fun to see all the different blocks I make. I like remembering where the fabric came from and what I used it for.
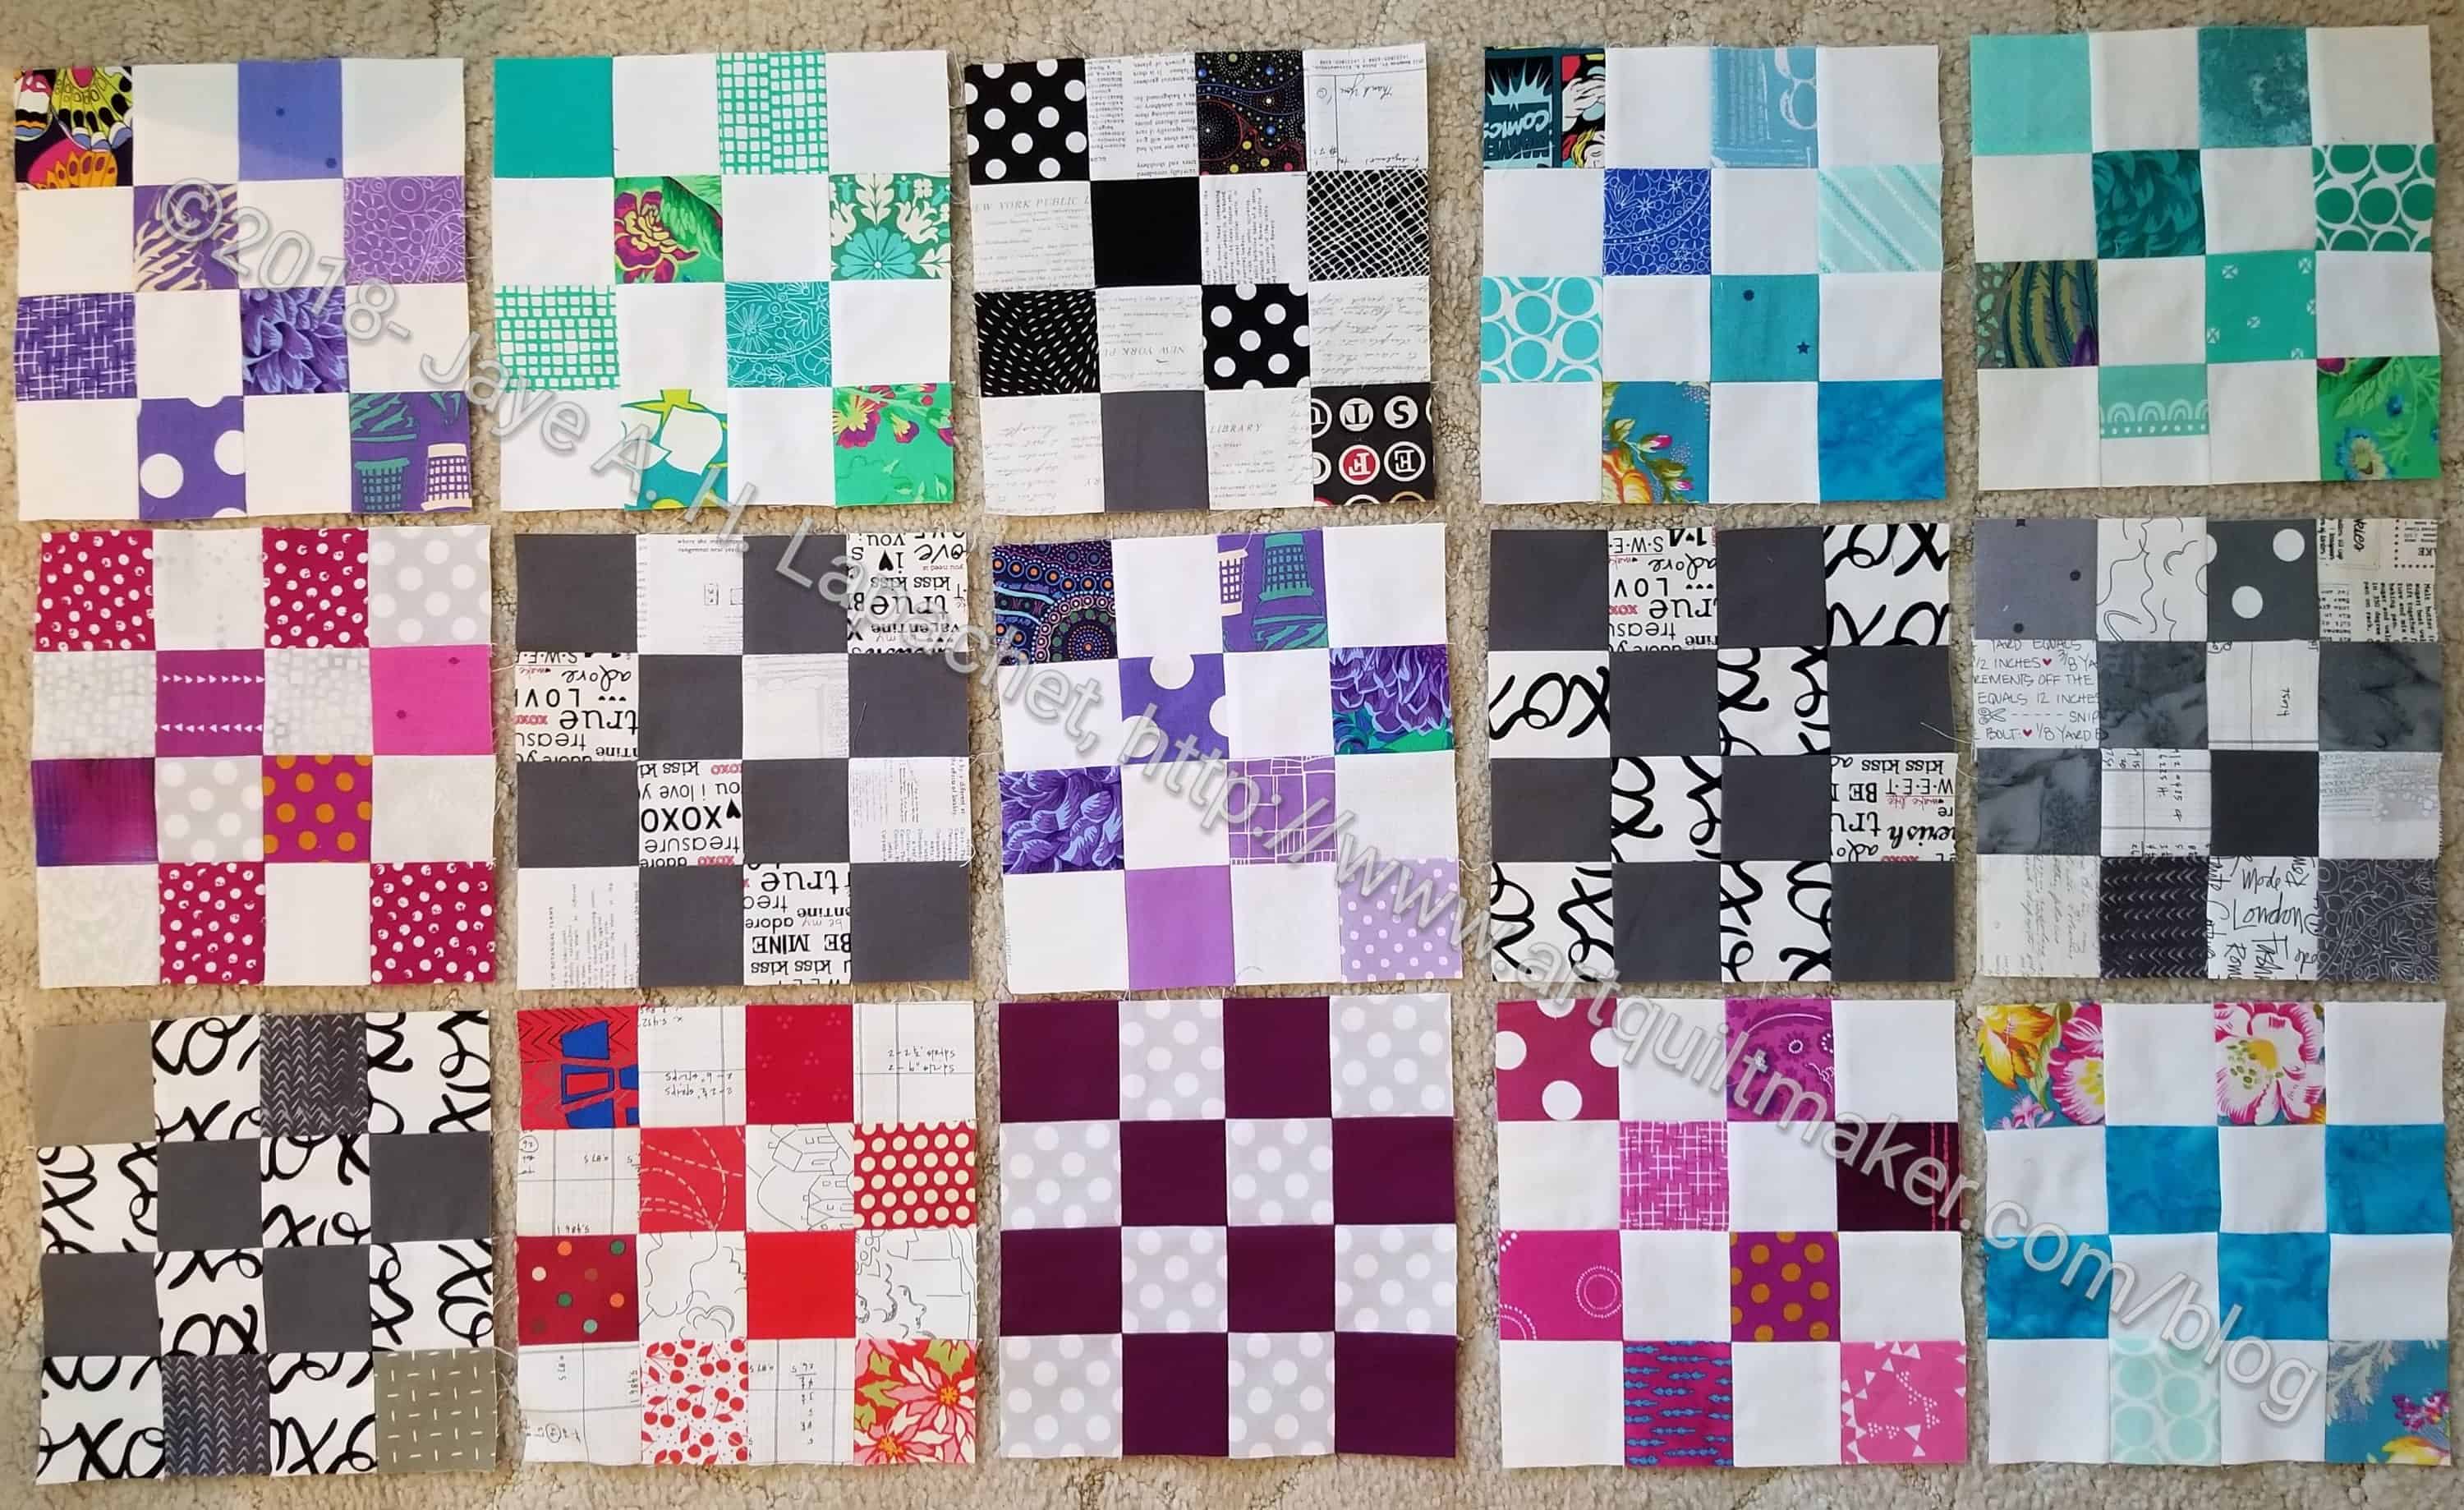
Donation Blocks turned in at June meeting
The group of blocks are the blocks I turned in at the June meeting. I know you have seen all of these blocks before, but I thought it would be great to show all of them together.
My donation block production has slowed as my work schedule has ramped up. I am spending less time at the machine, which affects my production. Still, I have money, which is nice. Don’t worry, I am not giving up, but other guild members will have to step up and fill in the gaps.ell
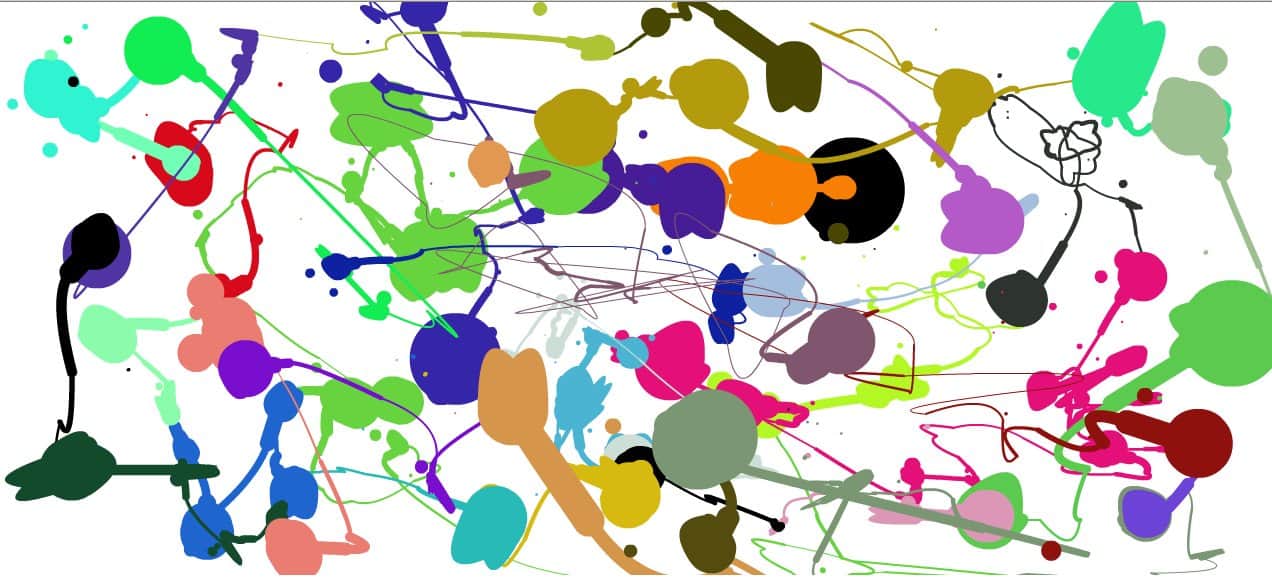
I am revisiting old posts and came up with this Dose of Daily Art post. I thought it would be a good ColorPlay – kind of revisiting old friends.
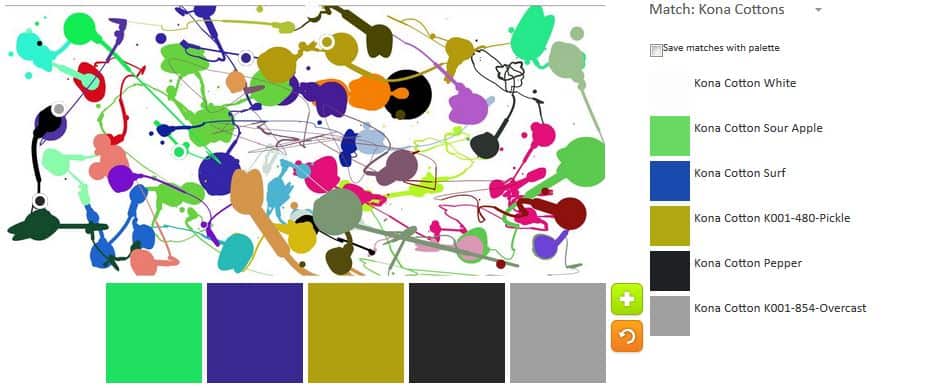
ColorPlay: Splatter Art-default
The default is, for once, not all neutrals.
ColorPlay: Splatter Art – 1
I like this one. It reminds me of the circus, but not a primary circus.
ColorPlay: Splatter Art n.2
I wasn’t quite done with that fuchsia. I like it with the various violets and blues. I can see actually using this palette for something very cheerful. I also noticed that one of the colors was white. I hadn’t seen it before.
ColorPlay: Splatter Art n.3
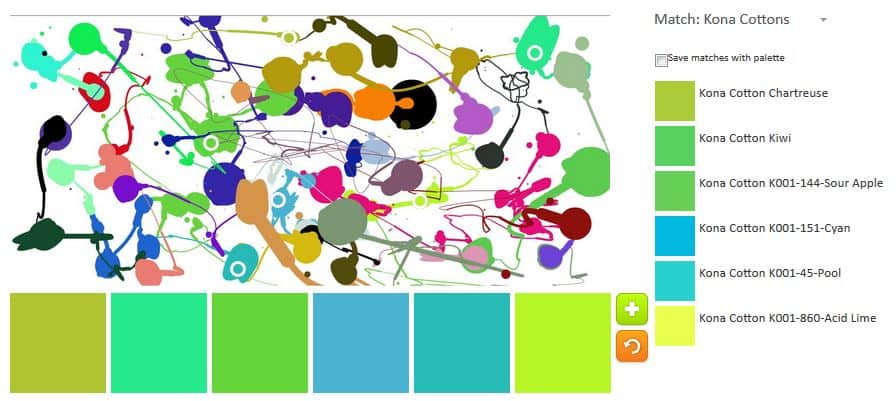
I had to try a blue and green palette. The two greens on the end are bit much, but I am not much of a fan of green so that could be part of the problem.
ColorPlay: Splatter Art n.4
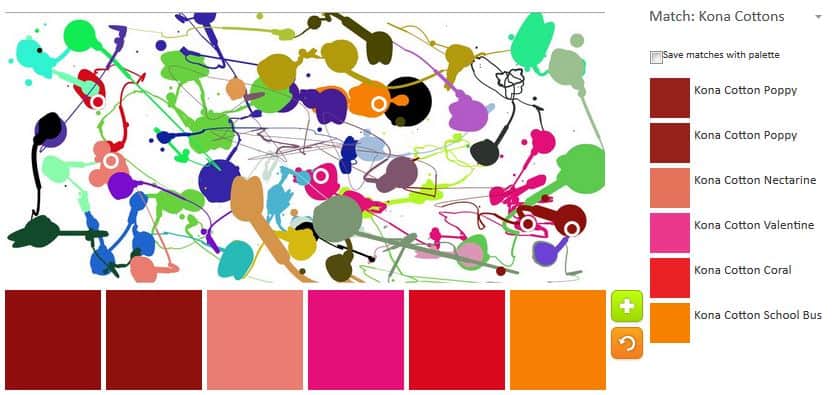
This is a warm palette I felt I needed to try.
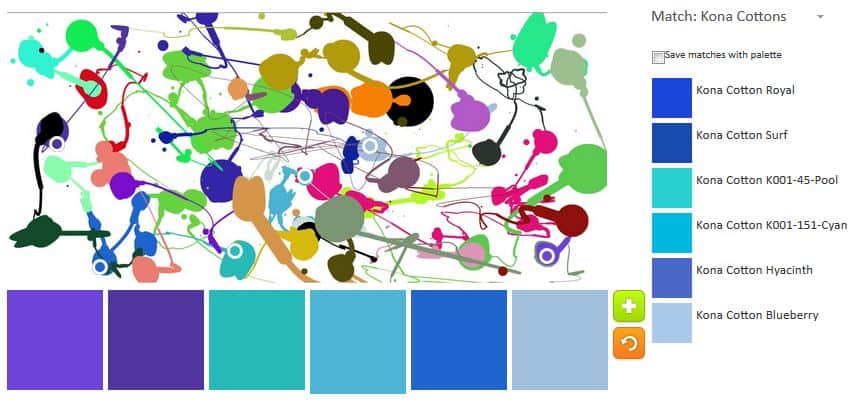
I wanted to try a monochromatic palettes. First was blue.
ColorPlay: Splatter Art n.5
I felt like I needed to make a neutral palette, so I gave up. This was a great picture to use. Although there was no variations in the colors used in different parts of the painting, there were a lot of colors and that was fun.
I was so thrilled with the cutting of the Tool Tote the other day that reporting today is kind of depressing.
The good news is that I am making progress. The bad news is that I am having trouble with the directions. This is a weakness of mine as I have mentioned, so I am willing to take some of the blame. However, I had Gerre try and help me interpret one step and she agreed that she thought something was missing.
As the pattern suggests, I emailed the designer and have not heard back. It is a sort of holiday week so she may not be at work.
Regardless, I will finish this bag. I know enough about bag making to make up some parts, if necessary. It won’t be done by this weekend, which is a shame, but can’t be helped.
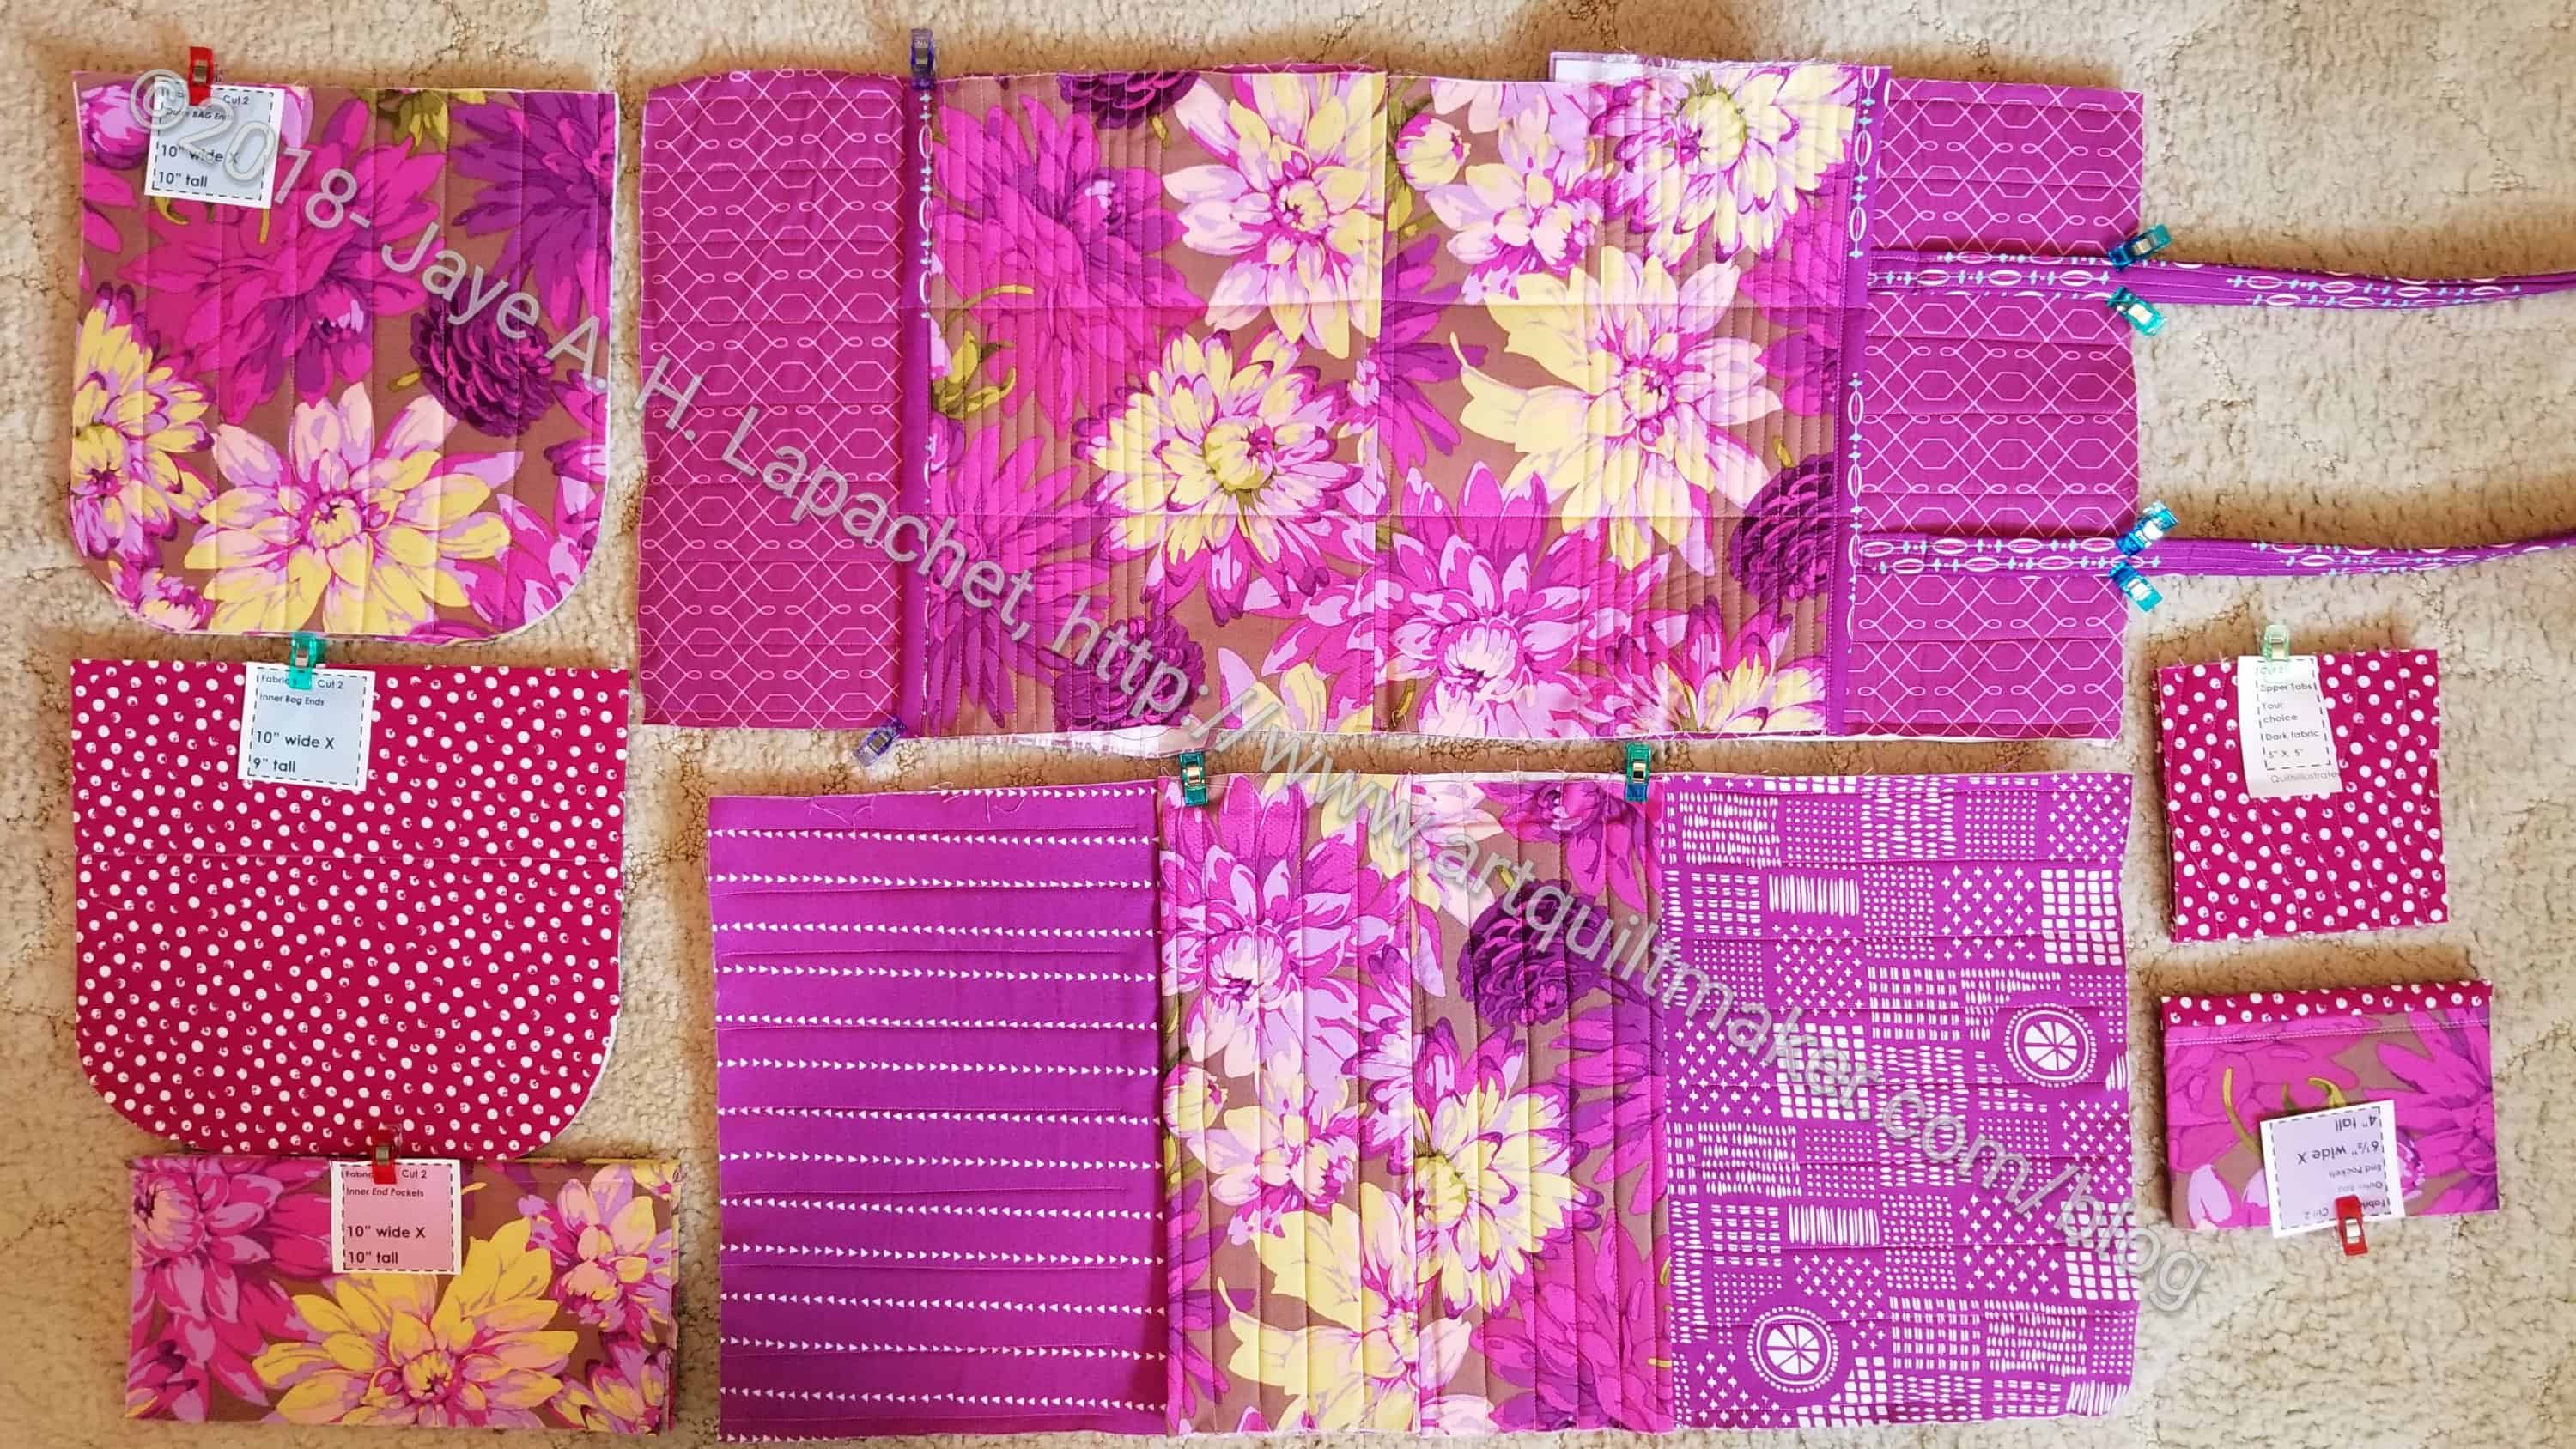
In the photo above, you can see the pieces with their little tags as well as the work that I have done. Quilting on all the pieces is complete, though I would have made the pieces bigger, quilted and then trimmed, if I had been thinking. Some of the pockets are sewn on. Handles are partially sewn (this is the problem step).
For those of you who celebrate, Happy Fourth of July! For those of you who do not celebrate, have a great day.
For the first time that I can remember it does not feel good to post this sentiment. My wish for this 4th (although it is not a gift giving holiday) is that we return to kindness, civility and working together to make a better future for our children.
I have been thinking about the Tool Tote a lot lately. Since I finished the Stepping Stones n.2 last week, I thought it was time to work on a bag. I have a lot of bags on my project list and never enough time.
As you may recall, I bought the pattern at QuiltCon from Elk Horn Quilts (great shop, BTW). I took some time several months ago to cut a few pieces at a Sew Day, but hadn’t made any other progress since. It was time to move, so I took out all the pieces and started cutting.
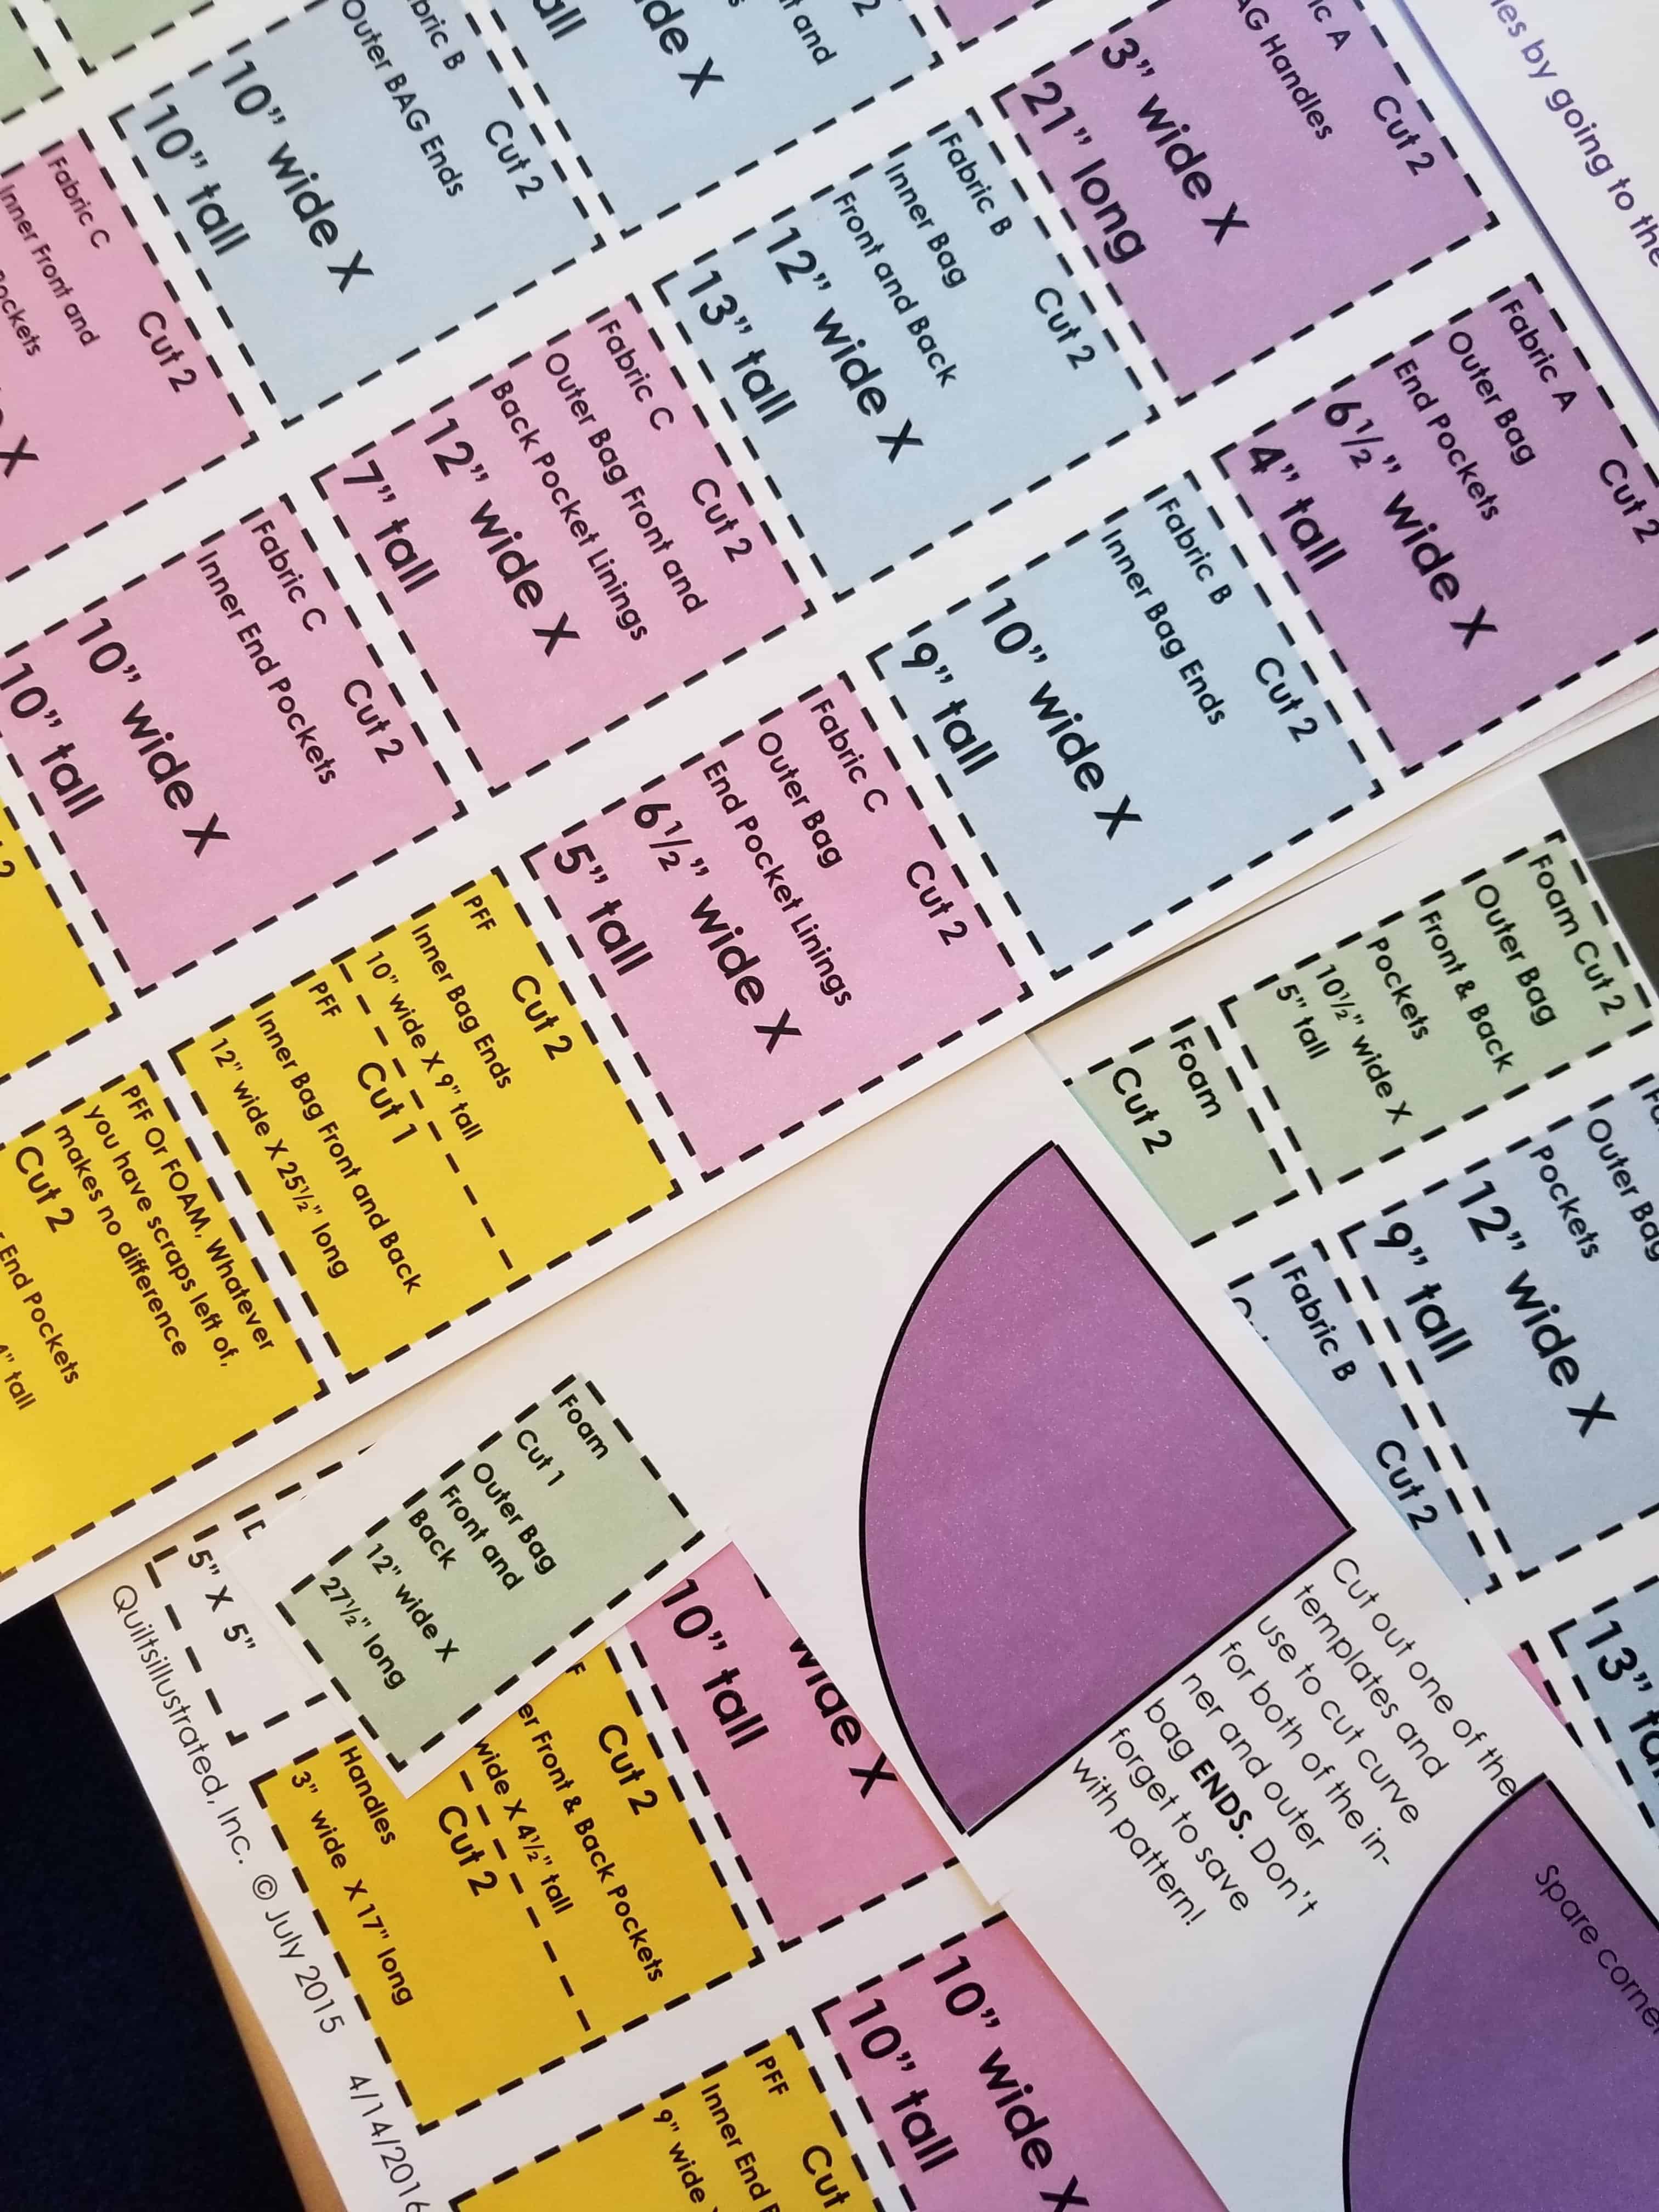
Quilts Illustrated Tool Tote chits
OMG! The Quilts Illustrated pattern was fantastic. You have probably seen the post-it notes I attach to the pieces I cut for bags. This Quilts Illustrated pattern had a sheet of bits of pattern chits included. they were already made!!
These made life so much easier. I took the sheet, cut off the chits as I cut the pieces and when there were no more chits there was no more cutting. I didn’t feel frustrated and exhausted. It was awesome.
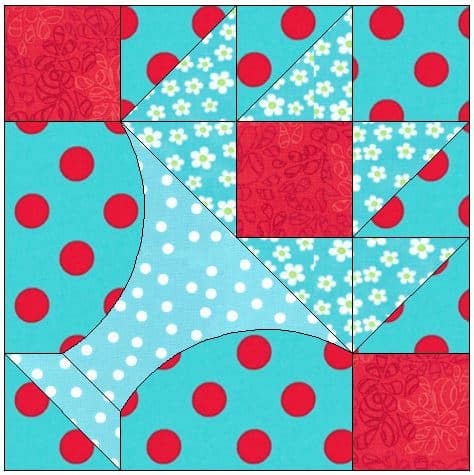
As I mentioned a couple of days ago, I have the Aqua-Red Sampler on my design wall and I am trying to figure out what block to make as my last block.
Tea Basket block
I was thinking of the Nosegay. I have a great version for the Handbag Sampler, so it isn’t pressing that I make another one. Still, it’s a good block. Then I remembered the Tea Basket block. It isn’t very popular. In fact I don’t know if I have ever seen a quilt that included that block. It is in Jinny Beyer’s The Quilter’s Album of Patchwork Patterns, so I was able to find it. I also found it in BlockBase and made some adjustments so the BlockBase version looked more like Jinny Beyer’s version. I also added some color to get an idea of how it would look. Looking at it now, I think it is more of a contender than I thought.